
If you’re looking to elevate your PowerPoint presentations with smooth, professional, and visually engaging animations, you’ve come to the right place. This comprehensive tutorial will guide you step-by-step through creating a captivating morph transition effect in PowerPoint, one of the most powerful and dynamic animation effects available. The effect seamlessly transitions between slides, creating a fluid motion that enhances storytelling and audience engagement.
In this article, we’ll explore how to design a morph transition slide featuring a sequence of beautiful images and text, from desert landscapes to lush jungles, flowing rivers, and majestic mountains. By the end, you’ll have a detailed understanding of how to use PowerPoint’s built-in tools to create an animation effect that looks polished and professional.
Whether you’re a business professional, educator, or creative looking to add wow factor to your slides, mastering PowerPoint animation effects like the morph transition can make a significant difference in your presentations.
Table of Contents
- Understanding the Morph Transition Effect
- Preparing Your Slide and Setting Up Guides
- Adding and Managing Background Images
- Creating Frames and Shapes for Focus
- Inserting and Formatting Text
- Duplicating and Adjusting Slides for Animation
- Applying the Morph Transition Effect
- Tips for Using PowerPoint Animation Effects
- Frequently Asked Questions
- Conclusion
Understanding the Morph Transition Effect
The morph transition in PowerPoint is an advanced animation effect that creates a smooth transformation between two slides. It animates the movement, resizing, and color changes of objects from one slide to the next, giving the impression that objects are seamlessly morphing into new positions or forms.
This effect is especially useful for storytelling, data visualization, and dynamic presentations where you want to maintain audience attention by providing visually appealing transitions that feel natural and engaging.
In the example we’re creating, the morph transition will allow the background images and text to flow from one scene to another—shifting from a desert landscape to a jungle, then moving along a river, and finally arriving at mountains—all with smooth, eye-catching animations.
Preparing Your Slide and Setting Up Guides
Before diving into the design, it’s important to set up your workspace effectively. PowerPoint’s guides help you align objects precisely, ensuring a clean and professional look throughout your slides.
Step 1: Add a New Slide
- Open your PowerPoint presentation and insert a new blank slide where you want to create the morph transition effect.
Step 2: Enable Guides
- Go to the View tab in the PowerPoint ribbon.
- Check the box for Guides to display vertical and horizontal guide lines on your slide.
- These guides help you position elements symmetrically and maintain consistent alignment.

Adding and Managing Background Images
The background images form the visual foundation of your morph transition slides. Here, you will add multiple images representing different scenes and prepare them for the morph effect.
Step 3: Insert Shapes and Add Pictures
- Go to the Insert tab and select Shapes.
- Choose the Rectangle shape and draw it to cover half of your slide, aligned with the guide.
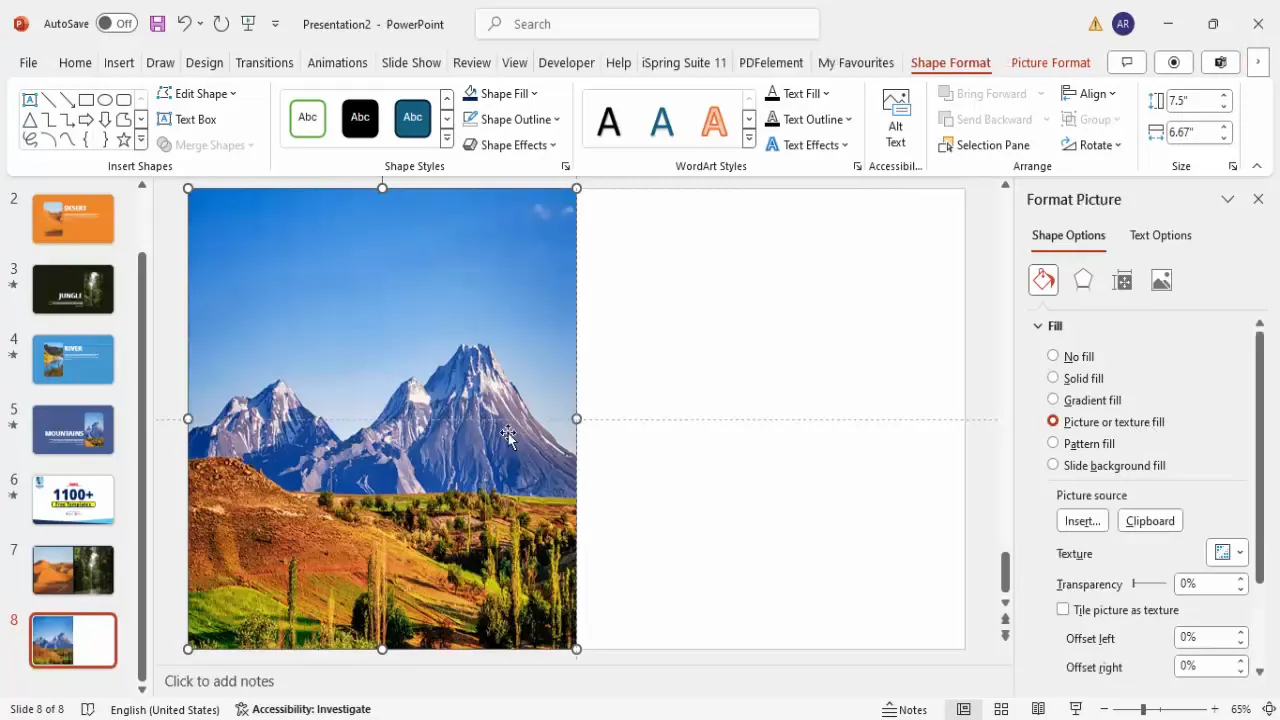
- Right-click the rectangle and choose Format Shape.
- Under Fill, select Picture or texture fill.
- Insert the first background image of your choice (e.g., a desert landscape).
- Remove the shape outline by setting it to No Outline.
Step 4: Duplicate and Add More Images
- Duplicate the rectangle shape with the image three times using Ctrl + Shift and dragging to the right.
- Replace each duplicated rectangle’s picture with different images representing the jungle, river, and mountains.
- You can add pictures from your local PC or search online directly from PowerPoint.
- Position the images so that two of them are visible on the slide, while the other two are placed outside the slide boundaries for smooth transitions.
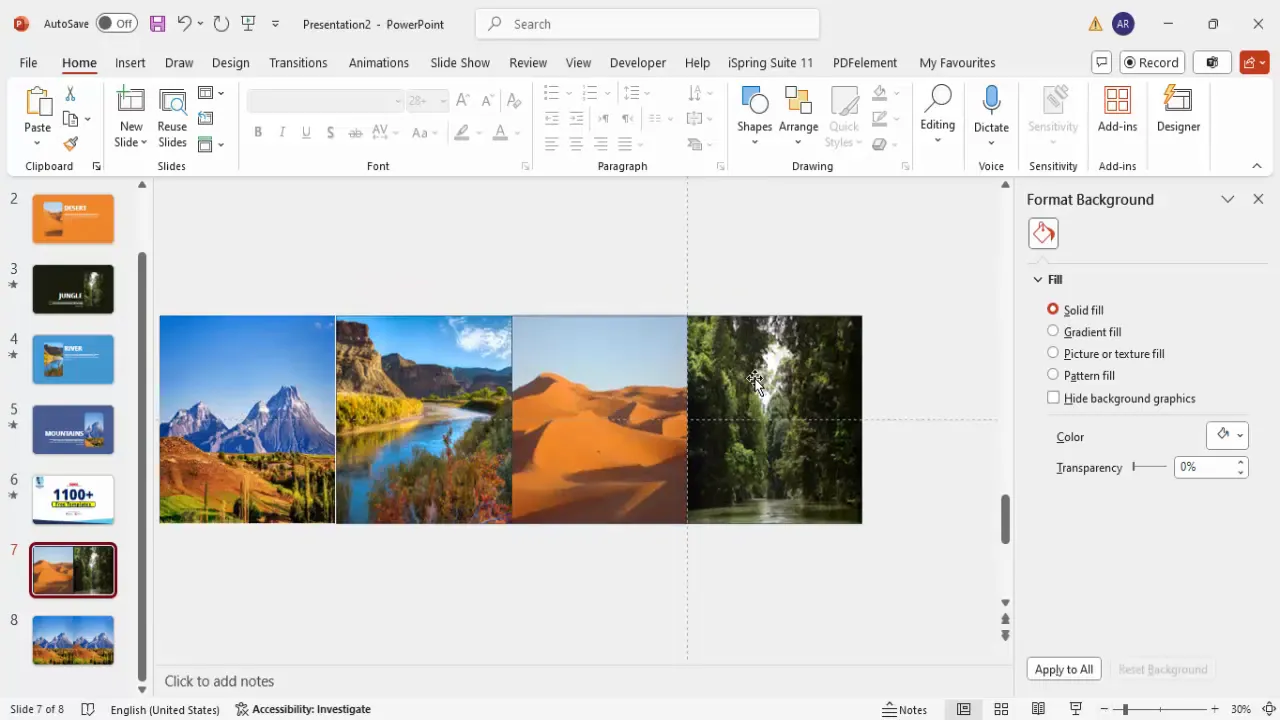
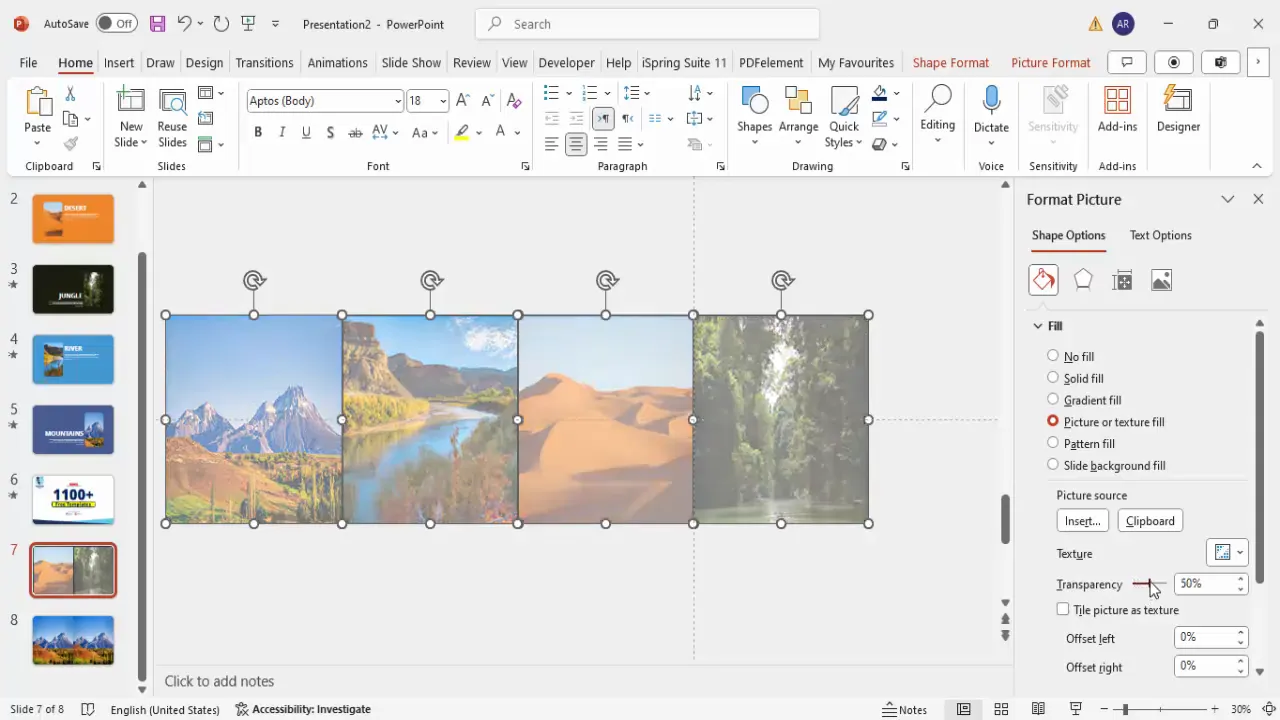
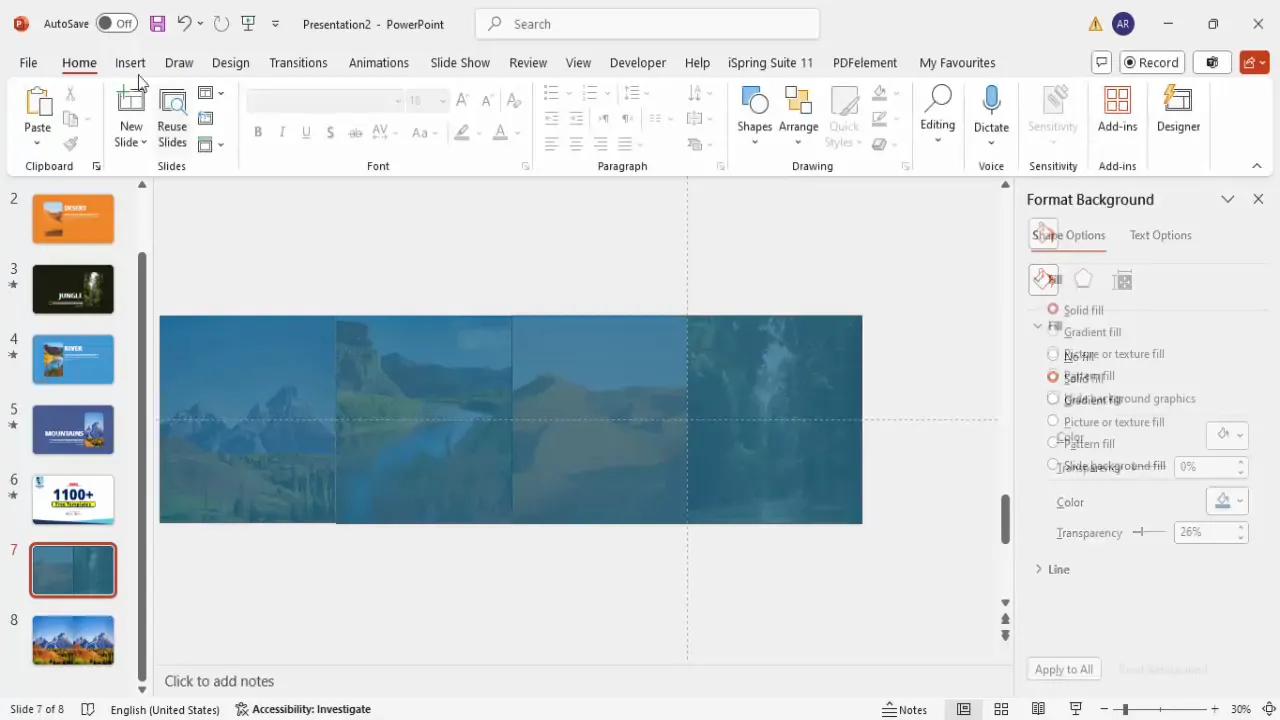
Step 5: Adjust Transparency for Positioning
- Select all four image rectangles.
- Go to Effects and reduce the transparency to about 25-30%.
- This helps you visualize the slide boundaries and positions of your images during the design process.
Step 6: Add a Large Transparent Rectangle
- Insert another rectangle shape that covers all four images.
- Remove the outline and set the fill transparency to a similar level (around 25-30%).
- This overlay helps unify the background images visually and prepares for the frame effect.
Creating Frames and Shapes for Focus
To highlight the main image in each slide and create a visual focus, we’ll use a frame effect by subtracting shapes.
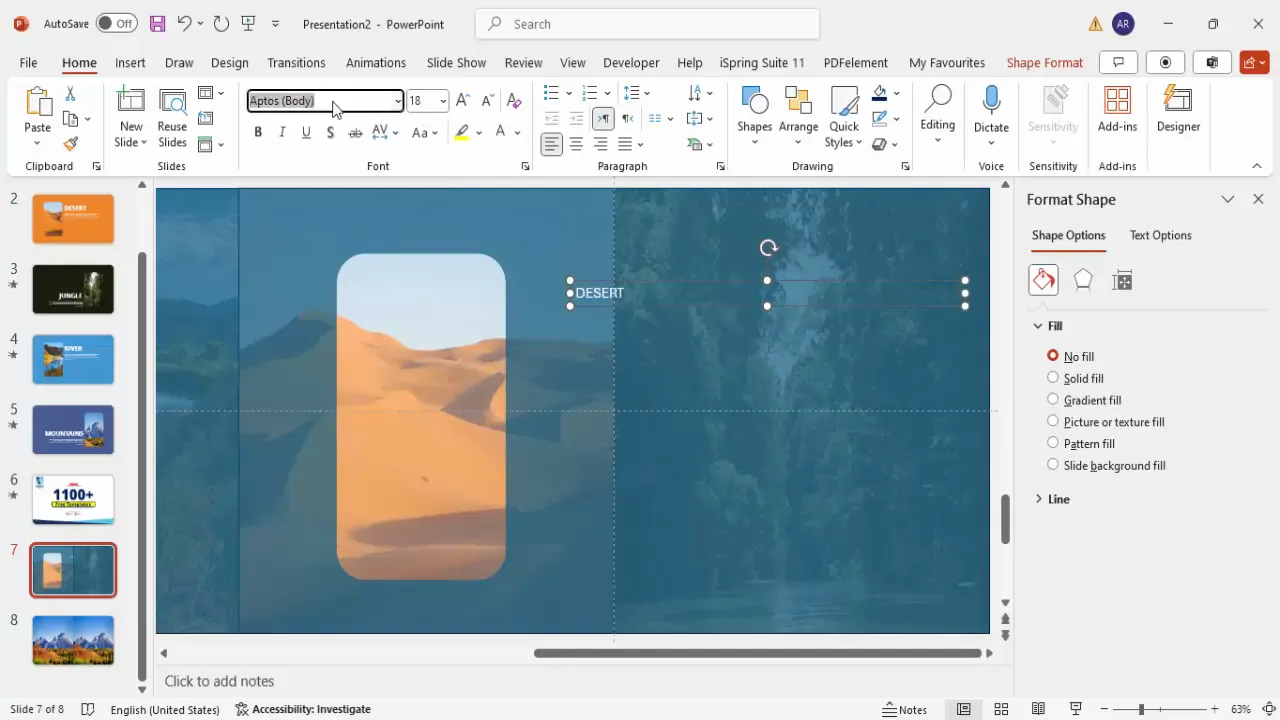
Step 7: Draw a Rounded Corner Rectangle for the Frame
- Go to Insert > Shapes and select the Rounded Corner Rectangle.
- Draw a shape sized to frame the main image area where the focus will be.
- Remove the outline to keep it clean.
Step 8: Subtract the Rounded Rectangle from the Large Rectangle
- Select the large transparent rectangle first.
- Hold Shift and select the smaller rounded rectangle.
- Go to Shape Format > Merge Shapes and choose Subtract.
- This operation cuts out the rounded rectangle shape from the larger rectangle, creating a frame effect that reveals the background image through the cutout.

Inserting and Formatting Text
Adding descriptive text to each slide helps provide context and enhances the storytelling aspect of your presentation.
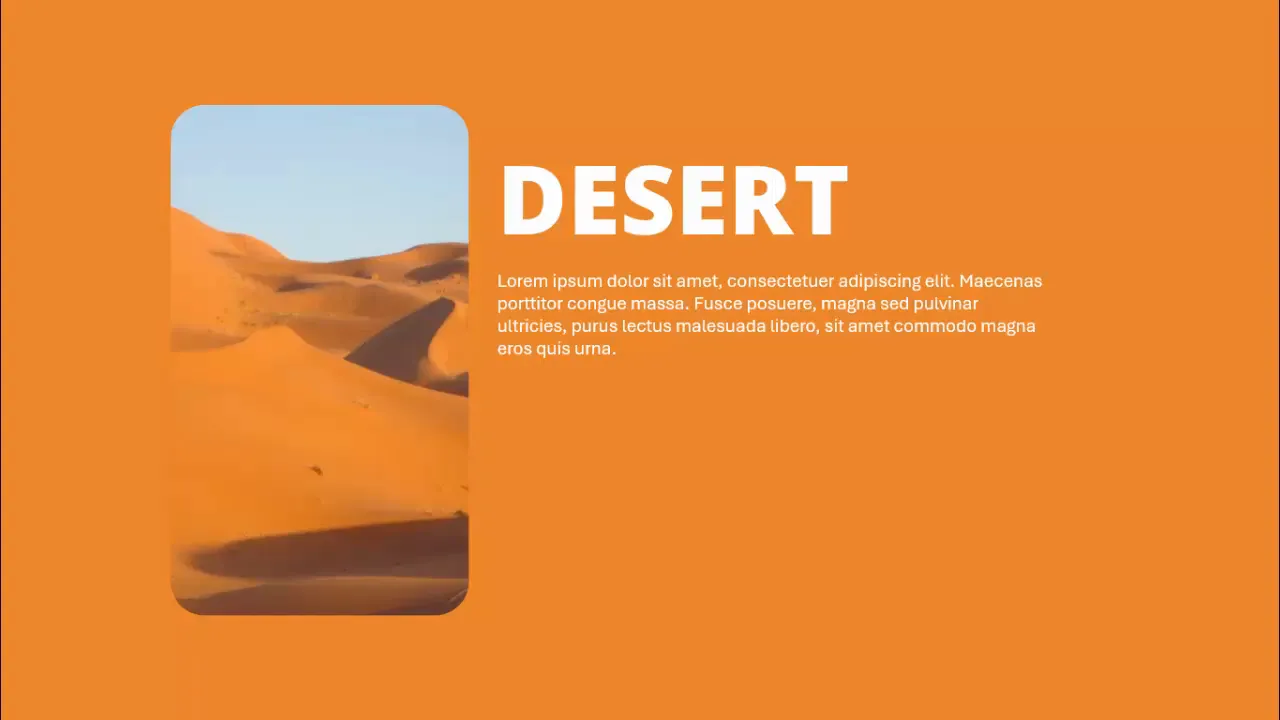
Step 9: Add Title Text
- Insert a text box and type the title for the first slide, e.g., Desert.
- Choose a bold, readable font such as Open Sans Extra Bold.
- Set the font color to white for contrast against the background.
- Adjust the font size to make it prominent but balanced with the slide design.
Step 10: Add Detailed Text
- Insert another text box below the title for additional descriptive text.
- Use placeholder text like Lorem ipsum which you can later replace with your own content.
- Ensure the text color and font size are readable and consistent across slides.
Step 11: Choose Background Colors to Match the Scene
- Set the slide background color or shape fill color to complement the image theme.
- Use the eyedropper tool to pick a color from the background image, such as a sandy tone for the desert.
- This color harmony enhances the visual appeal and professional look of your slides.

Duplicating and Adjusting Slides for Animation
To create the morph effect, you need multiple slides with objects in slightly different positions or content updates. This section covers duplicating slides and adjusting elements to prepare for animation.
Step 12: Duplicate the First Slide
- Right-click the first slide thumbnail and select Duplicate Slide.
- This creates an exact copy of the slide, which you will modify for the next scene.
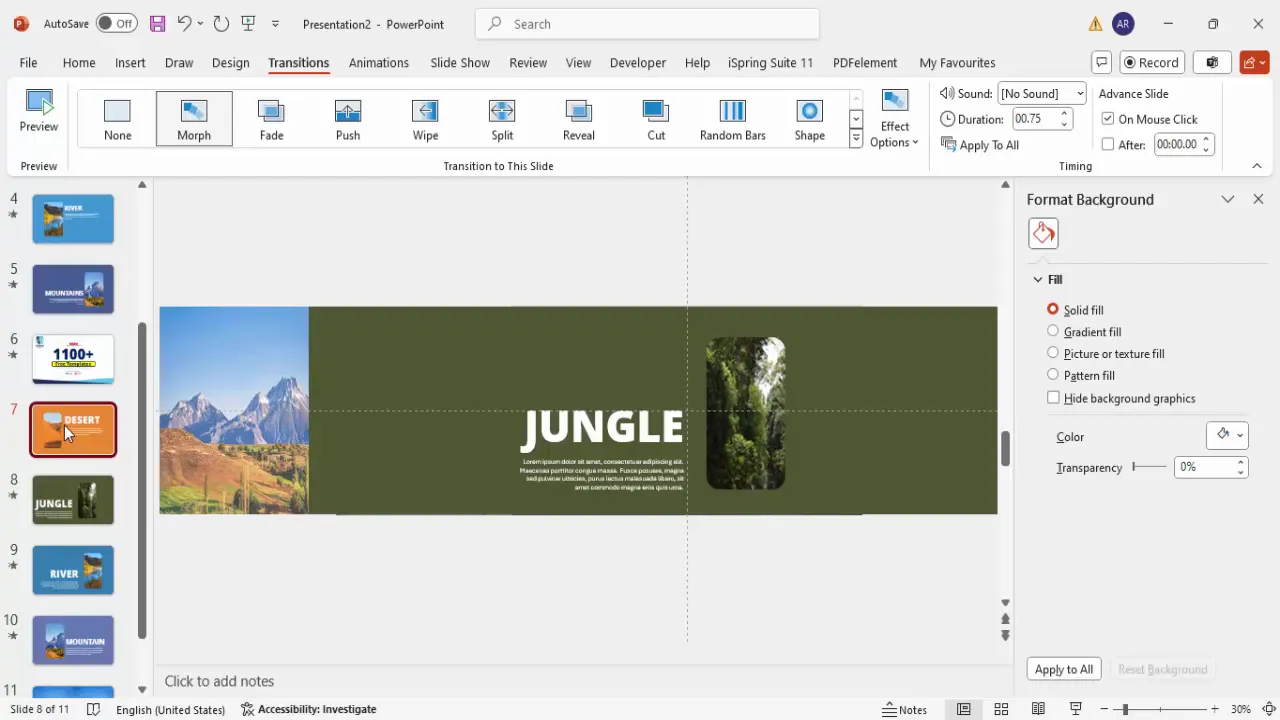
Step 13: Move the Frame and Update Text for the Next Scene
- On the duplicated slide, move the frame shape and images slightly to shift focus to the next background image (e.g., the jungle).
- Remove the transparency effect from the jungle image to make it fully visible.
- Adjust the title text to reflect the new scene, e.g., change from “Desert” to “Jungle”.
- Change the text color and background fill color to match the jungle theme (e.g., a sage green).
- Align the text appropriately (e.g., right-align if needed) to avoid cutting off.
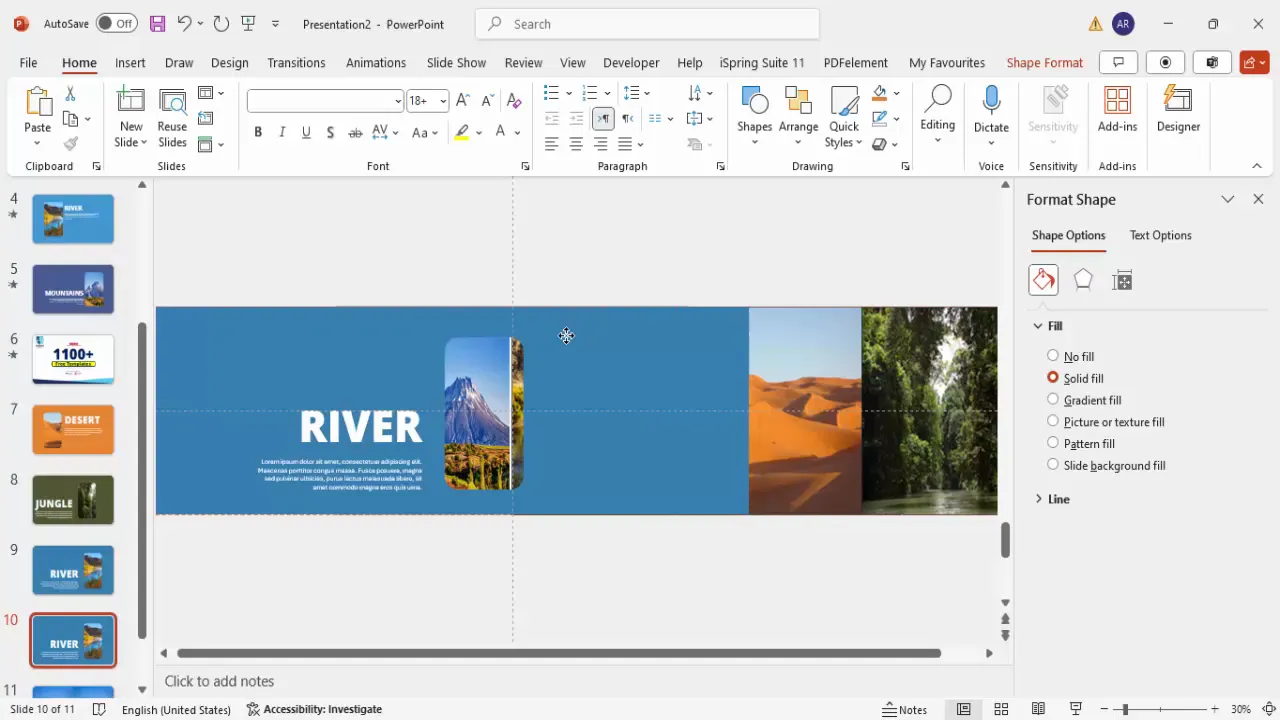
Step 14: Repeat for River and Mountain Scenes
- Duplicate the jungle slide again for the river scene.
- Shift images and frame to center the river picture.
- Set transparency of the river image to zero to make it fully visible.
- Update the title text to “River” and adjust colors to a blue shade matching the river.
- Duplicate once more for the mountain scene and repeat the adjustments.
- Align text to the left and pick colors that complement the mountain image.
Applying the Morph Transition Effect
Now comes the exciting part—applying the morph transition to create smooth animations between your slides.

Step 15: Select the Slides for Morph
- Do not select the first slide in the sequence.
- Select the second, third, and fourth slides by holding Ctrl and clicking each.
Step 16: Apply Morph Transition
- Go to the Transitions tab.
- Choose Morph from the transition options.
- Adjust the transition duration to 0.75 seconds for a smooth but quick effect.
Step 17: Preview the Morph Animation
- Start the slideshow from the first slide.
- Click to advance through the slides and observe the morph transition effect as the images and text flow seamlessly from desert to jungle, river, and mountains.
- Repeat the slideshow to ensure the timing and smoothness meet your expectations.
Tips for Using PowerPoint Animation Effects
To make the most out of PowerPoint animation effects like morph, consider these best practices:
- Keep It Simple: Avoid overcrowding slides with too many moving parts. Focus on key elements to animate.
- Consistent Style: Use consistent fonts, colors, and shapes across slides for a cohesive look.
- Align Objects Properly: Use guides and grids to ensure objects align perfectly across slides, which is critical for morph to work well.
- Use High-Quality Images: Crisp, high-resolution images enhance the visual appeal and professionalism.
- Test Timing: Adjust transition durations to match your presentation pace and audience attention spans.
- Leverage Duplicate Feature: Duplicating slides saves time and ensures consistency when creating morph sequences.
- Match Colors: Use the eyedropper tool to pick colors from images for backgrounds or text to create harmony.
- Practice Your Presentation: Run through your slides multiple times to make sure animations trigger smoothly and support your narrative.
Table: Common PowerPoint Animation Effects Compared
| Animation Effect | Description | Best Use Case | Complexity |
|---|---|---|---|
| Morph | Smooth transition animating object movement and transformation | Storytelling, object movement, dynamic presentations | Medium |
| Fade | Gradual appearance or disappearance of slide elements | Subtle emphasis, smooth entry/exit | Low |
| Fly In | Objects enter the slide from a direction | Attention grabbing, introductions | Low |
| Zoom | Objects grow or shrink in size | Highlighting key points or images | Medium |
| Spin | Objects rotate on the slide | Fun or creative emphasis | Medium |
Frequently Asked Questions
What is the Morph Transition in PowerPoint?
The Morph transition is a special animation effect that allows smooth movement and transformation of objects across slides, creating a seamless visual flow.
Which version of PowerPoint supports the Morph Transition?
The Morph transition is available in PowerPoint 2016 and later versions, including Office 365.
Can Morph transition be used with any object?
Morph works best with shapes, text boxes, and pictures that exist on consecutive slides with the same names or similar positions. It animates movement, resizing, and color changes effectively.
How do I make sure Morph transition works correctly?
Ensure objects you want to morph have the same names or are duplicated across slides. Use PowerPoint’s Selection Pane to rename objects consistently.
Can I adjust the speed of the Morph transition?
Yes, you can set the duration of the Morph transition in the Transitions tab, typically between 0.5 to 2 seconds depending on your desired effect.
Is Morph transition suitable for professional presentations?
Absolutely. When used tastefully, Morph can add a polished and dynamic feel to business, educational, and creative presentations.
Conclusion
Mastering PowerPoint animation effects like the Morph transition can transform your presentations from static and dull to dynamic and engaging. By following the detailed steps outlined here—setting up your slides, adding images and text, creating frames, and applying the morph effect—you can craft visually stunning presentations that captivate your audience.
Remember, the key to effective animation is subtlety and consistency. Use morph transitions to enhance your storytelling, not distract from it. With practice, these techniques will become a natural part of your PowerPoint design toolkit, helping you deliver presentations that leave a lasting impression.
Happy presenting!
Check out the full video: Morph Transition Effect in PowerPoint


