
If you’ve ever wanted to create a visually captivating timeline in PowerPoint that not only presents information clearly but also impresses your audience with smooth animations, you’re in the right place. In this comprehensive guide, we’ll dive deep into creating an animated morph timeline using PowerPoint’s powerful morph transition effect. This tutorial is inspired by the popular PowerPoint expert, One Skill PPT, who breaks down the process step-by-step in his video “ANIMATED PowerPoint Morph Timeline ✨ Free Download”.
This article will walk you through everything from setting up your slides, designing the timeline with circles and years, to adding animated phone illustrations that move seamlessly along with the timeline. We’ll also cover how to add hyperlinks for interactive navigation. Whether you’re a beginner or an intermediate PowerPoint user, this guide will help you master PowerPoint animation effects and create presentations that stand out.
Table of Contents
- Getting Started: Preparing Your Slides
- Creating the Timeline Base with Lines and Circles
- Adding Year Labels to Your Timeline
- Naming Objects and Setting Smooth Morph Transitions
- Duplicating Slides and Animating the Timeline Movement
- Highlighting Active Years with Enlarged Circles
- Enhancing the Timeline with Animated Phone Illustrations
- Adding Interactive Hyperlinks for Easy Navigation
- Final Tips and Tricks for PowerPoint Animation Effects
- Frequently Asked Questions
Getting Started: Preparing Your Slides
The first step in creating a smooth animated timeline in PowerPoint is to prepare your workspace properly. Start with a fresh, blank slide to give yourself a clean canvas.
- Set Slide Layout to Blank: Remove any default text placeholders by setting the slide layout to blank. This will allow you to freely add and arrange your timeline elements without interference.
- Activate Slide Guides: Turn on slide guides to help you find the center of the slide easily. This acts as a reference point for aligning your timeline precisely.
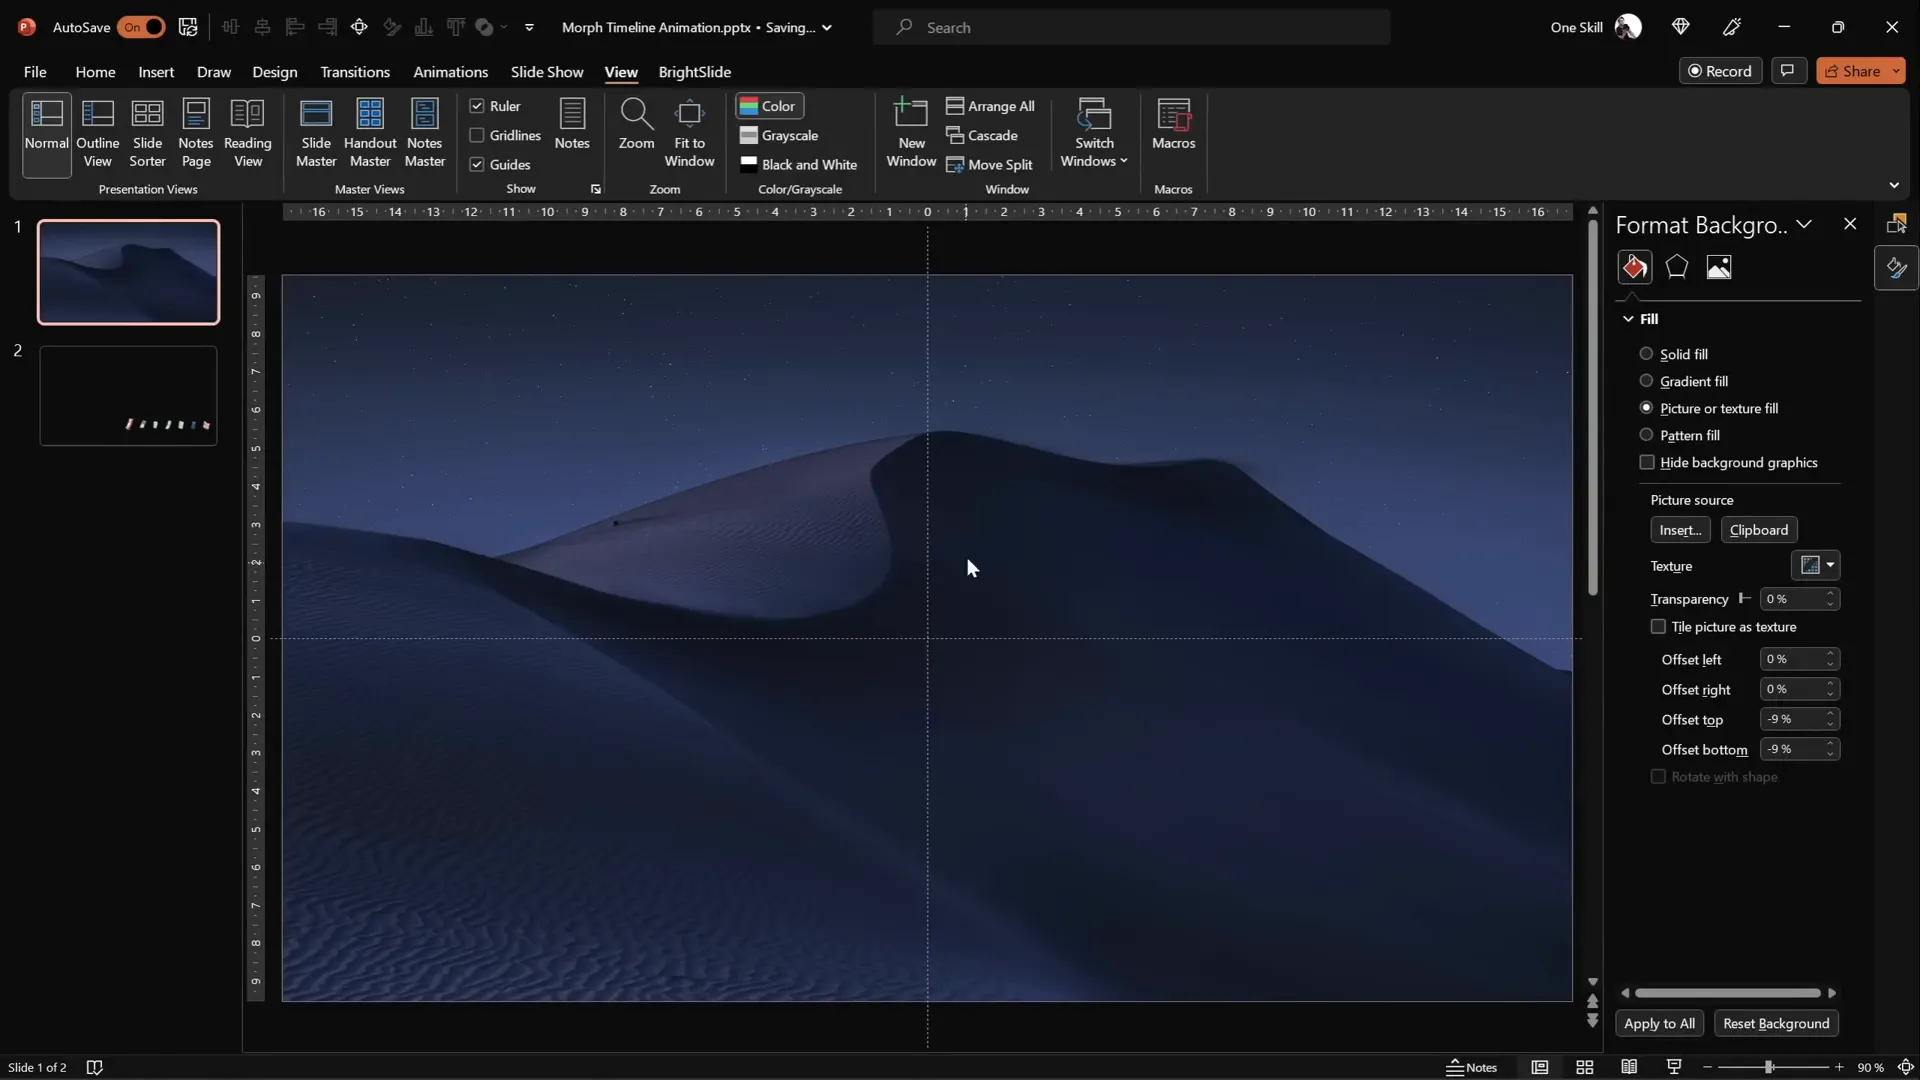
- Add a Background Picture: Instead of simply inserting a full-screen image, use the Fill options to paste a picture from your clipboard as the slide background. This is crucial because later, the circles you add will use the slide background fill effect, which only works if the background is pasted this way.
For the background image, websites like Unsplash offer beautiful free photos. Copy the image and use it as a fill for the slide background.
Once your slide is set up with a background and guides, you’re ready to start adding the timeline elements.
Creating the Timeline Base with Lines and Circles
The timeline itself consists of a horizontal line and a series of circles representing points in time (years). Here’s how to build this base:
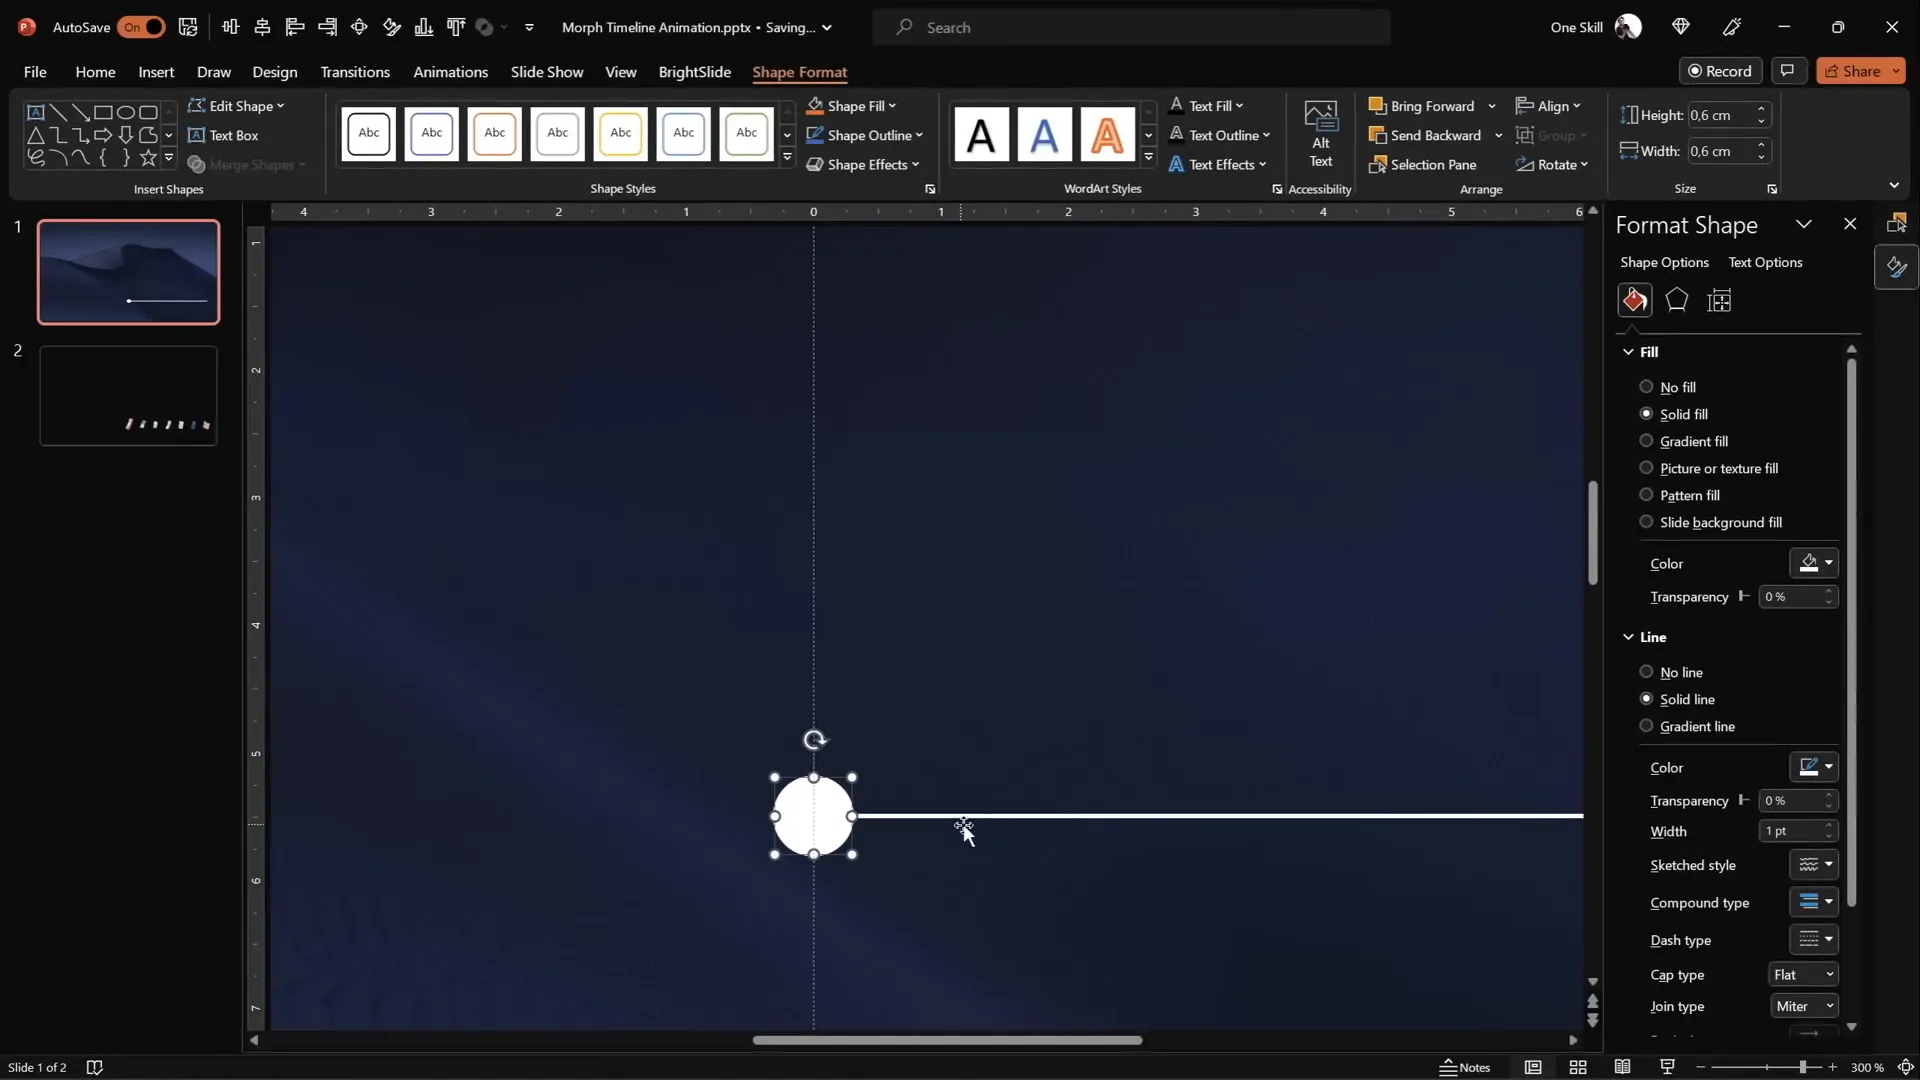
- Insert a Horizontal Line: Draw a straight line at the bottom right corner of the slide. Hold down the
Shiftkey to keep the line perfectly horizontal. Use guides to start drawing from the center of the slide. - Set Line Dimensions: Adjust the line width to around 15 centimeters and the weight to 1 point for a clean, subtle look.
- Add Circles: Draw seven perfect circles along the timeline using the
Ovalshape while holdingShiftto constrain proportions. Set each circle’s height and width to approximately 0.6 centimeters (you can adjust as per your preference). - Duplicate Circles: Position the first circle to the left of the line, then copy and paste (using
Ctrl + Shiftto drag copies) to the right side. Continue duplicating until you have seven circles evenly spaced along the line. - Distribute Circles Evenly: Select all circles, then use the Align options to distribute them horizontally, ensuring equal spacing.
These circles will serve as placeholders for the years on your timeline, and later on, for interactive animations.
Adding Year Labels to Your Timeline
With the circles in place, the next step is to add the years to each circle, giving context to your timeline.
- Insert Text Boxes: Zoom in on the circles and add text boxes inside each one.
- Type Years: Start with the year 1980 on the leftmost circle and incrementally move to 2020 on the rightmost circle, filling all seven circles with years in between.
- Font Settings: Use a clean, modern font like Hanson at a small size of 5 points initially. This small size helps you see the text clearly as you type.
- Color the Text: Start with black text so you can see what you’re typing easily. Later, change the font color to white to prepare for animation effects.
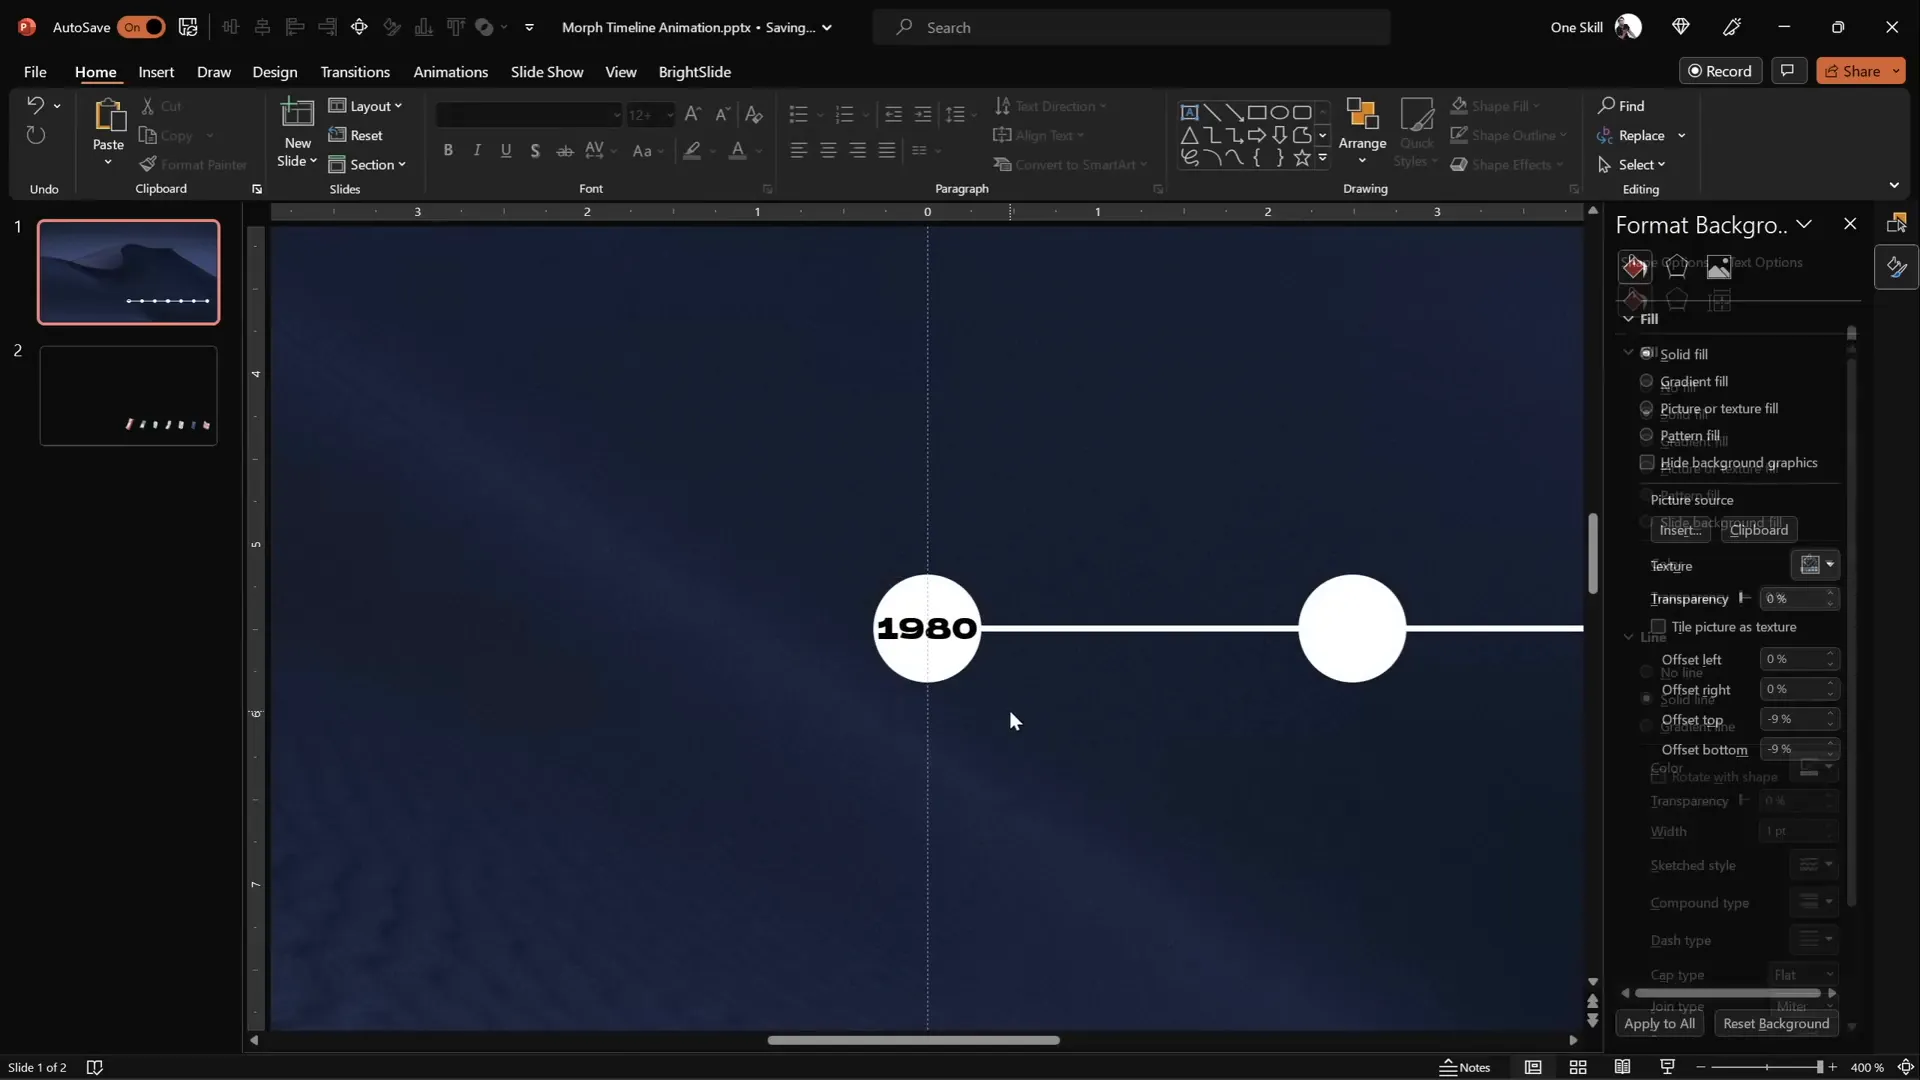
After adding the years, select all the text boxes and change the font color to white. This will make the text invisible on the background initially but sets the stage for the morph animation to reveal them smoothly.
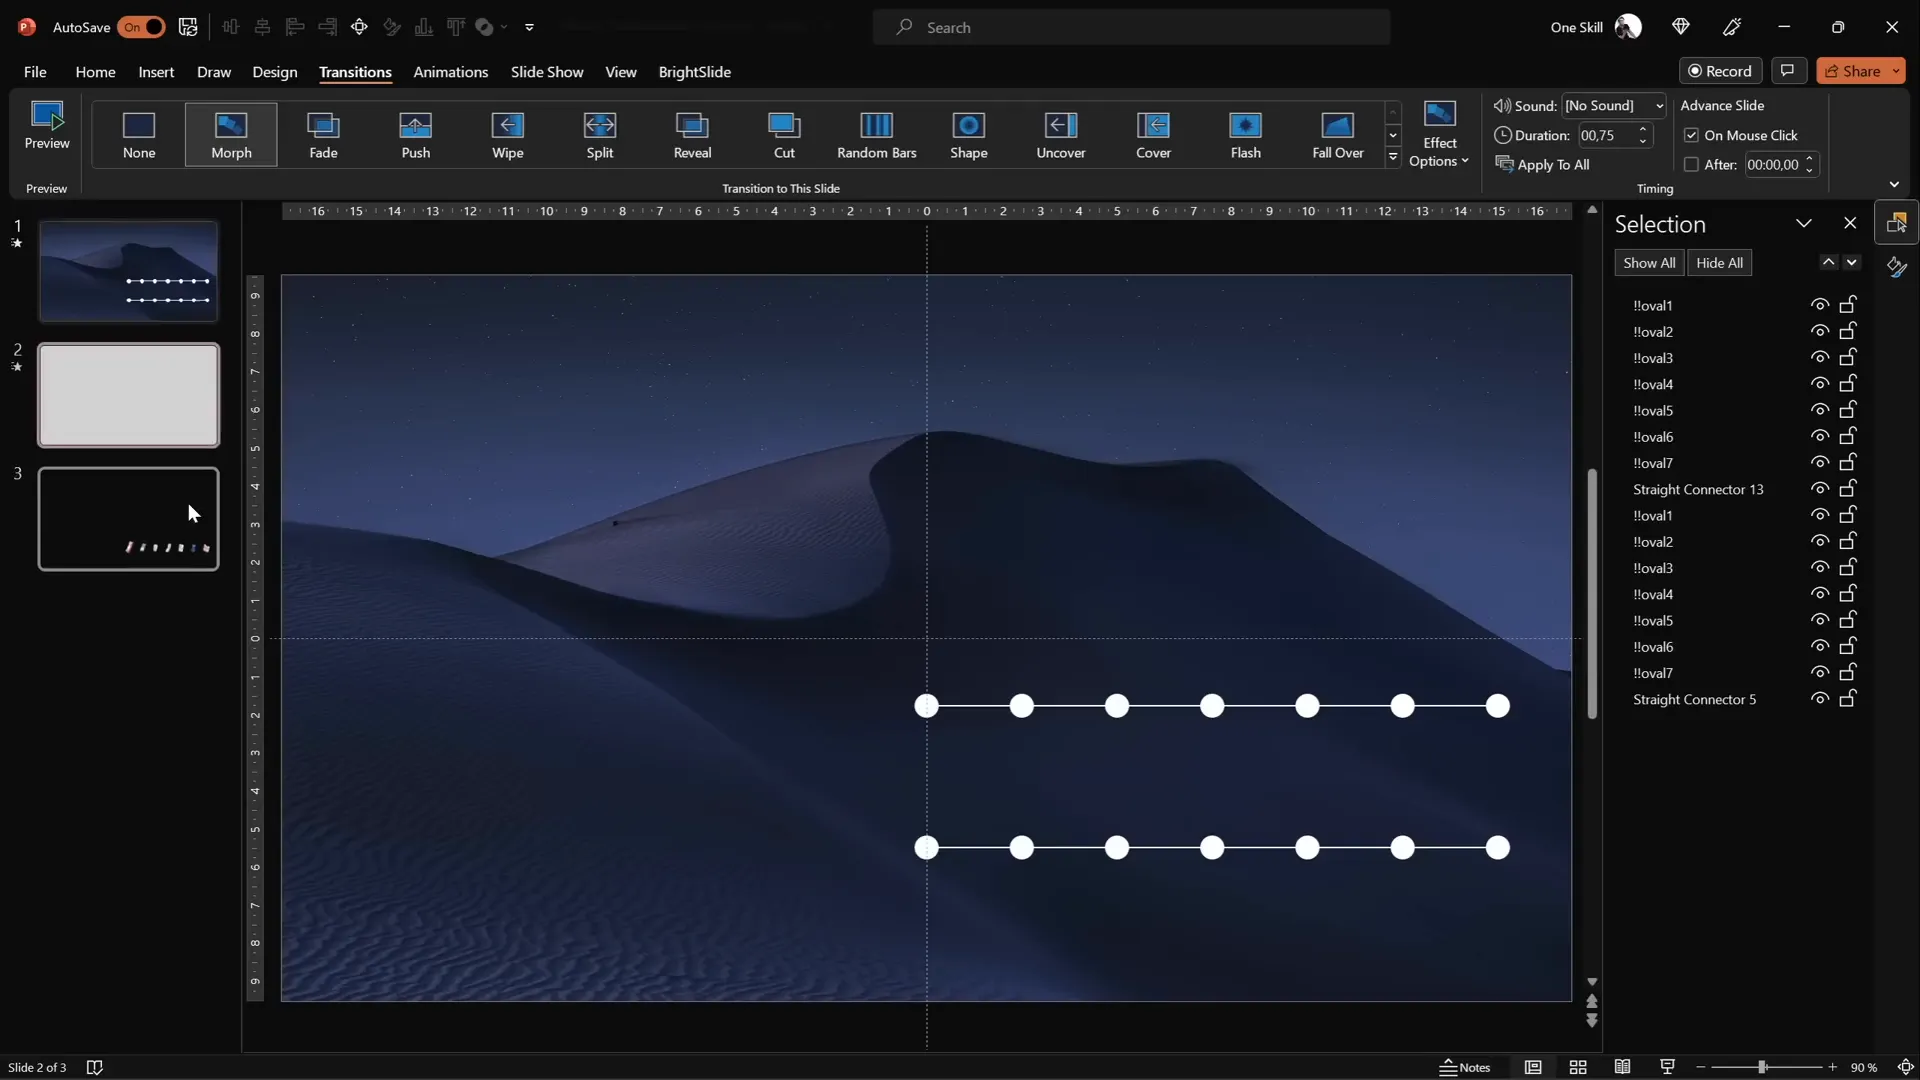
Naming Objects and Setting Smooth Morph Transitions
To use PowerPoint‘s morph transition effectively, it’s important to organize and name your objects consistently across slides. This helps PowerPoint understand which objects correspond to each other during the morph.
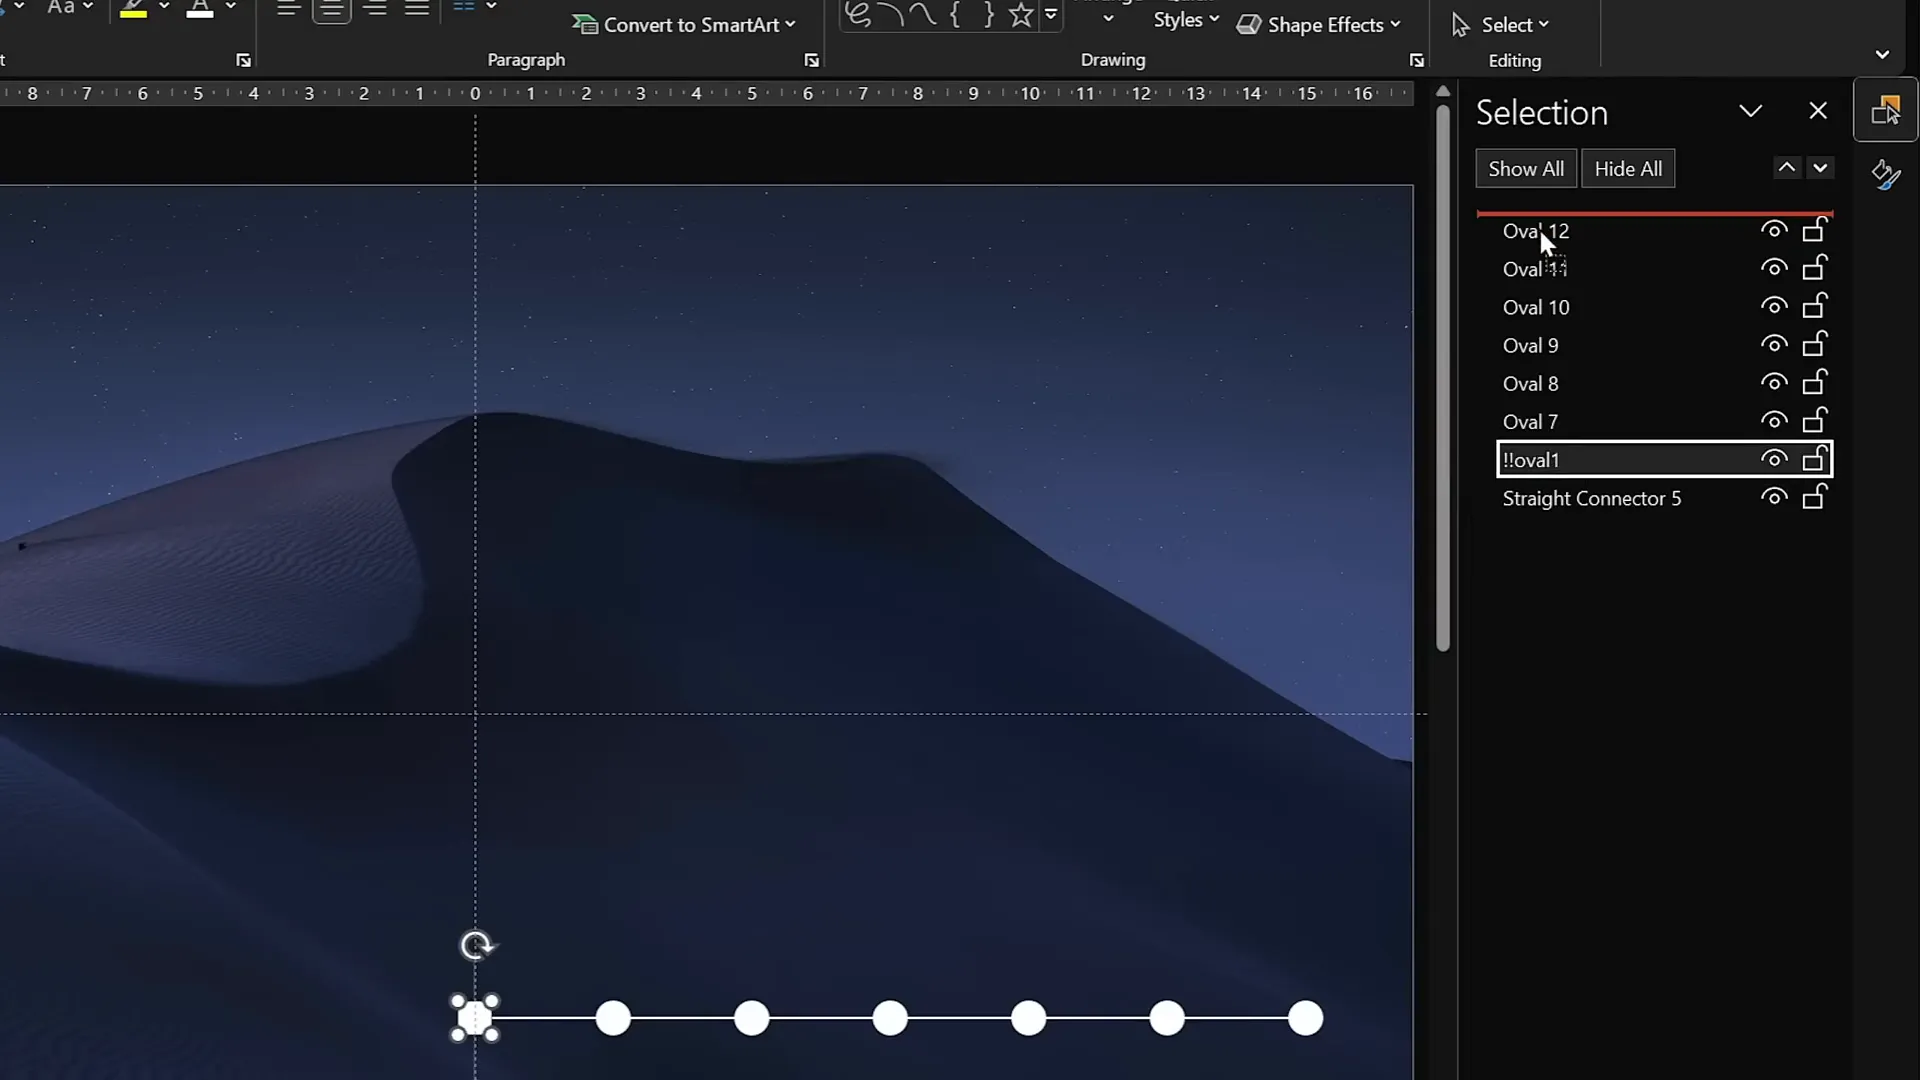
- Rename Circles: Open the Selection Pane (found under the Home tab > Arrange > Selection Pane). Rename each circle with a consistent naming convention, such as
!!Oval 1,!!Oval 2, etc. The double exclamation marks help these objects stay at the top of the list for easy access. - Set Slide Transition: Go to the Transitions tab and set the transition to Move (Morph transition). Adjust the duration to 0.75 seconds for a smooth but quick animation.
This setup ensures your timeline elements morph seamlessly from one slide to the next, creating a smooth animation effect.
Duplicating Slides and Animating the Timeline Movement
Now that the base slide is ready, it’s time to create the animation effect by duplicating slides and shifting the timeline elements.
- Make a Copy: Duplicate your first slide to create the second slide.
- Move Circles and Line: Select all seven circles and the horizontal line on the second slide. Move these elements one step to the left.
- Repeat the Process: Duplicate the second slide to create a third slide and move the timeline elements one step further to the left.
- Use the Original as a Guide: Keep your original circles (not moved) at the top of the slide as a guide for alignment. Once the shifting is done, delete these guide circles.
When you play the slide show, the circles and line will appear to slide left smoothly, thanks to the morph transition.
Highlighting Active Years with Enlarged Circles
To emphasize the current year on each slide of your timeline, you can enlarge the corresponding circle and make its text visible. Here’s how to do it:
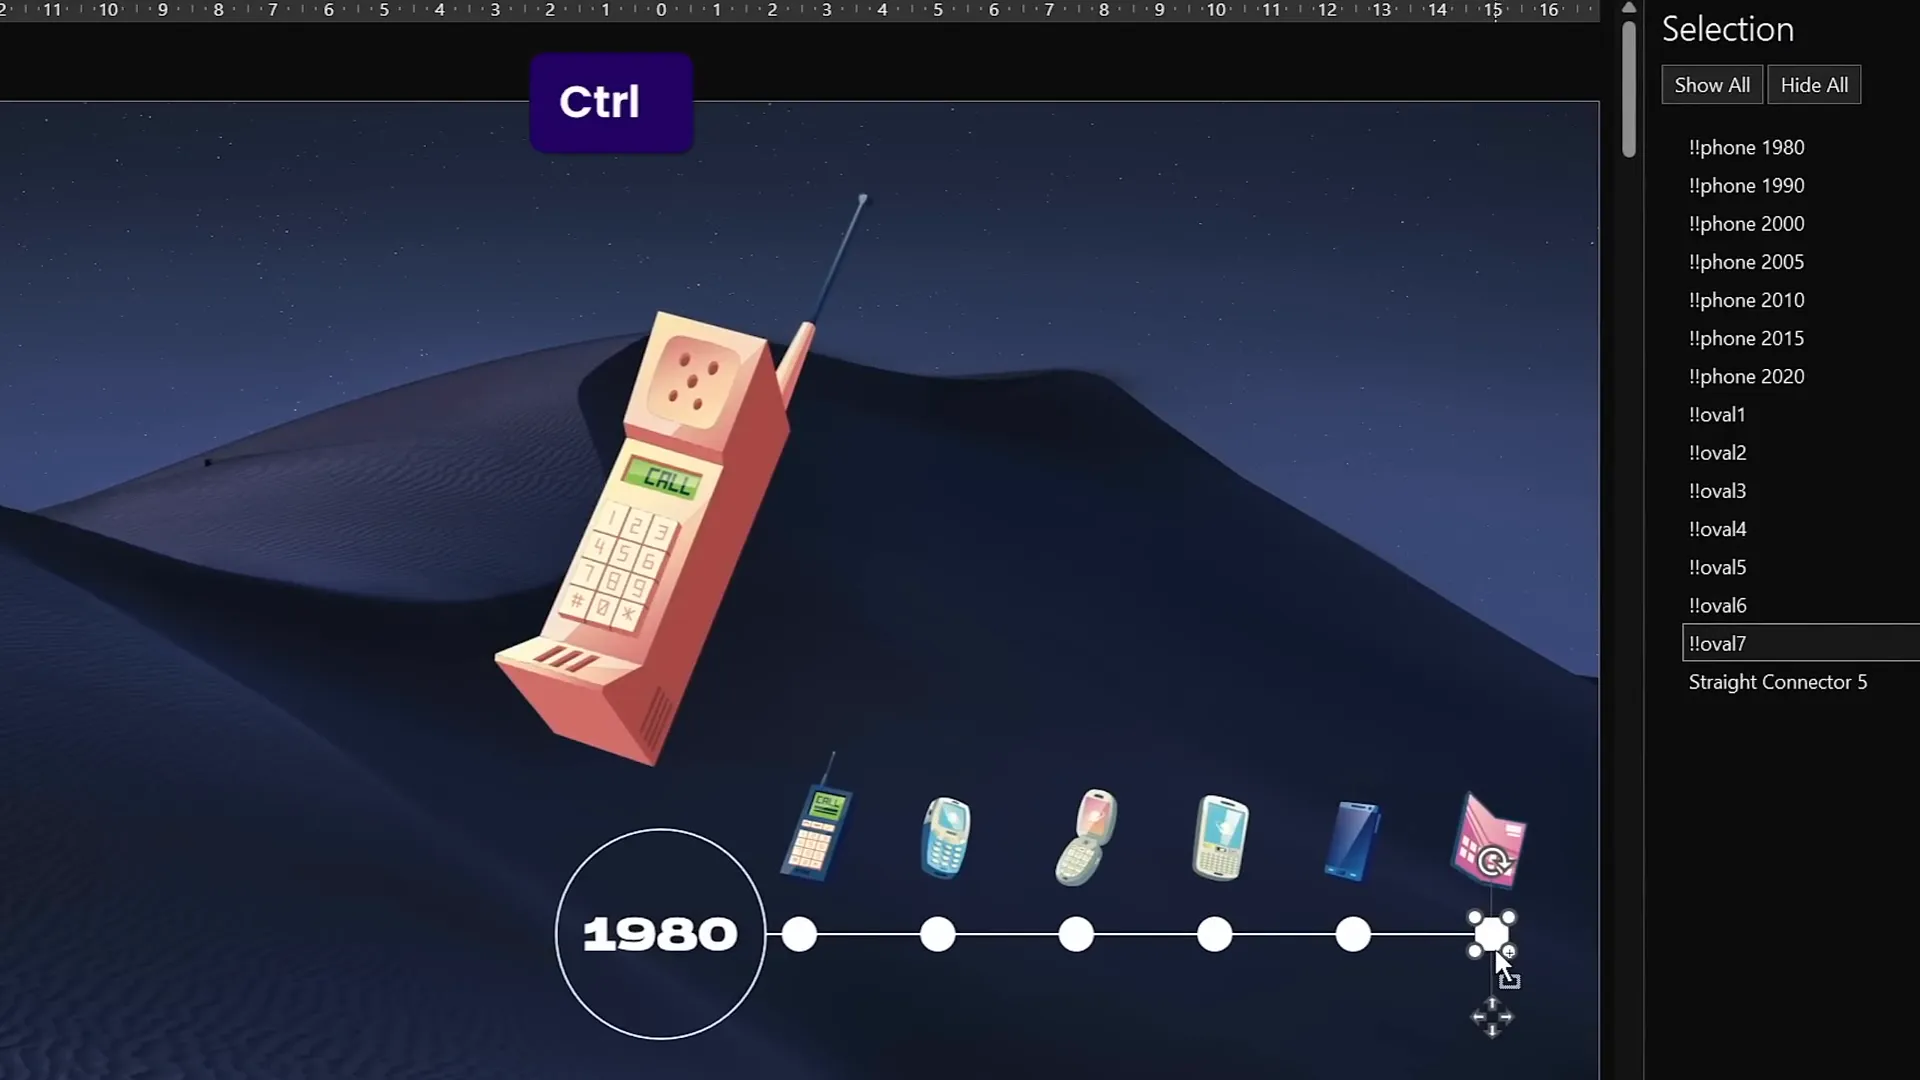
- Resize Circle: On each slide, select the circle representing the active year. Hold
Ctrl + Shiftand drag a corner handle to resize the circle proportionally from the center. - Remove Fill: Set the fill of the enlarged circle to No Fill to make the text inside stand out.
- Increase Font Size: Increase the font size of the year inside the circle to around 24 points so it’s clearly visible.
- Hide Overlapping Lines: If the line behind the circle is visible and distracting, add a light background fill to the circle to hide the line.
- Copy Style: Use
Ctrl + Shift + Cto copy the style of the enlarged circle andCtrl + Shift + Vto paste it onto the corresponding circle on the next slide, maintaining consistency.
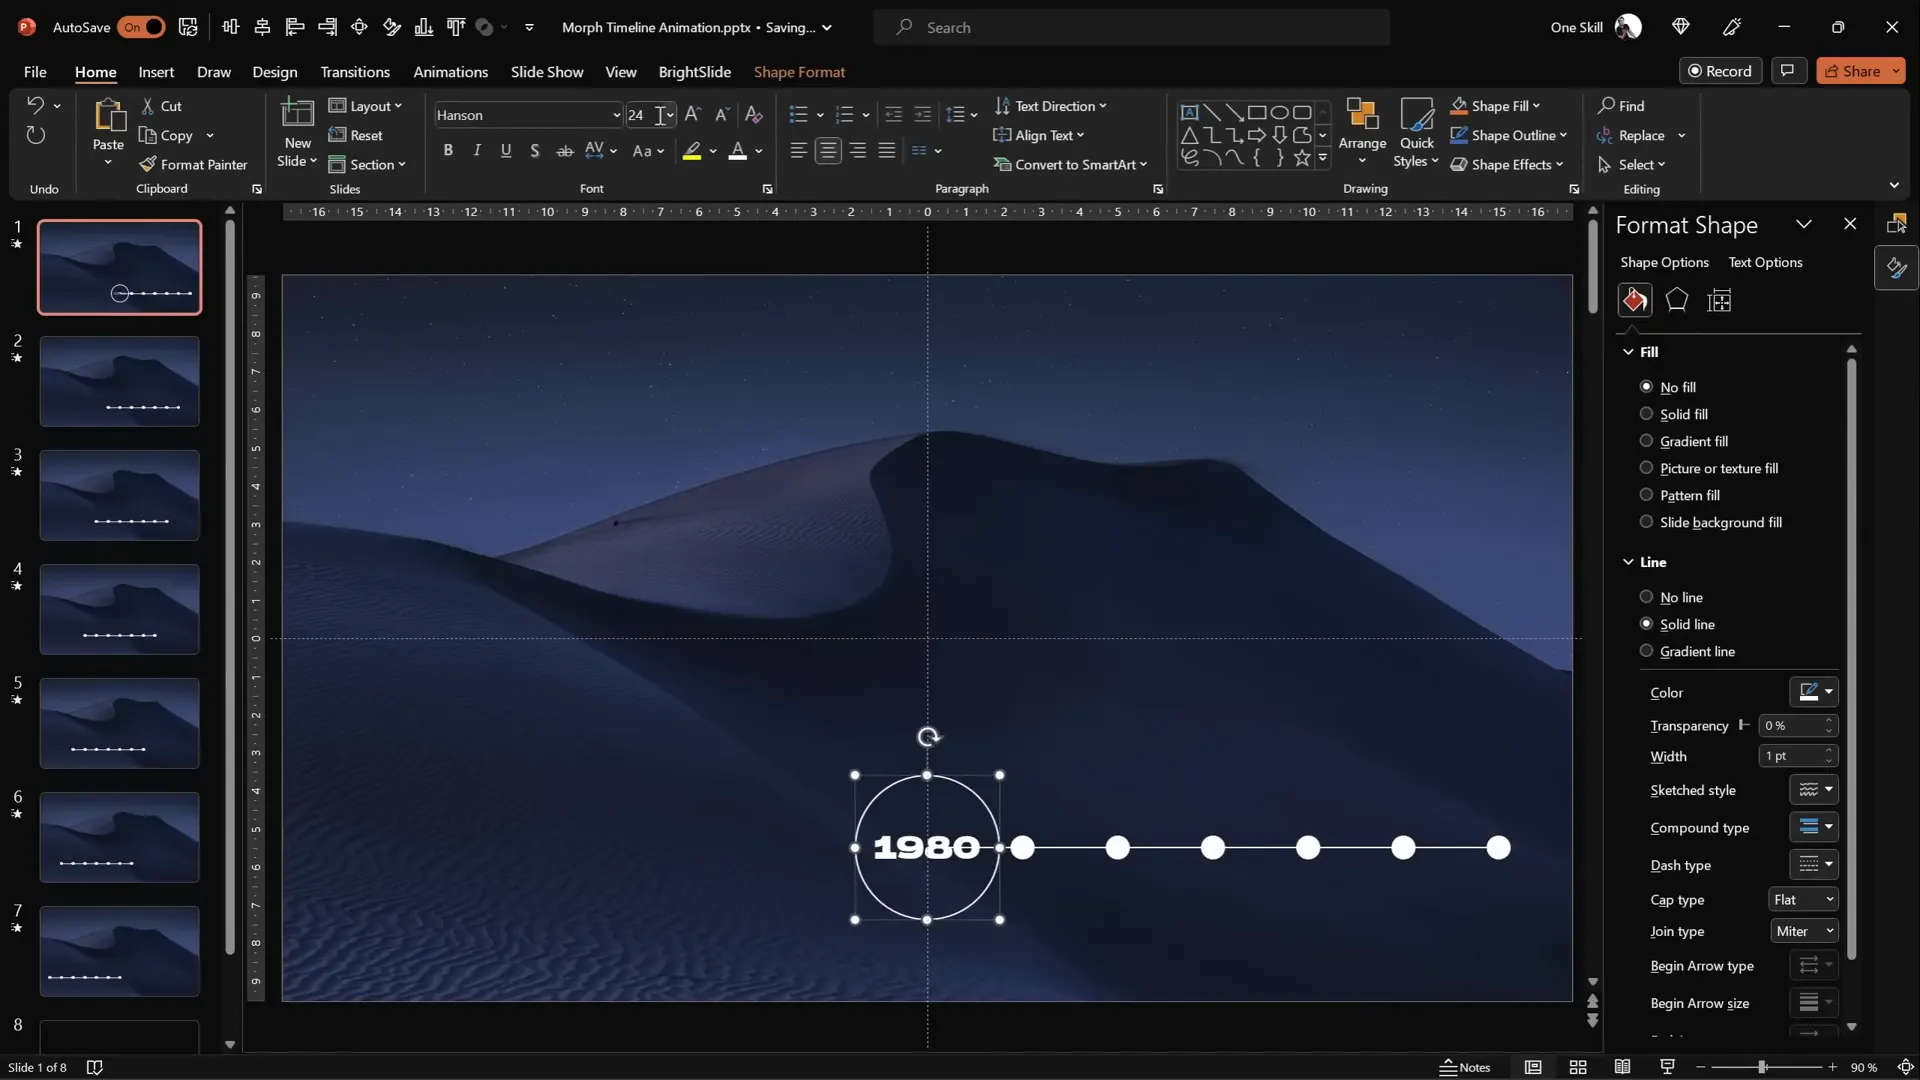
Repeat this process for all seven slides so each slide highlights a different year with a large circle and visible text, enhancing the timeline’s readability and animation appeal.
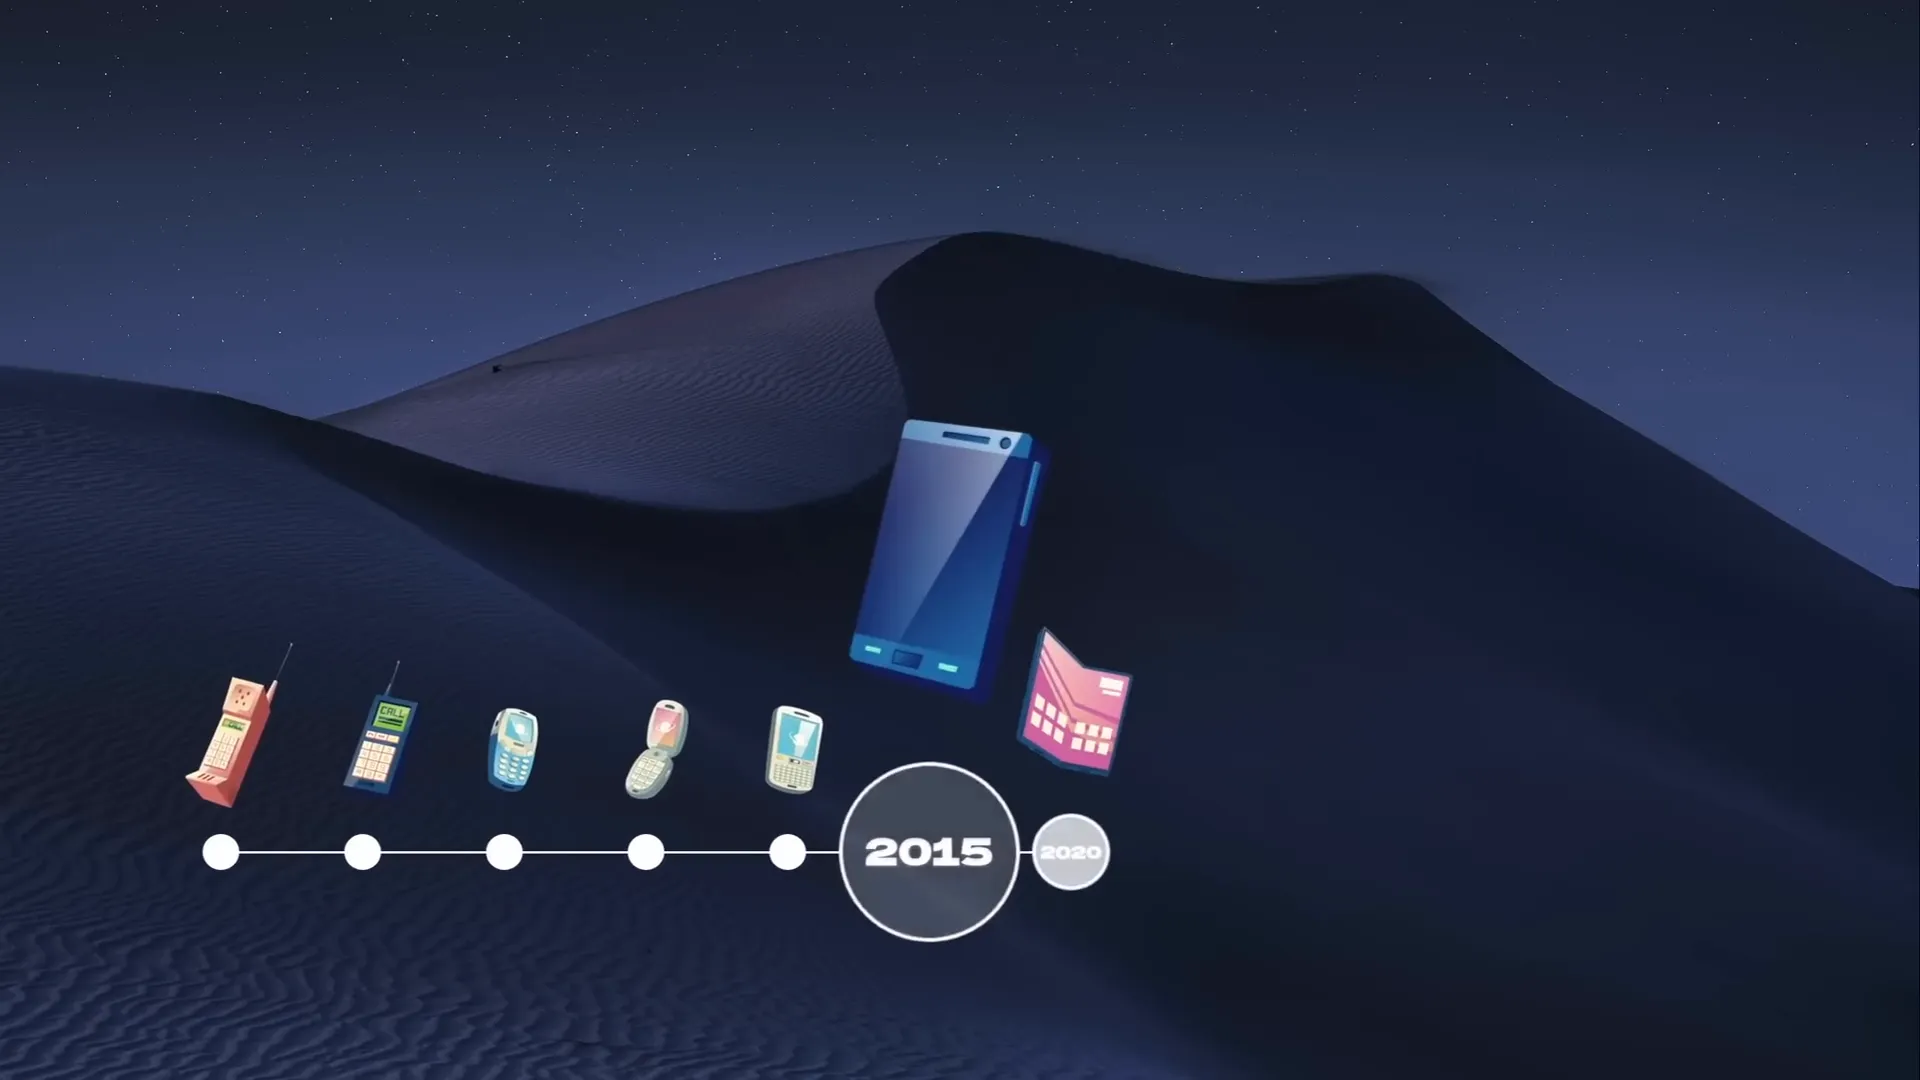
Enhancing the Timeline with Animated Phone Illustrations
To make your timeline more engaging and visually interesting, consider adding themed illustrations that correspond to each timeline point. In this example, phone illustrations are used to represent technological evolution over the years.
- Collect Illustrations: Gather phone illustrations or images for each year you want to represent. Free resources like Freepik offer great cartoon-style vectors.
- Name Illustrations: Use the Selection Pane to rename each phone illustration with corresponding years and double exclamation marks, such as
!!Phone 1980. - Paste on Slides: Paste all phone illustrations onto the first slide and position them just above the timeline.
- Resize and Rotate: Adjust the size of each phone and optionally rotate slightly for a more dynamic look.
- Animate Movement: On each subsequent slide, move all phone illustrations one step to the left to align with the shifting timeline.
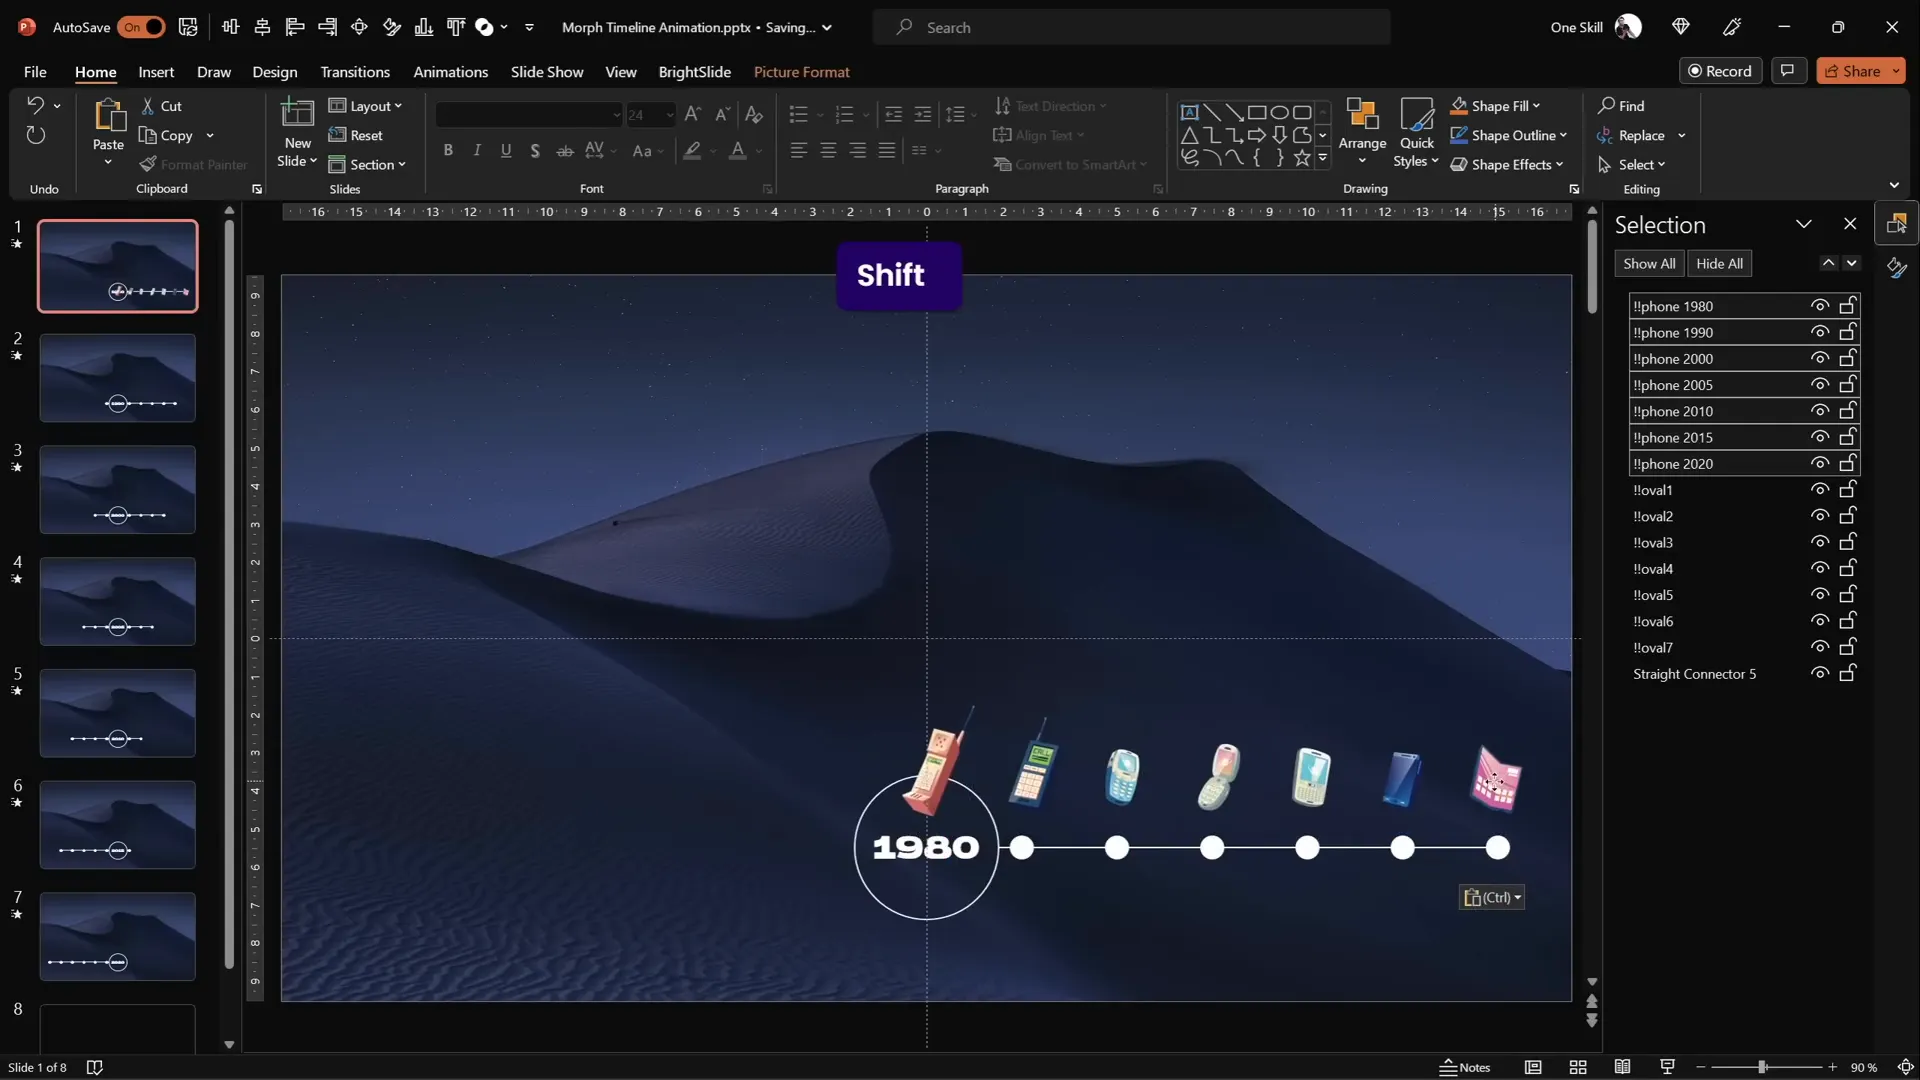
When you run the slideshow, the phones will move smoothly with the timeline, creating a compelling animated story about phone evolution over time.
Adding Interactive Hyperlinks for Easy Navigation
To make your timeline interactive and user-friendly, you can add hyperlinks to the circles that allow users to jump to specific slides instantly.
- Add Hyperlinks: Select a circle on the right side of the first slide and insert a hyperlink that jumps to the last slide (slide 7).
- Link Back: On the last slide, add a hyperlink to the leftmost circle that jumps back to the first slide.
- Customize Links: Feel free to add hyperlinks to other circles as needed to create a navigation system that suits your timeline.
This feature enhances the usability of your presentation, allowing viewers to jump back and forth between timeline points with a simple click.
Final Tips and Tricks for PowerPoint Animation Effects
Before wrapping up, here are some additional tips to help you get the most out of your PowerPoint animation effects:
- Use Consistent Naming Conventions: This makes managing objects across slides much easier, especially when using the morph transition.
- Keep Animation Duration Short: A duration of 0.75 seconds keeps the animation smooth and fast-paced, maintaining viewer interest.
- Leverage Slide Guides: Use guides and gridlines to align objects precisely for a polished look.
- Test Your Animation: Always preview your slideshow in full screen to make sure the morph effect works as expected.
- Explore More Resources: For more PowerPoint tutorials and templates, check out One Skill PPT’s channels and websites.
With these strategies, you’ll create timelines that not only inform but also captivate your audience using PowerPoint animation effects.
Frequently Asked Questions
What is the Morph transition in PowerPoint?
The Morph transition is a special effect in PowerPoint that allows smooth animation between slides by automatically moving, resizing, and transforming objects that exist on consecutive slides with the same name. It’s perfect for creating dynamic animations like moving timelines, zooming into details, or animating shapes.
Can I use any images for the background in my timeline?
Yes, but for the morph effect to work correctly with circles using the slide background fill, you need to paste the image as a background fill rather than inserting it as a standalone picture. Websites like Unsplash provide free high-quality images you can use for backgrounds.
How do I make sure the morph animation is smooth?
Ensure that objects you want to animate have consistent names across slides, use the Slide Master for uniform designs, and keep the transition duration around 0.75 seconds. Also, avoid drastic position changes to maintain smoothness.
Can I add interactive elements to my timeline?
Absolutely! You can add hyperlinks to timeline elements such as circles or icons to allow navigation between slides or external resources, enhancing interactivity.
Where can I find free resources like fonts and illustrations?
Free fonts can be found on websites like Fontesk. Illustrations and vector images are available on platforms like Freepik. Always check the licenses before use.
Is this animated timeline suitable for all PowerPoint versions?
The Morph transition is available in PowerPoint 2016 and later versions, including Office 365. If you’re using an older version, you may not have access to this feature.
Conclusion
Creating an animated morph timeline in PowerPoint is a fantastic way to bring your presentations to life. By combining clean design elements like lines and circles with carefully placed text and engaging illustrations, you can craft a timeline that is both informative and visually stunning.
PowerPoint’s morph transition simplifies the animation process, making it accessible even for users without advanced animation skills. With the techniques covered in this guide—from setting up your slides, aligning and naming objects, to duplicating slides for smooth animations—you’ll be equipped to design your own timelines that wow your audience.
Don’t forget to experiment with interactive hyperlinks to make your timeline more navigable, and always preview your presentation to ensure everything flows seamlessly.
For more tutorials and free templates, visit pptskill.com and explore the Interstellar PPT YouTube channel for additional PowerPoint animation effects and skills.
Ready to elevate your PowerPoint game? Start building your animated morph timeline today and impress your audience with professional-quality PowerPoint animation effects!


