
PowerPoint animation effects have become an essential tool for anyone looking to elevate their presentations from ordinary to extraordinary. With the recent announcement of Microsoft 365 Copilot—a groundbreaking AI productivity tool integrated within Microsoft 365 apps such as Word, Excel, Outlook, and PowerPoint—there’s a fresh wave of inspiration on how animations can transform the way we present information.
Inspired by the mesmerizing animations showcased in the Microsoft 365 Copilot announcement, this guide will walk you through creating a similar photo crop and text reveal animation in PowerPoint using the powerful Morph transition. These techniques will help you produce professional and engaging presentations that capture attention and communicate your message effectively.
Whether you’re a seasoned PowerPoint user or just starting, mastering these animation effects will enhance your design skills and help you deliver captivating presentations. Let’s dive into the step-by-step process to replicate these effects and explore tips for making your slides visually compelling.
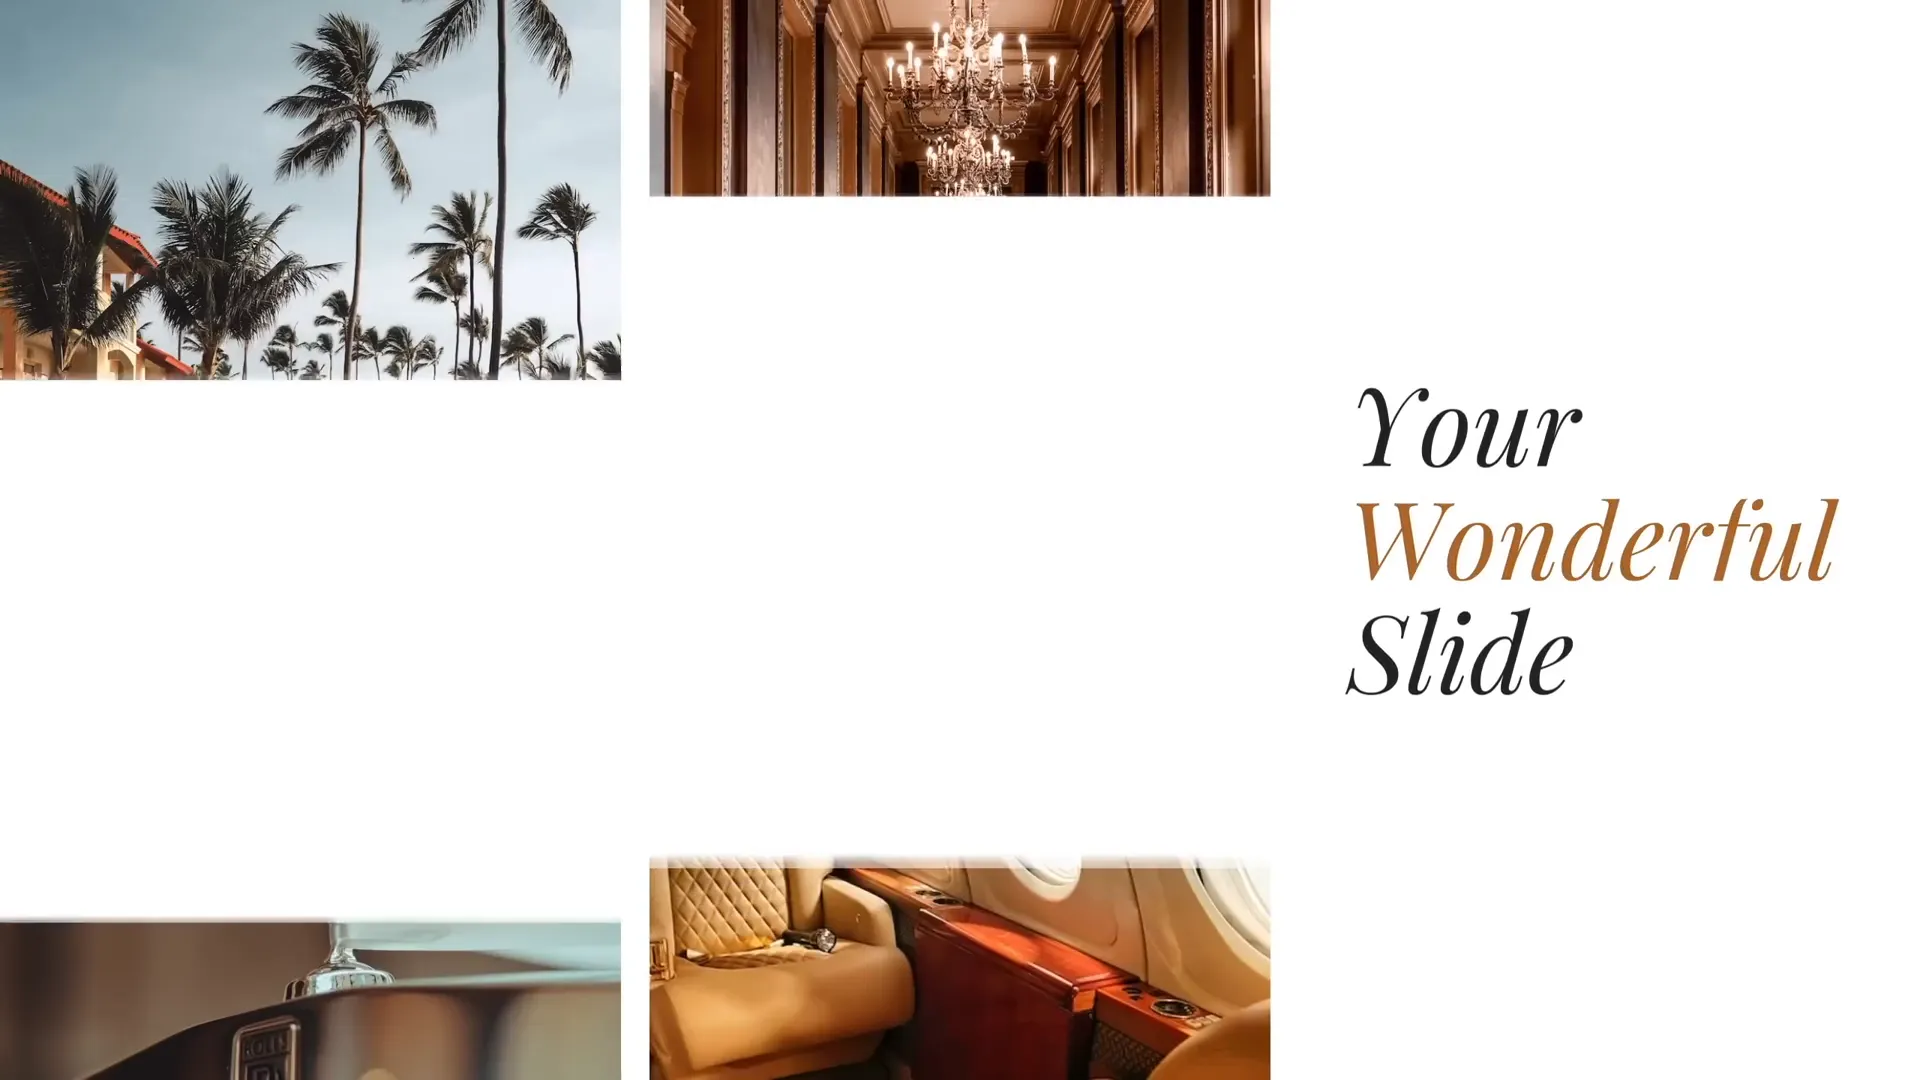
Table of Contents
- Introduction to PowerPoint Animation Effects
- Setting Up the Slide: Basic Layout and Elements
- Filling Rectangles with Photos Using Merge Shapes
- Designing and Arranging Text Boxes for Animation
- Applying Morph Transition for Smooth Animations
- Creating the Photo Crop Animation
- Adding Animation Delays for a Dynamic Effect
- Final Tips and Resources for PowerPoint Animation Mastery
- Frequently Asked Questions
Introduction to PowerPoint Animation Effects
Animations in PowerPoint do more than just add flair—they guide your audience’s focus, emphasize key points, and bring your content to life. Microsoft’s new AI feature, Copilot, demonstrated how automation can create intricate animations, such as transforming written documents into animated PowerPoint presentations complete with engaging text reveals and photo crop effects.
Since Copilot is not yet publicly available, you can achieve similar results manually using PowerPoint’s built-in tools, particularly the Morph transition. This transition allows seamless movement and transformation of objects between slides, making it an excellent choice for creating advanced animation effects without complex timelines or coding.
In this guide, we’ll replicate a Copilot-inspired animation that features:
- A visually striking photo crop animation where images slide into view from cropped rectangles.
- A smooth text reveal animation that elegantly introduces text on the slide’s right side.
Combining these effects will give your presentation a polished, professional look that will impress your audience.
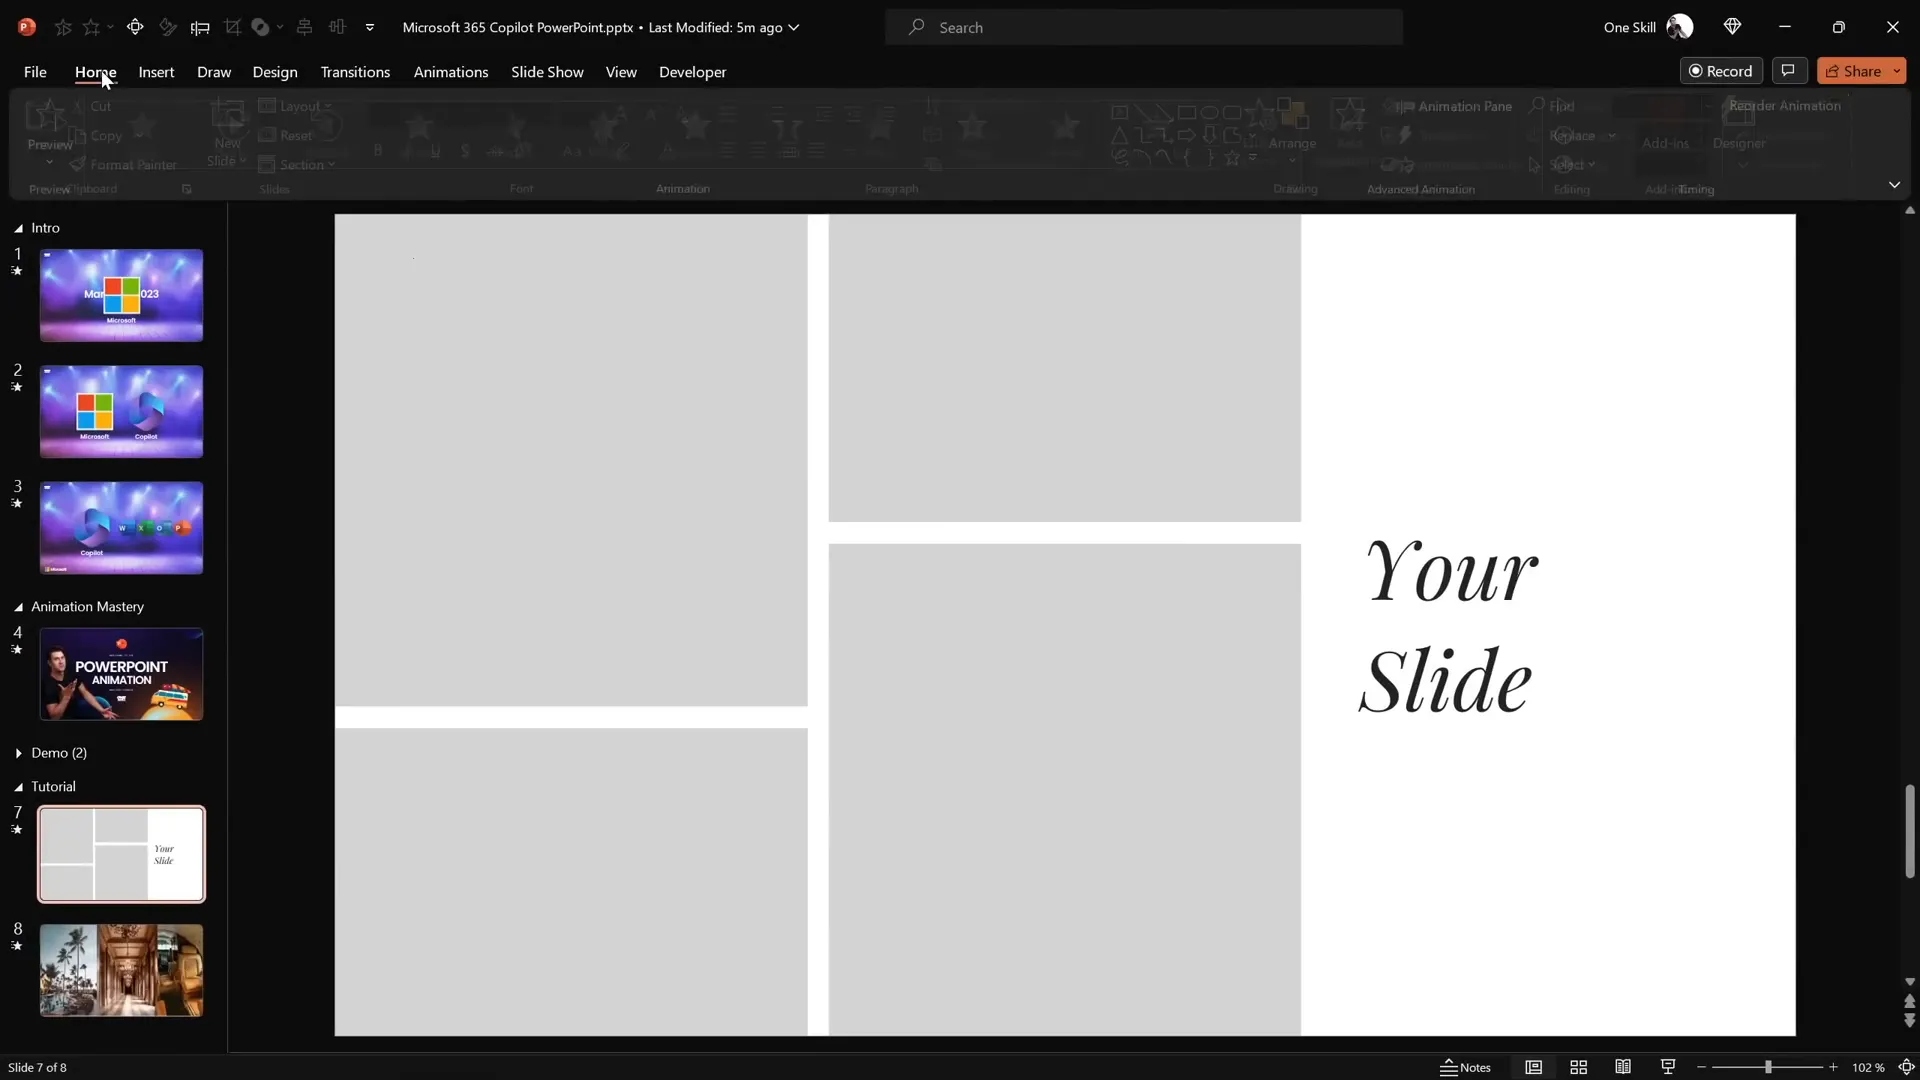
Setting Up the Slide: Basic Layout and Elements
Before diving into animations, it’s crucial to set up your slide with the right layout. Here’s how to start:
- Create four rectangles of varying heights: These will serve as placeholders for your photos. Arrange them horizontally with equal gaps between each rectangle to maintain visual balance and harmony.
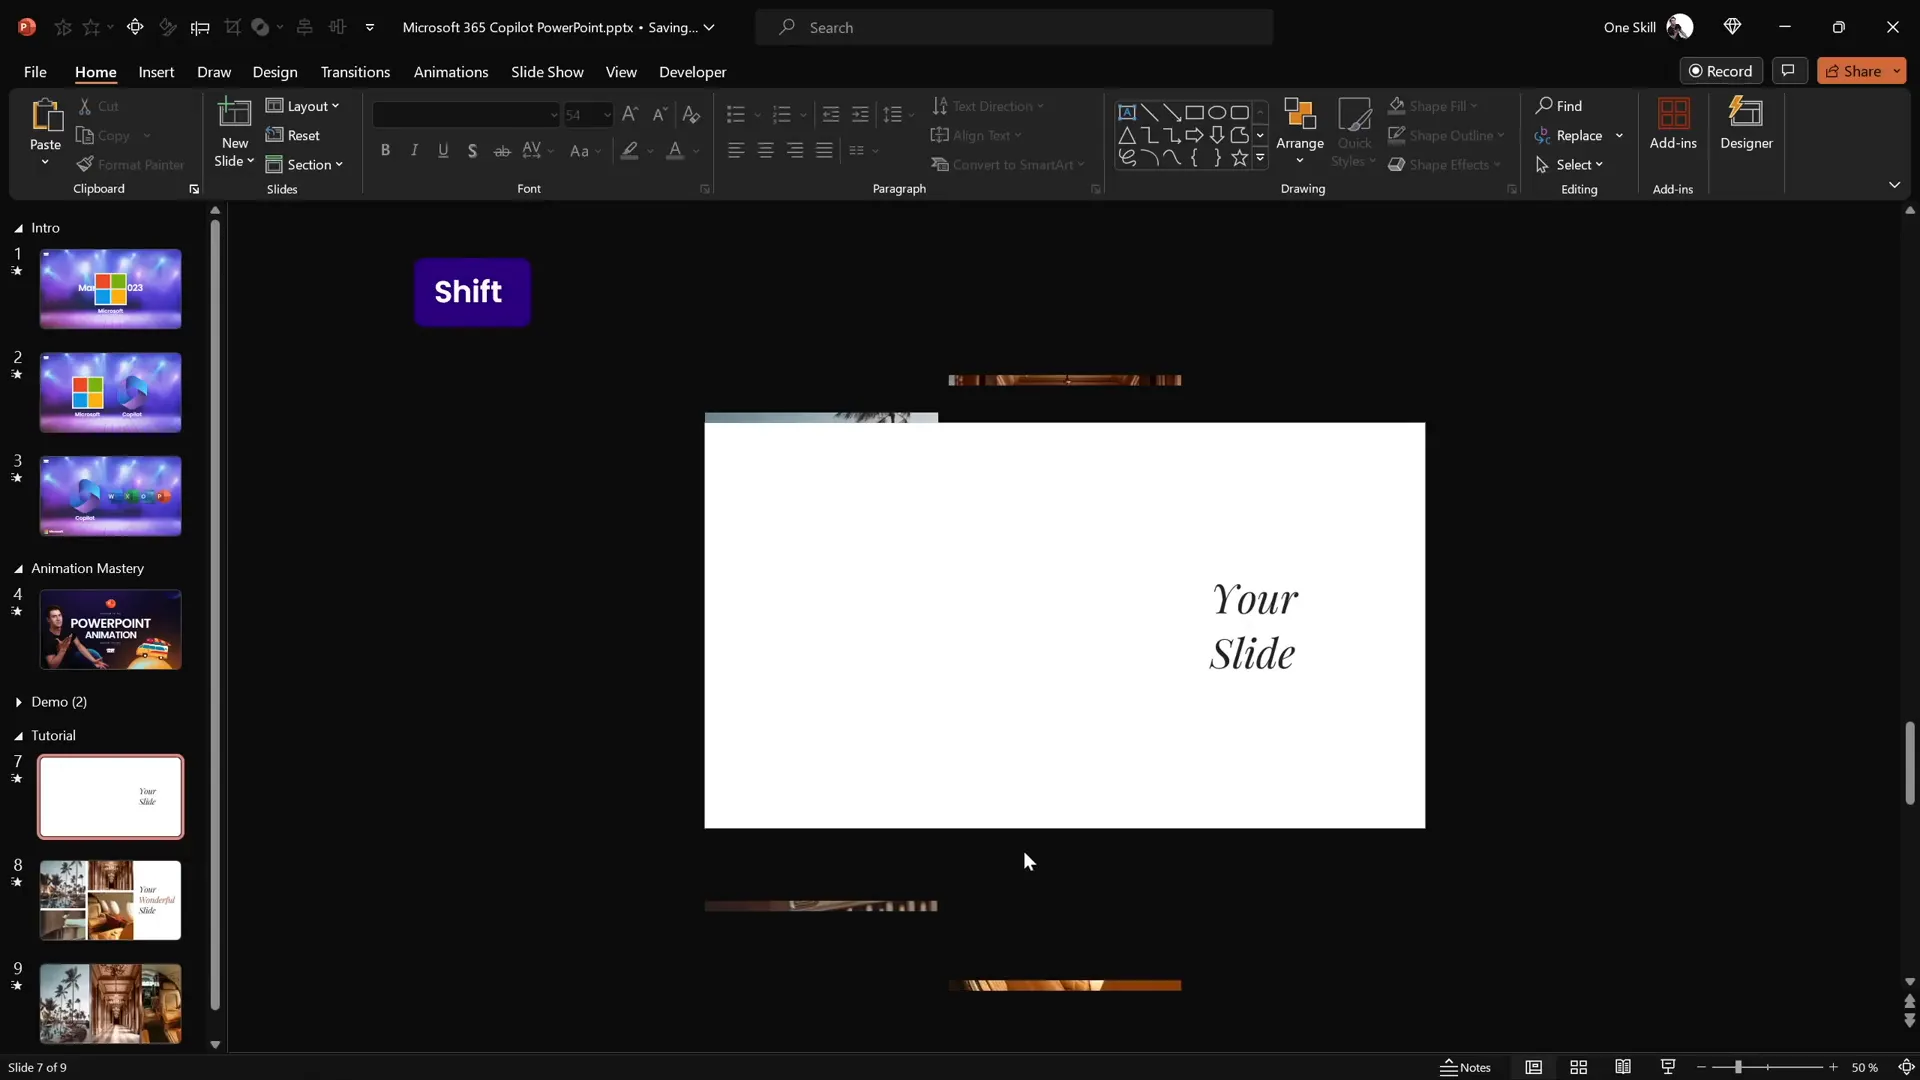
- Position two text boxes on the right side: Use a clean and elegant font for your text. In this example, the Playfair Display font at size 54 is used to create a sophisticated look.
Here’s a quick checklist for slide setup:
| Element | Details |
|---|---|
| Rectangles | Four rectangles, different heights, equal spacing |
| Text Boxes | Two on right side, Playfair Display font, size 54 |
Filling Rectangles with Photos Using Merge Shapes
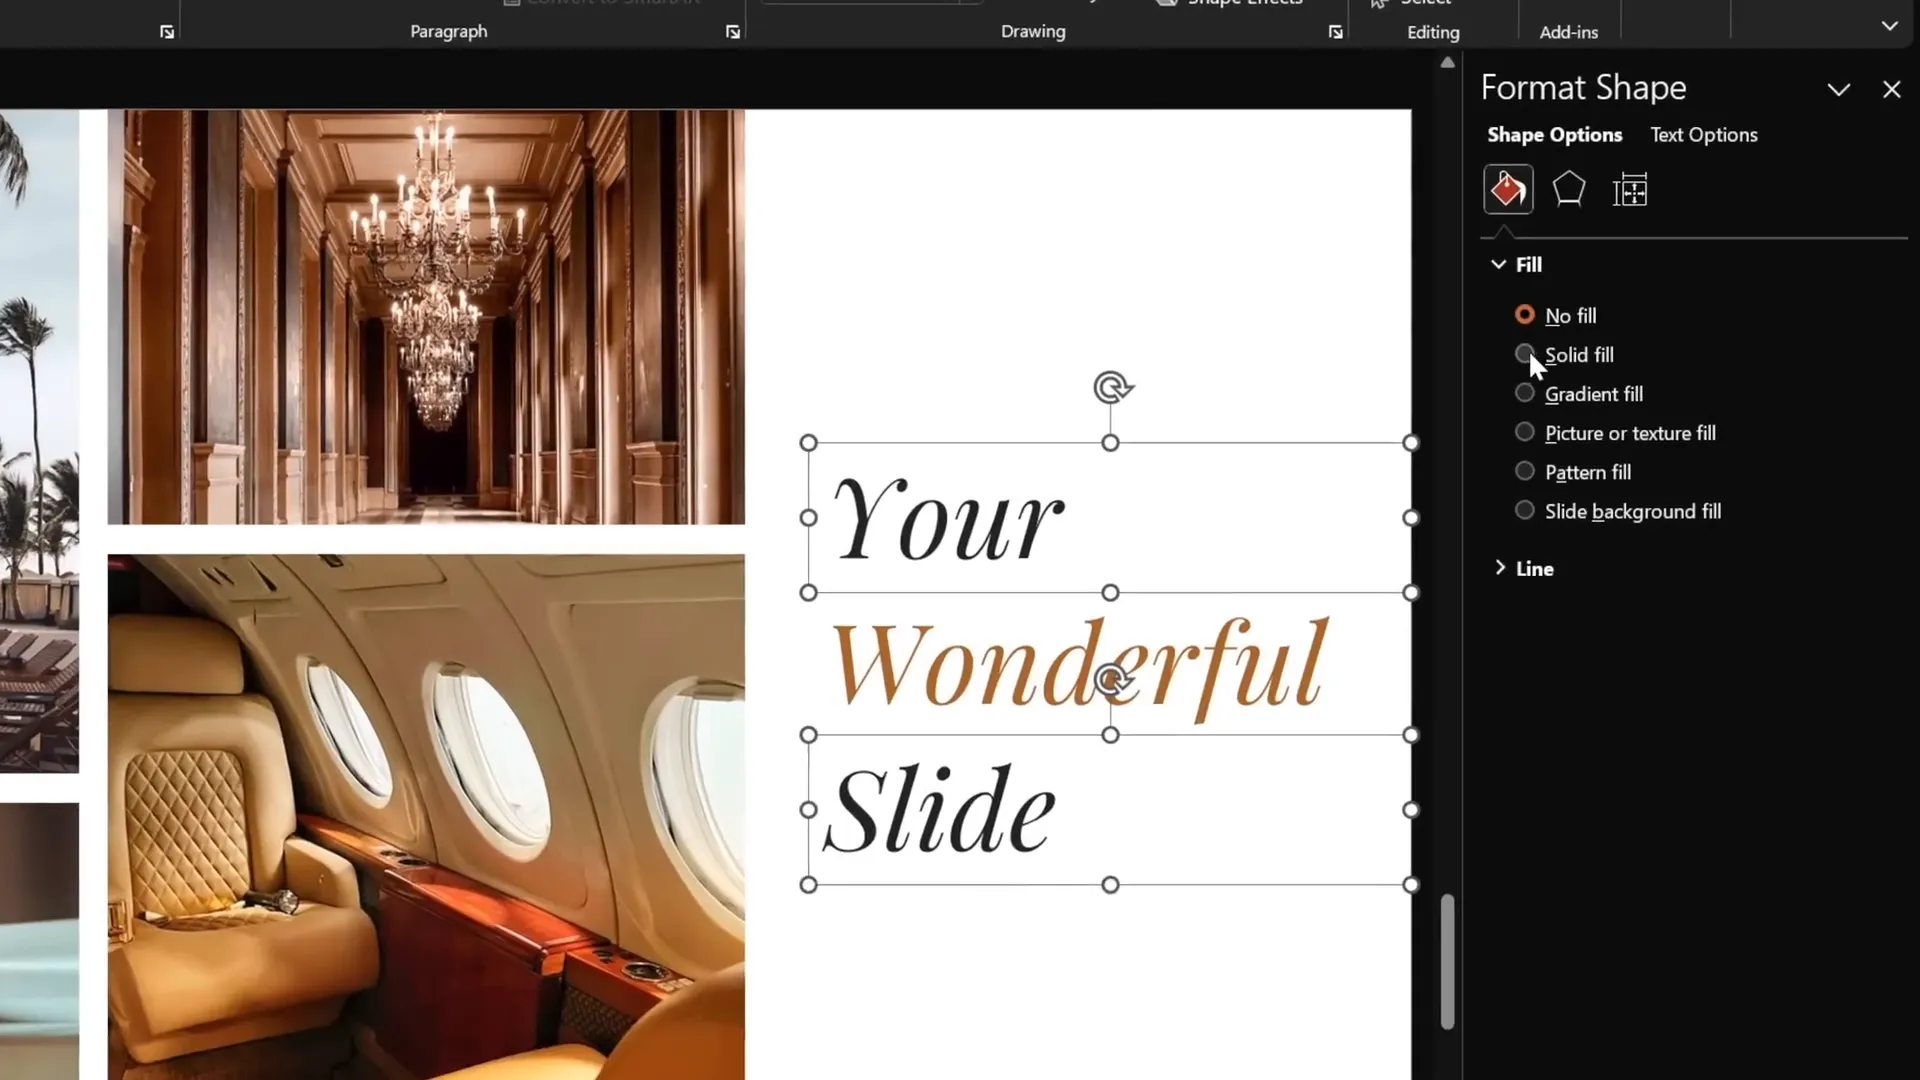
One of the key elements of the animation is placing photos inside the rectangles so that they appear cropped. While PowerPoint allows you to fill shapes with pictures via Format Shape options, this method often lacks flexibility for animation purposes.
Instead, use the Merge Shapes → Intersect technique to clip photos perfectly inside your rectangles:
- Insert your photos onto the slide: You can source high-quality images from sites like Unsplash. Place each photo over its respective rectangle, aligning carefully.
- Send the photo to the back: Right-click on the photo and select Send to Back so it sits behind the rectangle.
- Select both photo and rectangle: Hold the Shift key and select the photo and the rectangle shape.
- Go to Shape Format → Merge Shapes → Intersect: This will crop the photo perfectly to the shape of the rectangle.
- Repeat for all rectangles: Apply this process for each rectangle to fill them with photos.
This method gives you full control over how the photos interact with the shapes, allowing for precise cropping and positioning.
If you want to adjust the photo within the cropped shape, simply select the cropped photo, click Crop under Picture Format, and move the photo around within the cropping frame.

Designing and Arranging Text Boxes for Animation
Next, let’s refine the text on the right side of the slide. To create a dynamic text reveal animation, you will need three text boxes arranged vertically:
- Duplicate one of the existing text boxes: Hold down Ctrl + Shift and drag to create a copy aligned perfectly in a straight line.
- Edit the middle text box: Change the text to something meaningful like “wonderful” and adjust the color to complement your slide’s theme.
- Distribute the three text boxes evenly: Select all three, then use the “Distribute Vertically” option to space them equally.
- Group and center-align: Group the text boxes and align them to the center of the slide for balance, then ungroup to continue editing.
- Add solid white fills to the top and bottom text boxes: This is essential for the animation effect where these boxes will hide the middle text box during the transition.
- Send these two text boxes to the front: This ensures they correctly overlay the middle text box during the animation.
This setup will enable a clean and elegant text reveal animation when combined with the morph transition.
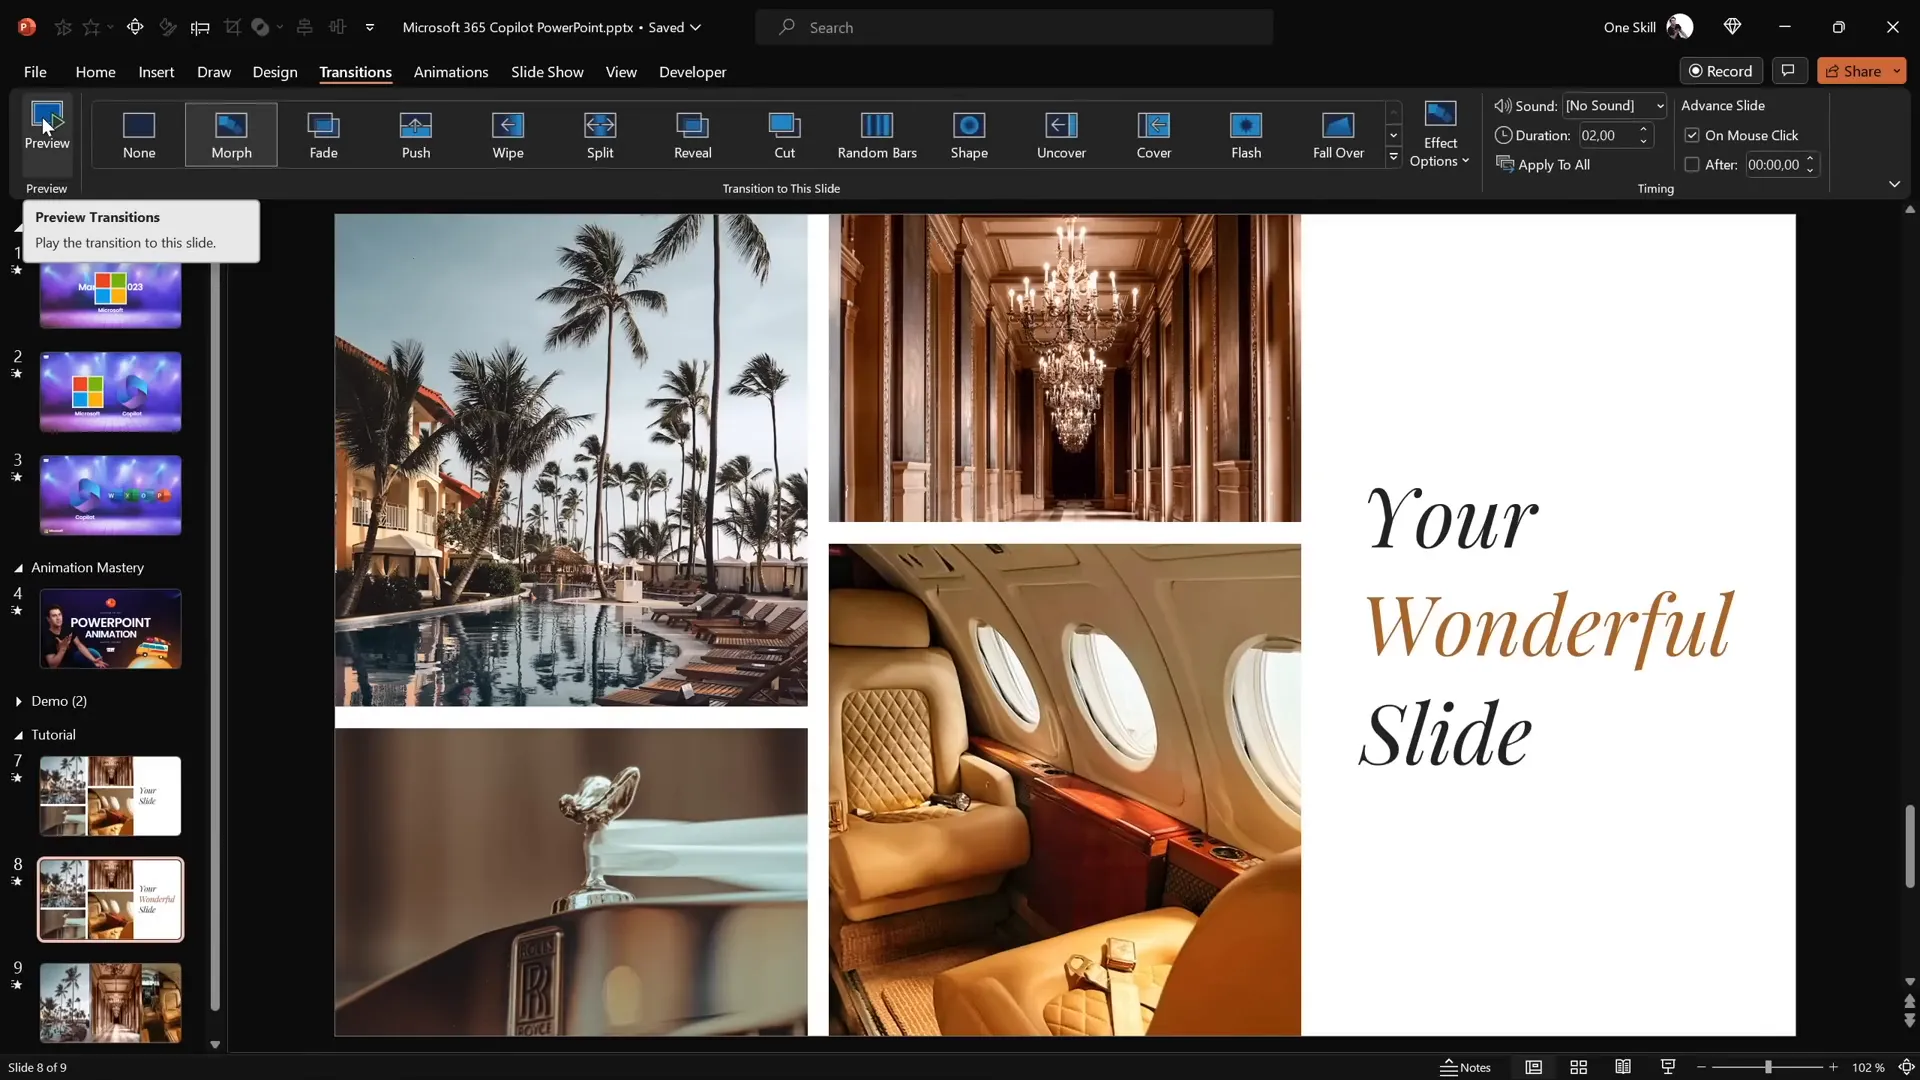
Applying Morph Transition for Smooth Animations
The secret sauce to creating seamless animations in PowerPoint is the Morph transition. Unlike traditional animations that rely on timelines and triggers, Morph automatically animates movement and transformation of objects between two slides.
Here’s how to apply Morph for your animation:
- Duplicate your completed slide: Right-click on the slide thumbnail and select Duplicate Slide.
- Apply a fade transition to the first slide: This keeps the entry smooth before the main animation.
- Apply Morph transition to the second slide: Select the second slide, go to the Transitions tab, and choose Morph.
- On the first slide, hide the middle text box: This will create the reveal effect on the next slide.
- Move the top text box down and the bottom text box up: Align them so they meet at the middle line where the hidden text box is located.
When you run the slide show and transition between these slides, Morph will animate the movement and reveal of the middle text box beautifully.

Creating the Photo Crop Animation
Now it’s time to animate the photos inside the rectangles to create the captivating photo crop effect:
- Go back to the first slide: This is where you will adjust the cropping handles of the photos.
- Select the top-left photo and crop it: Use the bottom cropping handle to move the crop slightly outside the slide boundary.
- Repeat for other photos: For photos at the top, move the bottom crop handle outside the slide. For photos at the bottom, move the top crop handle outside the slide.
By cropping the photos partially outside the slide on the first slide and restoring them on the second slide, Morph will animate the photos sliding into view, creating the photo crop effect.

Adding Animation Delays for a Dynamic Effect
In the original Microsoft 365 Copilot animation, the photos appear with slight delays, adding a dynamic flow to the presentation. You can mimic this effect by adjusting the positioning of photos relative to the slide boundaries:
- On the first slide, move some photos further outside the slide: The further a photo is outside the slide, the longer it takes to slide in during the Morph transition.
- Vary the distances for different photos: This creates a staggered animation effect where photos enter the slide with slight delays.
This simple trick adds a professional touch to your animation, making it more engaging and visually interesting.
Final Tips and Resources for PowerPoint Animation Mastery
Congratulations! You’ve now learned how to create a stunning photo crop and text reveal animation inspired by Microsoft 365 Copilot using PowerPoint’s Morph transition. Here are some additional tips to help you refine your skills and create even more impressive presentations:
- Experiment with different shapes: Try using circles, triangles, or custom shapes to crop your photos for unique effects.
- Use consistent fonts and colors: Maintain brand consistency and readability by choosing fonts and colors that complement your content.
- Leverage the Morph transition for other animations: Use Morph to animate charts, diagrams, or other complex objects smoothly.
- Practice timing and pacing: Adjust slide durations and transition speeds to control how your animations flow.
- Explore additional PowerPoint animation features: Combine Morph with entrance, exit, and emphasis animations for layered effects.
If you’re eager to master PowerPoint animations further, consider exploring dedicated courses such as the PowerPoint Animation Mastery course, which provides in-depth training on advanced techniques.
Remember, great presentations are a blend of storytelling, design, and delivery. Using PowerPoint animation effects thoughtfully enhances your ability to communicate ideas effectively and leave a lasting impression.
Frequently Asked Questions
What is the Morph transition in PowerPoint?
The Morph transition is a feature in PowerPoint that animates smooth movement and transformation of objects between two slides, creating seamless animations without complex setup.
Can I use Morph transition in all versions of PowerPoint?
Morph transition is available in PowerPoint for Microsoft 365, PowerPoint 2019, and later versions. It might not be available in older versions.
How do I create animation delays using Morph transition?
To create animation delays, position objects at varying distances outside the slide on the first slide. The further away they are, the longer it takes for Morph to animate them into view, creating a staggered entrance effect.
Is it necessary to use the Merge Shapes → Intersect method to crop photos?
While you can fill shapes with pictures using Format Shape options, using Merge Shapes → Intersect gives you more precise control for cropping and is better suited for creating advanced animations.
Can I apply these animation techniques to other presentation software?
These techniques leverage PowerPoint-specific features like Morph transition and Merge Shapes. Other software might have similar features but may require different steps.
Where can I find high-quality photos for my presentations?
Websites like Unsplash offer free, high-resolution photos that you can use legally in your presentations.
What fonts work best for PowerPoint presentations?
Fonts like Playfair Display, Calibri, Arial, and Helvetica are popular choices. Choose fonts that are readable and align with your presentation’s tone and branding.
How can I learn more about PowerPoint animation effects?
There are many online tutorials, courses, and resources available. For example, the PowerPoint Animation Mastery course offers comprehensive guidance on creating advanced animations.
Check out the full video: How I Made Microsoft 365 Copilot Animation in PowerPoint 😁✨


