If you’re looking to elevate your PowerPoint presentations with eye-catching animated subtitles, you’re in the right place. In this comprehensive tutorial, we’ll explore how to create animated captions in PowerPoint—just like the pros! These animated subtitles are popular among some of the biggest YouTubers, including MrBeast, and now you can easily craft them yourself using only PowerPoint.
Whether you’re a content creator, educator, or business professional, mastering powerpoint animation for text will add a dynamic and engaging touch to your slides. This step-by-step guide will walk you through setting up animated backgrounds, designing stylish subtitle text boxes with gradients and shadows, and adding smooth letter-by-letter animation effects. We’ll also cover how to manage multiple subtitles on the same slide and create seamless transitions between them.
Table of Contents
- Getting Started with Animated Backgrounds
- Creating Stylish Subtitle Text Boxes
- Applying Text Animations for Captivating Effects
- Managing Multiple Subtitles on the Same Slide
- Tips and Tricks for Smooth Workflow
- Frequently Asked Questions (FAQ)
- Conclusion
Getting Started with Animated Backgrounds
The first step in creating animated subtitles is to set the stage with an engaging background image. This adds visual interest and depth, making your subtitles pop.
1. Insert a Background Picture
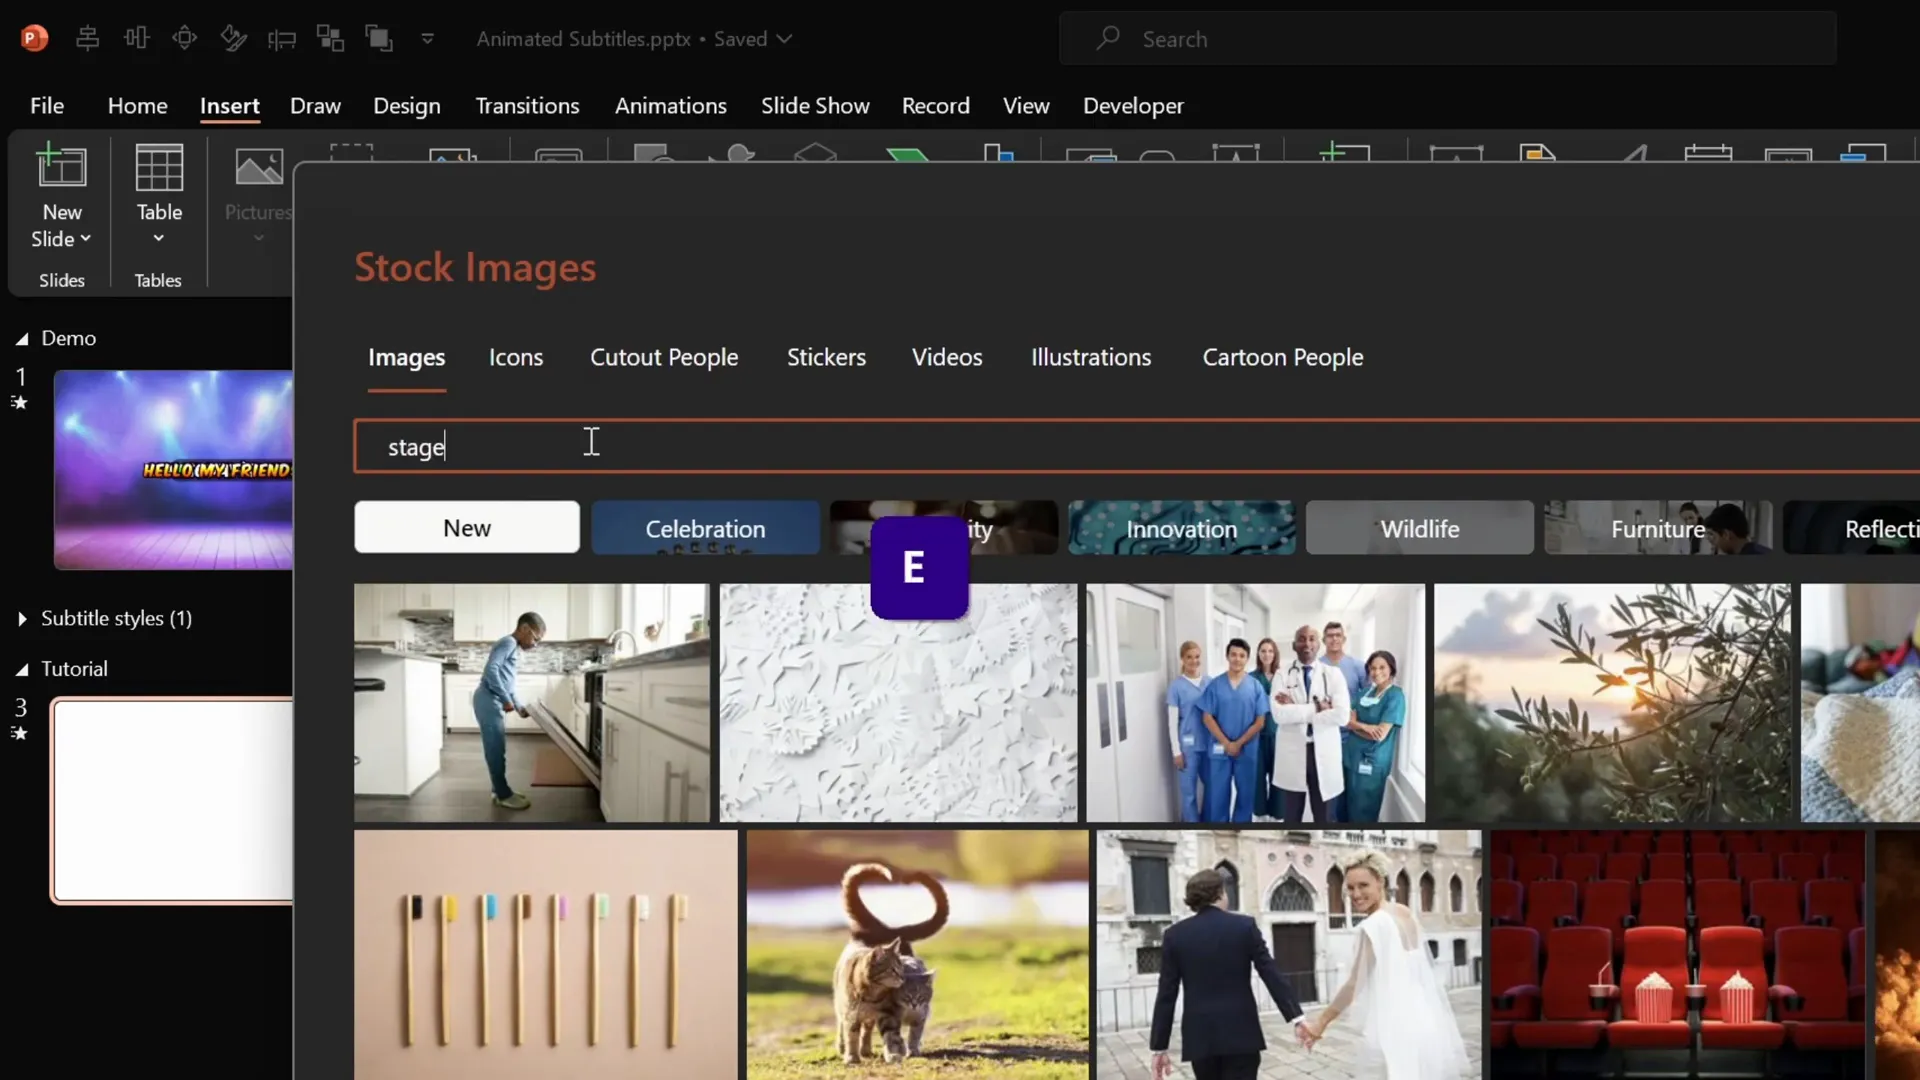
PowerPoint 365 offers a convenient stock image library, which we’ll use to find a suitable background. Here’s how:
- Go to Insert > Stock Images.
- Search for a keyword like stage to find dramatic or performance-themed backgrounds.
- Select an image that fits your style and click Insert.
Note: The inserted image may not cover the entire slide initially.
2. Resize and Crop for Perfect Fit
To make sure your image fills the entire slide:
- Select the image.
- Go to Picture Format > Crop > Aspect Ratio > 16:9 to match the slide dimensions.
- Click outside the slide to apply the crop.
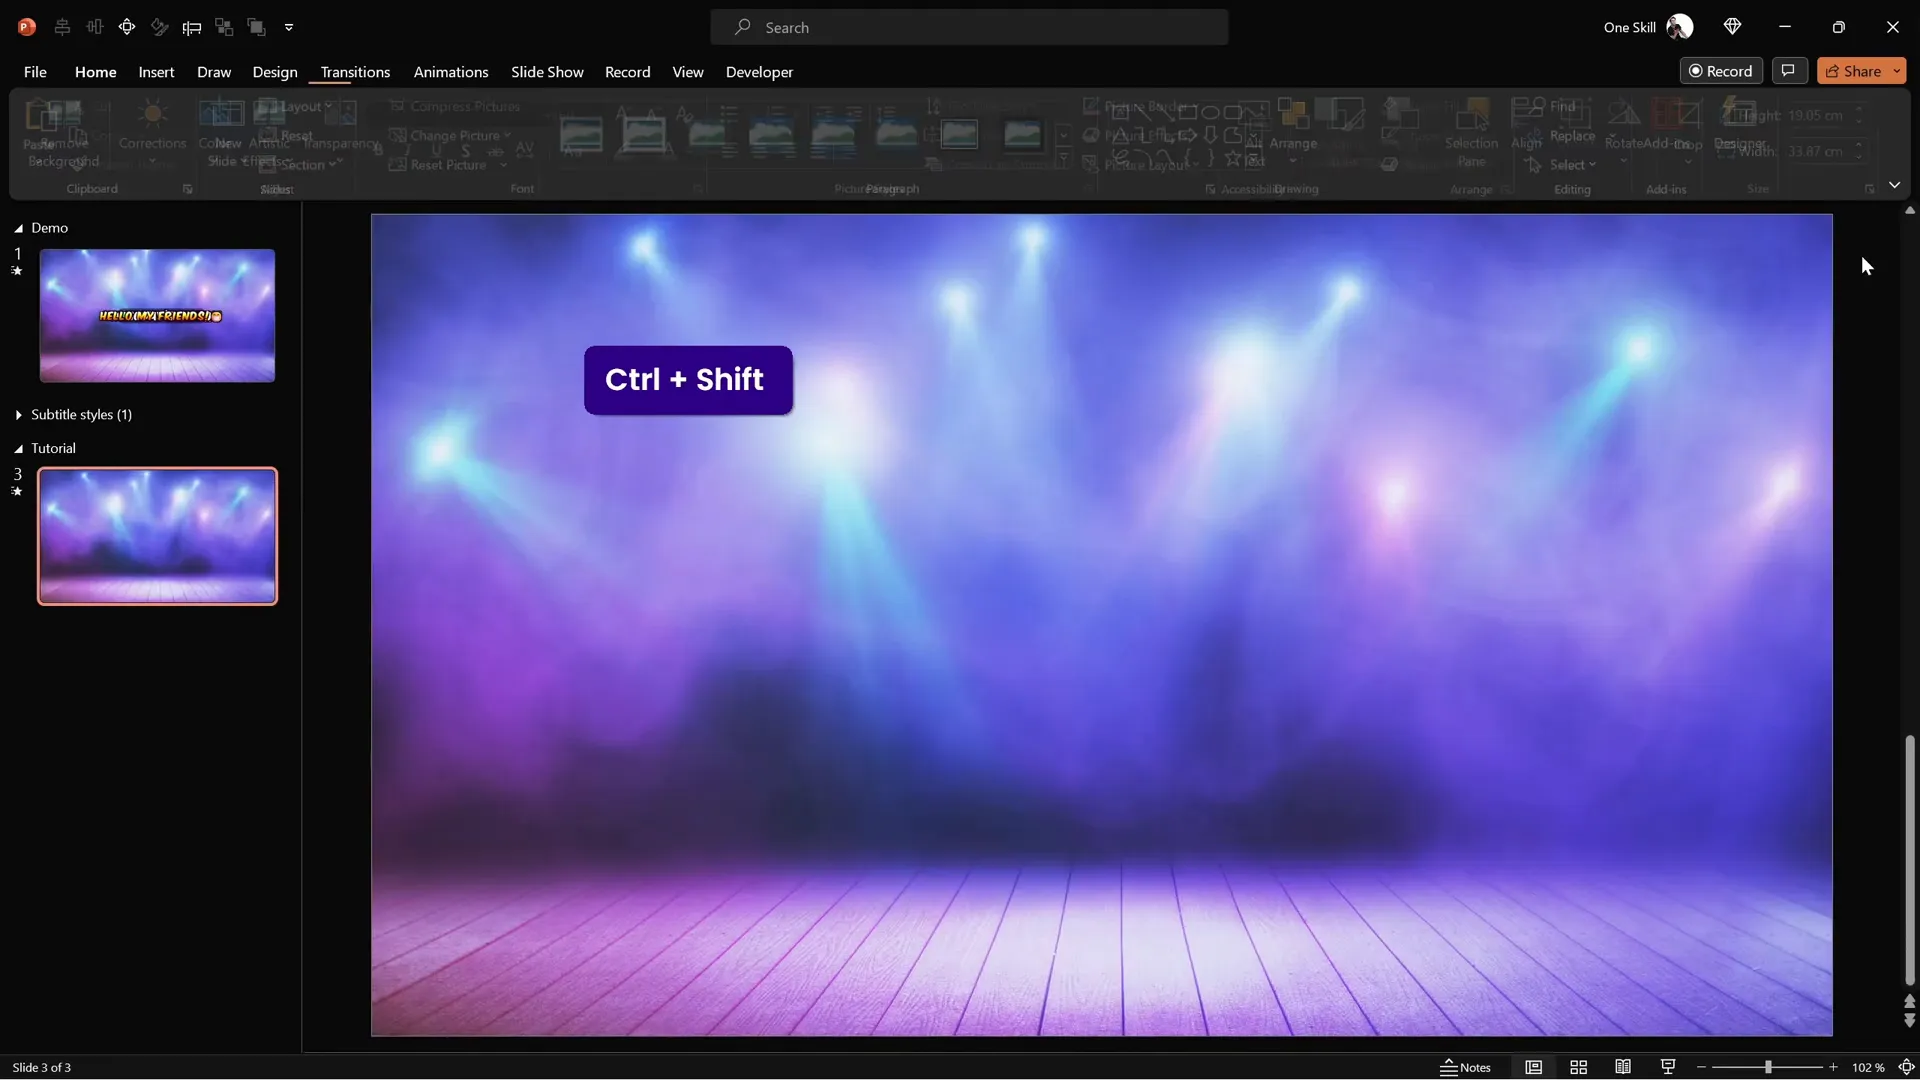
- Hold Ctrl + Shift and drag a corner handle to resize the image, ensuring it fully covers the slide.
3. Add a Subtle Zoom Animation
A subtle zoom effect on the background adds motion and keeps the slide visually interesting without distracting from the subtitles:
- Go to Animations and open the Animation Pane for better control.
- Click Add Animation and select Grow/Shrink.
- Set the animation to Start With Previous so it runs automatically.
- Change the duration to 4 seconds.
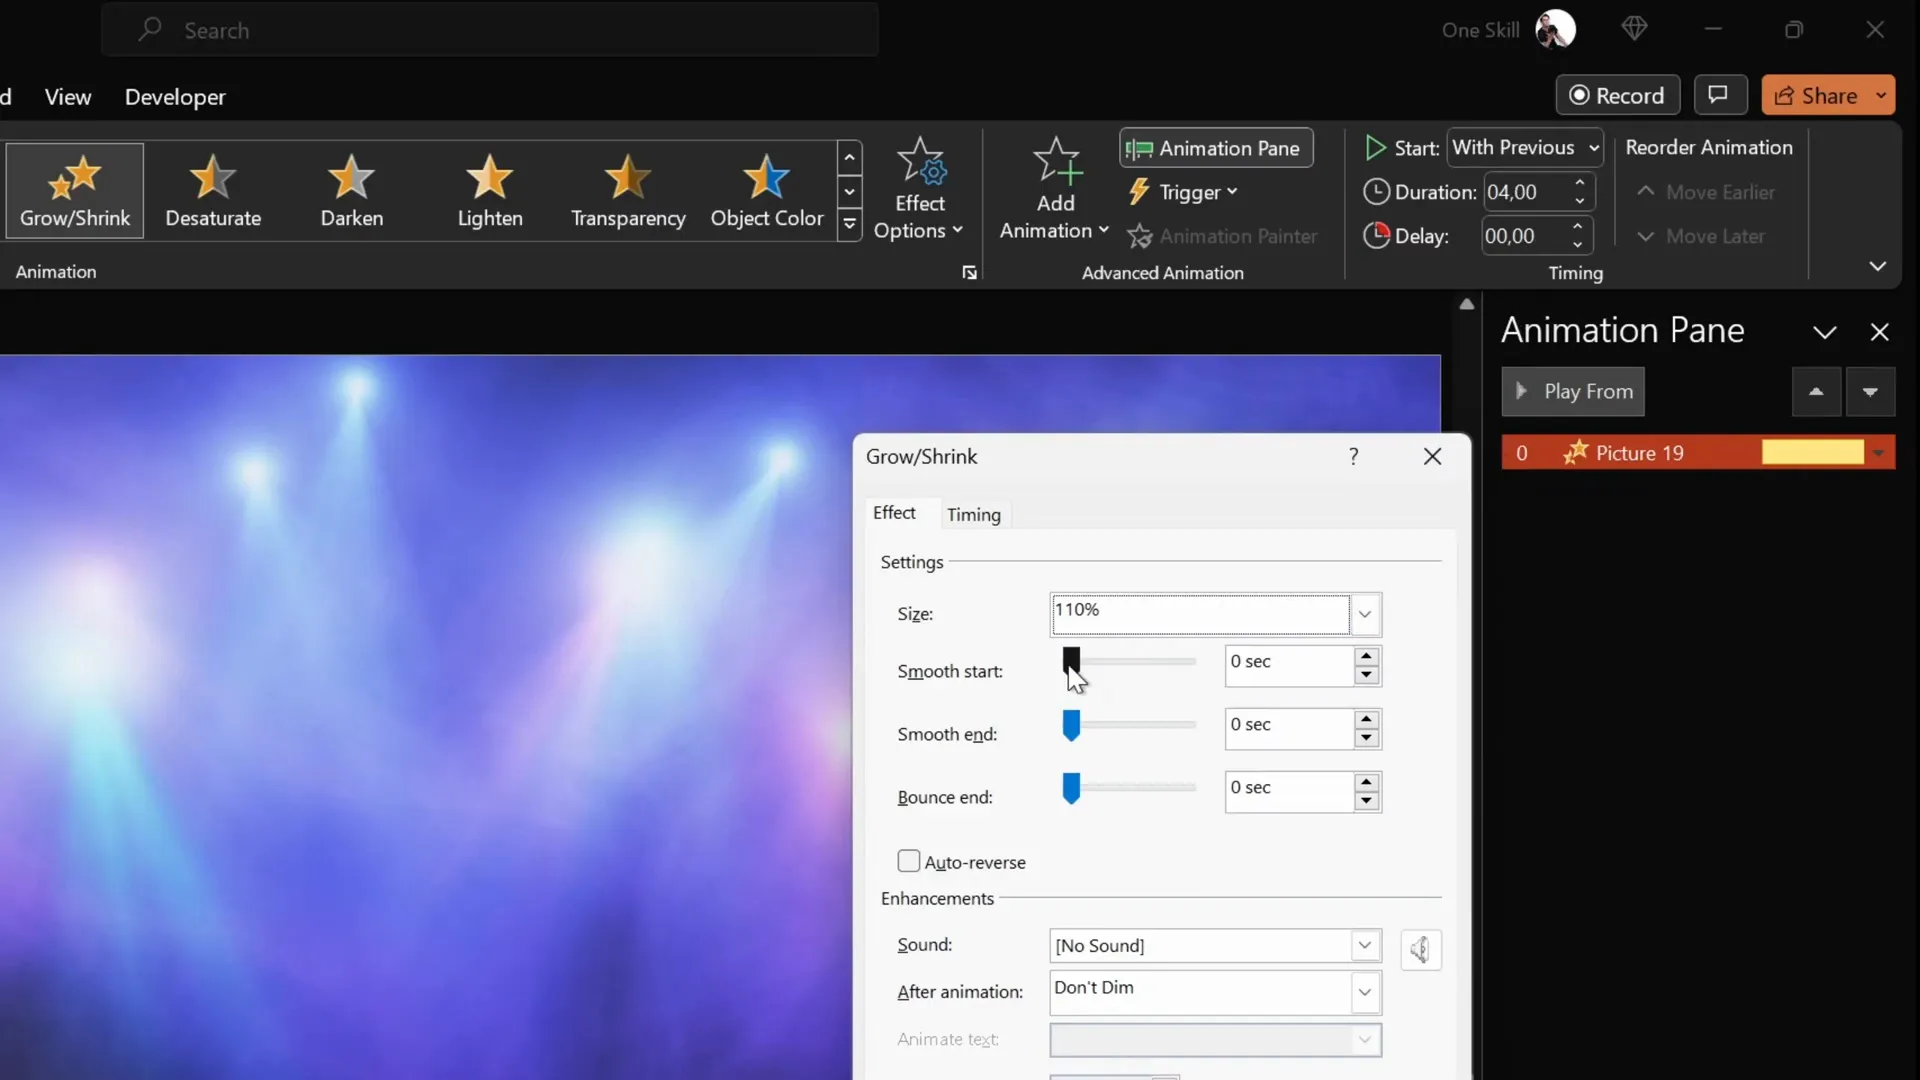
- Open animation settings by double-clicking the Grow/Shrink animation in the pane.
- Set the size to 110% for a subtle zoom in.
- Adjust Smooth Start and Smooth End to 2 seconds each for smooth motion.
- Enable Auto Reverse so the image zooms in then back out.
- Under the Timing tab, set Repeat to Until End of Slide for a looping effect.
Preview the slide in full screen to see the gentle zooming background effect.

Creating Stylish Subtitle Text Boxes
Now that your background is set, it’s time to create the animated subtitles themselves. These text boxes can be customized with gradients, shadows, and glow effects to make them stand out.
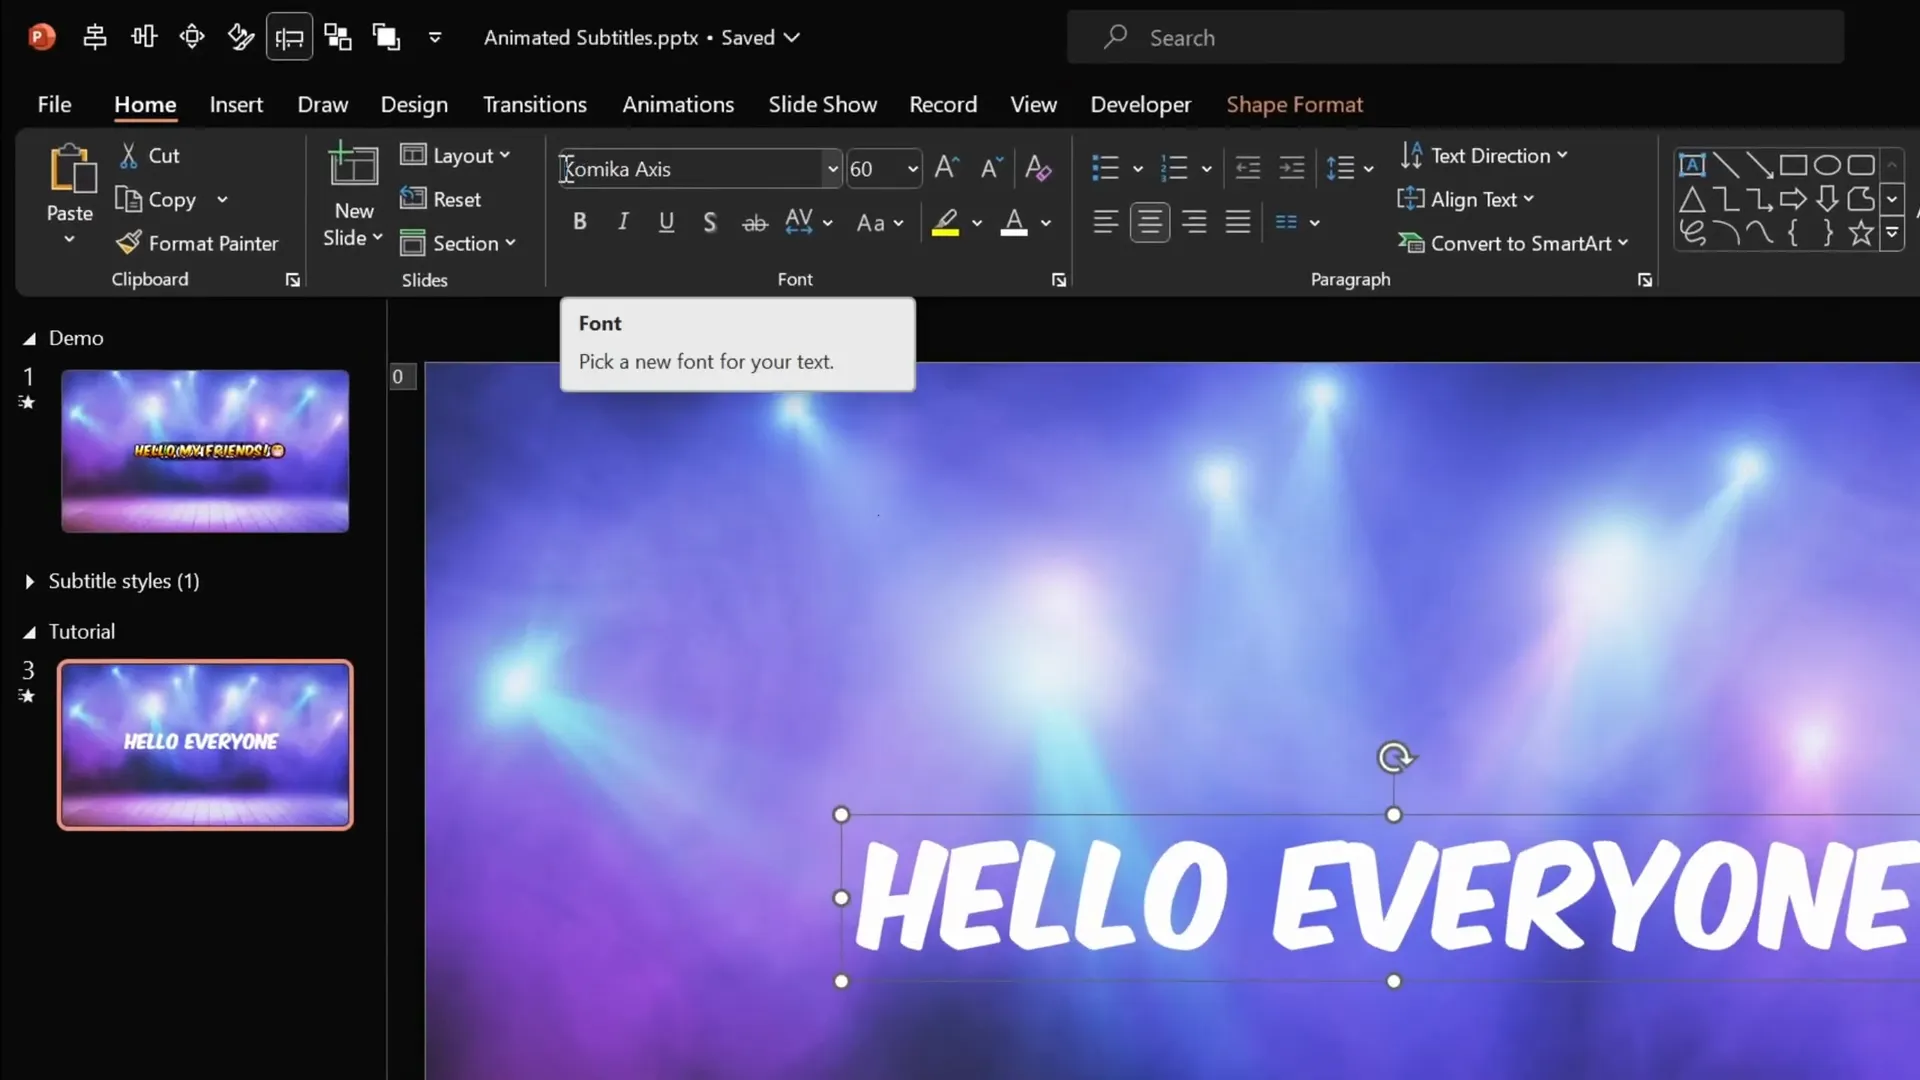
1. Insert a Text Box for Your Subtitle
- Go to Insert > Text Box and click once on the slide.
- Type your subtitle text, e.g., Hello everyone.
- Set the font to Comica Axis, a free font you can download here.
- Choose font size 60, font color white, and center-align the text.
- Center the text box both horizontally and vertically on the slide.
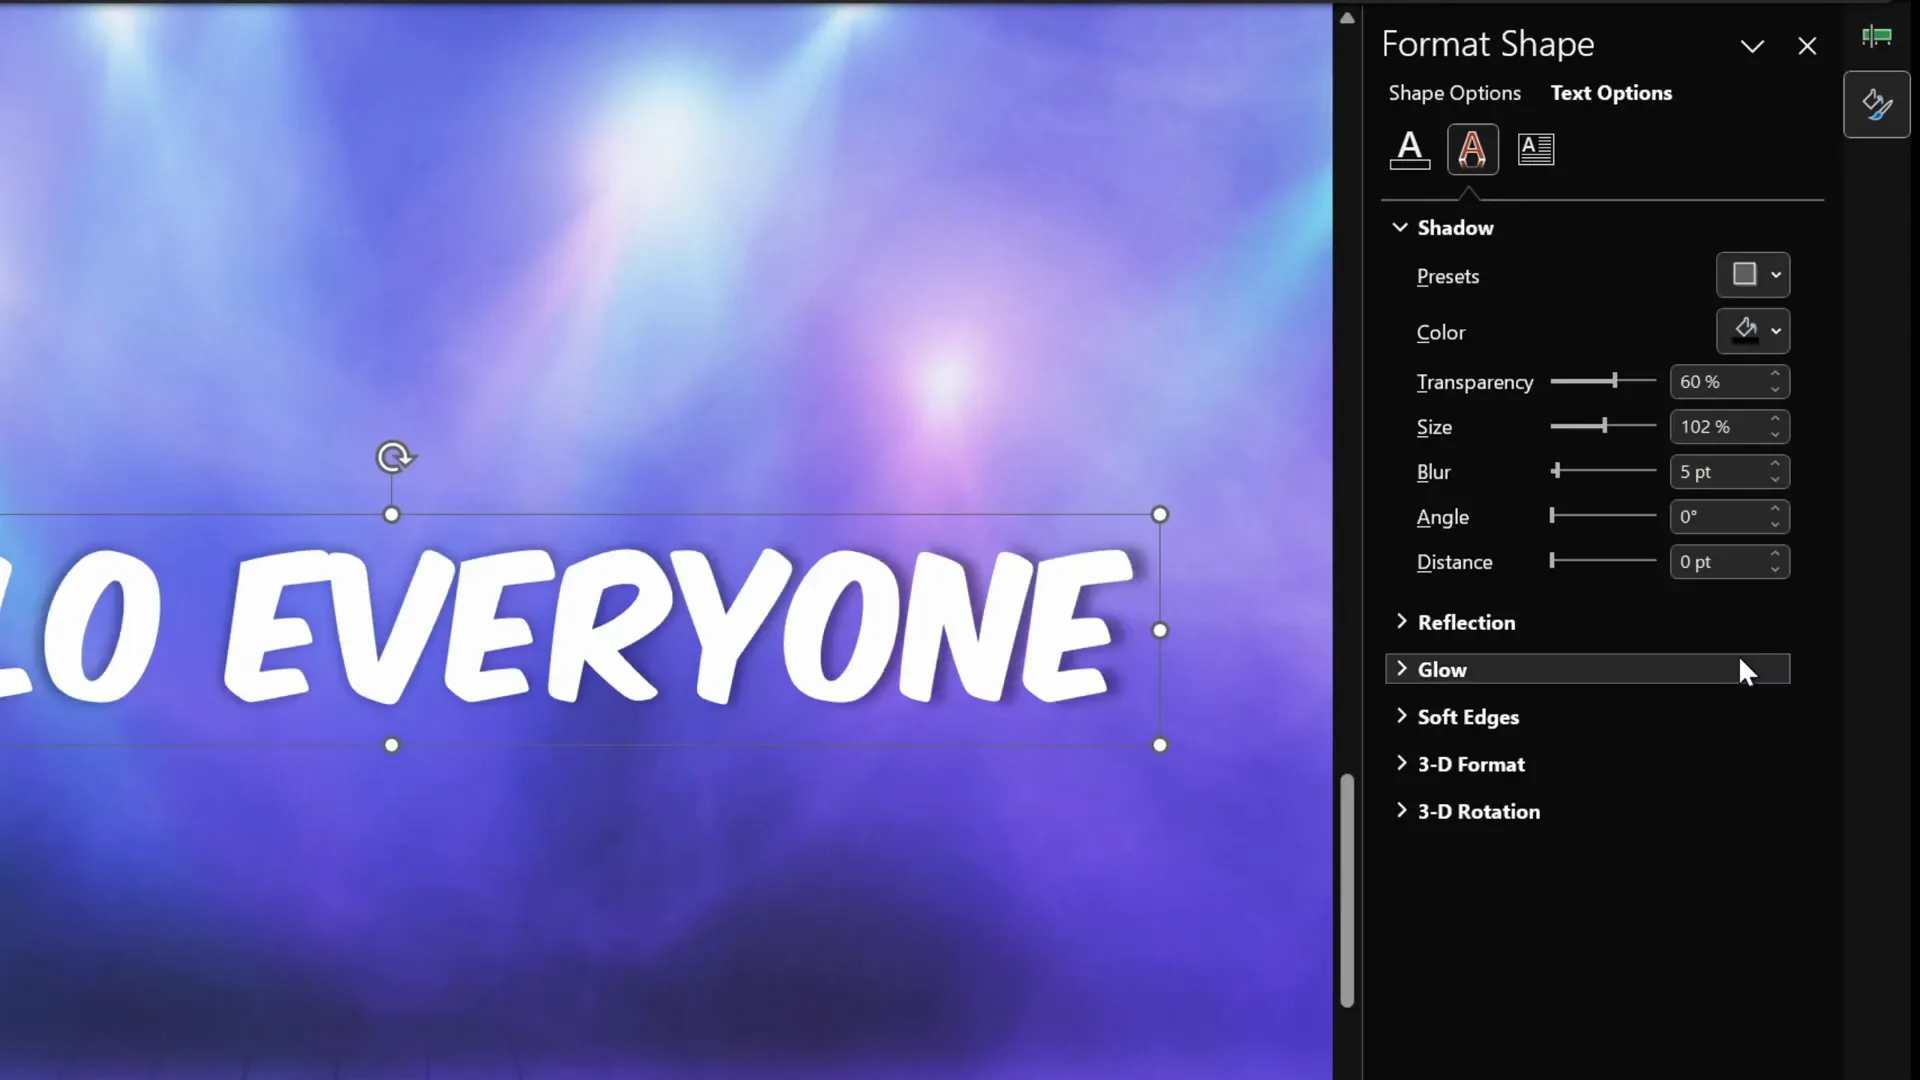
2. Add Text Shadow or Glow to Enhance Visibility
A simple white text on a dark background can sometimes blend in. Adding shadows or glow effects helps your text stand out:
- Select the text box and open the Format Shape pane.
- Under Text Options > Text Effects > Shadow, expand the shadow presets.
- Choose the preset called Offset Center.
- Set transparency to 0%, size to 100%, and adjust blur as desired.
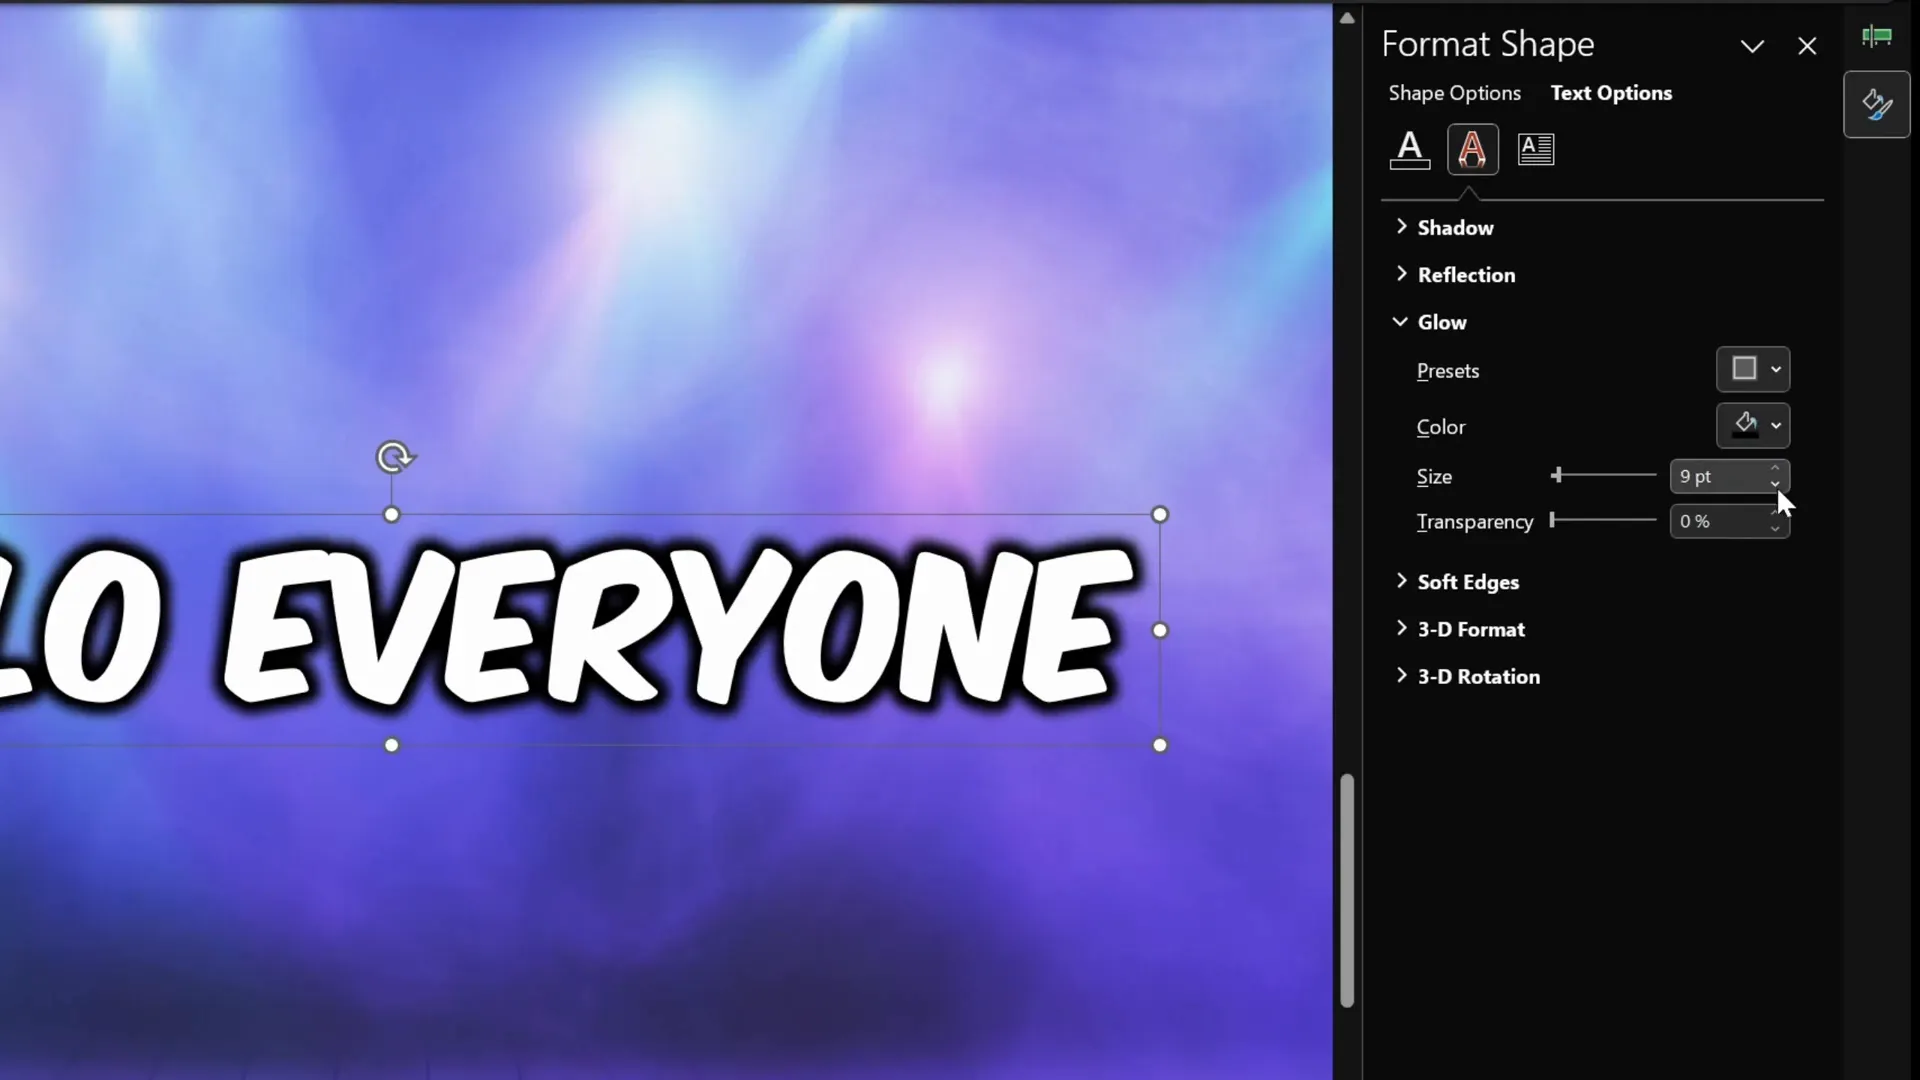
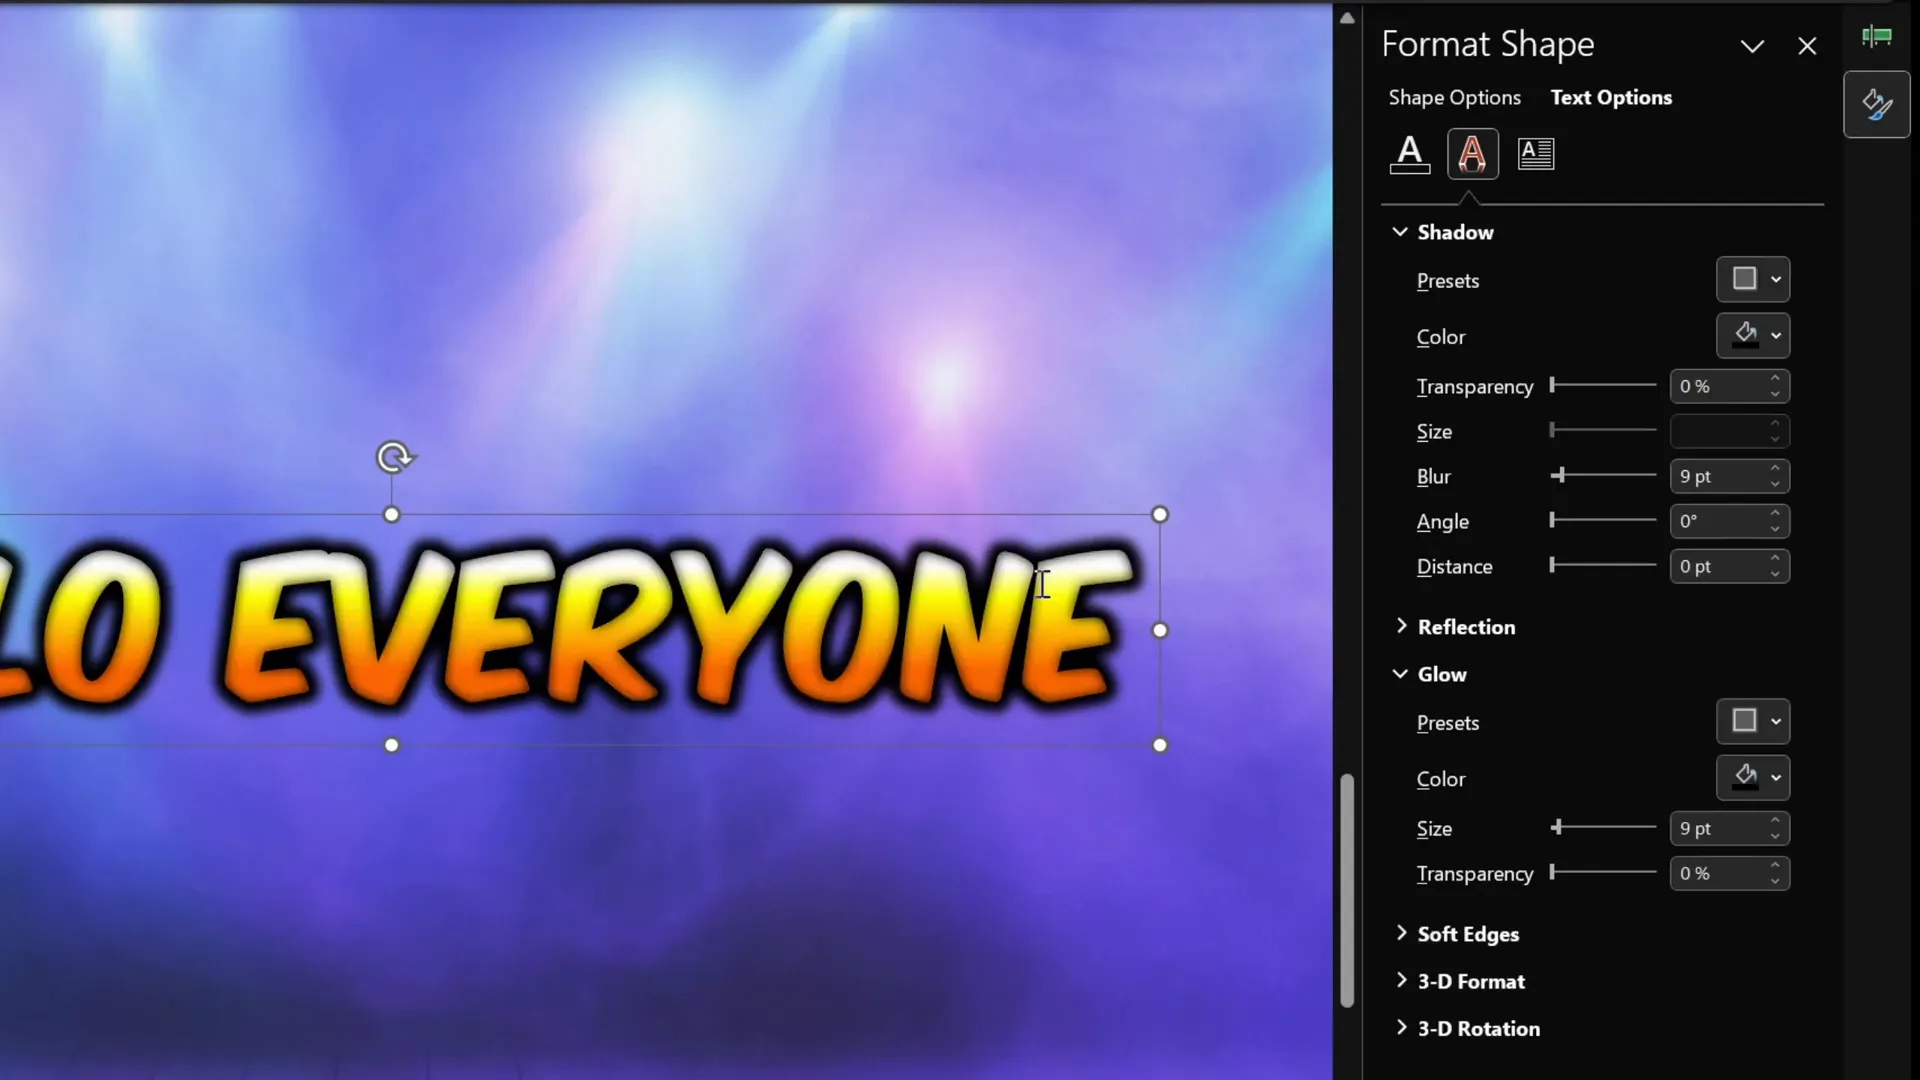
If the shadow effect feels too subtle, try adding a glow instead:
- Remove the shadow effect.
- Under Text Effects, select Glow.
- Choose black glow color and set the size to around 9 points.
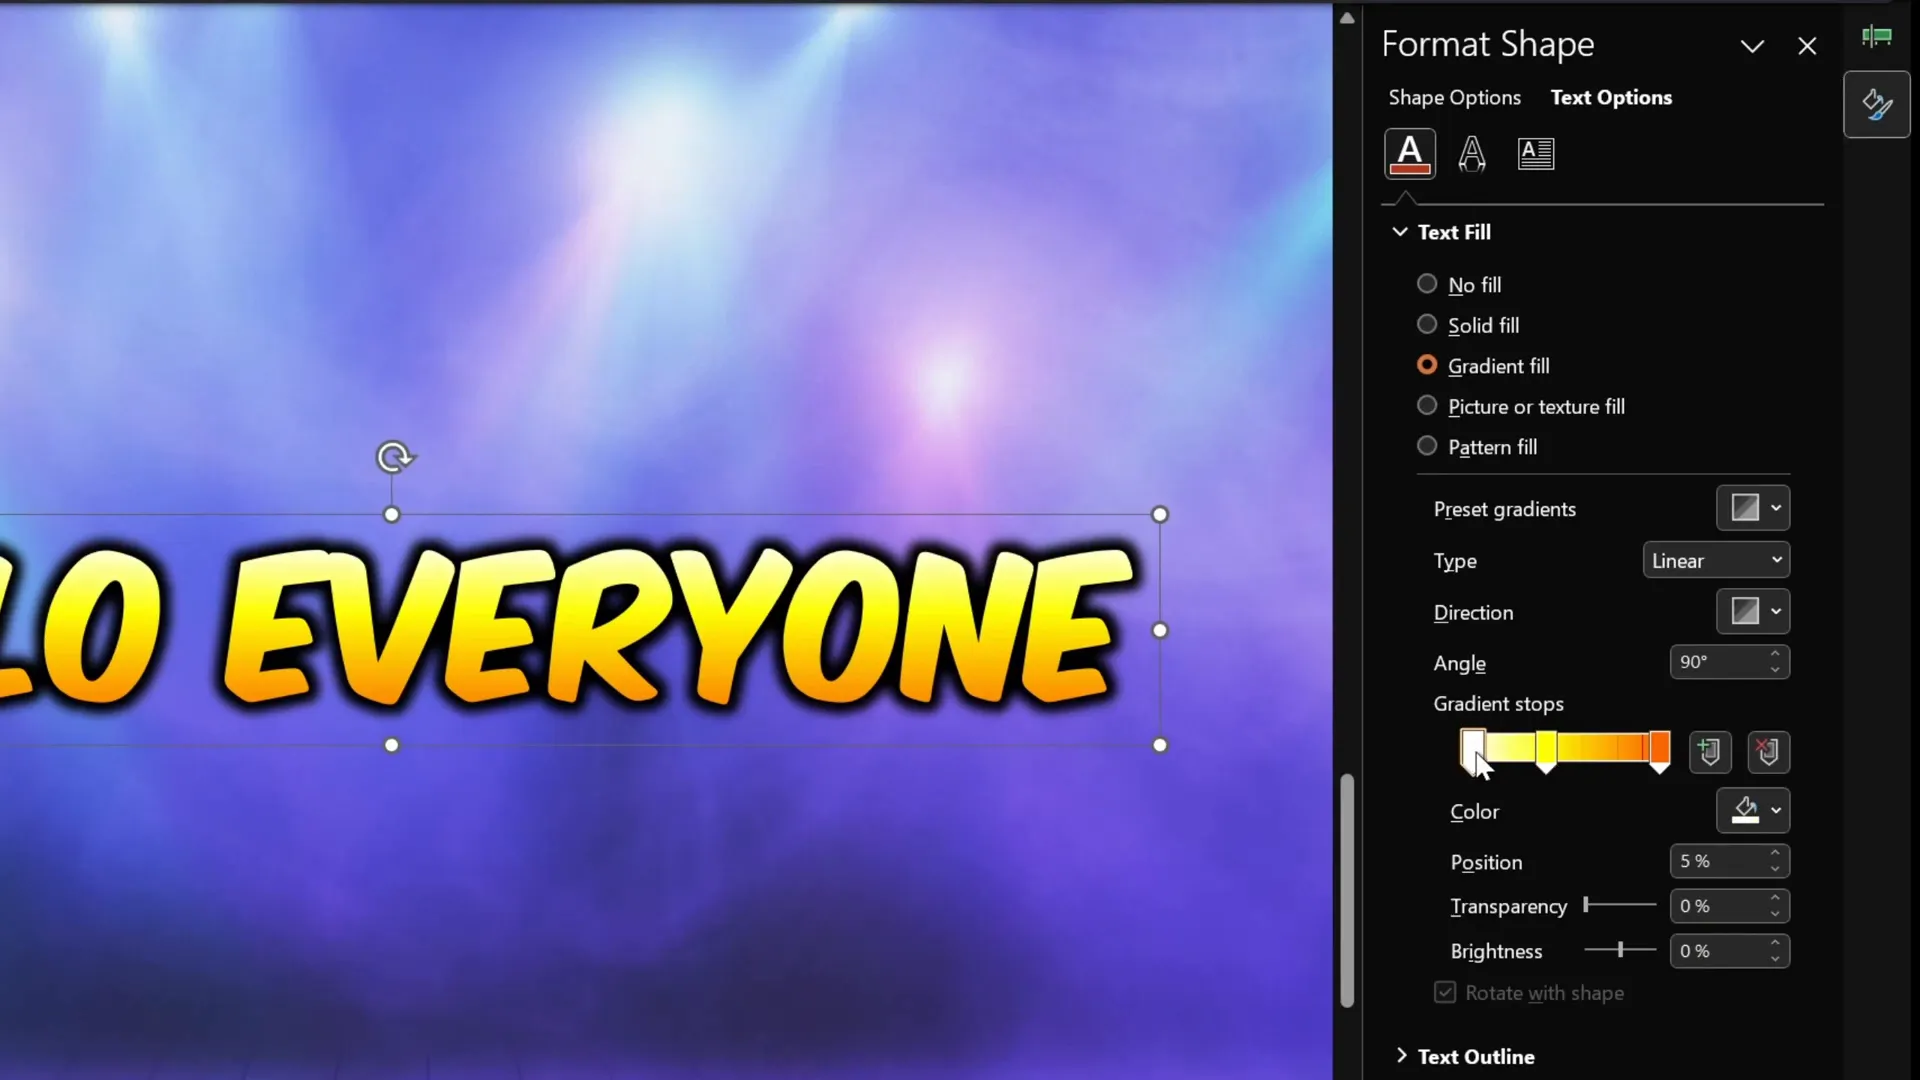
3. Apply a Vibrant Yellow Gradient Fill
Gradients add depth and visual interest to your subtitle text. Here’s how to create a yellow-orange gradient fill:
- With the subtitle selected, go to Format Shape > Text Options > Text Fill.
- Choose Gradient Fill.
- Ensure the gradient type is Linear with an angle of 90° (vertical gradient).
- Set two default color stops (white on the left, dark blue on the right).
- Change the dark blue stop to a vibrant orange by selecting More Colors > Standard Tab and picking an orange shade.
- Add a new color stop in the middle and set it to bright yellow.
- Adjust the positions of the stops for smooth blending: white at 20%, yellow at 35%, and orange at 70%.
4. Add an Inside Glow Using Inside Shadow
For an extra glow effect inside the letters, use the inside shadow feature:
- In Format Shape > Text Options > Text Effects > Shadow, select the preset called Inside Center.
- Change the shadow color to bright yellow.
- Adjust blur to around 15 points for a soft glow.
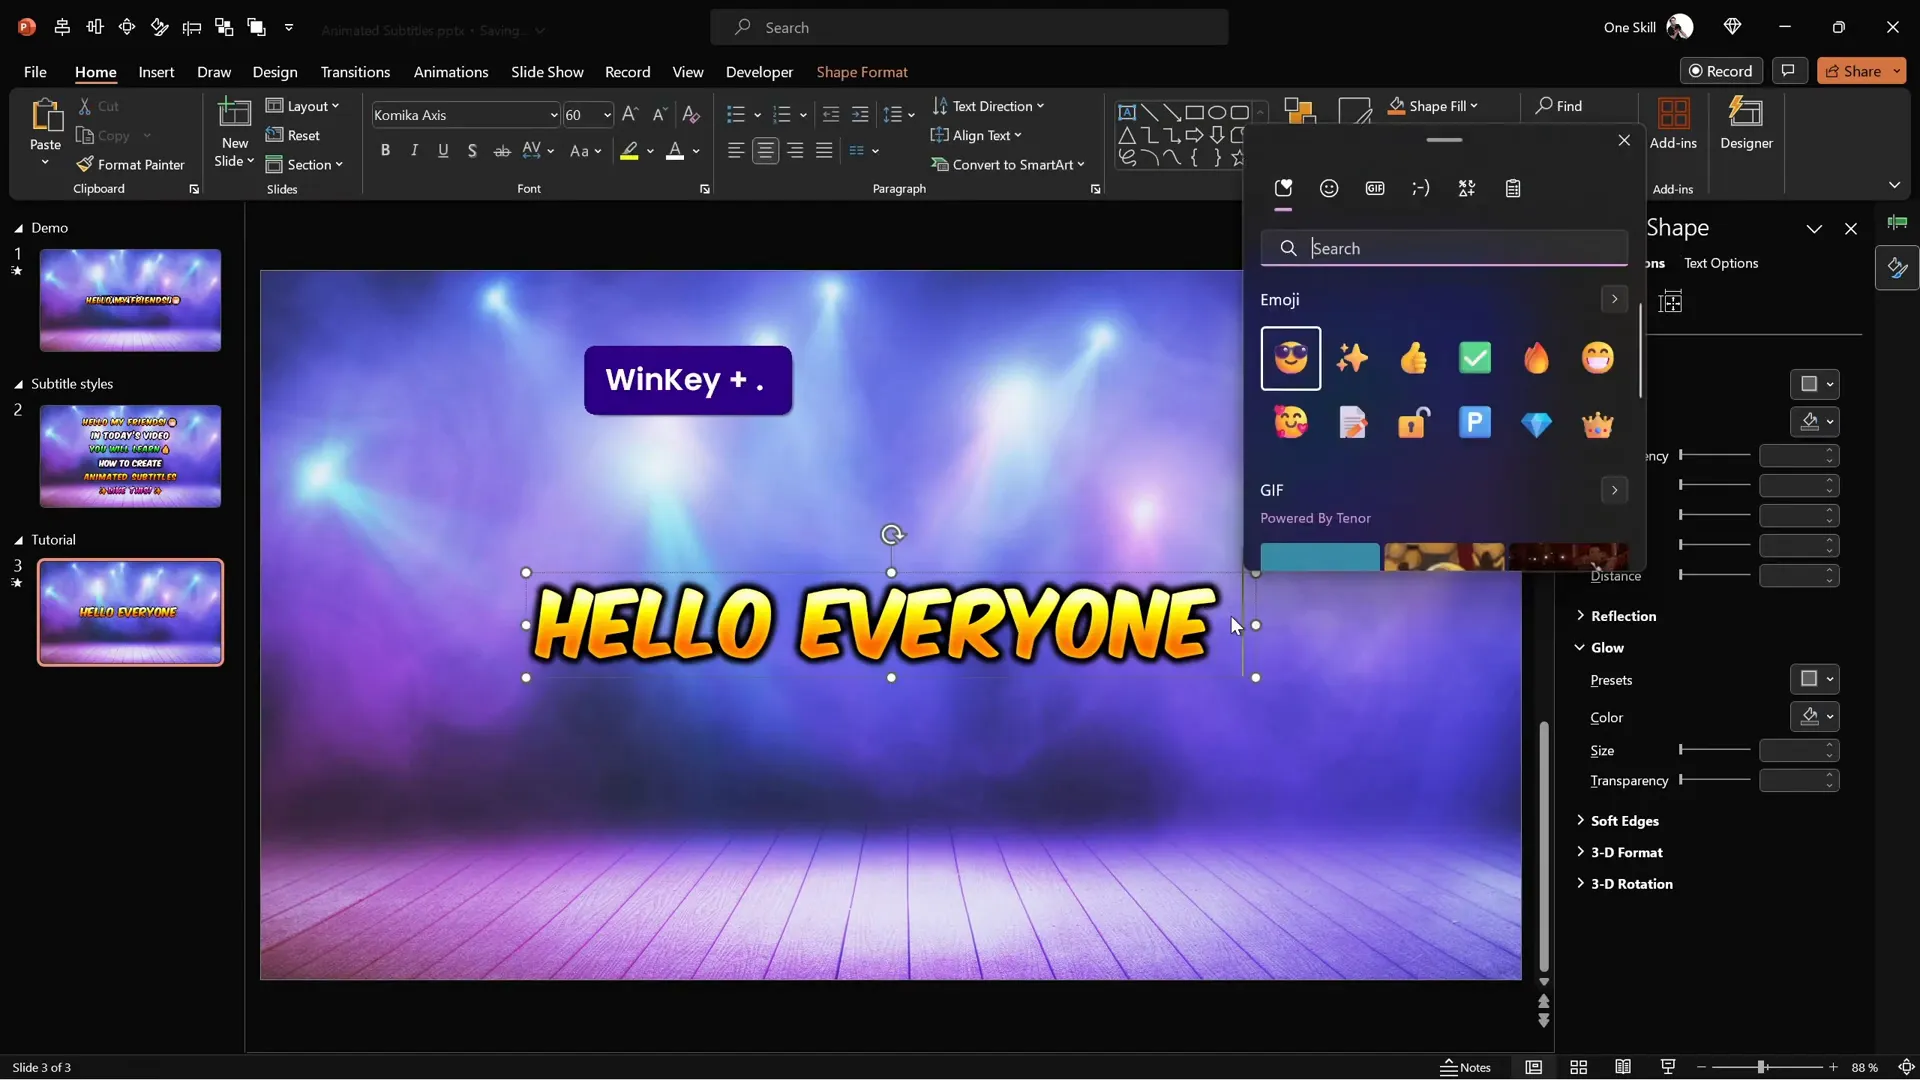
5. Incorporate Emojis (Optional)
Want to add a fun emoji to your subtitles? On Windows, press Windows Key + . (period) to open the emoji picker. Insert your chosen emoji.
If the emoji mistakenly inherits the text gradient fill, select the emoji alone and set its fill to Solid color for proper display.
Applying Text Animations for Captivating Effects
With your subtitle designed, it’s time to bring it to life using PowerPoint’s animation features. Let’s explore how to animate your text for a dynamic, professional look.
1. Animate the Subtitle with Basic Zoom
- Select your subtitle text box.
- Go to the Animations tab and click Add Animation.
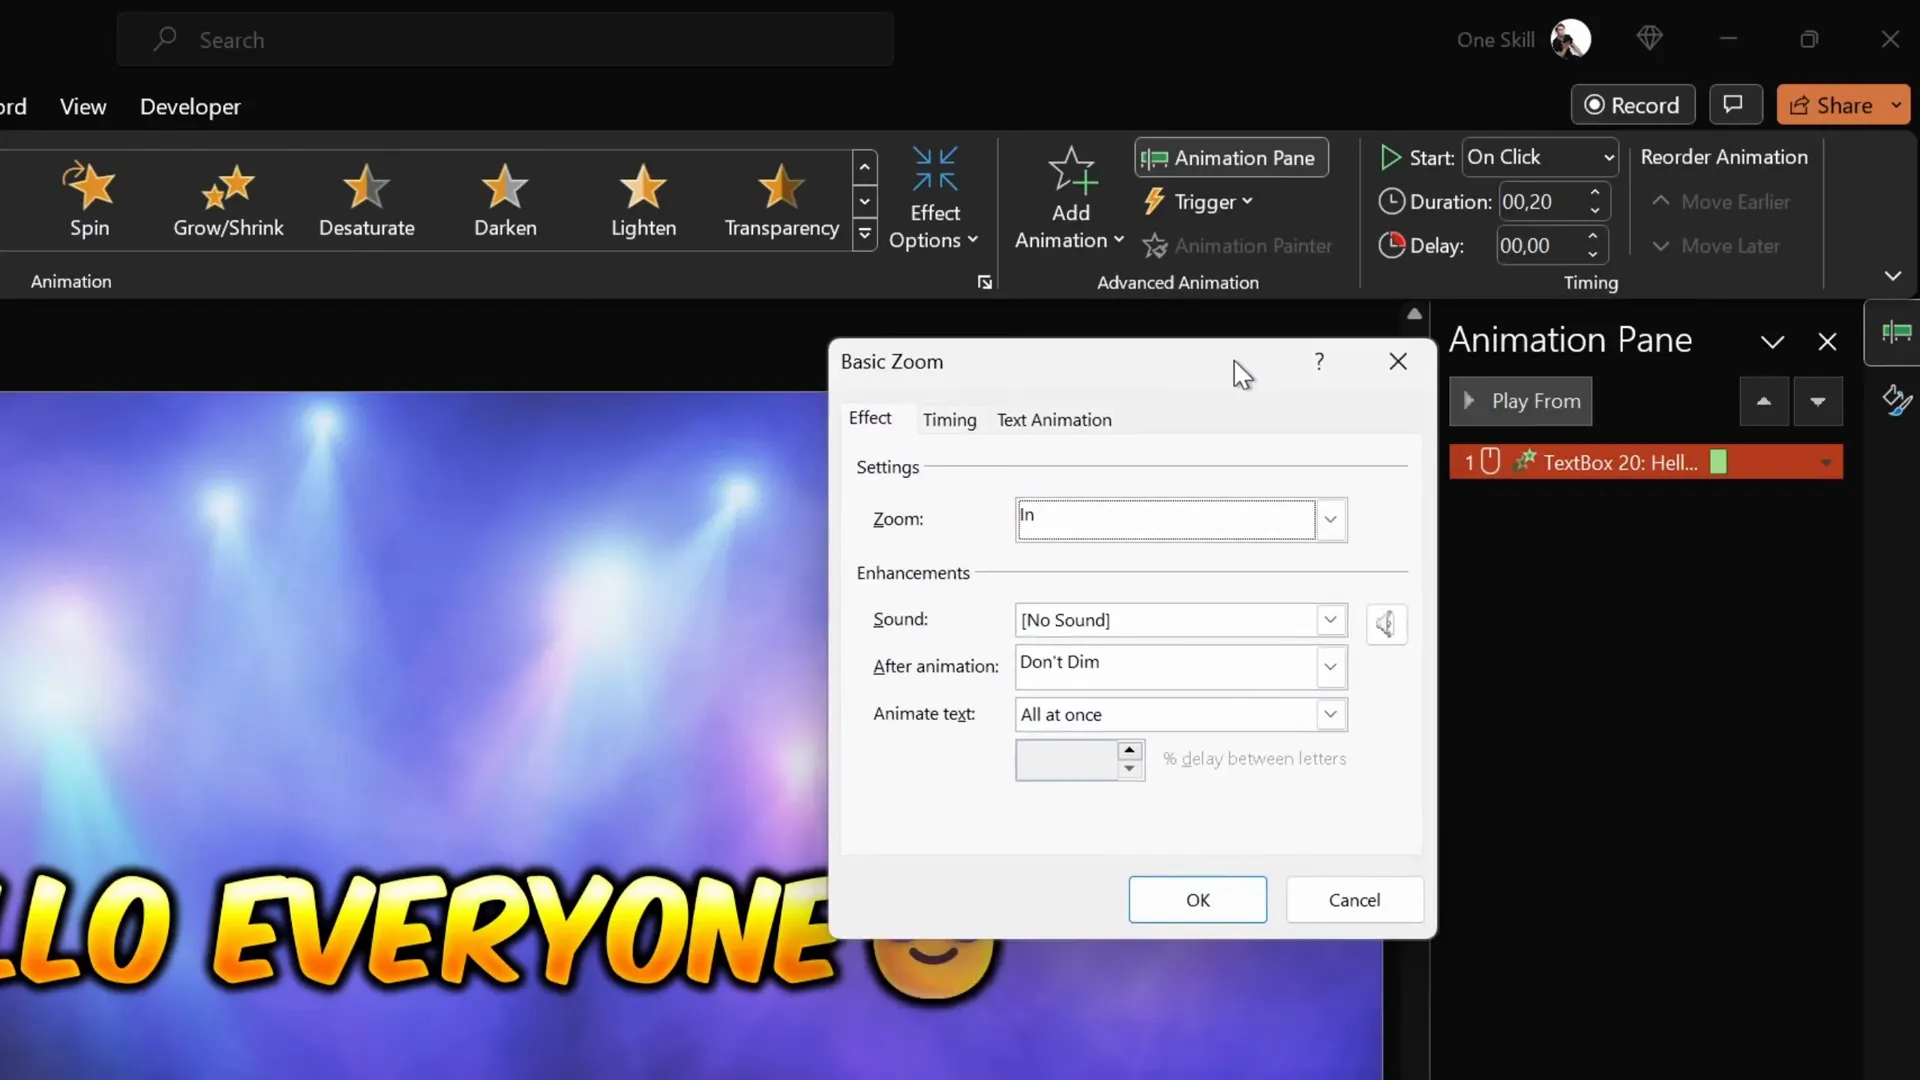
- Scroll to More Entrance Effects and select Basic Zoom.
- Set the animation to start On Click.
- Change the duration to 0.2 seconds for a quick effect.
- Open the animation’s Effect Options.
- Change the text animation to By Letter with a delay of 10% between letters.
2. Add a Pop Effect with Grow/Shrink Animation
To make the letters pop as they animate, add a Grow/Shrink effect:
- Select the subtitle text box again.
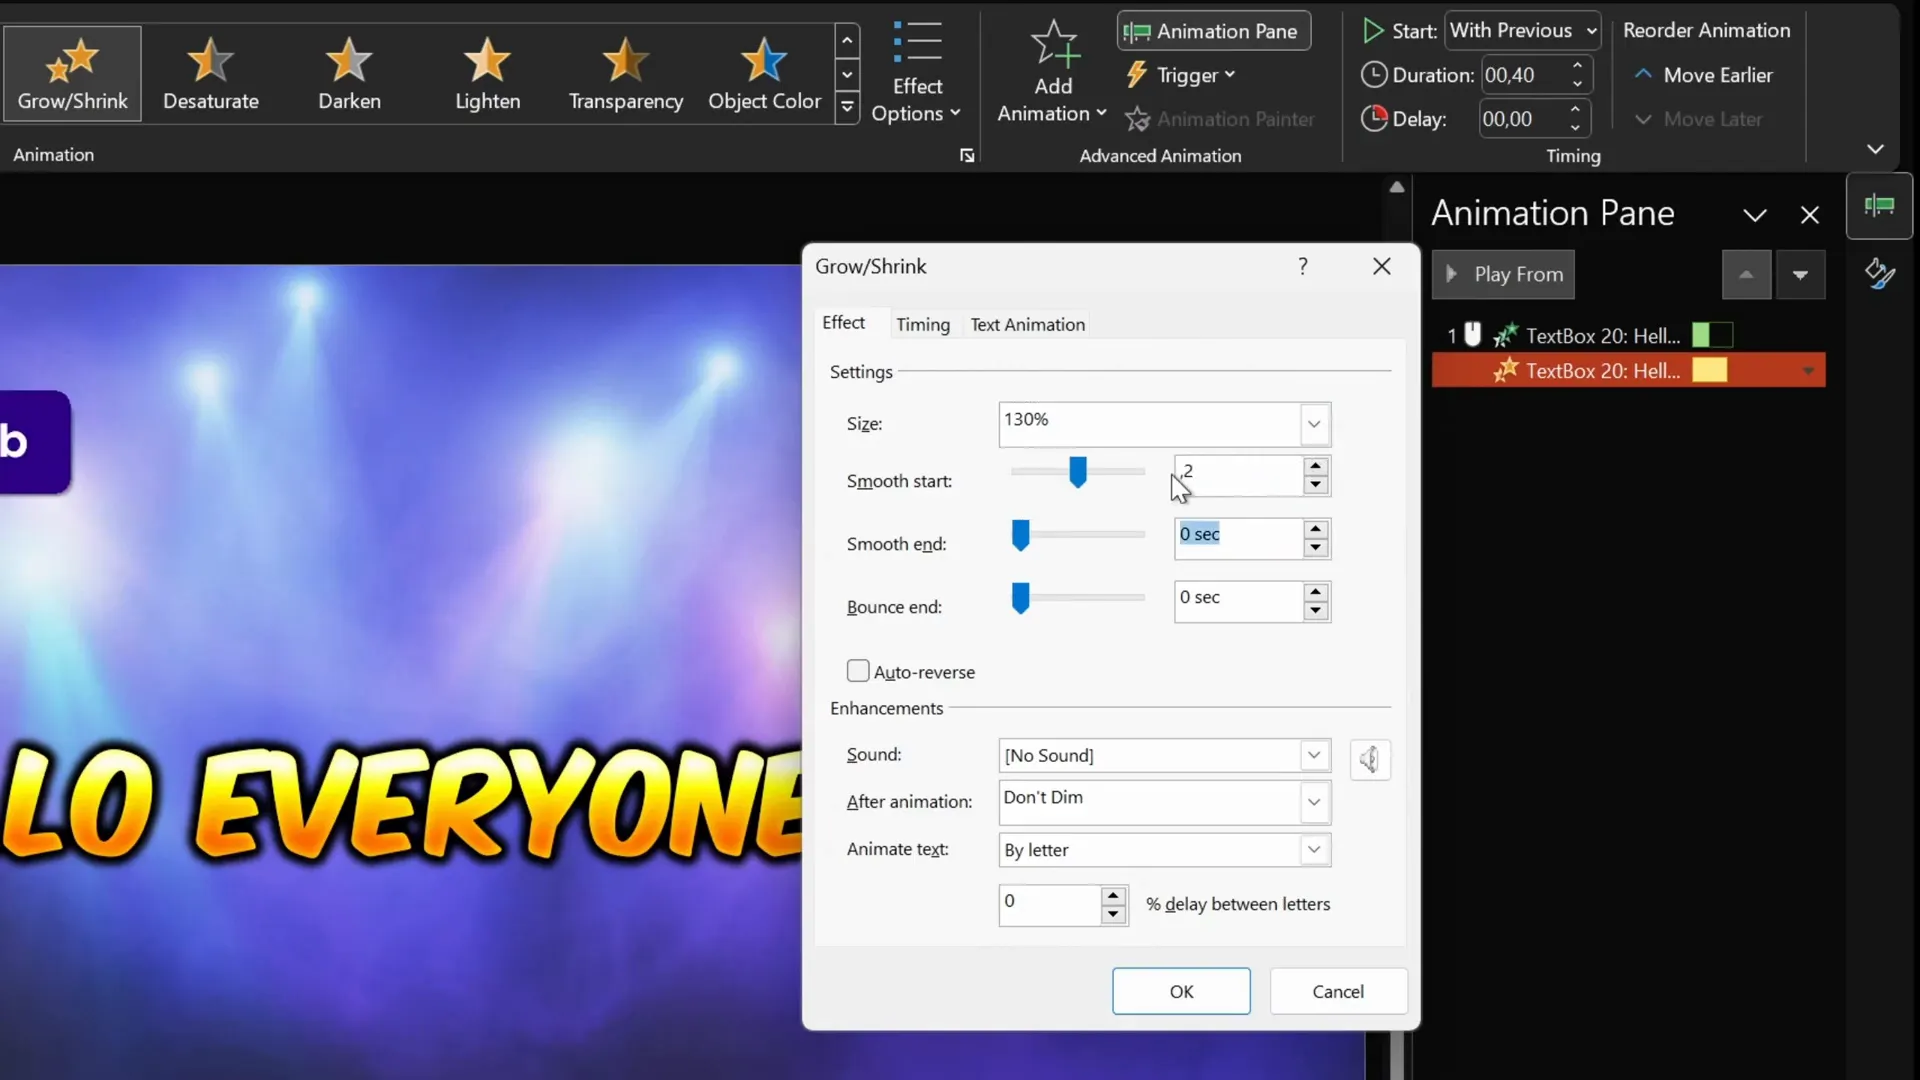
- Click Add Animation and choose Grow/Shrink.
- Set the animation to Start With Previous.
- Set the duration to 0.4 seconds (twice the zoom animation).
- Open the animation settings and set Grow/Shrink size to 130%.
- Set Smooth Start and Smooth End to 0.2 seconds each.
- Enable Auto Reverse to scale back to original size after growing.
Previewing this combination, your subtitle letters will zoom in one by one with a satisfying pop effect.

Managing Multiple Subtitles on the Same Slide
Often, you want to display multiple subtitles sequentially on the same slide, such as in a video or presentation. Here’s how to manage multiple animated subtitles effectively.
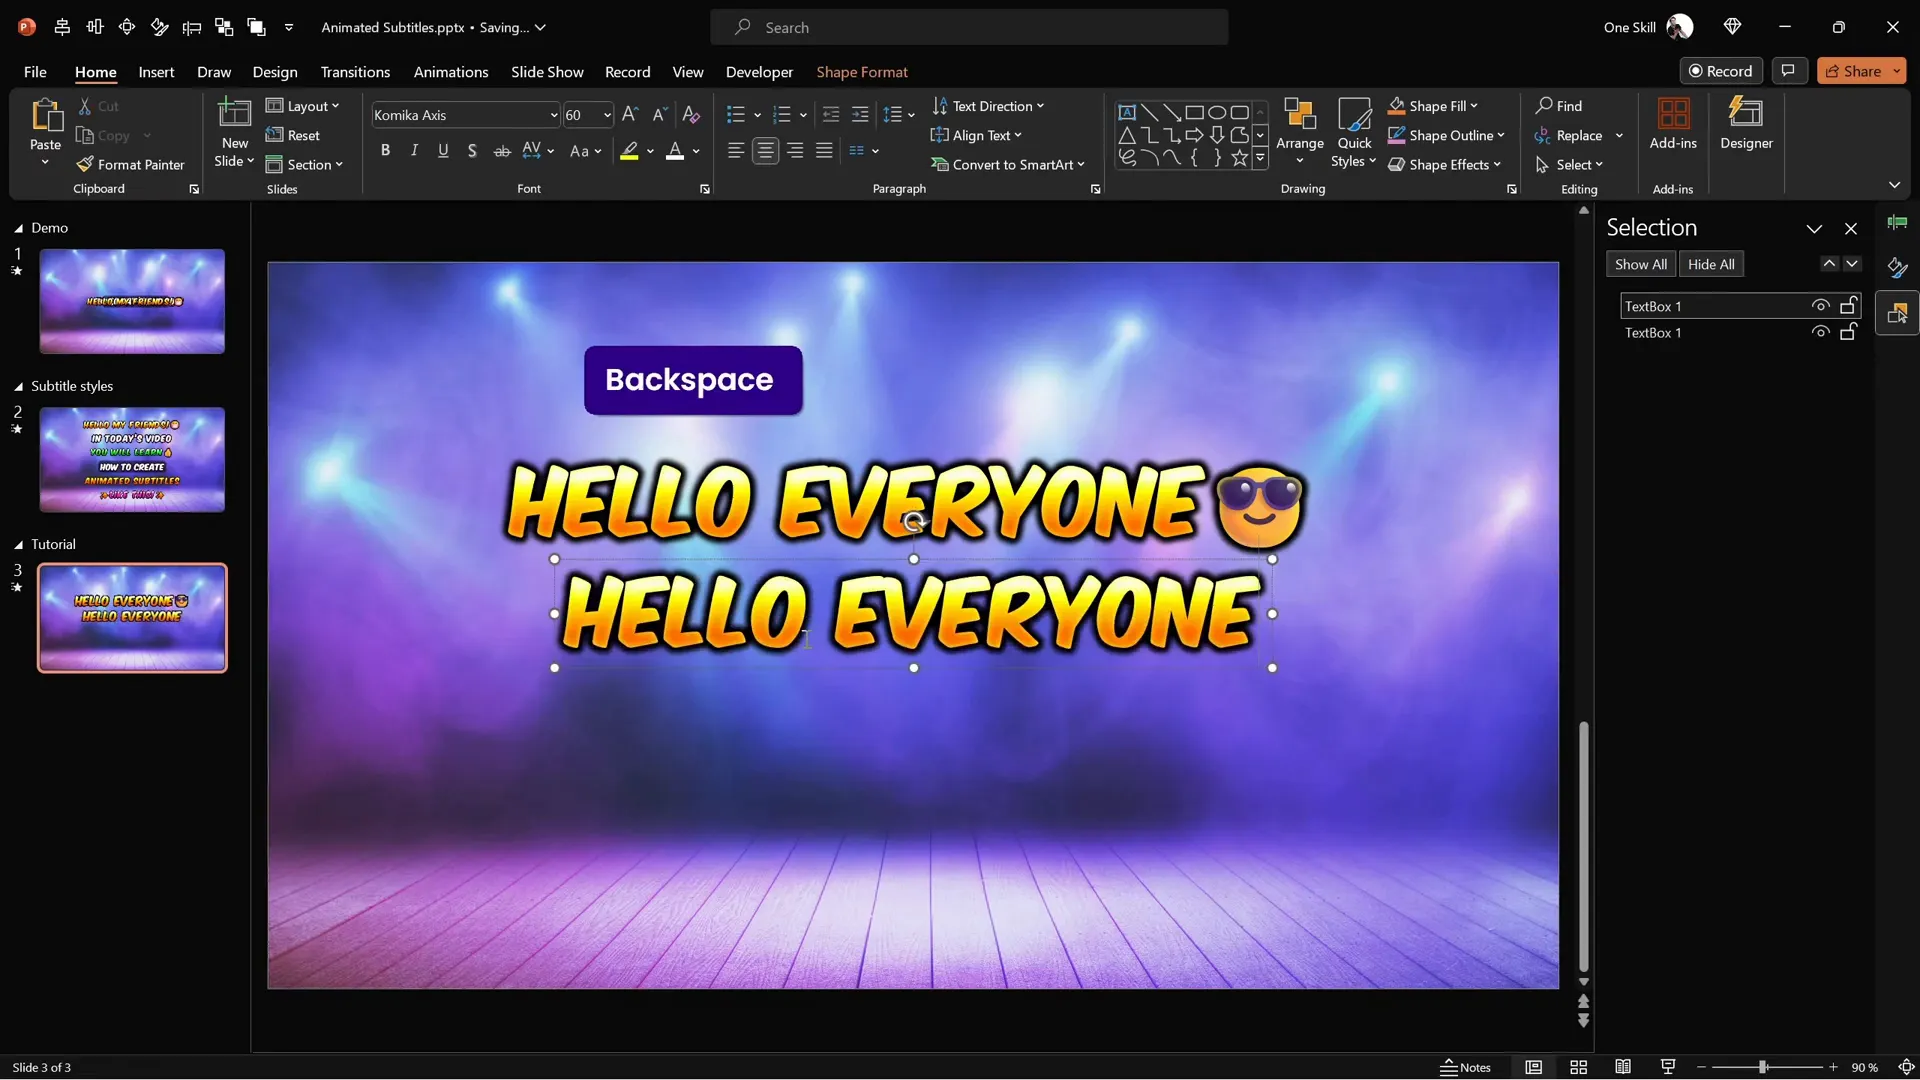
1. Duplicate Your Subtitle Text Box
To save time, duplicate your existing subtitle:
- Open the Selection Pane (Home > Select > Selection Pane).
- Rename your existing subtitle to Text Box 1 for easier management.
- Hold Ctrl + Shift, then click and drag the subtitle to create a copy.
- Rename the copy to Text Box 2.
- Repeat to create a third subtitle, Text Box 3.
- Edit the text in each subtitle to different messages (e.g., “Today you’ll learn”, “Something awesome”).
2. Align Subtitles to Appear in the Same Position
To avoid subtitles appearing in different locations, align them:
- Select all subtitle text boxes.
- Go to Home > Arrange > Align.
- Choose Align Center and Align Middle.

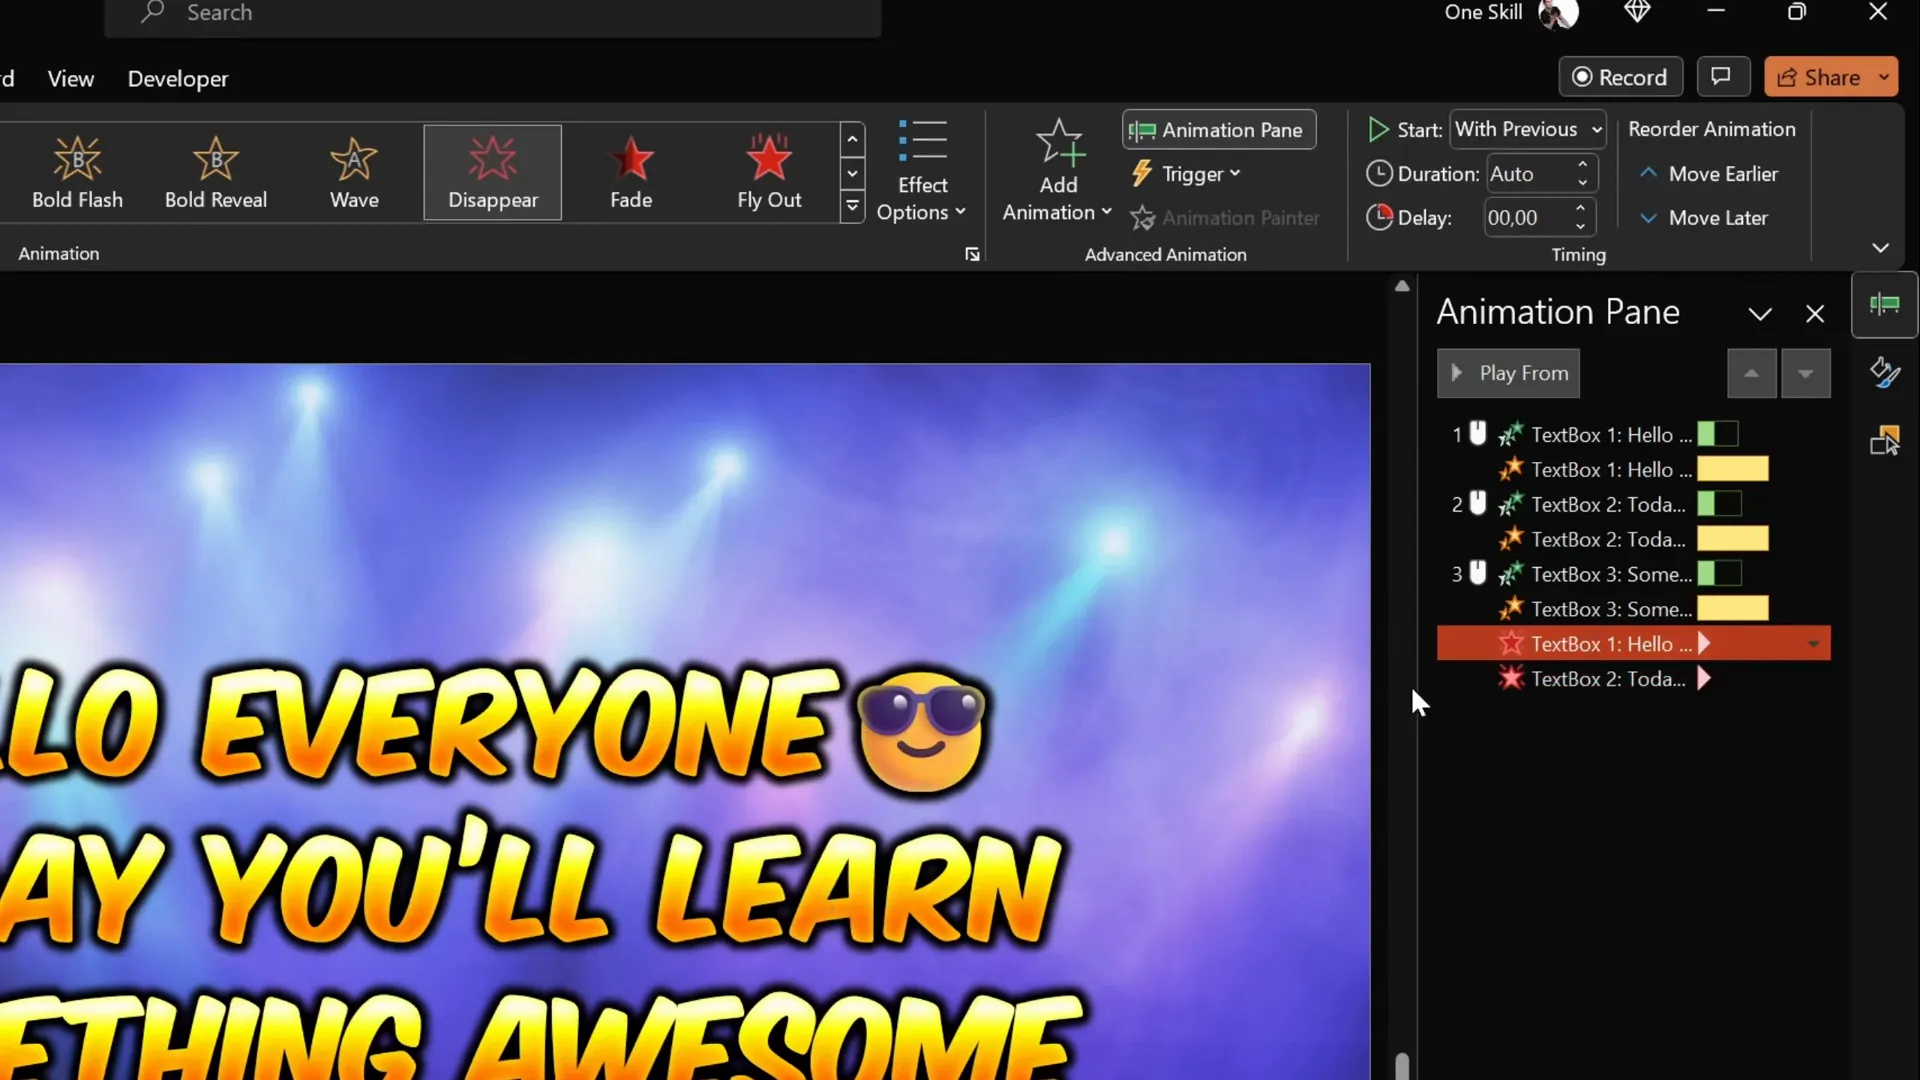
3. Add Disappear Animations for Smooth Transitions
To prevent overlapping text and ensure subtitles replace each other cleanly:
- Select the first two subtitle text boxes.
- Add a Disappear animation to each.
- Set both disappear animations to Start With Previous.
- In the Animation Pane, reorder animations so:
- Text Box 1 disappears right before Text Box 2 appears.
- Text Box 2 disappears right before Text Box 3 appears.
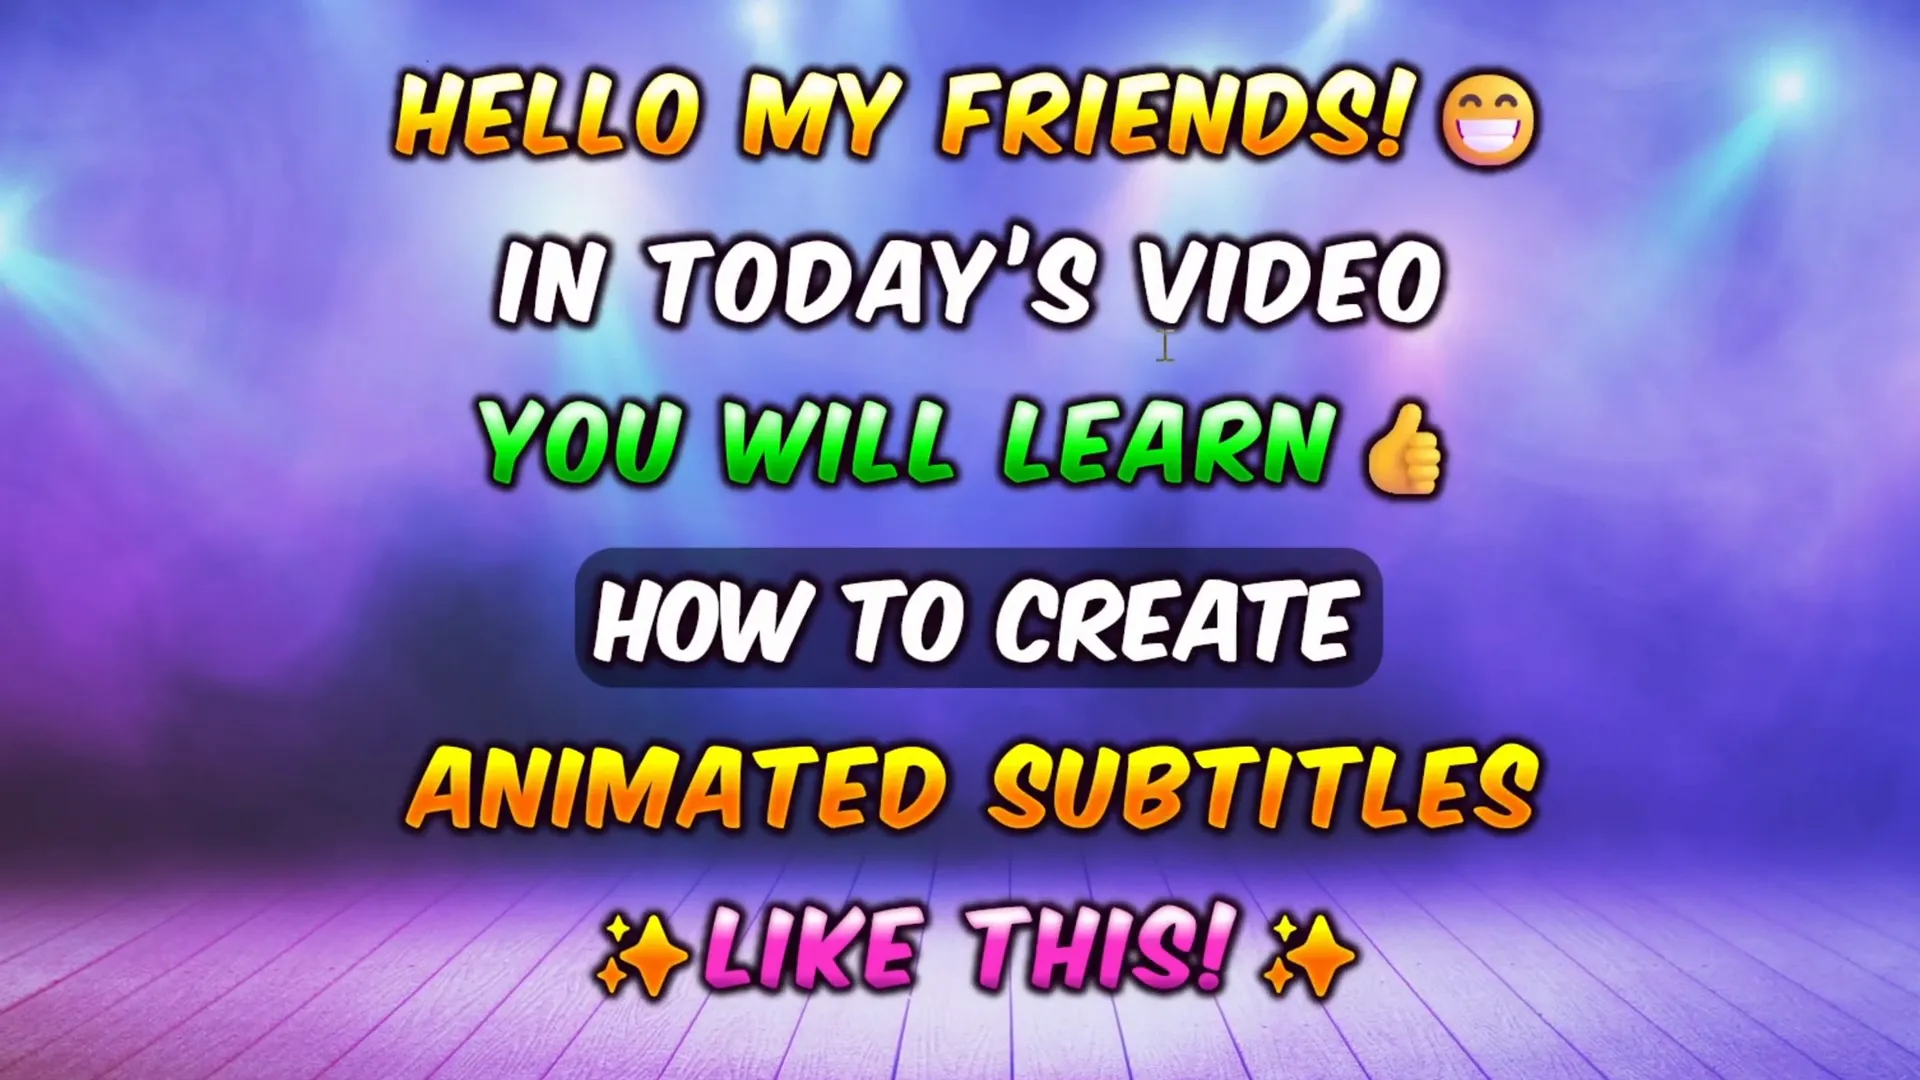
4. Final Preview
Play your slide in full screen to see the subtitles animate in sequence at the same position, with seamless transitions between each:
- Click 1: Subtitle 1 appears.
- Click 2: Subtitle 1 disappears, Subtitle 2 appears.
- Click 3: Subtitle 2 disappears, Subtitle 3 appears.
Tips and Tricks for Smooth Workflow
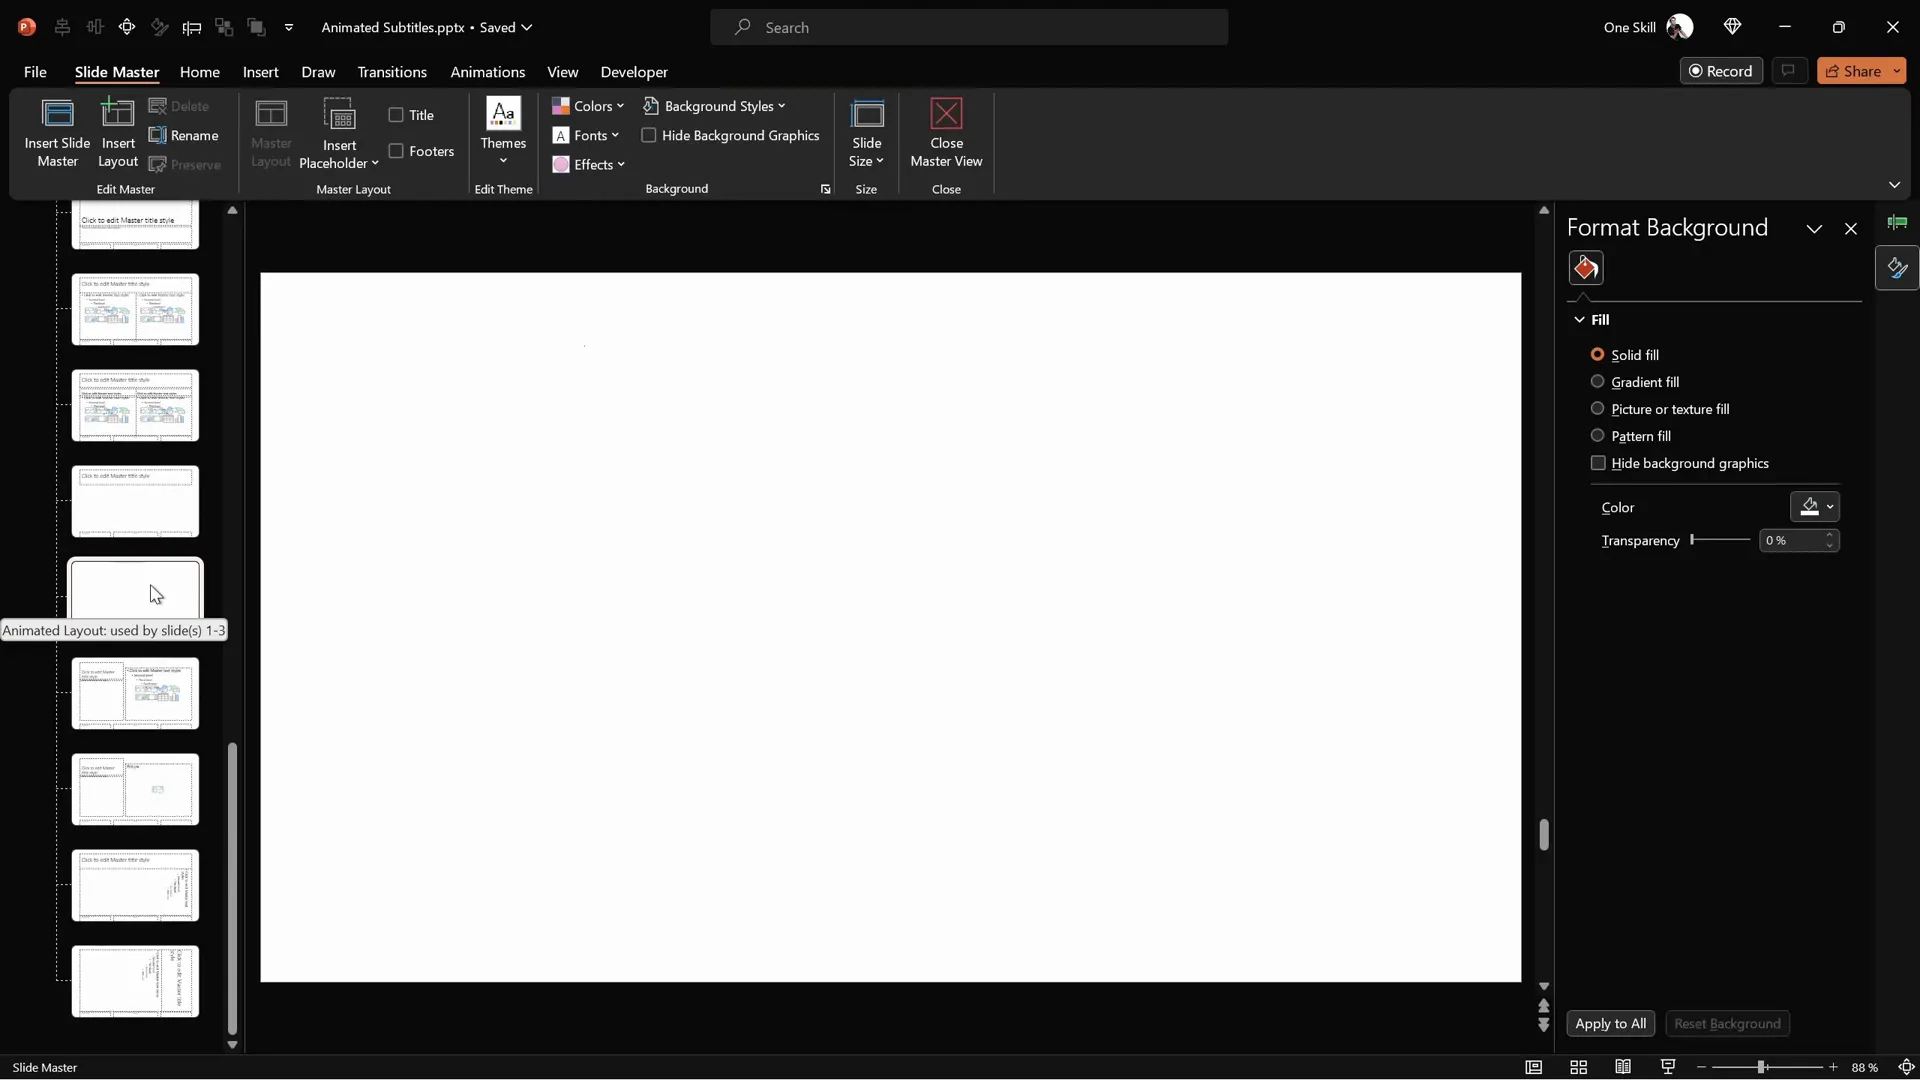
1. Prevent Accidental Background Selection
Sometimes selecting the background image instead of your text box can be frustrating. To avoid this:
- Select the background image and press Ctrl + X to cut it.
- Go to View > Slide Master.
- Paste the image into the Slide Master layout.
- Return to Normal View — now the background is locked in the master and won’t be selected by accident.
2. Understand Animation Timelines
PowerPoint has two animation timelines:
- One in Normal View — shows animations applied to slide elements like text boxes.
- One in Slide Master View — shows animations applied to the background or layout elements.
Knowing this helps you troubleshoot animations and organize your workflow better.
3. Naming Objects Helps Manage Complex Slides
When working with multiple text boxes and animations, use the Selection Pane to rename objects clearly (e.g., Text Box 1, Text Box 2). This makes it easier to track animations and edits.
4. Use Free Resources
The font Comica Axis used in this tutorial is free and can be downloaded from DaFont. Additionally, the creator uploads subtitle styles and tutorials on their Patreon page.
Frequently Asked Questions (FAQ)
Q1: Can I create animated subtitles in older versions of PowerPoint?
While this tutorial uses PowerPoint 365 for stock images and some animation features, many steps can be adapted to older versions. However, some animations and stock image options may not be available.
Q2: How do I make sure my animations run smoothly during a presentation?
Always preview your slide show in full screen and test your animations multiple times. Use the Animation Pane to check the order and timing. Also, avoid overly complex animations that may slow down the presentation.
Q3: Can I use other fonts instead of Comica Axis?
Yes, you can use any font you prefer. Choose a font that is clear and fits your presentation style. Just ensure the font is installed on the presenting computer or embedded in the PowerPoint file.
Q4: How do I add emojis to my subtitles?
On Windows, press Windows Key + . (period) to open the emoji menu. Insert emojis directly into your text box. If the emoji inherits unwanted styles, select it and set its fill to solid color.
Q5: Can I reuse these animated subtitles in other presentations?
Absolutely! Save your animated subtitles as templates or copy them into other presentations. Using the Slide Master for backgrounds and naming text boxes helps with easy reuse and editing.
Conclusion
Mastering powerpoint animation for text is a fantastic way to bring your presentations to life and engage your audience. With just a few simple steps, you can create animated subtitles that look professional and dynamic—on par with some of the biggest content creators like MrBeast.
In this tutorial, we covered how to:
- Set up subtle animated backgrounds using stock images and zoom effects.
- Create stylish subtitle text boxes with gradient fills, shadows, and glowing effects.
- Apply smooth letter-by-letter zoom and pop animations.
- Manage multiple subtitles on the same slide with disappearing transitions.
- Use practical tips for managing your slide elements and animations.
With these skills, you can make your PowerPoint presentations more engaging, professional, and visually appealing. Don’t forget to explore the creator’s Patreon page for additional subtitle styles and tutorials, and keep practicing to create seamless, looping animations like a pro.
Happy animating!