If you’re looking to elevate your presentations and captivate your audience, mastering PowerPoint animation ideas is a game-changer. Animations not only add visual interest but can also guide your audience’s attention, emphasize key points, and bring your slides to life. However, creating custom animations that look professional and engaging can sometimes feel daunting.
In this comprehensive guide, inspired by the expert tips from the One Skill PPT YouTube channel, you’ll discover five genius and easy-to-follow custom animation techniques that you can create directly in PowerPoint. These animations range from futuristic text effects to dynamic backgrounds and interactive button shines. Whether you’re a beginner or an intermediate PowerPoint user, these step-by-step instructions will help you create stunning animations to impress your audience and make your presentations unforgettable.
Ready to dive in? Let’s explore these creative PowerPoint animation ideas and learn how to implement them with practical tips and tricks.
Table of Contents
- 1. Cyber Text Animation
- 2. Scrolling Grid Animation
- 3. Floating Images Animation
- 4. Horizon Parallax Animation
- 5. Button Shine Effect
- PowerPoint Animation Pack
- Frequently Asked Questions (FAQ)
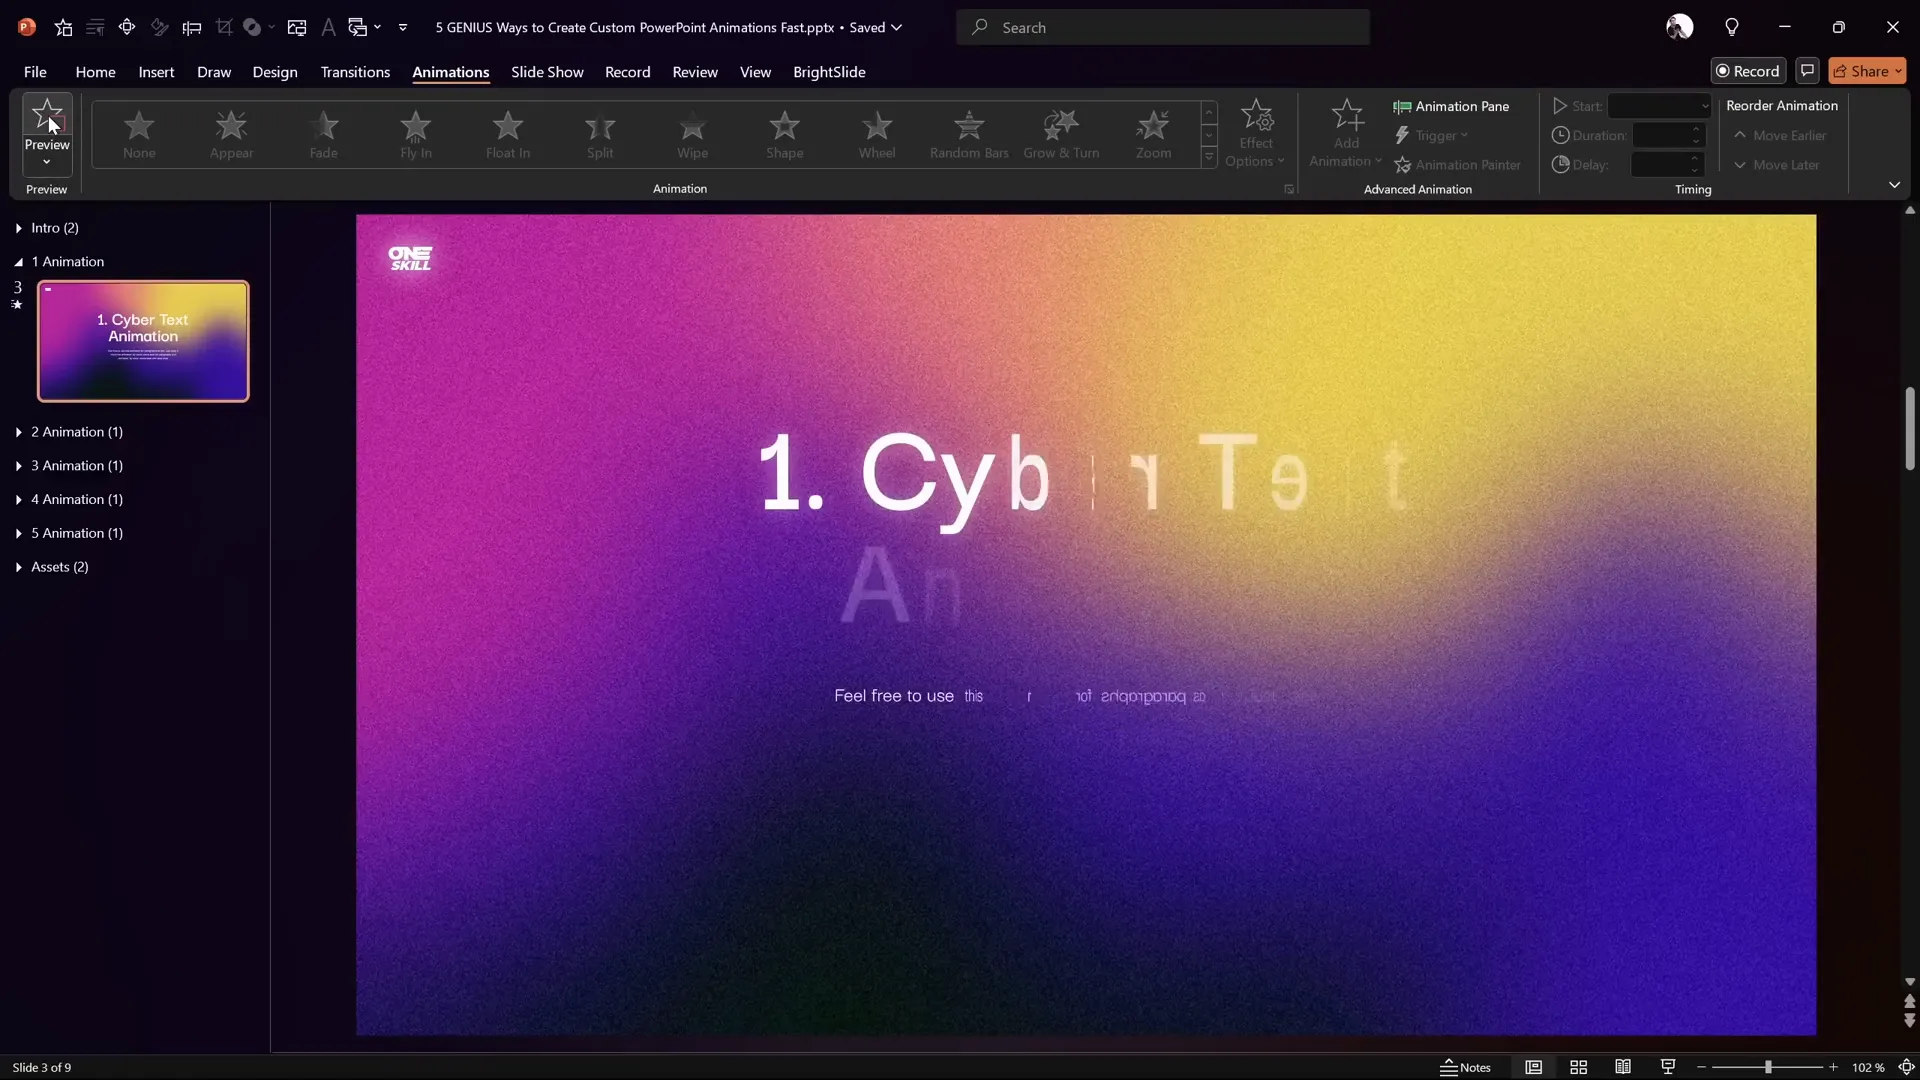
1. Cyber Text Animation: Futuristic Flicker Effect
The first animation technique is called the Cyber Text Animation. This effect makes each letter of your text flicker in sequence, creating a futuristic, cyber-inspired look perfect for tech presentations or modern themes.
How to Create the Cyber Text Animation
- Duplicate your slide: Start by duplicating the slide containing your text to preserve the original.
- Clear existing animations: Open the Animation Pane and delete all animations to start fresh.
- Select the text box: Click on the title or text you want to animate.
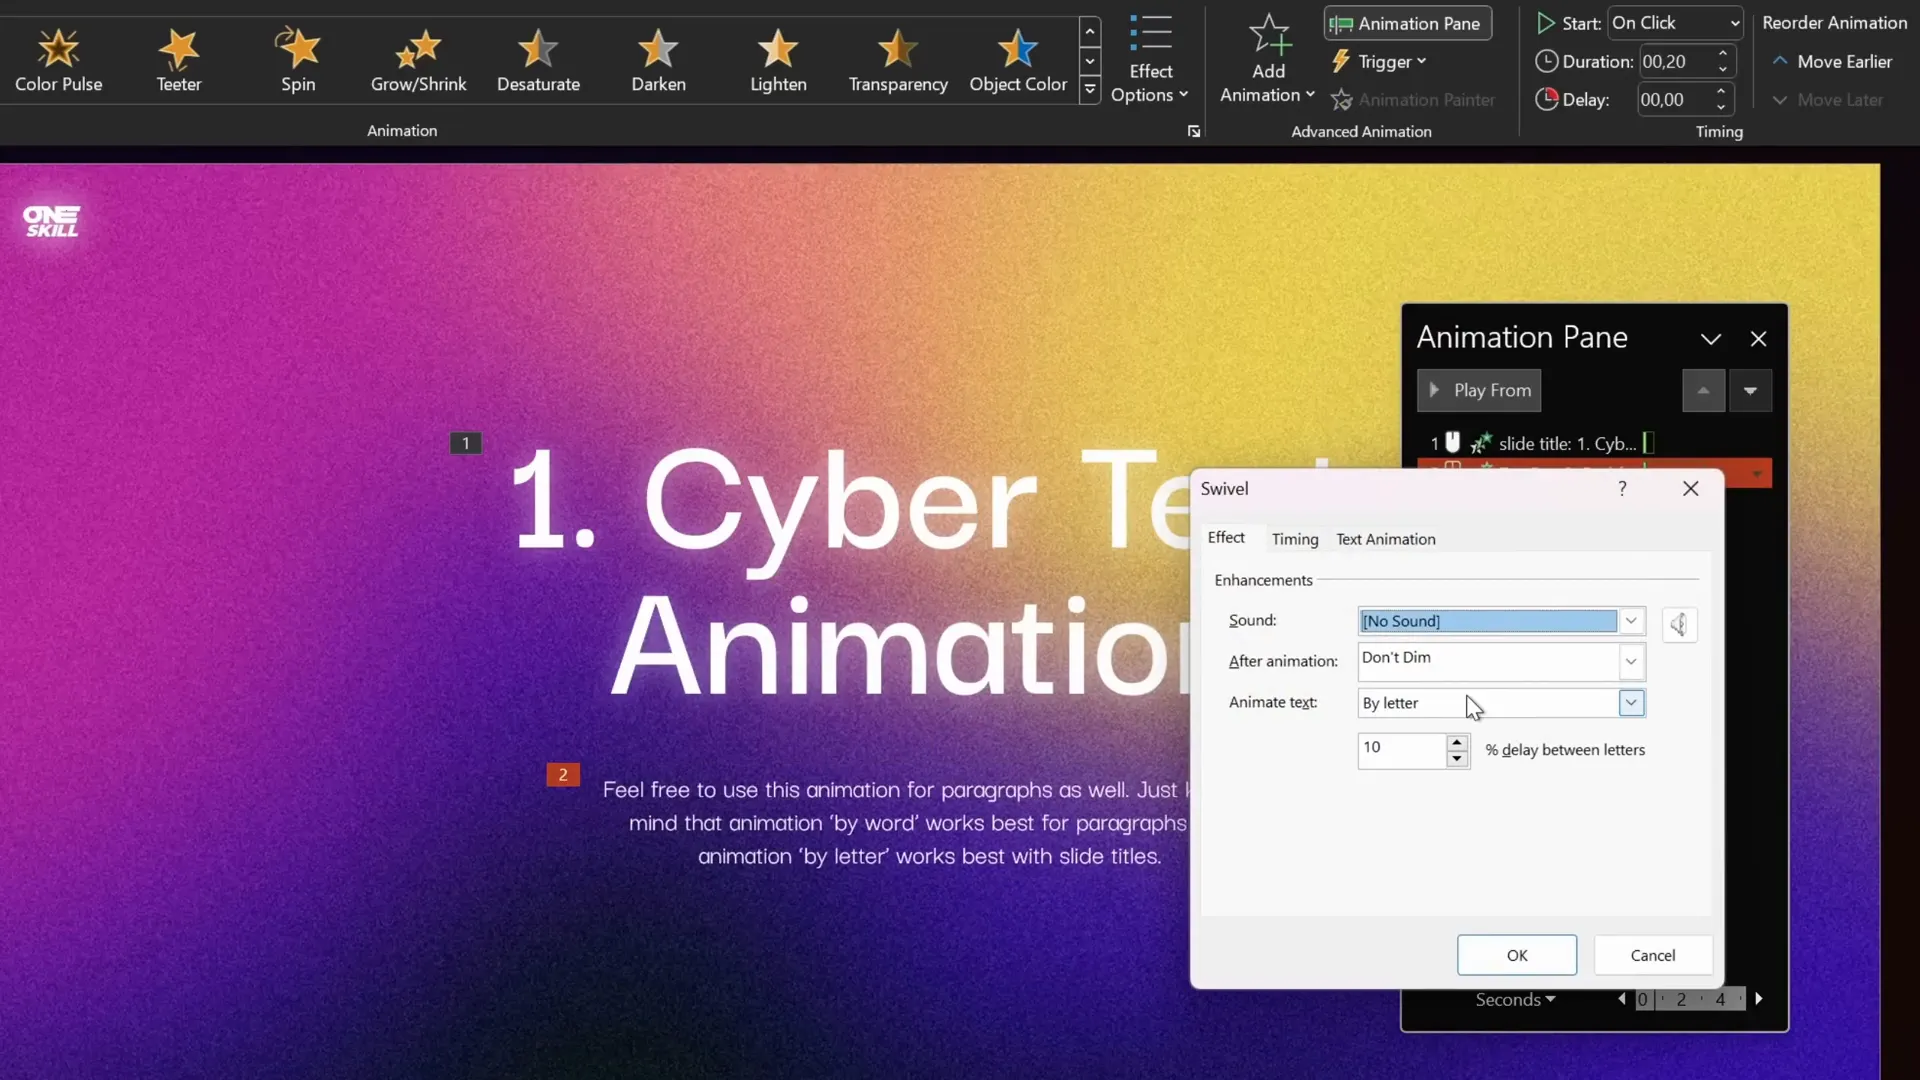
- Add the Swivel Entrance Animation: Go to Animations > More Entrance Effects and select Swivel. Click OK.
- Animate by letter: In the animation options, set the effect to animate text By Letter with a 10% delay between letters.
- Adjust duration: Set the animation duration to 0.2 seconds for a quick flicker.
- Apply to paragraph: Use the Animation Painter to copy the animation from the title to the paragraph text.
- Animate paragraph by word: Change the paragraph animation to animate by Word for a different effect.
- Set timing: Configure the title animation to start With Previous and the paragraph to start After Previous.
- Preview your animation: Use Slide Show mode to see the cyber text flicker in action.
This technique is both simple and visually striking, making it a great choice for titles, headers, or key points.
Tips for Customizing Cyber Text Animation
- Experiment with different entrance animations like Fade or Zoom for varied effects.
- Adjust the delay percentage to speed up or slow down the flicker.
- Use contrasting colors or glowing text effects to enhance the cyber look.
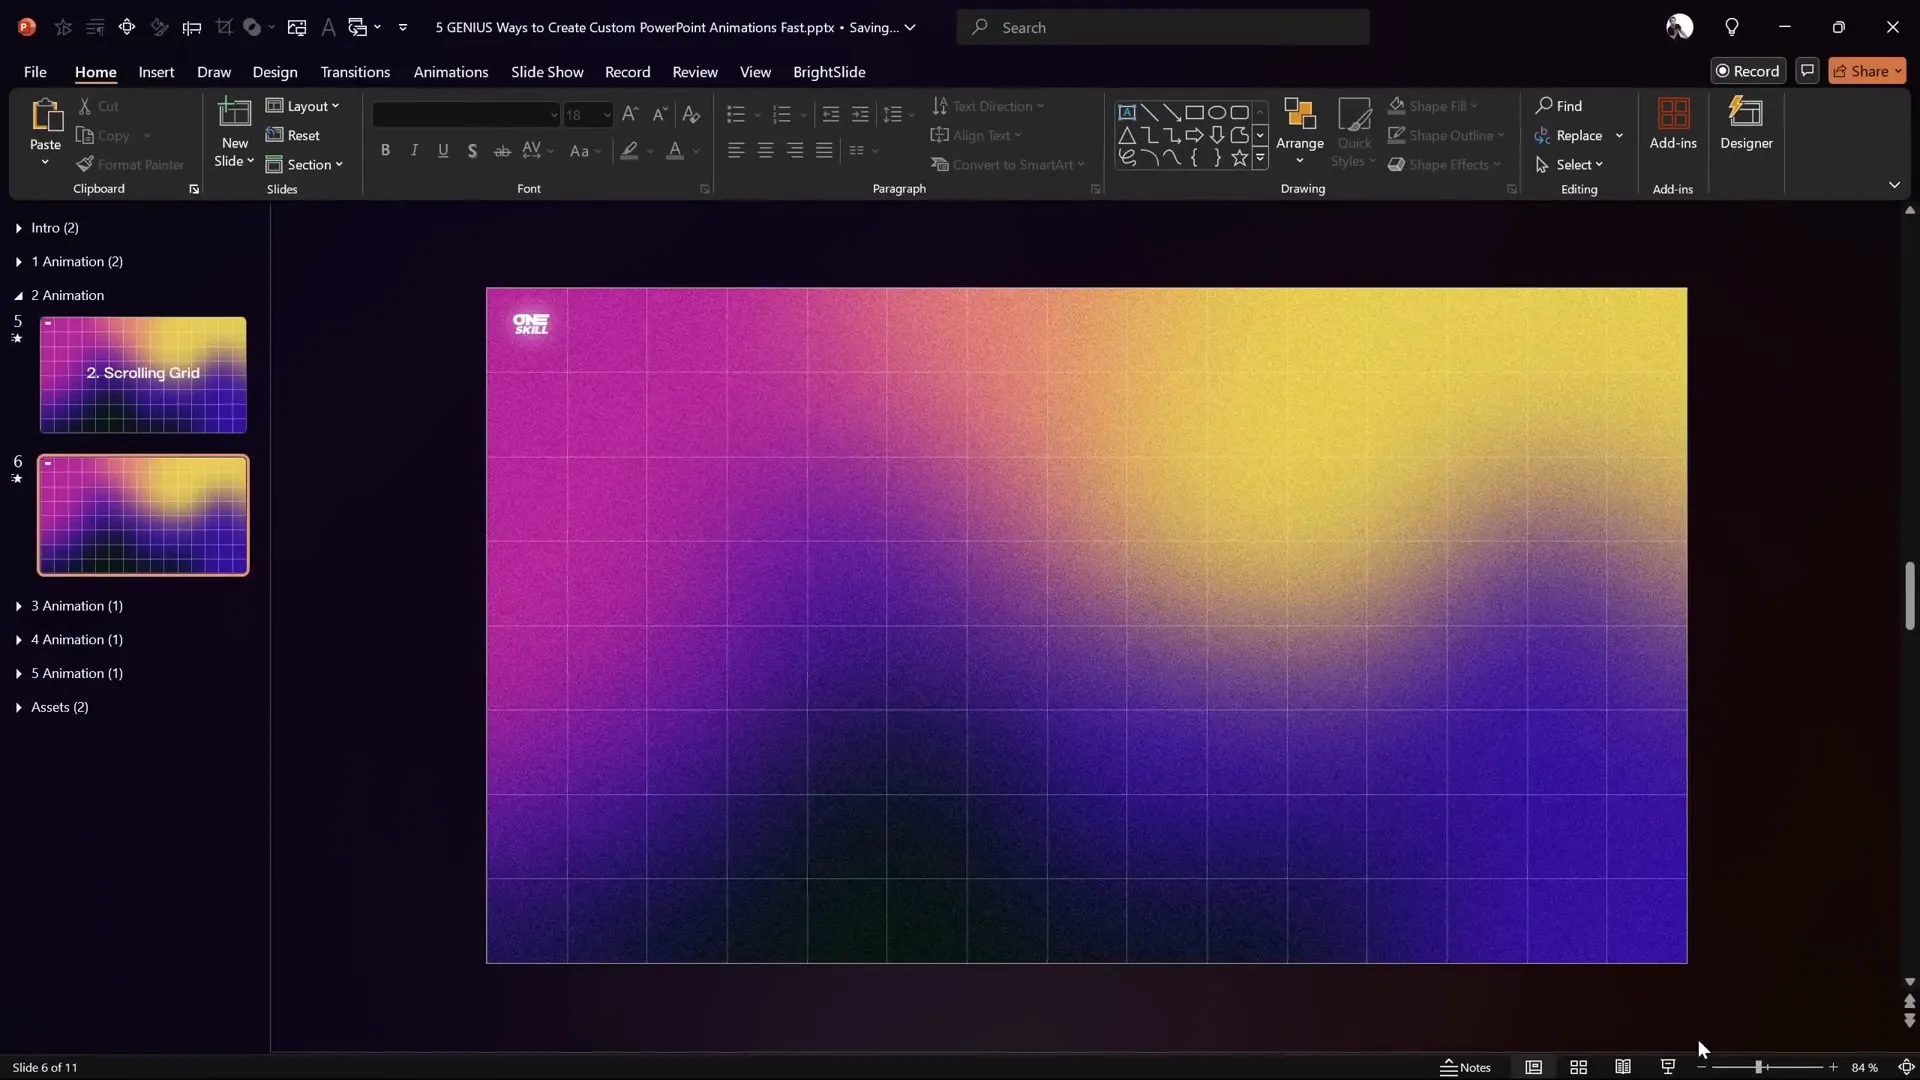
2. Scrolling Grid Animation: Dynamic Background for Slides
The Scrolling Grid Animation is a creative way to add an animated, futuristic background to your slides using a grid of lines that scrolls continuously. This effect adds depth and motion without overwhelming your main content.
Step-by-Step Guide to Create the Scrolling Grid
- Duplicate your slide: Again, start by duplicating the slide to keep your original intact.
- Create vertical grid columns:
- Insert a rectangle shape with the height equal to the slide height.
- Align it to the left edge of the slide.
- Duplicate this rectangle 14 times so you have 15 columns total.
- Select all rectangles and group them.
- Stretch the group to cover the slide width fully.
- Create horizontal grid rows:
- Copy one of the column rectangles and paste it on top.
- Transform this column into a horizontal row by adjusting width and height.
- Align it to the top of the slide.
- Duplicate this row 7 more times so you have 8 rows total.
- Select all rows and group them.
- Stretch the group to cover the slide height fully.
- Group columns and rows: Place the row group back into position, select both the column and row groups, and group them into one large grid.
- Format the grid:
- Set fill to No Fill so the grid is transparent.
- Set line color with 80% transparency and line width to 0.5 pt for subtlety.
- Duplicate and extend the grid: Duplicate the entire grid and place the copy to the right of the original, creating a grid twice the slide width.
- Add motion path animation:
- Select the large grid group.
- Add a Motion Path Line animation.
- Change direction to Left.
- Adjust the red end point of the motion path to align perfectly with the left edge of the slide.
- In animation options, remove smooth start and end for a constant scroll speed.
- Set duration to 17 seconds for a slow, smooth scroll.
- Set the animation to repeat Until End of Slide for infinite looping.
- Add fade-in effect: Add a Fade In animation at the top of the animation list, duration 1 second, starting With Previous to smoothly reveal the grid.
- Preview: Run the slide show to see the grid fade in and scroll endlessly.
Customization Tips for Scrolling Grid
- Change line colors to match your brand or presentation theme.
- Adjust the number of rows and columns to make the grid denser or more sparse.
- Experiment with different line thicknesses or dash styles for variety.
- Use this animated background behind semi-transparent content for a layered effect.
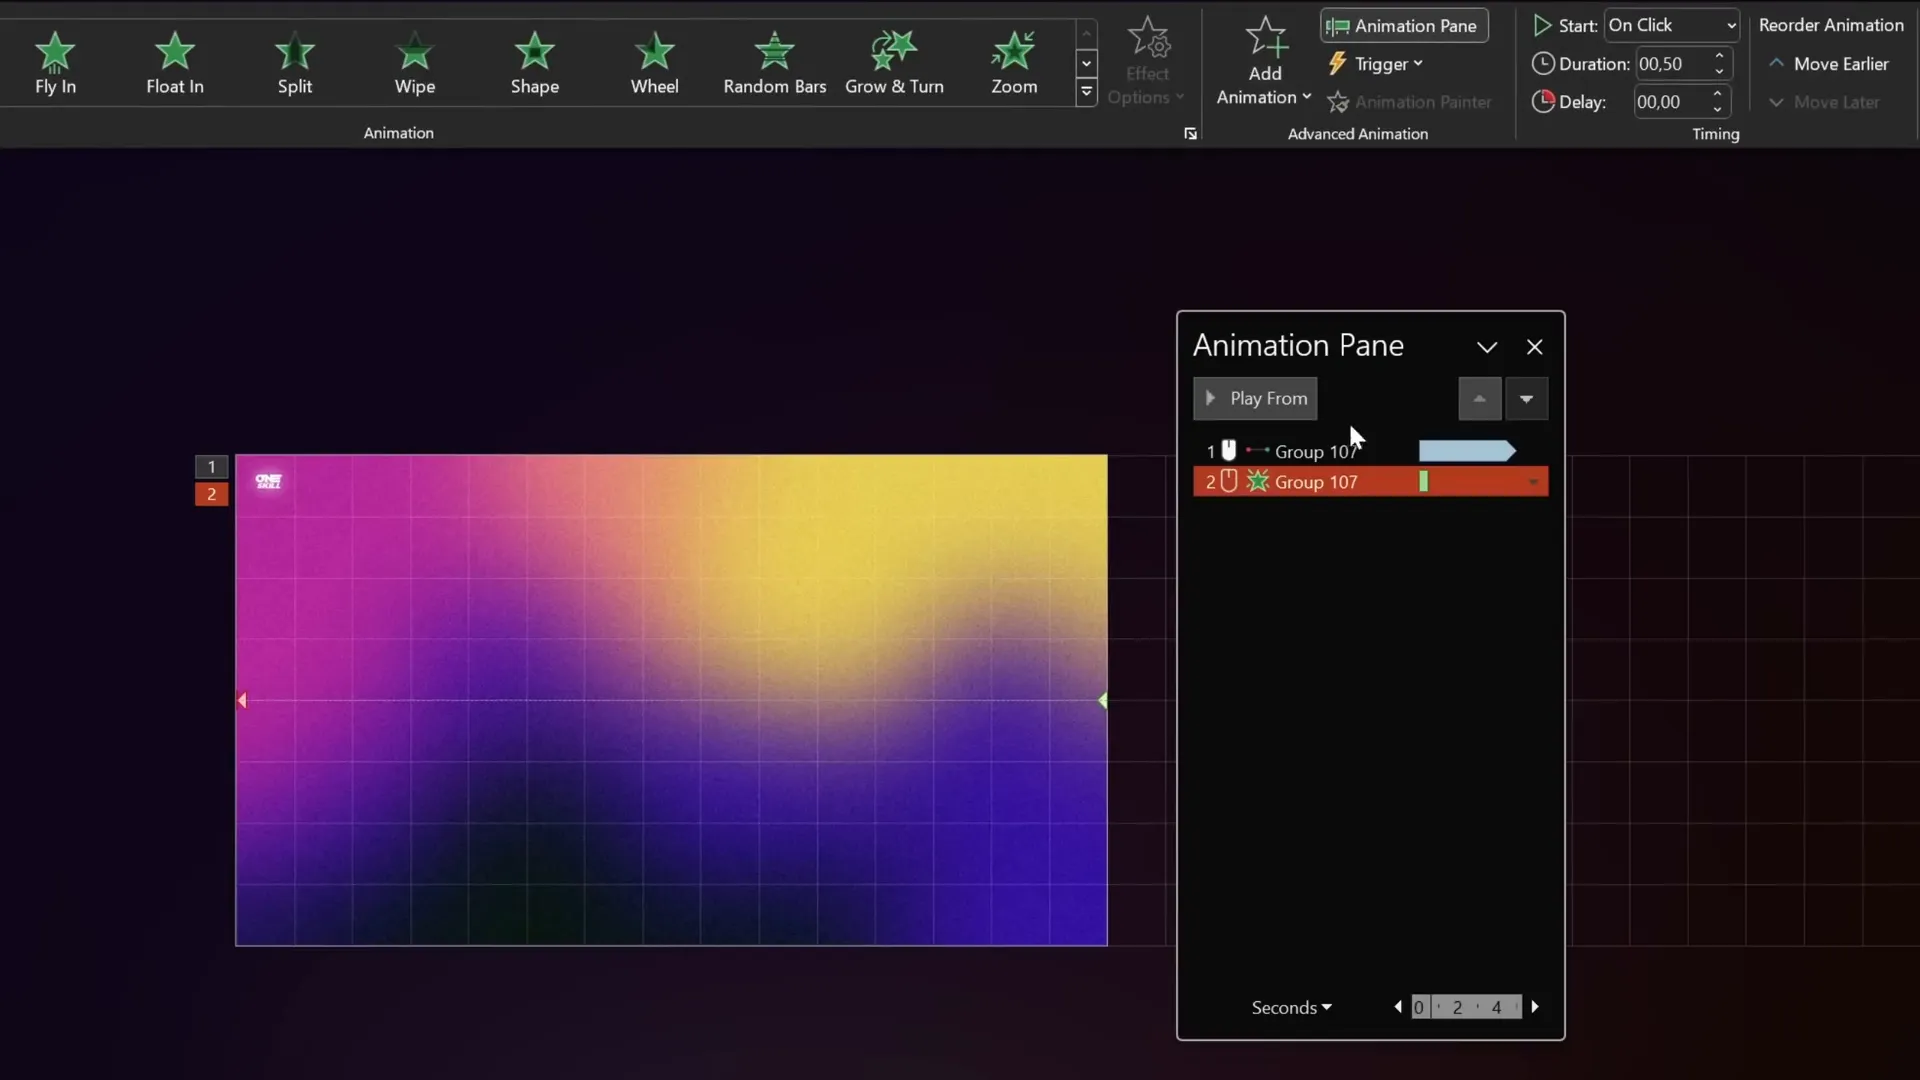
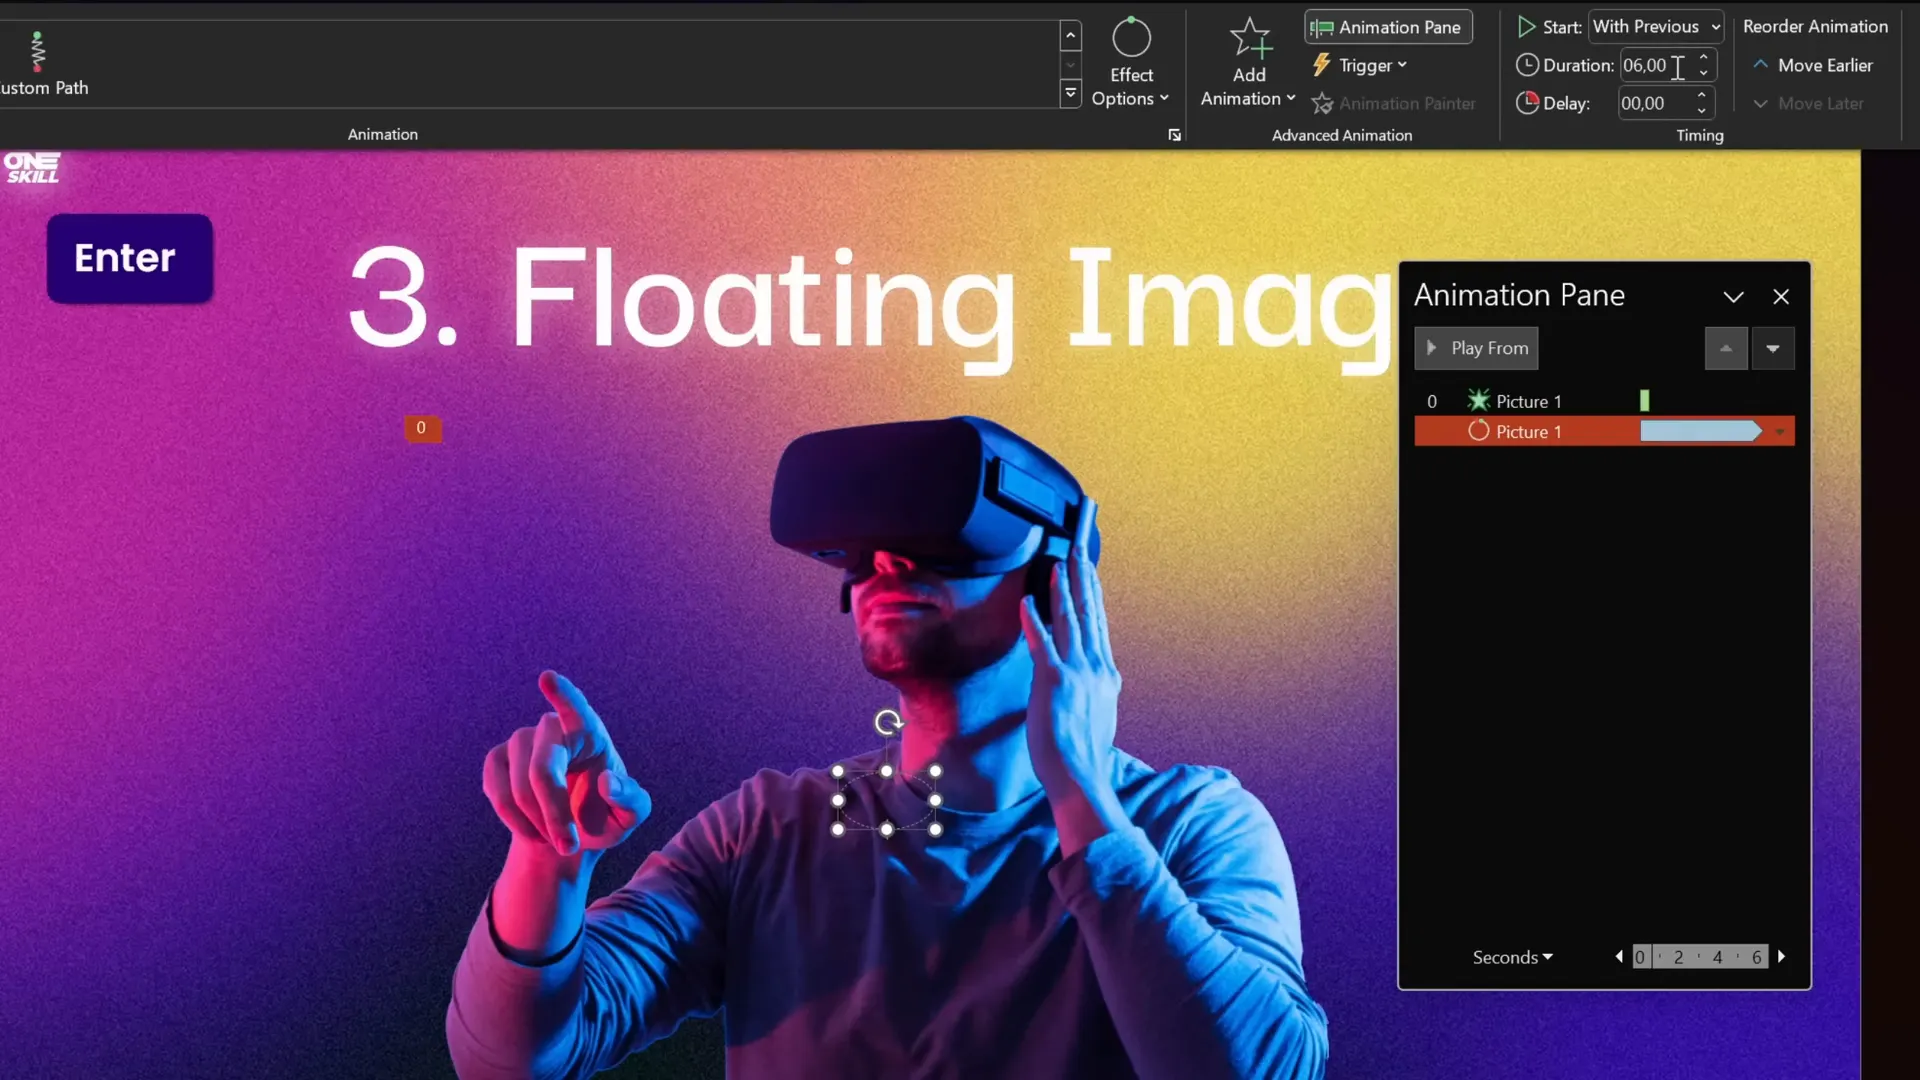
3. Floating Images: Circular Motion with Subtle Spin
Bring your images to life with the Floating Images Animation. This creates a smooth circular motion path for your images combined with a subtle spin, making them appear to gently float around a point. It’s a fantastic effect for showcasing product images, icons, or logos.
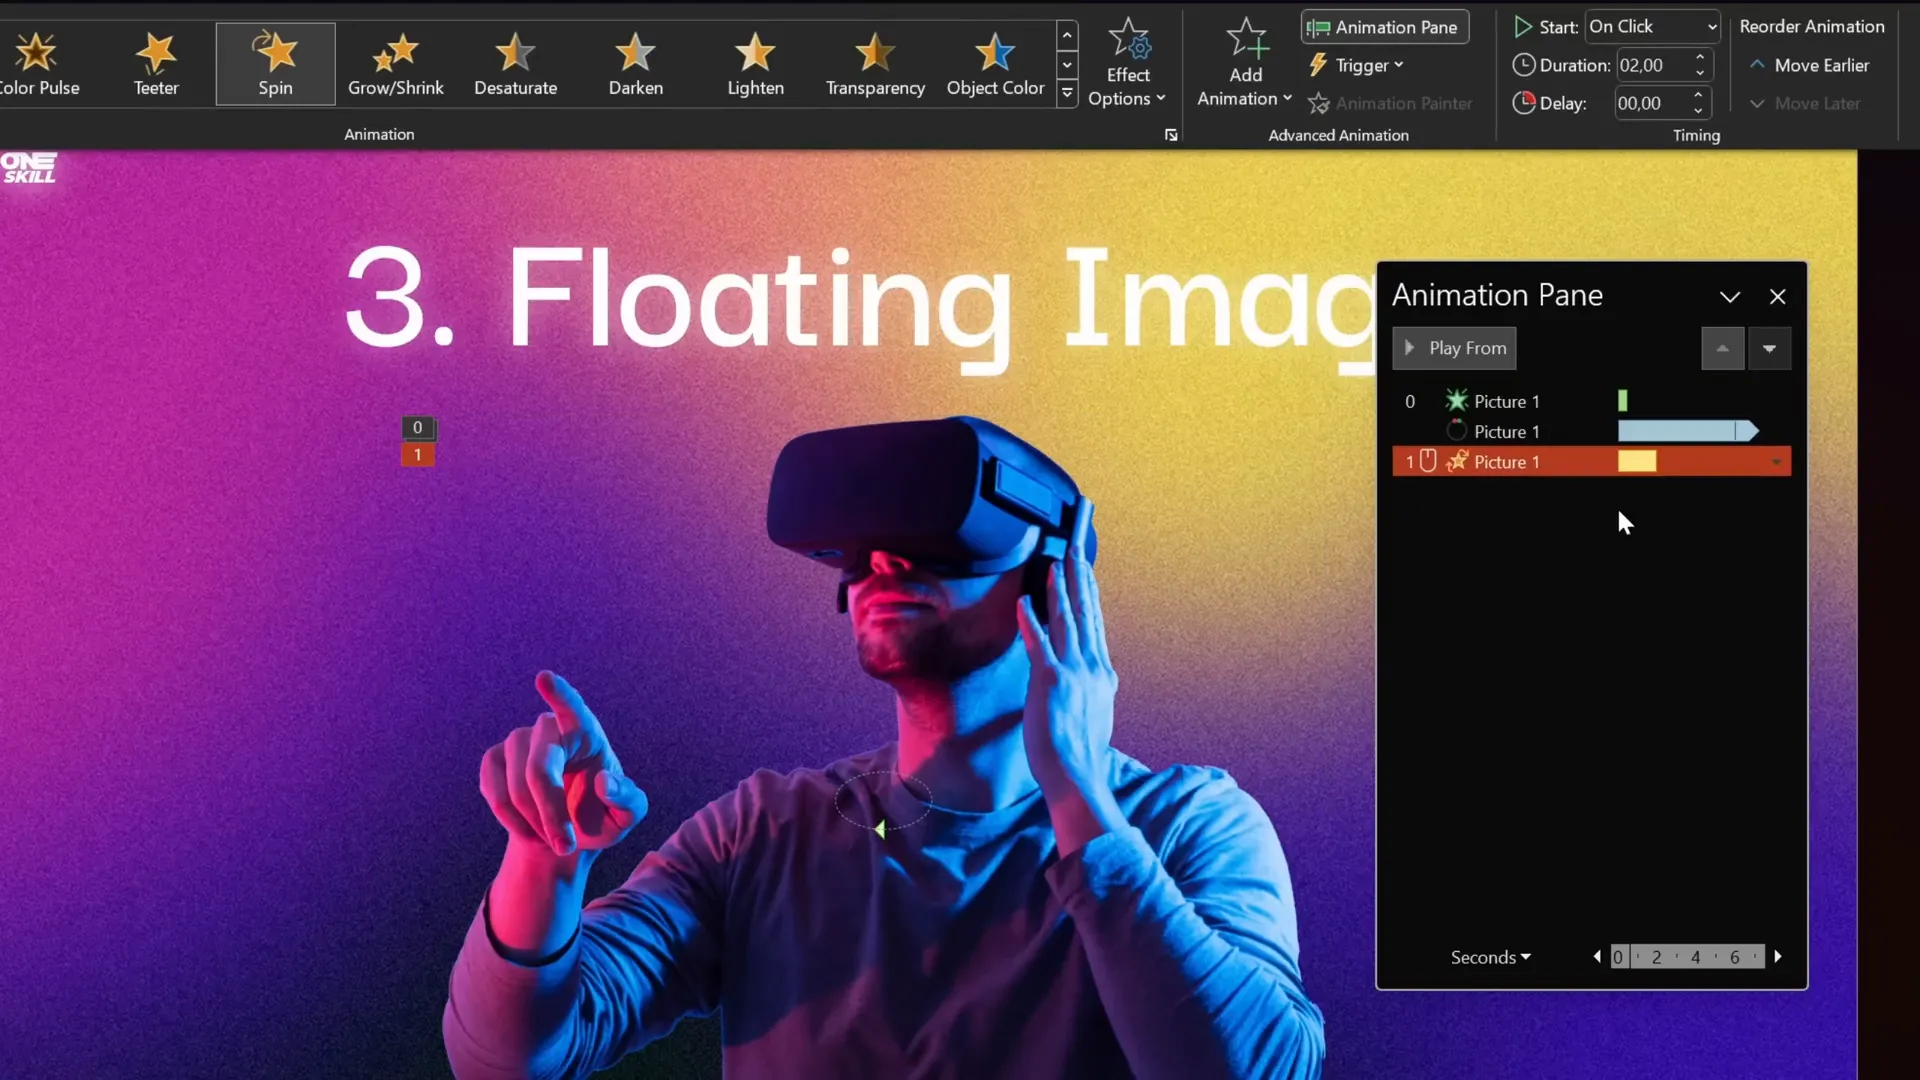
How to Animate Floating Images
- Duplicate your slide: To keep your original safe, duplicate the slide before animating.
- Add Fade In: Select the image and apply a Fade In animation starting With Previous, duration 0.5 seconds.
- Add Circular Motion Path:
- Choose Add Animation > Motion Paths > Custom Path.
- Draw a circular path around the desired area.
- Adjust the path to ensure it’s a smooth circle. Resize proportionally by holding Ctrl.
- Change motion direction to clockwise by selecting Effect Options > Reverse Path Direction.
- Set animation duration to 6 seconds, start With Previous, and repeat Until End of Slide.
- Remove smooth start and end for even speed.
- Add Subtle Spin:
- Add a Spin animation to the image.
- Set it to start With Previous, duration 3 seconds.
- Set rotation to 5 degrees clockwise.
- Enable Auto Reverse and smooth start/end of 1 second.
- Set repeat Until End of Slide.
- This spin will synchronize with the circular motion, creating a gentle floating effect.
- Preview the animation: Run the slide show to see the image fade in, float in a circle, and gently spin back and forth.
Tips for Floating Images
- Use this effect for logos, icons, or any image you want to highlight subtly.
- Adjust the circle size to control the floating radius.
- Experiment with rotation degrees and speed for different vibes.
- Combine with other effects like shadows or glows for extra polish.
4. Horizon Parallax: Create Depth with Animated Layers
The Horizon Parallax Animation is a powerful technique to bring photos to life by creating a layered, moving parallax effect. This adds depth and motion to your backgrounds, making your slides more immersive and visually rich.
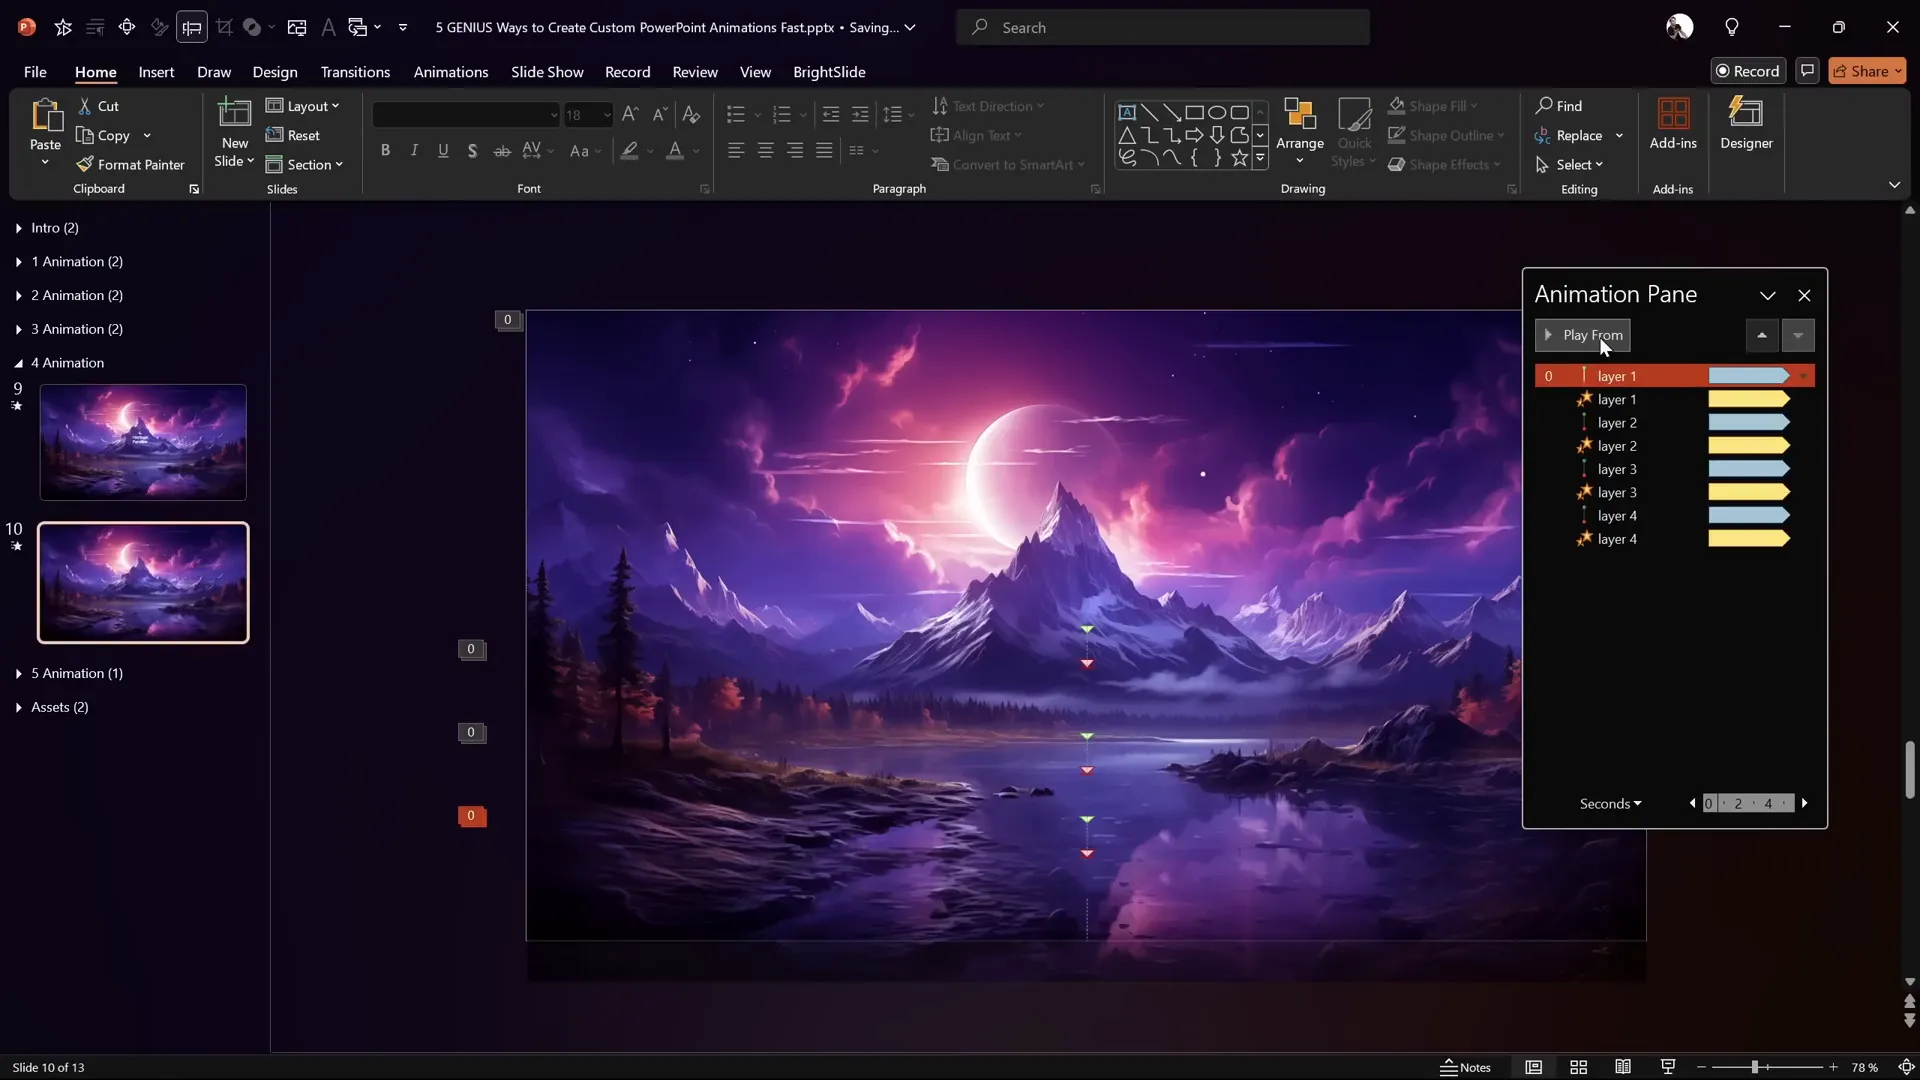
Creating the Horizon Parallax Effect
- Prepare your layers: Insert four rectangles named Layer 1, Layer 2, Layer 3, and Layer 4. Layer 4 should cover the entire slide.
- Set slide background: Fill the slide background with the photo you want to animate.
- Apply soft edges: For Layers 1-3, apply 30 points of soft edges so they blend softly with the slide edges.
- Arrange layers: Ensure Layer 1 is on top, followed by Layer 2, Layer 3, and finally Layer 4 at the bottom.
- Add motion path animation to Layer 1:
- Apply a downward motion path.
- Reduce the travel distance by dragging the end point upwards.
- Set duration to 5 seconds with smooth start and end of 1 second.
- Enable Auto Reverse and repeat Until End of Slide.
- Add Grow/Shrink animation to Layer 1:
- Set growth to 175%.
- Duration 5 seconds, smooth start 1 second, auto reverse enabled, repeat until end of slide.
- Copy animations: Use Animation Painter to apply both animations to Layers 2, 3, and 4.
- Adjust growth percentages:
- Layer 2: 150%
- Layer 3: 125%
- Layer 4: 110%
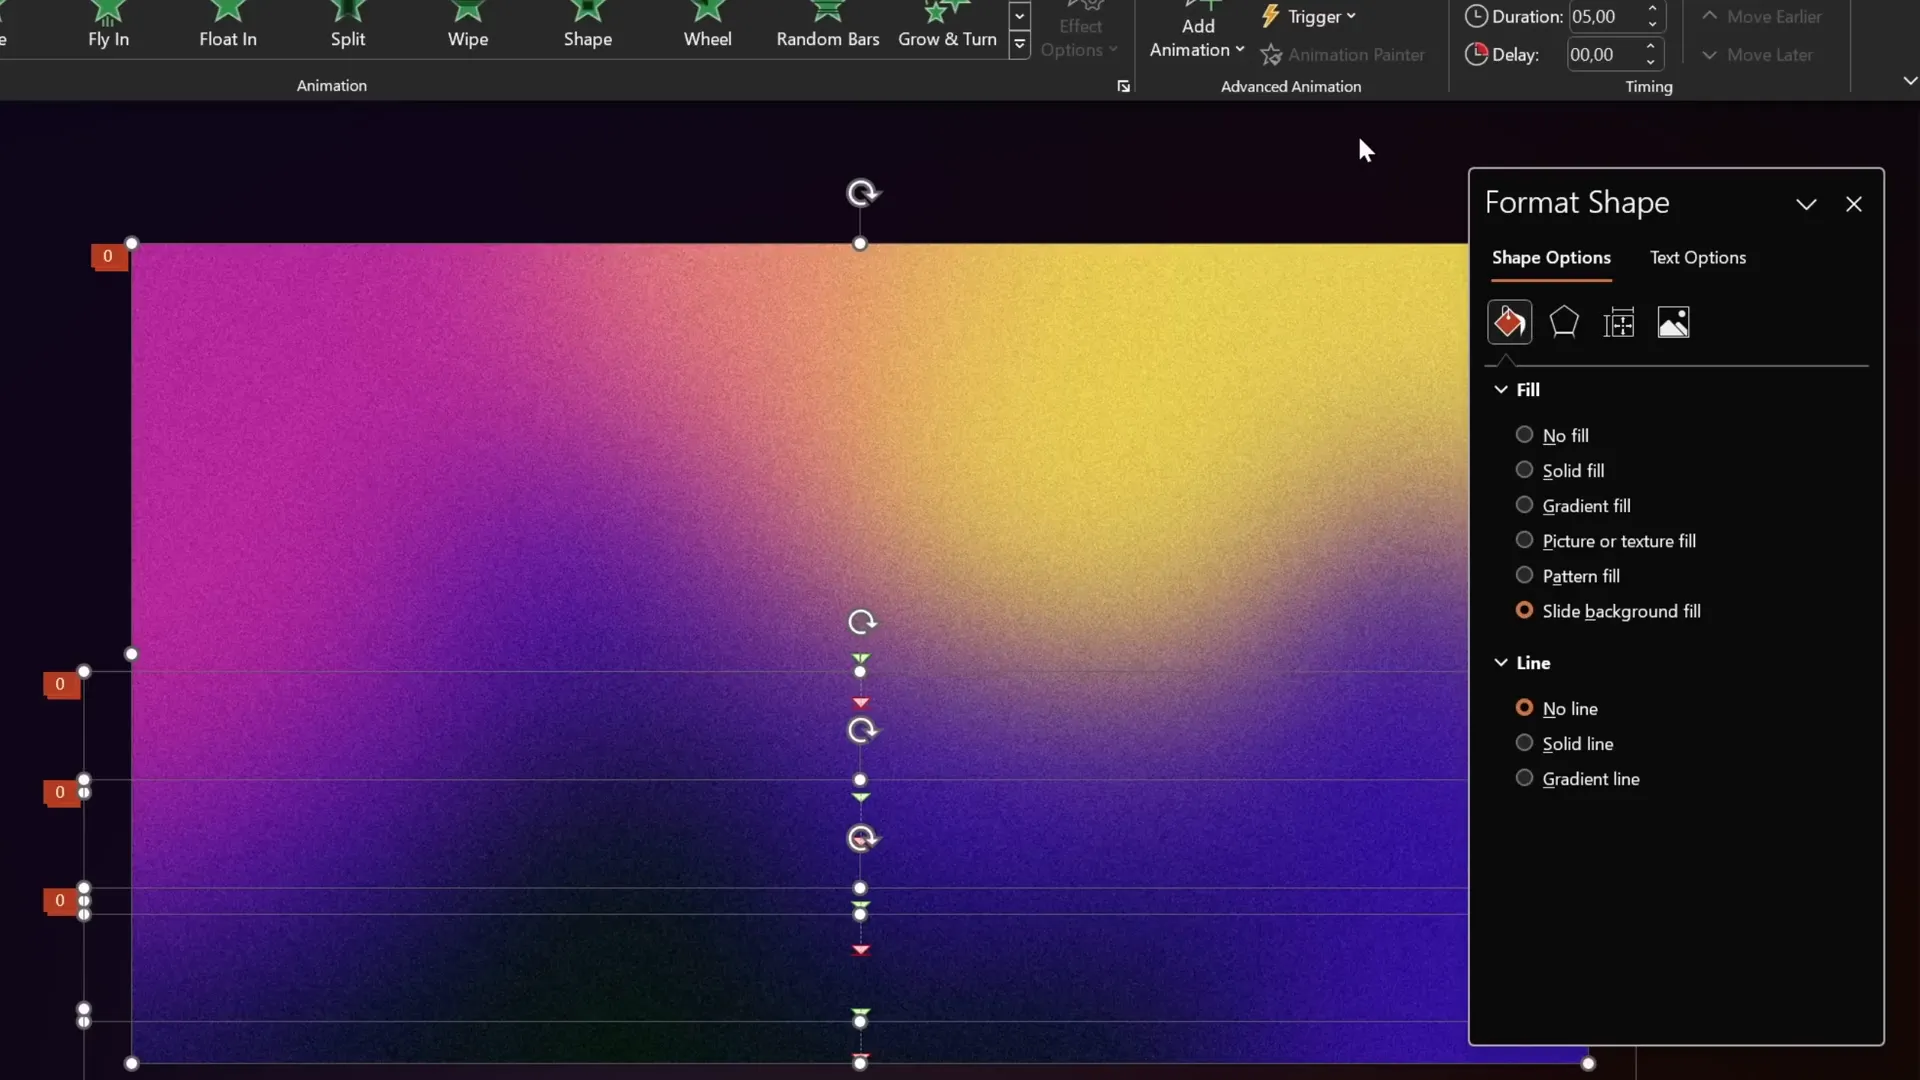
- Set fill for layers: Select all rectangles, right-click, choose Format Shape > Fill > Slide Background Fill so all layers display the same background image.
- Preview your slide: Run the slide show to see the parallax effect in motion, with layers moving and scaling at different rates to create depth.
Why Use Horizon Parallax?
- Adds dynamic depth to otherwise static photos.
- Great for nature scenes, cityscapes, or any layered images.
- Enhances presentations with subtle but impressive motion.
- Works well as a background for text or content slides.
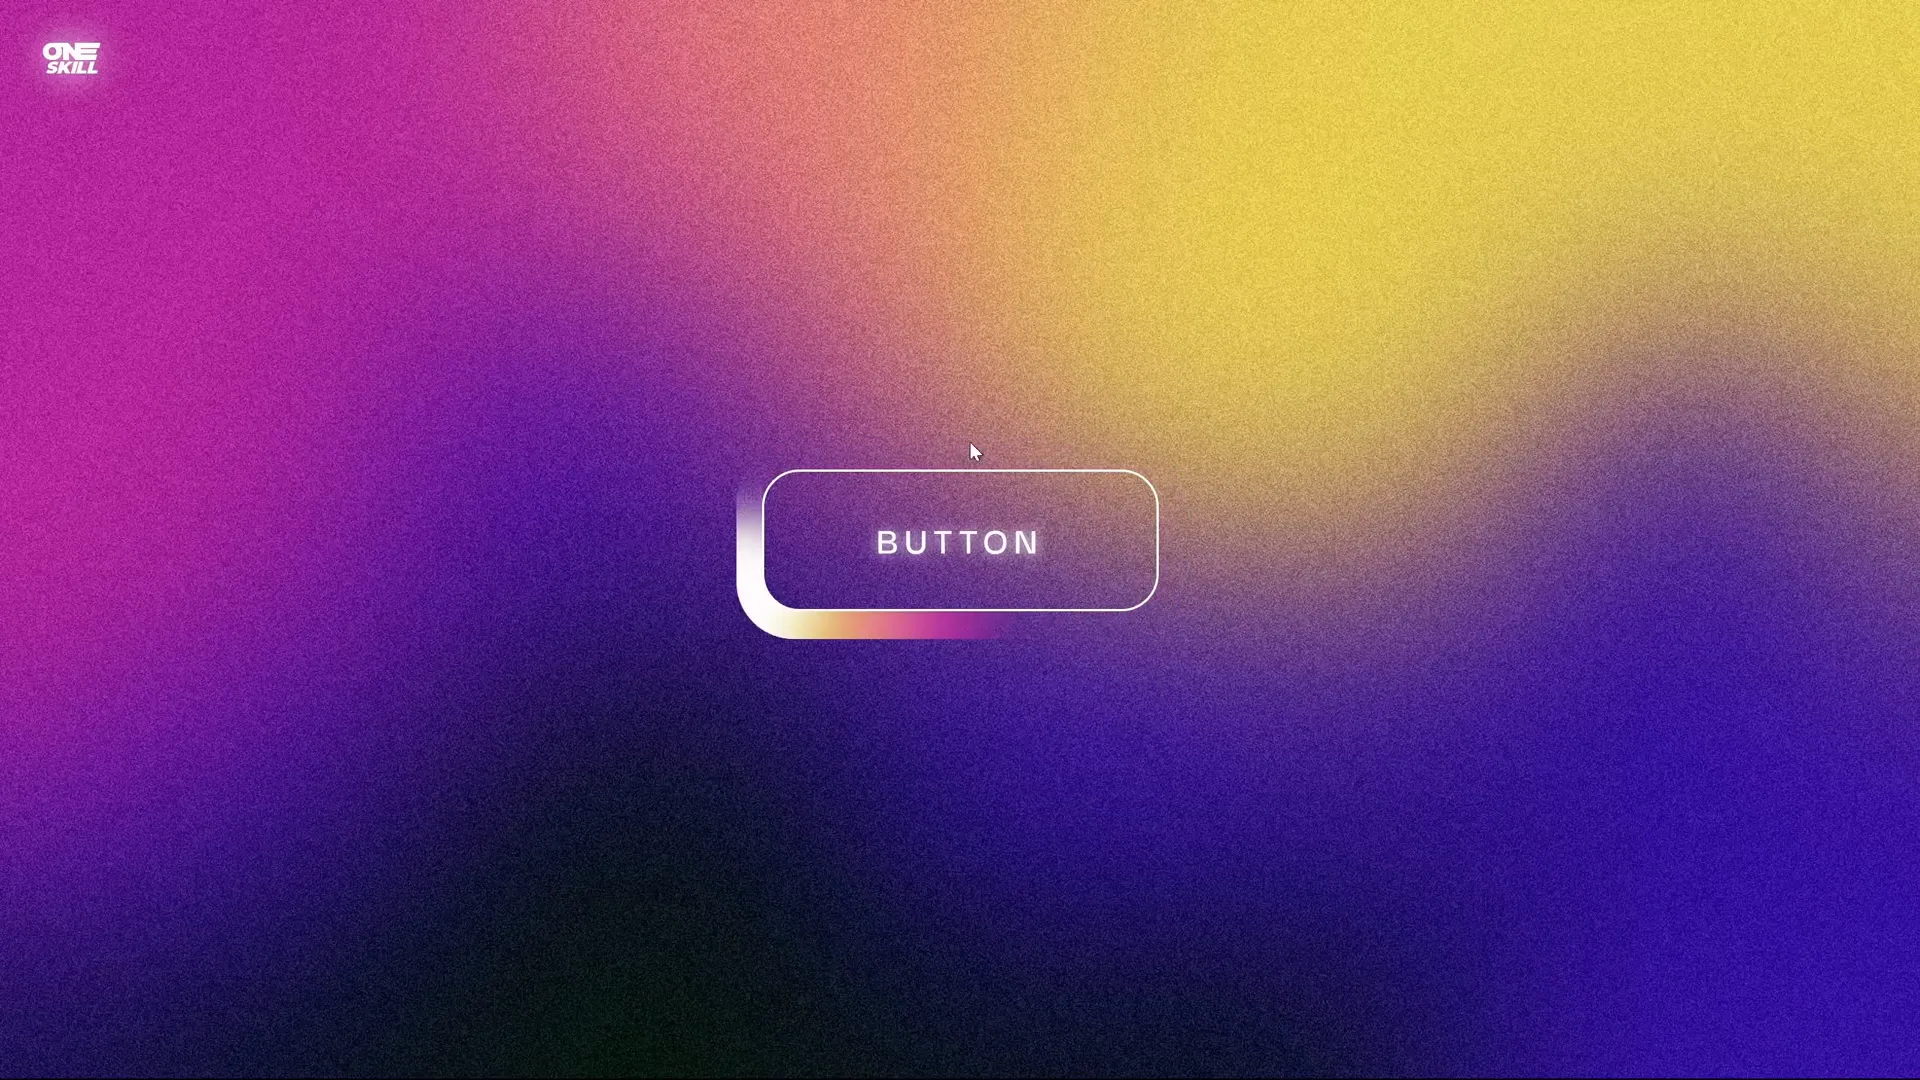
5. Button Shine Effect: Eye-Catching Looping Highlight
The final animation technique is the Button Shine Effect, which creates a beautiful, looping shine or highlight that moves around buttons or shapes on your slide. This effect is perfect for call-to-action buttons or any interactive elements.
Step-by-Step to Create the Button Shine Effect
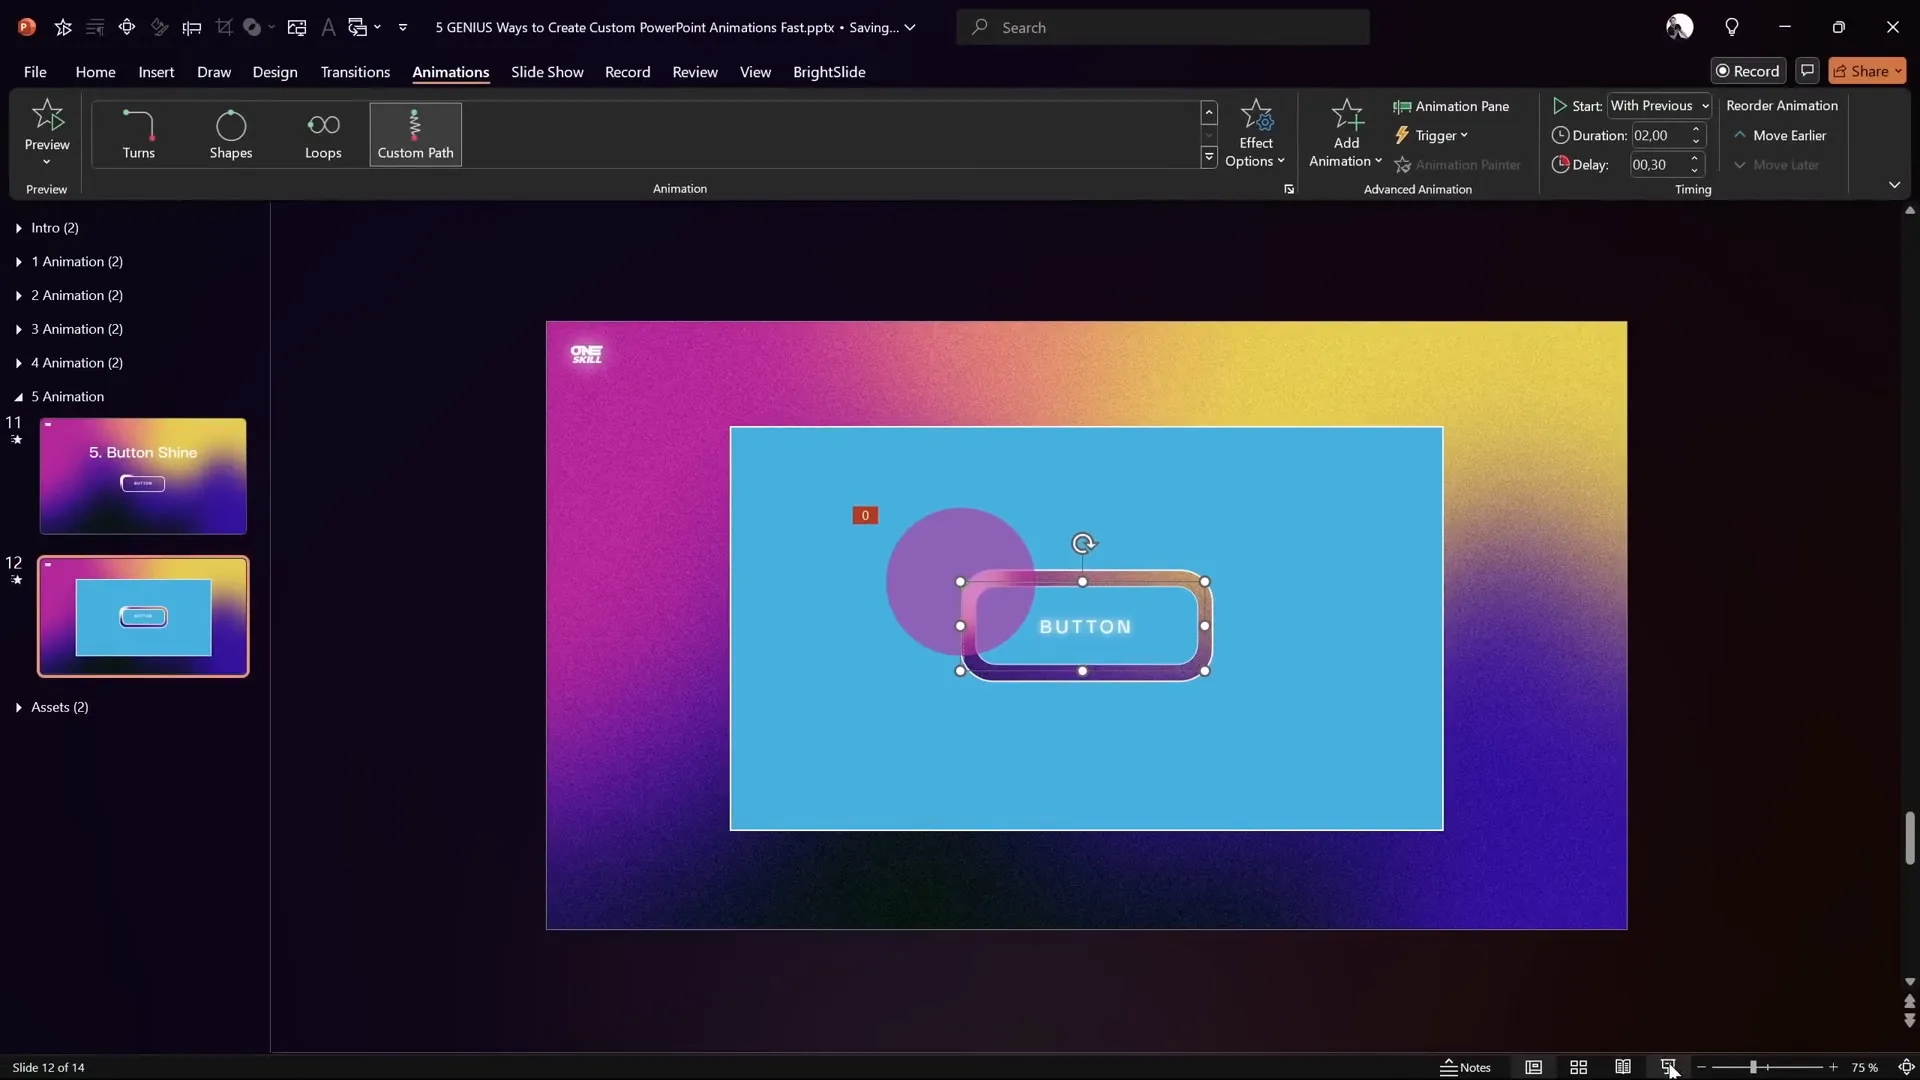
- Prepare your shapes: Insert a rounded rectangle button and several small circles that will act as highlights.
- Duplicate the button: Create a duplicate of the button, remove text, change fill color (darker), enlarge slightly, and send to back behind the original button.
- Create mask shape: Insert a large rectangle covering both buttons, send it to back, then select it and the dark button, use Merge Shapes > Subtract to punch a hole in the rectangle matching the button shape.
- Arrange circles: Name circles (e.g., Oval 1, Oval 2, Oval 3, Oval 4), position them overlapping the button edges where you want highlights.
- Animate first circle:
- Add a Custom Motion Path that loops around the button’s perimeter (click points around the button to create a closed path).
- Set animation duration to 2 seconds, start With Previous, repeat Until End of Slide, and remove smooth start/end.
- Remove transparency and send the circle behind all shapes.
- Add soft edges: To all circles, apply 30 points of soft edges to create a glowing effect.
- Copy animation to other circles: Use Animation Painter to paste the same motion path animation to the other circles.
- Align circles: Position all circles precisely on top of each other for a neat trail effect.
- Add animation delay: Stagger the animations by adding delays: 0.1s for second circle, 0.2s for third, 0.3s for fourth, creating a trailing shine.
- Apply slide background fill: Set the fill of the button shapes to Slide Background Fill so that the shine blends naturally with the slide.
- Remove outlines: Remove lines from the mask shape for a clean look.
- Preview: Run the slide show to see a colorful, looping highlight that makes your button shine dynamically.
Tips for Button Shine Effect
- Use multiple colors for circles to create a vibrant shine.
- Adjust motion path points to customize the shine trajectory.
- Change animation speed and delay for different pacing effects.
- Perfect for interactive presentations or to highlight clickable areas.
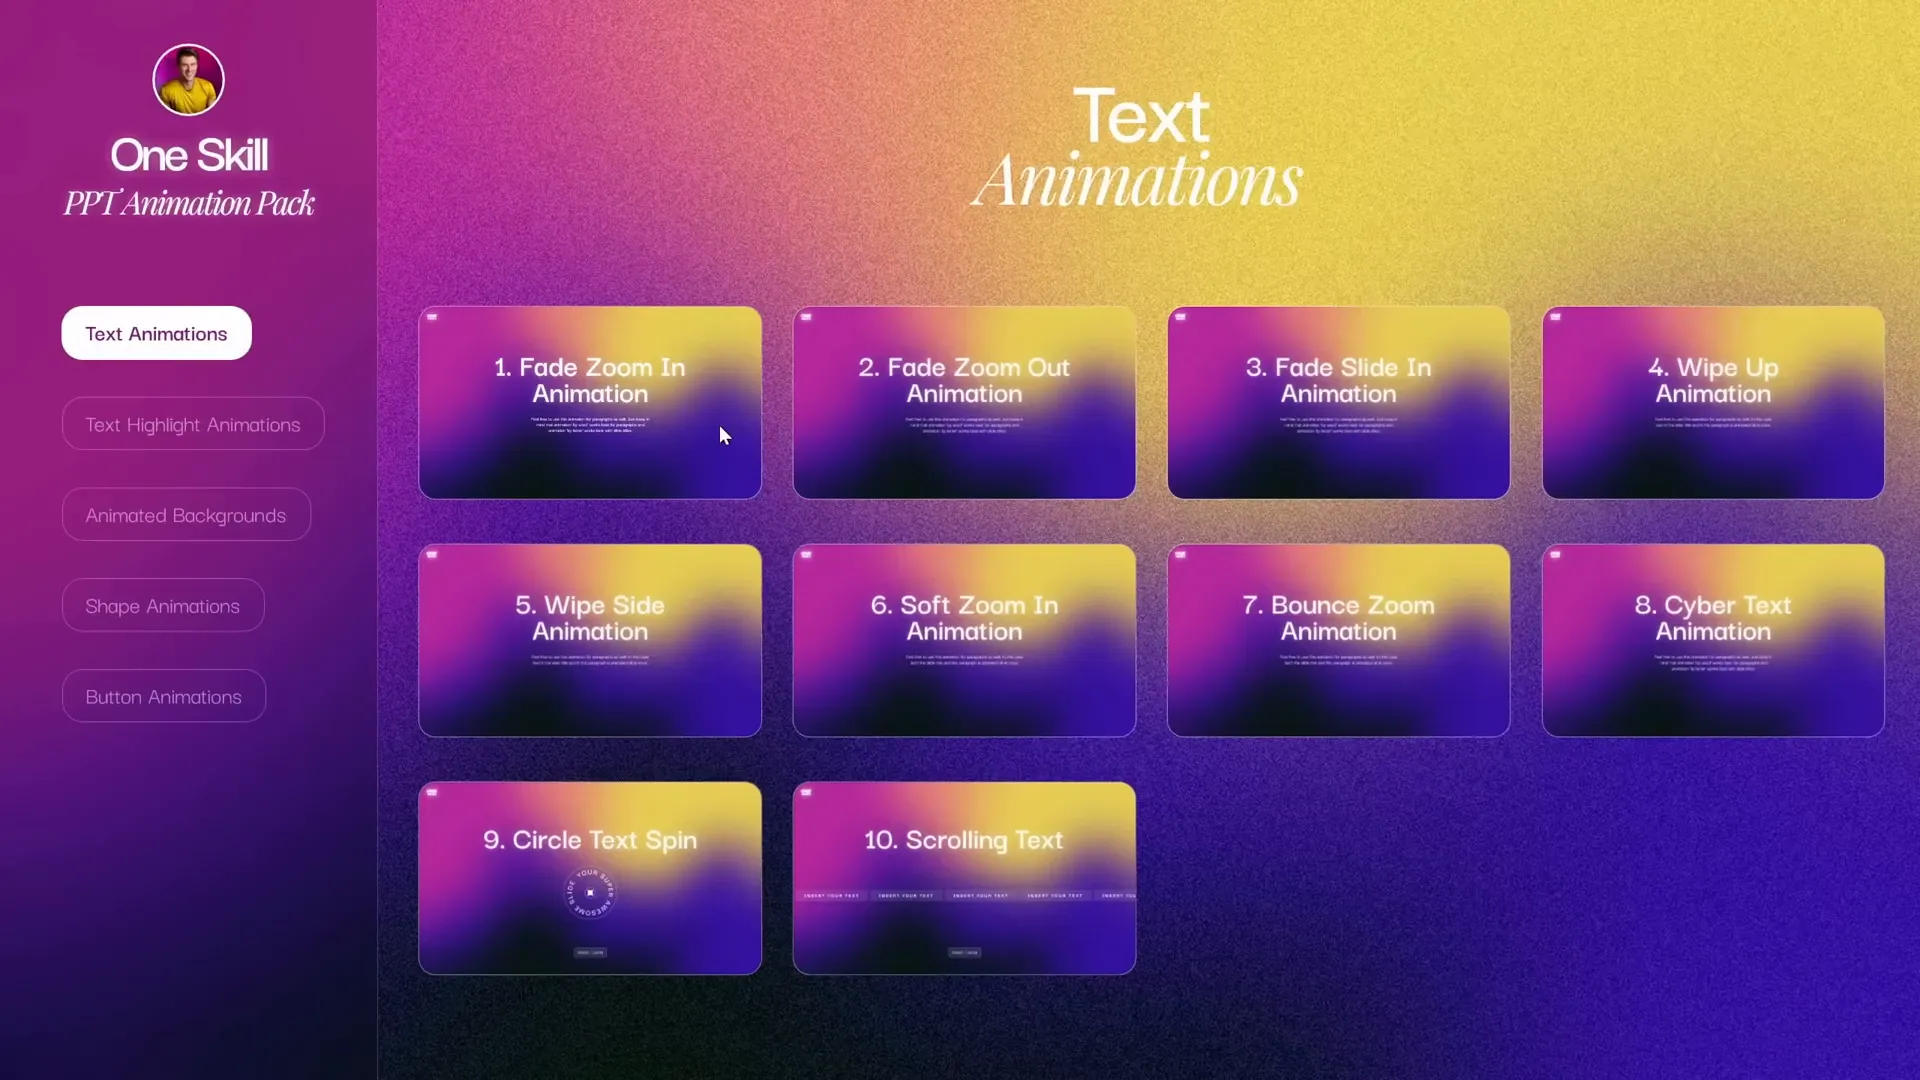
PowerPoint Animation Pack: Your Personal Animation Library
All five of these fantastic custom animations, along with many more, are included in the PowerPoint Animation Pack by One Skill PPT. This pack is a comprehensive collection of ready-made animations that you can quickly apply to your presentations, saving you time and ensuring professional results.
Here’s what you’ll find in the pack:
| Animation Category | Description |
|---|---|
| Text Animations | Creative text entrances, emphasis, and transitions. |
| Text Highlight Animations | Subtle highlights and glowing text effects. |
| Animated Backgrounds | Looping and dynamic backgrounds like grids and parallax. |
| Shape Animations | Custom shape motions and effects for visual interest. |
| Button Animations | Interactive button shines and highlights. |
The animation pack is available on the creator’s Patreon page, especially for the “Superhero” membership level. Patreon operates on a subscription basis, but you can cancel anytime. Staying subscribed grants you access to all updates and new animations added over time.
Subscribers also gain access to many additional PowerPoint templates and resources, making this an excellent value for anyone who frequently creates presentations.
Using the animation pack is straightforward:
- Copy animated text boxes or shapes and paste them into your presentation.
- Use the Animation Painter to quickly copy animation settings between slides or objects.
- Customize colors, sizes, and timings to fit your design needs.
Having a personal animation library like this can significantly speed up your workflow and improve the quality of your presentations.
Frequently Asked Questions (FAQ)
What are some simple yet effective PowerPoint animation ideas for beginners?
Start with animations like the Cyber Text Animation where letters animate sequentially, or simple motion paths for images. These are easy to set up but add a professional touch to your slides.
Can I create looping animations in PowerPoint?
Yes! Animations like the Scrolling Grid and Floating Images use settings like “Repeat Until End of Slide” to loop infinitely, giving continuous motion effects.
How can I make my animations look smooth and professional?
Adjusting animation options such as removing smooth start and smooth end can create consistent speeds. Using auto-reverse and soft edges also helps animations flow naturally.
Is it possible to animate backgrounds in PowerPoint?
Absolutely. The Scrolling Grid and Horizon Parallax animations are examples of animated backgrounds that add depth without distracting from content.
Where can I find ready-made PowerPoint animations?
The PowerPoint Animation Pack by One Skill PPT offers a great collection of custom animations that are easy to apply and customize. It’s available on Patreon for subscribers.
Can I use these animation techniques on any version of PowerPoint?
Most custom animations work on recent versions of PowerPoint (2016 and later). Some advanced features might not be available on older versions or PowerPoint Online.
How do I copy animations from one object to another?
Use the Animation Painter tool in PowerPoint. Select the animated object, click the Animation Painter, then click the object you want to apply the animation to.
Will animations work when I export my presentation as a PDF?
No. PDF files do not support animations. To preserve animations, present your slides directly in PowerPoint or export as a video.
How can I ensure animations don’t distract from my message?
Use animations sparingly and purposefully. Choose subtle effects that support your content rather than overwhelm it. Avoid excessive or flashy animations.
Are there any tips for timing animations effectively?
Set animations to start automatically with or after previous animations to maintain flow. Use delays to stagger animations for smooth transitions and avoid abrupt changes.
Conclusion
Mastering PowerPoint animation ideas can dramatically enhance your presentations, making them more engaging, dynamic, and memorable. The five custom animation techniques covered here—the Cyber Text Animation, Scrolling Grid, Floating Images, Horizon Parallax, and Button Shine Effect—offer a diverse toolkit to bring your slides to life.
Each animation is designed to be easy to create yet visually impressive, suitable for a wide range of presentation styles and topics. Plus, with the PowerPoint Animation Pack, you can save time by accessing a library of ready-made animations tailored for professional results.
Remember, the key to great animations is not just flashy effects but thoughtful use that supports your message and keeps your audience focused. Experiment with these ideas, customize them to your style, and watch your presentations transform.
Happy animating!


