If you’re passionate about PowerPoint animation and want to create engaging, interactive presentations that stand out, this tutorial is tailor-made for you. In this comprehensive guide, we’ll walk you through how to create a stunning, interactive taxi door animation in PowerPoint that opens and closes on click — complete with sound effects and smooth spin animations. This step-by-step tutorial leverages animation triggers, custom rotation centers, and smart shape manipulation to bring your slides to life like never before.
Whether you’re a PowerPoint beginner or an animation enthusiast, this tutorial will empower you to add professional-level interactivity to your presentations. So, buckle up and let’s drive into the world of advanced PowerPoint animations!
Table of Contents
- Getting the Taxi Illustration
- Preparing the Taxi Image in Photopea
- Inserting and Positioning the Taxi in PowerPoint
- Cutting Out the Doors Using Freeform Shapes
- Merging Shapes and Creating the Taxi Interior
- Extracting Individual Doors
- Setting New Rotation Centers for Doors
- Naming Doors and Organizing Slides
- Adding Animations to Doors
- Fixing Animation Directions for Right-side Doors
- Adding Door Opening and Closing Sounds
- Final Touches and Extra Scenes
- Frequently Asked Questions
- Conclusion
Getting the Taxi Illustration
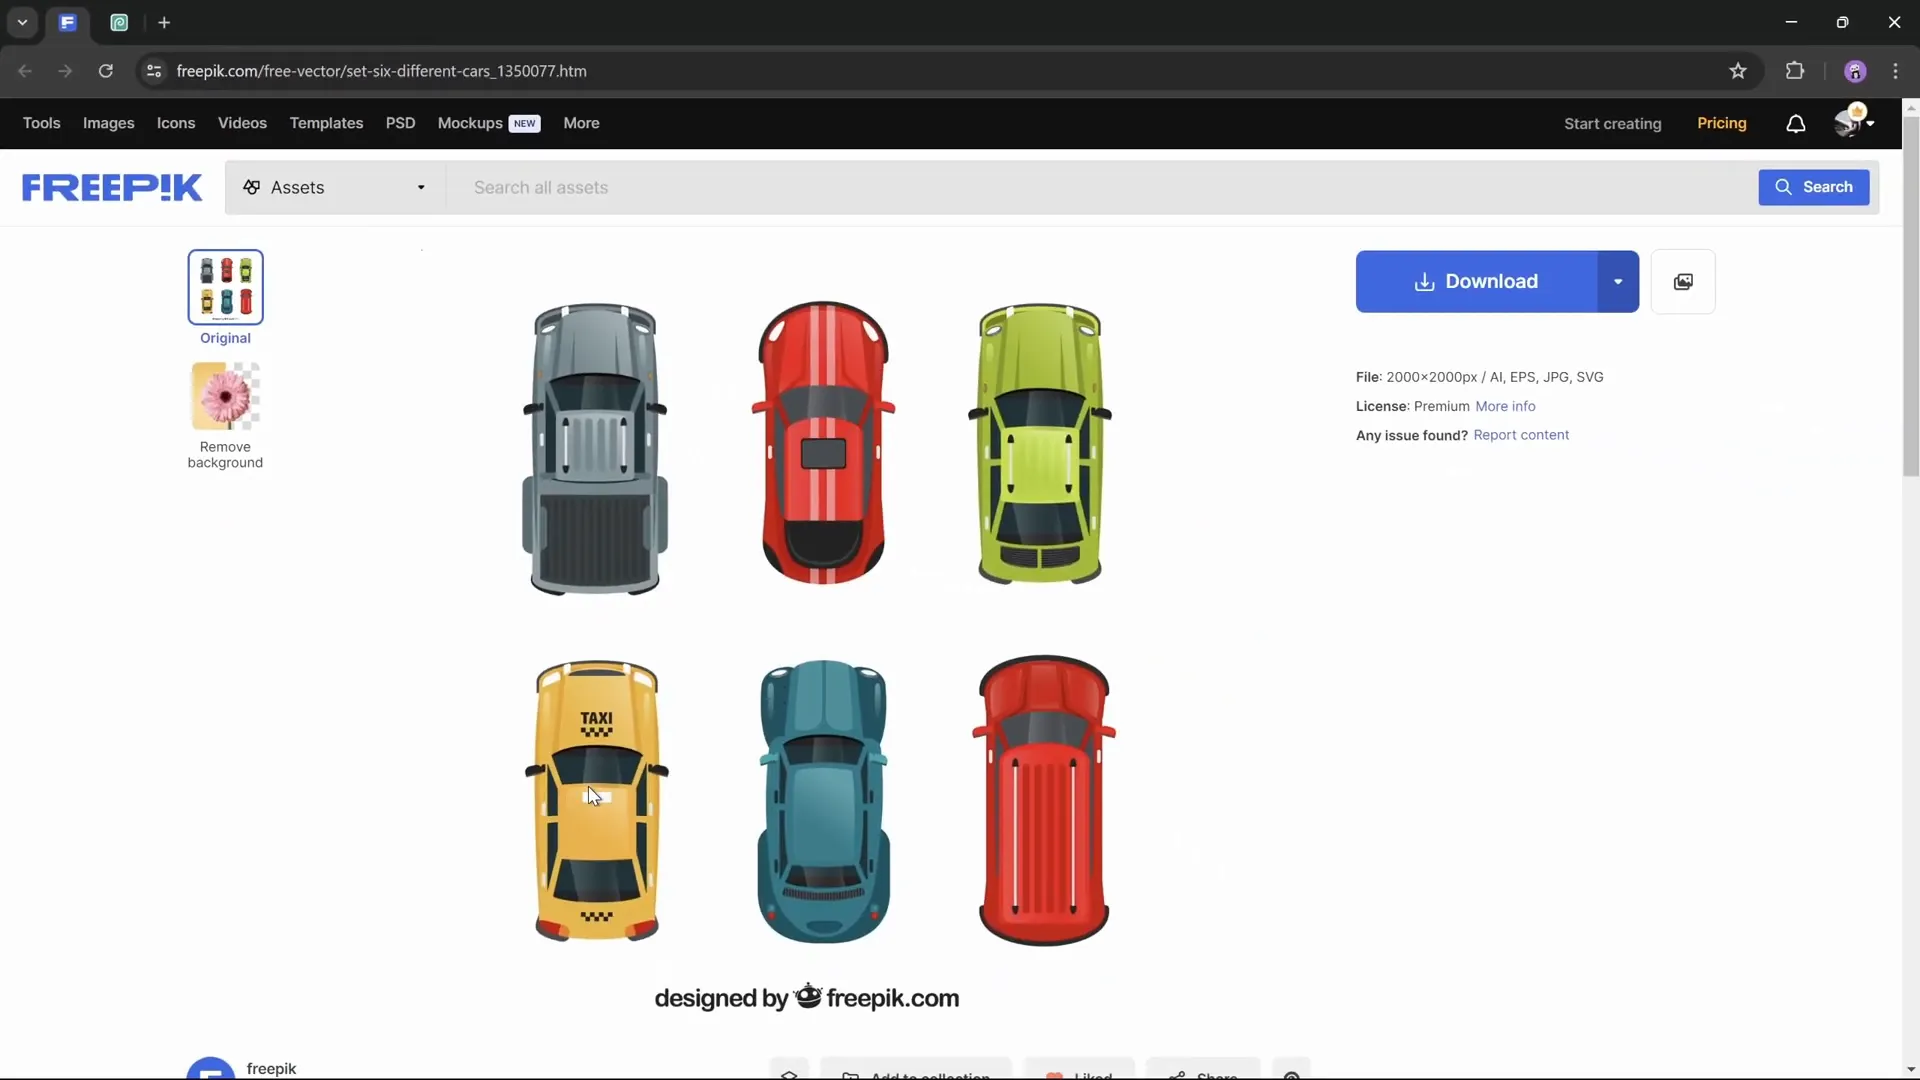
To start, you’ll need a high-quality taxi car illustration that you can animate. The best place to find such illustrations is Freepik, a popular resource for free and premium vector graphics.
Here’s how to get the taxi illustration:
- Go to freepik.com and search for “set of six different cars.”
- Among the six cars displayed, select the taxi illustration.
- Click the blue download button, then click the small arrow next to it to choose the file format.
- Instead of JPEG, select the AI (Adobe Illustrator) file format for higher quality and better editing capabilities.
- Download the AI file to your computer.
Choosing the AI format is essential because it preserves vector quality, allowing you to scale the taxi image without losing resolution — a key factor for crisp animations.
Preparing the Taxi Image in Photopea
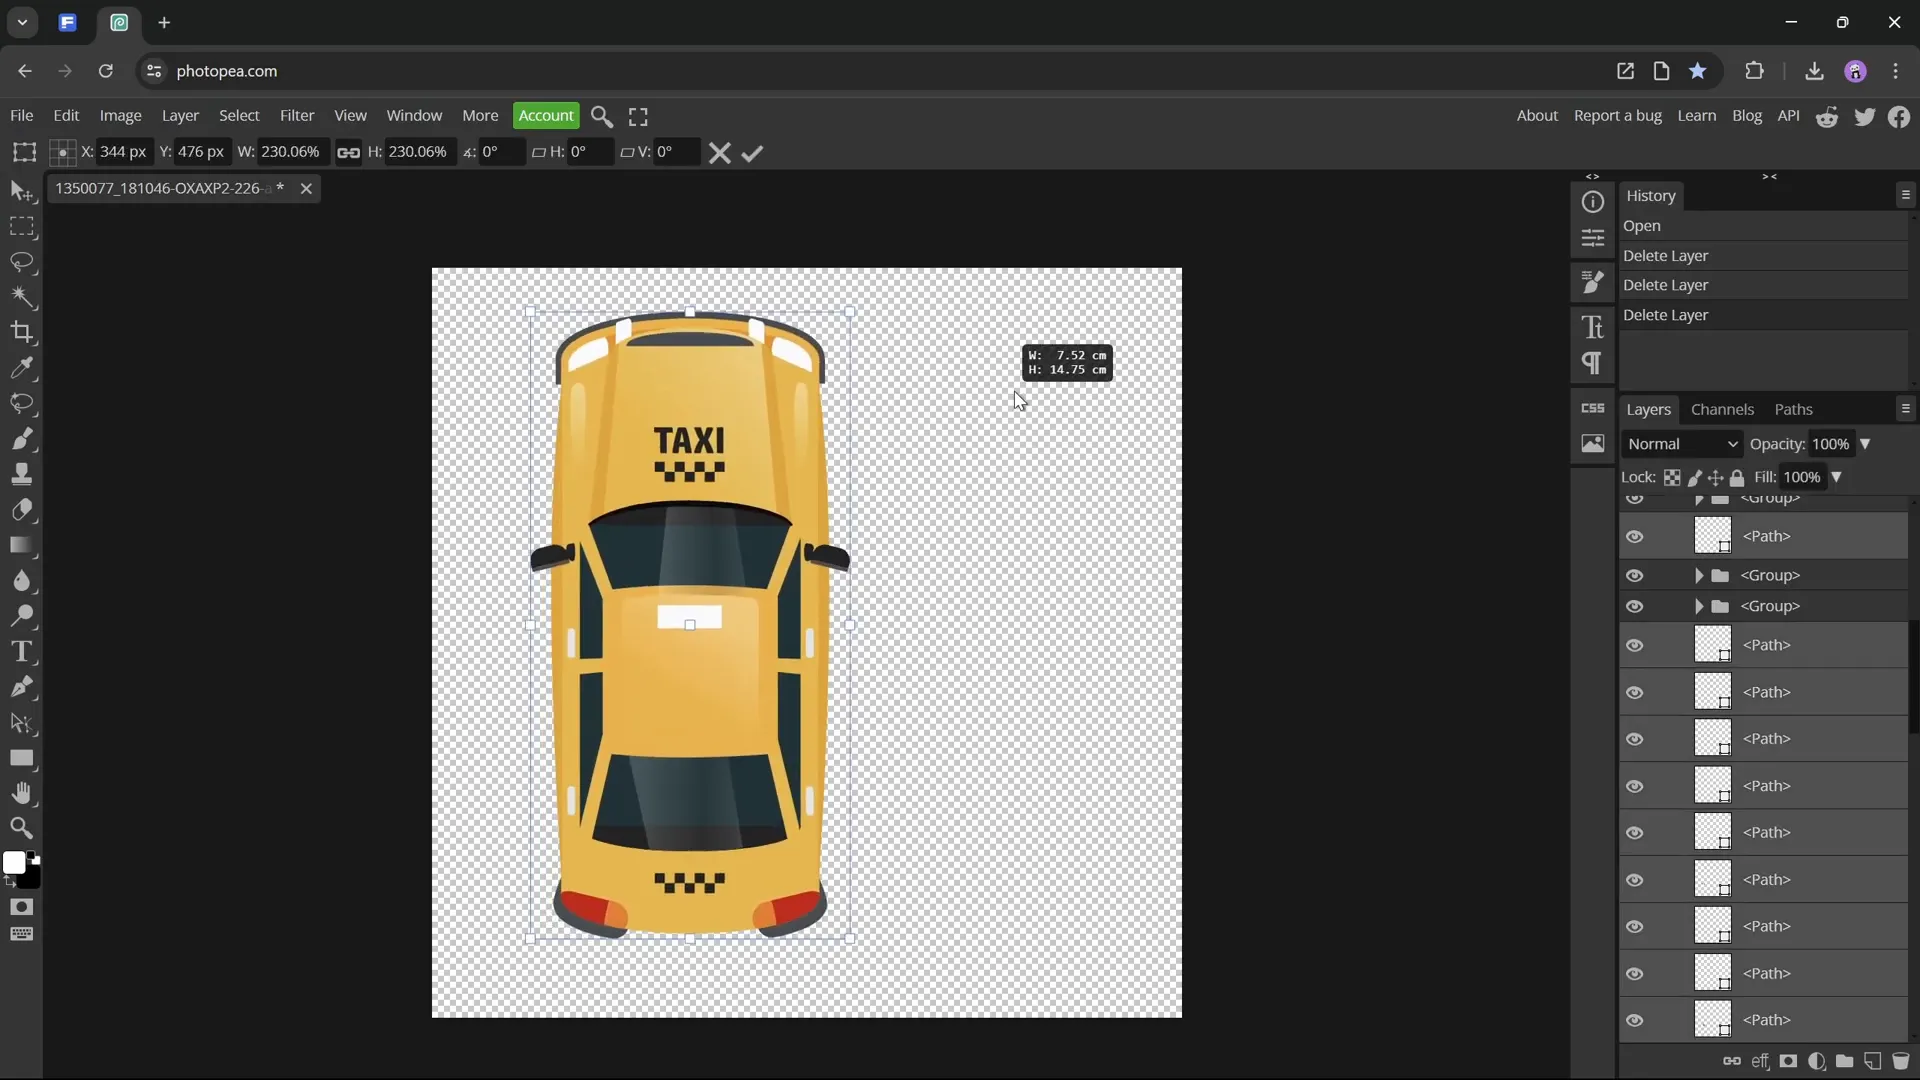
Next, you need to isolate the taxi from the other cars in the AI file. For this, we will use Photopea, a free online photo editor that supports AI files.
Follow these steps to extract only the taxi illustration:
- Open Photopea in your browser.
- Drag and drop the downloaded AI file into Photopea.
- Use the selection tools to select all other cars except the taxi and delete them.
- Select all elements of the taxi illustration, then increase the image size by scaling it up. This enhances the quality.
- Go to the Image menu and choose Trim Image to remove the empty space around the taxi.
- Export the taxi as a PNG file by selecting File → Export As → PNG.
- Save the PNG file with your preferred name.
This process leaves you with a clean, high-quality PNG image of the taxi, ready to insert into PowerPoint.
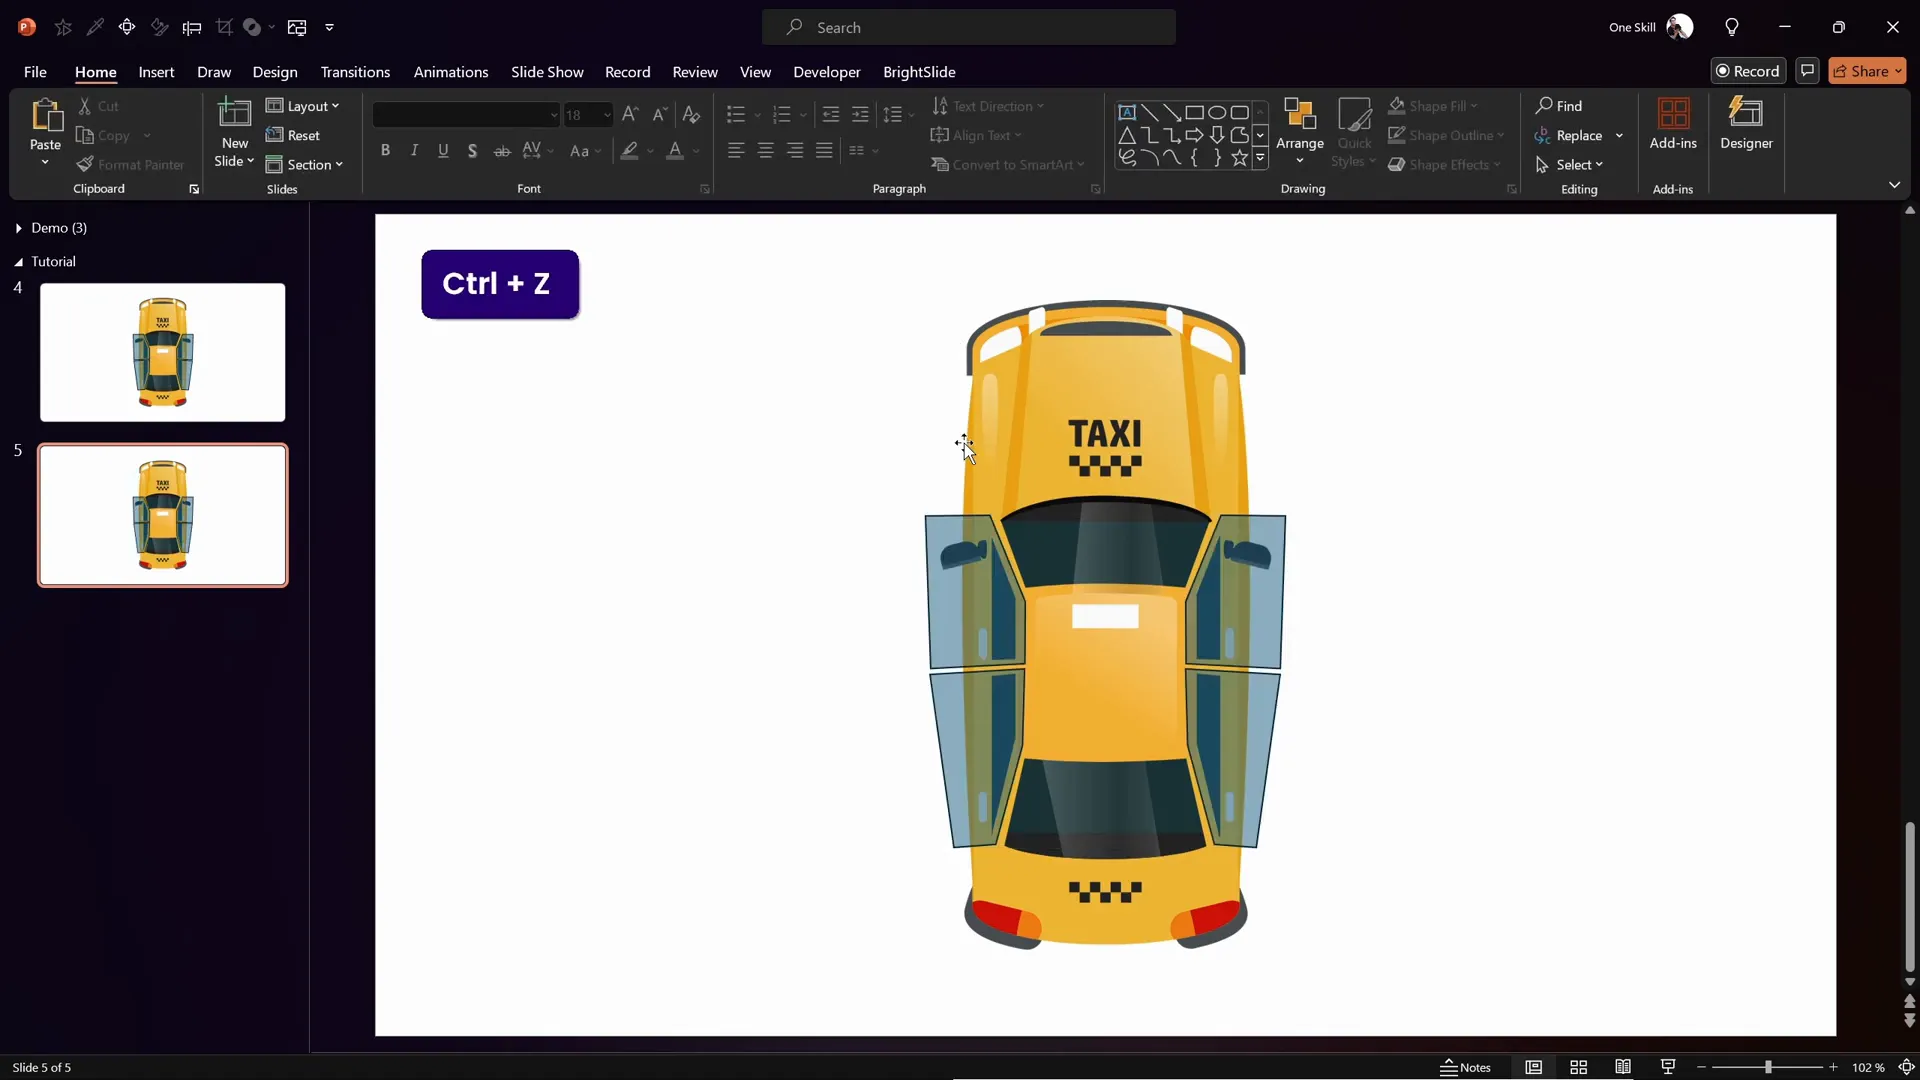
Inserting and Positioning the Taxi in PowerPoint
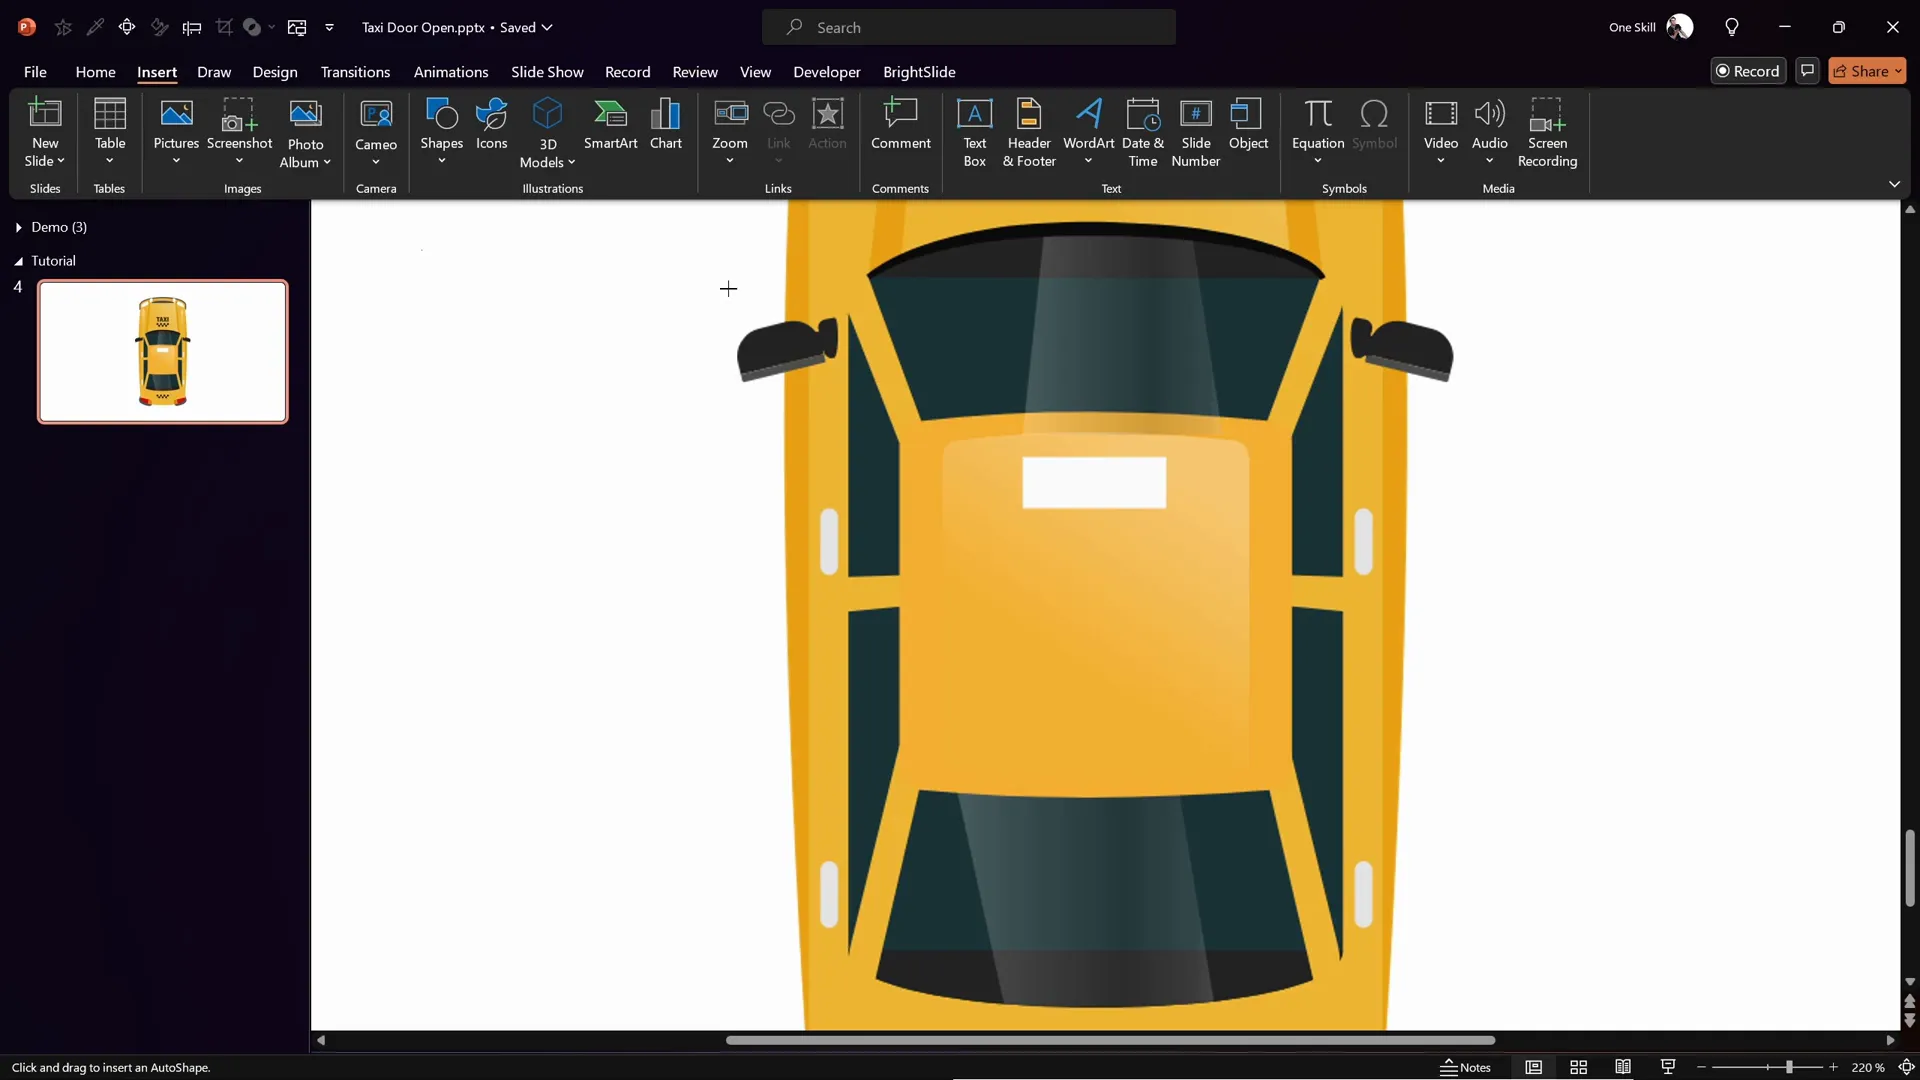
Now it’s time to import the taxi image into PowerPoint and set it up for animation.
- Open PowerPoint and insert a new blank slide.
- Insert the PNG taxi image by clicking Insert → Pictures → This Device and selecting the exported PNG.
- Resize the taxi to fit well on the slide, ensuring it’s centered.
- Make sure the taxi is placed precisely in the center of the slide’s light background or designated area.
Proper positioning is crucial because all animations and rotations will be relative to this setup.

Cutting Out the Doors Using Freeform Shapes
To animate the taxi doors opening and closing, you first need to isolate the doors by cutting them out from the taxi illustration. PowerPoint’s Freeform Shape Tool is perfect for this task.
Here’s how to cut out the doors:
- Zoom into the taxi image so you can clearly see the doors.
- Go to Insert → Shapes → Freeform Shape and select the tool.
- Draw a custom shape around the front left door by clicking points along the door’s outline. Slightly go beyond the door edges to include the side mirror.
- Close the shape by clicking back on the starting point.
- Set the shape’s transparency to 50% so you can see the taxi underneath for precise adjustments.
- Duplicate this shape by holding Ctrl + Shift and flip it horizontally to create the front right door shape, then position it accordingly.
- Repeat the process for the two rear doors at the bottom side of the taxi.
- If needed, right-click on a shape and select Edit Points to adjust the shape for a perfect fit.
By the end of this, you will have four custom shapes covering all four doors of the taxi.
Merging Shapes and Creating the Taxi Interior
Next, we will merge these door shapes and subtract them from the taxi image to “cut out” the doors, then add an interior to the taxi to fill the empty space.
Follow these steps:
- Duplicate the slide with the taxi and door shapes to keep a backup.
- Select all four door shapes by holding Shift and clicking each.
- Go to Shape Format → Merge Shapes → Union to combine them into one shape.
- Select the taxi image first, then hold Shift and select the merged door shape.
- Go to Shape Format → Merge Shapes → Subtract to remove the doors from the taxi.
- Insert a rectangle behind the taxi (Insert → Shapes → Rectangle) to act as the taxi’s interior.
- Send the rectangle to back (Right-click → Send to Back) and fill it with colors that simulate the interior for a realistic look.
Now the taxi appears without doors, with a colored interior showing through the door spaces.
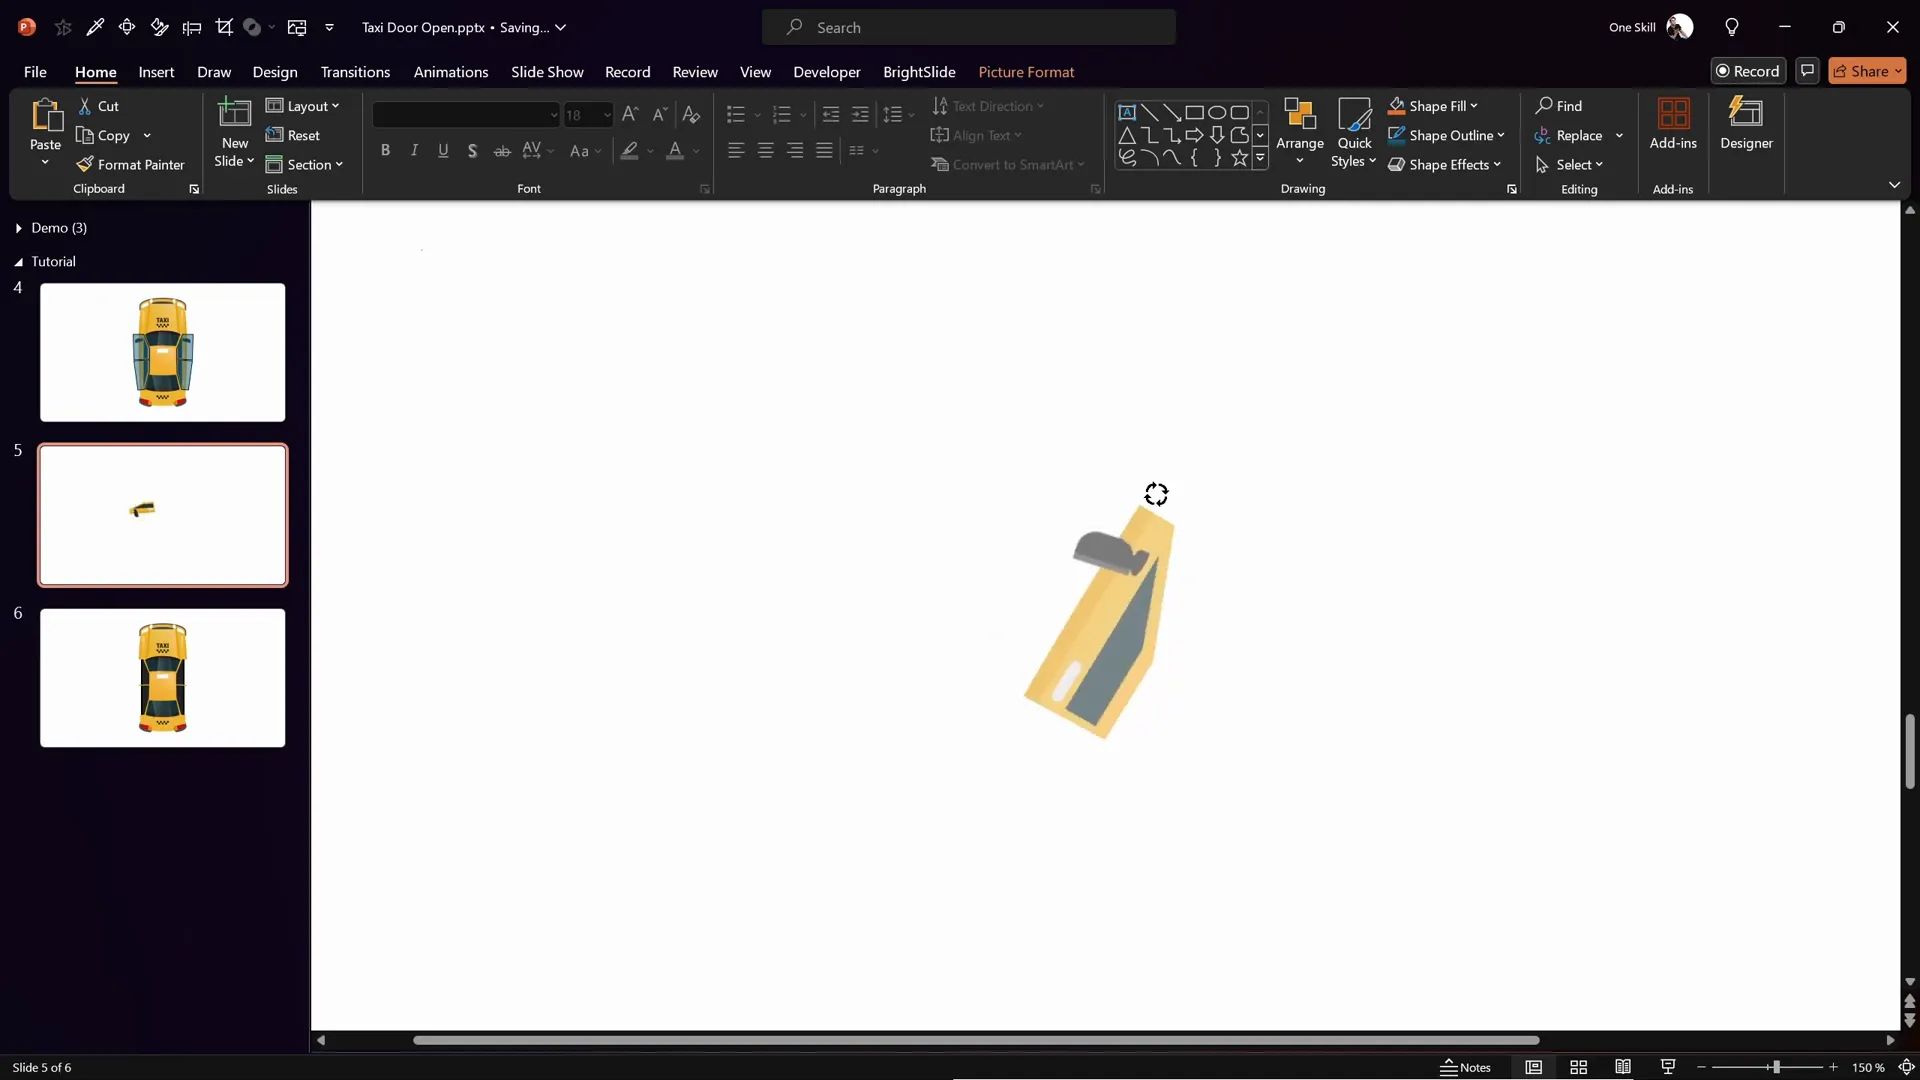
Extracting Individual Doors
To animate the doors independently, you need to extract each door as a separate object.
Here’s how to extract a single door:
- Duplicate the backup slide with all door shapes.
- Delete all door shapes except the one you want to extract.
- Select the taxi image, then hold Shift and select the single door shape.
- Go to Shape Format → Merge Shapes → Intersect. This creates a new shape of just that door.
Repeat this process for all four doors, so you have four separate door shapes extracted from the taxi.
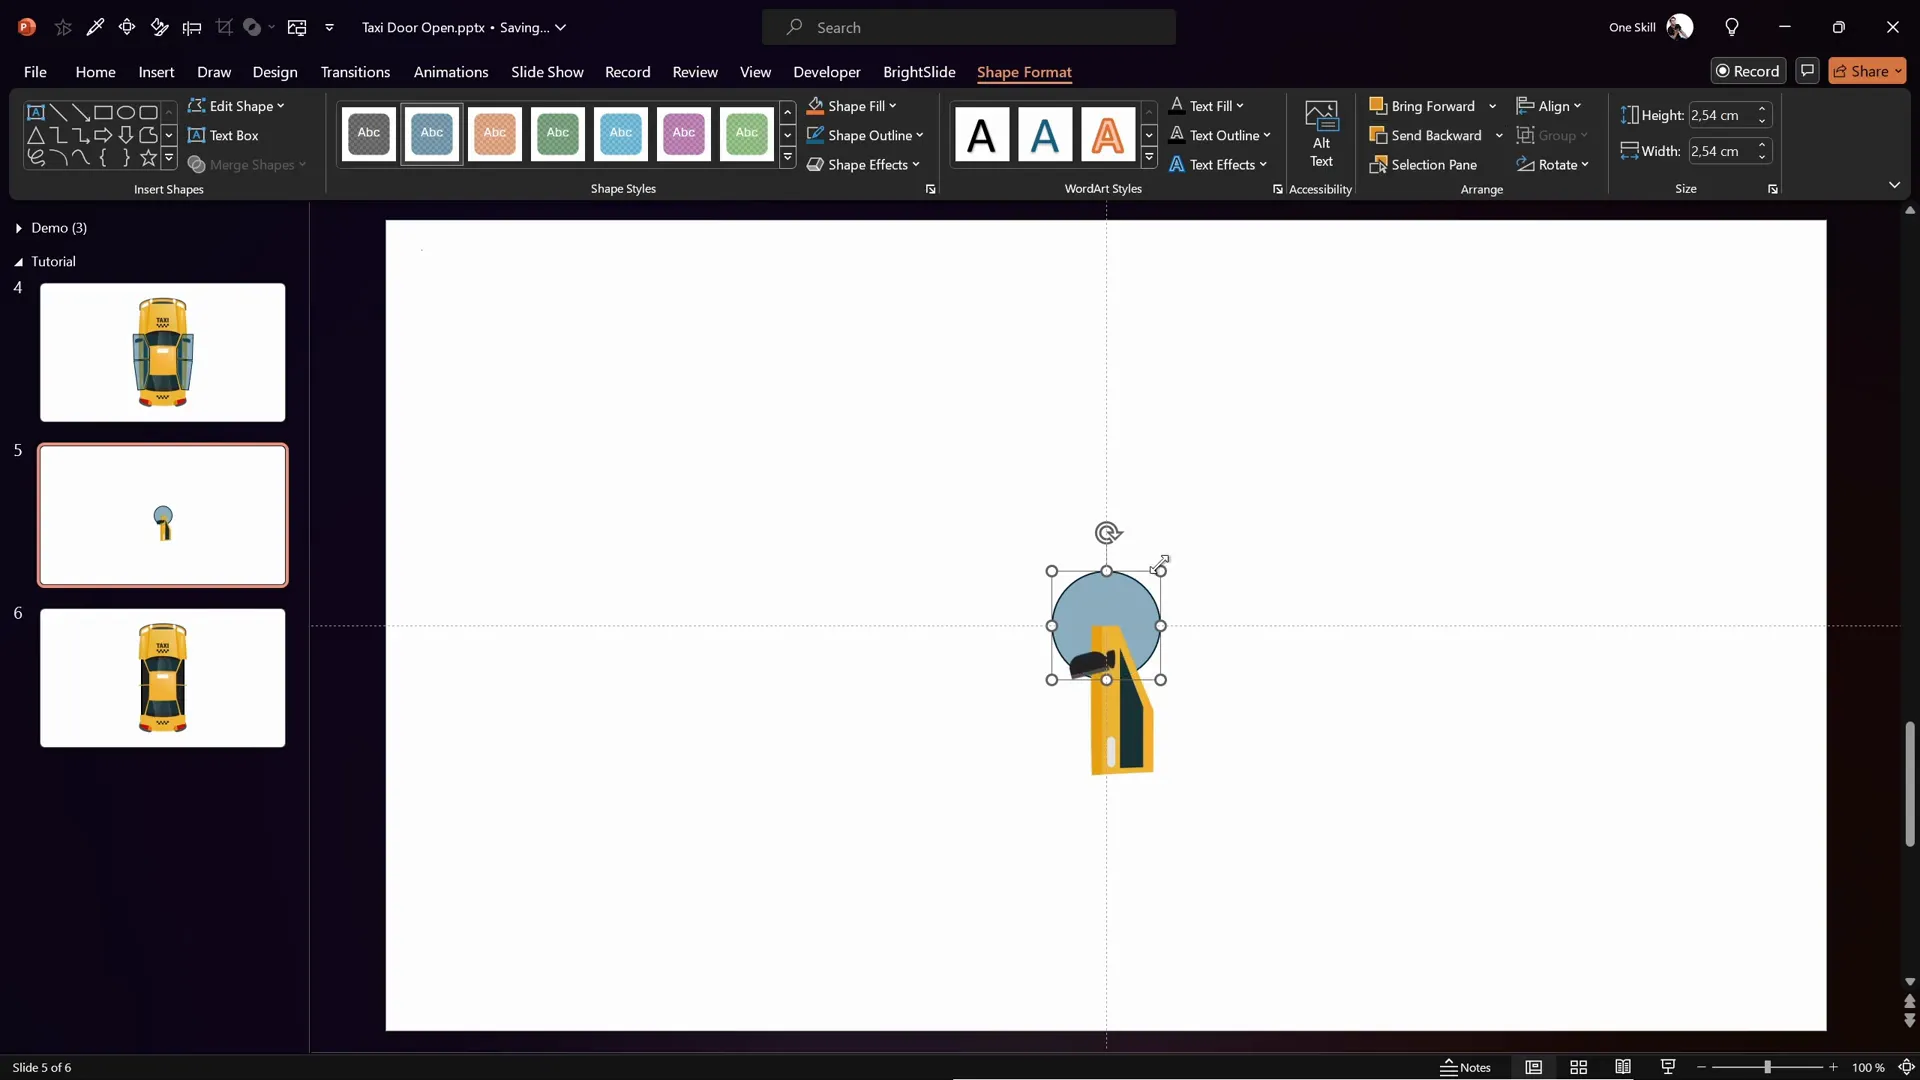
Setting New Rotation Centers for Doors
By default, rotating these doors spins them around their center, but to mimic real door movement, you need to set a custom rotation point at the top hinges of each door.
Here’s the step-by-step process:
- Go to the View tab and enable Slide Guides to help with alignment.
- Position the extracted door so that the top of the door aligns with where you want the new rotation center.
- Insert a large circle shape (Insert → Shapes → Oval) that is bigger than the door.
- Center the circle on the slide and send it to back.
- Make the circle fully transparent by setting its fill transparency to 100% and removing the outline.
- Select both the circle and the door shape, right-click, and choose Group to combine them.
- This grouped object now rotates around the center of the circle, effectively creating a new rotation center at the door hinge.
- Fine-tune the door position using arrow keys so it aligns perfectly.
- Make sure the circle outline is set to no line to keep it invisible during animation.
Repeat this process for all four doors to set proper rotation centers for each.
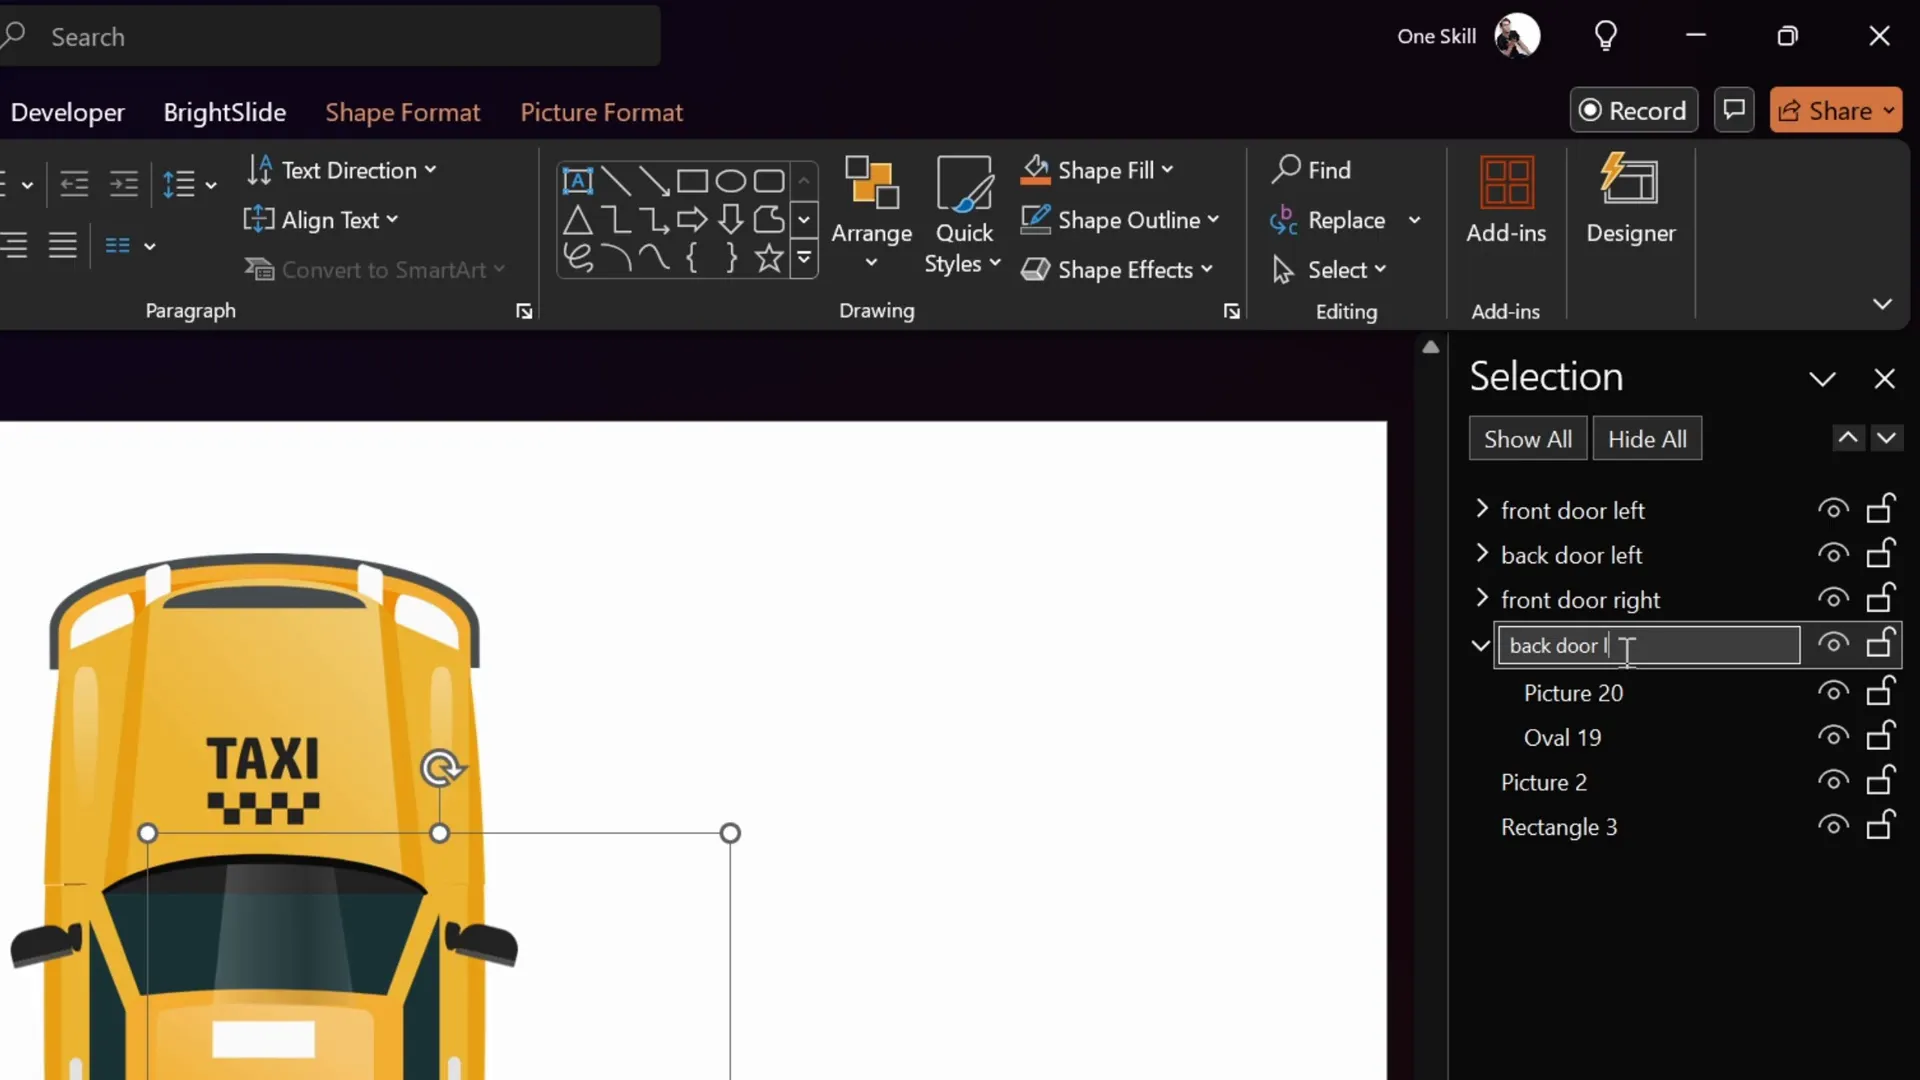
Naming Doors and Organizing Slides
Proper naming of door groups helps manage animations later on.
- Open the Selection Pane (Home → Select → Selection Pane).
- Rename each door group with clear, descriptive names like “Front Left Door,” “Front Right Door,” etc.
- Check the visibility icons (eye icons) to ensure the groups are named and organized correctly.
- Organize your slides by creating sections. For example, add a section named “Animation” to group related slides.
Organizing your workspace this way streamlines the animation process and makes your presentation easier to manage.
Adding Animations to Doors
Now comes the exciting part — animating the doors to open and close interactively using spin animations and triggers.
Here’s how to add door animations:
- Select the Front Left Door group.
- Go to the Animations tab and open the Animation Pane.
- Add a Spin animation to the door.
- Set the animation duration to 1 second.
- Double-click the animation in the pane to open options:
- Set spin amount to 90 degrees.
- Set spin direction to Clockwise.
- Add a Bounce effect with duration 0.8 seconds for a natural feel.
- Add a second spin animation to allow the door to close:
- Set duration to 0.5 seconds.
- Set spin amount to 90 degrees.
- Set spin direction to Counterclockwise.
- Add Smooth Start and Smooth End effects, each 0.25 seconds.
- Set both animations to trigger on clicking the door itself:
- Click on the animation → Trigger → On Click of → Front Left Door.
- Add a Fade slide transition to the slide for smooth entry.
- Preview the slide in full screen to test door open/close on clicks.
Clicking the door once opens it with a spin and bounce; clicking again closes it smoothly. This interactive effect is engaging and professional.

Fixing Animation Directions for Right-side Doors
When you duplicate animations using the Animation Painter for other doors, the right-side doors may open inward (like a Lamborghini) due to identical spin directions.
To fix this:
- Select each right-side door.
- Change the first spin animation direction to Counterclockwise.
- Change the second spin animation direction to Clockwise.
- Repeat for all right-side doors.
- Preview the animation to ensure all doors open outward correctly.
This simple adjustment makes the animation realistic and visually pleasing.

Adding Door Opening and Closing Sounds
To enhance the animation experience, adding door opening and closing sound effects is a great idea.
Here’s how to add sounds:
- Create a new slide section named “Sounds” to keep things organized.
- Copy and paste the animated slide into this section for sound editing.
- Import two short audio clips: one for door opening and one for door closing.
- Trim audio clips using the Trim Audio feature in PowerPoint to select the desired sound portion.
- Delete any existing sound animations to start fresh.
- Select both audio clips and add the Play Sound animation.
- For the opening sound:
- Place the play animation just below the door’s first spin animation.
- Set it to start With Previous to play simultaneously with the door opening.
- For the closing sound:
- Place the play animation just below the door’s second spin animation.
- Add an animation delay of 0.15 seconds so the sound syncs with the door closing.
- Repeat adding sound animations for all four doors (eight animations total for sounds).
- Ensure all sounds are properly timed and triggered with the respective door animations.
The sound effects add realism and make your PowerPoint animation truly immersive.

Final Touches and Extra Scenes
In the original project, the author also included additional scenes like the taxi arriving and driving away to make the presentation even more dynamic.
These extra scenes can be added as separate slides with entrance and exit animations, enhancing storytelling within your PowerPoint.
Also, the tutorial slides are included in the PowerPoint Animation Mastery course, allowing students to access the fully editable files for free.

Frequently Asked Questions
1. What software do I need to create this taxi door animation?
You mainly need Microsoft PowerPoint for the animation part. For preparing the taxi illustration, a free online editor like Photopea is used to edit and export the taxi image.
2. Can I use other car illustrations for this animation?
Yes, you can use any vector car illustration, but ensure it’s high quality and editable. The steps remain similar for isolating and animating the doors.
3. How do I create custom rotation points in PowerPoint?
PowerPoint doesn’t allow setting rotation points directly, but you can simulate this by grouping the object with a transparent shape positioned at the desired rotation center, then rotating the group.
4. Are sound effects necessary for the animation?
Sound effects are optional but highly recommended to add realism and engagement to the animation. Free sounds can be sourced from sites like Pixabay.
5. Can I apply this animation technique to other objects?
Absolutely! This method of isolating parts, setting custom rotation centers, and animating with triggers works for many interactive animations in PowerPoint.
6. Does this work on all versions of PowerPoint?
Most steps work in PowerPoint 2016 and later. Some features like Merge Shapes and animation triggers may vary in older versions.
7. How can I get the tutorial slides?
The tutorial slides are available for free to students enrolled in the PowerPoint Animation Mastery course.
Conclusion
Creating interactive animations in PowerPoint, like opening taxi doors, is a fantastic way to captivate your audience and showcase your presentation skills. This tutorial demonstrated how to:
- Source and prepare high-quality illustrations using Freepik and Photopea.
- Use PowerPoint’s Freeform Shape tool to isolate and extract parts of an image.
- Set custom rotation centers to animate objects realistically.
- Add spin animations and use triggers to create interactive open/close effects.
- Enhance animations with synchronized sound effects.
With these skills, you can elevate your PowerPoint presentations into engaging, dynamic experiences that leave a lasting impression. Feel free to experiment with other objects and animations to find creative ways to tell your story.
Thanks for following along! If you try this animation, share your results or ideas in the comments — I’d love to hear how you use this technique to enhance your presentations.
Happy animating!


