
If you want to elevate your PowerPoint presentations and truly captivate your audience, learning how to incorporate interactive animations is a game changer. In this comprehensive guide, we will walk you through a step-by-step tutorial on creating an engaging interactive button animation in PowerPoint that not only looks professional but also adds a dynamic element to your slides.
This tutorial is based on a popular technique demonstrated by One Skill PPT. You’ll learn how to create a clickable button that triggers a photo to pop out and makes decorative stars spin, adding flair and interactivity to your presentation. Whether you’re a beginner or looking to polish your animation skills, this guide is packed with tips, tricks, and best practices for mastering PowerPoint animation.
Table of Contents
- Getting Started with the Template
- Adding a Shadow Effect to Your Button
- Creating the Button Press Animation
- Making the Button Clickable with Animation Triggers
- Launching a Photo with the Button
- Adding Spinning Stars Animation
- Final Testing and Tips
- Frequently Asked Questions
Getting Started with the Template
Before diving into the animation process, it’s helpful to start with a well-designed slide template to save time and focus on the animations themselves. For this tutorial, we’ll use a beautiful PowerPoint template created by Graphiccook, available on Envato. The link is provided in the video description for easy access.
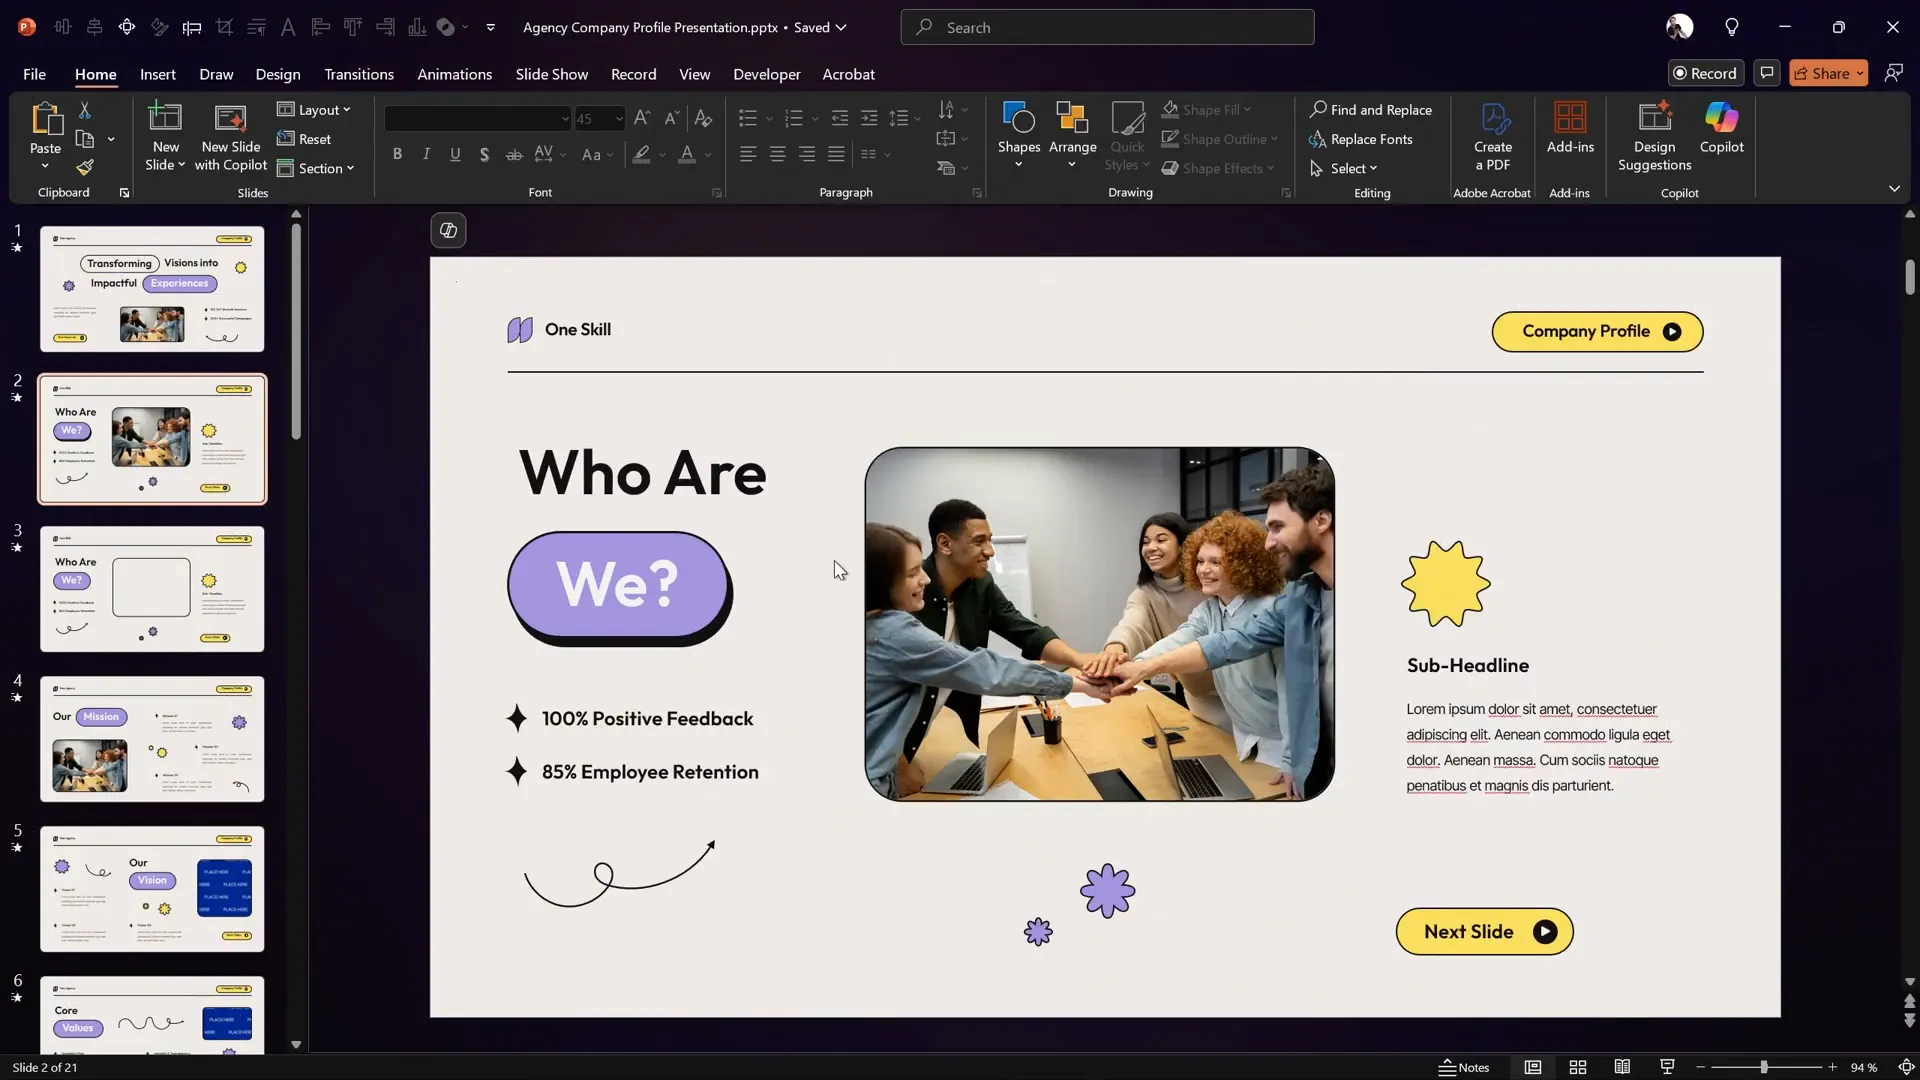
The slide we’ll work on contains a few key elements:
- A rounded rectangle button with text inside
- An image placeholder where a photo will pop out
- Several small star shapes that will spin
These components form the foundation of the interactive animation, and you’ll learn how to animate each part to create a cohesive effect.
Adding a Shadow Effect to Your Button
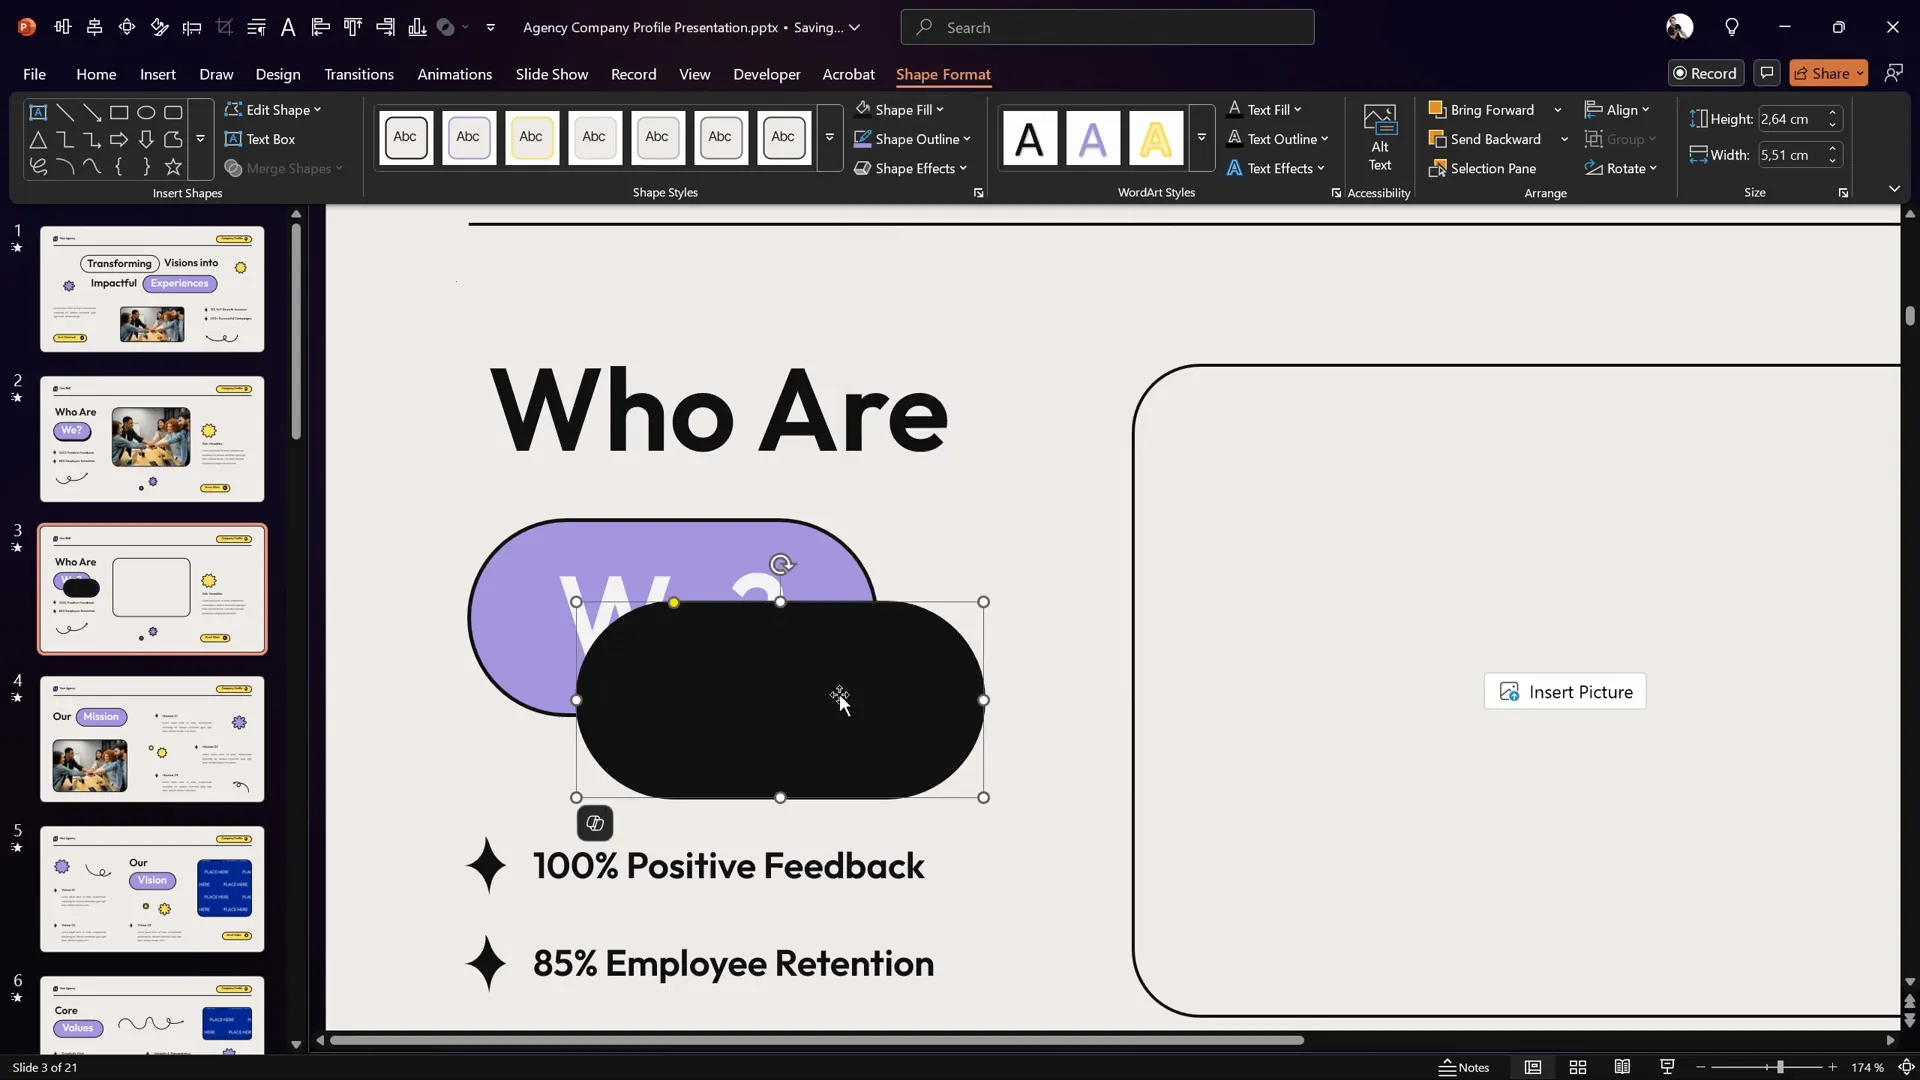
Shadows add depth and realism to any design element, making your button appear more tactile and inviting to click. Instead of using PowerPoint‘s built-in shadow effects, we’ll create a more customizable shadow by duplicating the button itself.
Here’s how to do it step-by-step:
- Select the rounded rectangle button on your slide.
- Zoom in to get a better view of the button for precise editing.
- Press Ctrl + D (or Cmd + D on Mac) to duplicate the button.
- Delete all the text inside the duplicated button since the shadow doesn’t need text.
- Fill the duplicate shape with a solid black color to create the shadow.
- Send the shadow shape to the back by right-clicking and selecting Send to Back.
- Position the shadow shape slightly offset from the original button to simulate a natural shadow.
This method gives you full control over the shadow’s size, color, and position, allowing you to customize the look perfectly for your slide design.
Creating the Button Press Animation
Now that we have a button with a shadow, it’s time to animate it to simulate a button press — a subtle but effective detail that brings interactivity to life.
Follow these steps to create a smooth button press animation using motion paths:
- Select the original rounded rectangle button.
- Go to the Animations tab and click Add Animation.
- Scroll down to Motion Paths and select Line.
- Adjust the red endpoint of the motion path so the button moves precisely on top of the shadow shape, creating a downward press effect.
- If the motion path is very short and the green and red points overlap, redo the step to ensure the animation works properly.
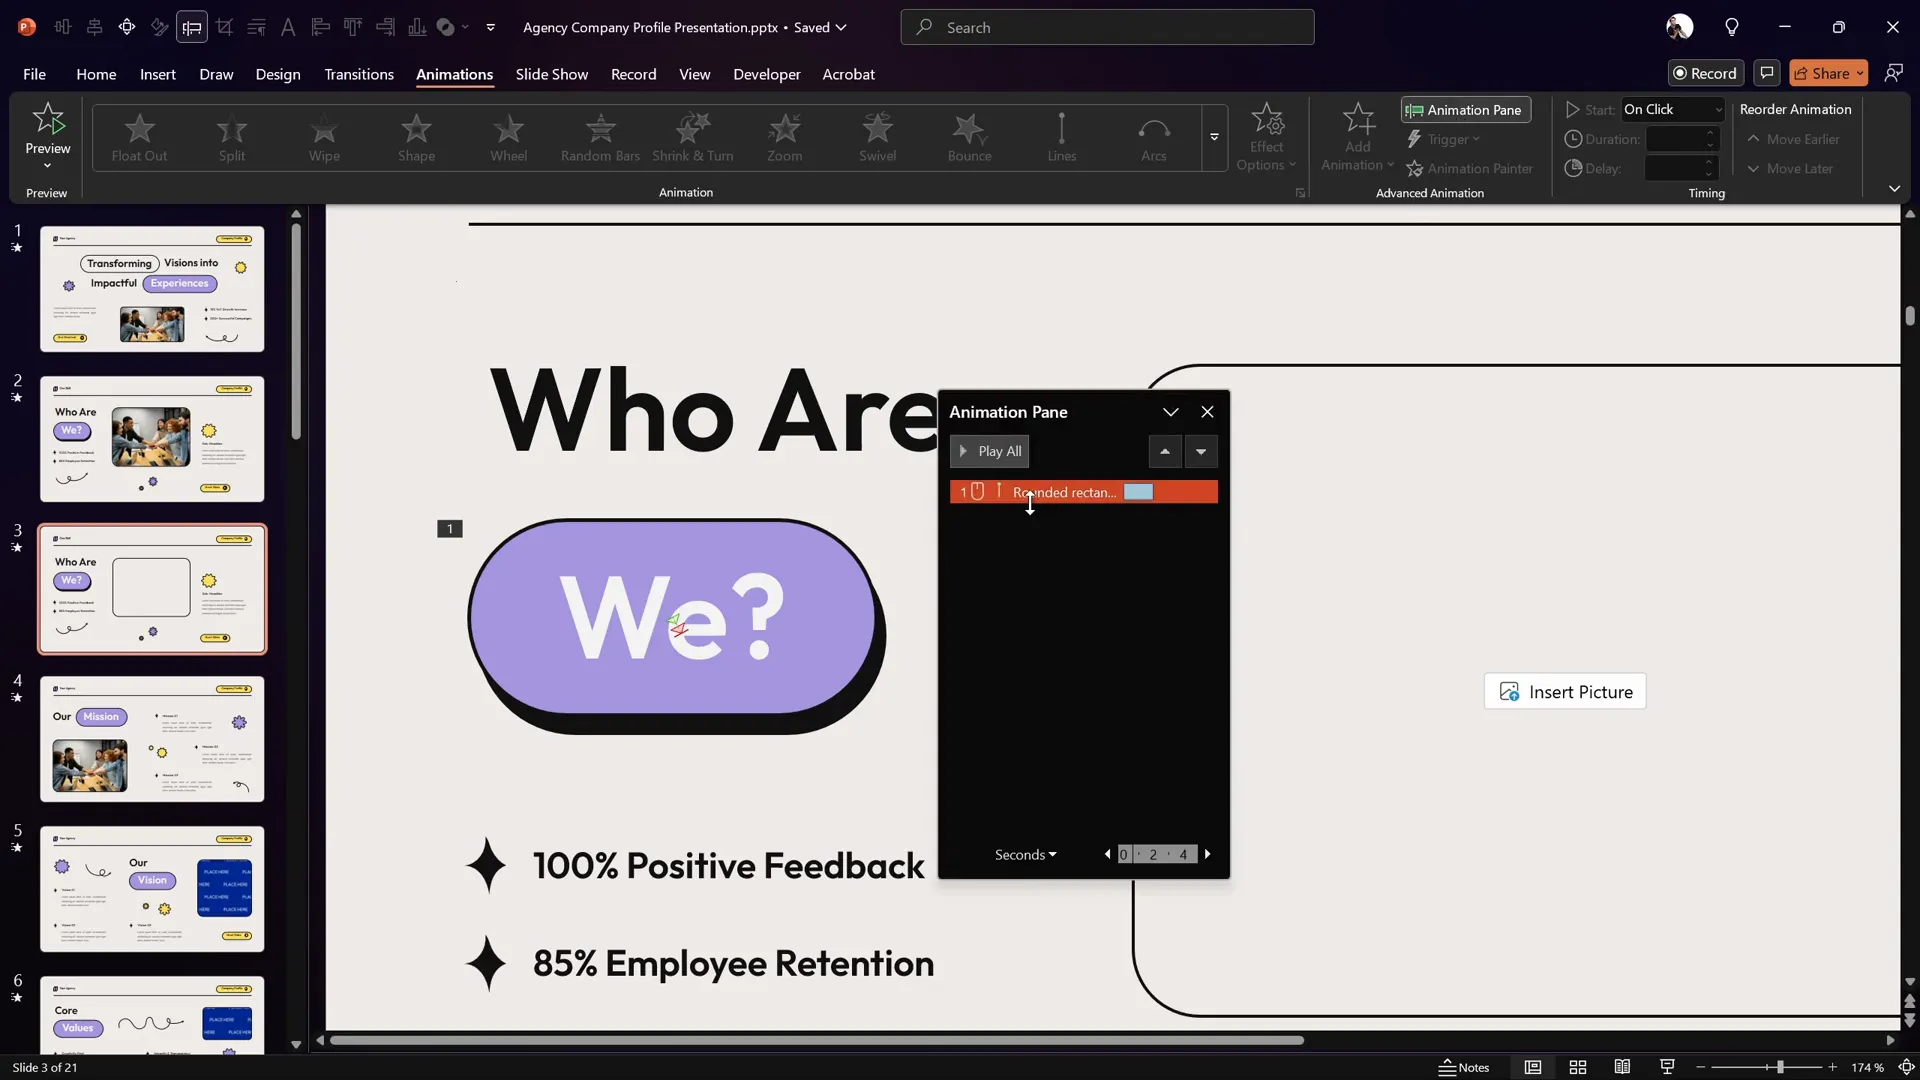
- Open the Animation Pane to manage the animation settings.
- Set the animation to start With Previous for smooth automation.
- Set the duration to a quick 0.2 seconds for a snappy button press effect.
- Double-click the motion path animation to open Effect Options.
- Enable Smooth Start, Smooth End, and most importantly, Auto Reverse so the button returns to its original position after pressing down.
This motion path animation creates a delightful press-and-release feel when triggered.
Making the Button Clickable with Animation Triggers
By default, the button press animation will play automatically when the slide loads, which is not what we want. Instead, we want the animation to trigger only when the user clicks the button, making it truly interactive.
Here’s how to set up an animation trigger for your button:
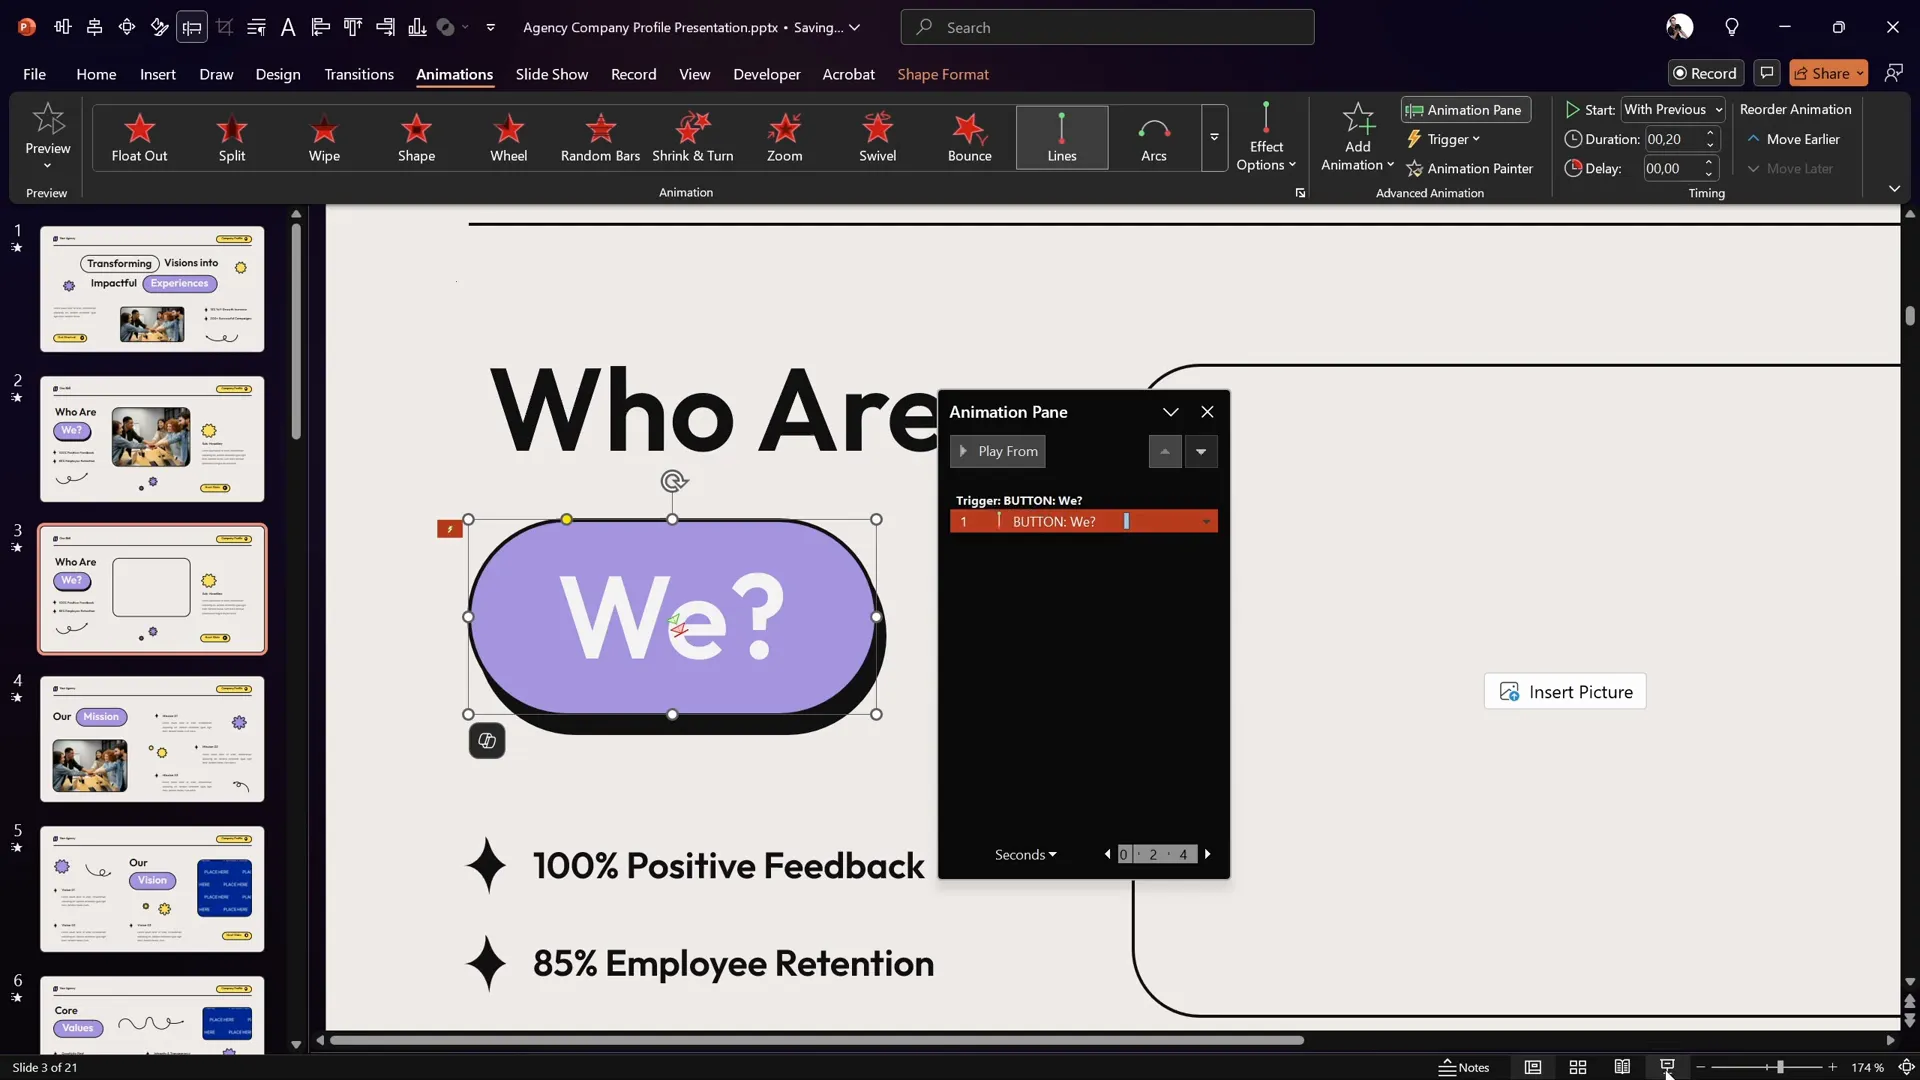
- Open the Selection Pane (found in the Home tab under Select > Selection Pane) to view all objects on your slide.
- Find the rounded rectangle button in the list and rename it to button for easy reference.
- Go back to the Animations tab and select the motion path animation applied to the button.
- Click the Trigger dropdown and choose On Click Of > select the button from the list.
- Ensure the motion path animation still starts With Previous and is grouped under the trigger.
Now, the button press animation will only play when the button itself is clicked, enhancing the interactivity of your slide.
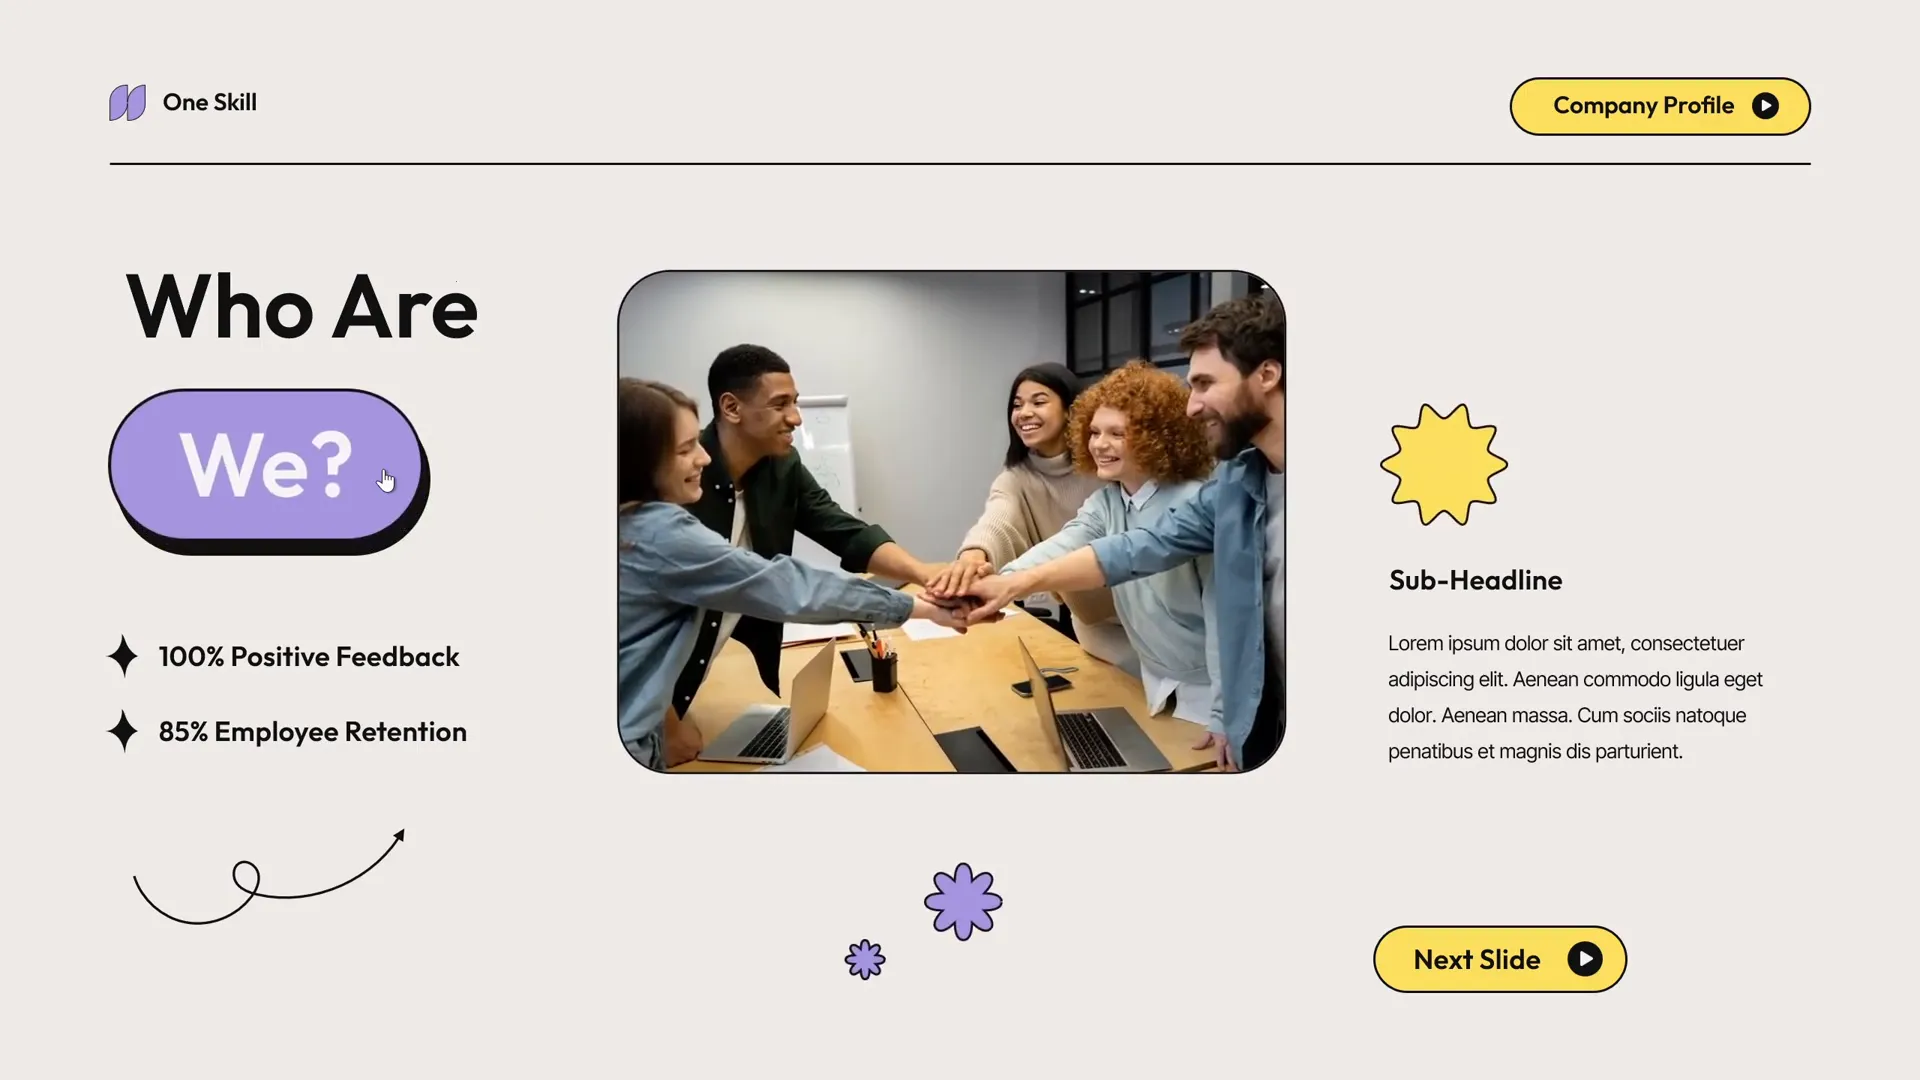
Launching a Photo with the Button
Interactivity becomes more exciting when your button not only animates but also launches other content. In this case, we’ll make the button trigger a photo to pop out from its location.
Follow these steps to add and animate the photo:
- Insert a photo into the image placeholder on your slide. You can find free, high-quality photos on Freepik.
- Select the photo and go to the Animations tab.
- Click Add Animation and choose the Basic Zoom entrance animation (found under More Entrance Effects).
- Open the Animation Pane, set the zoom animation to start With Previous, and set the duration to 0.6 seconds.
- Drag the zoom animation into the same trigger animation group as the button press animation so both are triggered together.
- Test the animation by clicking the button — the photo should zoom in but currently pops out from the slide center.
To make the photo pop out from the button itself, you need to add a motion path animation to the photo:
- Select the photo.
- Add a Motion Path: Line animation.
- Adjust the red endpoint of the motion path to align precisely on top of the button.
- Reverse the path direction so the animation starts at the button and ends at the photo’s current position.
- Set the motion path animation to start With Previous and duration to 1 second.
- Drag this animation into the same trigger group as the button animations.
- Double-click the motion path to open additional settings and set the Smooth End slider to max for a soft landing effect.
- Send the photo to the back layer so it appears behind other slide elements, enhancing realism.
This creates a smooth and professional effect where the photo appears to pop out from the button itself.

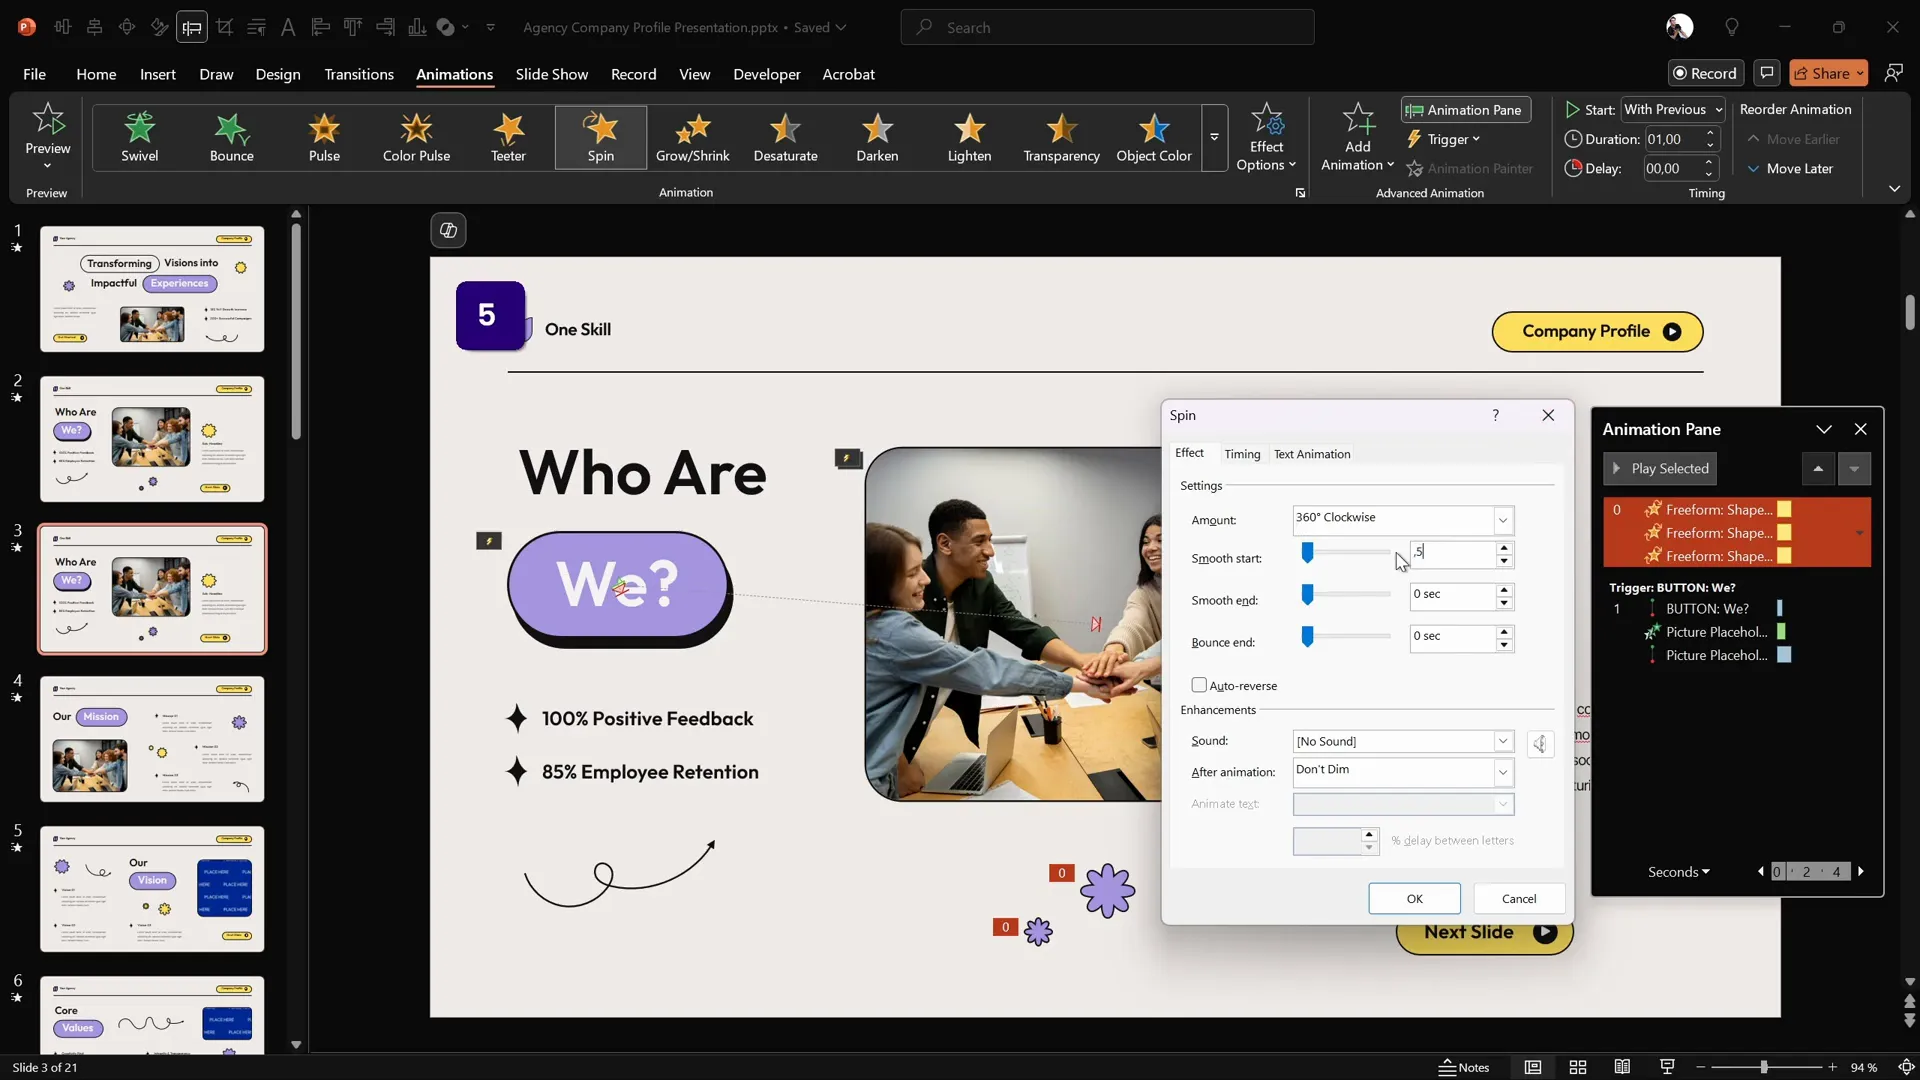
Adding Spinning Stars Animation
To add an extra playful touch, the tutorial includes spinning stars that animate simultaneously with the photo pop-out. This adds visual interest and highlights the interactivity.
Here’s how to animate the stars:
- Hold down the Shift key and select all the star shapes on your slide.
- Go to the Animations tab and add the Spin animation.
- Set the spin animations to start With Previous and set the duration to 1 second.
- Open the animation settings and add a smooth start and smooth end, each set to 0.5 seconds, to create a fluid spin effect.
- Drag all star spin animations into the same trigger group as the button and photo animations.
Now, when you click the button, the photo will pop out, and the stars will spin once, creating a delightful interactive moment.
Final Testing and Tips
After setting up all the animations and triggers, it’s essential to test your slide in full-screen presentation mode to ensure everything works seamlessly.
When you click the button:
- The button should press down and release smoothly.
- The photo should pop out from the button’s location with a smooth zoom and motion path.
- The stars should spin gracefully once.
This interactive animation not only enhances the visual appeal of your slide but also encourages audience engagement through clickable elements.
Feel free to experiment with animation durations, easing options, and layering to customize the effect to your presentation style.
Summary Table: Steps to Create Interactive PowerPoint Animation
| Step | Description | Key PowerPoint Feature |
|---|---|---|
| 1. Prepare Template | Use a pre-designed slide with button, image placeholder, and stars | Slide Layout |
| 2. Add Shadow | Duplicate button, fill with black, and position as shadow | Shape Duplication & Fill |
| 3. Button Press Animation | Add motion path to button to simulate pressing down | Motion Path Animation |
| 4. Set Animation Trigger | Make button press animation activate on button click | Animation Trigger |
| 5. Animate Photo | Add zoom and motion path animations to photo | Zoom & Motion Path Animation |
| 6. Animate Stars | Add spin animations with smooth start/end to stars | Spin Animation |
| 7. Group Animations | Group all animations under the same trigger | Animation Pane & Grouping |
Frequently Asked Questions (FAQ)
Can I use this interactive animation technique with any PowerPoint template?
Yes! While this tutorial uses a specific template from Graphiccook, the animation principles and techniques can be applied to any PowerPoint slide with similar elements. Just ensure you have a button shape, an image placeholder, and any decorative shapes you’d like to animate.
Is this animation compatible with all versions of PowerPoint?
The motion path animations, triggers, and entrance effects used here are supported in most modern versions of PowerPoint, including PowerPoint 2016, 2019, and Microsoft 365. If you are using an older version, some features might have limited functionality.
How can I customize the animations to fit my brand or presentation style?
You can customize the colors, shapes, animation durations, and easing options to match your branding and presentation tone. For example, adjust the shadow color or button shape, change the photo, or use different entrance effects to create unique interactions.
Can I add sound effects to this interactive animation?
Yes, you can add sound effects to enhance the button press or photo pop-out animations. However, use sound sparingly to avoid distracting your audience. You can add sounds by selecting an animation and choosing the Effect Options to add sound.
Where can I learn more about advanced PowerPoint animations?
For a deep dive into PowerPoint animations and professional presentation skills, visit pptskill.com. They offer over 65 video lessons revealing animation secrets step-by-step.
Conclusion
Mastering PowerPoint animation techniques like the interactive button press, photo pop-out, and spinning stars can transform your presentations from static slides to engaging experiences. This tutorial empowers you to create clickable animations that captivate your audience and add a layer of professionalism to your work.
Remember, the key to effective animation is subtlety and purpose — animations should support your message, not distract from it. By following the step-by-step instructions above, you can build interactive slides quickly and easily, impressing your audience and elevating your presentation skills.
If you have any questions or want to share your creations, feel free to reach out. For more inspiration, check out the next tutorial on advanced animation techniques to keep enhancing your PowerPoint prowess!


