
If you’re eager to elevate your PowerPoint presentations and captivate your audience with visually impressive effects, mastering PowerPoint animation on slide is a must. In this comprehensive tutorial, we will walk you through the step-by-step process to create a stunning looping cinematic animation in PowerPoint, perfect for your presentation intro slide or any slide where you want to grab attention.
This tutorial is designed for users who want to learn how to build dynamic animations without relying on external tools—everything is done inside PowerPoint itself. We’ll cover creating animated arrows that move along a road, designing a polished slide title with outlines and shadows, and setting animations to loop infinitely for a seamless effect.
Table of Contents
- Getting Started: Preparing Your Slide Background
- Creating Pointy Arrows with PowerPoint Shapes
- Animating the Arrows with Motion Path and Zoom
- Setting Up Looping for Continuous Animation
- Designing a Cinematic Slide Title with Outlines and Shadows
- Animating the Slide Title for a Cinematic Effect
- Frequently Asked Questions
- Conclusion: Take Your PowerPoint Animations to the Next Level
Getting Started: Preparing Your Slide Background
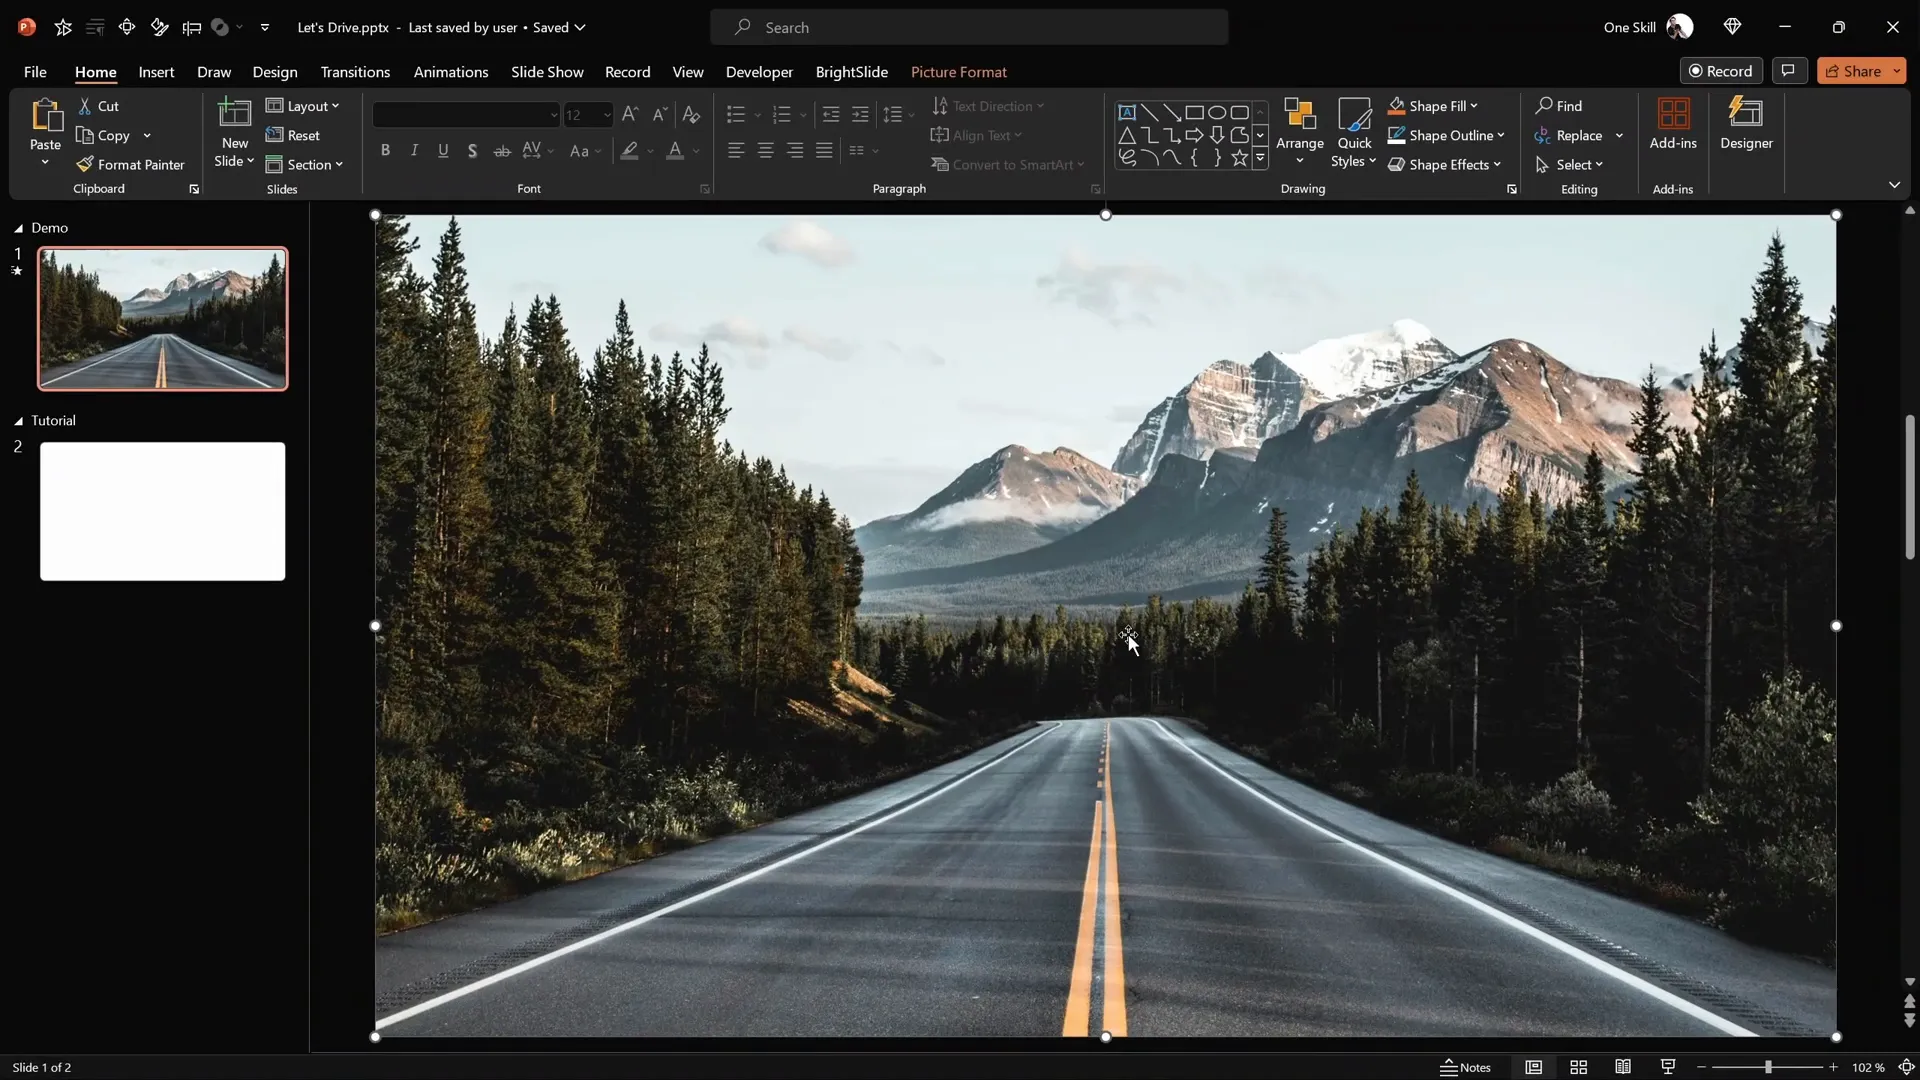
Before diving into the animation, it’s essential to set up a visually appealing slide background that complements the cinematic effect. For this tutorial, you can use a beautiful road photo as the background to give context to the moving arrows.
- Step 1: Start with an empty slide in PowerPoint.
- Step 2: Find a high-quality photo for your background. The tutorial uses an image from Unsplash, a great source for free photos.
- Step 3: Insert the photo on your slide and resize it to cover the entire slide area.
Using a visually rich background sets the stage for your animation and makes your slide more immersive.
Creating Pointy Arrows with PowerPoint Shapes
The moving arrows are the focal points of this cinematic animation. Here’s how to create them directly in PowerPoint using simple shapes and shape editing tools.
Step-by-step Arrow Creation
- Turn on Light Guides: Enable guides in PowerPoint to help you align shapes precisely at the center of the slide.
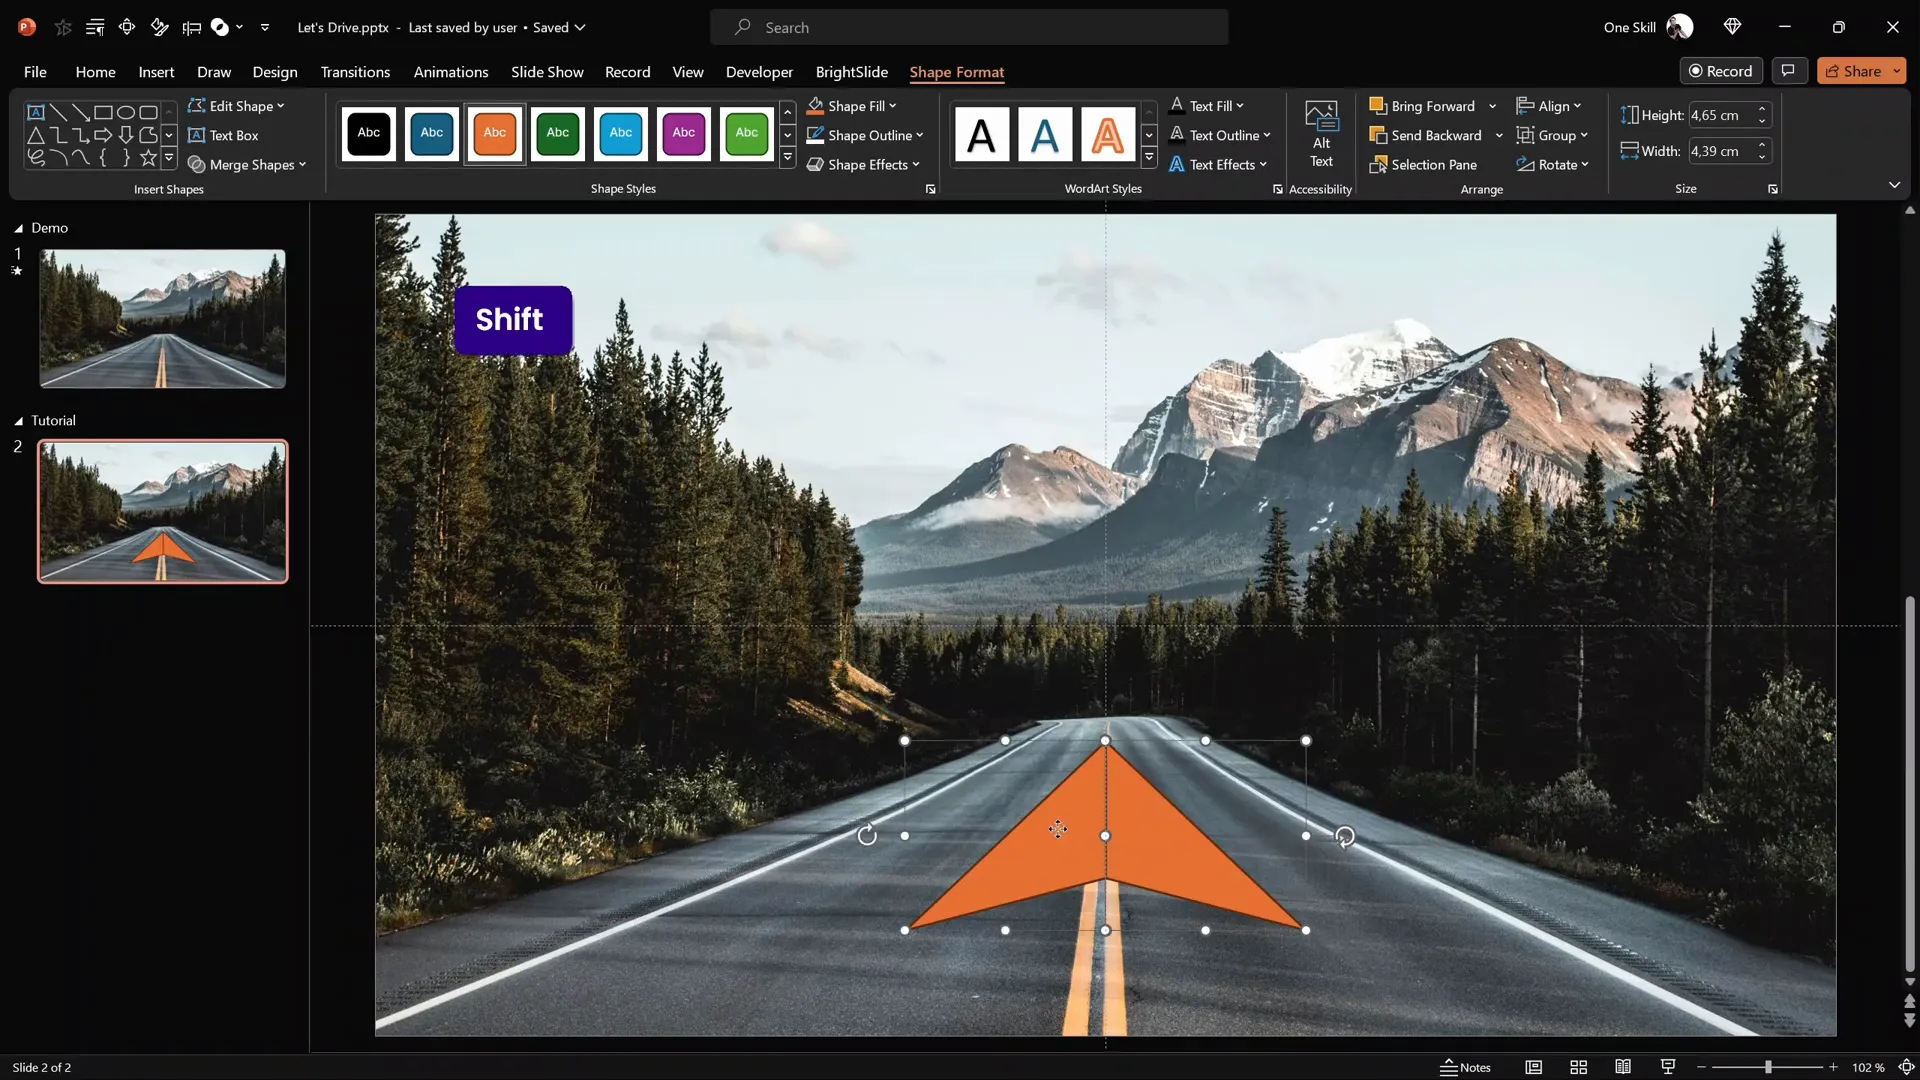
- Insert Triangle Shape: Go to Insert > Shapes and select the triangle tool. Hold Shift while drawing to create a perfect equilateral triangle.
- Color and Flip: Change the triangle fill to orange for visibility, then flip it horizontally to face left.
- Positioning: Align the triangle so it touches the center of the slide.
- Adjust Shape: Use the yellow adjustment handle to elongate the triangle downward. Then right-click the triangle, select Edit Points, and drag the bottom point further down to sharpen the arrow tip.
- Squish the Triangle: Slightly compress the triangle vertically to create a sleeker arrow shape.
- Duplicate and Flip: Press Ctrl + D to duplicate the triangle, then flip the copy horizontally. Now you have two halves of the arrow.
- Align and Merge: Select both triangles, go to Shape Format > Merge Shapes > Union to combine them into one solid arrow shape.
This process creates a custom arrow shape that perfectly fits the cinematic theme.
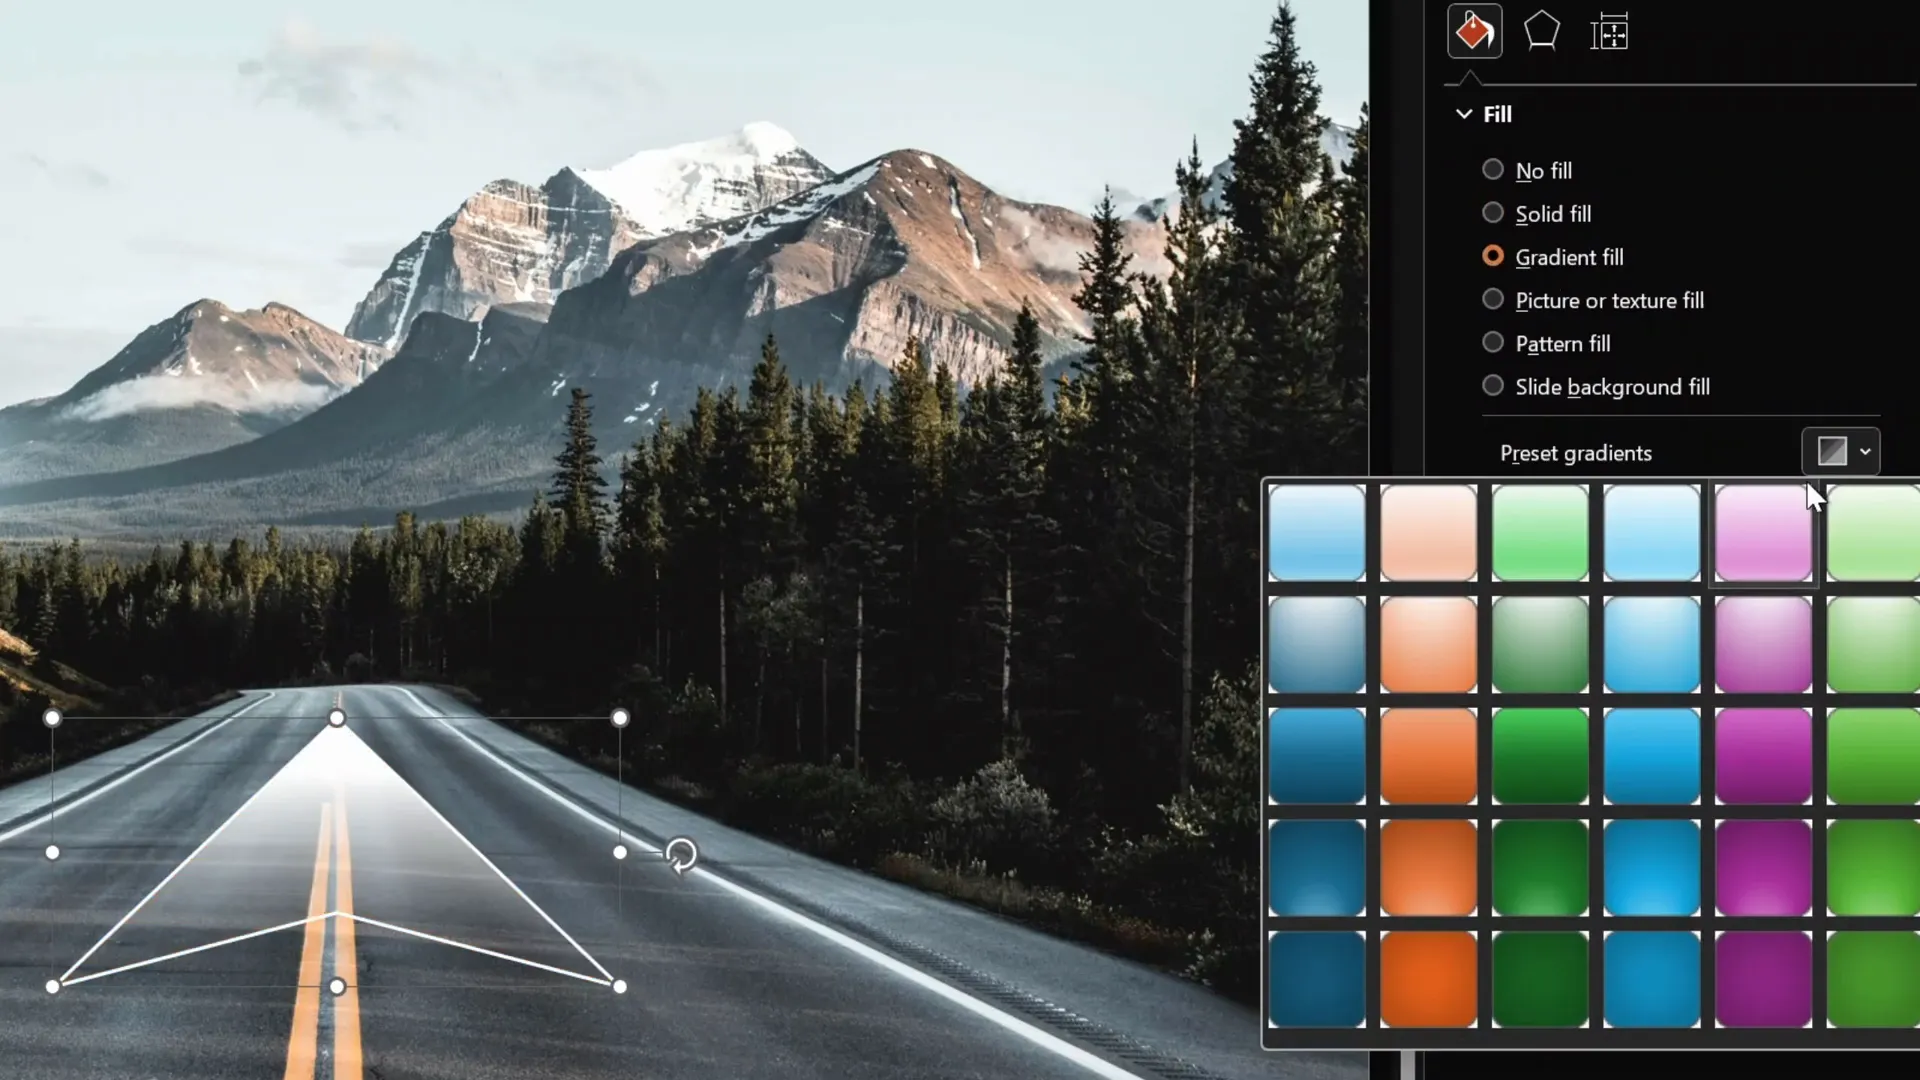
Applying Gradient Fill and Outline
To make the arrow visually dynamic, apply a gradient fill and a white outline:
- Turn off the guides since alignment is done.
- Go to Shape Format > Shape Outline and select white with a width of 3 points.
- Open Format Shape pane and choose Gradient Fill.
- Set two color stops: white on one end and black on the other.
- Adjust the black color stop to white with 100% transparency, creating a smooth fade effect.
- Position the color stops to 20% and 80% for a subtle gradient.
- Resize and rotate the arrow to align with the road angle in the background.
Animating the Arrows with Motion Path and Zoom
Animating the arrows involves combining a motion path with a zoom effect to simulate arrows moving upward and shrinking as if traveling along the road’s perspective.
Steps to Animate the Arrow
- Add Motion Path: Select the arrow shape, then go to Animations > Add Animation > Motion Paths > Line.
- Adjust Motion Path: Drag the red endpoint of the motion path upward to define the animation’s endpoint.
- Set Animation Duration: Open the animation pane and set the motion path duration to 4 seconds.
- Fine-tune Start and End Effects: Double-click the motion path animation and set smooth start and smooth end to 2 seconds each.
- Add Zoom Exit Animation: Add a second animation to the arrow — a basic zoom exit animation that shrinks the arrow.
- Sync Animations: Set the zoom to start With Previous and match the duration (4 seconds) with the motion path.
When played, the arrow will move upward while simultaneously shrinking, creating a dynamic cinematic effect.

Setting Up Looping for Continuous Animation
To make the animation truly captivating, the arrows should loop infinitely, giving the impression of continuous movement.
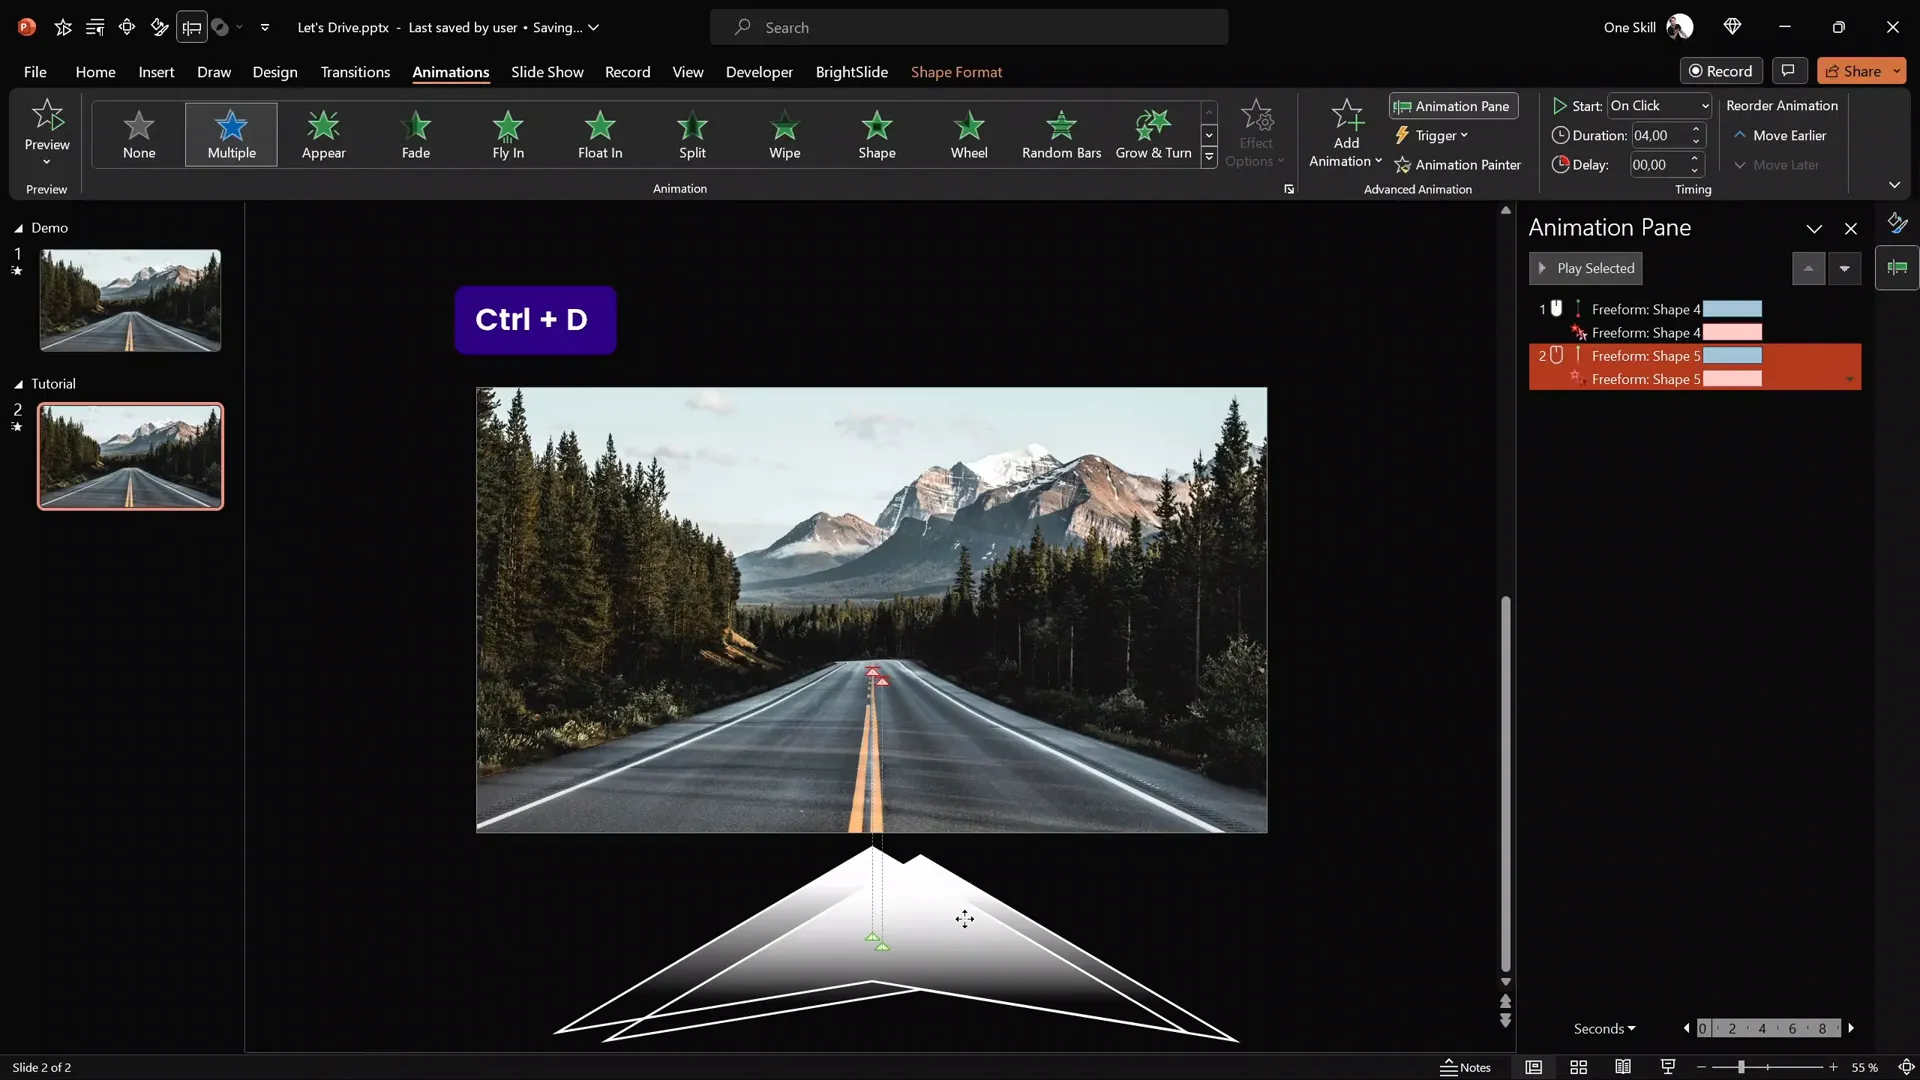
Duplicating and Staggering Arrows
- Duplicate the animated arrow three times to have a total of four arrows.
- Align all arrows perfectly on top of each other at the center of the slide.
- In the animation pane, select all animations and set each to start With Previous.
- Add delays between the animations so the arrows start with a 1-second gap. For example, animations 3 and 4 have a 1-second delay, 5 and 6 have 2 seconds, and so on.
Enable Infinite Loop
- Select all animations in the animation pane.
- Go to Animation Options > Timing > Repeat and select Until End of Slide.
- Now the animation bars in the pane will appear infinite, indicating the animations will loop continuously.
When you play the slide, the arrows will move upward one after another, shrinking and disappearing in a smooth, endless loop.
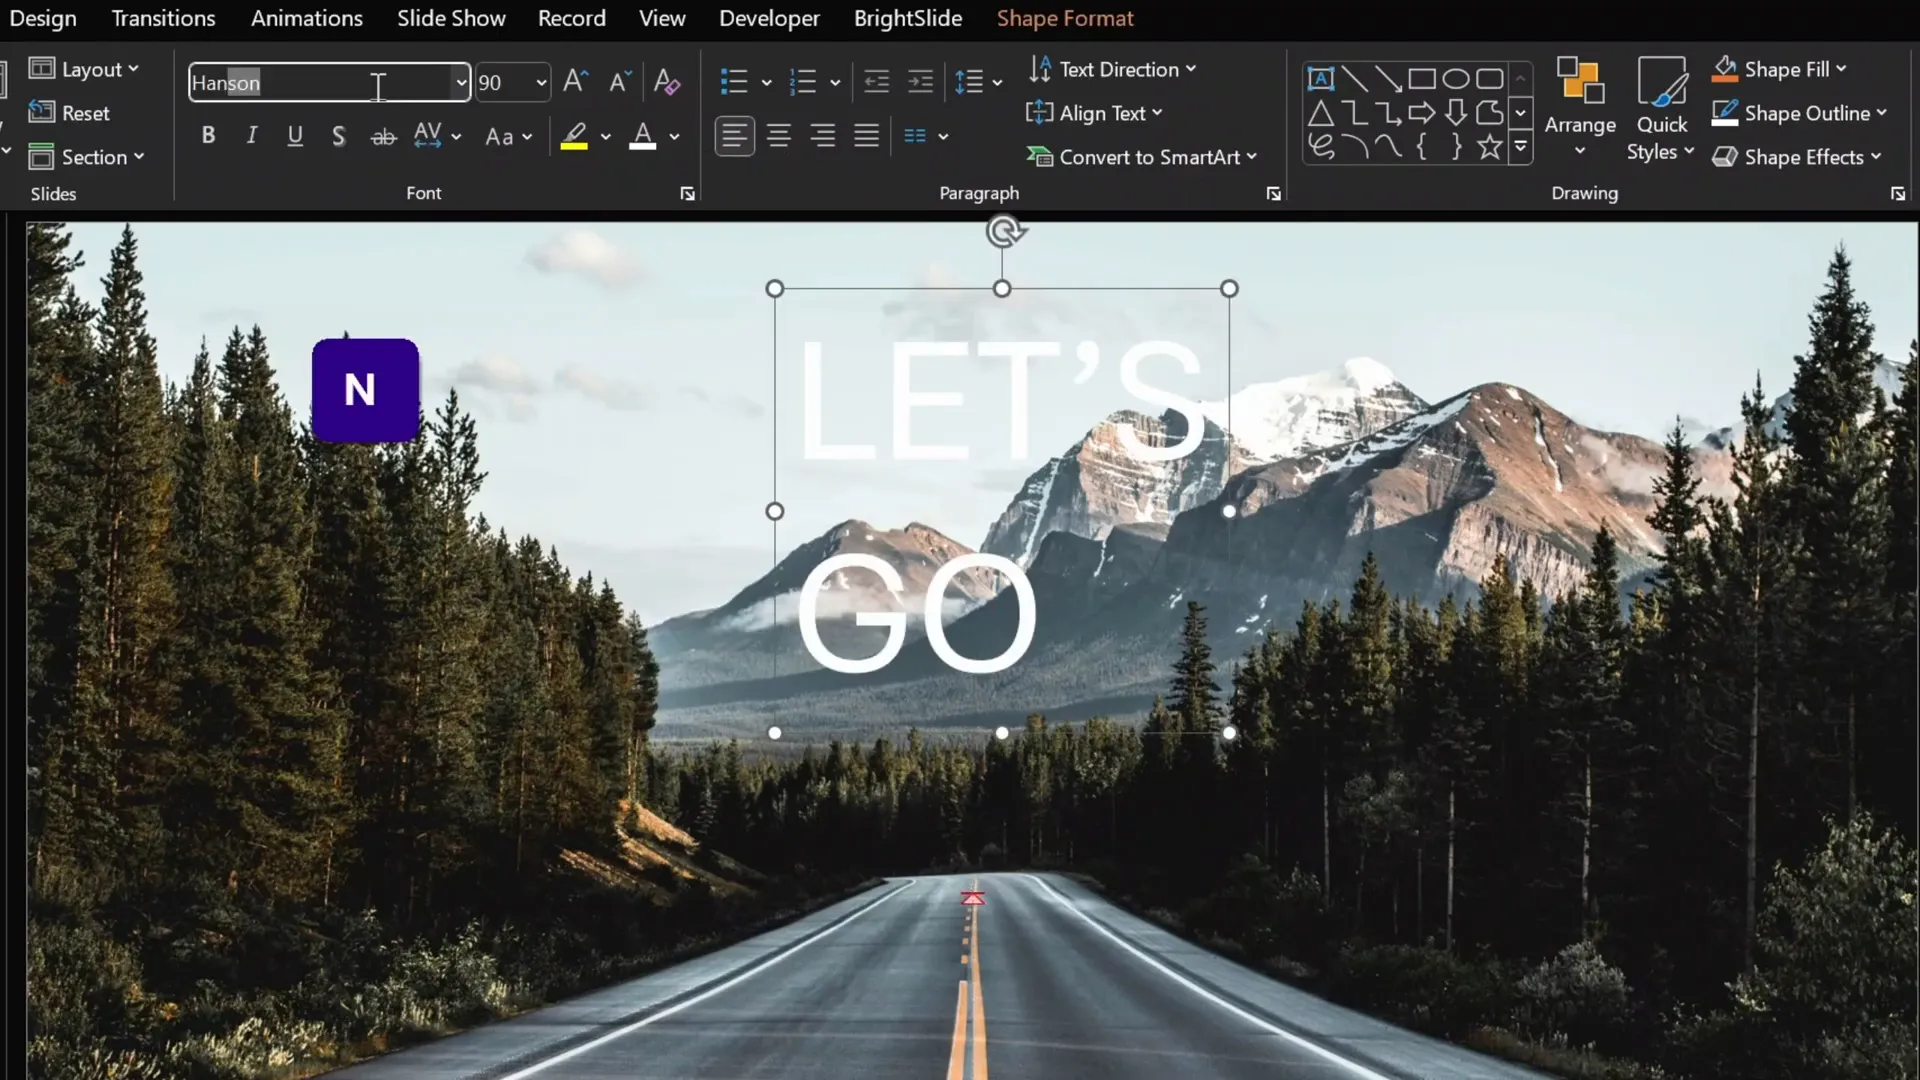
Designing a Cinematic Slide Title with Outlines and Shadows
To complement the animated arrows, a cinematic slide title adds professionalism and visual appeal. PowerPoint allows detailed customization of text boxes for this effect.
Creating the Slide Title
- Insert a text box at the top of the slide with your desired title text (e.g., “Go”).
- Set the font size large (e.g., 90 points) and font color to white.
- Use a stylish font like Hanson Bold for a clean, modern look.
- Center-align the text.
- Adjust line spacing to multiple 0.7 for a narrow gap between lines.
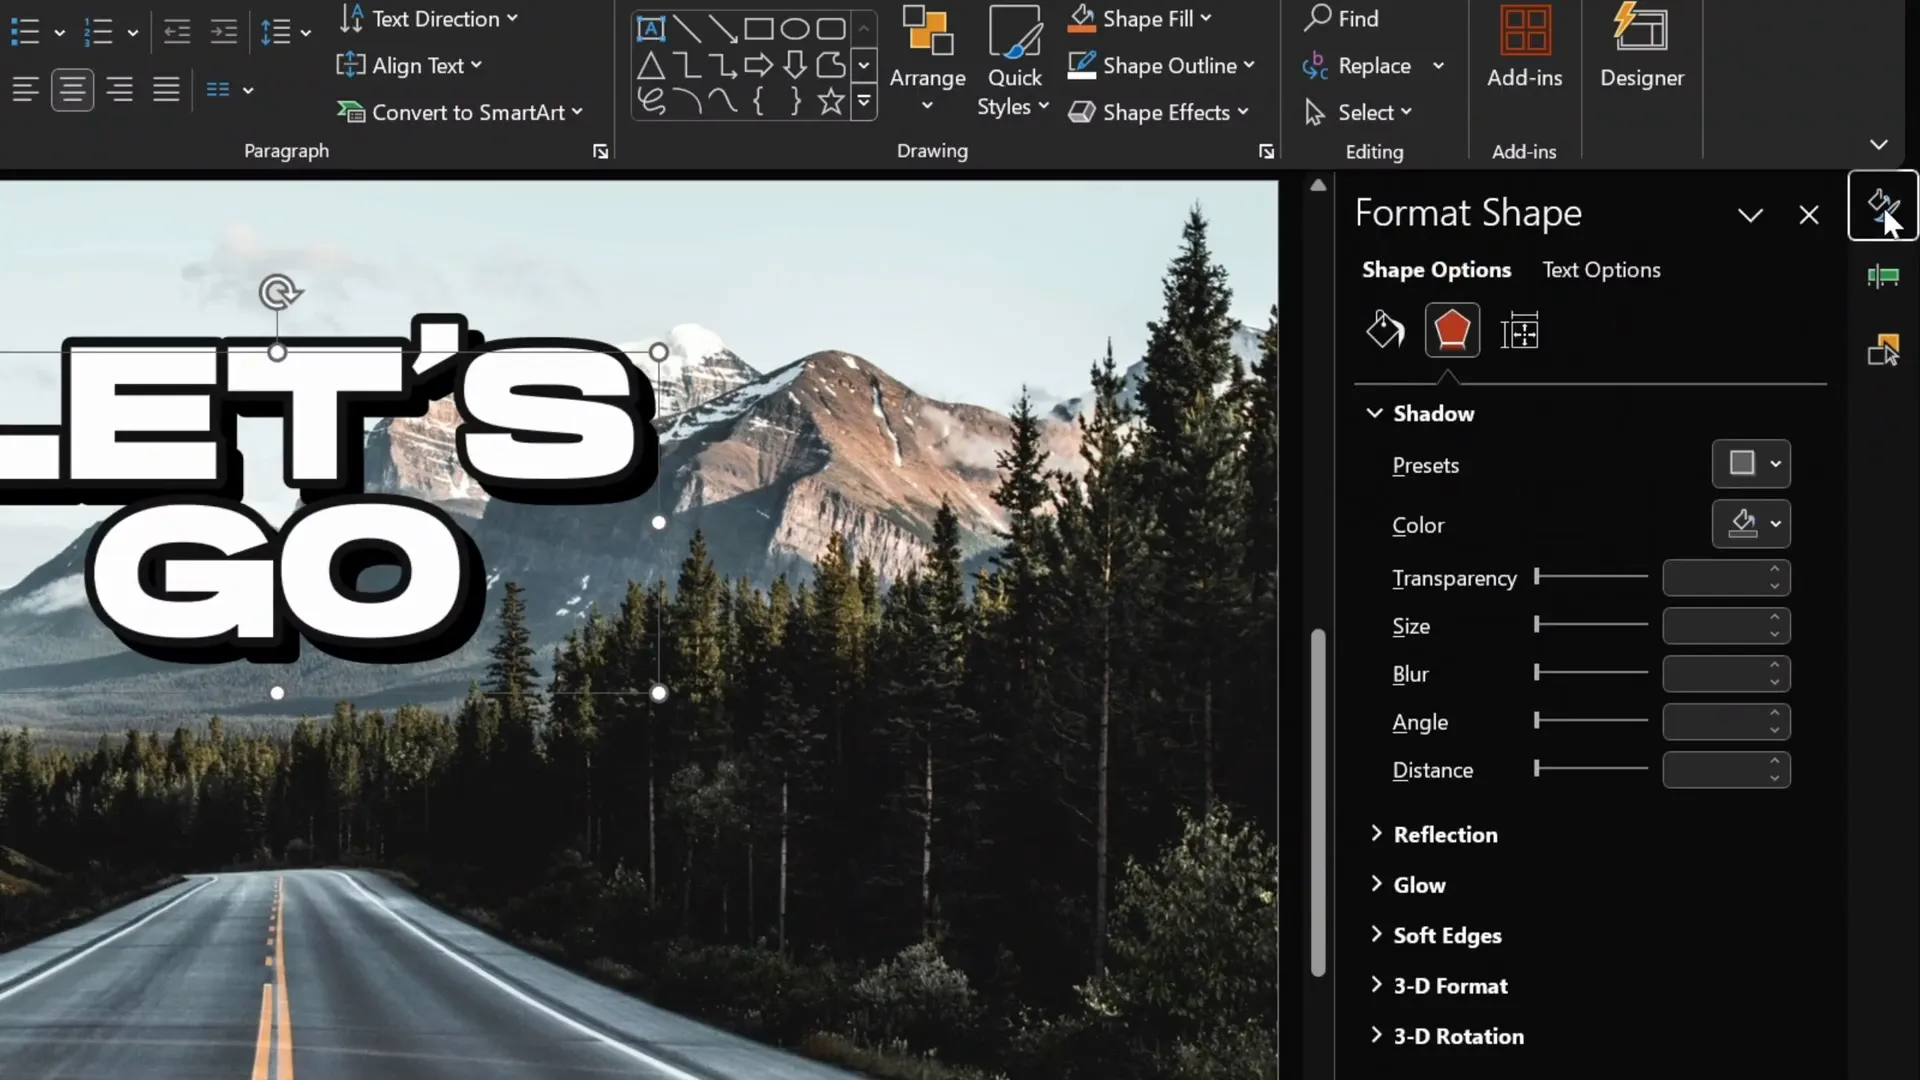
Adding Outline and Shadow Effects
- Duplicate the text box.
- Select the first text box, go to Text Options > Text Outline, and add a solid outline using the eyedropper tool to pick a dark green color.
- Set the outline width to 10 points for a thick border effect.
- Align both text boxes perfectly on top of each other to create a layered effect.
- Rename the text boxes in the selection pane for clarity (e.g., “Text Box White” and “Text Box Outline”).
- Select the outline text box and add a right-edge shadow with zero transparency and increased distance to create a 3D look.
- Select the white text box and add an inside text shadow with a warm orange glow for added depth and warmth.
- Adjust the blur slider to your liking for a soft glow effect.
This layered shadow and outline technique creates a professional cinematic appearance for your slide title.
Animating the Slide Title for a Cinematic Effect
Animating the slide title enhances the cinematic vibe by making the text move in sync with the arrows but at a slower pace for contrast.
Step-by-step Title Animation
- Select both text boxes of the slide title and group them for easier animation handling.
- Move the grouped title text box outside the slide area initially.
- Use the animation painter tool to copy the arrow animations (motion path and zoom) and apply them to the title group.
- Adjust the motion path endpoint to a position just above the road to simulate the title traveling upward.
- In the animation pane, reorder the title animations below the first two arrow animations.
- Set the duration of the title animations to 8 seconds, making it move slower than the arrows (which move in 4 seconds).
- Duplicate the slide title group for a second instance and add a 4-second delay to its animations to stagger the titles.
- Align both title groups perfectly on top of each other.
- Ensure all animations are set to loop infinitely until the end of the slide.
Now, your slide title will elegantly float upward in a cinematic style alongside the looping arrows, creating a dynamic and professional opening slide.

Frequently Asked Questions (FAQ)
1. Can I use this PowerPoint animation on slide technique for other shapes or objects?
Absolutely! The method of combining motion path animations with zoom or other effects, plus using staggered delays and looping, can be applied to any object or shape in PowerPoint to create continuous animations.
2. Where can I find the background photo and fonts used in this tutorial?
The background photo is from Unsplash, a free resource for high-quality images. The font used for the title is Hanson Bold, which you can download for free from Befonts.
3. How do I make sure my animations loop indefinitely?
In the animation pane, select your animations, go to the timing options, and under “Repeat,” choose “Until End of Slide.” This setting makes your animations loop continuously as long as the slide is active.
4. Can I customize the speed and delay of animations?
Yes! You can adjust the duration of each animation and add delays to stagger animations for more dynamic effects. For example, arrows can move faster than the slide title to create contrast.
5. Is this animation compatible with all versions of PowerPoint?
The features used—motion path animations, zoom effects, shape editing, and text effects—are available in most recent versions of PowerPoint (2016 and newer). Some features may vary slightly depending on your PowerPoint version.
Conclusion: Take Your PowerPoint Animations to the Next Level
Creating a cinematic looping animation in PowerPoint may seem complex at first, but by breaking down the process into manageable steps, you can achieve professional-grade results directly within PowerPoint. From designing custom arrows and applying gradient fills to mastering motion path and zoom animations, this tutorial equips you with the techniques needed to impress your audience with dynamic visuals.
Don’t forget to experiment with delays, durations, and layering to create your unique animation style. Adding a polished slide title with outlines and shadows further enhances the cinematic feel, making your presentation stand out from the crowd.
If you want to deepen your skills and become a PowerPoint animation pro, consider exploring advanced courses like the PowerPoint Animation Mastery course, where you can learn all animation secrets step-by-step.
Now it’s your turn to try out these techniques and create stunning PowerPoint animation on slide effects that will wow your audience every time!
Good luck, and happy animating!


