
If you’ve ever wanted to create an engaging and professional-looking product slider directly in PowerPoint, this guide is tailored just for you. In this comprehensive tutorial, we’ll dive deep into how to craft a stunning dynamic product slider using PowerPoint’s powerful morph transition and interactive clickable buttons, enhanced with fade and blur effects, animated titles, and much more. Whether you’re a beginner or an experienced PowerPoint user looking to sharpen your animation skills, this step-by-step breakdown will help you bring your presentations to life.
Throughout this article, you’ll find practical tips and creative tricks inspired by the expert PowerPoint creator One Skill PPT, who demonstrates how to build this product slider from scratch. Plus, you’ll discover how AI-generated images can be seamlessly integrated to boost your slide’s visual appeal.
Table of Contents
- Getting Started: Preparing Your PowerPoint Slide
- Using AI-Generated Images for Stunning Visuals
- Designing the Slider Layout with Controllers and Text
- Adding Shadows and Blur Effects for Depth
- Creating Interactive Clickable Buttons
- Setting Up Morph Transitions for Smooth Animation
- Linking Buttons to Slides for Navigation
- Fixing Animation Issues with Object Naming
- Final Touches and Testing Your Animation Slide
- Frequently Asked Questions (FAQs)
- Conclusion
Getting Started: Preparing Your PowerPoint Slide
The journey to creating a dynamic product slider begins with setting up a clean and simple workspace in PowerPoint. Here’s how you get started:
- Insert a new slide: Open PowerPoint and hit Enter or use the New Slide button to insert a blank slide.
- Set slide background and hide distractions: For a sleek, modern look, use a black background. You can hide the footer and slide number by going to Insert > Header & Footer and unchecking the options for footer and slide number. This creates a clean canvas for your slider.
- Customize slide size for better resolution: Consider increasing your slide dimensions to twice the default size. This approach enhances image resolution and overall slide quality.

Additionally, you can customize footers, slide numbers, and other elements via the Slide Master View if you want to add consistent branding or custom layouts across your presentation.
Using AI-Generated Images for Stunning Visuals
A key feature of this tutorial is the use of eye-catching images of gaming controllers, which were generated using Leonardo AI. This AI tool allows you to create consistent, high-quality images tailored to your needs, perfect for enhancing your PowerPoint slides.
Here’s why incorporating AI-generated images can elevate your presentations:
- Unique visuals: AI-generated images ensure your slides stand out with original graphics.
- Consistent style: Leonardo AI lets you create images with consistent style and themes, perfect for cohesive presentations.
- Customization: You can tailor images specifically for your product or topic.
If you’re new to Leonardo AI or want to master it, One Skill PPT recommends a detailed Skillshare class by Christian Wojtarovich that covers all essential features and techniques for creating consistent AI images.
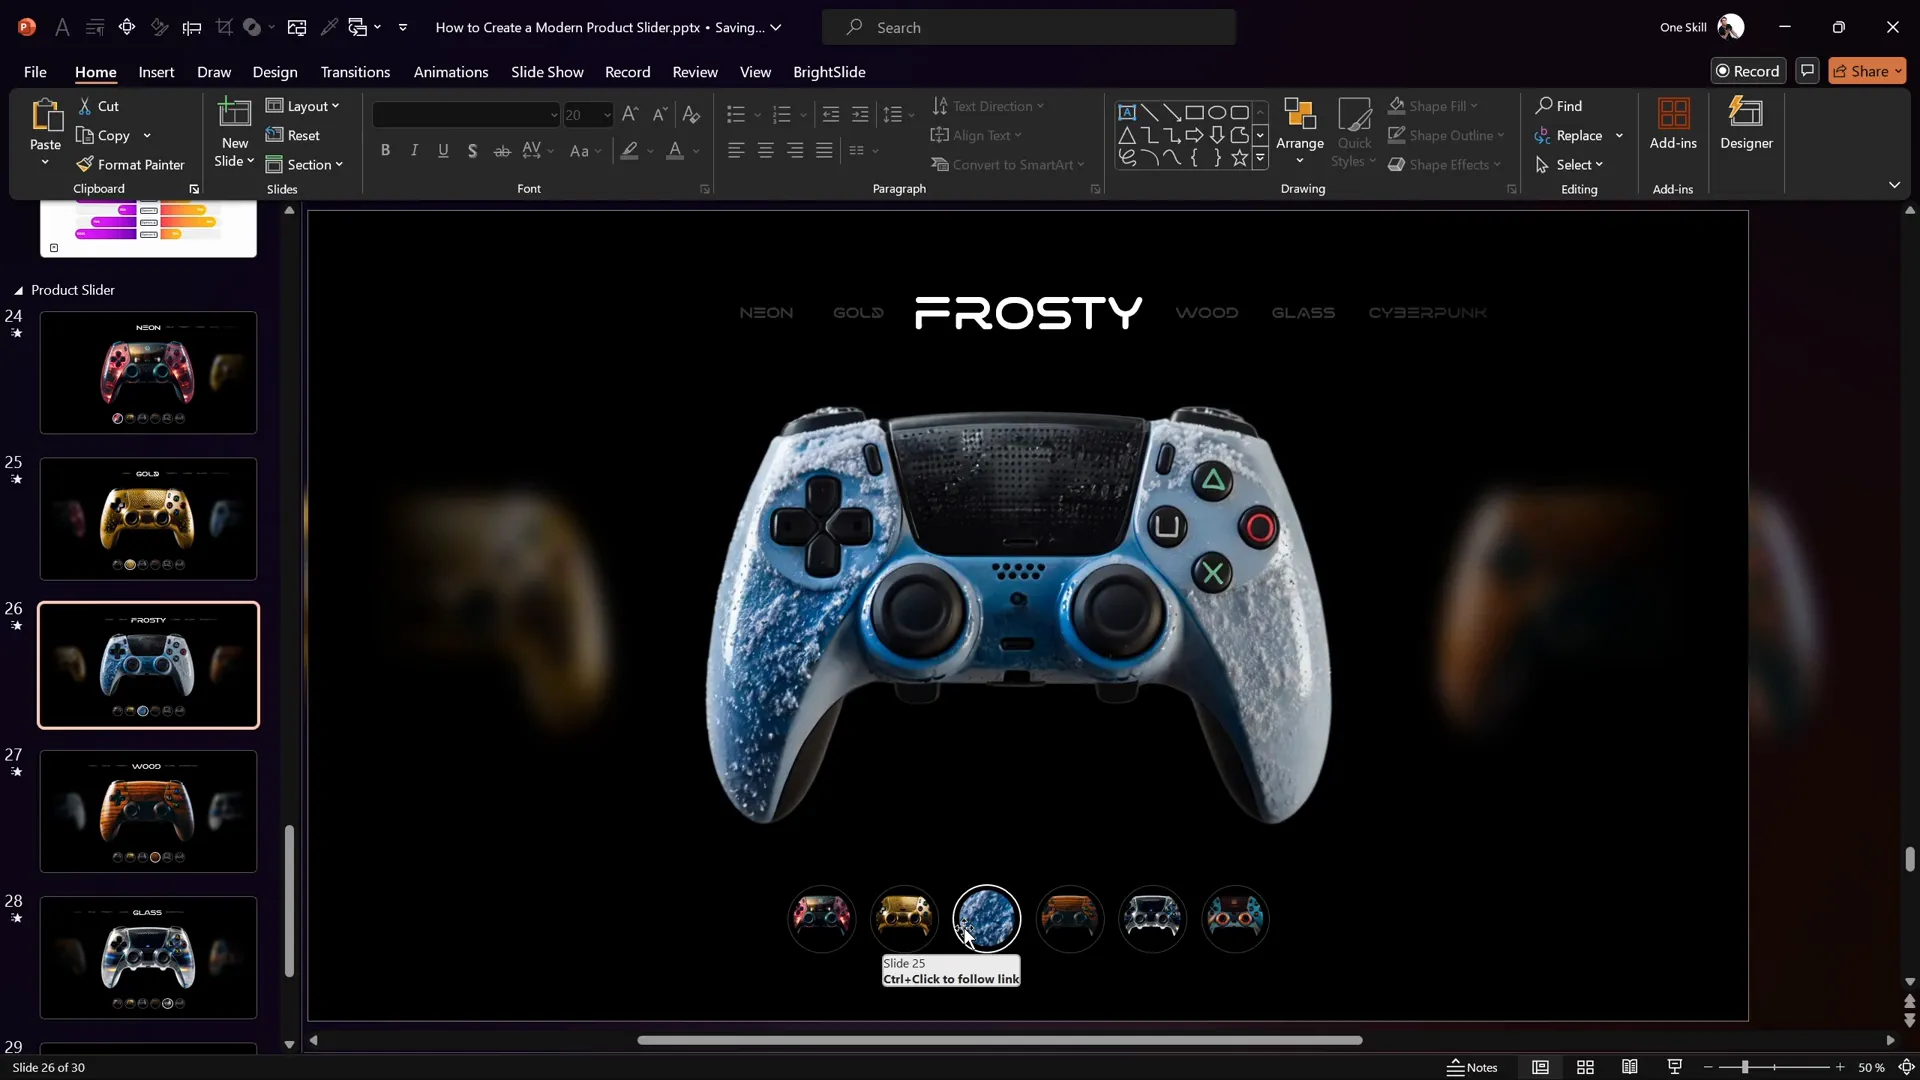
For this tutorial, three controller images named Neon, Gold, and Frosty were created and used. You can download these images or create your own to personalize your product slider.
Designing the Slider Layout with Controllers and Text
Once your slide is ready and you have your images, it’s time to design the slider layout:
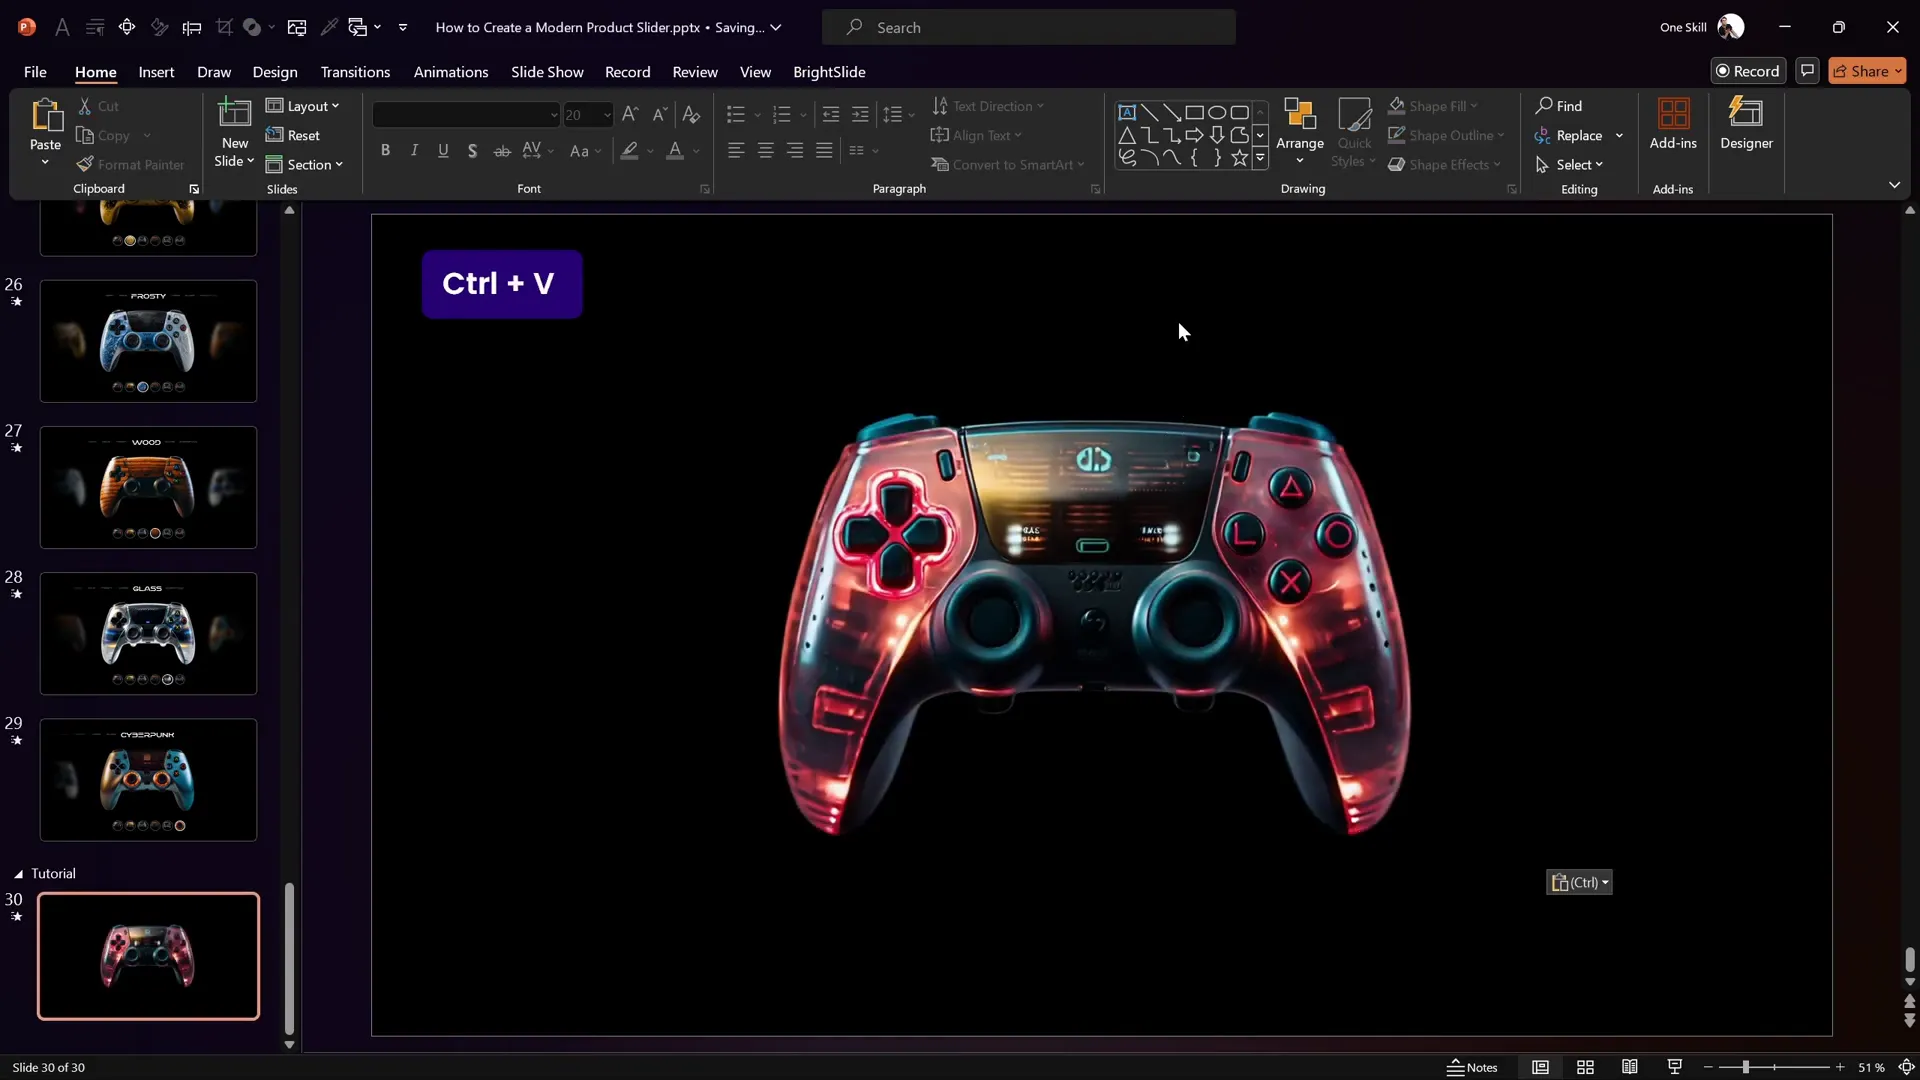
- Insert controller images: Copy and paste your AI-generated controller images onto the slide.
- Add text boxes: Above each controller, insert a text box to display the model name (e.g., “Neon”). Use a bold font like Virino Normal at a large size (e.g., 60 pt) to make the title stand out.
- Adjust text transparency: For secondary text boxes showing additional info, apply about 80% transparency to make the main model name the focal point.
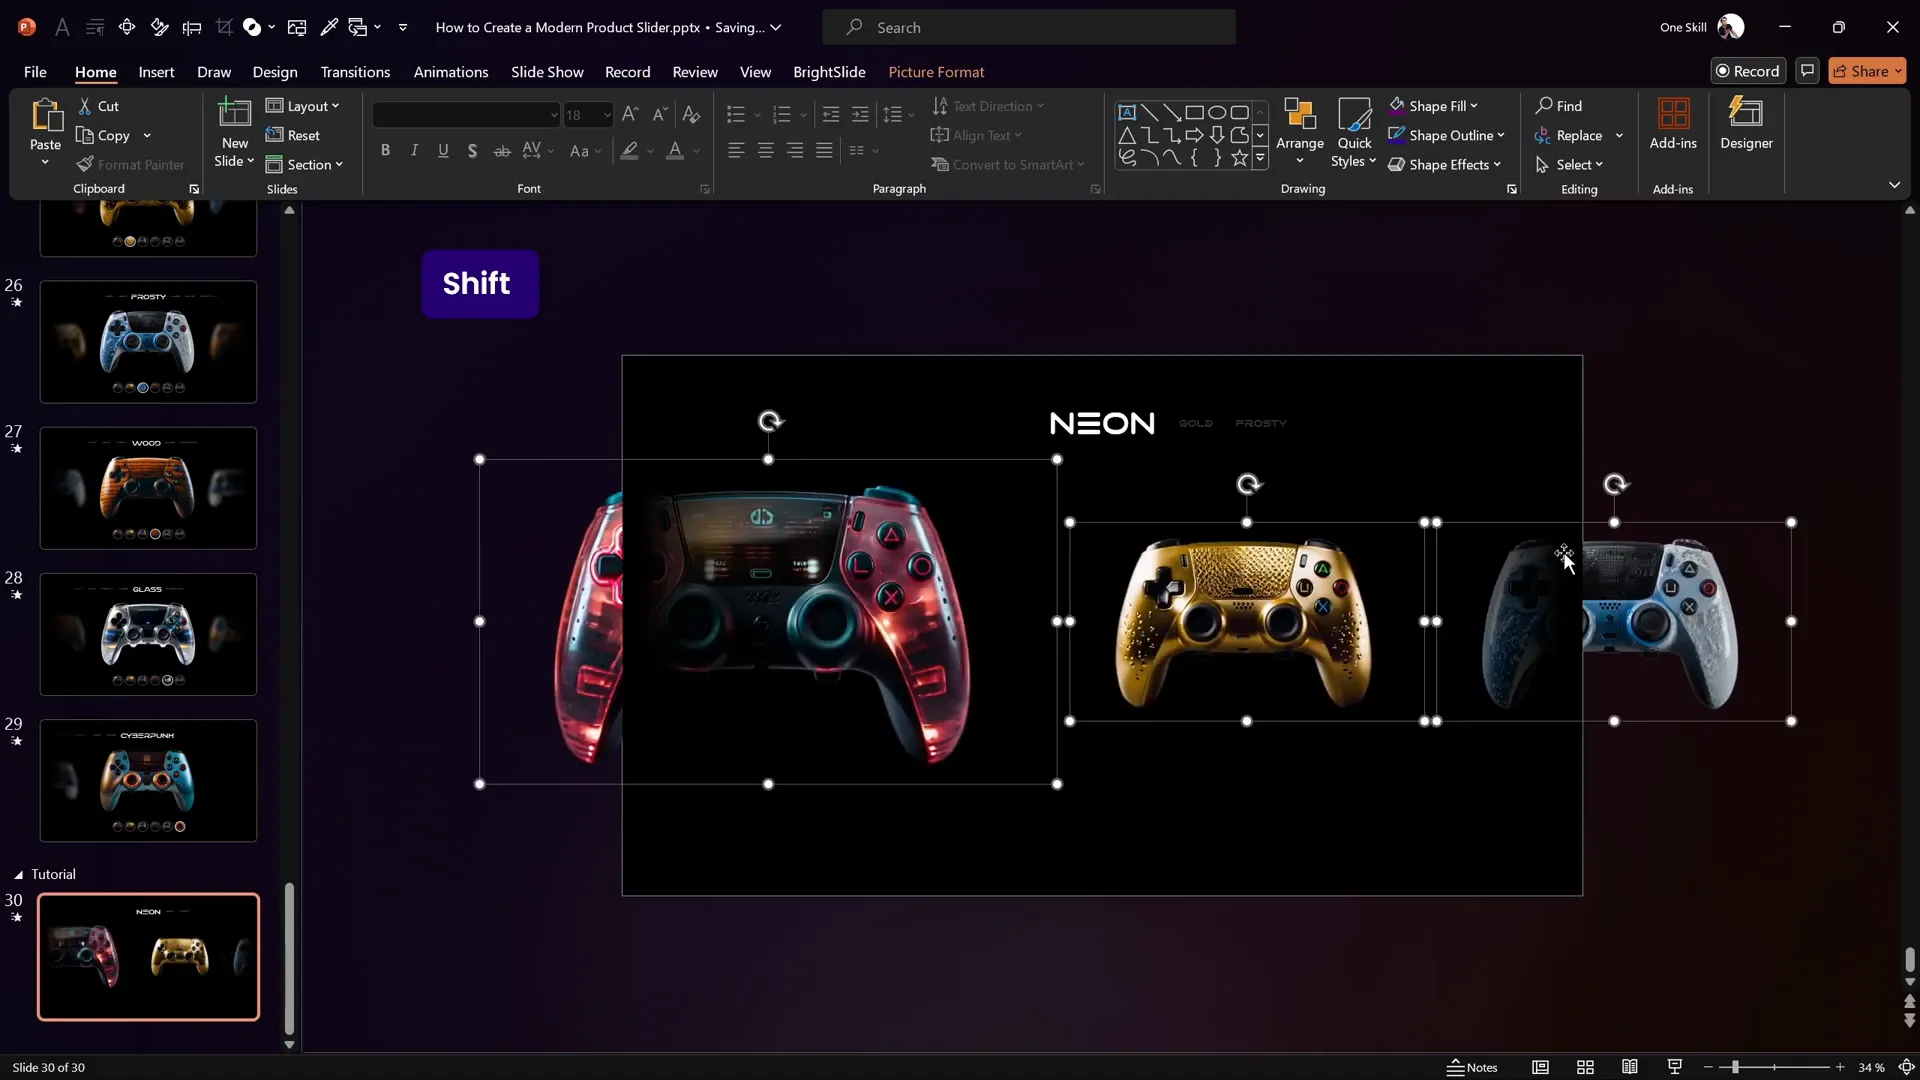
- Position and size images: Arrange the three controllers horizontally. Make the central image larger and the side images smaller (e.g., 14 cm height), aligning them along the middle of the slide.
Aligning images and text properly ensures a professional and balanced look. Use PowerPoint’s alignment tools to center objects vertically and horizontally.
Adding Shadows and Blur Effects for Depth
To create a sense of depth and realism, add shadows and blur effects to your images:
- Create shadow rectangles: Insert two tall rectangles on the left and right edges of the slide. Apply a gradient fill transitioning from transparent to black to simulate shadows fading in and out.
- Adjust gradient stops: Remove excess color stops and set the first stop to transparent black, the second to solid black, and adjust positions for intensity.
- Flip and position shadows: Duplicate the rectangle, flip it horizontally, and position it on the opposite edge to create symmetrical shadows.
- Apply blur to side images: Select the side controller images and apply a blur artistic effect (e.g., 60% blur) to simulate distance and focus on the central image.
This technique creates an immersive effect where controllers appear to emerge from and recede into darkness, enhancing the slider’s visual appeal.
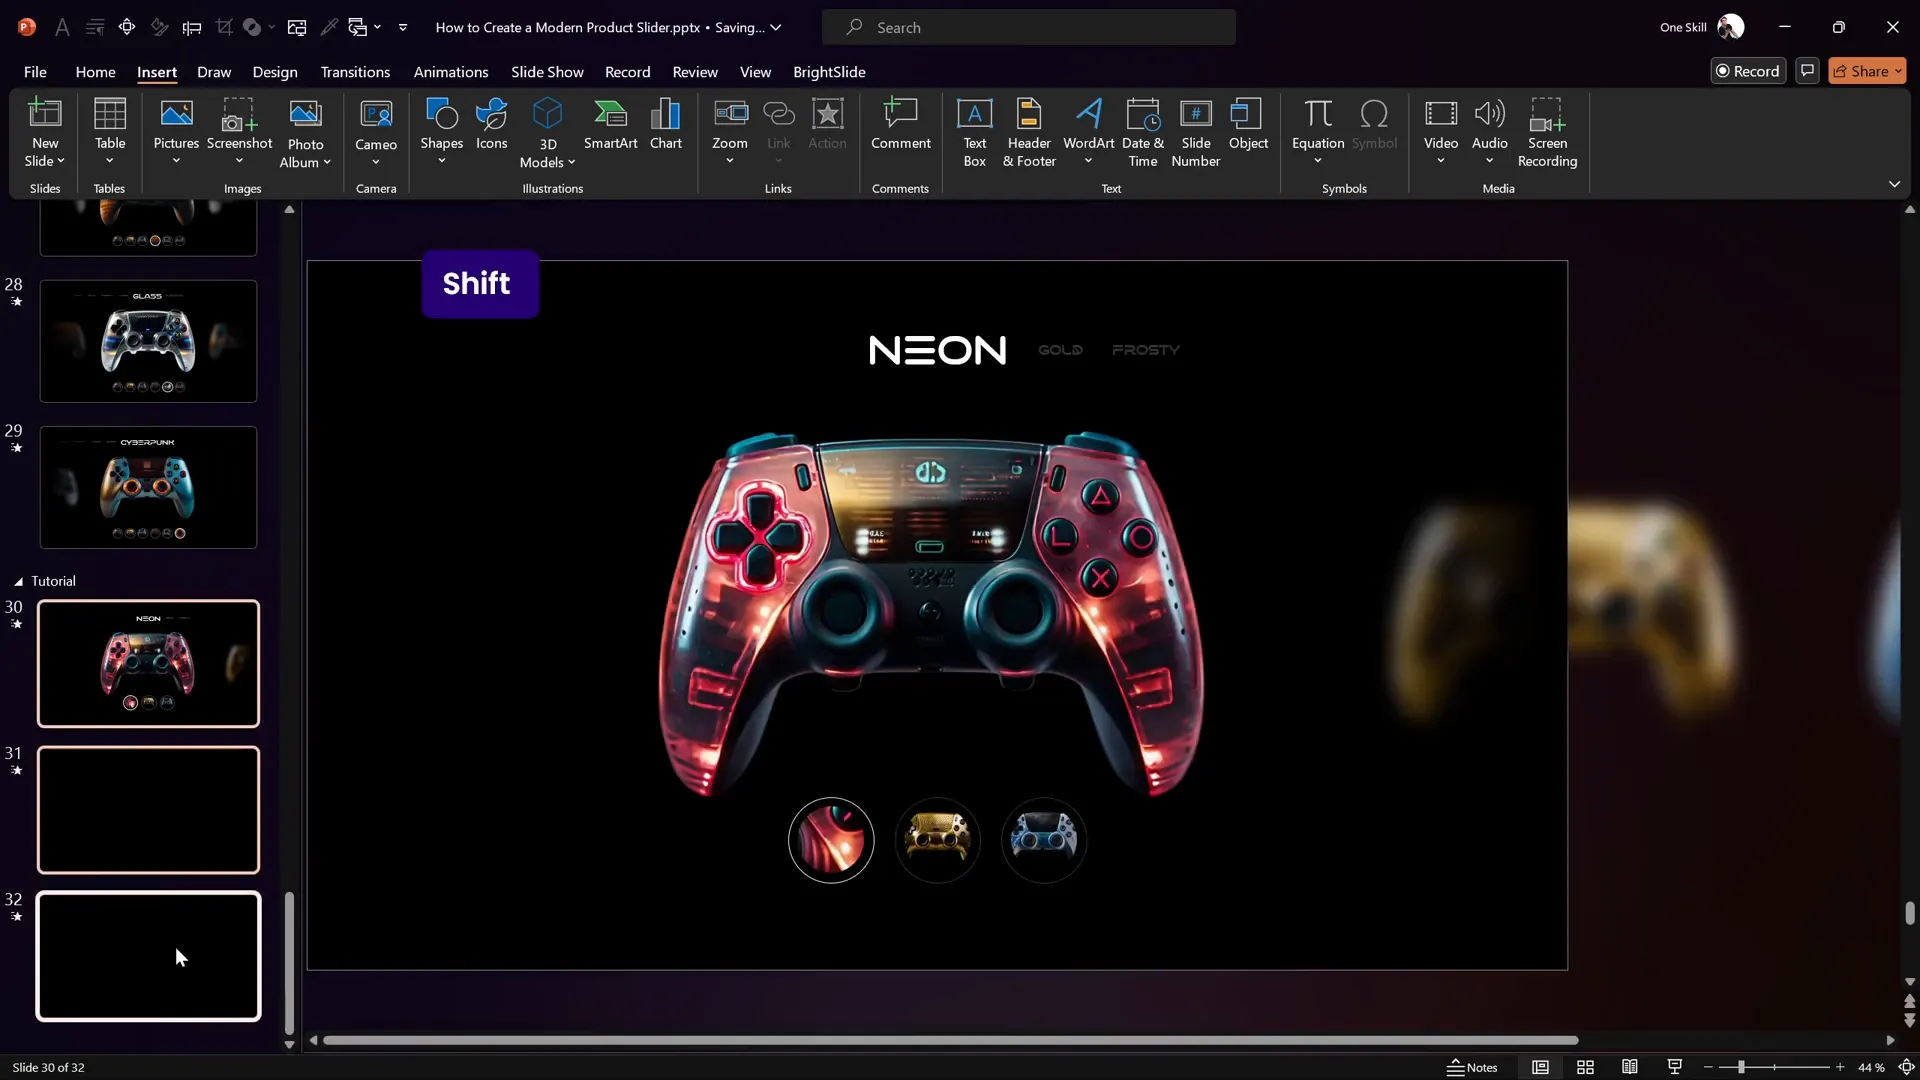
Creating Interactive Clickable Buttons
One of the most exciting features of this slider is the interactivity through clickable buttons that control which image is displayed. Here’s how to create these buttons:
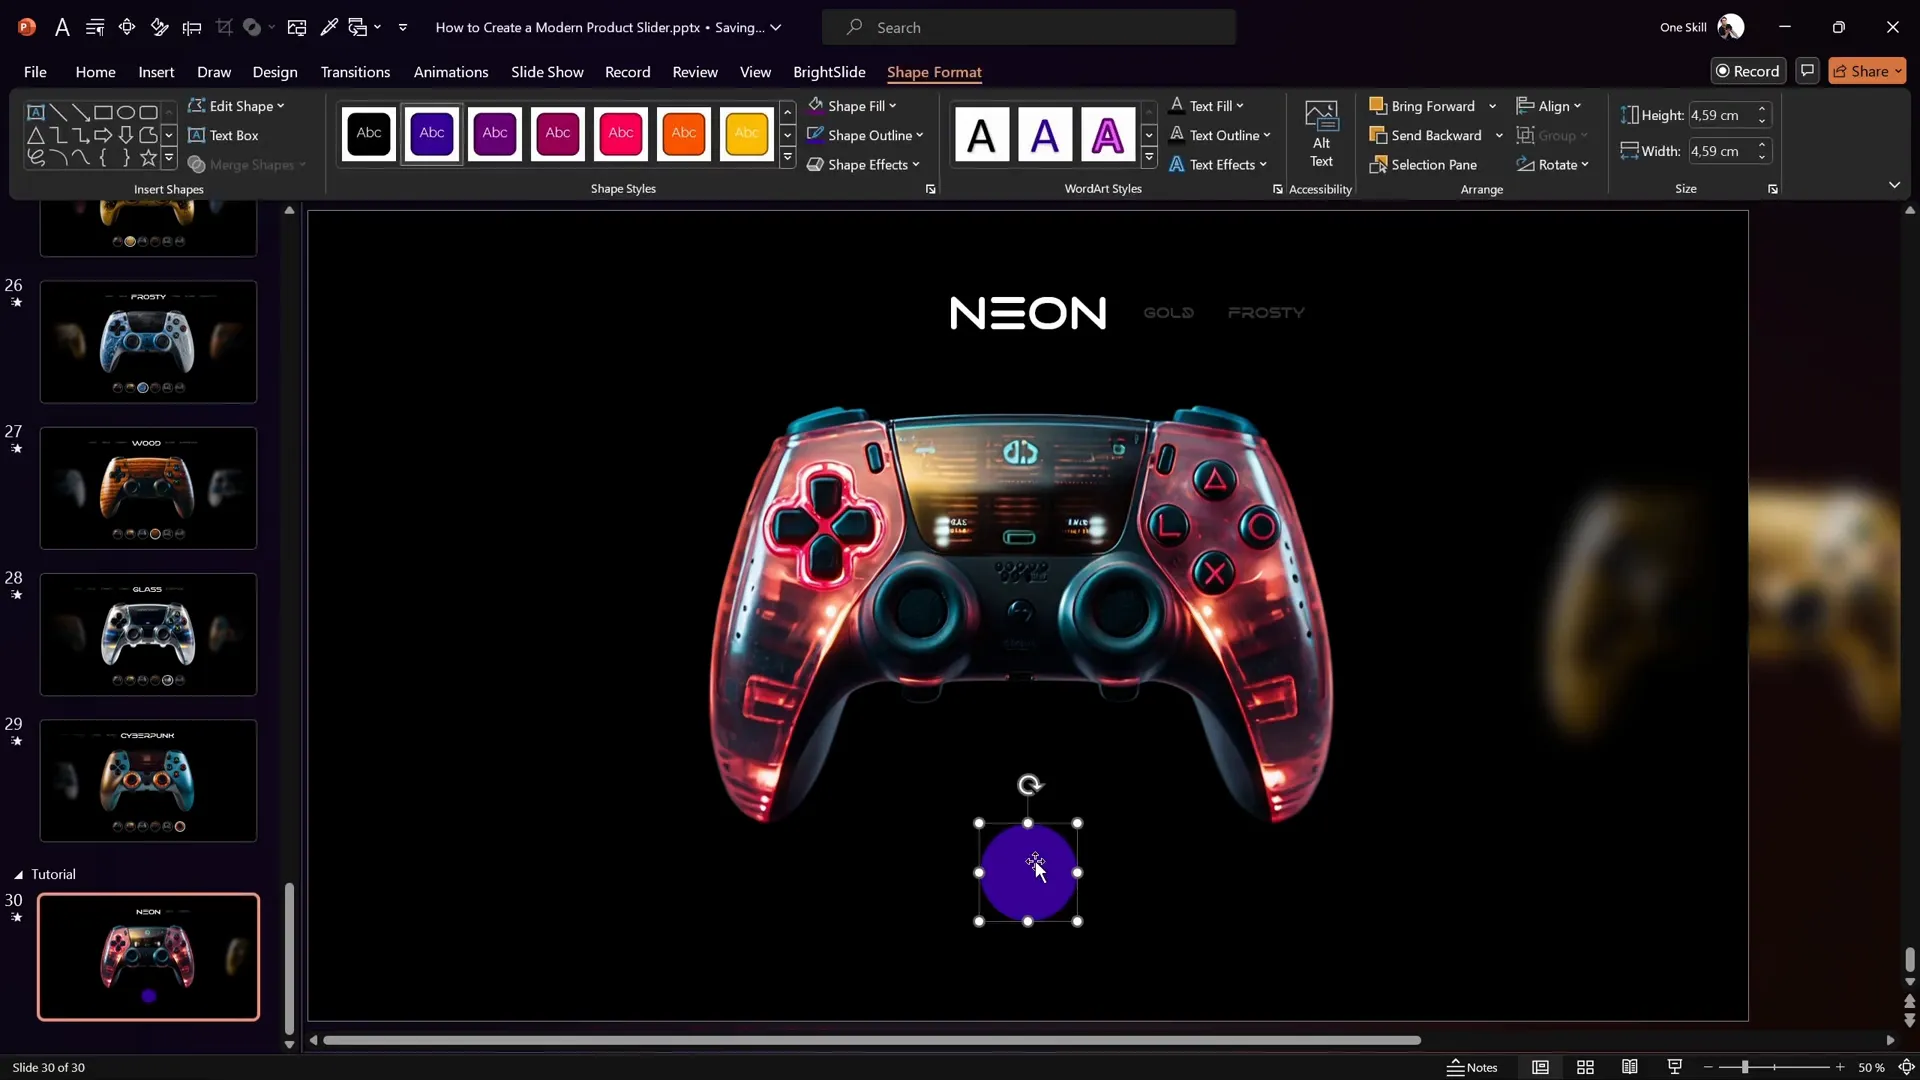
- Draw circles: Insert a perfect circle by holding the Shift key while drawing. Format the circle with a black fill and a white outline with about 75% transparency.
- Duplicate and size smaller circle: Make a smaller duplicate of the circle and center-align it over the larger one to create a ring-like button.
- Fill smaller circle with image: Duplicate the central controller image, bring the smaller circle to the front, then select both and use Shape Format > Merge Shapes > Intersect to crop the image into the circle shape.
- Adjust image cropping: Use the Picture Format > Crop tool to reposition the image within the circle for the best framing.
- Duplicate buttons: Create three buttons in total, each filled with one controller image (Neon, Gold, Frosty).
- Highlight active button: Increase the outline width and remove transparency on the active button’s outer circle for clear visual feedback.
These buttons will later be linked to corresponding slides to enable interactive navigation.
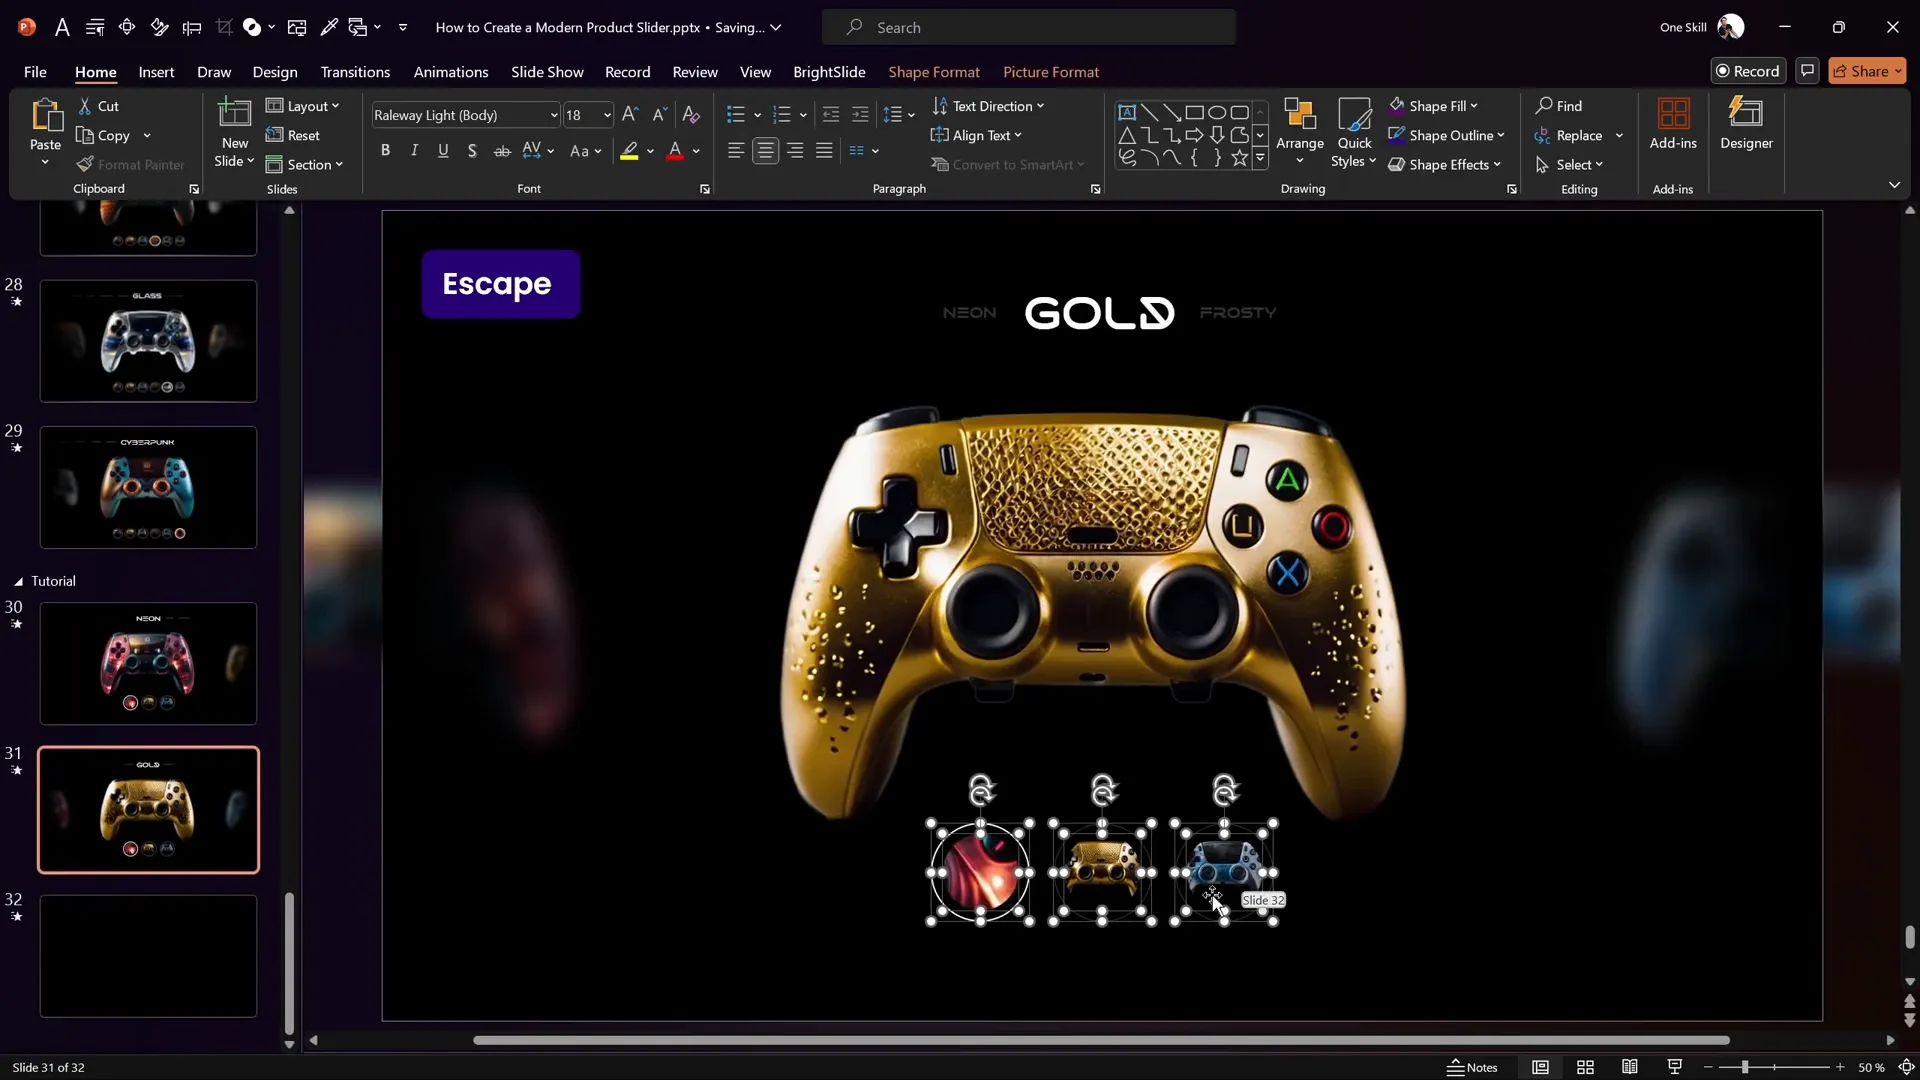
Setting Up Morph Transitions for Smooth Animation
PowerPoint’s Morph transition is the secret ingredient that brings the product slider to life with smooth scrolling animations. Here’s the setup process:
- Create three slides: Duplicate your initial slide to have three identical slides representing each controller state.
- Adjust controller positions: On each subsequent slide, shift the controllers one step to the left to simulate scrolling. Make the central controller larger and remove blur, while side controllers are smaller and blurred.
- Update text boxes: Move text boxes in sync with the controllers and update the model names accordingly.
- Apply Morph transition: Select all three slides, go to the Transitions tab, and apply the Morph transition with a duration of 2 seconds.
The morph transition automatically animates the movement and resizing of objects between slides, creating a seamless sliding effect.
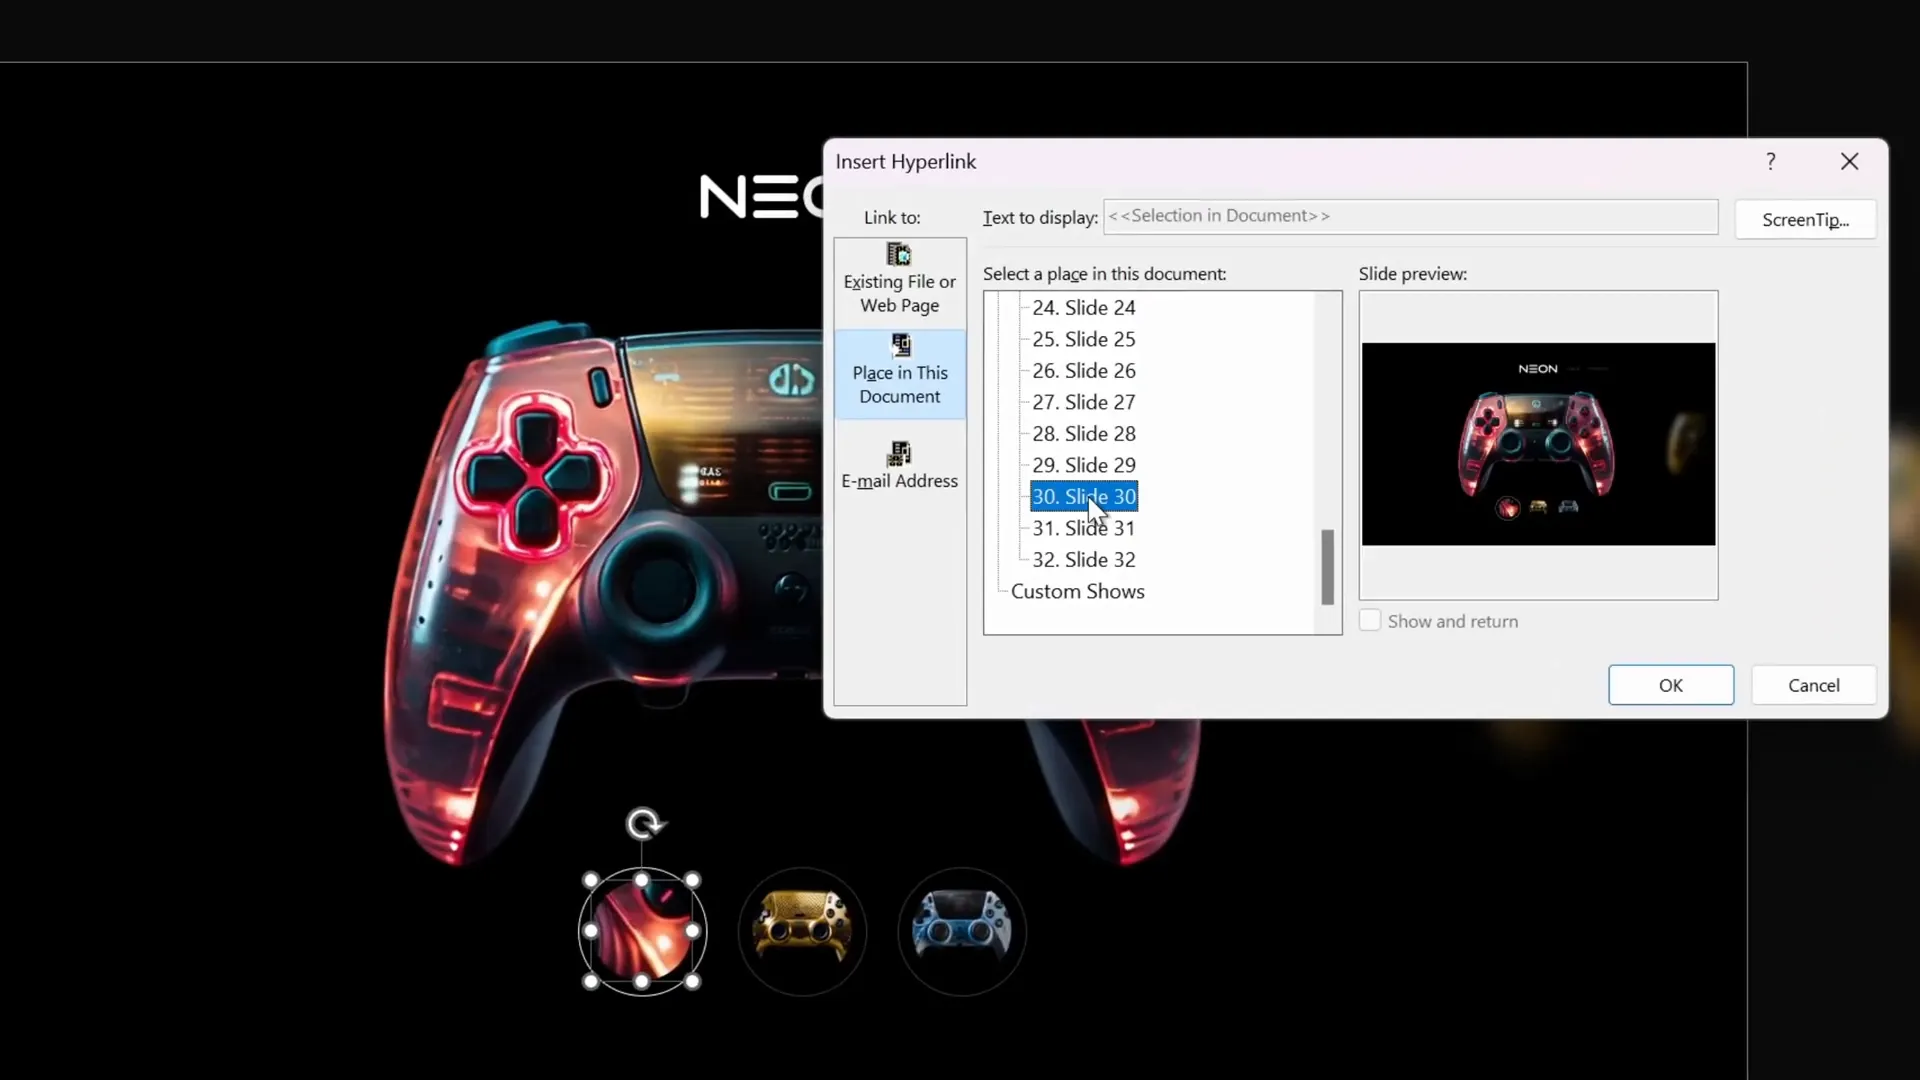
Linking Buttons to Slides for Navigation
To make your product slider interactive, link each button to its respective slide:
- Select a button: Click on the first button.
- Insert link: Go to Insert > Link or press Ctrl + K.
- Choose slide destination: Select Place in This Document and link to the corresponding slide number (e.g., slide 30 for the first controller).
- Repeat for all buttons: Link the second and third buttons to slides 31 and 32 respectively.
Now, clicking on any button during the presentation will navigate to the respective slide, triggering the morph animation to slide the controllers accordingly.
Fixing Animation Issues with Object Naming
Sometimes, Morph transitions may not animate objects correctly, especially with multiple similar shapes. To solve this:
- Rename outline circles: Rename each button’s outer circle uniquely using double exclamation marks and a consistent naming convention (e.g., !!ring one, !!ring two, !!ring three).
- Delete and re-copy buttons: Remove buttons from subsequent slides and copy-paste the correctly named buttons from the first slide to maintain consistency.
- Update active button styling: Adjust the active button’s outline on each slide to reflect the current selection.
This naming trick helps PowerPoint identify matching objects across slides to animate them smoothly.
Final Touches and Testing Your Animation Slide
With everything set up, it’s time to polish and test your product slider:
- Adjust cropping on buttons: Use Picture Format > Crop to zoom in or zoom out on images inside buttons, enhancing the zoom effect on click.
- Align controllers and texts: Ensure all elements are aligned and spaced evenly for a professional look.
- Test in full screen: Run the presentation in full-screen mode and click buttons to verify the scrolling animation and button highlights work flawlessly.
- Additional slides: If desired, expand your slider with more images and slides, following the same principles.

Summary Table: Key Steps to Create a PowerPoint Animation Slide Product Slider
| Step | Action | Purpose |
|---|---|---|
| 1 | Insert blank slide and hide footer/slide number | Create a clean canvas for the slider |
| 2 | Use AI-generated images | Get unique, high-quality visuals |
| 3 | Add images and text boxes | Design the slider layout |
| 4 | Add shadow rectangles and blur effects | Create depth and focus |
| 5 | Create clickable circular buttons with images | Enable interactive navigation |
| 6 | Duplicate slides and apply Morph transition | Animate smooth sliding effect |
| 7 | Link buttons to corresponding slides | Make buttons clickable |
| 8 | Rename objects to fix animation issues | Ensure smooth Morph animations |
| 9 | Final adjustments and testing | Polish and verify functionality |
Frequently Asked Questions (FAQs)
What is a PowerPoint animation slide?
A PowerPoint animation slide is a slide that uses PowerPoint’s animation and transition features to add movement and interactivity, making presentations more engaging. Examples include morph transitions, fade effects, and clickable buttons that trigger slide navigation.
How does the Morph transition work in PowerPoint?
The Morph transition animates smooth movement, resizing, and transformation of objects between two slides. PowerPoint automatically calculates how objects should move or change, creating seamless animations without complex manual keyframes.
Can I use AI-generated images in PowerPoint presentations?
Yes, AI-generated images like those created with Leonardo AI can be imported into PowerPoint to enhance your slides with unique, customized visuals. Just save the images and insert them as pictures in your slides.
How do I create clickable buttons in PowerPoint?
Clickable buttons can be created by inserting shapes or images, then adding hyperlinks to specific slides or external URLs. Use the Insert > Link feature to link buttons to slides for navigation within your presentation.
How can I fix Morph transition animation issues?
Sometimes Morph animations don’t work smoothly if objects have generic names or inconsistent formatting. Renaming objects uniquely (e.g., using exclamation marks) and ensuring consistent object placement across slides helps PowerPoint properly animate them.
Is it possible to download the tutorial slides and images?
Yes! One Skill PPT offers free downloads of the tutorial slides and more creative layouts via their Skillshare class. You can sign up for a one-month free trial of Skillshare to access and download all resources.
Conclusion
Creating a dynamic product slider in PowerPoint might seem intimidating at first, but with the right techniques and tools, it’s absolutely achievable. By leveraging PowerPoint’s Morph transition, AI-generated images, and interactive clickable buttons, you can elevate your presentations to a whole new level of professionalism and engagement.
Remember, the key steps involve setting up a clean slide, designing a visually appealing layout, adding depth with shadows and blur effects, and enabling interactivity through button hyperlinks. Don’t forget to rename your objects properly to avoid animation glitches and always test your slide show to ensure everything works smoothly.
Whether you’re showcasing products, portfolios, or creative projects, mastering the powerpoint animation slide technique will empower you to captivate your audience effectively.
For those eager to explore AI-generated images, I highly recommend diving into Leonardo AI and the Skillshare course mentioned earlier. It’s a fantastic way to add originality and flair to your presentations.
Thank you for reading! Stay creative, keep experimenting with PowerPoint, and watch your presentations transform into dynamic storytelling masterpieces.
For more tutorials and free resources, check out One Skill PPT’s YouTube channel and their Skillshare classes.


