
Welcome to an exciting and comprehensive guide on transforming your PowerPoint presentations into an engaging platform game! In this tutorial, you’ll learn how to animate a game character, create smooth animated GIFs, build a vibrant game background, and add interactive elements like coins and information pop-ups—all within PowerPoint. This step-by-step walkthrough, inspired by One Skill PowerPoint, will empower you to gamify your presentations and captivate your audience like never before.
Whether you’re a Mac or Windows user, this tutorial is designed to be accessible and fun. Ready to dive into the world of PowerPoint animation and game design? Let’s get started!

Table of Contents
- Introduction: Meet Jack, Our Animated Runner
- Step 1: Creating an Animated Game Character in PowerPoint
- Step 2: Exporting and Enhancing the Animated GIF
- Step 3: Adding a Vibrant Game Background
- Step 4: Positioning and Animating Jack on the Game Map
- Step 5: Adding Interactive Coins and Information Boxes
- Step 6: Finalizing and Testing Your PowerPoint Game
- Bonus Tips and Tools Used
- Frequently Asked Questions (FAQ)
- Conclusion
Introduction: Meet Jack, Our Animated Runner
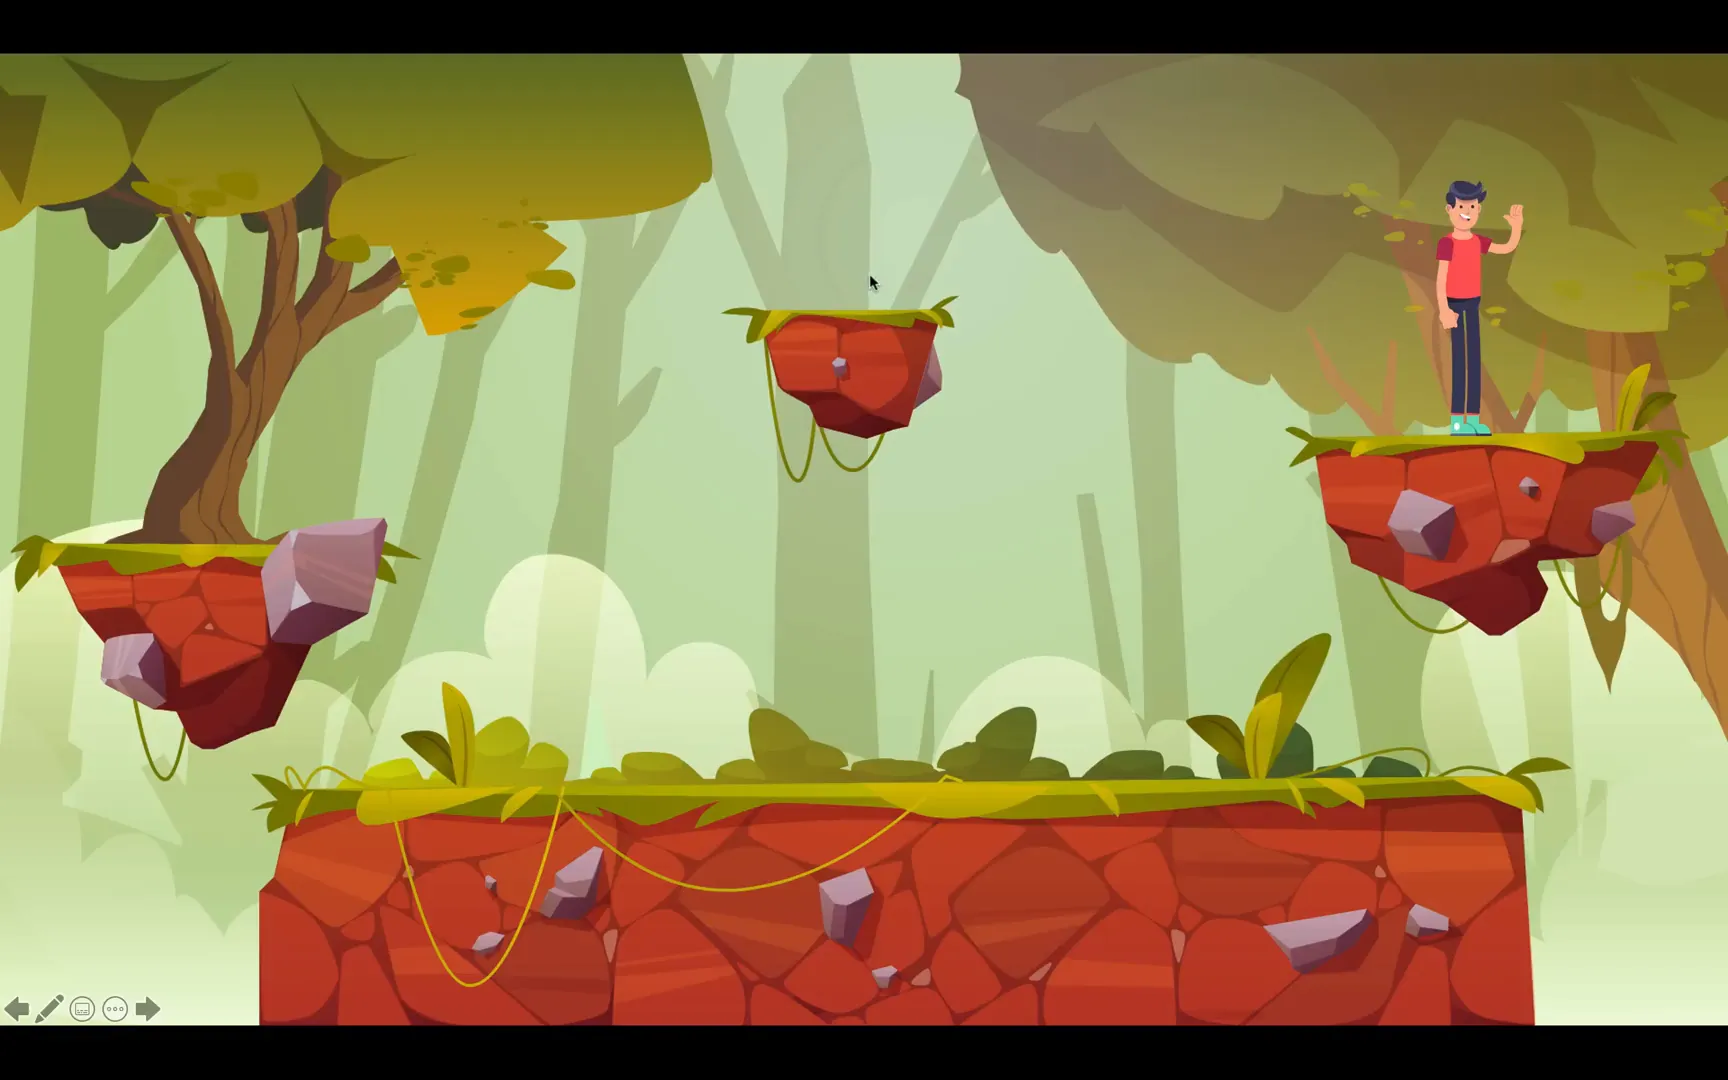
To kick things off, we introduce Jack, our animated runner character who will become the star of our PowerPoint game. Jack is a simple figure that we’ll animate to perform actions like running and jumping across a whimsical forest landscape with floating rocks.
Imagine Jack running to the right, jumping from rock to rock, collecting shiny coins along the way, and returning to his starting point. This dynamic behavior not only adds movement but also interactivity to your presentation, making it engaging and memorable.
Here’s a quick preview of what we’ll create:
- Jack running smoothly across the screen
- Jumping animations on floating rocks
- Collectible coins that disappear upon contact
- Pop-up information boxes triggered by coin collection
By the end of this tutorial, you’ll have a game-like experience built entirely in PowerPoint!
Step 1: Creating an Animated Game Character in PowerPoint
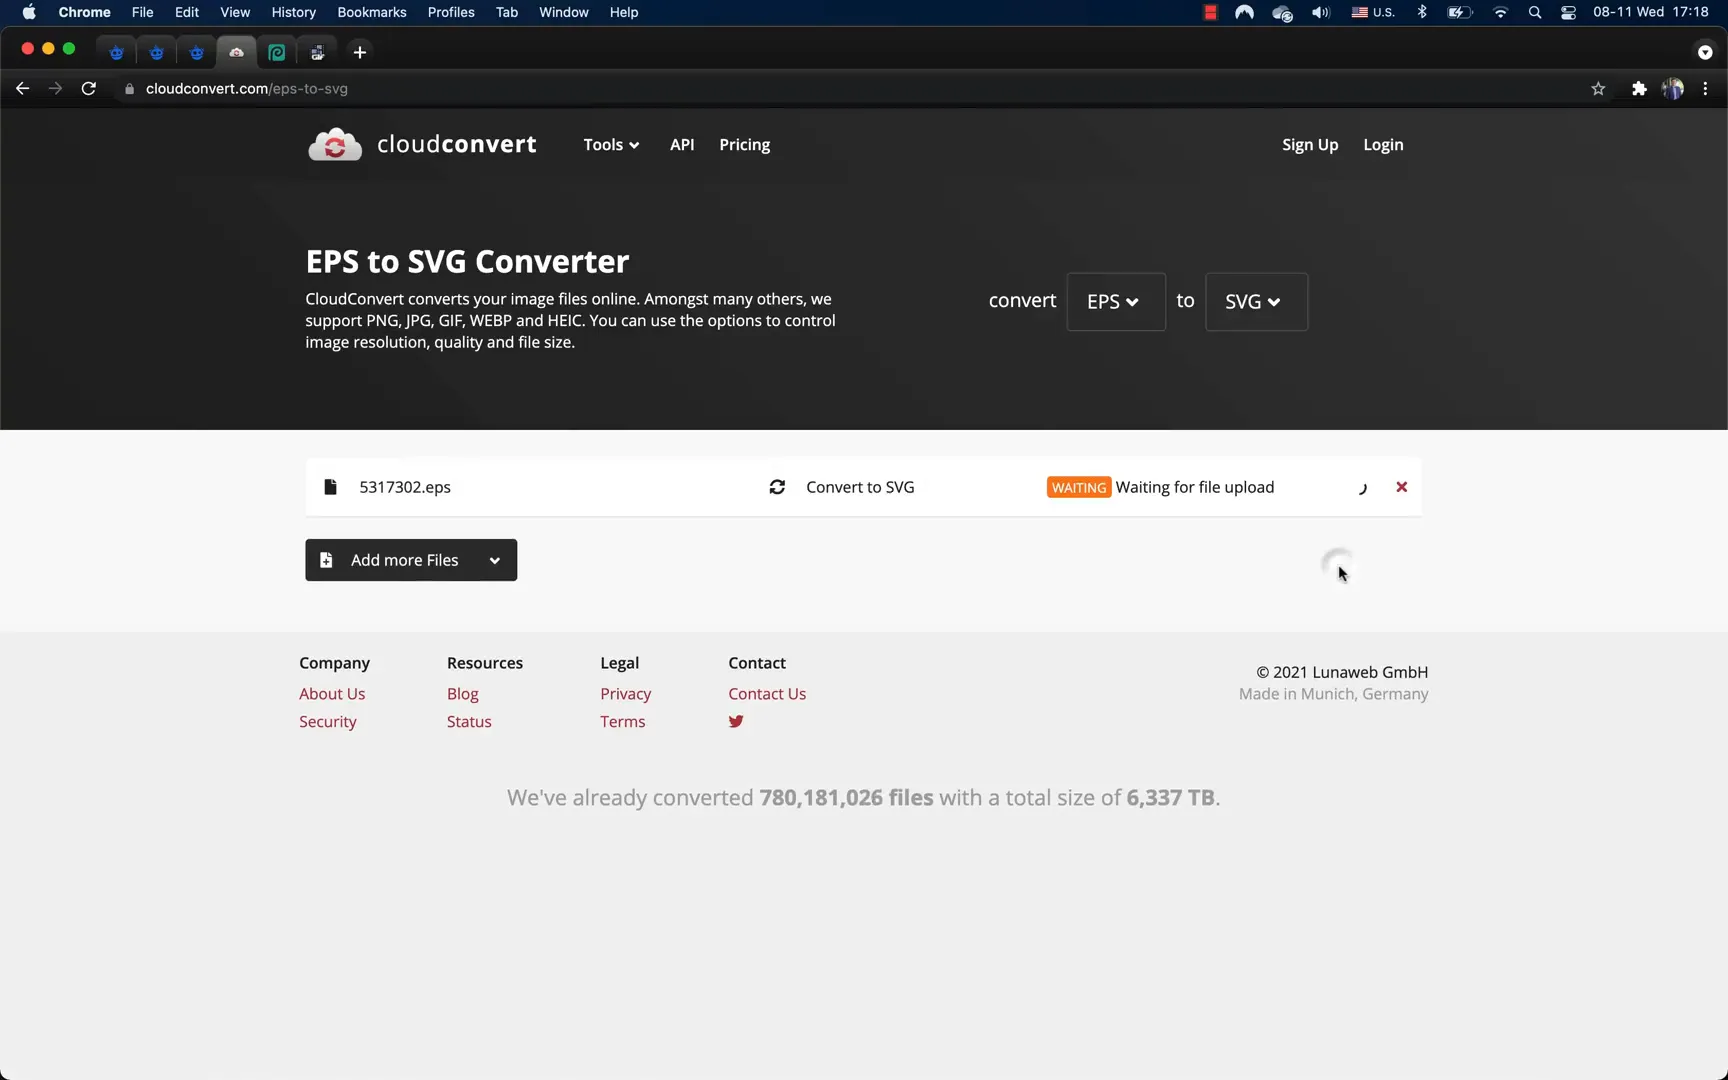
The first major step is to create an animated game character. Instead of drawing Jack from scratch, we’ll use an illustration from Freepik, a great resource for high-quality vector graphics. This saves time and ensures a professional look.
Important: The illustration is provided as an EPS file, which PowerPoint cannot import directly. We need to convert it to SVG format using an online converter like CloudConvert.
Once converted, insert the SVG file into PowerPoint:
- Go to Insert > Pictures and select the SVG file.
- Resize the illustration to make Jack larger and improve the quality of the upcoming GIF.
- Center the illustration on the slide.
Next, convert the SVG illustration to shapes so we can manipulate individual parts:
- Right-click the SVG and select Convert to Shape.
- Ungroup the shapes into individual components (arms, legs, body, etc.).
- Delete any background elements or unnecessary shapes.
- Group each frame of Jack’s running cycle separately for animation.
Jack’s running animation consists of 10 frames, each representing a different stage of his run cycle. Arrange these frames horizontally to organize your workflow.
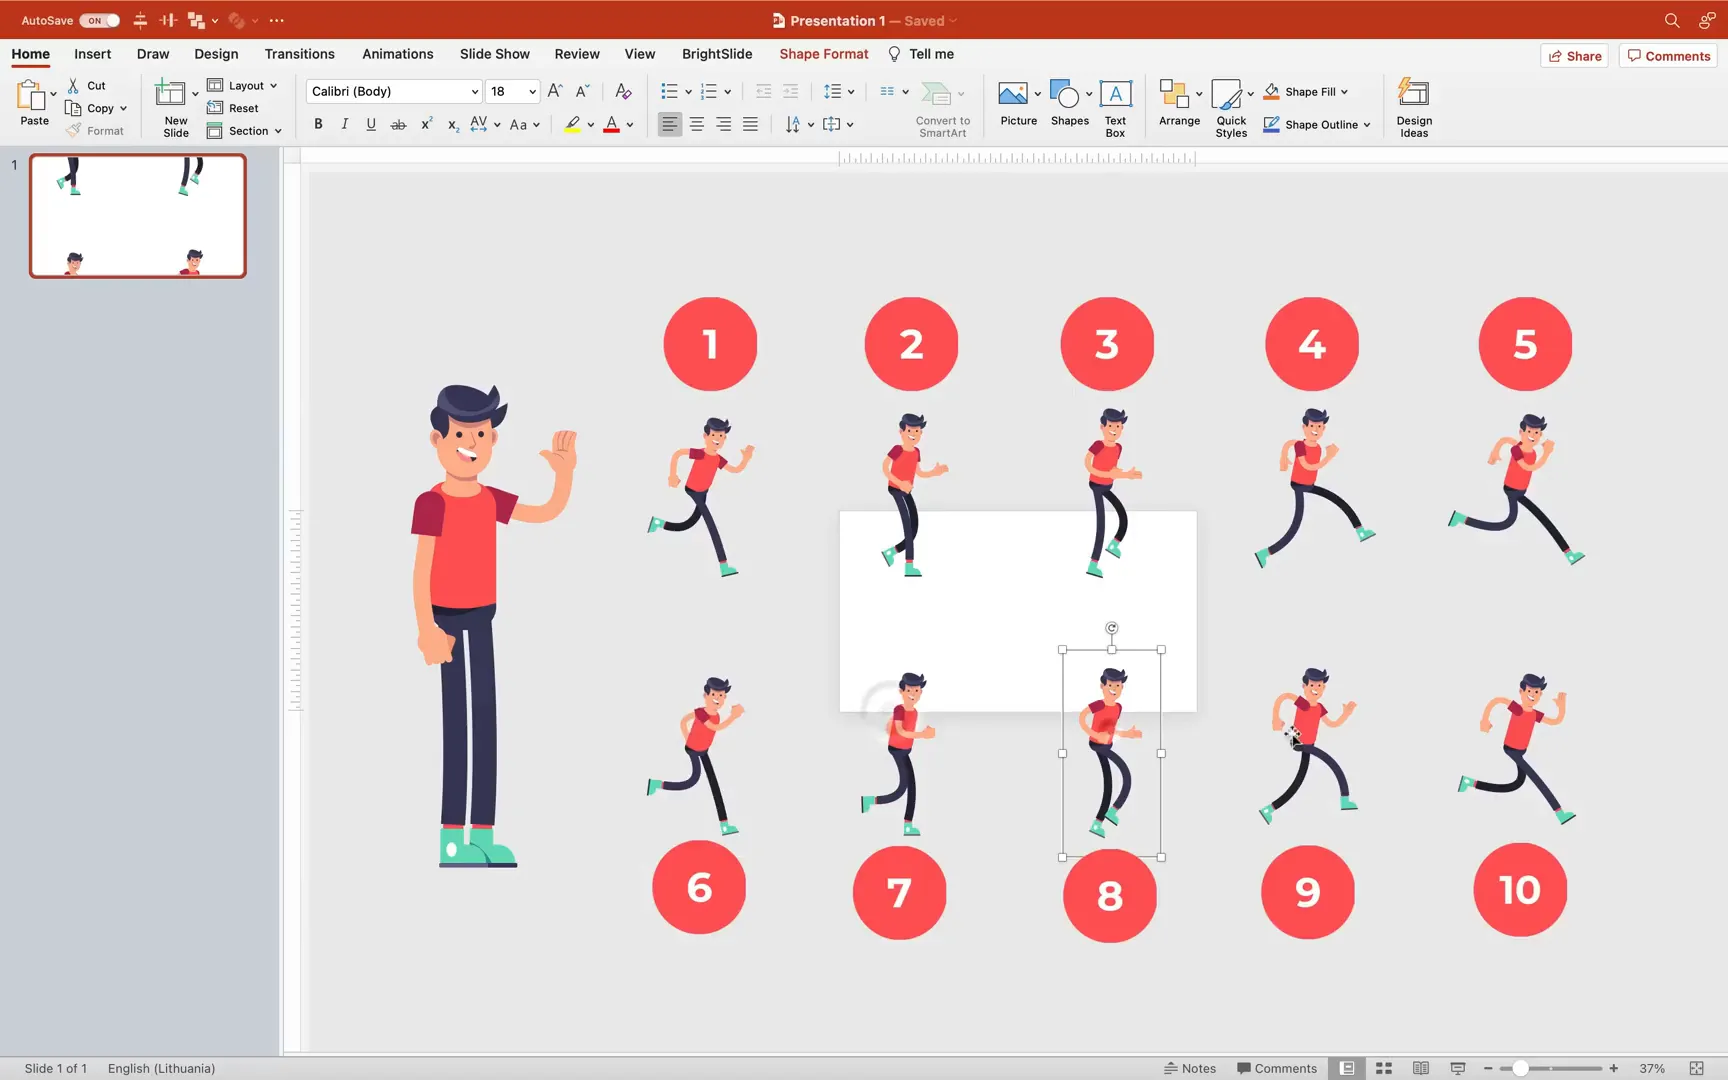
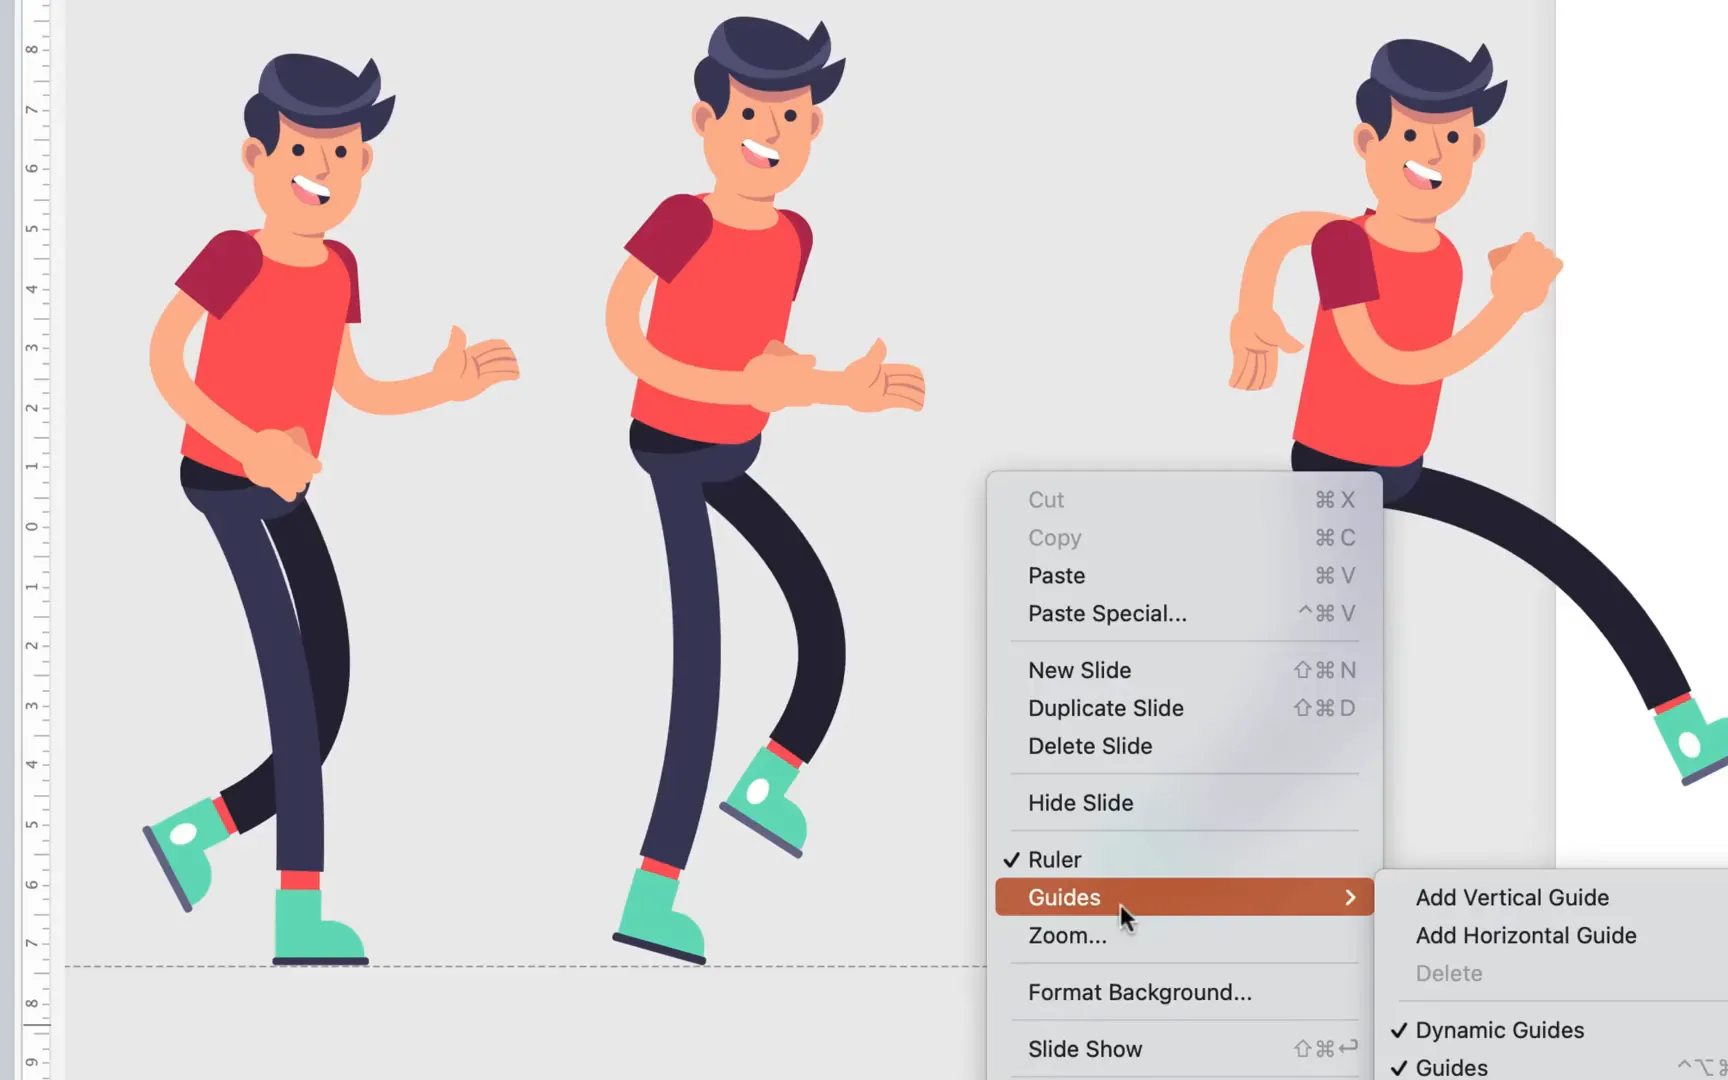
Adjust line widths and sizing to ensure consistency across all frames. For example, if one frame has unusually thick arms or legs, modify the line width to match the others.
Once all frames are aligned and grouped, position them so each foot touches the same horizontal guide. This alignment ensures smooth animation when frames are layered on top of each other.
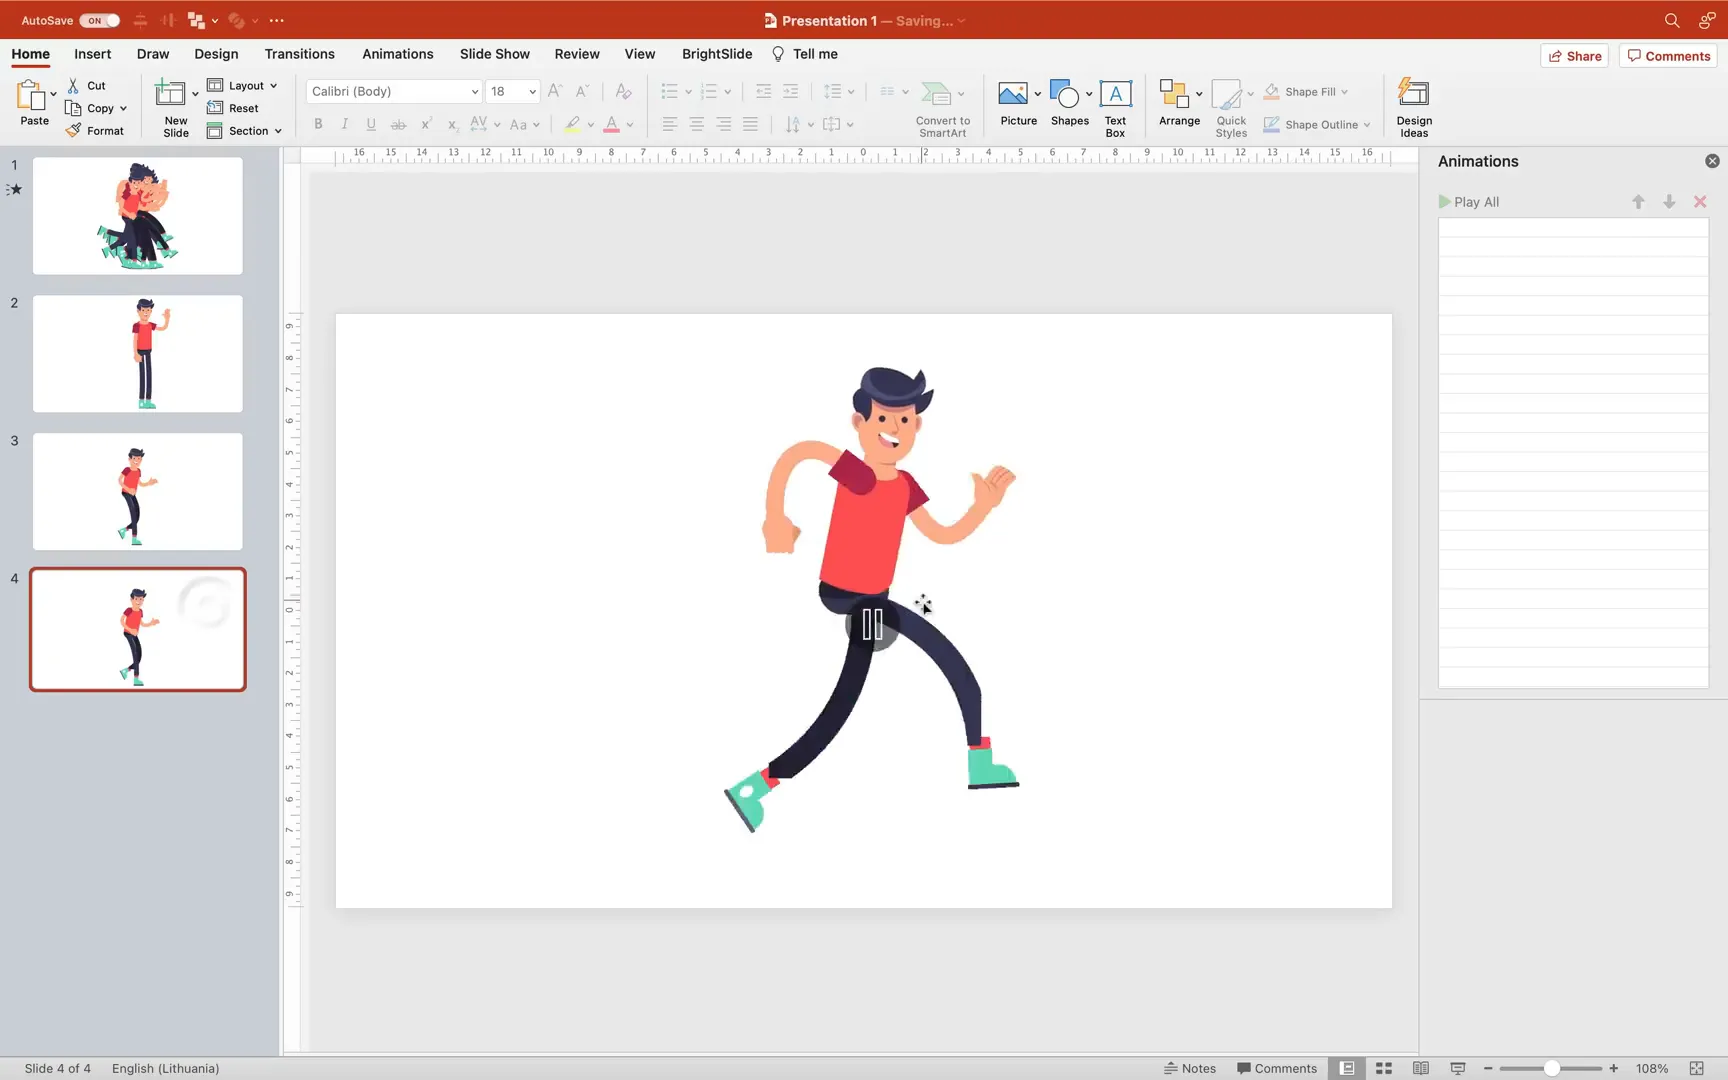
Animating the Run Cycle Using PowerPoint Animations
Now for the fun part: animating Jack’s run cycle!
We’ll use a simple appear/disappear animation sequence to cycle through the frames:
- Add a Disappear exit animation to the first frame with a slight delay.
- Add an Appear entrance animation to the second frame, set to start after previous.
- Add a Disappear exit animation to the second frame with a delay.
- Use the animation painter to copy the appear/disappear animations from the second frame to all subsequent frames.
- Align all frames on top of each other, so only one frame is visible at a time.
When you play the slideshow, the frames will cycle through, creating the illusion of running.
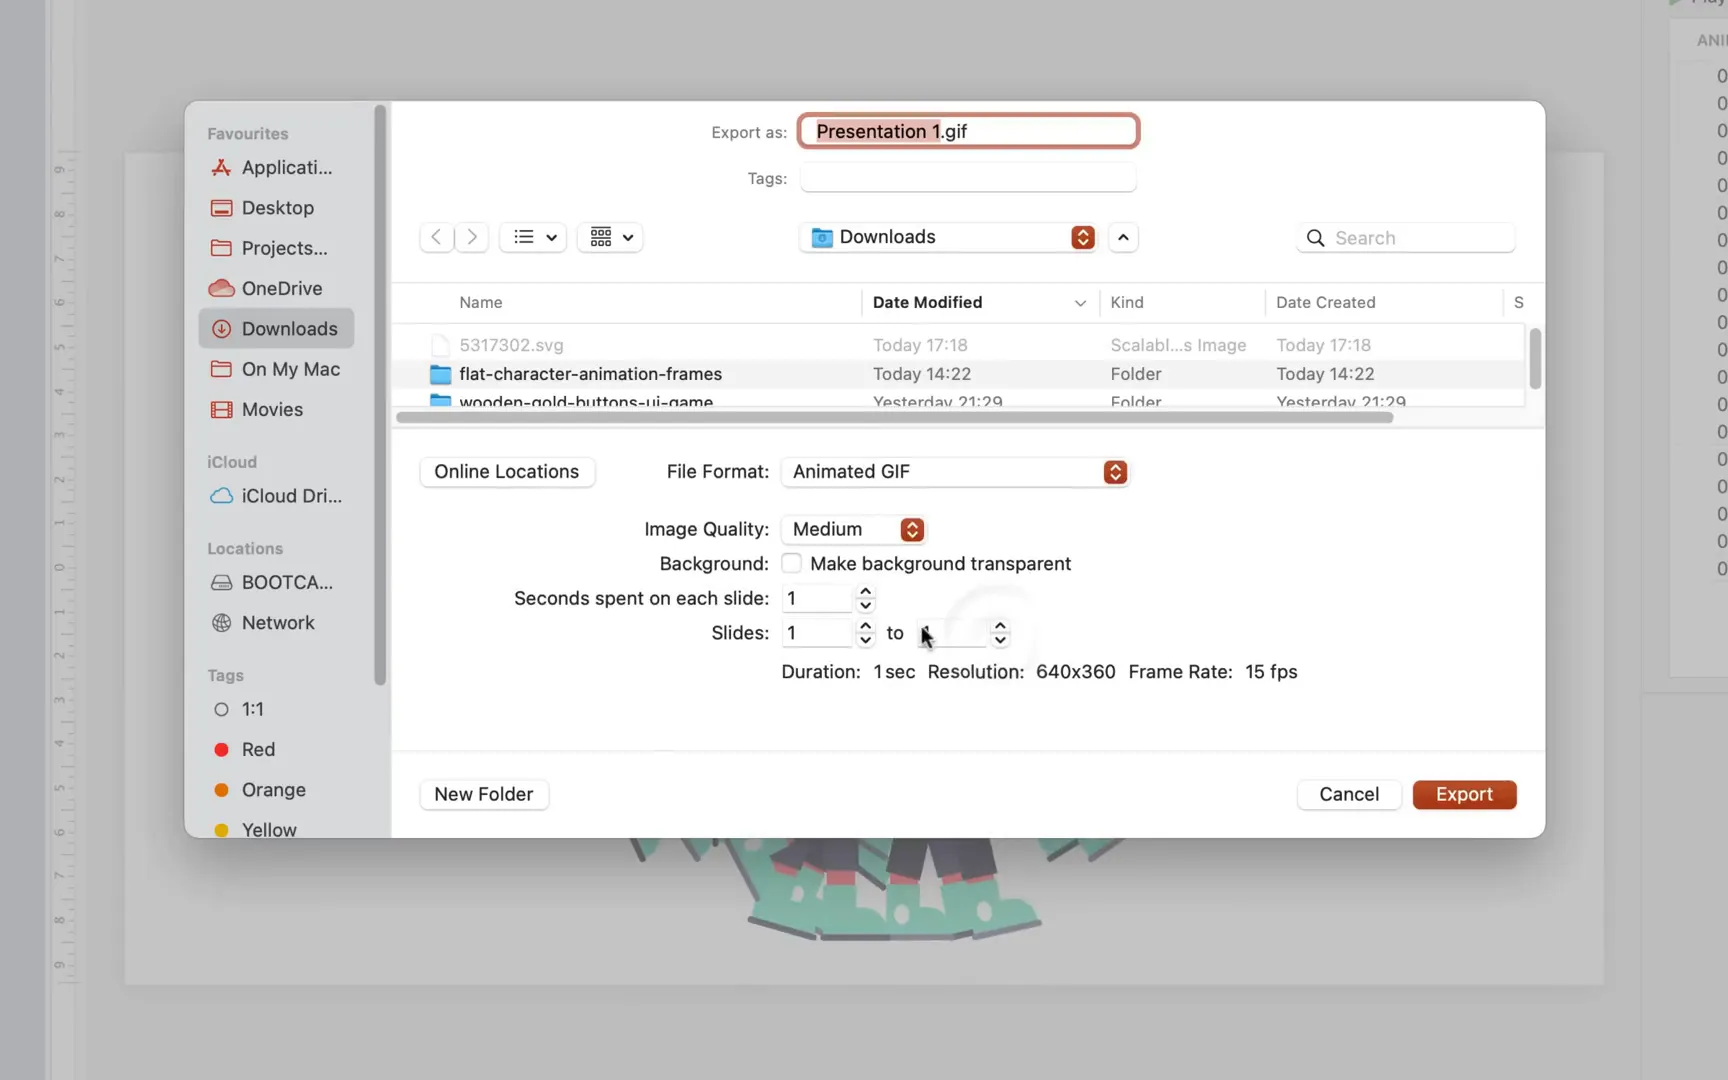
Step 2: Exporting and Enhancing the Animated GIF
With the run cycle animation complete, the next step is to export it as an animated GIF for easy reuse and smoother playback.
In PowerPoint:
- Go to File > Export.
- Select Animated GIF as the file format.
- Choose Extra Large image quality.
- Check the option for Make background transparent to avoid a white box around Jack.
- Export only the slide containing the run cycle animation.

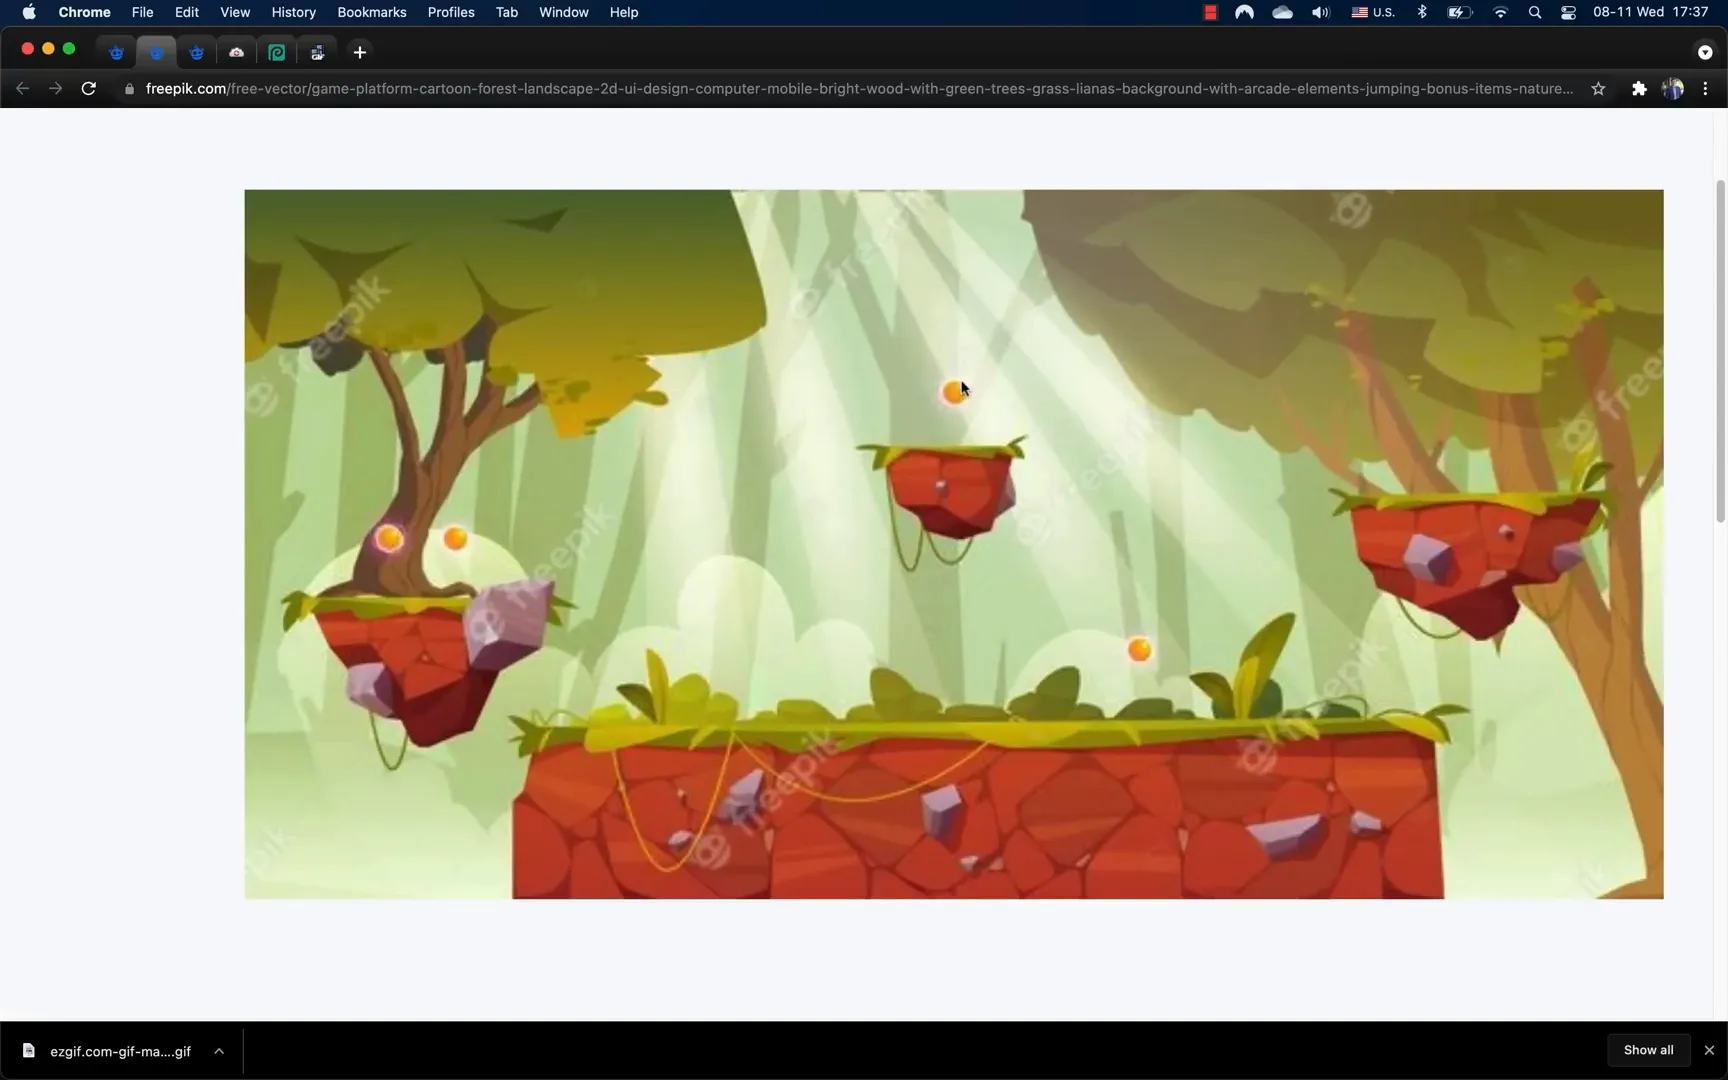
The exported GIF plays but may appear choppy. To smooth it out, upload the GIF to ezgif.com, a free online GIF editor. Here’s what to do:
- Upload your GIF.
- Skip any empty frames to keep the animation clean.
- Set all frame delay times to the same value (e.g., 8 milliseconds) for consistent timing.
- Choose the option Don’t stack frames to prevent overlay issues.
- Crop transparent pixels to reduce file size and focus on the animated character.
- Generate and download the optimized GIF.
This process results in a smooth, looping GIF with a transparent background that fits perfectly into your presentation.
Step 3: Adding a Vibrant Game Background
With Jack ready to run smoothly, it’s time to create the game world where he’ll adventure. For this, we’ll use a beautiful forest illustration featuring floating rocks.
Like before, the illustration comes in EPS format, but it’s more complex due to gradients and layered elements. Instead of converting to SVG, we’ll use Photopea, an online Photoshop alternative:
- Open the EPS file in Photopea.
- Explore the layers and hide unwanted elements such as shiny balls to avoid visual clutter with coins later.
- Crop the image to a 16:9 aspect ratio for perfect slide fit.
- Adjust and reposition floating islands if desired.
- Export the cleaned-up background as a PNG.
Insert the background PNG into PowerPoint and name it BG in the selection pane for easy reference.
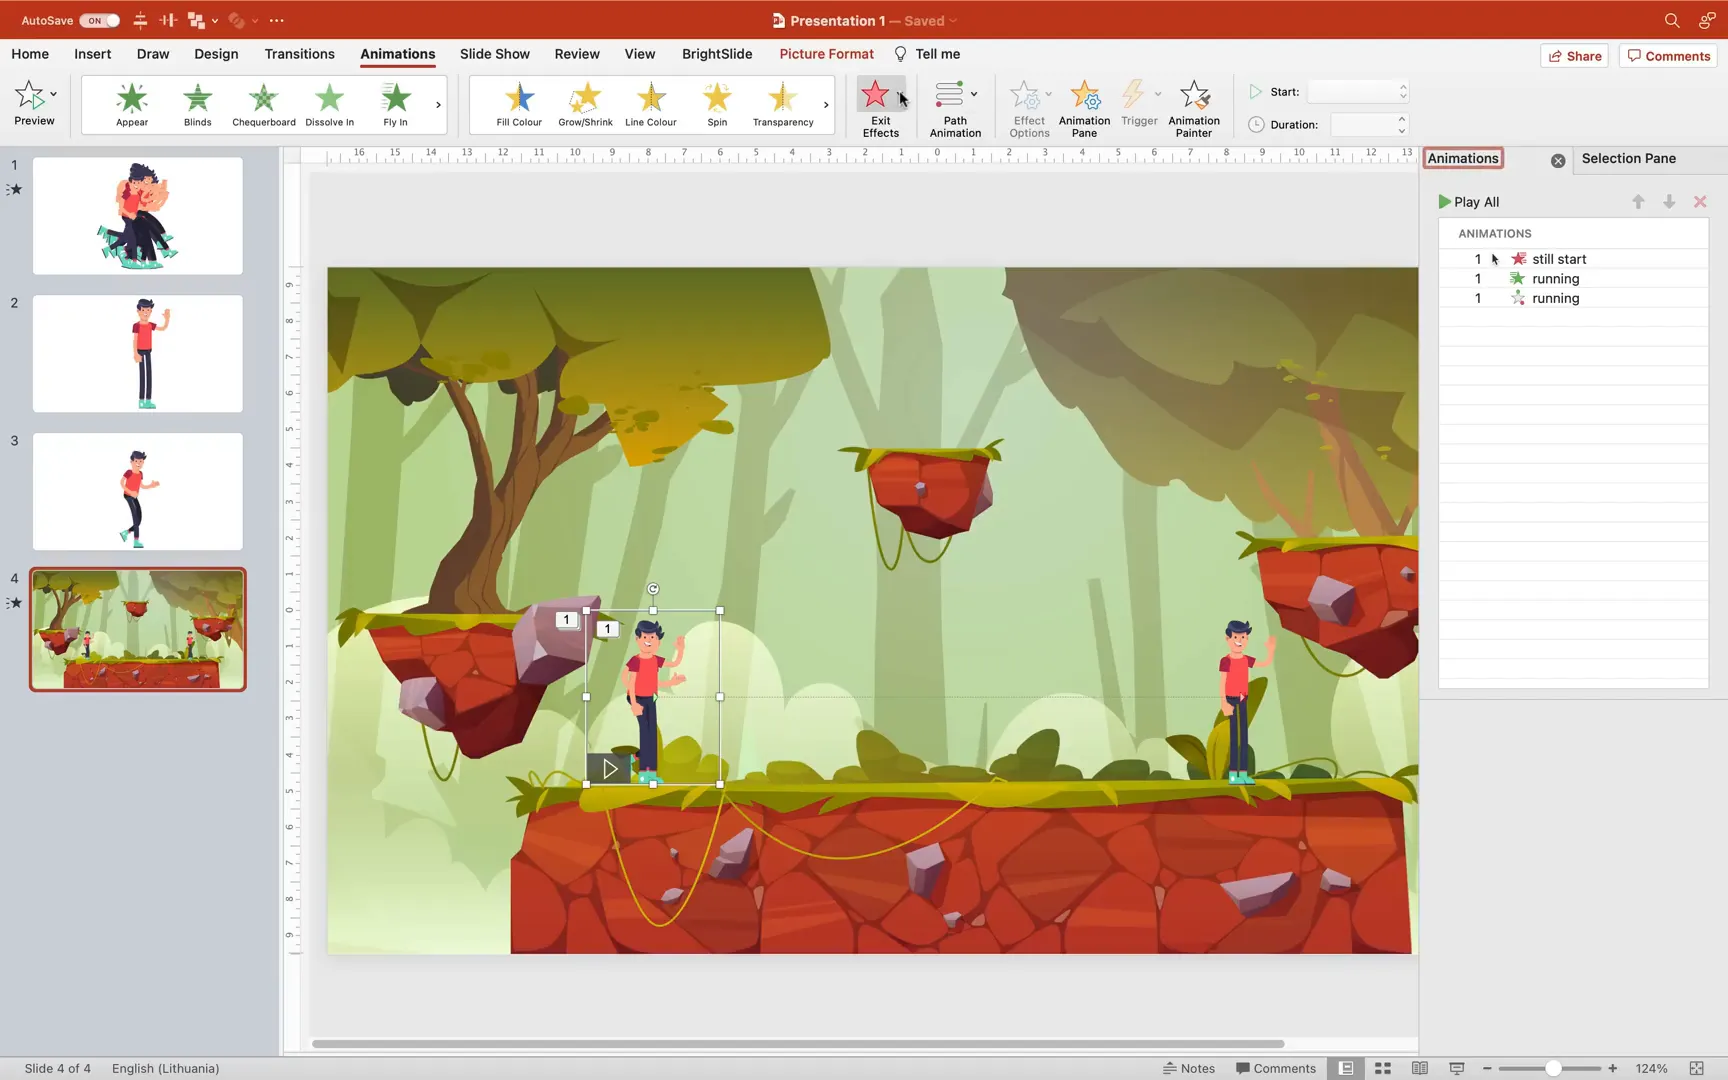
Step 4: Positioning and Animating Jack on the Game Map
Now, let’s bring Jack into the game world and animate his movement across the map.
Start by copying the standing Jack from the first slide (the still frame before running) and paste it onto the background slide. Resize Jack so that his proportions match the background scale.
Name this Jack Still Start in the selection pane, representing his starting position.
Make a copy and name it Still End, which will represent Jack’s stopping point after running or jumping.

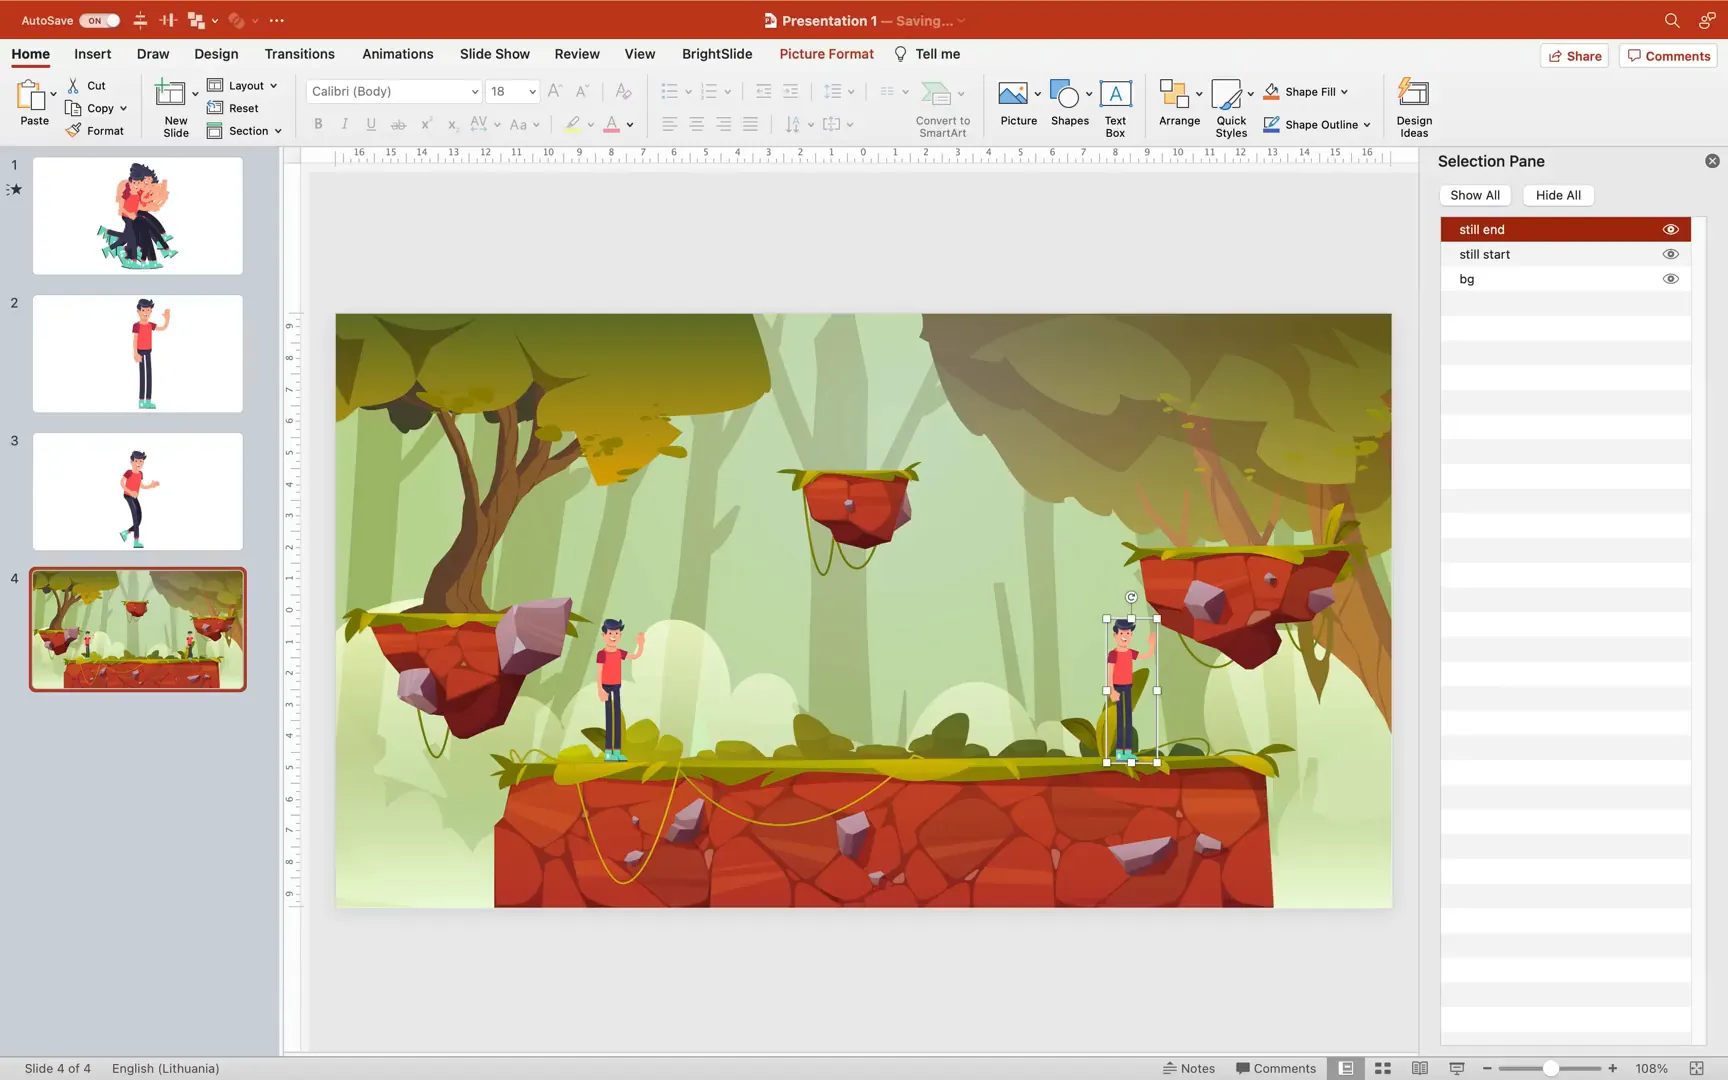
Animating Jack’s Run to the Right
Next, copy the animated running Jack GIF and paste it into the background slide. Resize and align it behind the still start Jack to prepare for the running animation.
Set up animations:
- Add a Disappear animation to Still Start, triggered on click.
- Add an Appear animation to the running Jack, starting with previous (simultaneously with the disappearance of still start).
- Add a Motion Path animation for the running Jack to move to the right, aligning with the Still End position.
- Add a Disappear animation to the running Jack to hide it after movement.
- Add an Appear animation to Still End, starting with previous to show Jack standing at the end position.
Enable kiosk mode in slideshow settings to disable accidental slide advances and ensure animations only trigger on clicks to Jack.
Animating Jack’s Jumps on Floating Rocks
To animate Jack’s jumps onto the floating rocks, follow similar steps but swap the running animation for a jumping pose from the original frames:
- Copy the jumping frame from the run cycle slides.
- Use the Change Picture from Clipboard feature on the running Jack to switch his appearance to the jumping pose.
- Adjust the motion path to a curved “turn” path to simulate jumping arcs.
- Fine-tune the motion path points and duration (e.g., 0.5 seconds) for smooth, realistic jumps.
- Link the end of each jump animation to the next slide for seamless transitions.
Repeat this process for each jump across the three rocks and back to the starting position.
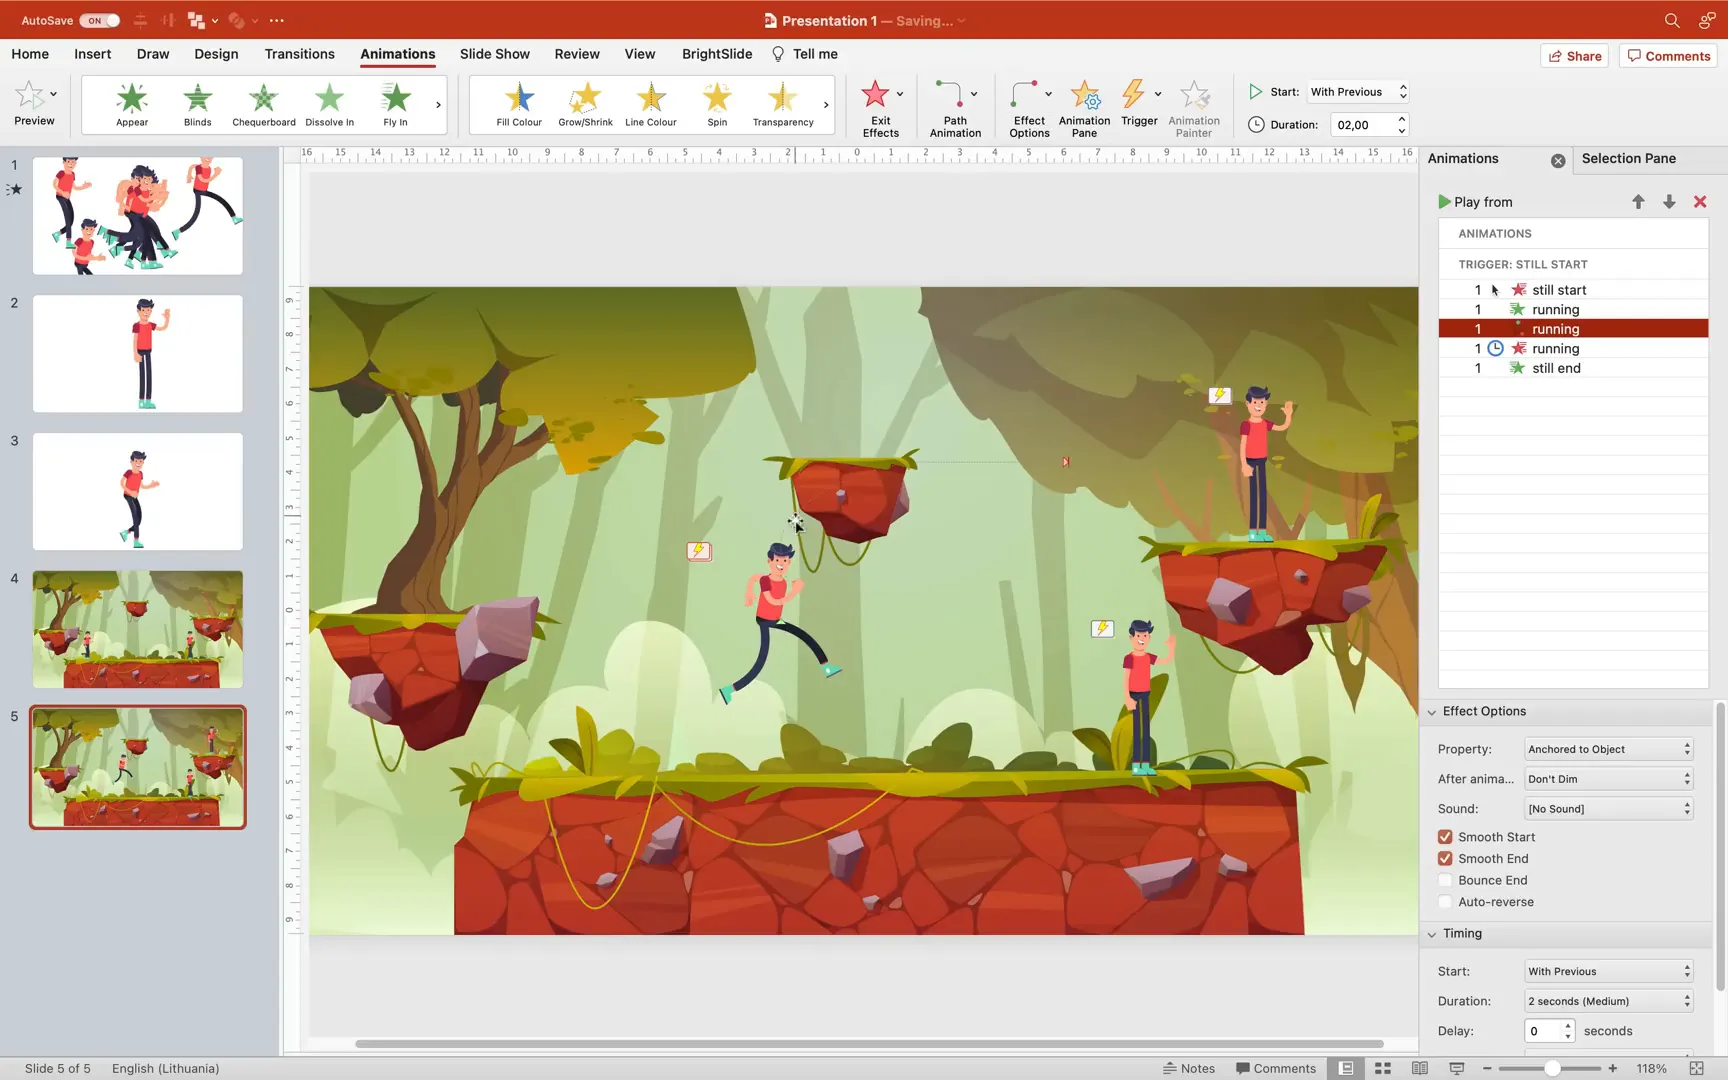
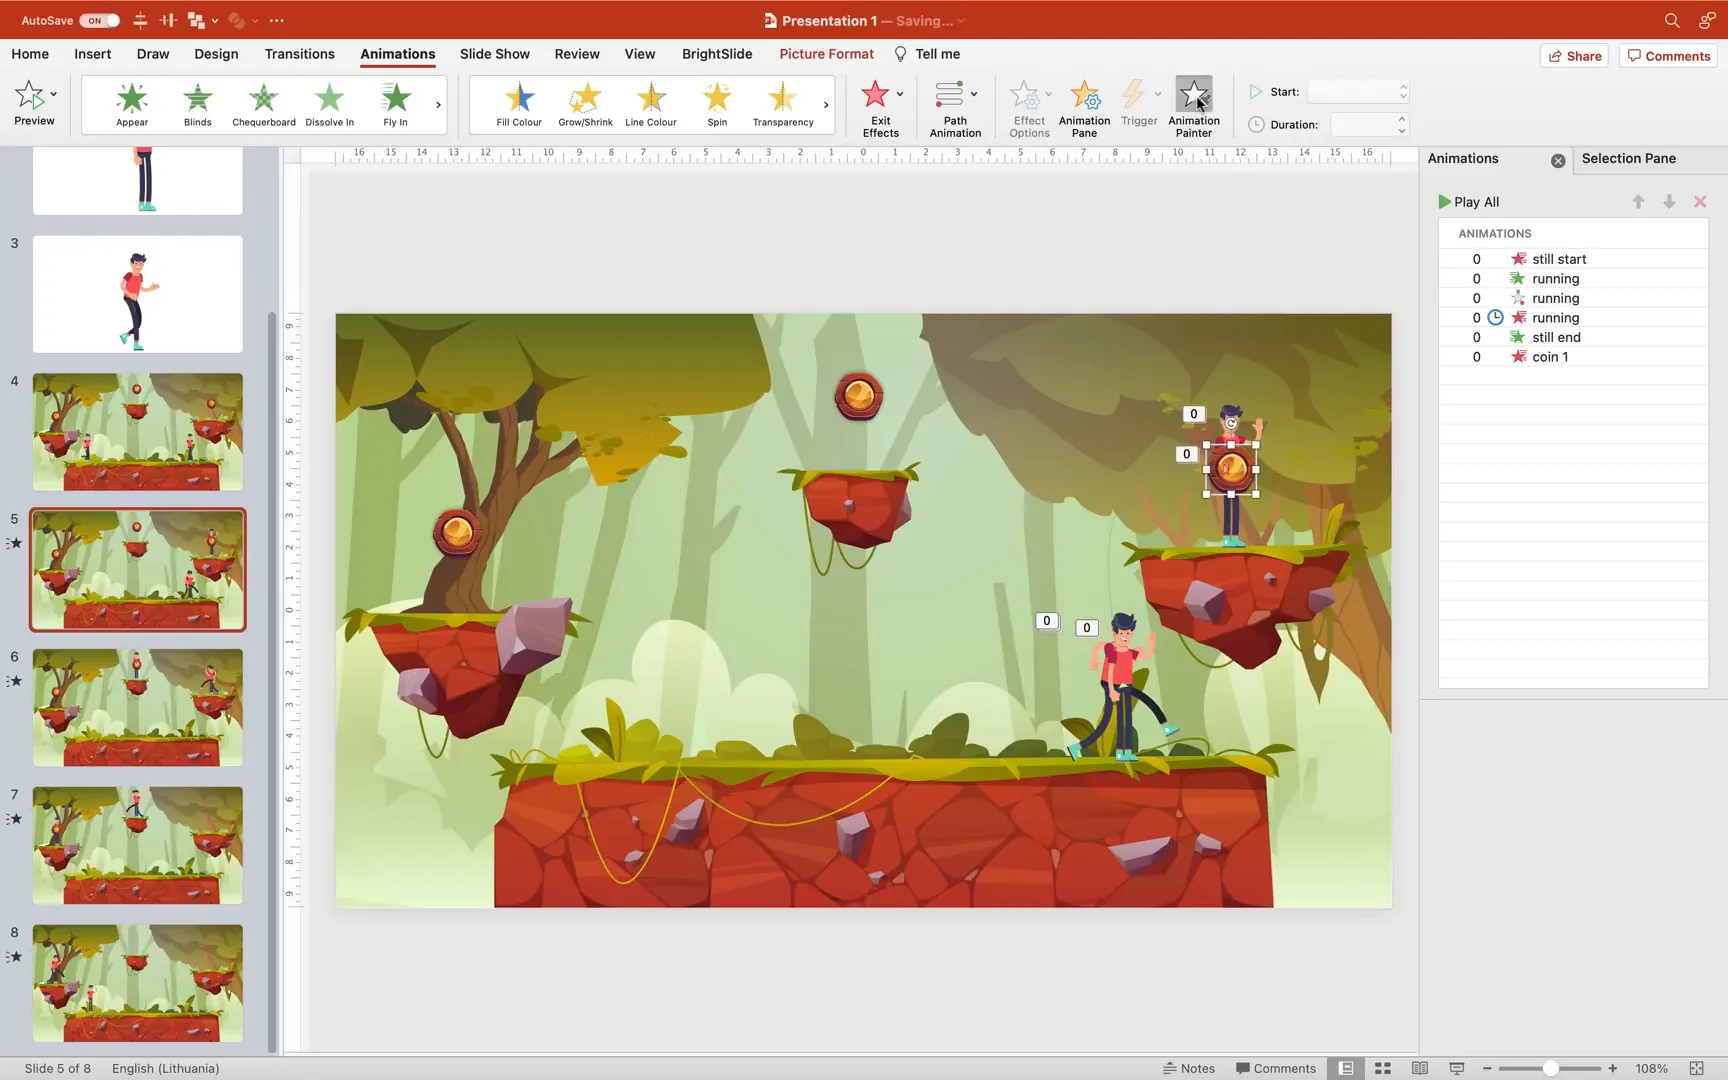
Step 5: Adding Interactive Coins and Information Boxes
To make the game more engaging, insert shiny coins for Jack to collect as he runs and jumps around the map.
Use Freepik illustrations of coins and a game board for information pop-ups. Extract individual coin and board shapes using Photopea, then paste them into the relevant slides.
Place coins on the rocks and path where Jack will “collect” them.
For each coin:
- Add an exit animation (e.g., Float Out) that triggers with previous when Jack reaches the coin.
- Ensure coins disappear smoothly as Jack collects them.
- Use the animation painter to replicate coin animations across slides for consistency.
Next, add information boards that pop up when Jack collects a coin:
- Group the board elements and text boxes.
- Add a Fly In animation from the bottom, starting with previous to appear alongside coin disappearance.
- Add a Bounce End effect for a playful entrance.
- Customize the text to provide facts or other relevant information tied to each coin.
- Copy and paste the board to subsequent slides, editing text as needed.
Step 6: Finalizing and Testing Your PowerPoint Game
After setting up all animations, triggers, and links, test your presentation in kiosk mode to experience the game as your audience will:
- Click on Jack to start running and jumping.
- Watch Jack collect coins, with coins disappearing and info boxes popping up.
- Ensure smooth transitions between slides and animations.
- Confirm that clicking outside interactive elements does not advance slides accidentally.
This setup allows you to gamify your PowerPoint presentation, turning a typical slide deck into an engaging, interactive experience.

Bonus Tips and Tools Used
This tutorial leverages several free and accessible online tools and resources to enhance your PowerPoint game:
- Freepik for high-quality vector illustrations (freepik.com).
- CloudConvert to convert EPS files to SVG (cloudconvert.com).
- Photopea for editing complex EPS files and extracting individual elements (photopea.com).
- Ezgif for optimizing and smoothing animated GIFs (ezgif.com).
Additionally, keep in mind the following:
- Use kiosk mode in PowerPoint to control slide navigation and triggers.
- Maintain consistent naming conventions in the selection pane for easier animation management.
- Use grouping and layering strategically to keep your slides organized.
Frequently Asked Questions (FAQ)
Can I create these animations on Windows versions of PowerPoint?
Yes! While the tutorial uses Microsoft 365 for Mac, the steps are very similar on Windows. Some interface elements might look slightly different, but the core functionality remains the same.
Is it necessary to convert EPS files to SVG before importing?
PowerPoint does not support EPS files directly. Converting to SVG is recommended for simpler illustrations. For complex EPS files with gradients, use an editor like Photopea to export to PNG instead.
How do I make the animated GIF background transparent?
When exporting the animated GIF from PowerPoint, select the option Make background transparent. If your version of PowerPoint does not support this, use online tools like Ezgif to replace white backgrounds with transparency.
Can I customize the information boxes that appear when Jack collects coins?
Absolutely! The information boxes are simple groups with text boxes. You can edit the text to display any message, fact, or data relevant to your presentation.
How do I prevent accidental slide advances during the game?
Enable kiosk mode in PowerPoint’s slideshow setup. This disables mouse clicks and keyboard keys from advancing slides except for triggered animations and links, giving you full control over navigation.
Can I use this technique for other types of presentations?
Yes! This method can be adapted to create interactive tutorials, quizzes, storytelling presentations, and more. The gamification approach increases engagement and retention.
Conclusion
Transforming your PowerPoint slides into an interactive game is easier than you think. By combining vector illustrations, frame-by-frame animations, motion paths, and interactive triggers, you can craft a captivating experience that your audience will love.
From creating a smooth animated runner character named Jack to designing a beautiful game background, animating movements, and adding collectible coins with information pop-ups, this tutorial covers everything you need to gamify your presentation.
Remember to leverage free online tools for file conversion and GIF optimization, and always test your animations thoroughly in kiosk mode for the best results.
So go ahead, bring your presentations to life with animation, interactivity, and fun. Your audience will thank you!
Stay happy, stay healthy, and happy animating!
Check out the full video: PowerPoint Animation Tutorial 🔥Best Game Engine 🔥


