If you’ve ever felt that your PowerPoint presentations could use a little extra spark, you’re not alone. Mastering PowerPoint animations can truly transform your slides from dull and static to dynamic and engaging. In this comprehensive guide, I’ll walk you through five pro-level PowerPoint animation techniques that you can start using immediately to impress your audience and keep their attention throughout your presentation.
These techniques, inspired by the brilliant work of my friend Interstellar PowerPoint, cover everything from slide zoom flip effects and animated textures to 3D rotating text and futuristic typewriter animations. Plus, we’ll wrap up with a fun way to animate colorful spinning donut charts. By the end of this article, you’ll have practical skills to animate like a pro and create presentations that stand out.

Table of Contents
- Flip Animation for Slide Zooms
- Creating Animated Textures for Your Slides
- Rotating 3D Text Animation with Morph Transition
- Futuristic Typewriter Animation for Text
- Spinning Colorful Donut Charts
- Frequently Asked Questions
1. Flip Animation for Slide Zooms
Slide Zooms are a fantastic PowerPoint feature that lets you create interactive presentations by zooming into different sections or slides. By default, clicking a slide zoom zooms you into the chosen slide and then zooms back, but adding a flip animation can make this transition much more visually appealing.

How to Create the Flip Effect
- Insert a Slide Zoom: Go to Insert > Zoom > Slide Zoom and pick any slide you want to zoom into.
- Remove Zoom Border: Select the slide zoom thumbnail and remove the border to keep the design clean.
- Activate Return to Zoom: Ensure the “Return to Zoom” option is active so you can zoom back after viewing the slide.
- Add 3D Rotation: Select the slide zoom and go to the 3D rotation presets. Choose a parallel rotation preset.
- Customize Rotation: Increase the X-axis rotation so the slide zoom flips to the other side, revealing the back of the slide zoom shape.
- Test the Flip: Click the slide zoom to see it flip and zoom in simultaneously, then flip back when returning.
This technique adds a sleek, professional touch to your slide navigation and keeps your audience engaged.
Adding Subtle Floating Animation
To add more life to your slide, you can animate objects such as images or icons with subtle floating effects. For example, a character wearing VR glasses can gently float up and down, combined with a slight spin for a dynamic feel.
- Motion Path Animation: Apply a motion path line animation that moves the object up and down with a short distance.
- Duration and Smoothness: Set the animation duration to 2 seconds with smooth start and end of 1 second each.
- Auto Reverse: Enable auto reverse so the animation flows back and forth seamlessly.
- Spin Animation: Add a subtle spin animation of 2 degrees with auto reverse to enhance the floating effect.
By combining these two animations, you create an elegant floating effect that adds personality to your slides without distracting from your message.

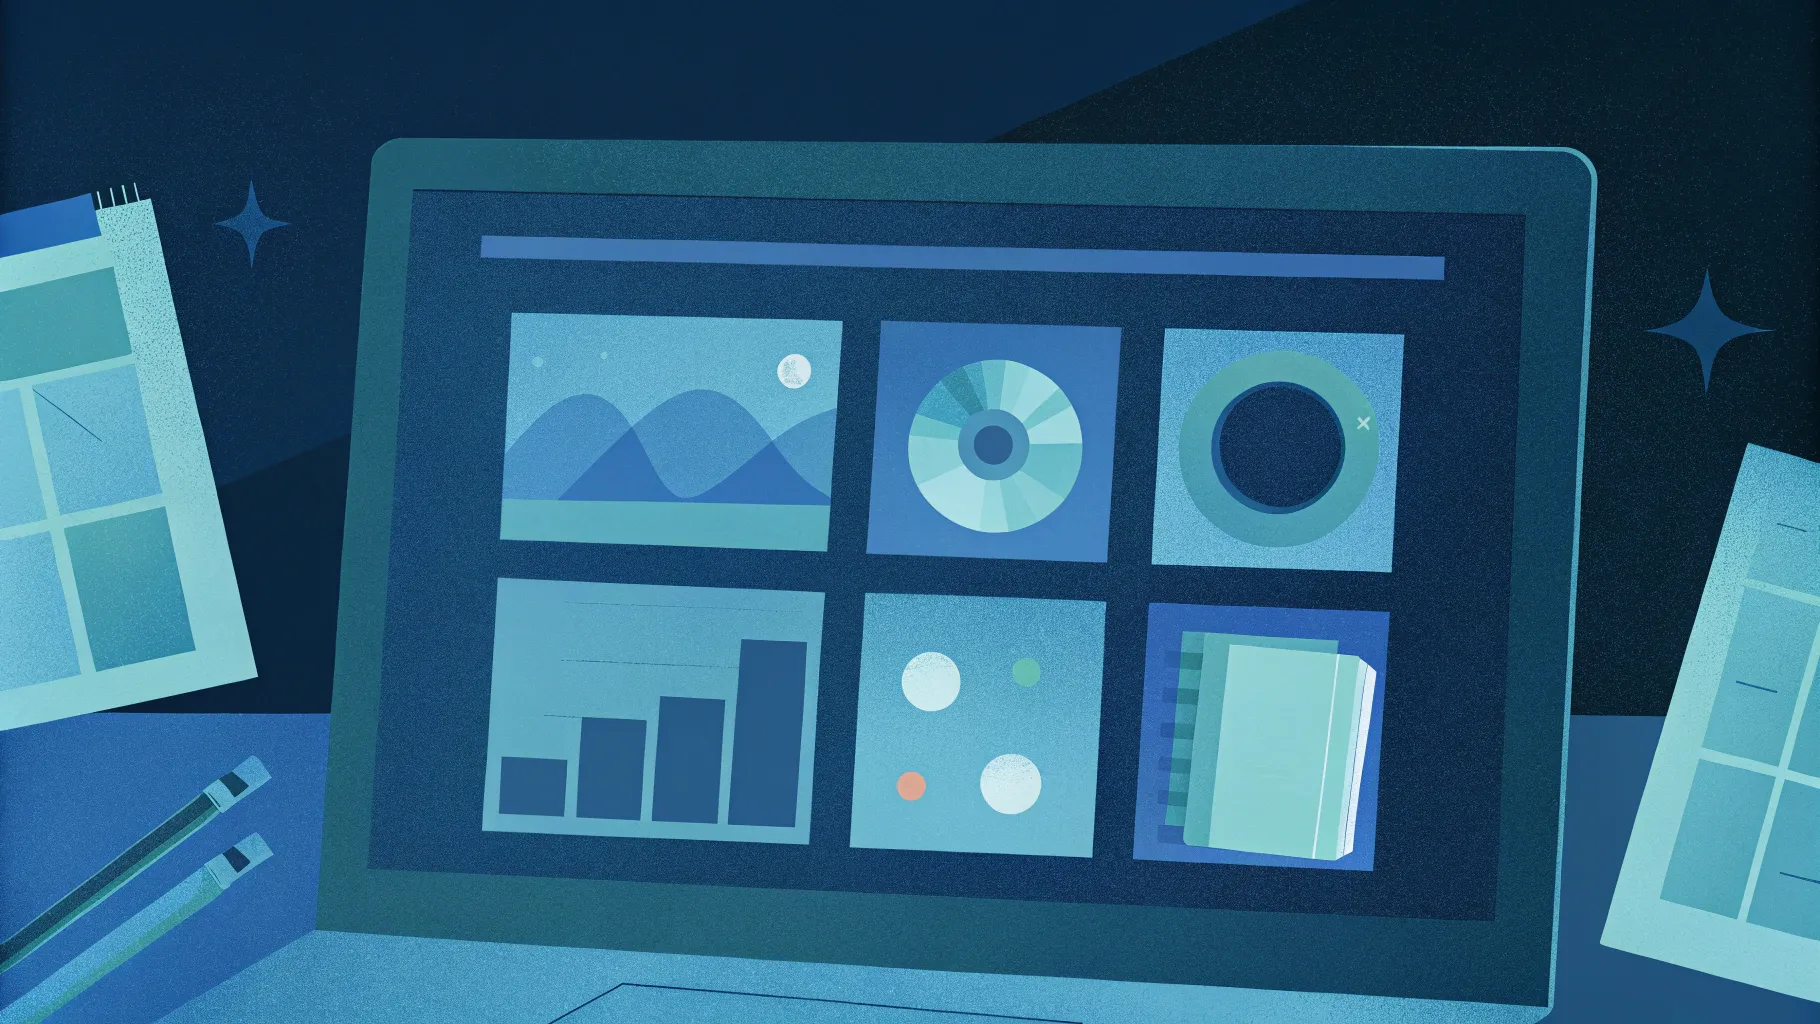
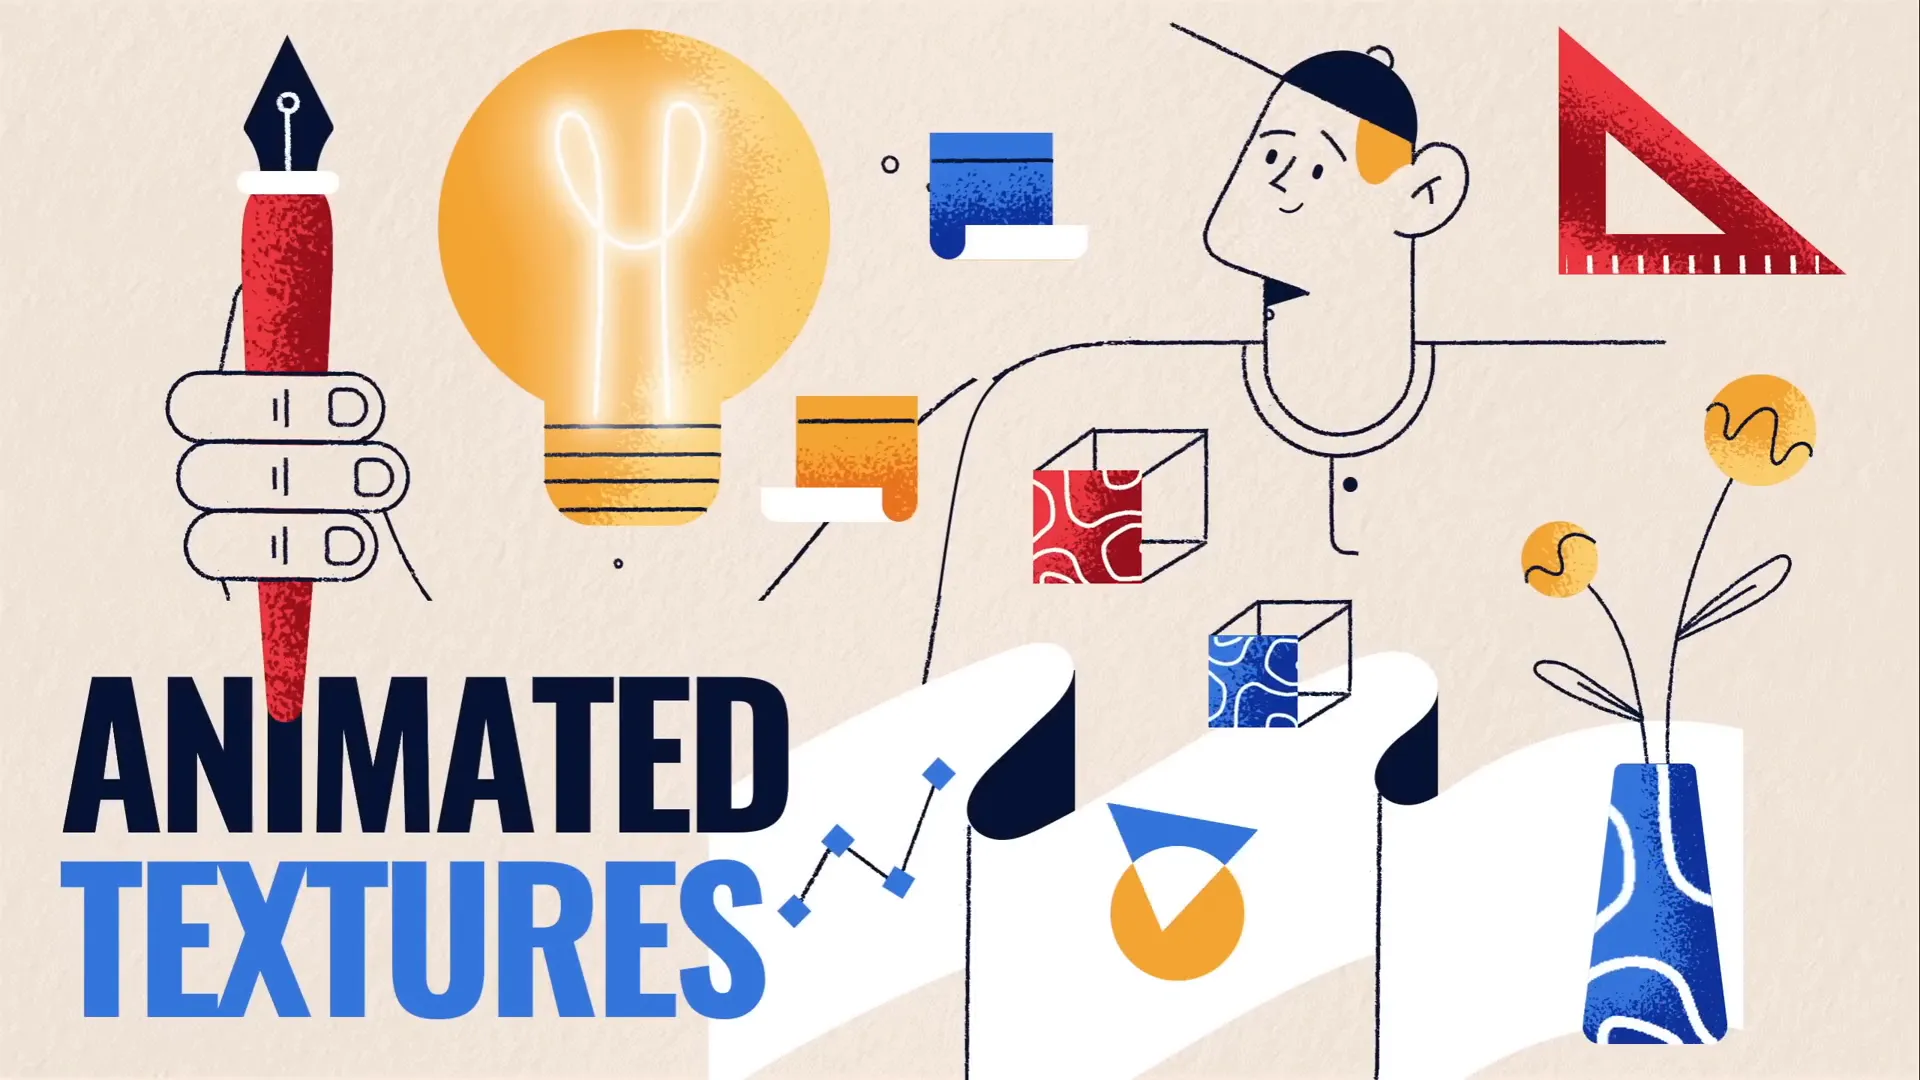
2. Creating Animated Textures for Your Slides
Animated textures can spice up your slide designs and illustrations by adding movement and depth. This technique works best with vector shapes, allowing you to animate groups of shapes to create visually appealing textures.
Step-by-Step Guide to Animated Textures
- Create Vector Shapes: Draw a series of squares or other shapes using the Rectangle tool. Hold down the Shift key to create perfect squares.
- Duplicate and Resize: Duplicate the squares and resize each to create a layered effect. Align them centrally on the slide.
- Group Shapes: Select all the shapes and press Ctrl + G to group them. This makes animating easier.
- Add Spin Animation: Apply a clockwise spin animation with a quarter spin amount. Set duration to 2 seconds with smooth start and end of 1 second, and enable auto-reverse.
- Add Grow/Shrink Animation: Use the “Add Animation” button to add a grow/shrink effect. Set the size to 130%, smooth start of 1 second, and auto-reverse to create a pulsating effect.
This results in shapes that spin and grow/shrink simultaneously, creating an eye-catching animated texture that can be used as a background or design element.
Exporting Animated Textures as GIFs
To reuse your animated textures easily, export the slide as a transparent animated GIF:
- Go to Export > Create an Animated GIF.
- Select the slide with your animated texture.
- Set seconds per slide to zero so PowerPoint determines the GIF length automatically.
- Choose transparent background and extra-large quality.
- Click Export.
Once exported, you can insert this GIF into other slides or presentations and even crop it to fit shapes for creative effects.
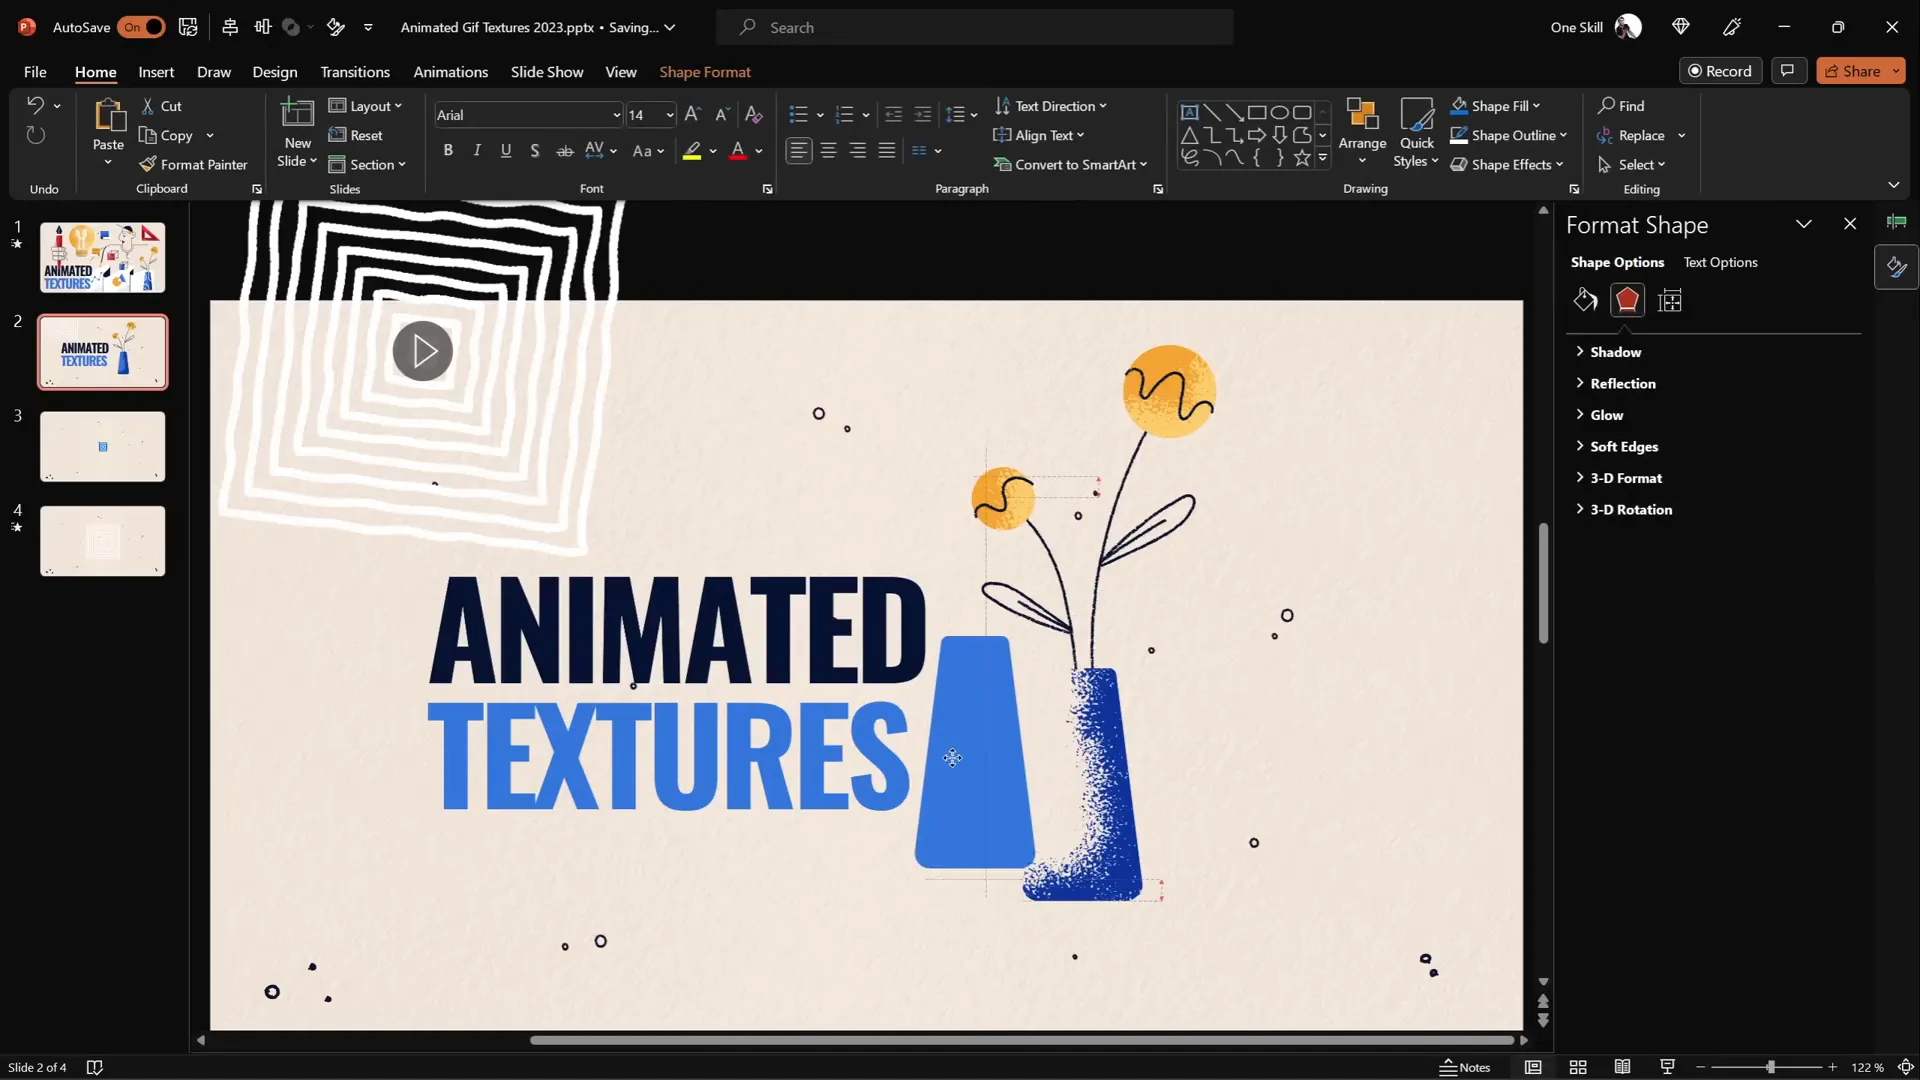
Using Animated Textures as Fill for Shapes
One fun trick is to crop your animated GIF to the shape of an object, like a vase:
- Duplicate the shape you want to fill and change its color to a contrasting one (e.g., red) to help with alignment.
- Place the animated GIF over the shape and adjust size and position.
- Select the GIF and the duplicate shape together (hold Shift to multi-select).
- Go to Shape Format > Merge Shapes > Intersect.
This crops the GIF to the exact shape of your object, giving it an animated texture fill that adds depth and interest.
3. Rotating 3D Text Animation with Morph Transition
Combining PowerPoint’s 3D rotation options with the Morph transition opens up exciting possibilities for text animations. You can create an intro slide where your text rotates in 3D space with smooth morphing between slides.
How to Create 3D Rotating Text
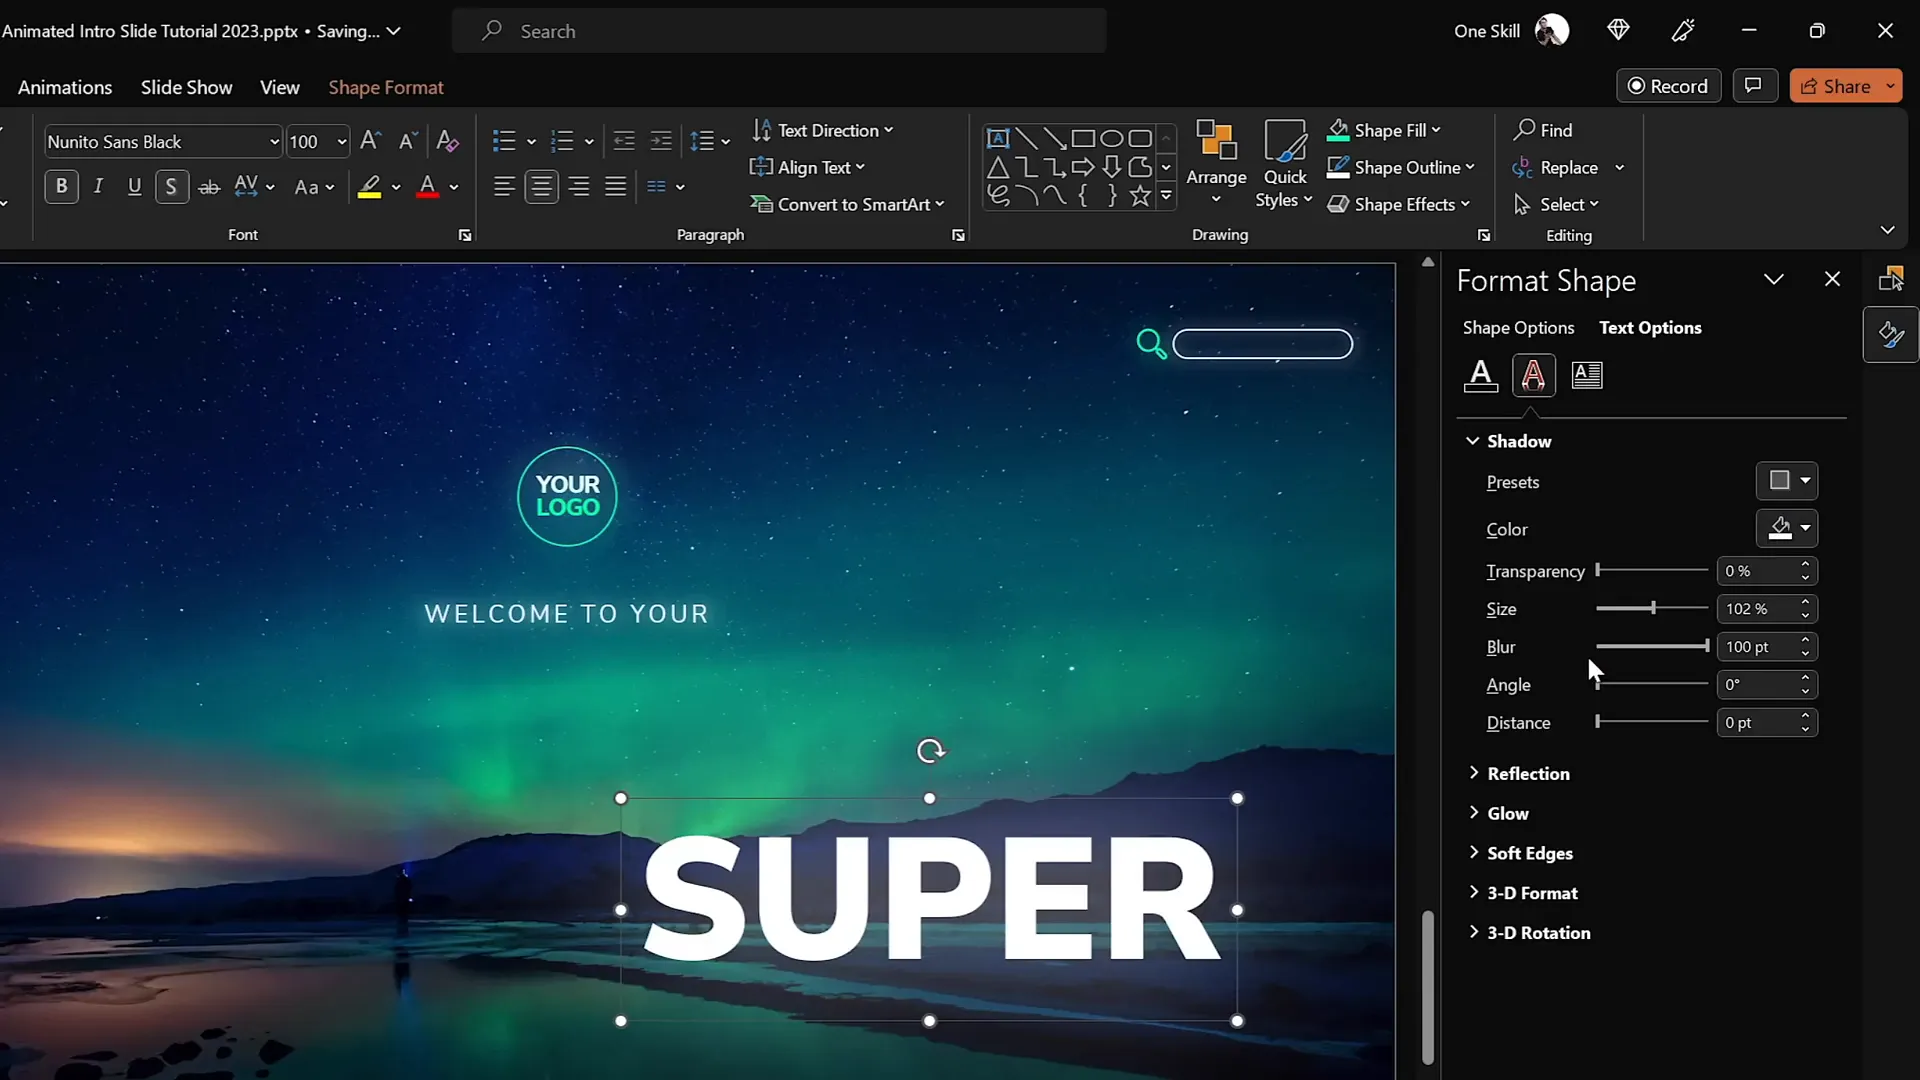
- Add Text Box: Insert a large text box with your desired word or phrase.
- Add Shine Effect: To add a white shine to the text box, apply a white shadow with a blur of 100 points.
- Apply 3D Rotation: Go to text effects and select a perspective preset (e.g., “Perspective Relaxed”). Set the perspective field to the maximum of 120 degrees.
- Duplicate Slide: Copy the slide and change the text on the second slide to another word (e.g., “Awesome”).
- Adjust Rotation on Second Slide: On the second slide, set the first text box’s 3D rotation X-axis to 90 degrees so it appears flat and invisible.
- Position Text Box: Move the rotated text box so its midpoint aligns with the second text box below it.
- Apply Morph Transition: Apply the Morph transition to both slides with a duration of 1 second. This will smoothly animate the 3D rotation between the two text boxes.
- Repeat for Second Text Box: Paste the second text box onto the first slide, rotate it on the Y-axis to 270 degrees, and position it accordingly. This completes the rotation effect.
The Morph transition handles the animation beautifully, creating a seamless 3D rotating text effect that’s perfect for intro slides or section headers.
4. Futuristic Typewriter Animation for Text
Want to create a cool, futuristic typewriter effect for your text? PowerPoint’s “Swivel” animation combined with text animation by letter or word can do just that.

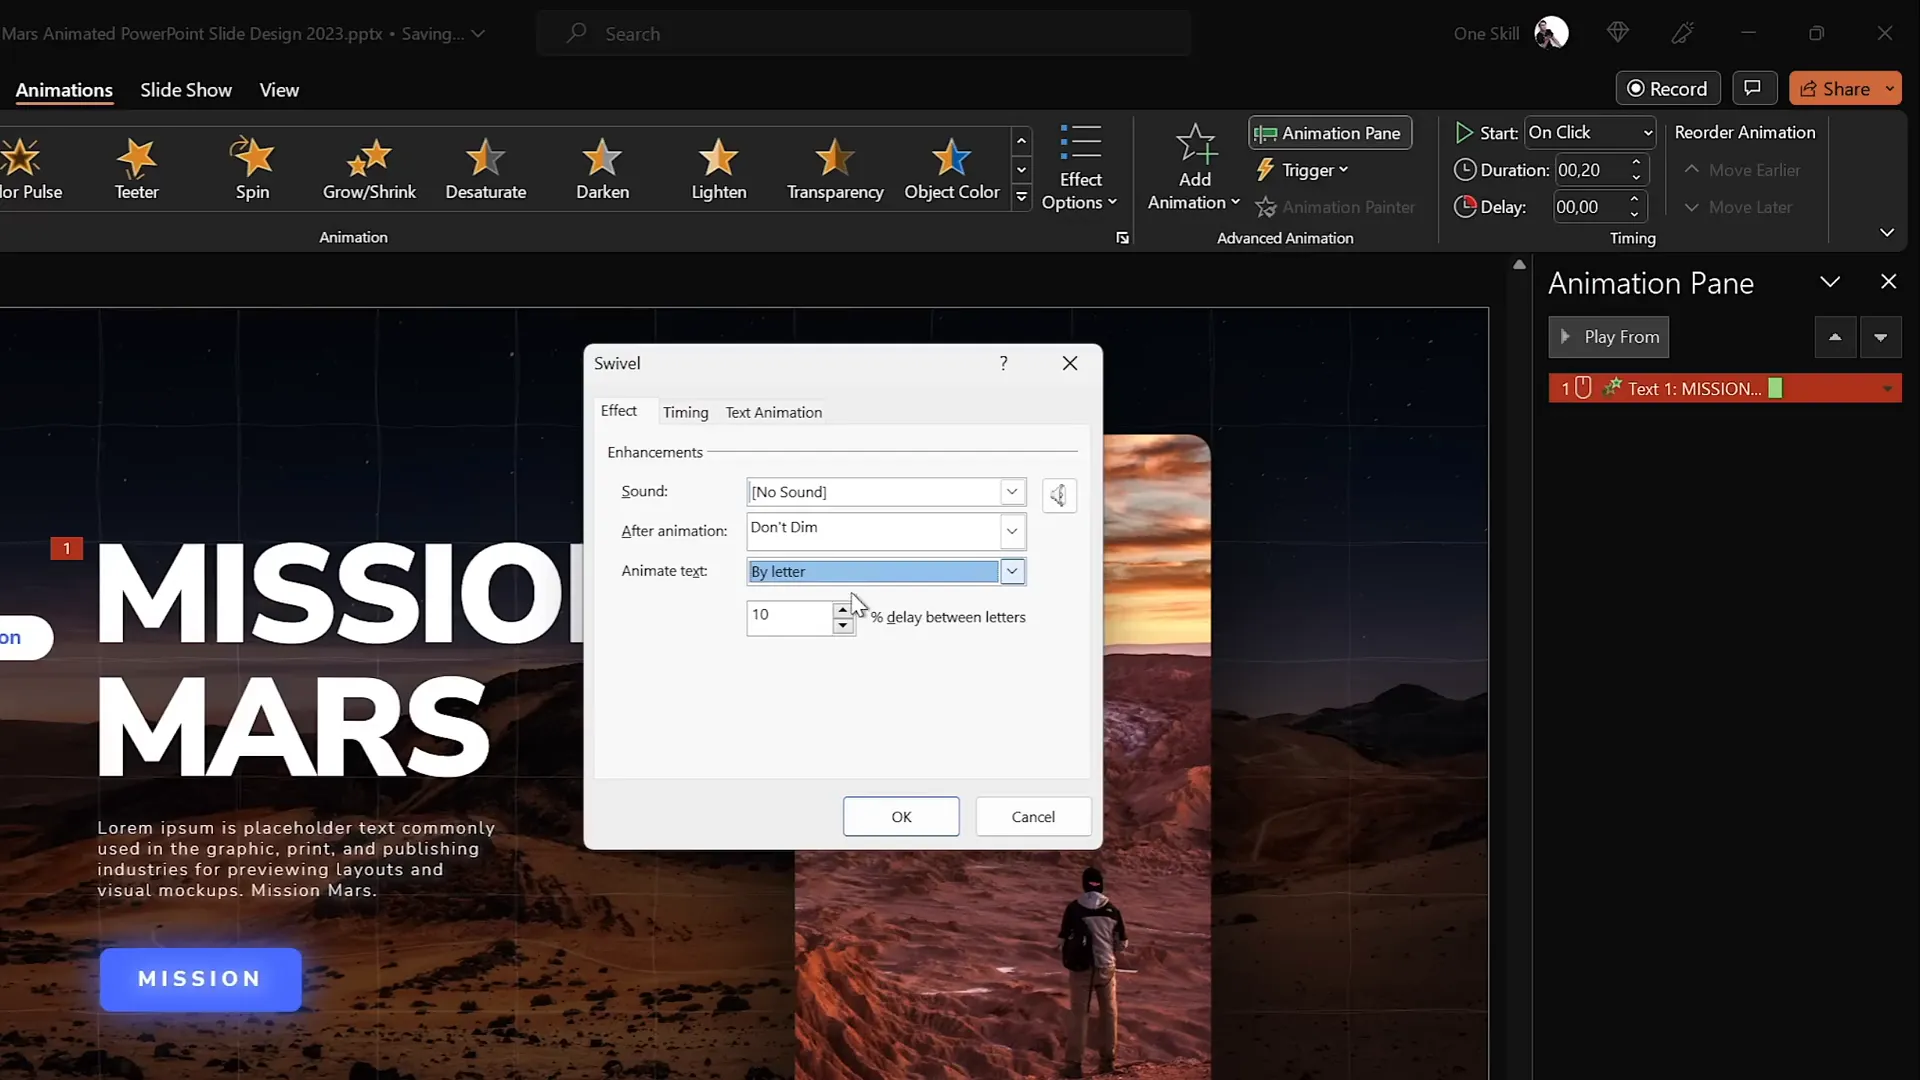
Steps to Create the Effect
- Select Text: Click on the text box or title you want to animate.
- Add Swivel Animation: From the Animations tab, pick the “Swivel” entrance animation.
- Adjust Duration: Set the animation duration to a short time, around 0.2 seconds.
- Animate Text by Letter: In the animation options, set text animation to “By Letter” and set the delay between letters to 10% for a smooth typing effect.
- Copy Animation: Use the Animation Painter tool to apply the same animation to other text boxes or paragraphs.
- Adjust Paragraph Animation: For longer paragraphs, animate by word instead of letter to speed up the effect.
- Set Animation Sequence: Configure the first animation to start “On Click” and the rest to start “With Previous” so all animations play with a single click.
This creates a slick animated typewriter effect with a modern twist, perfect for futuristic or tech-themed presentations.
5. Spinning Colorful Donut Charts
Donut charts are a popular way to visualize data percentages. Adding spinning animations can make your data visuals more engaging and memorable.
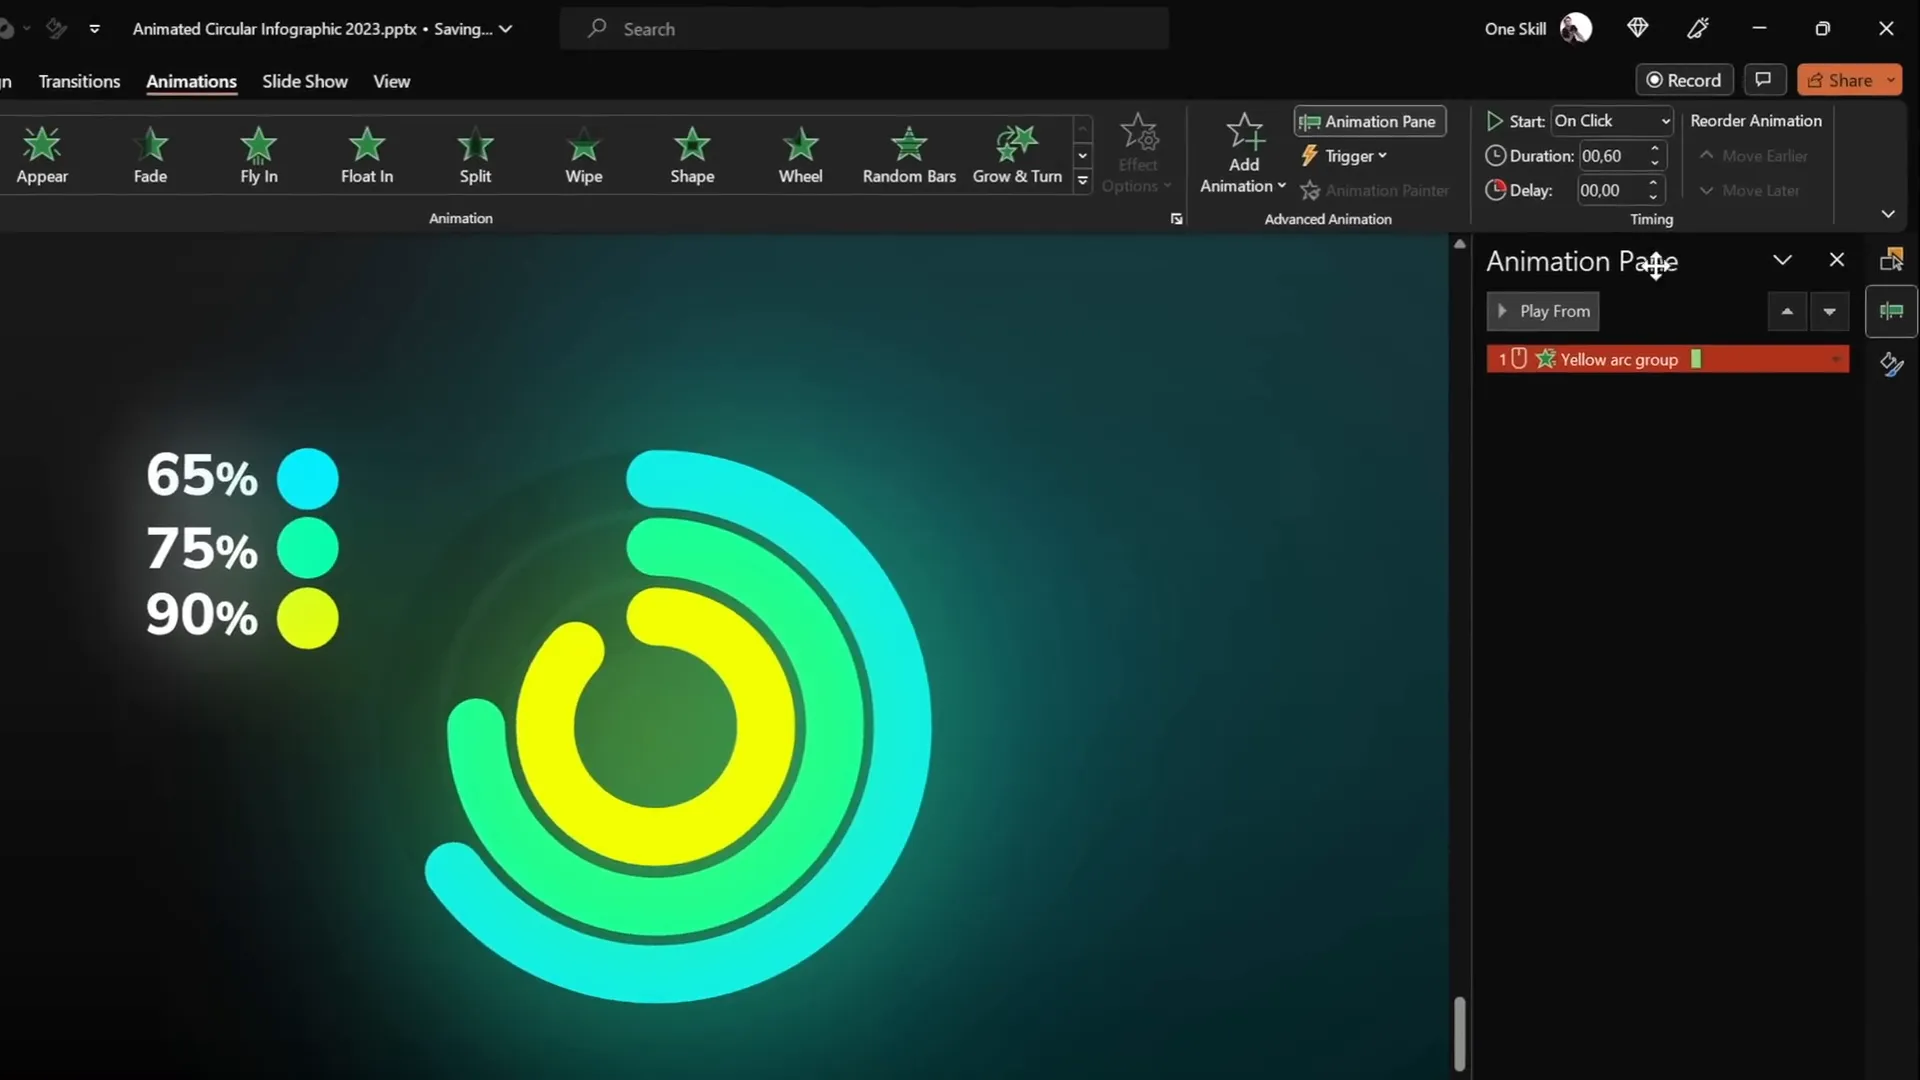
How to Create and Animate Donut Charts
- Create Donut Shape: Insert an Arc shape by going to Insert > Shapes > Arc. Hold Shift to draw a perfect arc.
- Adjust Appearance: Increase the line width (e.g., 20 points) and set the cap type to “Round” for smooth edges.
- Customize Shape: Use the yellow handles to adjust the arc to your desired donut shape.
- Add Wedge Animation: Go to More Entrance Animations and select “Wedge.” Reduce the duration to 0.6 seconds to speed up the animation.
- Add Spin Animation: Add a spin animation set to start “With Previous,” duration 1 second, and rotate amount to 1080 degrees (3 full spins).
- Combine Animations: The wedge animation “draws” the donut slice, followed by a futuristic spin effect.
- Copy Animations: Use the Animation Painter to apply the same animations to other donut charts for consistency.
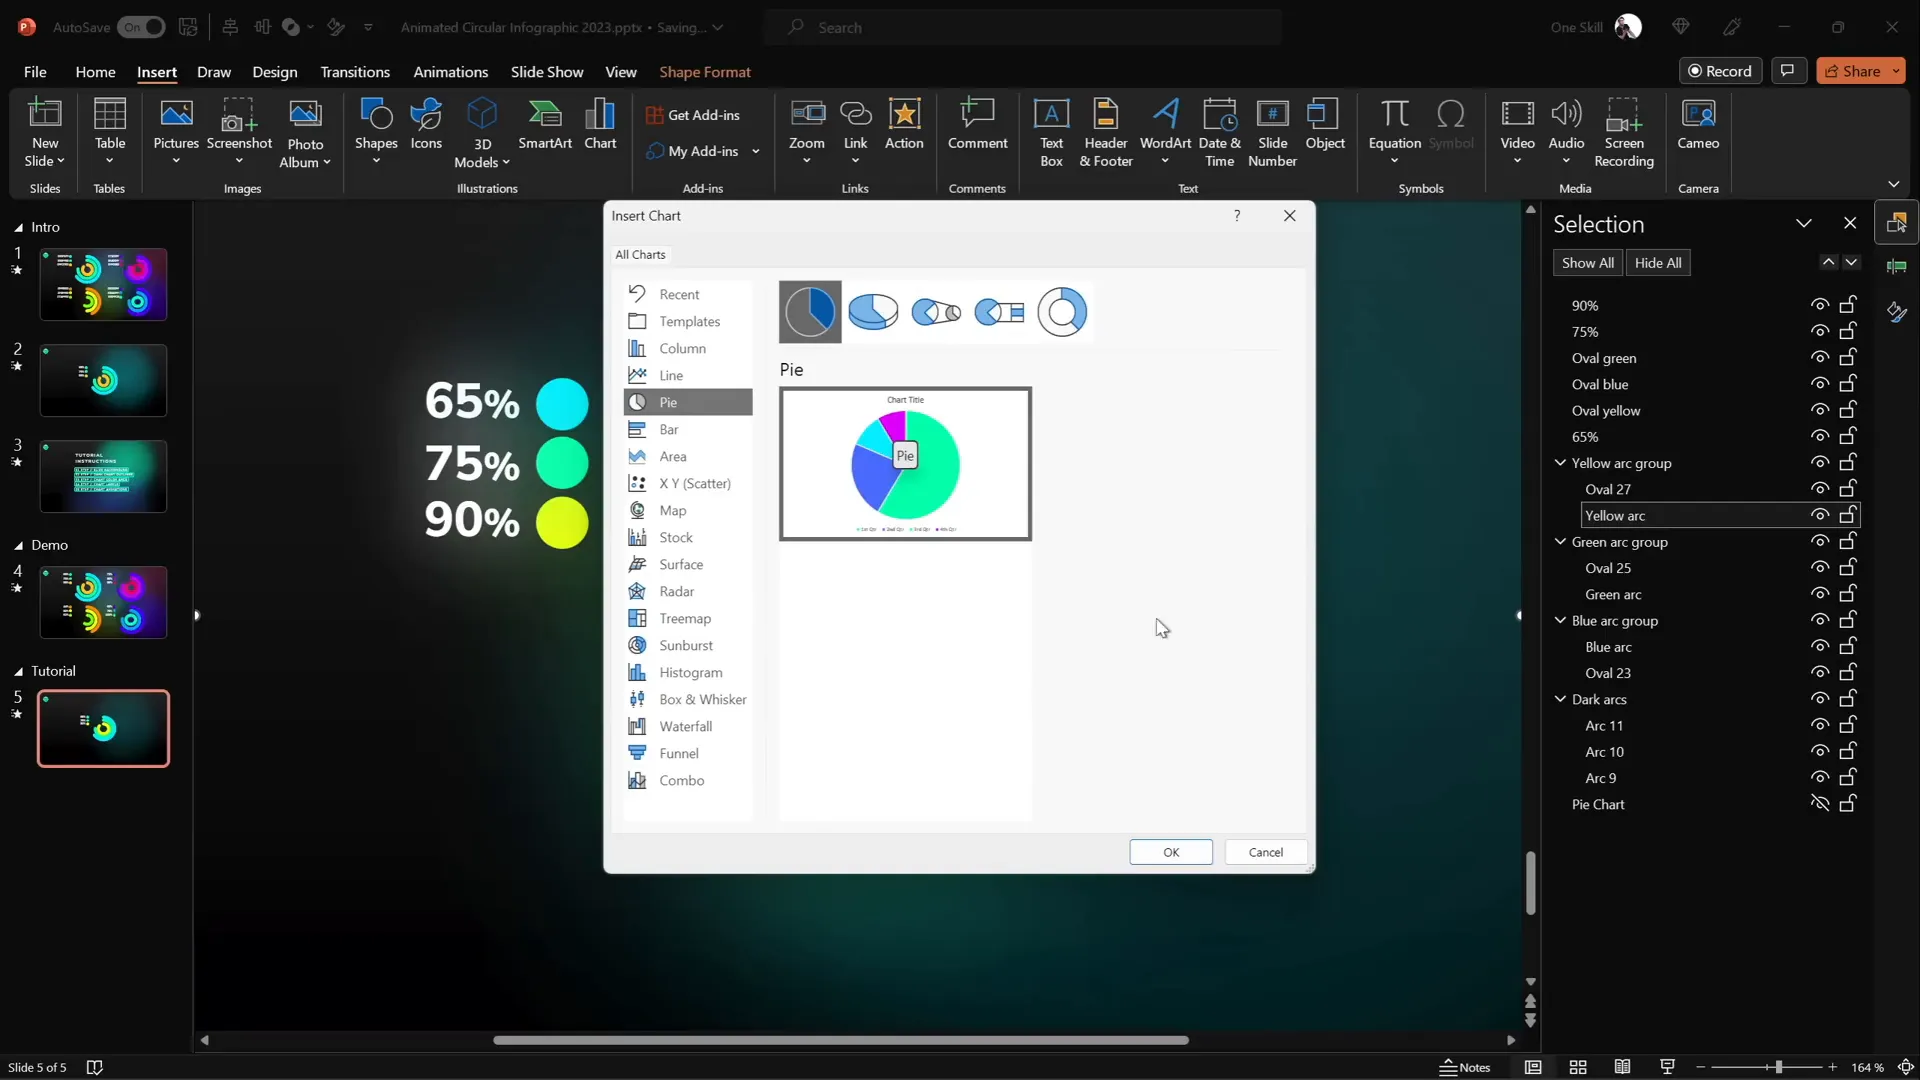
Adjusting Donut Charts to Precise Percentages
To align your donut charts perfectly with actual data percentages, use a simple pie chart as a guide:
| Step | Description |
|---|---|
| 1. Insert Pie Chart | Go to Insert > Charts > Pie Chart and add a simple pie chart behind your donut charts. |
| 2. Edit Data | Right-click the pie chart and select “Edit Data.” Enter your desired percentage (e.g., 85%). |
| 3. Adjust Donut Chart | Drag the donut chart’s endpoint to align precisely with the pie chart’s slice edge. |
This method ensures your visual data is both accurate and visually appealing.
Frequently Asked Questions about PowerPoint Animations
Q1: What are the best animation types to use in professional presentations?
Subtle and smooth animations like fades, morph transitions, and gentle spins generally work best in professional settings. Avoid overly flashy or distracting animations to maintain focus on your content.
Q2: How can I make animations consistent across my slides?
Use the Animation Painter tool to copy animations from one object to another. Also, consider creating master slides with preset animations for uniformity.
Q3: Will complex animations affect my presentation’s performance?
While modern computers handle animations well, excessive or complicated animations can slow down your presentation. Test your slides in advance to ensure smooth playback.
Q4: Can I export animated slides as videos or GIFs?
Yes, PowerPoint allows you to export slides as videos or animated GIFs, which can be useful for sharing or embedding animations in other platforms.
Q5: How do I ensure my animations look good on different devices?
Stick to standard fonts and test your presentation on multiple devices. Also, avoid relying on third-party add-ins that may not be supported everywhere.
Conclusion
Mastering PowerPoint animations can dramatically enhance your presentations by making them more dynamic, engaging, and memorable. From flipping slide zooms and animated textures to 3D rotating text, futuristic typewriter effects, and spinning donut charts, these five techniques will elevate your PowerPoint game to a professional level.
Experiment with these animations, customize them to fit your brand and message, and watch as your presentations captivate audiences like never before. And remember, animation is a tool to support your story—use it thoughtfully to create impact without overwhelming your content.
Happy animating!
Check out the full video: Create PowerPoint ANIMATIONS Like a Pro ✨ feat. @interstellar_ppt


