
Looking to take your PowerPoint presentations to the next level? Mastering PowerPoint animations can transform a simple slide deck into an engaging, dynamic experience that captivates your audience. In this comprehensive guide, you’ll discover five advanced animation techniques that professional presenters use to add flair and polish to their slides. These techniques—from flipping slide zooms to spinning donut charts—are practical, creative, and easy to implement.
This tutorial draws inspiration from the brilliant creator behind Interstellar PowerPoint, whose animation secrets are shared here to help you animate like a pro. Ready to impress your audience? Let’s dive in!
Table of Contents
- Flip Animation for Slide Zooms
- Creating Animated Textures for Vector Illustrations
- Rotating 3D Text Animation with Morph Transition
- Futuristic Typewriter Animation for Text
- Spinning Colorful Donut Charts
- Frequently Asked Questions
- Conclusion & The Big Secret
1. Flip Animation for Slide Zooms
Slide Zooms are a fantastic PowerPoint feature that allows you to navigate between sections or slides in a dynamic and interactive way. By default, clicking a slide zoom smoothly transitions you to the target slide and back. But what if you could add a stylish flip animation to make this transition visually striking? Here’s how:
Step-by-Step Guide
- Go to the Insert tab, click Zoom, and select Slide Zoom.
- Choose any slide you want to zoom into and insert the zoom thumbnail on your slide.
- Remove the zoom border by selecting the zoom and setting the border to none for a cleaner look.
- Ensure that Return to Zoom is activated so you can zoom back after navigating.
Now, to create the flip effect:
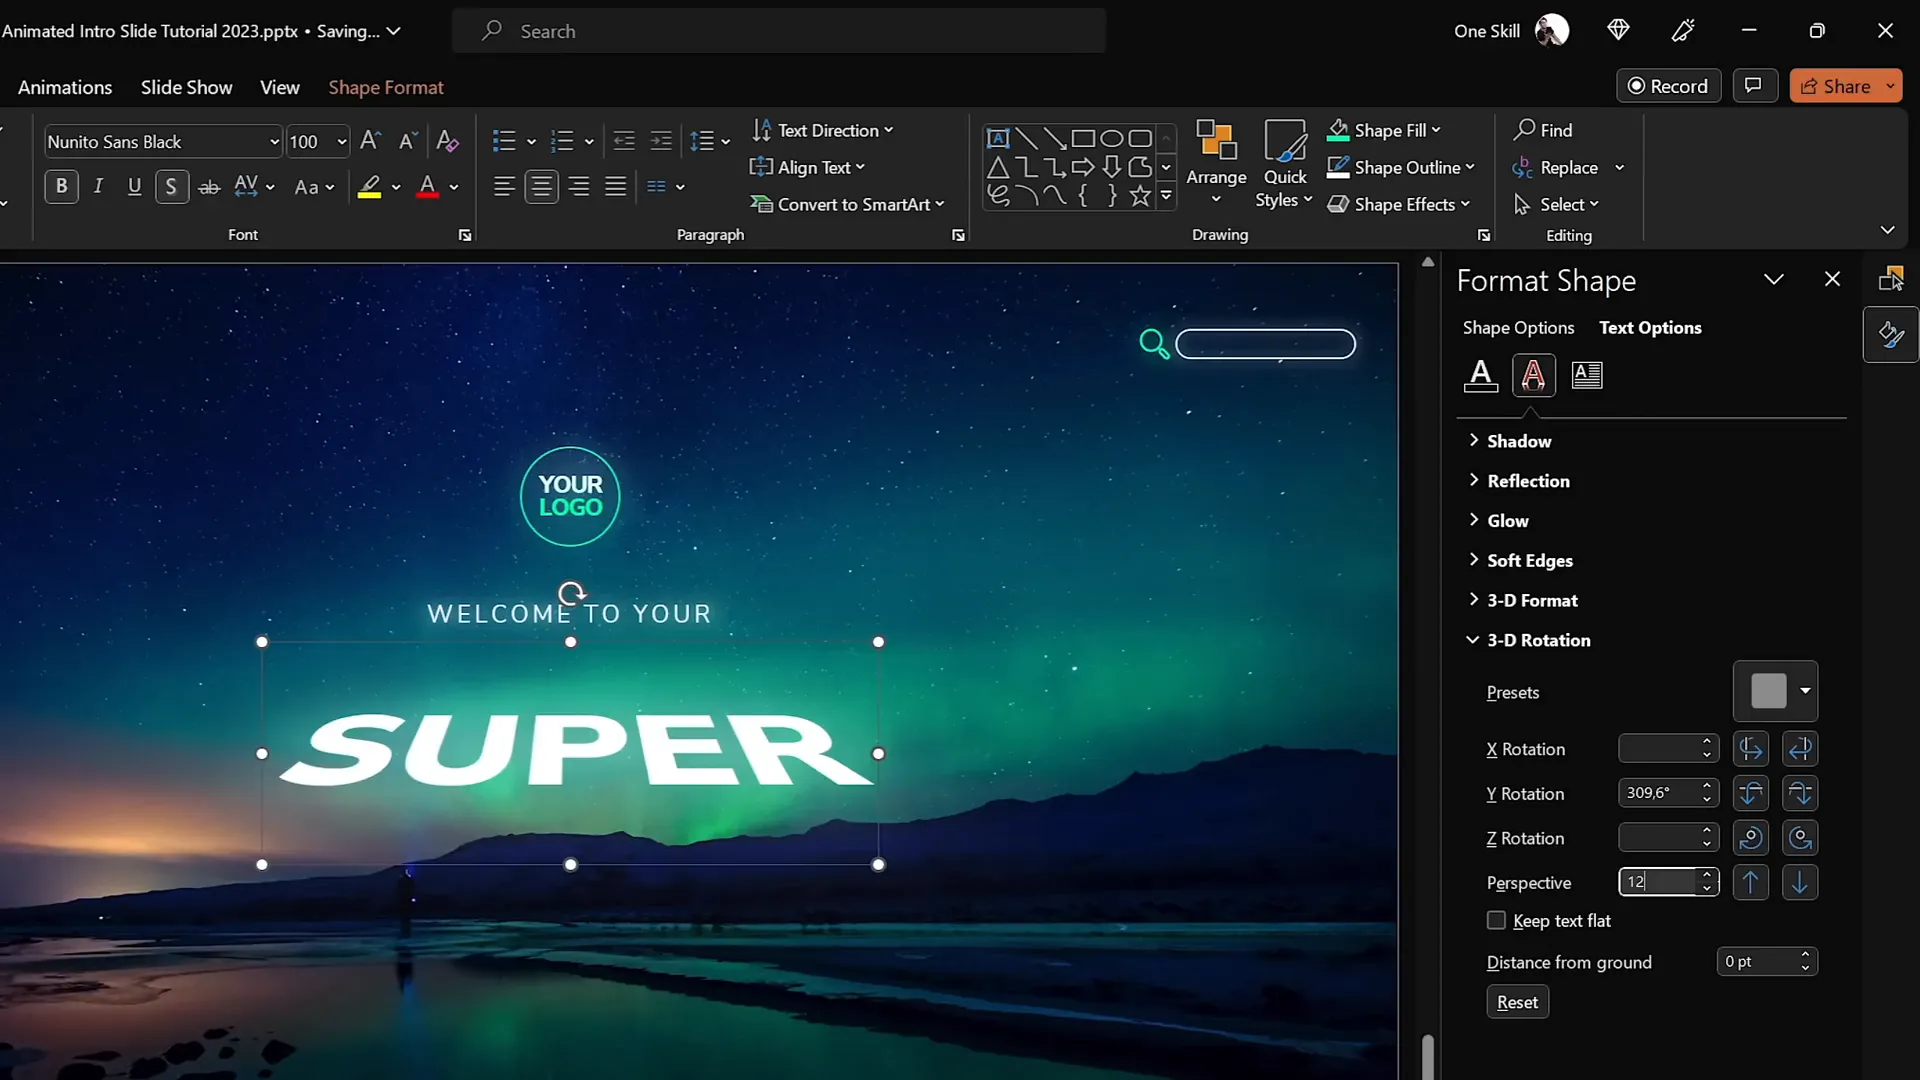
- Select the slide zoom object, go to the Format Shape pane, and open the 3D Rotation options.
- Choose one of the parallel rotation presets for a base effect.
- Adjust the X Rotation value to around 180 degrees, flipping the slide zoom to its backside.
- Optionally, tweak the Y and Z rotations to add depth and perspective.
When you click the slide zoom during your presentation, it will flip beautifully as it zooms into the slide, creating a memorable effect for your audience.
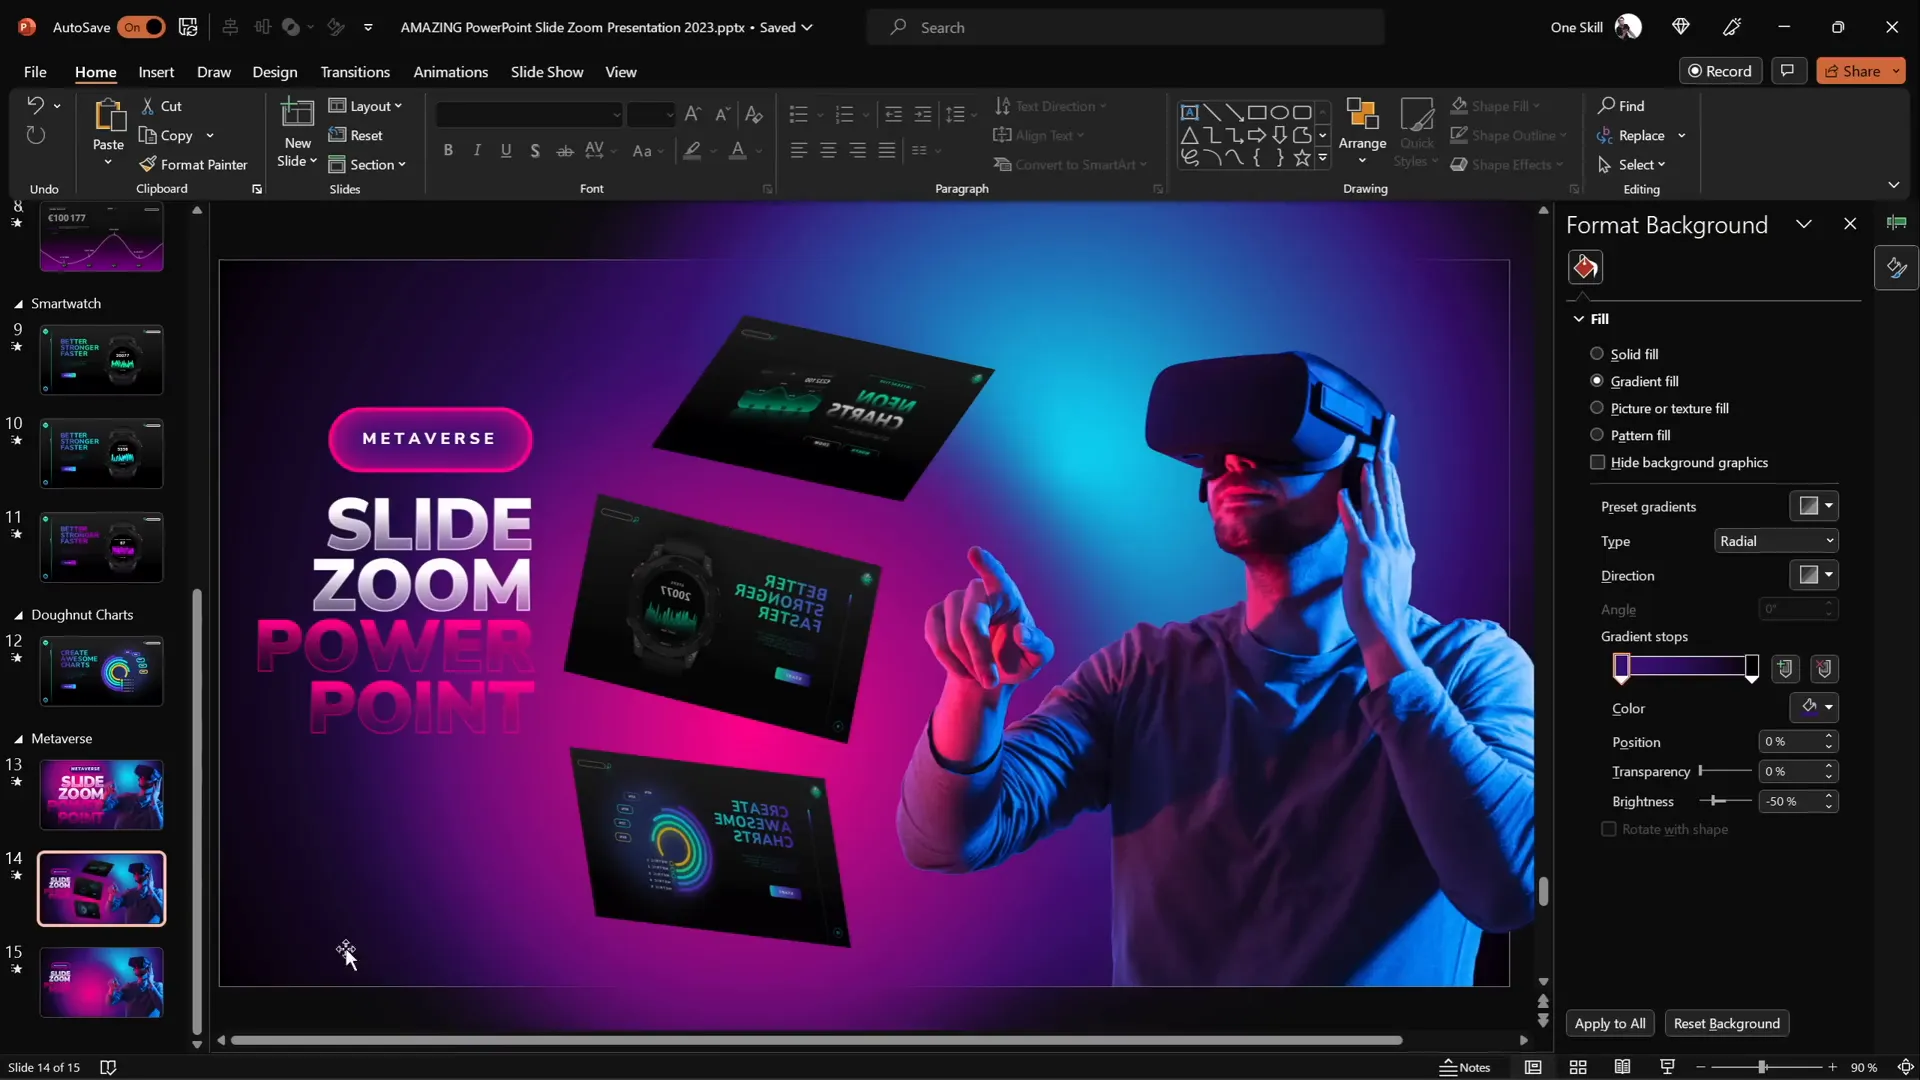
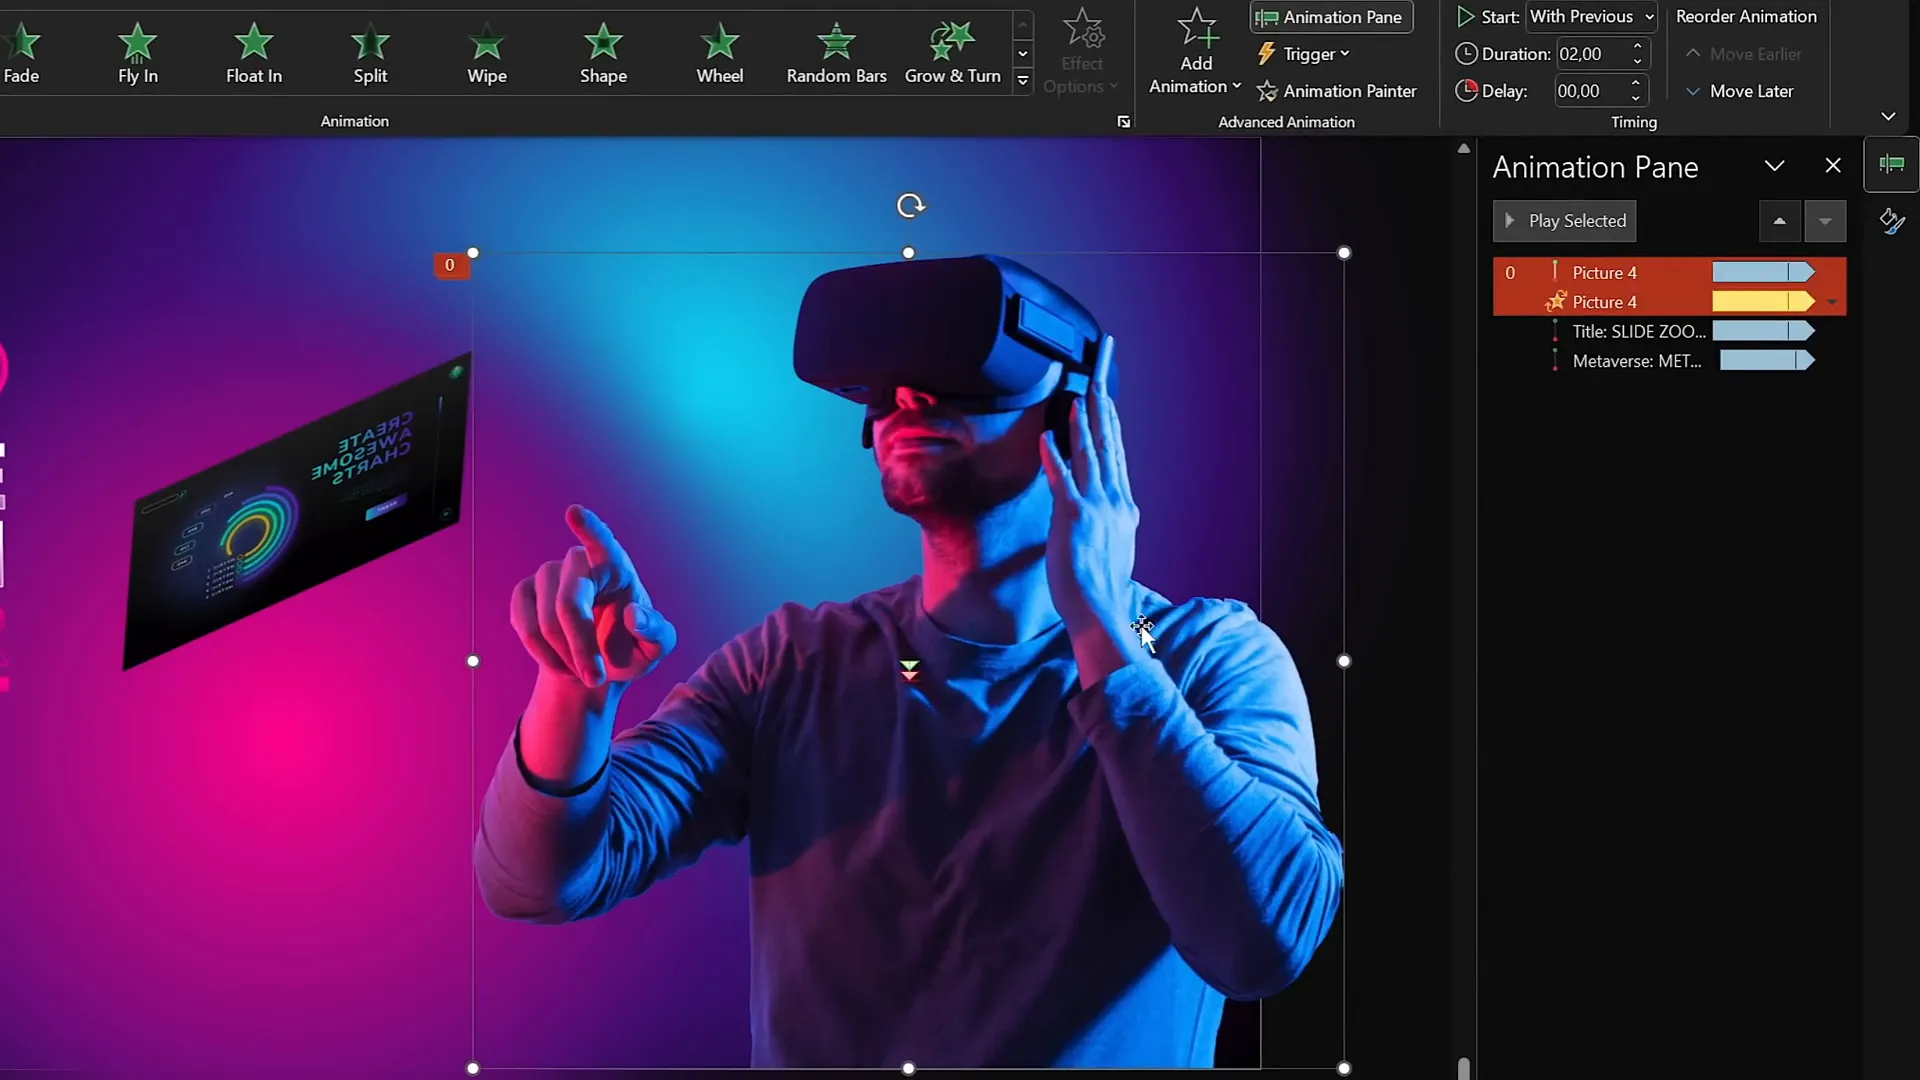
Adding a Subtle Floating Animation
To enhance the slide’s visual appeal, you might want to animate supporting images or illustrations. For example, a floating VR glasses-wearing character can add personality:
- Apply a Motion Path animation with a short up-and-down line path.
- Set animation duration to 2 seconds with smooth start and end of 1 second.
- Enable Auto Reverse so the motion repeats smoothly.
- Add a subtle Spin animation of about 2 degrees with auto reverse for a gentle sway effect.
These combined animations create a subtle floating effect that brings life to your slide elements.
2. Creating Animated Textures for Vector Illustrations
Static illustrations are great, but adding animated textures can make your designs pop and engage your audience even more. This technique works best with vector shapes that you can edit and animate easily.
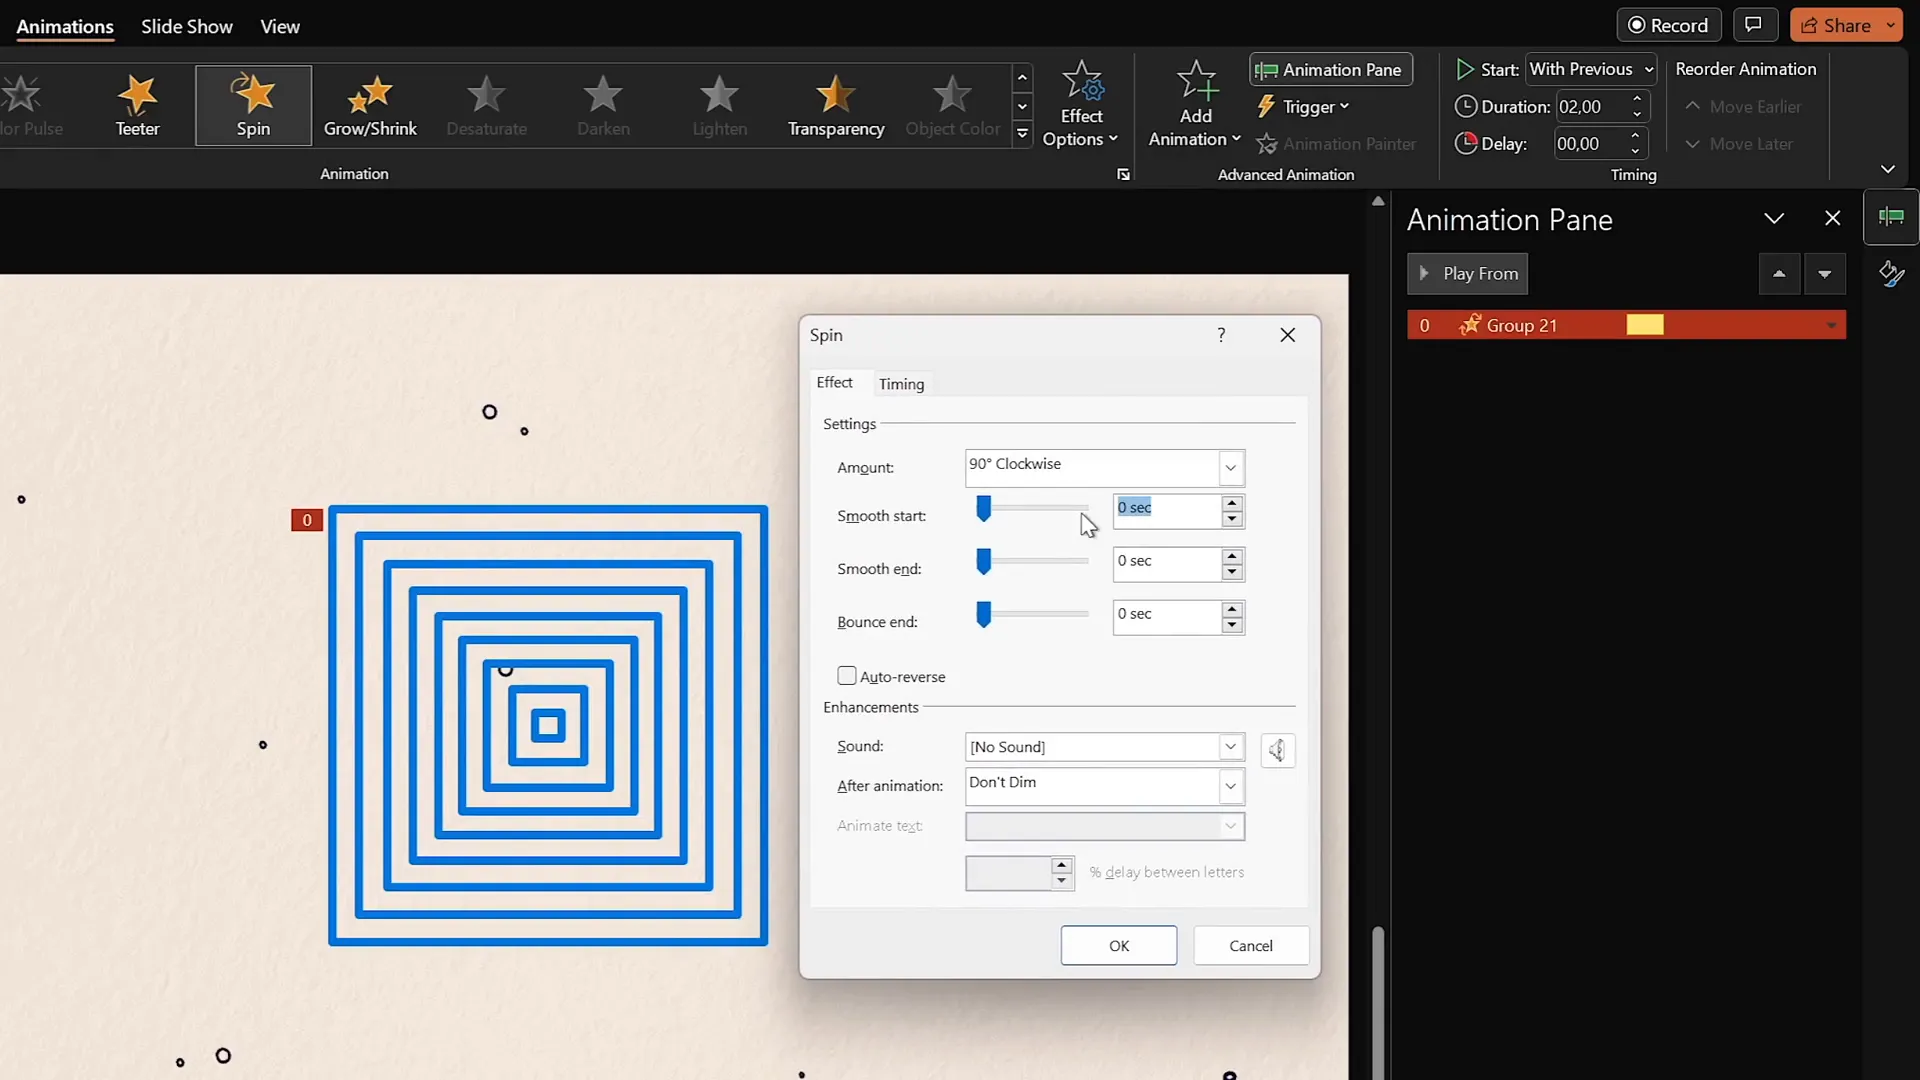
How to Create Animated Textures
- Insert a perfect square: Go to Insert > Shapes, select the rectangle tool, hold Shift, and draw a square.
- Duplicate the square and resize the duplicates to create a layered effect with multiple squares of varying sizes.
- Group all the squares together (Ctrl + G) for easier animation management.
- Apply a Spin animation to the group with clockwise direction and a quarter spin amount.
- Set the animation to start With Previous and duration to 2 seconds.
- Enable smooth start and smooth end for 1 second each, and check Auto Reverse so the spin reverses smoothly.
- Add a second animation: Grow/Shrink with 130% size growth, smooth start of 1 second, and auto reverse enabled.
The combined effect is a group of squares that spin and gently grow/shrink simultaneously, creating a lively animated texture.
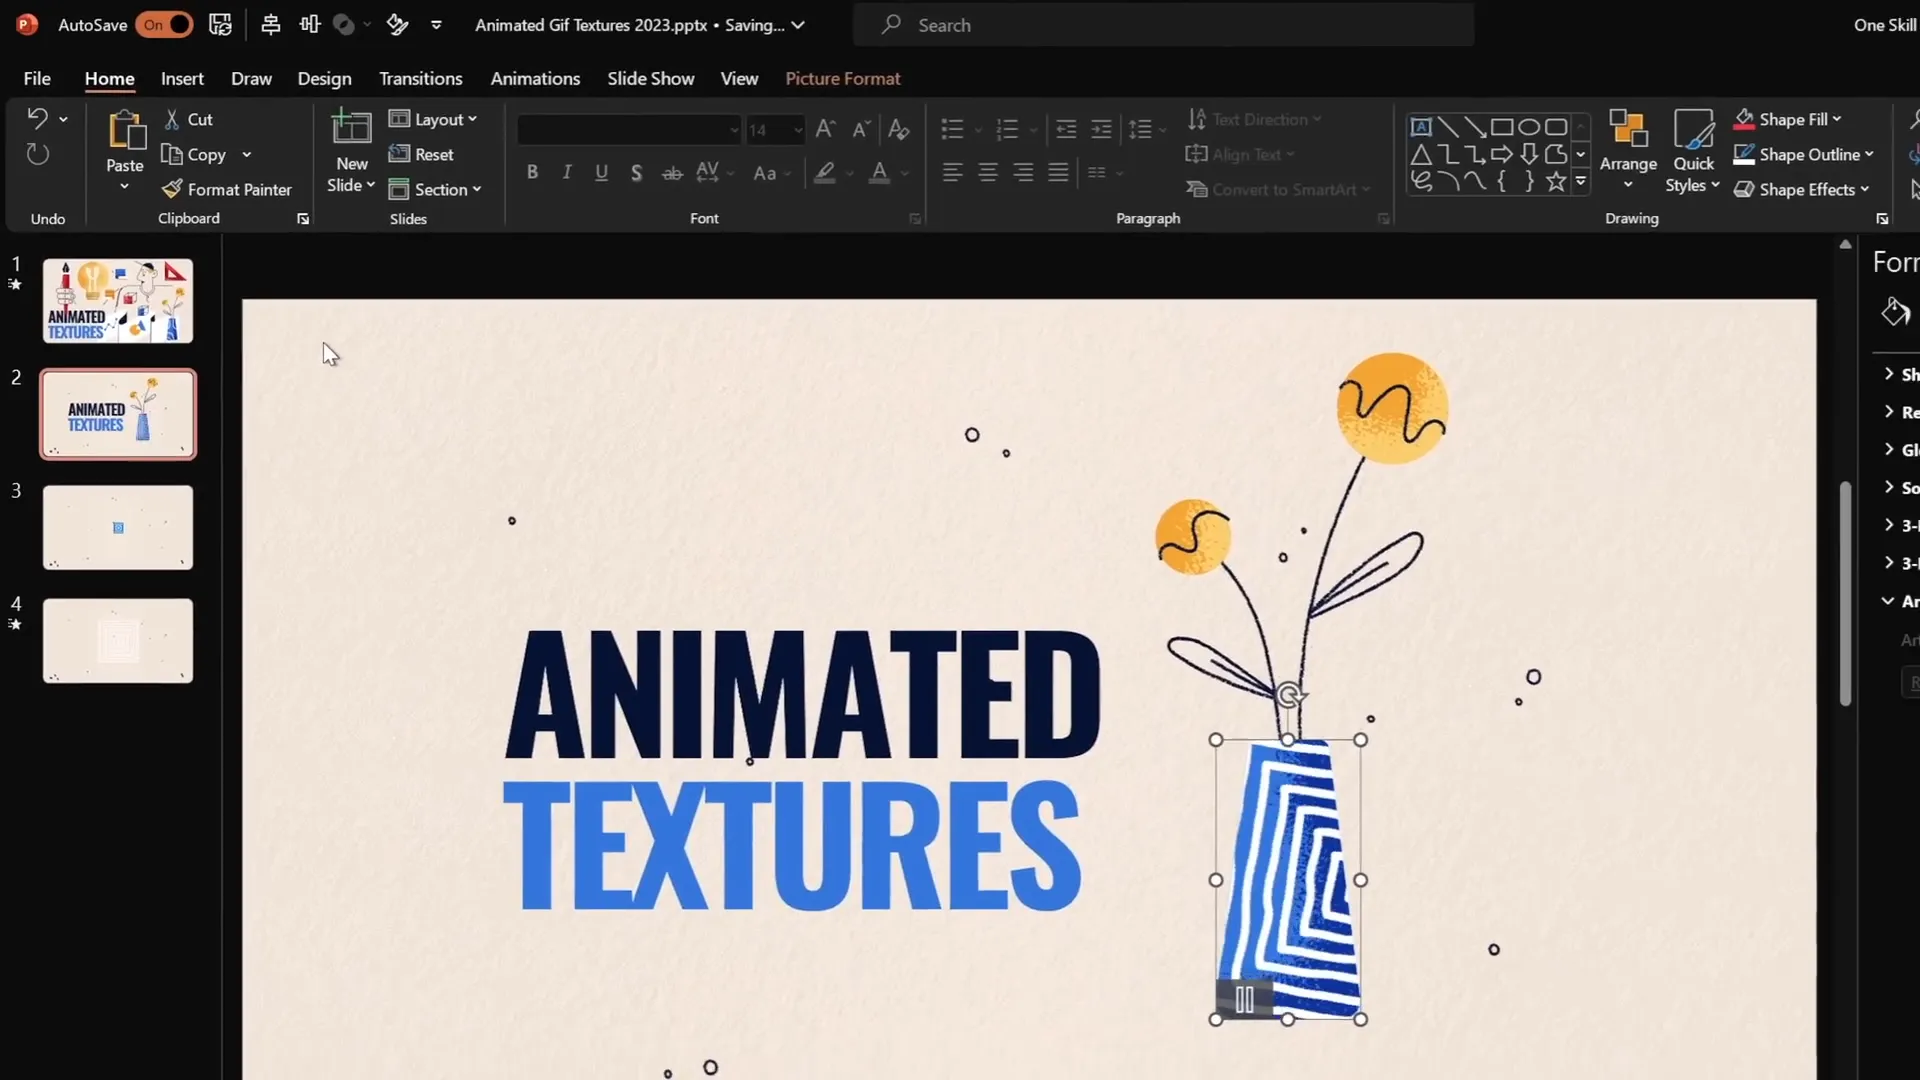
Applying the Animated Texture to Illustrations
To integrate this animated texture into your design:
- Export your animated texture slide as a transparent GIF (File > Export > Animated GIF).
- Insert the exported GIF back into your presentation as an image.
- Duplicate the vector illustration shape you want to animate (e.g., a vase) and change its color for visibility.
- Position the GIF over the illustration and resize as needed.
- Select both the GIF and the duplicate shape, then go to Shape Format > Merge Shapes > Intersect.
This crops the animated texture to the shape of your illustration, creating a seamless animated texture effect.
3. Rotating 3D Text Animation with Morph Transition
Creating dynamic text animations can elevate your presentation’s intro or highlight key messages. Using PowerPoint’s 3D rotation combined with the Morph transition, you can craft an eye-catching rotating text effect.
Steps to Create the 3D Rotating Text
- Start with a text box containing your desired text.
- Go to Format Shape > Text Effects > 3D Rotation and choose a perspective preset (e.g., Perspective Relaxed).
- Set the Perspective field to the maximum of 120 degrees.
- Keep the Y Rotation at 0 degrees for the first slide.
- Duplicate the slide.
- On the duplicate slide, replace the text with the next word or phrase you want to animate.
- Copy the original text box and paste it onto the duplicate slide.
- Rotate the pasted text box by adjusting the 3D rotation’s left wire rotation arrow until it reaches 90 degrees (making it flat).
- Move the rotated text box so its middle aligns with the new text below it.
- Apply the Morph transition to both slides with a duration of 1 second.
- Repeat the process for the second text box, rotating it to 270 degrees in the opposite direction and aligning it appropriately.
The Morph transition will animate the rotation of the text boxes, creating a smooth 3D rotating text effect that looks professional and futuristic.
4. Futuristic Typewriter Animation for Text
Typewriter animations are a classic way to animate text, but adding a futuristic twist with PowerPoint‘s Swivel animation creates a fresh and engaging effect.
How to Create the Futuristic Typewriter Effect
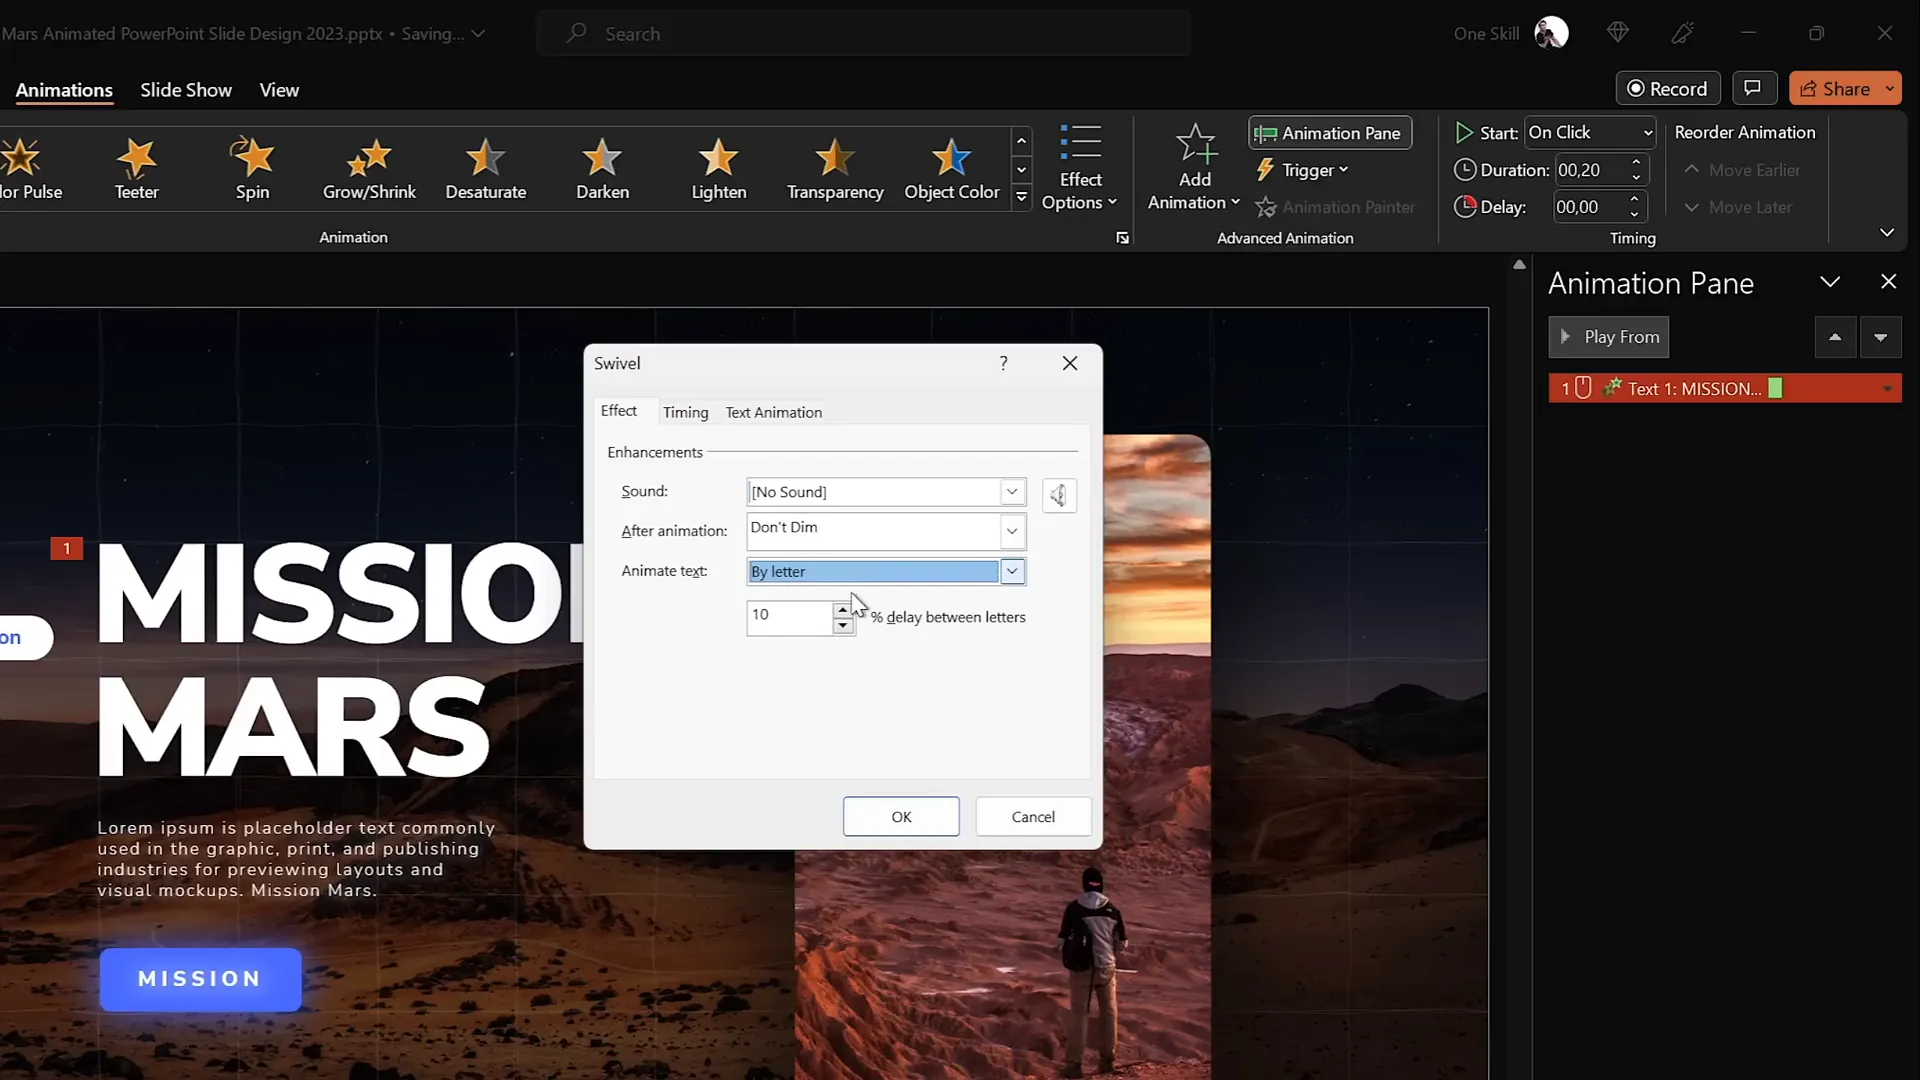
- Select the text box you want to animate, such as a slide title.
- Go to the Animations tab and choose the Swivel entrance animation.
- Set the animation duration to a short 0.2 seconds for a quick effect.
- In the animation options, set the text animation to By Letter with a delay of 10% between letters.
- Use the Animation Painter to apply this animation to other text elements you want animated similarly.
- For paragraphs or longer text, consider animating By Word to speed up the effect and maintain readability.
- Adjust all animations to start With Previous except the first one, which should start On Click.
This setup lets you click once to trigger all the text animations simultaneously, producing a slick, typewriter-like effect that feels modern and captivating.

5. Spinning Colorful Donut Charts
Charts are essential for data presentation, but adding animation can make your stats visually exciting. Spinning donut charts combine shape design and animation for a fun, futuristic look.
Creating Donut Shapes
- Insert an Arc shape via Insert > Shapes.
- Hold Shift to draw a perfect arc.
- Increase the line width to 20 points for a bold donut appearance.
- Set the line cap type to Round for smooth edges.
- Adjust the yellow handles to customize the donut’s arc length.
Animating the Donut Chart
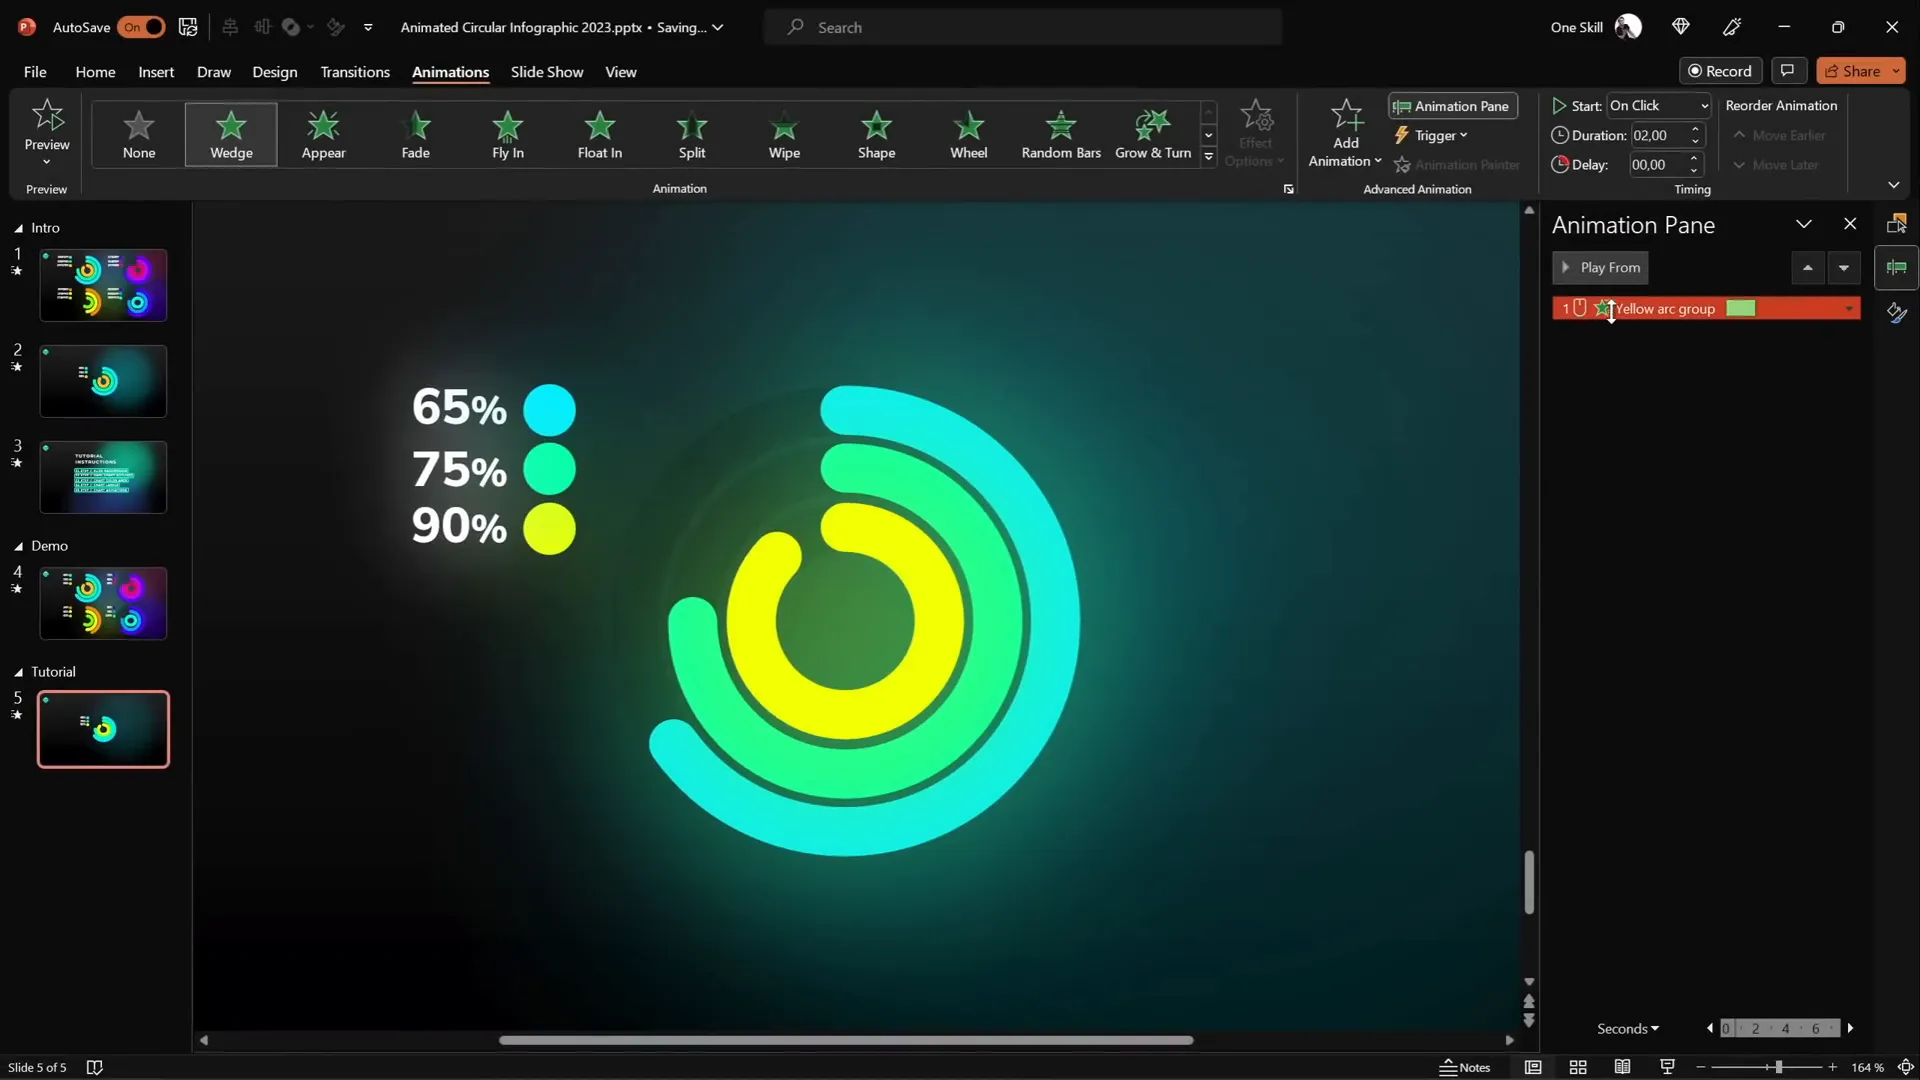
- Select your donut shape and navigate to Animations.
- Choose the Wedge entrance animation from the more options.
- Reduce the duration to 0.6 seconds to speed up the entrance.
- Add a Spin animation as a second effect, starting With Previous.
- Set the spin duration to 1 second and the amount to 1080 degrees (three full spins).
- Optionally, adjust the spin timing to half a second for a snappier effect.
- Use the Animation Painter to quickly apply the same animations to other donut charts.
Adjusting Donut Charts to Represent Exact Percentages
To precisely display data percentages on your donut charts, use a hidden pie chart as a guide:
| Step | Action | Purpose |
|---|---|---|
| 1 | Insert a simple pie chart behind the donut charts. | Creates a visual reference for exact percentages. |
| 2 | Right-click the pie chart and select Edit Data. | Modify the percentage values for each section. |
| 3 | Change the data value (e.g., from 65% to 85%). | Updates the pie chart to match desired percentages. |
| 4 | Drag the donut chart’s arc endpoint until it aligns with the pie chart’s edge. | Ensures the donut chart visually represents the correct percentage. |
This trick allows you to combine visual appeal with data accuracy in your presentations.
Frequently Asked Questions
What are the benefits of using advanced PowerPoint animations?
Advanced animations enhance audience engagement, help emphasize key points, and make presentations more memorable. They can transform static slides into interactive experiences that keep viewers interested.
Do I need special software or plugins to create these animations?
No. All the techniques shared here use standard Microsoft PowerPoint features, such as Slide Zooms, 3D Rotation, Morph Transition, and built-in animations like Swivel and Spin.
Can these animations be used in any version of PowerPoint?
Most of these features require PowerPoint 2016 or later, especially Morph Transition and Slide Zooms. Animations like Spin and Swivel are available in most recent versions. Check your PowerPoint version to ensure compatibility.
How do I ensure my animations run smoothly during a presentation?
Test your presentation in Slide Show mode before presenting. Adjust animation timings and transitions as needed. Also, avoid overusing animations to maintain a professional look and prevent distractions.
Can I apply these animation techniques to templates or existing presentations?
Absolutely! These techniques can enhance any presentation, whether built from scratch or using templates. Just ensure your illustrations are vector-based for animated textures, and you can layer animations on existing elements.
Conclusion & The Big Secret
Congratulations! By mastering these five secret PowerPoint animation techniques, you now have the tools to create presentations that stand out and impress. From flipping slide zooms to spinning donut charts, these effects are sure to elevate your storytelling and design skills.
And here’s a little insider secret: the creator behind these animation tips, Interstellar PowerPoint, is actually the same person behind the One Skill PPT channel. This dual identity allowed for a dedicated focus on PowerPoint mastery and sharing high-level tips with a growing community of presentation enthusiasts.
If you have questions about why a second channel was started, how it differs from One Skill PPT, or what exciting content is coming next, feel free to engage and ask. There’s a lot more to come in the world of PowerPoint animations!
Remember, animation is a powerful storytelling tool—use it thoughtfully to enhance your message and keep your audience engaged. Now go forth and animate like a pro!
Stay happy, stay healthy, and happy presenting!
Check out the full video: Create PowerPoint ANIMATIONS Like a Pro ✨ feat. @interstellar_ppt


