
Mastering PowerPoint animations can transform your presentations from ordinary to extraordinary. Whether you’re pitching a project, teaching a class, or sharing ideas, engaging animations can captivate your audience and keep their attention focused on your message. In this comprehensive guide, you’ll discover five professional-level animation techniques that will make your slides stand out immediately.
These techniques are inspired by the creative genius of Interstellar PowerPoint, a leading PowerPoint creator who generously shares his secrets for animating like a pro. By the end of this article, you’ll be equipped to add flip effects to slide zooms, create animated textures, build 3D rotating text intros, apply futuristic typewriter animations, and spin colorful donut charts—all within PowerPoint itself.
Ready to unleash your animation skills? Let’s dive in!
Table of Contents
- 1. Flip Animation for Slide Zooms
- 2. Creating Animated Textures
- 3. Rotating 3D Text with Morph Transition
- 4. Futuristic Typewriter Text Animation
- 5. Spinning Colorful Donut Charts
- FAQ: PowerPoint Animations
- Conclusion
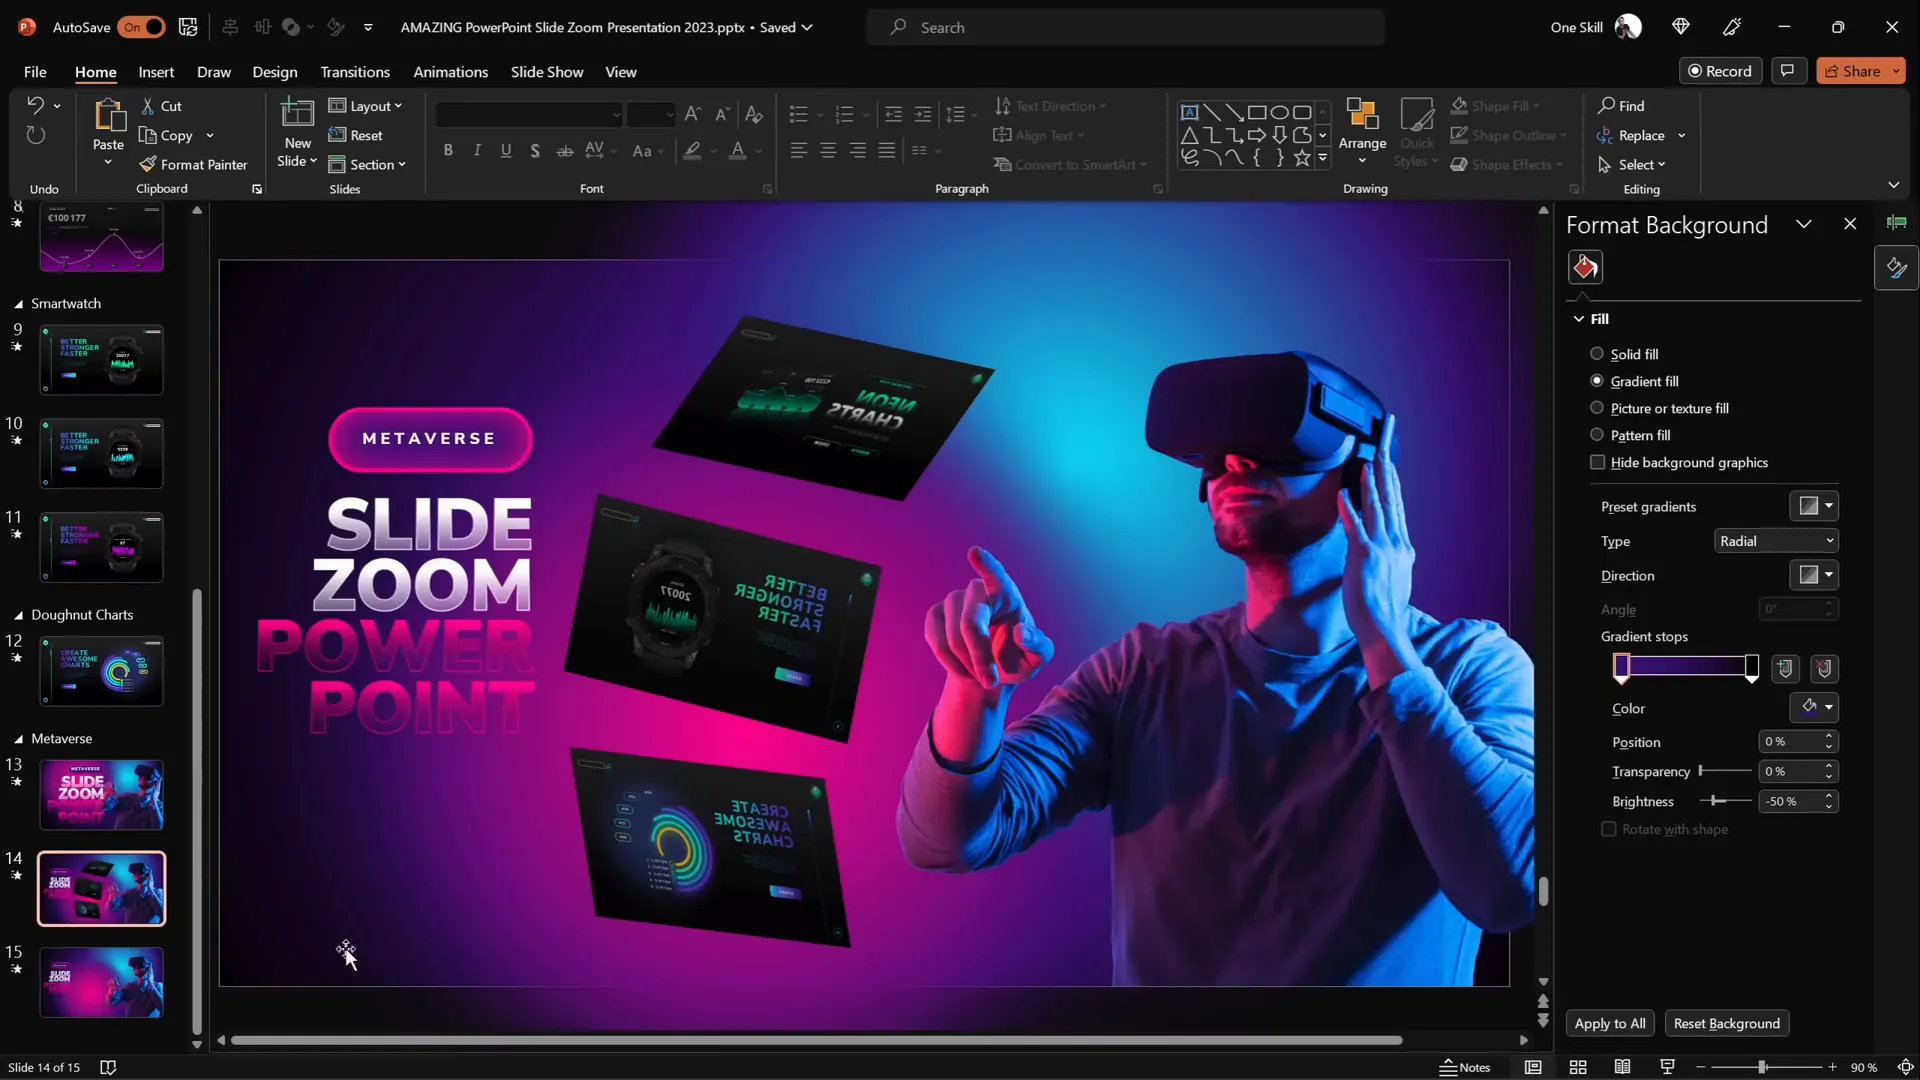
1. Flip Animation for Slide Zooms
Slide zooms are a dynamic way to navigate between sections or slides within your presentation. By default, clicking a slide zoom zooms you into the target slide and then back out. But what if you could make that zoom more visually exciting? Adding a flip animation to your slide zooms can create a stunning effect that impresses your audience.
Step-by-Step Guide to Create a Flip Effect on Slide Zooms
- Insert a Slide Zoom: Go to Insert > Zoom > Slide Zoom. Choose the slide you want to zoom into.
- Remove Zoom Border: Click the slide zoom thumbnail and remove the zoom border for a clean look.
- Enable Return to Zoom: Make sure the “Return to Zoom” option is activated. This allows you to zoom back to the original slide after viewing the zoomed slide.
- Add 3D Rotation: Select the slide zoom object, then go to the Format Shape > Effects > 3D Rotation options. Choose a parallel rotation preset and adjust the X rotation to flip the slide zoom to the other side.
- Customize Rotation: Experiment with Y and Z rotation handles to perfect the flip effect.
When you click the slide zoom during your presentation, you’ll see the slide flip and zoom in simultaneously, creating a captivating transition effect.
Bonus: Adding Subtle Floating Animation
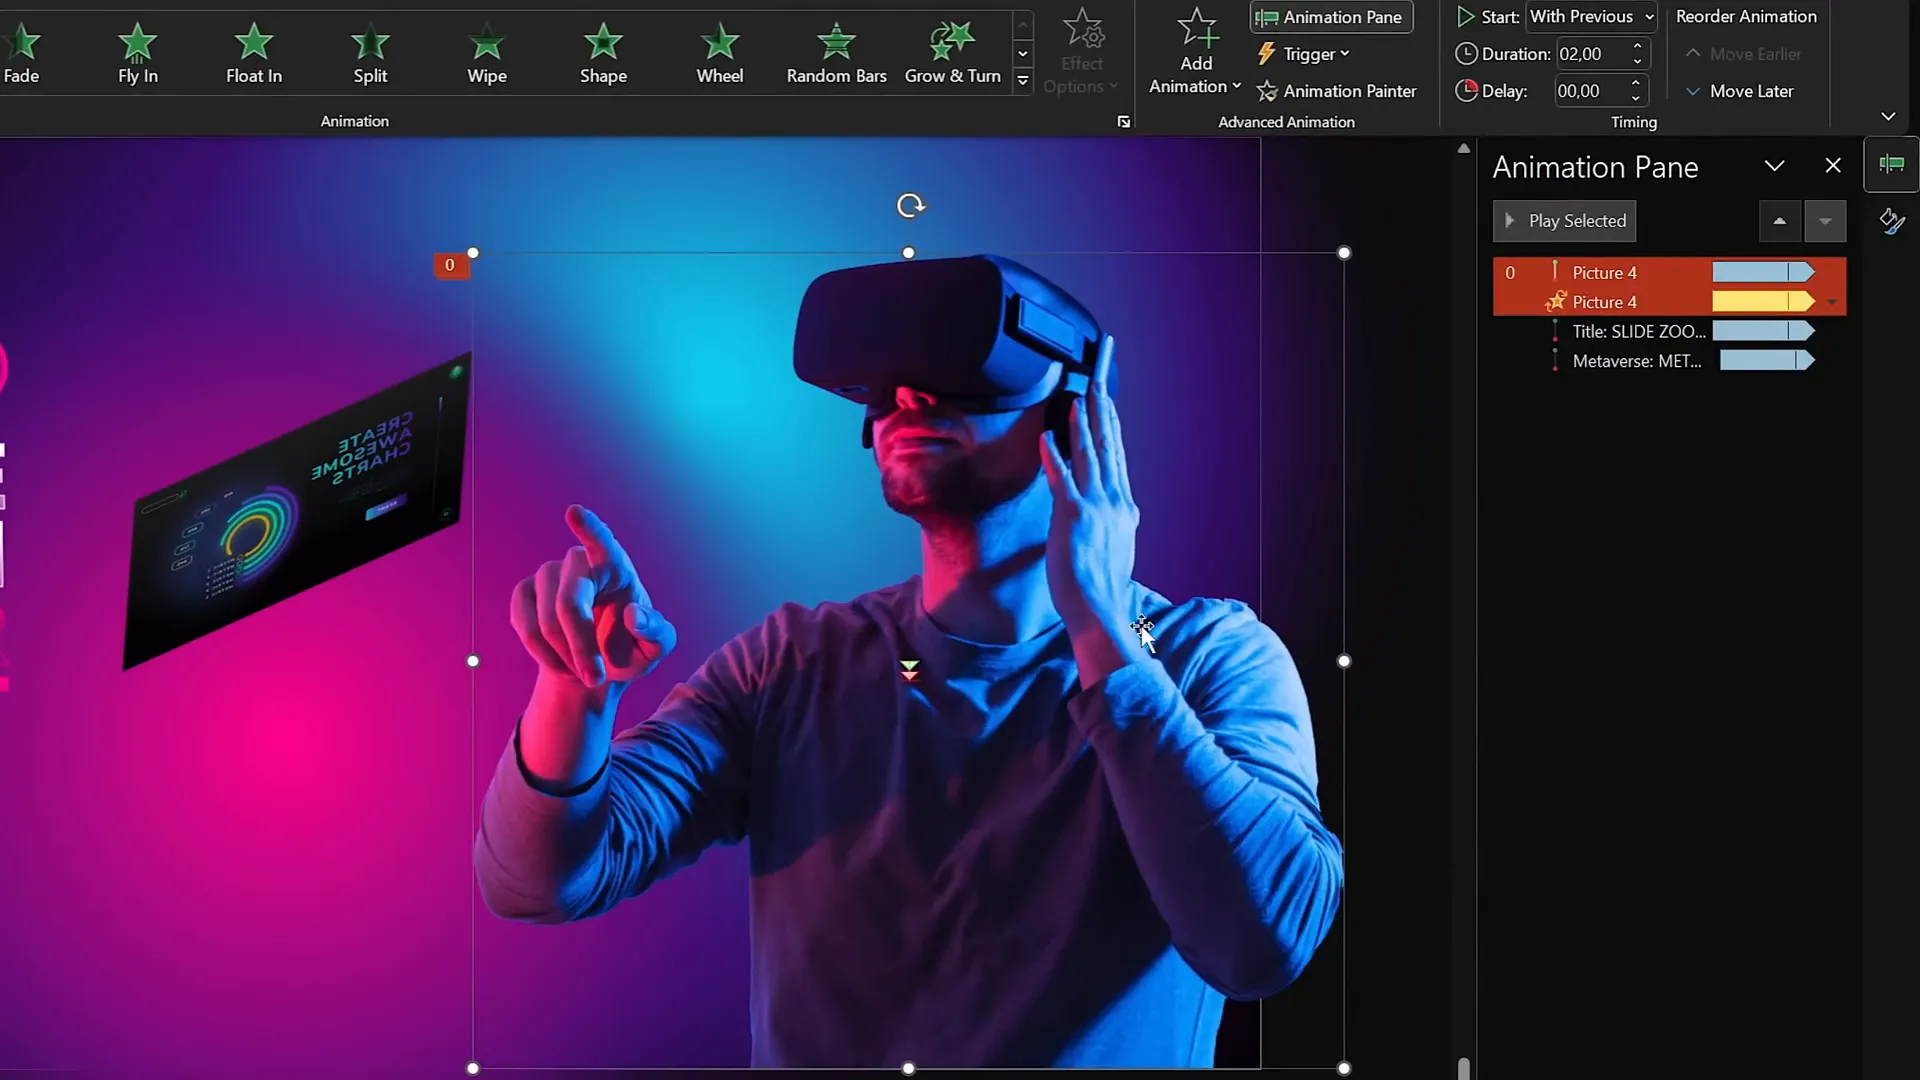
To add an extra layer of polish, animate objects on your slide to float subtly. For example, a character wearing VR glasses can gently move up and down while spinning slightly, creating a floating effect.
- Motion Path Animation: Apply a short vertical line motion path with a 2-second duration, smooth start/end of 1 second, and auto-reverse enabled.
- Spin Animation: Add a spin effect with just 2 degrees rotation, auto-reverse, and smooth start for subtle movement.
This combination of animations gives your slide dynamic depth and interest.
2. Creating Animated Textures
Animated textures are a fantastic way to spice up your slide backgrounds, illustrations, or any vector shape elements. Unlike static textures, animated textures add life and motion, making your slide design more engaging.
How to Create Animated Textures in PowerPoint
- Use Vector Shapes: Start with vector illustrations or shapes where you can edit points (indicating they are vector).
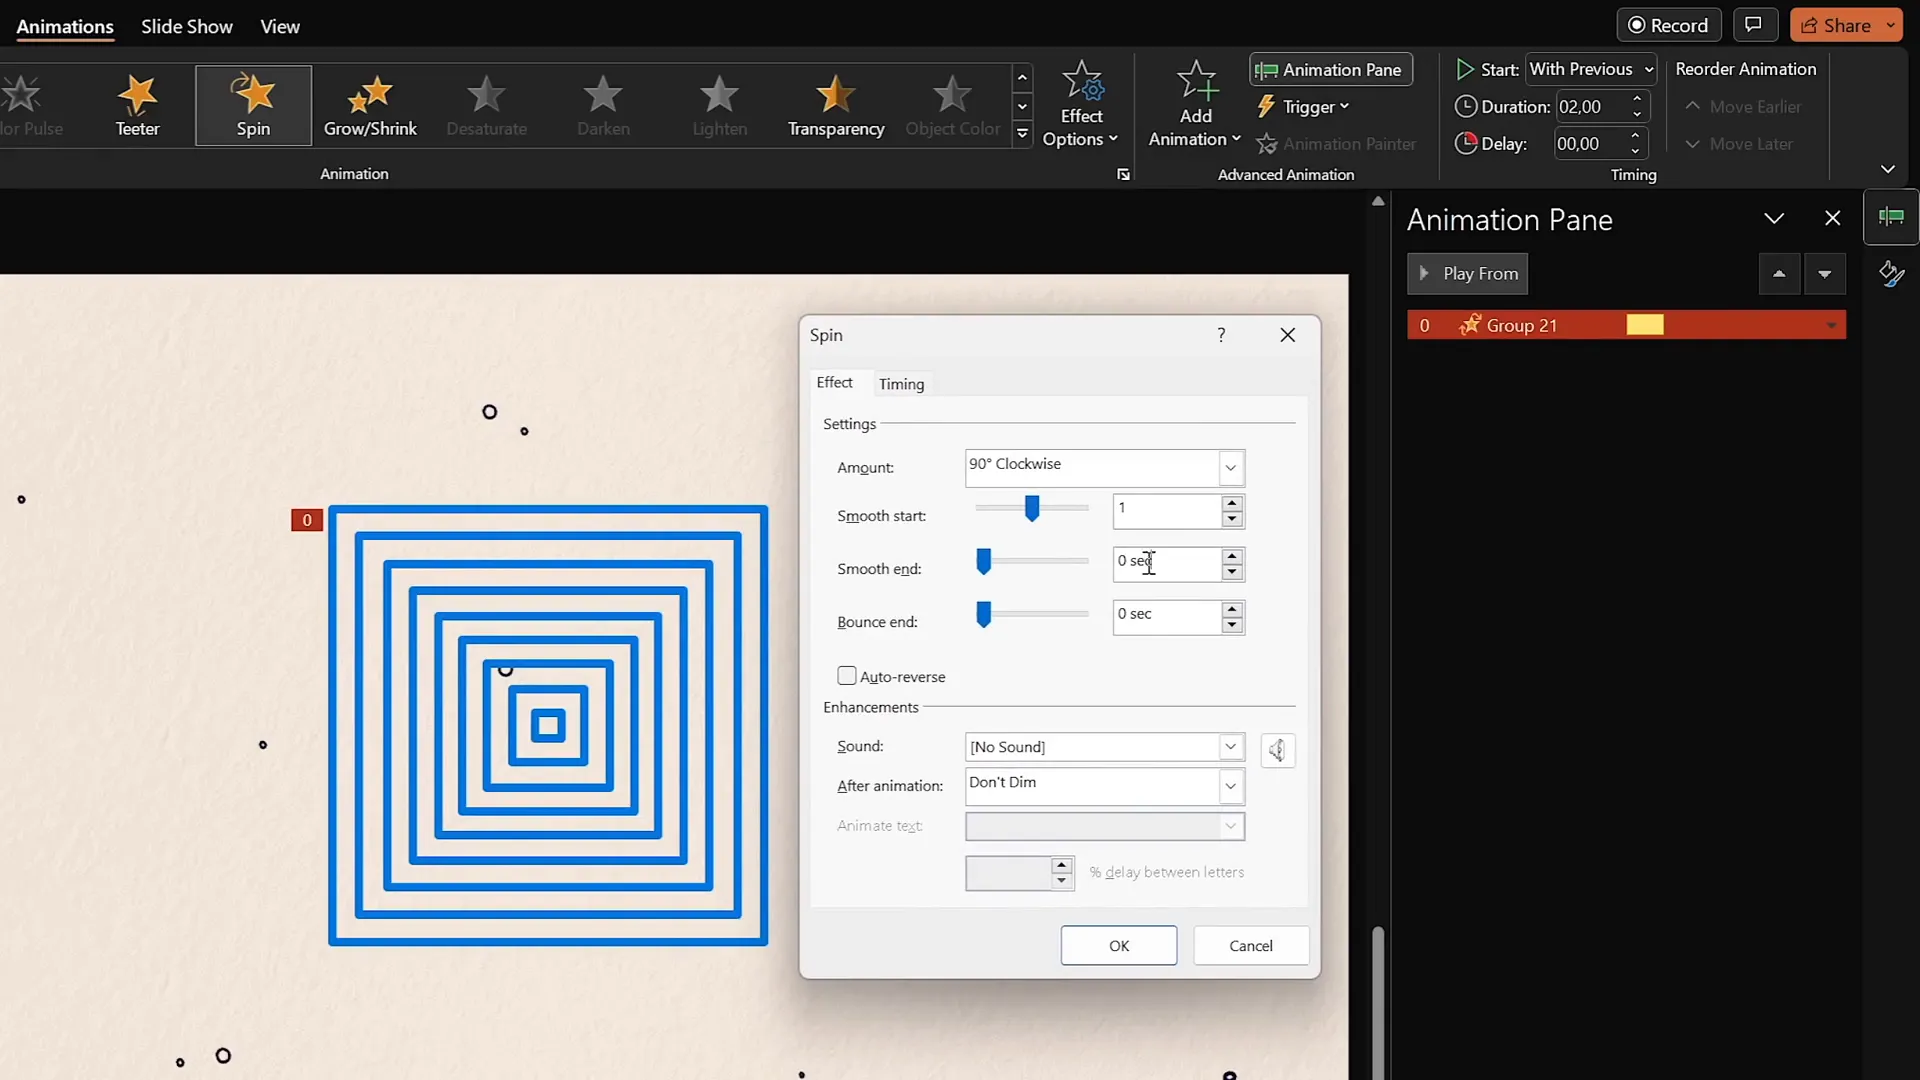
- Create Multiple Squares: Insert a perfect square (hold Shift while drawing) and center-align it. Duplicate it multiple times, increasing the size each time, and align all squares centrally.
- Group the Squares: Select all the squares and press
Ctrl + Gto group them, making animation easier. - Add Spin Animation: Apply a clockwise spin animation with a quarter spin amount. Set the animation to start with previous, duration of 2 seconds, smooth start/end of 1 second, and auto-reverse enabled.
- Add Grow/Shrink Animation: Use the “Add Animation” button to apply a grow/shrink effect with 130% size, smooth start of 1 second, and auto-reverse enabled. This will make the group grow and shrink rhythmically.
- Experiment with Line Style: Change the line style of the squares to “sketch” for a hand-drawn look. Adjust the outline color to white for better visibility.
The final result is a group of squares that spin and grow/shrink simultaneously, creating a lively animated texture.
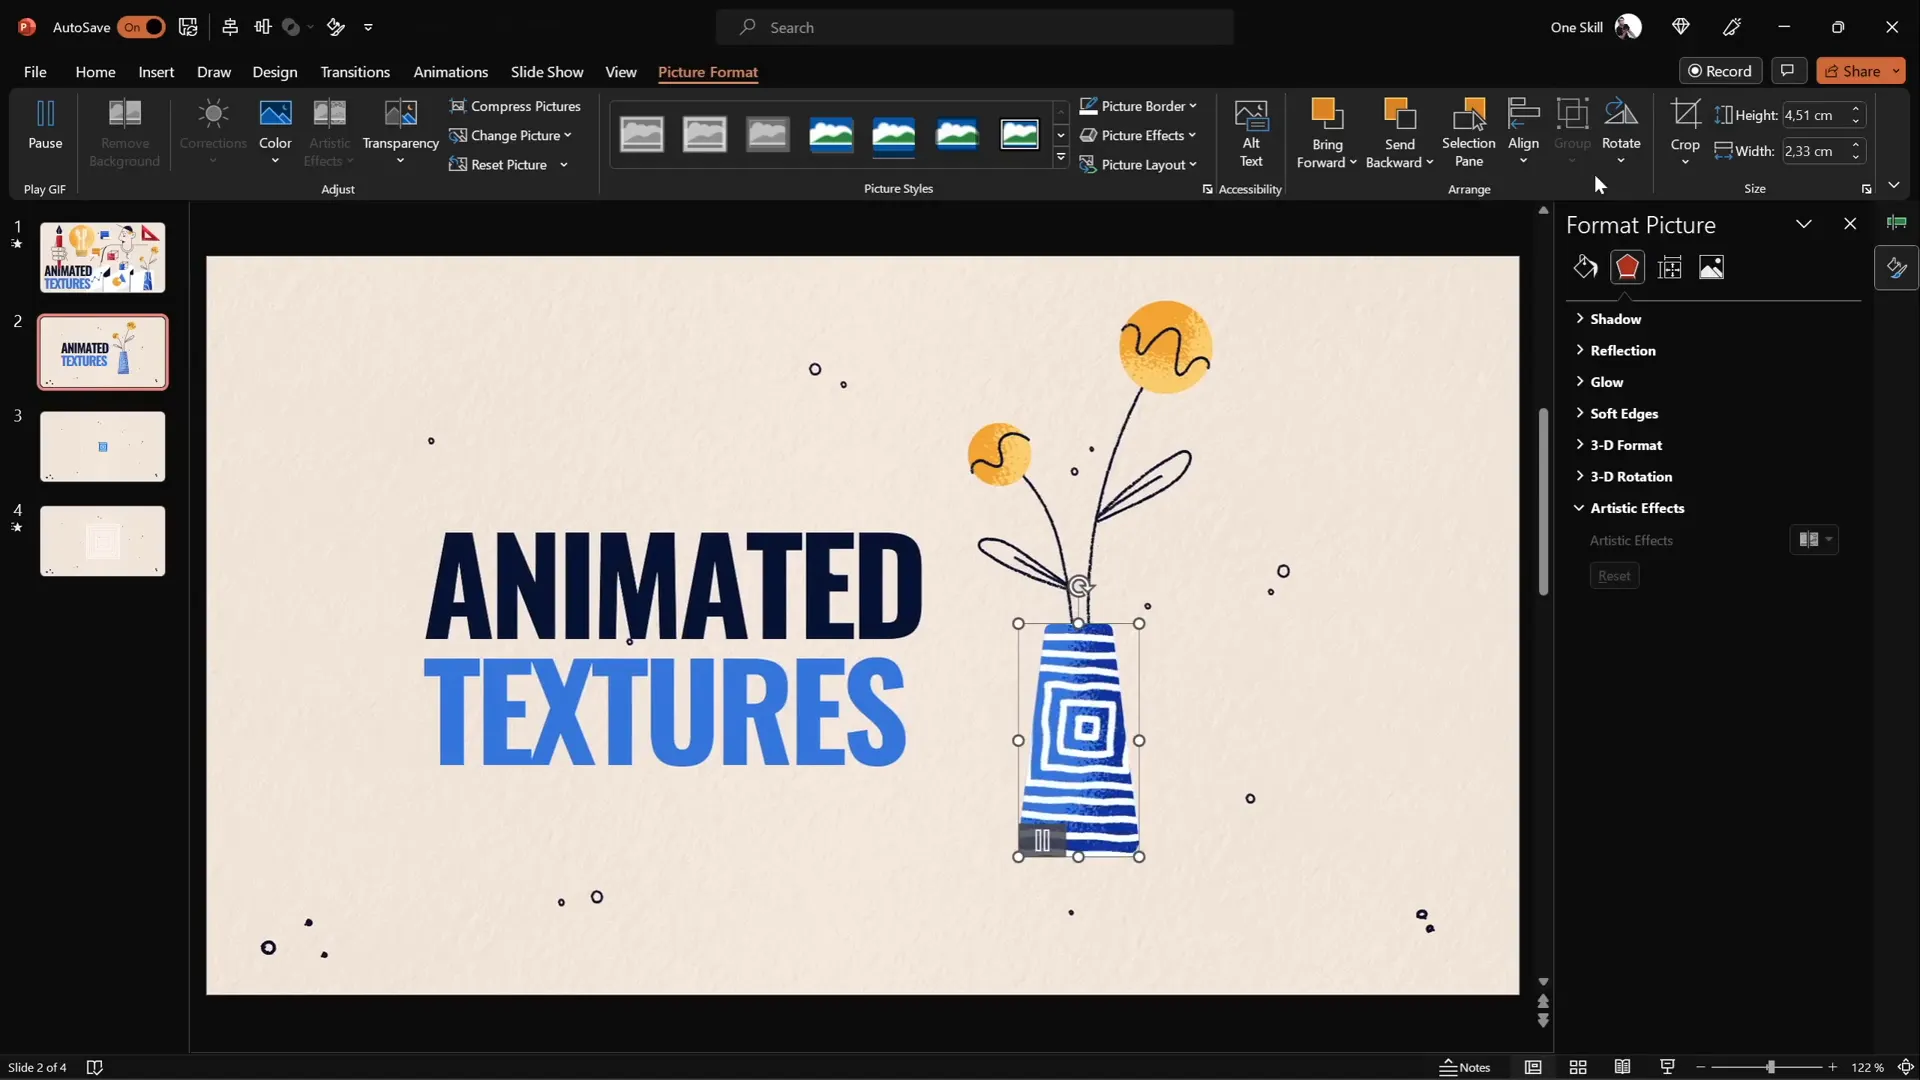
Applying Animated Textures to Illustrations
You can export your animated slide as a transparent GIF and then crop it to fit any vector shape to add an animated texture. For example, you can apply this animated texture to a vase illustration by:
- Exporting the animation as a transparent GIF.
- Inserting the GIF back into PowerPoint.
- Placing a duplicate shape of the vase over the GIF, changing its color for visibility, and aligning it perfectly.
- Selecting both the GIF and the shape, then using Shape Format > Merge Shapes > Intersect to crop the GIF into the vase shape.
- Adjusting the crop for the best fit.
This technique adds stunning, dynamic textures to your illustrations that will captivate your audience.
3. Rotating 3D Text with Morph Transition
Combining PowerPoint’s 3D rotation options with the Morph transition can create eye-catching text animations perfect for intro slides or section headers.
Steps to Create 3D Rotating Text
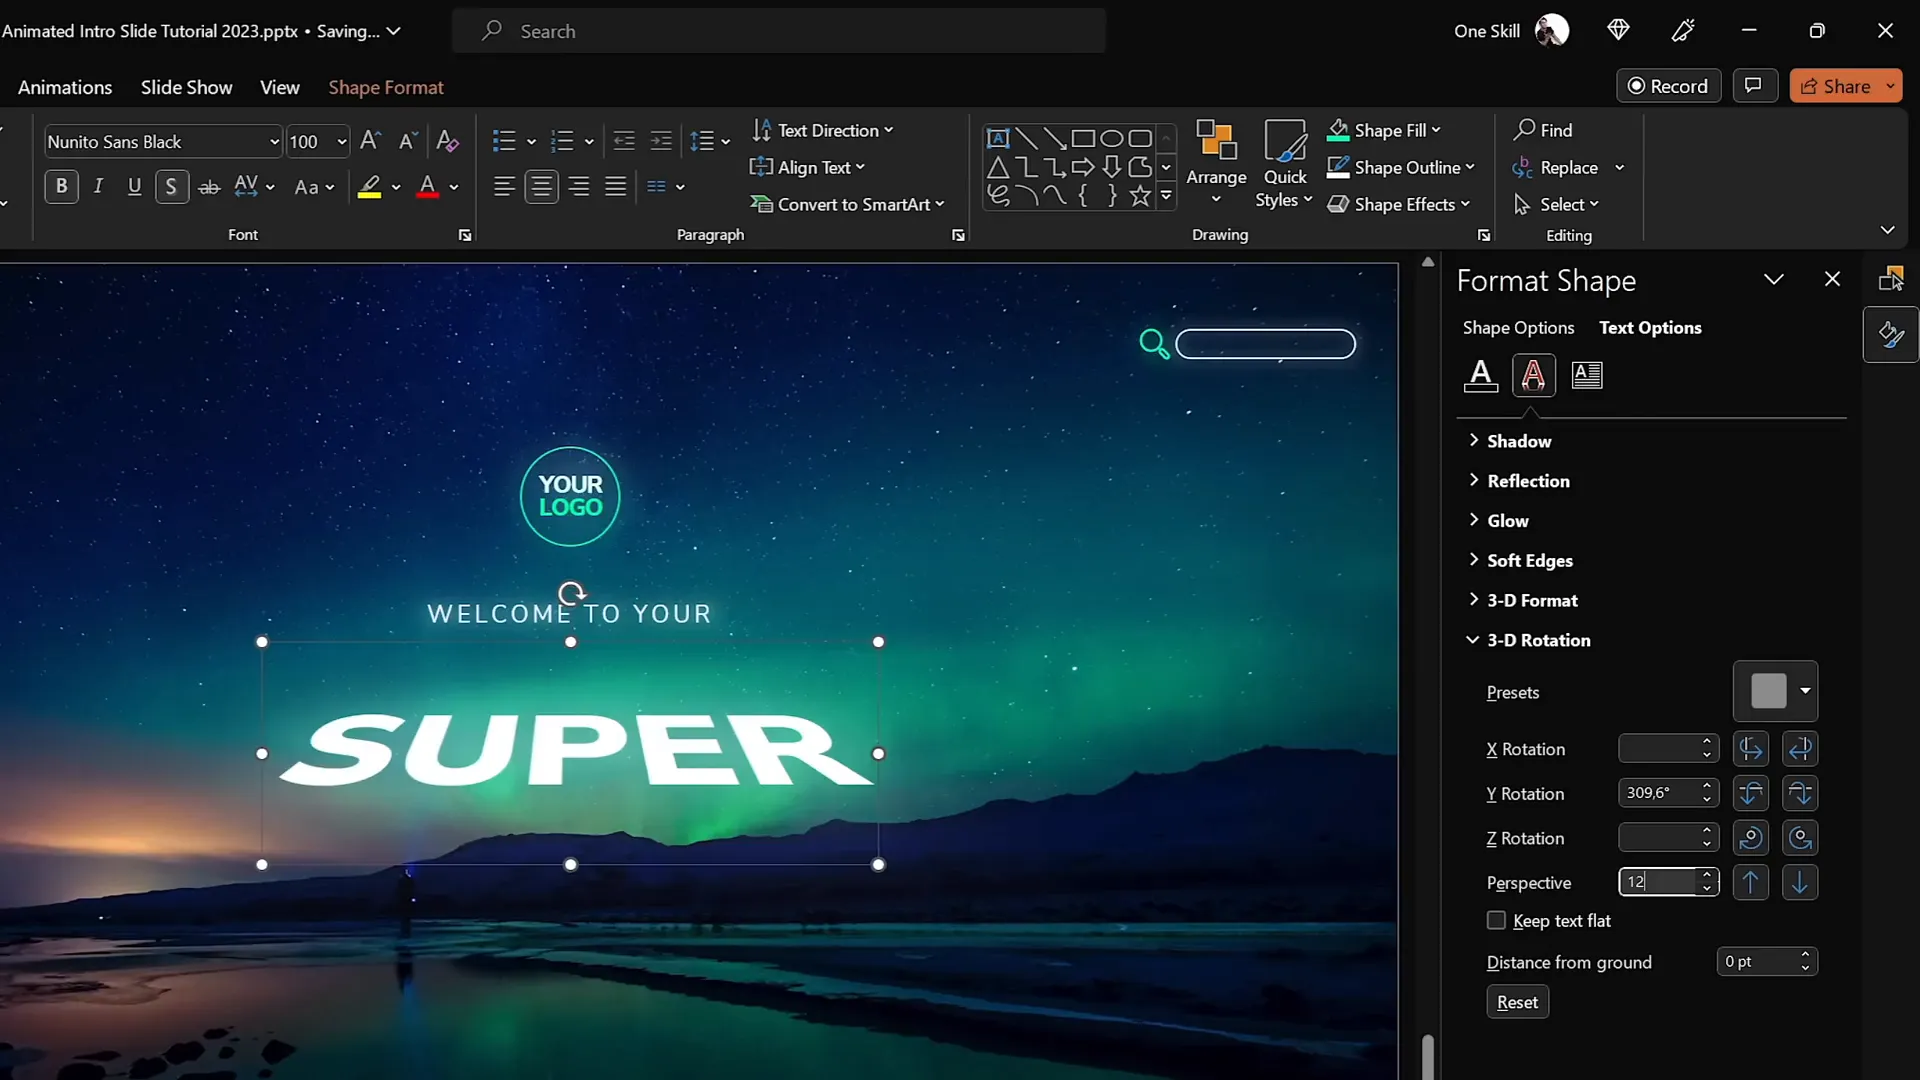
- Prepare Your Text Box: Use a large text box with your desired text. Add a white shadow with a blur of 100 points to create a shiny glow effect around the text.
- Apply 3D Rotation: Go to Format Shape > Effects > 3D Rotation and choose a perspective preset, like “Perspective Relaxed.” Set the perspective field to the maximum 120 degrees and Y rotation to zero.
- Duplicate the Slide: Duplicate your slide to create two versions of your text.
- Rotate Text on Second Slide: On the duplicated slide, copy the text box and move it slightly down. Then rotate it 90 degrees on the X axis so it looks flat and almost invisible. Adjust its position so the middle of this rotated text box touches the text on the slide.
- Apply Morph Transition: Set the transition between slides to Morph with a duration of 1 second. This will animate the text rotating down.
- Repeat for the Other Text: Apply the opposite rotation on the first slide for the second text box, rotating it to 270 degrees on the Y axis and adjusting its position accordingly.
When you run the presentation, the text will rotate in 3D space smoothly, creating an impressive animation effect.
You can extend this effect by adding more slides with additional rotating text boxes to build a full animated intro sequence.
4. Futuristic Typewriter Text Animation
For a modern and sleek text animation, the swivel effect can mimic a futuristic typewriter, animating letters or words in a quick, eye-catching way.
How to Create the Futuristic Typewriter Effect
- Select Your Text: Choose the title or text you want to animate.
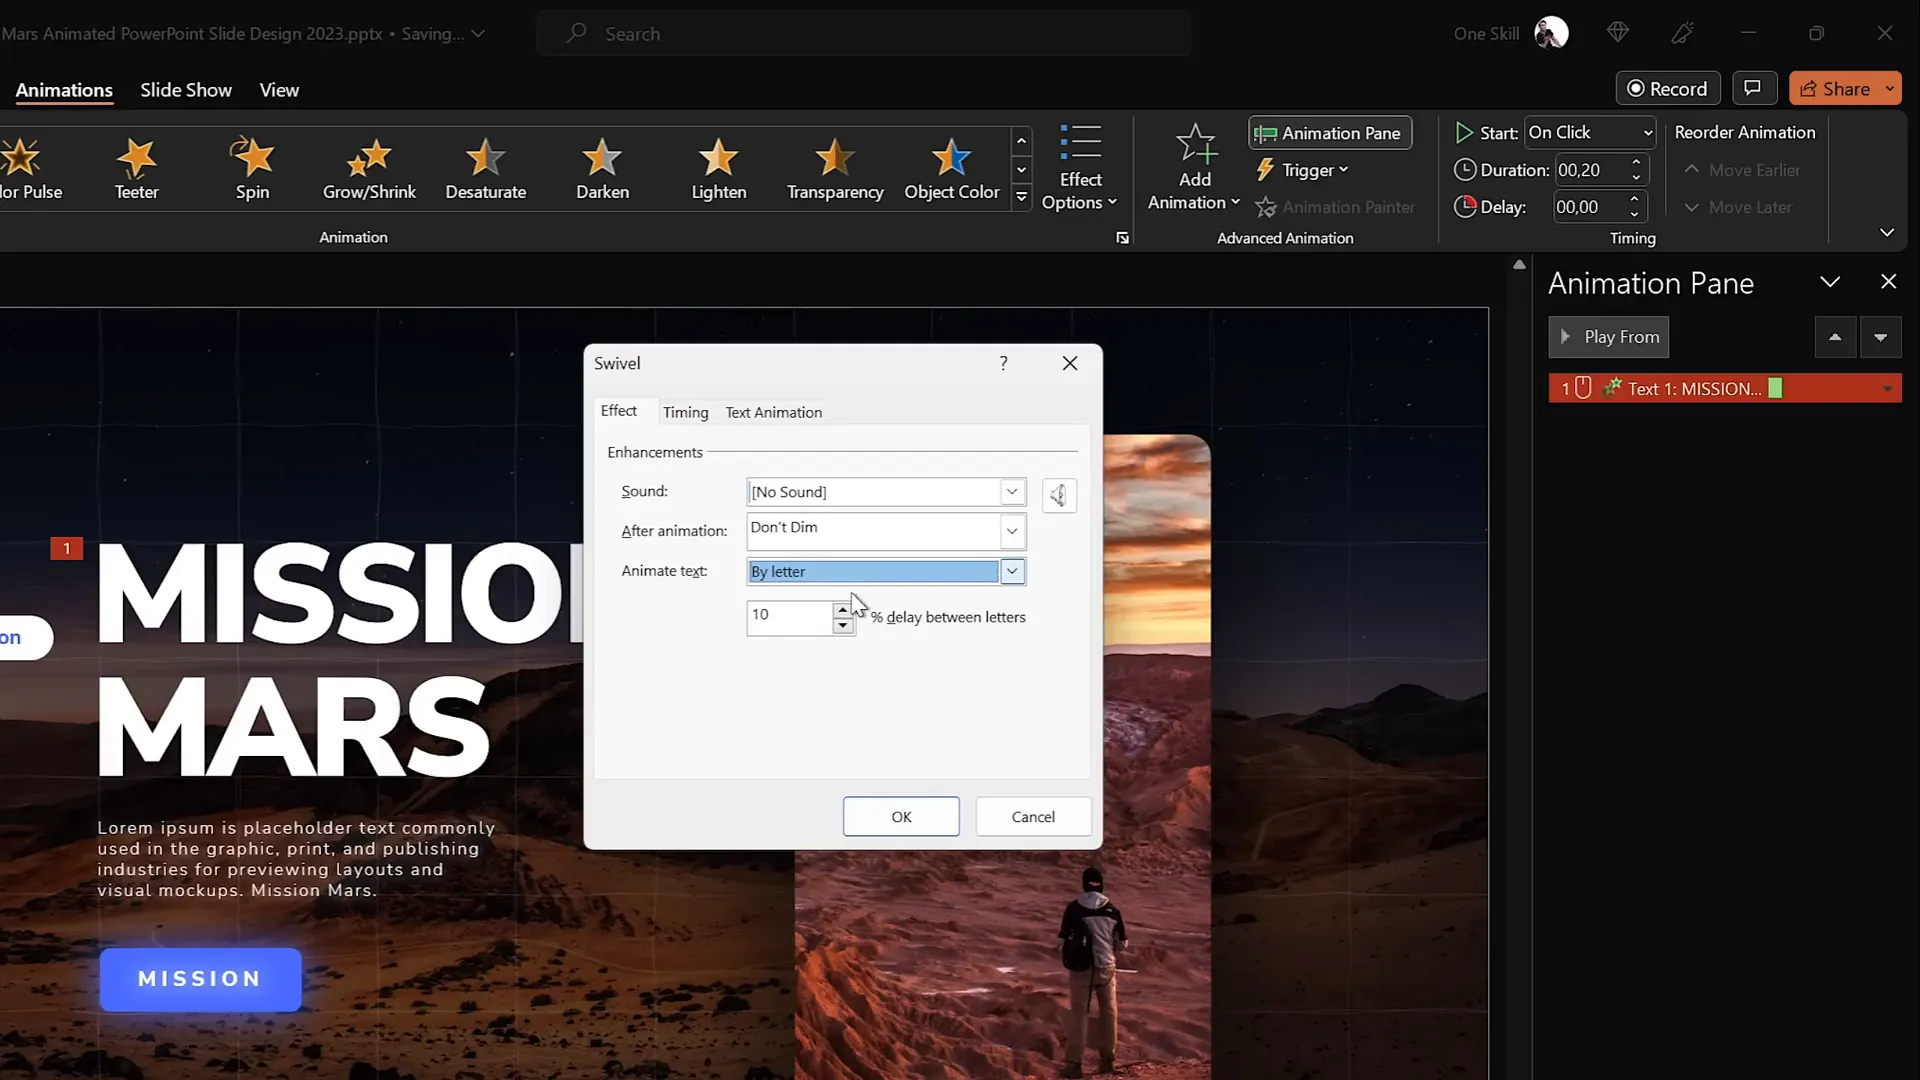
- Apply Swivel Animation: Go to the Animations tab, find “Swivel” under entrance animations, and apply it to your text.
- Adjust Animation Settings: Set the duration to a short 0.2 seconds. Under text animation options, choose “By letter” with a delay of 10% between letters.
- Copy Animation to Other Objects: Use the Animation Painter to apply the same animation settings to other text boxes or paragraphs.
- Modify Paragraph Animation: For longer text blocks, animate “By word” to speed up the effect and maintain readability.
- Configure Animation Start: Set the first animation to start “On Click” and all others to start “With Previous” for smooth simultaneous play after one click.
The result is a slick, futuristic typewriter effect that animates your text letter-by-letter or word-by-word, perfect for dynamic slide titles or headings.

If you want to create a clickable menu with this animation style, consider exploring detailed tutorials on interactive PowerPoint menus.
5. Spinning Colorful Donut Charts
Donut charts are excellent for visualizing percentages, and adding spin animations can make them fun and futuristic. Here’s how to create spinning donut charts with precision and style.
Creating Donut Shapes for Charts
- Insert an Arc shape by going to Insert > Shapes > Arc.
- Hold the Shift key to draw a perfect arc.
- Increase the line width to 20 points and set the line cap type to Round for smooth edges.
- Adjust yellow handles on the arc to customize the donut shape.
Animating Donut Charts
- Apply Wedge Entrance Animation: Select the donut shape, go to More Entrance Animations, and choose “Wedge.”
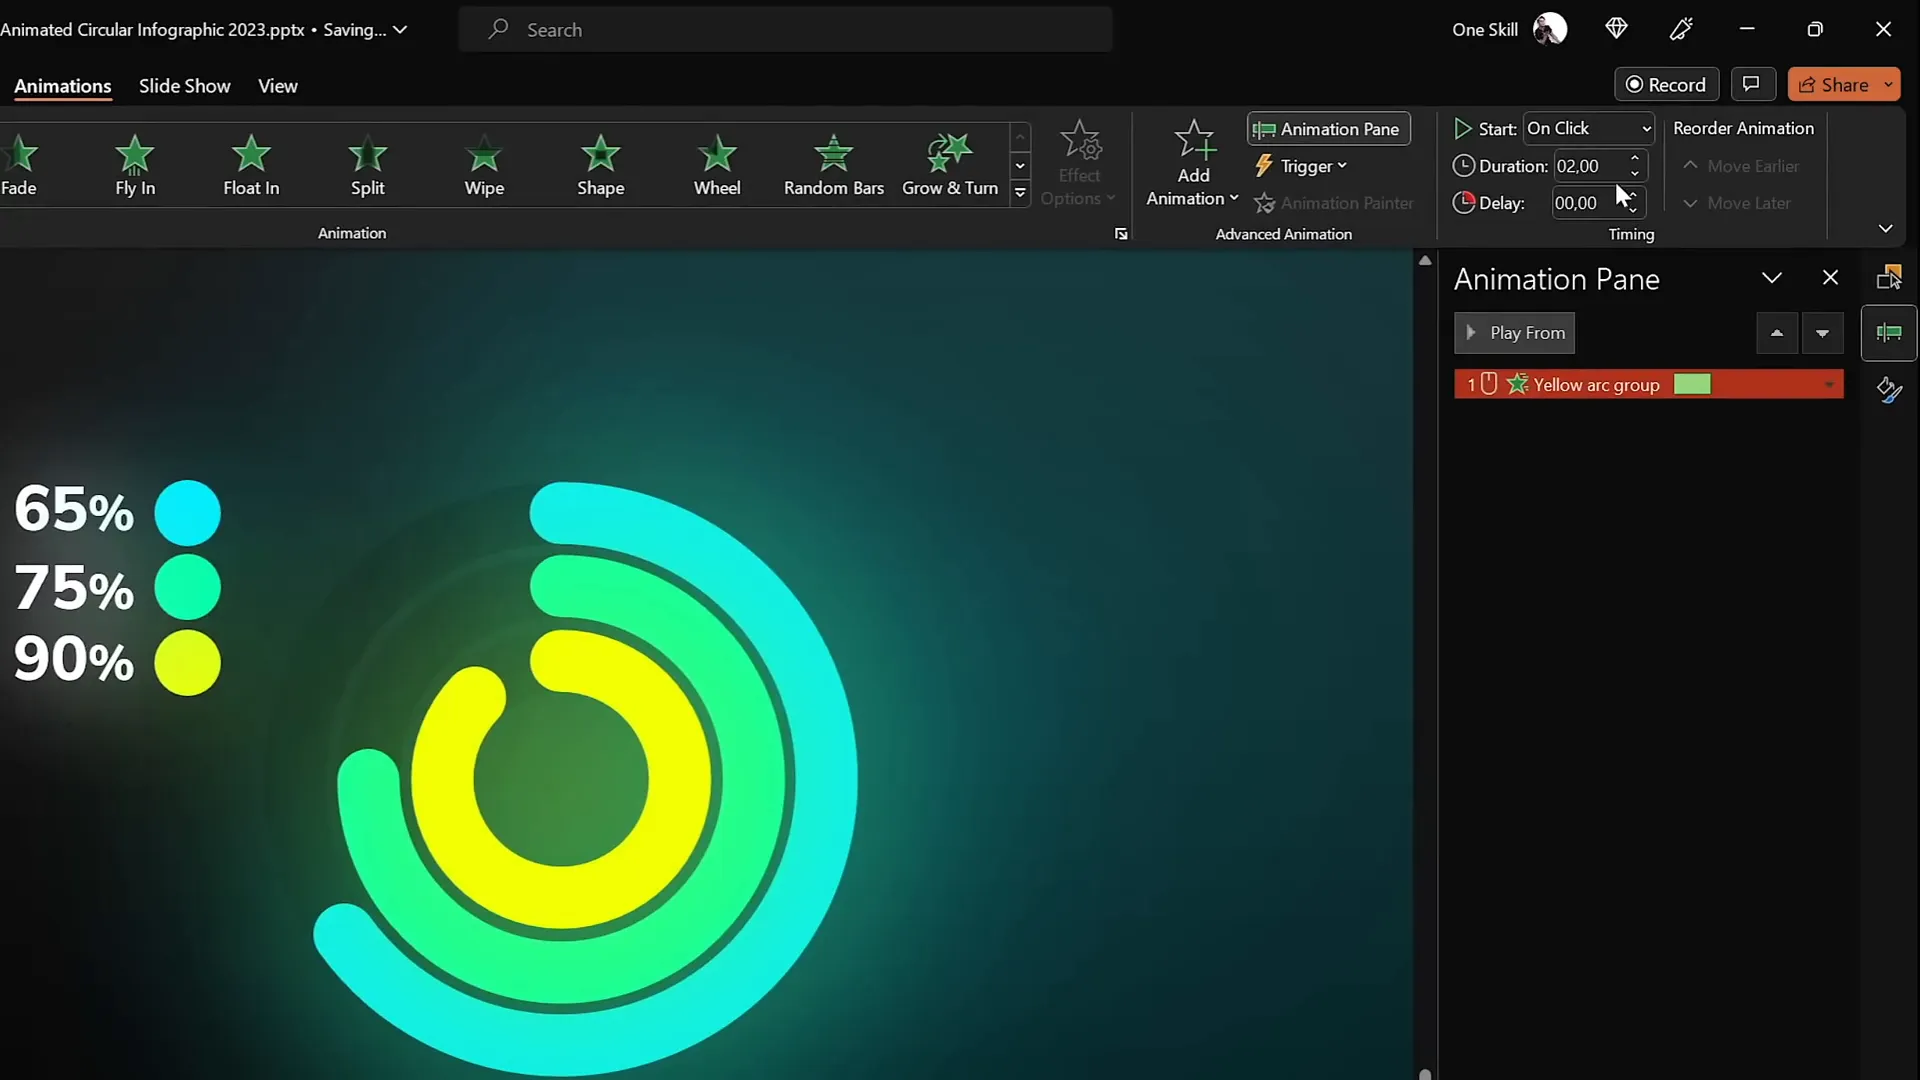
- Speed Up Animation: Reduce the duration from 2 seconds to 0.6 seconds to make the animation snappy.
- Add Spin Animation: Add a spin animation set to start “With Previous,” duration 1 second, and rotation amount 1080 degrees (3 full spins).
- Adjust Spin Duration: Set the spin to last 0.5 seconds for a quick, dynamic effect.
- Copy Animation: Use the Animation Painter to apply this spinning animation to other donut charts.
Adjusting Donut Charts for Exact Percentages
To precisely represent data percentages (e.g., 85%, 90%), use a pie chart as a guide behind the donut chart:
| Step | Action | Details |
|---|---|---|
| 1 | Insert Pie Chart | Go to Insert > Charts > Pie Chart and add a simple pie chart behind the donut charts. |
| 2 | Edit Data | Right-click the pie chart and select “Edit Data.” Adjust the percentage values in the spreadsheet to desired amounts. |
| 3 | Align Donut | Drag the donut chart’s end point until it matches the edge of the pie chart, visually matching the percentage. |
This method ensures your donut charts are not only visually appealing but also data-accurate.
FAQ: PowerPoint Animations
Q1: Can I use these animation techniques in all versions of PowerPoint?
Most of these animations and effects are available in PowerPoint 2016 and later, including PowerPoint for Microsoft 365. The Morph transition and 3D rotation features require newer versions, so ensure your software is up to date.
Q2: How do I avoid my animations being distracting?
Use animations purposefully to enhance your message, not overwhelm it. Keep animations subtle and consistent throughout your presentation. Avoid excessive or flashy animations that detract from your content.
Q3: Can I export animated slides as GIFs?
Yes! PowerPoint allows you to export slides as animated GIFs with transparency, which can be used to add animated textures or share snippets of your presentation outside PowerPoint.
Q4: How do I make my animations smoother?
Adjust animation duration, smooth start/end, and use the Morph transition for fluid movements. Experiment with auto-reverse settings to create natural back-and-forth effects.
Q5: Are these techniques suitable for beginners?
While some techniques are advanced, they are explained step-by-step and can be mastered with practice. Start with simpler animations and gradually incorporate these pro techniques as you gain confidence.
Conclusion
Animating your PowerPoint presentations like a pro is within your reach when you learn to harness powerful techniques like flip slide zooms, animated textures, 3D rotating text, futuristic typewriter effects, and spinning donut charts. These animation strategies not only enhance the visual appeal of your slides but also help retain audience attention and communicate your message more effectively.
Remember, the key to great PowerPoint animations is combining creativity with subtlety and purpose. Use these techniques thoughtfully to add polish and professionalism to your presentations.
Keep practicing these methods, experiment with your own creative twists, and watch your presentations come alive. Happy animating!
For more inspiration and tutorials, be sure to explore the work of creators like Interstellar PowerPoint, who continue to push the boundaries of what’s possible in PowerPoint animation.
Check out the full video: Create PowerPoint ANIMATIONS Like a Pro ✨ feat. @interstellar_ppt


