
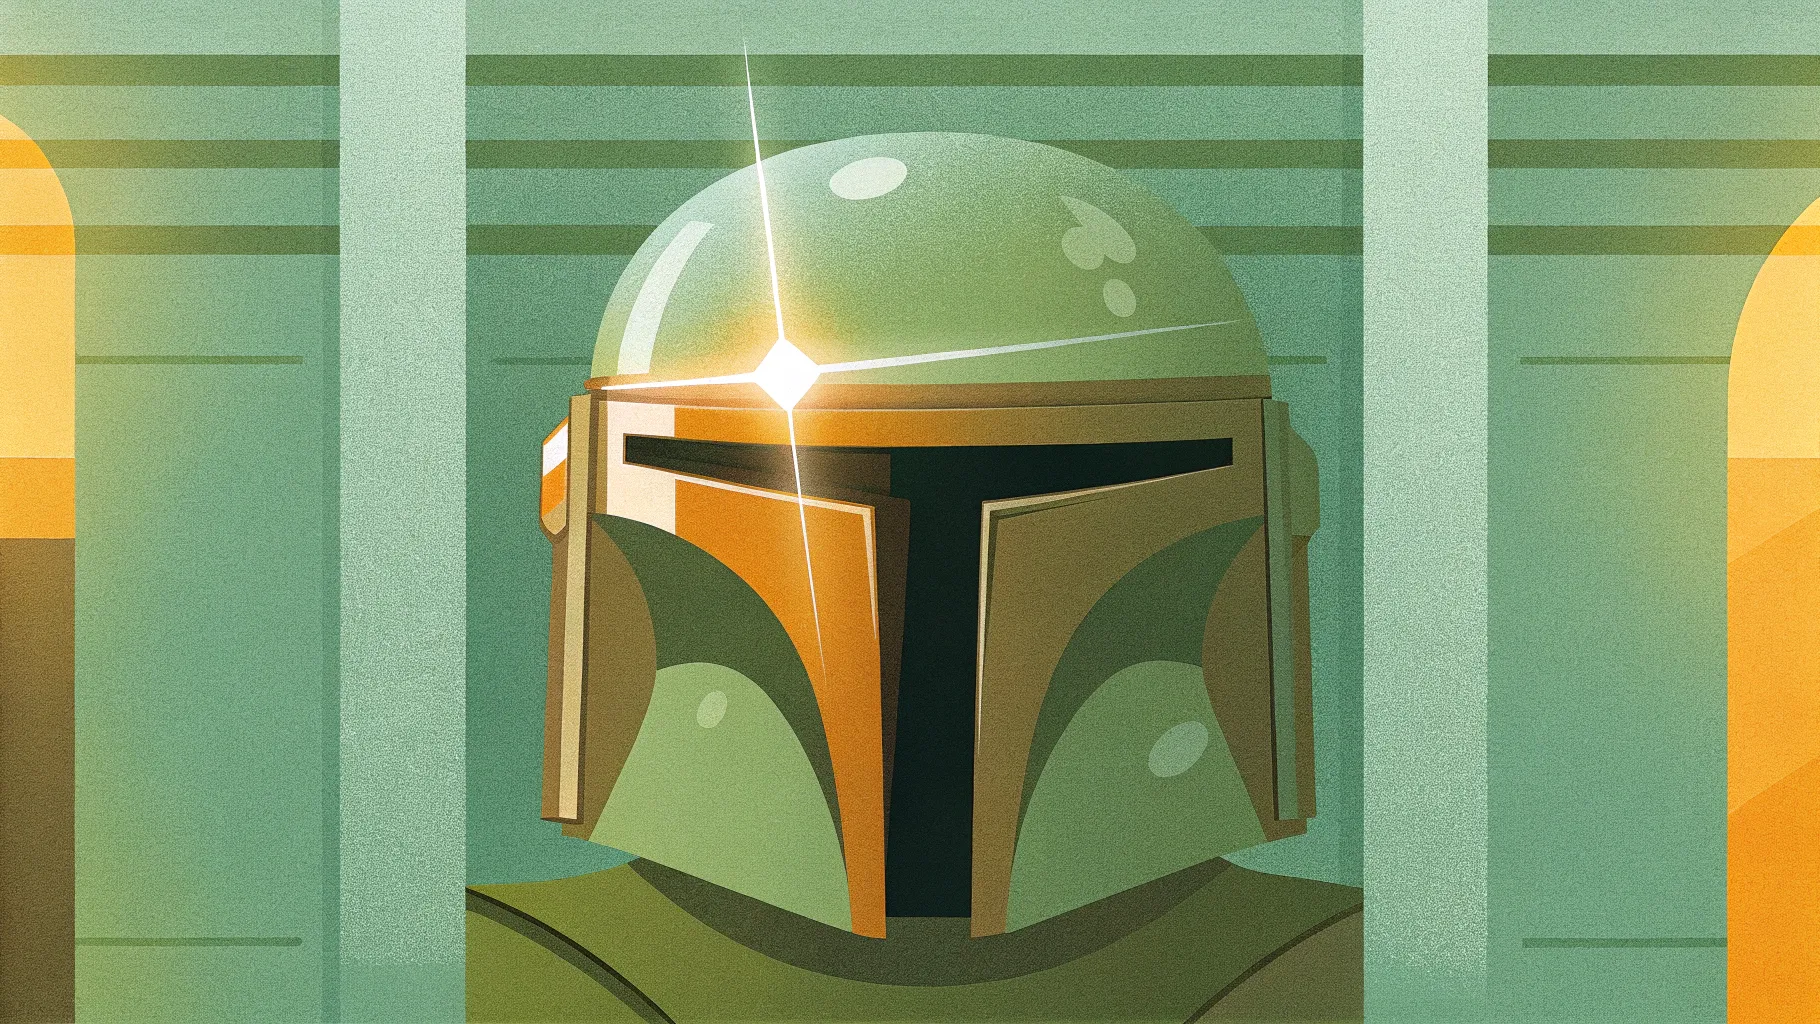
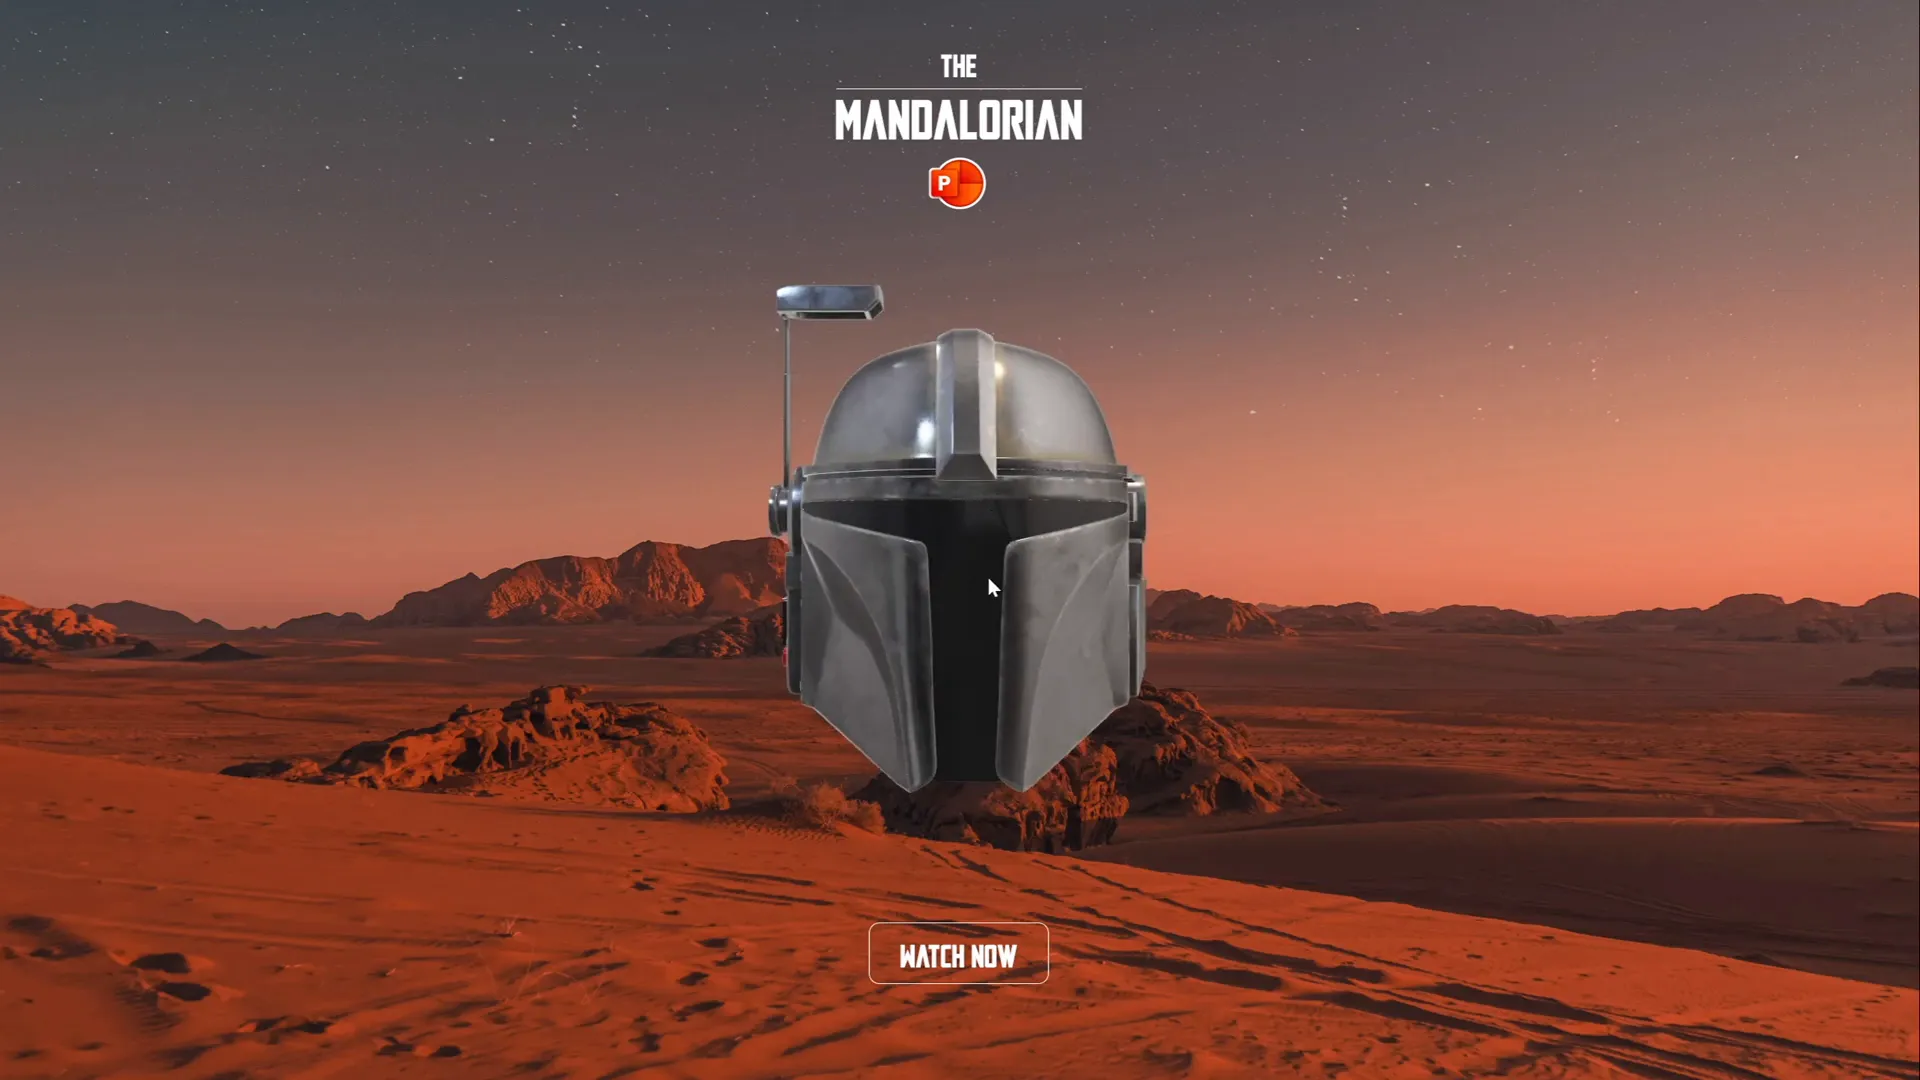
If you’re passionate about PowerPoint animations and want to create something truly unique and interactive, you’ve come to the right place. Imagine a Mandalorian helmet moving fluidly across your slide, following your mouse cursor as you navigate. This isn’t just a flashy effect—it’s a clever use of PowerPoint’s features to create engaging presentations that captivate your audience. In this comprehensive tutorial, I’ll guide you step-by-step on how to achieve this incredible animation using PowerPoint’s 3D models, Morph transitions, and interactive triggers.
This article is designed to equip you with the skills to create your own interactive PowerPoint animations, using a Mandalorian helmet as our example. But the concepts apply to any 3D model you want to animate. Let’s dive in and discover how to bring your slides to life with PowerPoint animations that respond dynamically to your mouse movements.
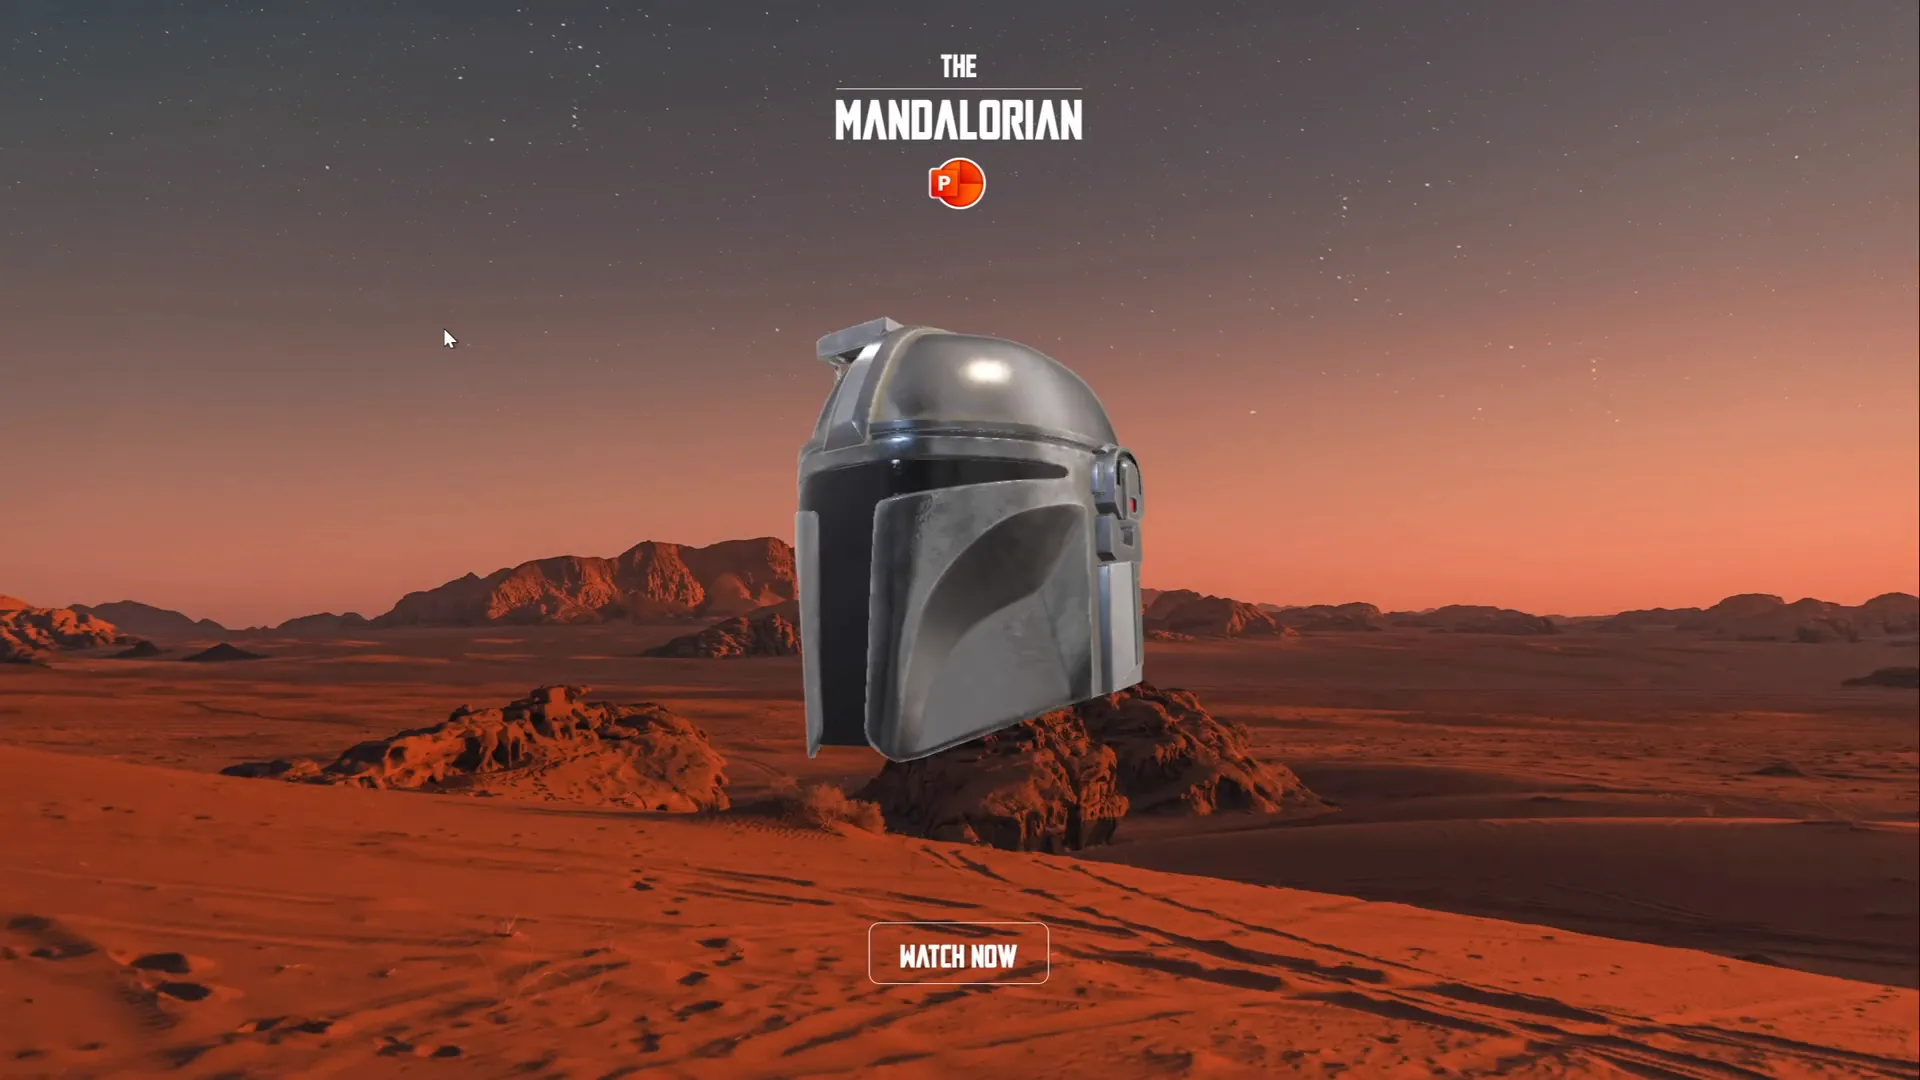
Table of Contents
- Preparing Your Presentation and Slide Layout
- Inserting the Mandalorian 3D Model
- Setting Up Slide Navigation with Mouse-Over Actions
- Using the Morph Transition for Smooth Animation
- Creating Invisible Interactive Zones
- Finalizing and Testing Your Animation
- Frequently Asked Questions
- Conclusion
Preparing Your Presentation and Slide Layout
Before we jump into animating the Mandalorian helmet, the first step is to prepare your PowerPoint presentation with a clean and visually appealing foundation. Here’s how to start from scratch:
1. Create a Blank Presentation
Open PowerPoint and start a new presentation. Choose a blank slide layout to have a clean canvas without any pre-existing placeholders or distractions.
2. Choose a Stunning Background Image
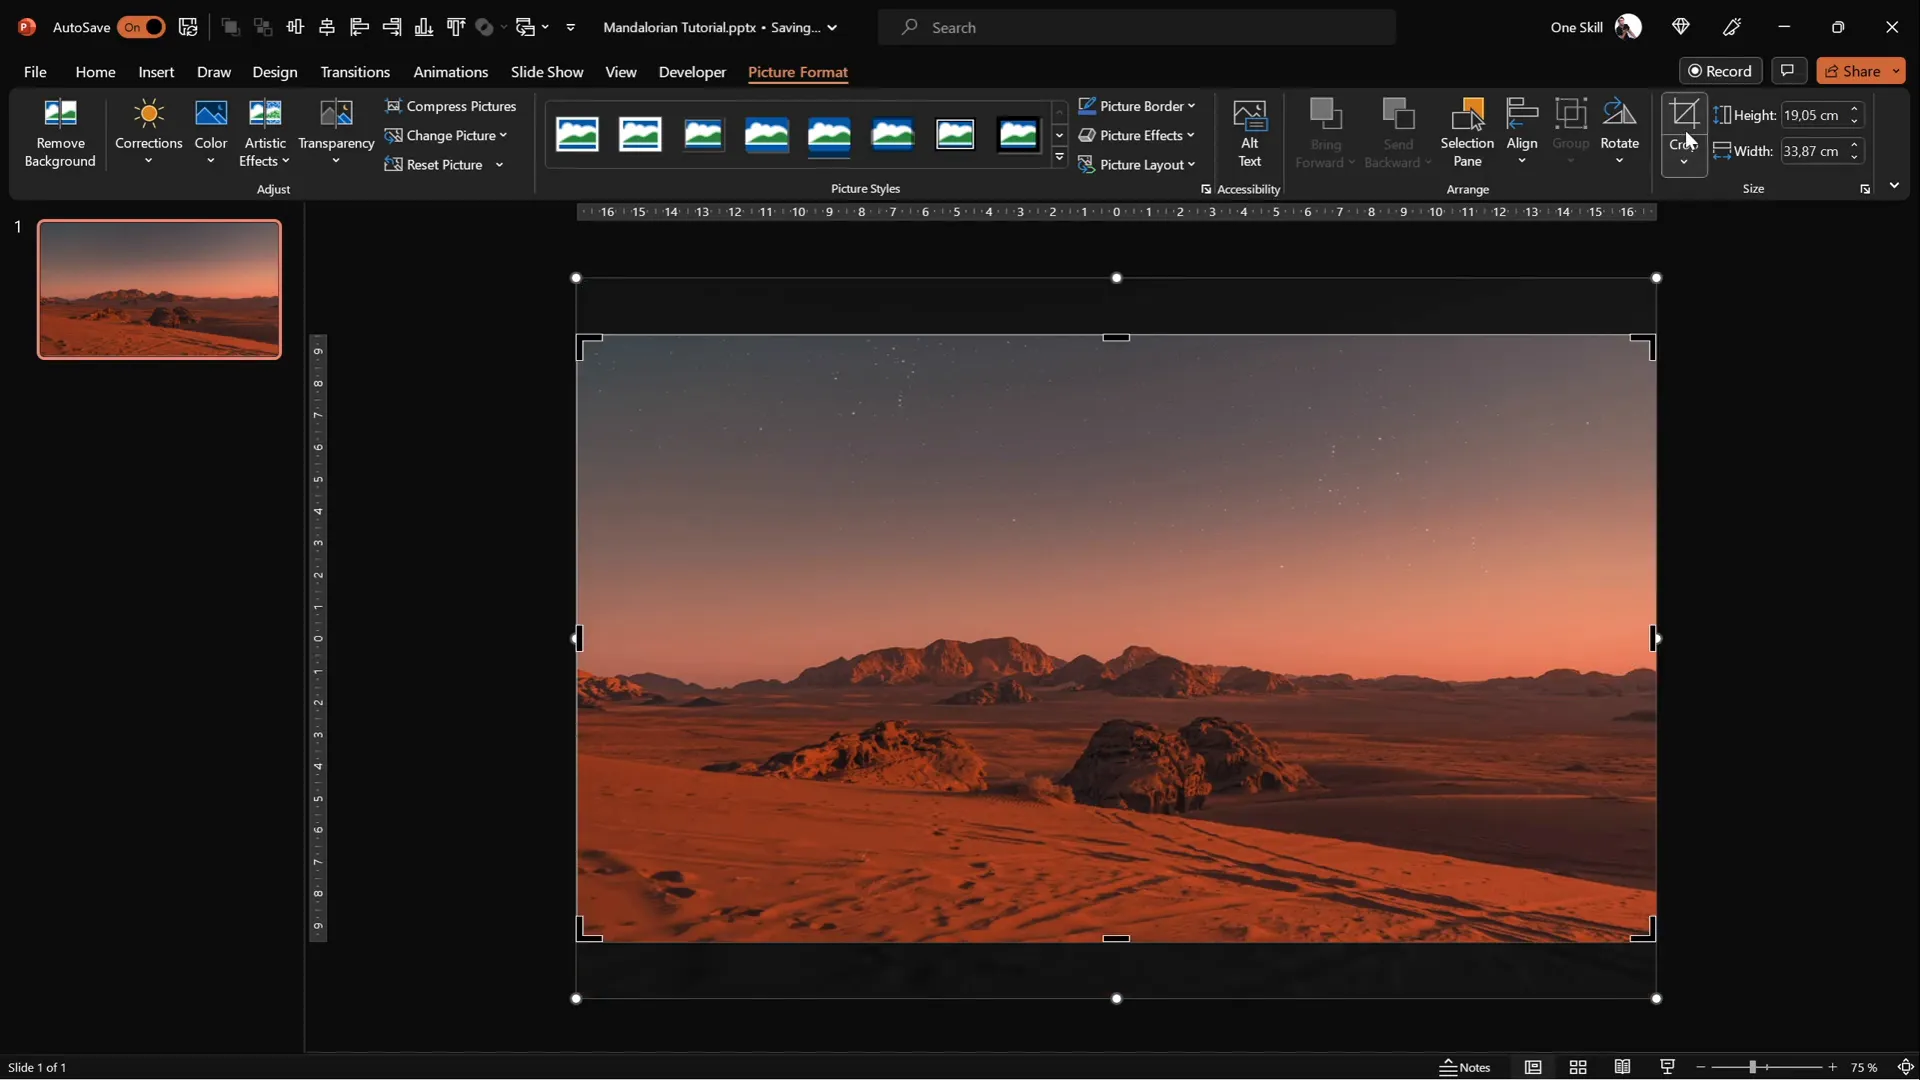
Visual context is everything. Select a background image that complements your animation theme. For our Mandalorian helmet animation, I used a high-quality photo that adds depth and mood to the slide.
- Insert the image by going to Insert > Pictures.
- Resize the image by dragging its corners while holding Ctrl + Shift to maintain aspect ratio and cover the entire slide.
- Use the Crop to Aspect Ratio feature to set it to 16:9, ensuring it fits perfectly.
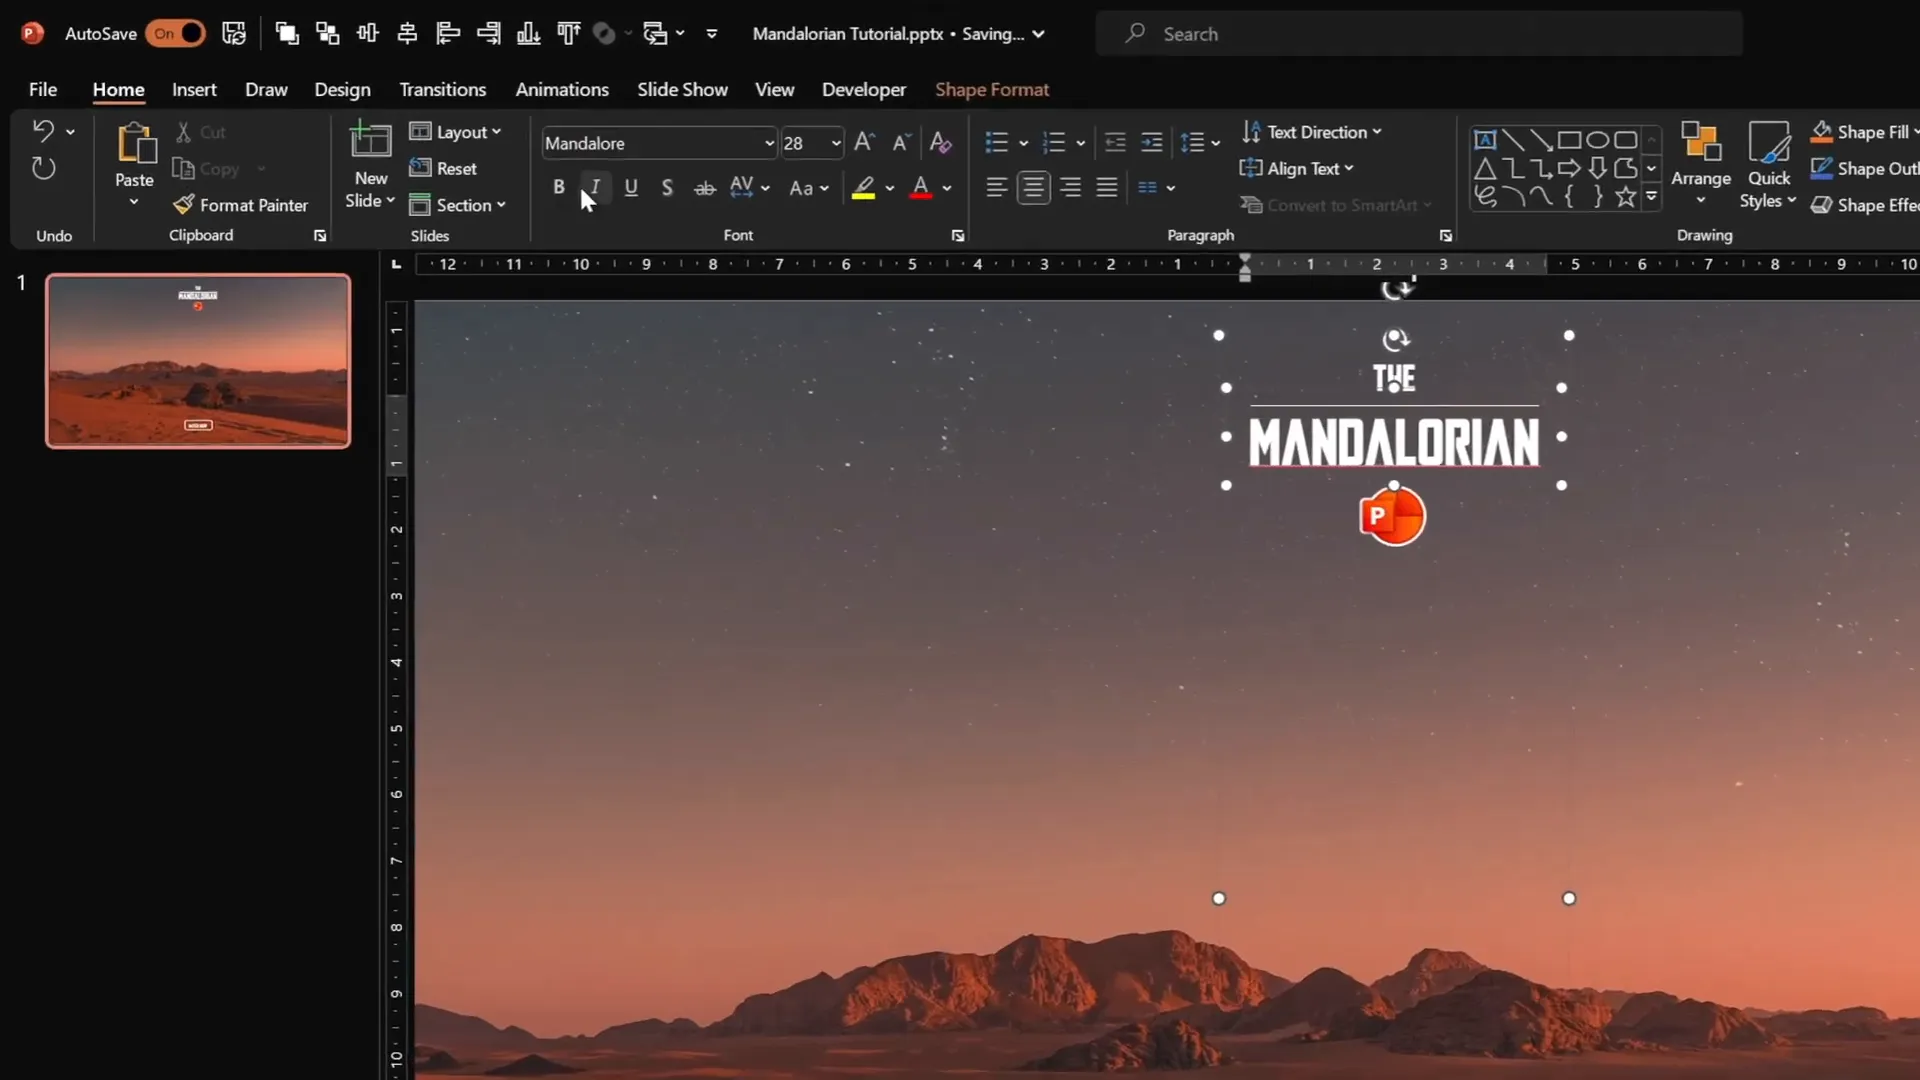
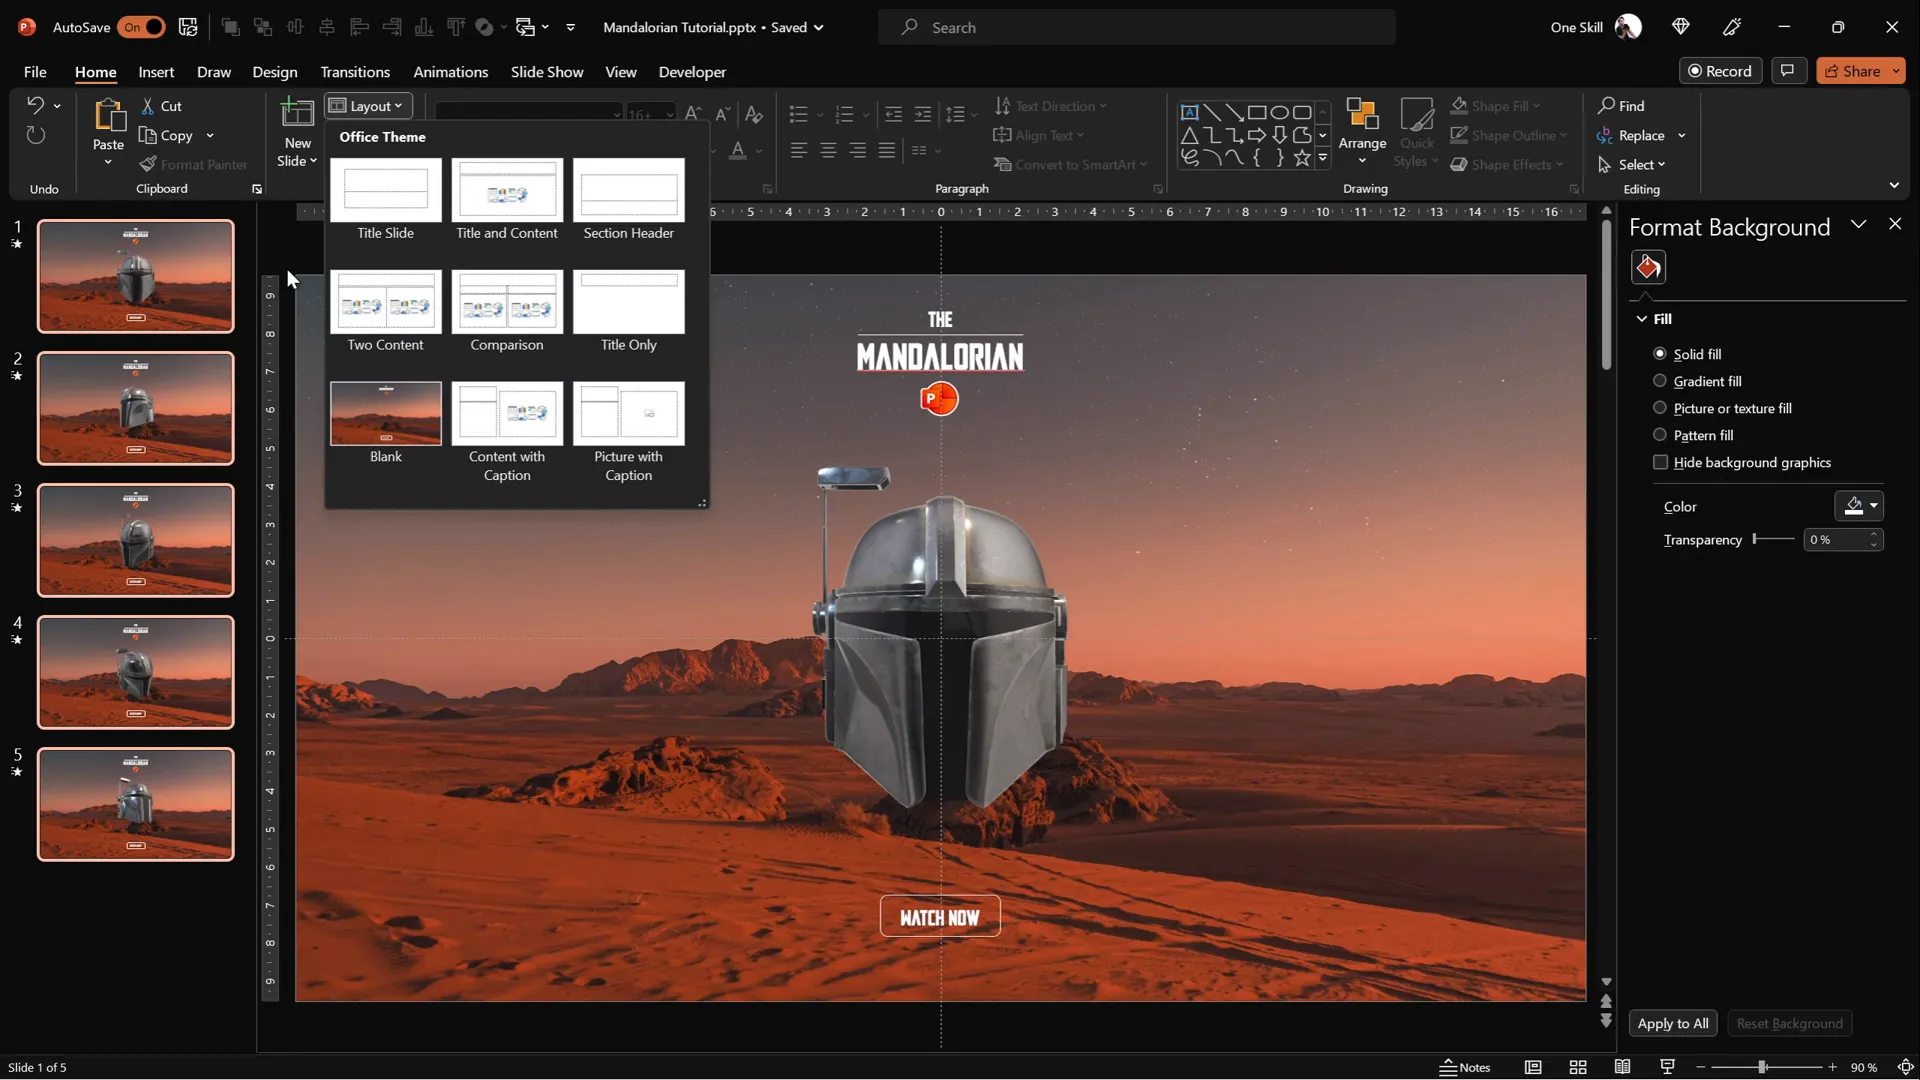
3. Utilize Slide Master for Consistency
To save time and ensure consistency, place text boxes, logos, or other recurring elements in the Slide Master view:
- Go to View > Slide Master.
- Insert and arrange your text boxes and logo elements here.
- Once done, exit the Slide Master. These elements will now appear on all slides using the same layout.
Using the Slide Master prevents accidental editing during your slide creation and streamlines your workflow.
4. Choose the Right Font
For the Mandalorian theme, I used a custom font called Mandalore which adds authenticity and style to the text elements. You can download it for free and install it on your system to use in PowerPoint.
Pro Tip: Custom fonts can elevate the design, but ensure that if you share the presentation, the recipient has the font installed to avoid display issues.
Inserting the Mandalorian 3D Model
One of the standout features of modern PowerPoint versions is the ability to insert and manipulate 3D models directly within your slides. This is crucial for creating immersive and dynamic animations like our Mandalorian helmet.
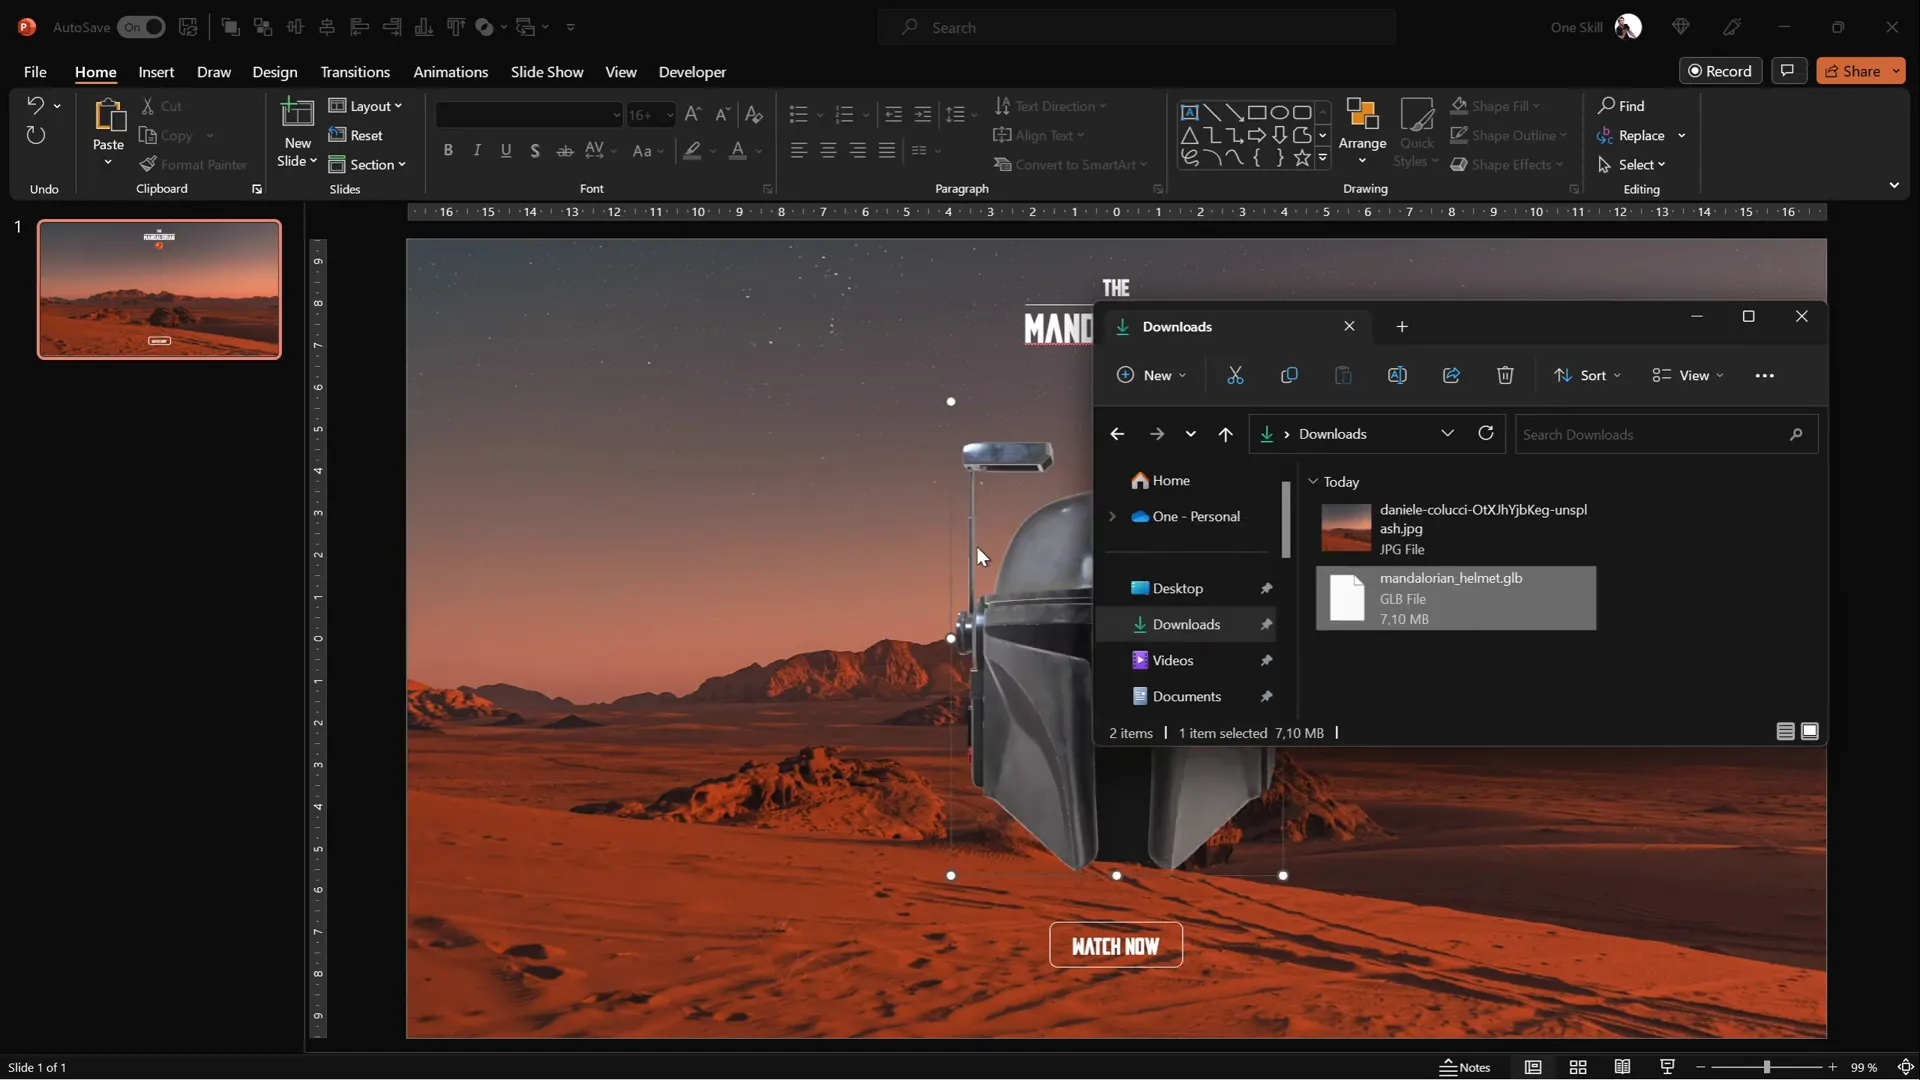
1. Download the 3D Model
You can find the Mandalorian helmet 3D model on Sketchfab or other 3D asset sites. Make sure to download a format compatible with PowerPoint, such as .glb or .fbx.
2. Insert the 3D Model
- Go to Insert > 3D Models > From a File.
- Select the Mandalorian helmet 3D model file you downloaded.
- Resize and position the model as desired on your slide.
Feel free to use any other 3D model that fits your presentation’s theme—PowerPoint’s 3D capabilities are versatile.
Setting Up Slide Navigation with Mouse-Over Actions
To create the illusion that the Mandalorian helmet is following your mouse cursor, we’ll use PowerPoint’s interactive Mouse Over actions to navigate between slides based on where your cursor moves.
1. Add a Mouse Over Action to the Helmet
- Select the 3D helmet model.
- Go to Insert > Action.
- Choose the Mouse Over tab.
- Set the action to Hyperlink to: First Slide.
This ensures that when you hover over the helmet, PowerPoint jumps back to the first slide, maintaining the animation cycle.
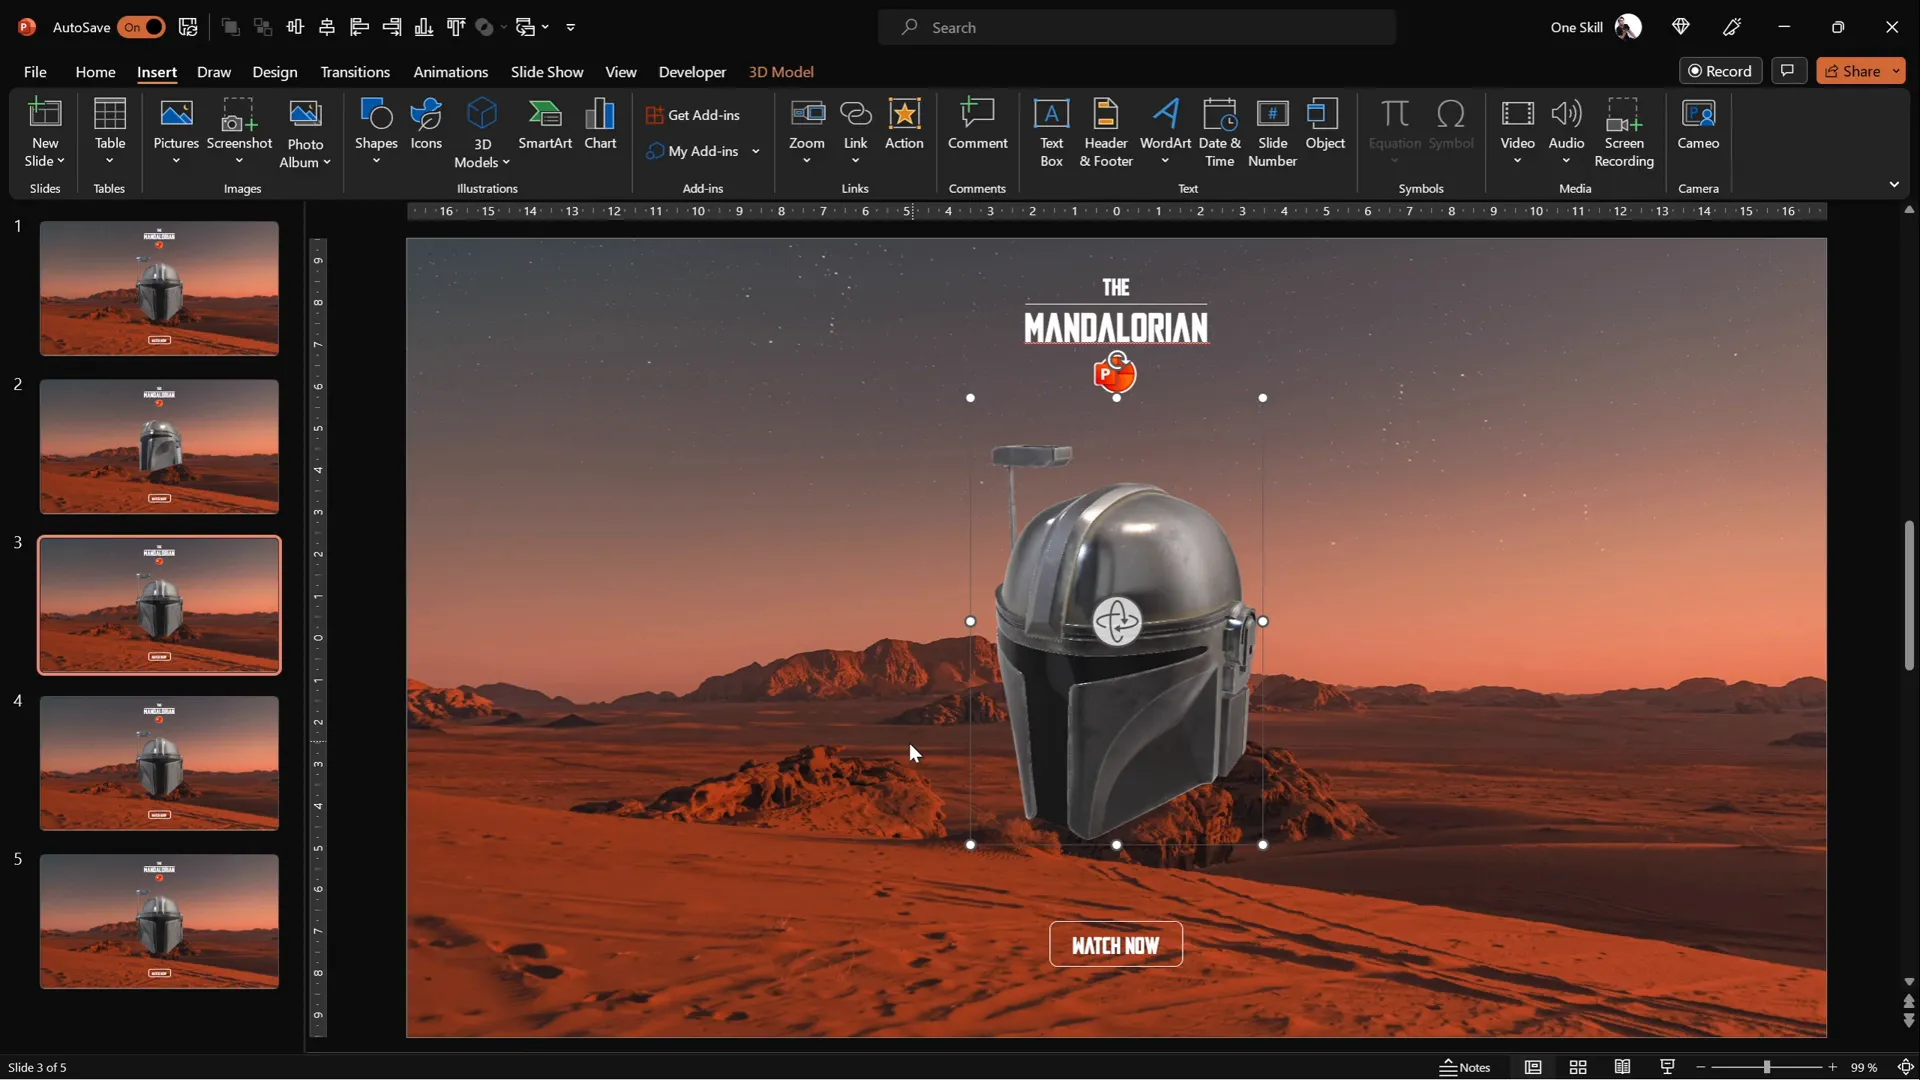
2. Duplicate Slides for Different Helmet Orientations
To simulate the helmet following the cursor in different directions, create multiple slides with the helmet facing various directions:
- Duplicate your first slide 4 times, resulting in 5 slides total.
- On each duplicated slide, rotate the helmet to face a different direction: top-left, bottom-left, bottom-right, and top-right.
This setup prepares the animation sequence where the helmet appears to move fluidly as you navigate slides.
Using the Morph Transition for Smooth Animation
PowerPoint’s Morph transition is the secret sauce that makes the helmet’s movement smooth and natural between slides.
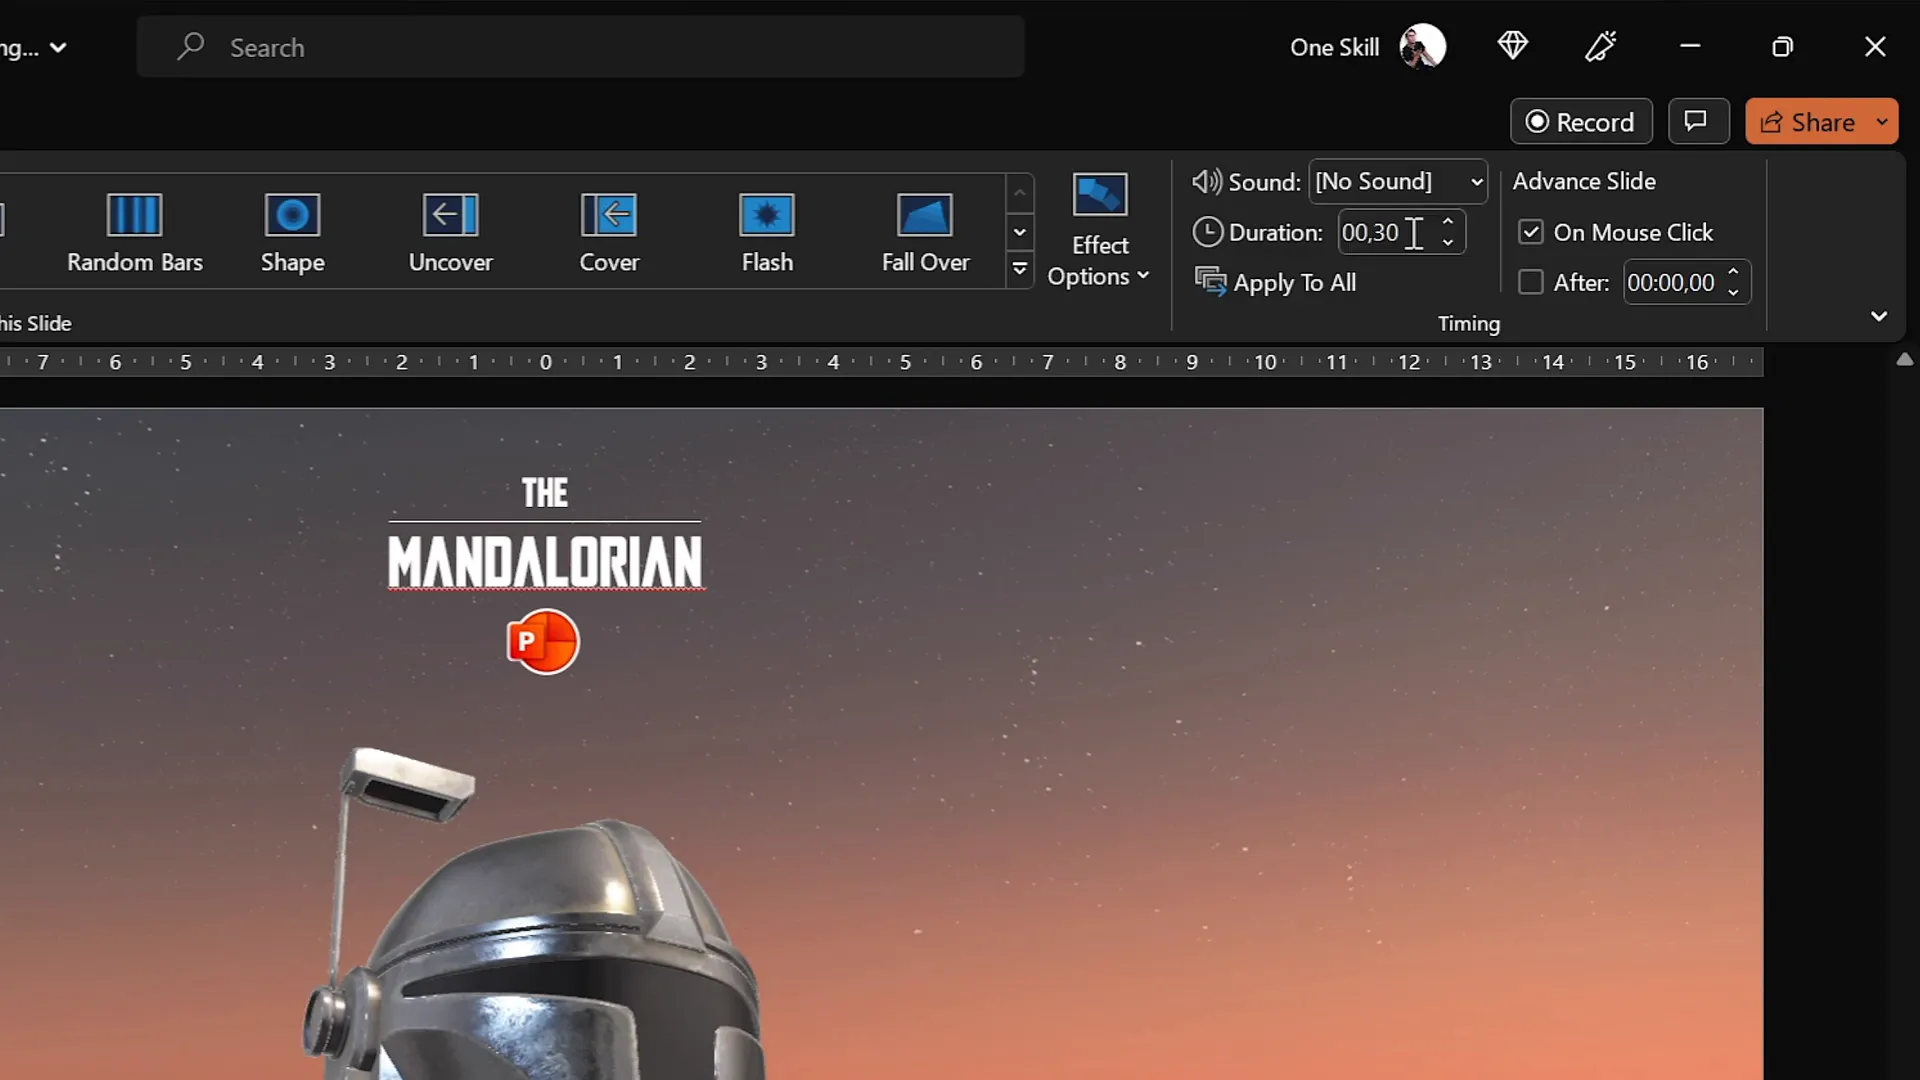
1. Apply Morph Transition to All Slides
- Select all slides in the slide sorter pane.
- Go to the Transitions tab.
- Choose the Morph transition.
- Set the transition duration to a short time, such as 0.3 seconds, for quick and responsive animation.
This transition smoothly animates the rotation and position changes of the 3D helmet from one slide to the next, creating a visually appealing effect.
2. Preview the Animation
Use the arrow keys to navigate through the slides and observe the helmet smoothly turning to face different directions. This manual navigation simulates the helmet’s movement, but the next step will automate this based on mouse position.

Creating Invisible Interactive Zones
To make the helmet follow your mouse cursor seamlessly, we’ll divide the slide into four invisible zones. Each zone triggers a slide change when hovered over, making the helmet appear to track the cursor.
1. Enable Slide Guides
Activate guides to divide your slide into four equal quadrants:
- Go to View > Guides.
- Two center guides will appear, dividing the slide vertically and horizontally.
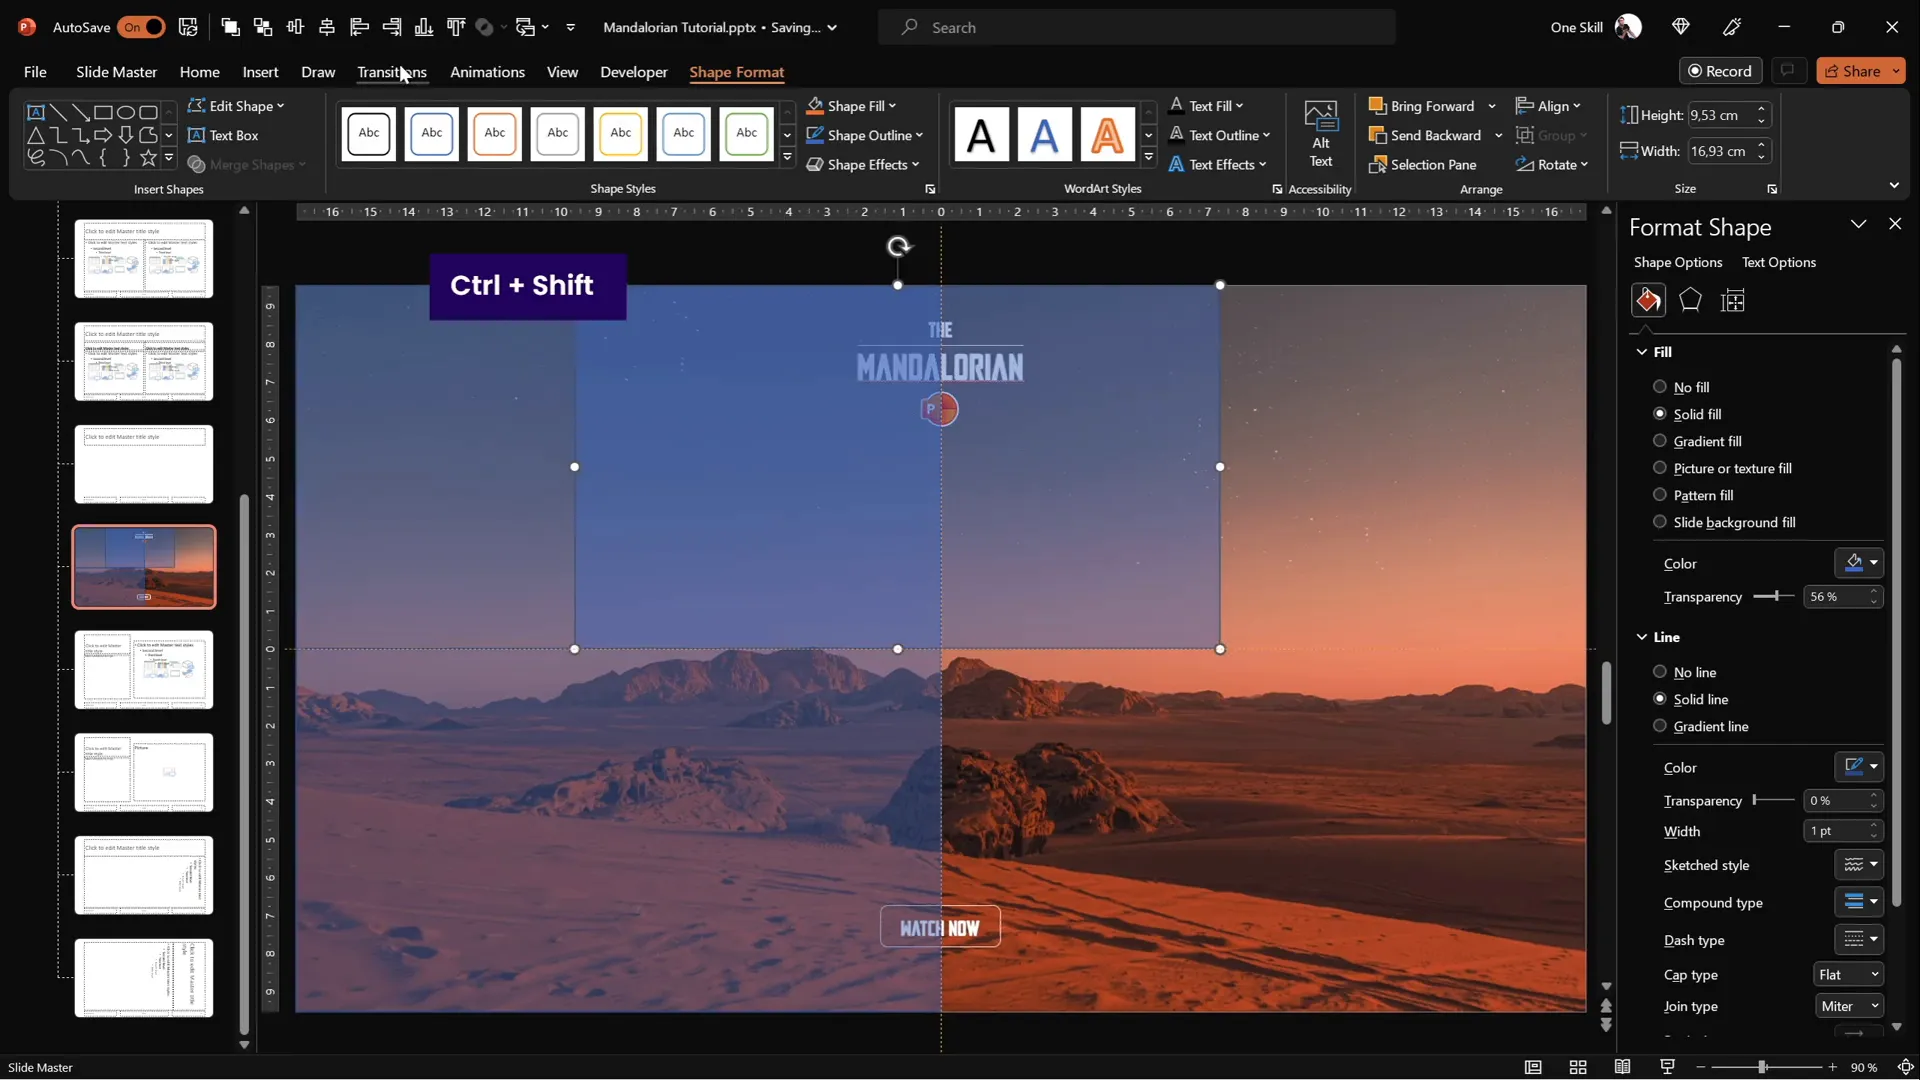
2. Insert Transparent Rectangles Covering Each Quadrant
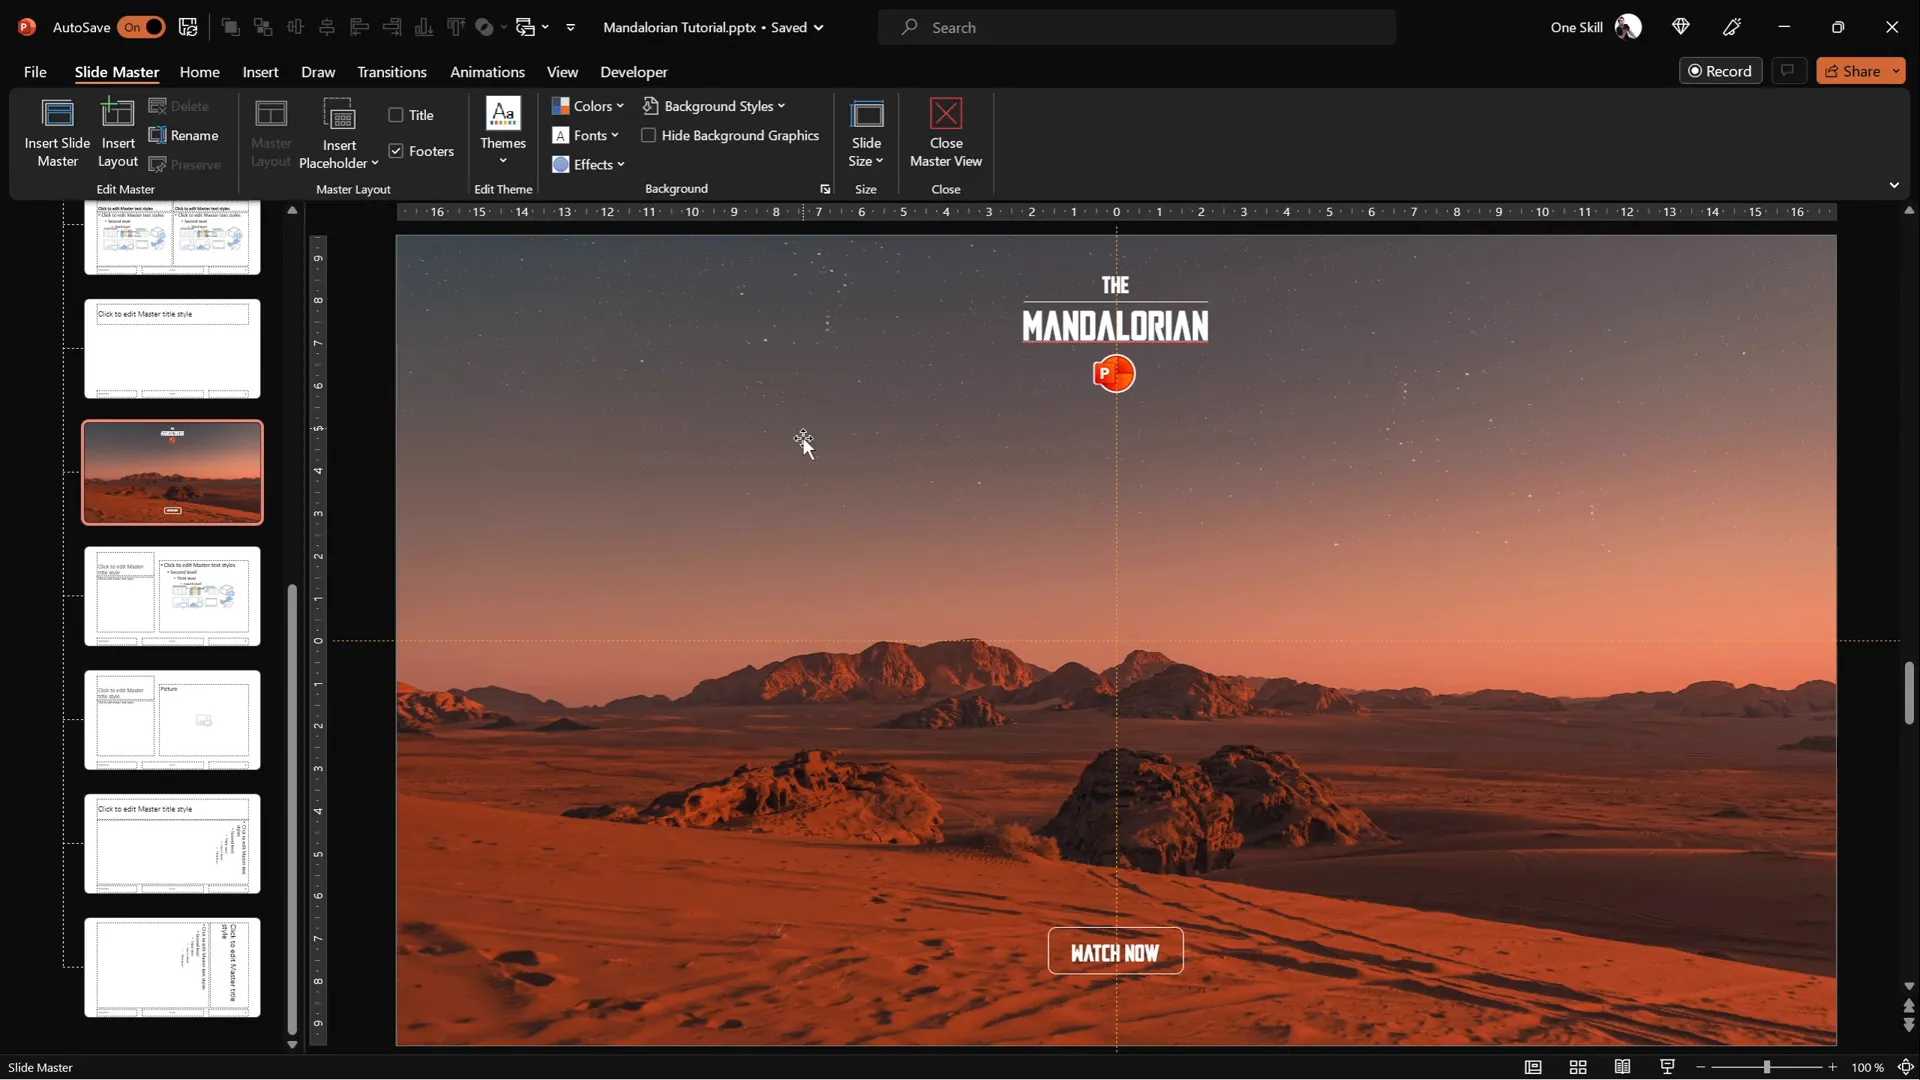
- Switch to Slide Master view (View > Slide Master).
- On your slide layout, insert four rectangles, one for each quadrant.
- Make the rectangles slightly transparent to see their placement.
- Duplicate rectangles by holding Ctrl + Shift and dragging.
3. Assign Mouse Over Actions to Each Rectangle
Each rectangle will be linked to a slide where the helmet faces the corresponding direction:
| Rectangle Location | Linked Slide | Helmet Direction |
|---|---|---|
| Top Left | Slide 2 | Helmet facing top left |
| Bottom Left | Slide 3 | Helmet facing bottom left |
| Bottom Right | Slide 4 | Helmet facing bottom right |
| Top Right | Slide 5 | Helmet facing top right |
- Select each rectangle, go to Insert > Action.
- Choose Mouse Over and set the hyperlink to the corresponding slide.
4. Make Rectangles Invisible but Active
To keep the interface clean and professional, set all rectangles to No Fill and No Line. This makes them invisible to the audience but retains their interactive mouse-over functionality.
Finalizing and Testing Your Animation
With everything set up, it’s time to test your animation in full-screen mode to see the Mandalorian helmet follow your mouse cursor smoothly.
1. Exit Slide Master and Return to Normal View
All interactive zones and actions are now applied across your slides automatically due to the slide master setup.
2. Run the Presentation in Slide Show Mode
- Press F5 or go to Slide Show > From Beginning.
- Move your mouse cursor across the slide quadrants.
- Observe the helmet’s direction changing dynamically as you hover over different invisible zones.
3. Understand the Mechanism
What you’re seeing is an illusion created by jumping between slides with slight differences and smooth Morph transitions. The invisible rectangles detect your mouse position and trigger the slide change. This interactive animation adds a delightful touch of engagement to your presentation.
Frequently Asked Questions
Q1: Can I use any 3D model for this animation?
Yes! PowerPoint supports many 3D file formats like .glb, .fbx, and .obj. You can use any 3D model you prefer. Just make sure it’s compatible and that you have the appropriate rights to use the model.
Q2: Is the Morph transition available in all PowerPoint versions?
The Morph transition is available in PowerPoint 2019, Microsoft 365, and PowerPoint for the web. If your version doesn’t support Morph, this animation technique won’t work as intended.
Q3: How do I ensure the font displays correctly on other computers?
If you use a custom font like Mandalore, embed the font in your presentation or provide the font file to your audience. Alternatively, convert your slides to PDF to preserve appearance without requiring the font installation.
Q4: Can I add more directional zones for smoother animation?
Absolutely! Instead of four quadrants, you can divide your slide into more zones (e.g., eight or sixteen) for more granular movement. However, this requires creating more slides with different helmet orientations and configuring more mouse-over actions.
Q5: Will this animation work on all devices?
Interactive animations using mouse-over actions work best on desktop versions of PowerPoint. On tablets or smartphones, the interaction might be limited or behave differently due to touch input. Test on your target devices before finalizing.
Conclusion
Creating interactive and visually stunning PowerPoint animations is more accessible than ever thanks to the combination of 3D models, Morph transitions, and action triggers. By following this step-by-step guide, you can build a captivating animation where a Mandalorian helmet—or any 3D object—seamlessly follows your mouse cursor, adding a dynamic layer of engagement to your presentations.
Remember, the key elements in this animation are:
- Using multiple slides with different orientations of the 3D model.
- Applying Morph transitions for smooth movement.
- Dividing the slide into invisible interactive zones with mouse-over hyperlinks.
- Leveraging the Slide Master to apply consistent interactive elements across slides.
With these techniques, you’re not just making slides—you’re crafting an experience that captures attention and makes your message memorable. So, go ahead, experiment with your own 3D models and animations, and transform your PowerPoint presentations into interactive storytelling masterpieces.
This is the way.
Check out the full video: Unbelievable PowerPoint Animation ✨MANDALORIAN✨


