PowerPoint Animations have the power to transform your presentations from dull to dynamic, captivating your audience and making your message memorable. Whether you are a designer, business professional, entrepreneur, instructor, speaker, teacher, or student, mastering PowerPoint animations can elevate your presentations to a whole new level. This comprehensive guide will walk you through everything you need to know about PowerPoint animations—from fundamental concepts to advanced techniques—equipping you with the skills to create breathtaking animated slides with ease.
Created by Kaspare from Vilnius, Lithuania, known on YouTube as One Skill, this deep dive into PowerPoint animations is inspired by his years of experience and teaching millions of learners how to make their presentations truly awesome. Let’s unlock the secrets behind incredible PowerPoint animations and help you become a PowerPoint animation pro!
Table of Contents
- Introduction to PowerPoint Animations
- The Four Main Types of PowerPoint Animations
- How to Insert and Manage Animations in PowerPoint
- Advanced Animation Techniques
- Tips for Using PowerPoint Animations Effectively
- Frequently Asked Questions
- Conclusion
Introduction to PowerPoint Animations
Have you ever wanted to add animations to your PowerPoint slides but didn’t know where to start? Or maybe you dreamed of creating truly unique and advanced animations, but felt overwhelmed by the tools and options available? You are not alone. Animations can seem complex at first, but once you understand the fundamentals, you’ll find that PowerPoint offers a rich set of tools to bring your ideas to life.
This guide is designed to take you step-by-step through the world of PowerPoint animations. We will start with the basics, gradually moving to more advanced concepts, so whether you are a beginner or an experienced user, there will be something valuable for you.
By mastering PowerPoint animations, you will be able to:
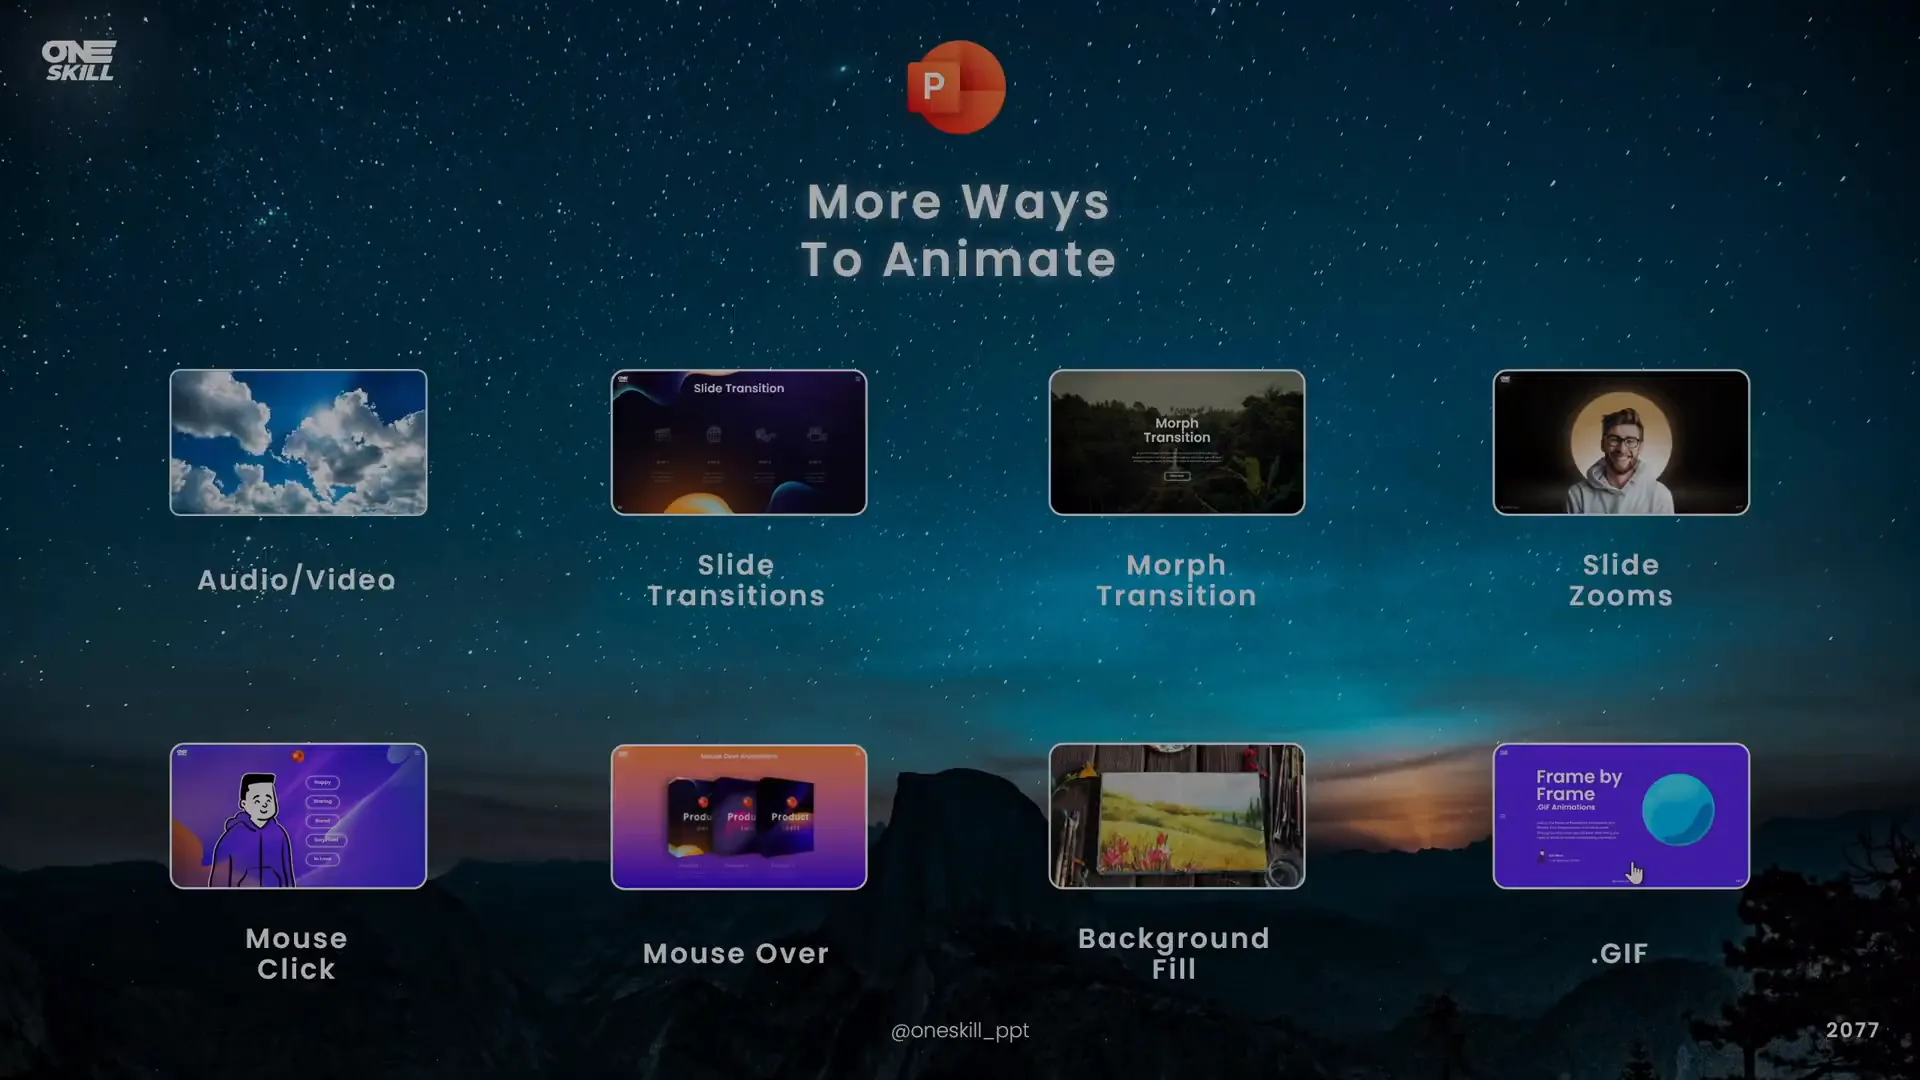
- Create smooth transitions that keep your audience engaged
- Animate text, images, videos, and other elements for maximum impact
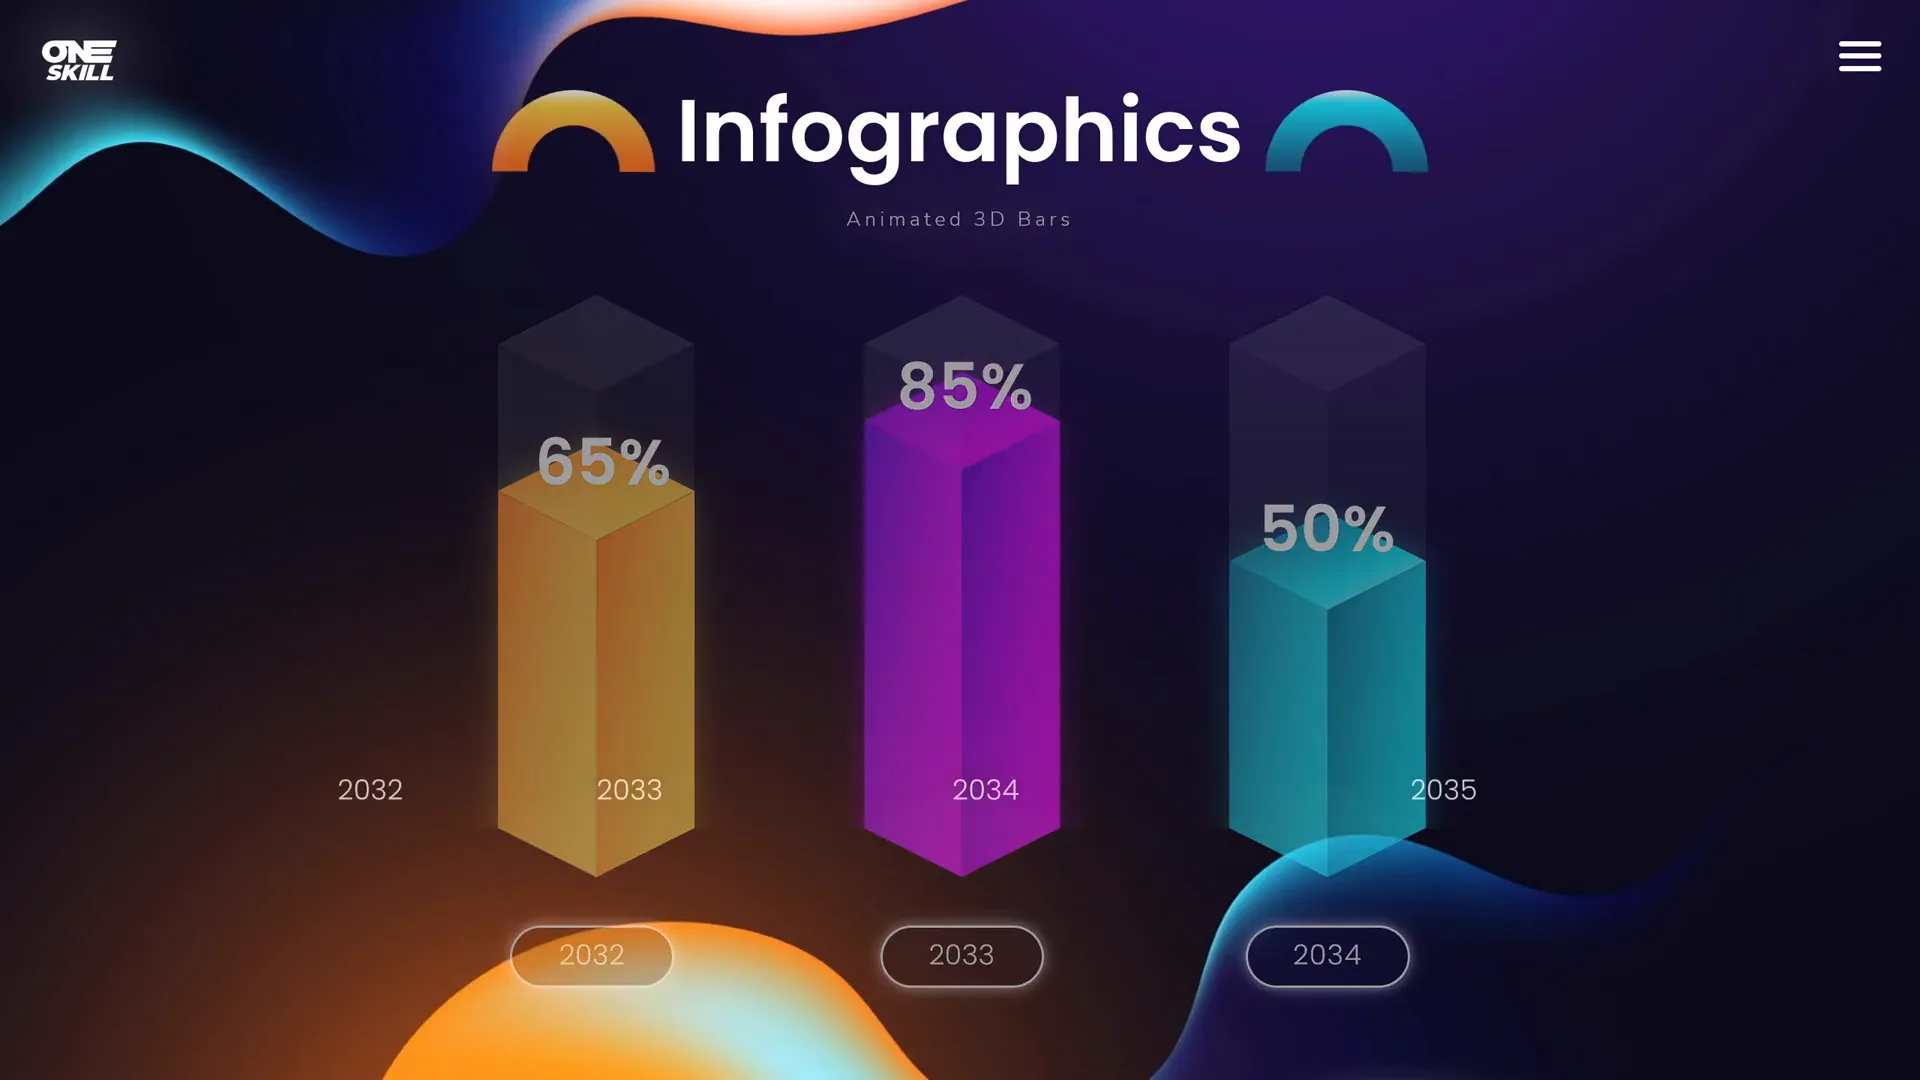
- Design animated intros, infographics, and illustrations
- Combine multiple animations to craft custom effects
- Use tools like motion paths, draw animations, and 3D model animations
PowerPoint animations are not just about flashy effects—they are about enhancing your storytelling and delivering your message with clarity and style.
The Four Main Types of PowerPoint Animations
Understanding the types of animations available in PowerPoint is the first step toward mastering animation. There are four main categories:
- Entrance Animations
- Emphasis Animations
- Exit Animations
- Motion Path Animations
1. Entrance Animations
Entrance animations are used to introduce an element onto your slide. Whether it’s a picture, a text box, or a video, entrance animations create a dynamic way to bring content in and grab attention.
Common entrance animations include:
- Fade
- Fly In
- Zoom
- Pinwheel
Example: You might want a headline to gently fade in or a photo to fly in from the side to draw the audience’s eye.
2. Emphasis Animations
Once an object is on the slide, emphasis animations help highlight or draw attention to it. These animations can make your content spin, pulse, change color, or even shake to emphasize a point.
Examples include:
- Spin
- Pulse
- Grow/Shrink
- Color Change
Note: Some emphasis animations are specifically designed for text, enabling you to animate words or letters individually.
3. Exit Animations
Exit animations are used when you want to remove an object from the slide in a visually appealing way. This can help you transition smoothly between points or clear the slide for new content.
Popular exit animations include:
- Fade Out
- Fly Out
- Zoom Out
- Disappear
4. Motion Path Animations
Motion path animations allow you to move an object along a predefined path on the slide. This is perfect for creating dynamic movement, such as moving a star across the screen or animating a flow chart.
Key points about motion paths:
- The green bubble marks the starting position.
- The red bubble marks the ending position.
- You can customize the path shape—line, curve, circle, or even custom drawn paths.

How to Insert and Manage Animations in PowerPoint
Inserting animations in PowerPoint is straightforward once you know where to look and how to apply them effectively. Here’s a step-by-step guide:
Step 1: Select the Object to Animate
You can animate almost anything on your slide: shapes, text boxes, pictures, videos, and even 3D models if available.
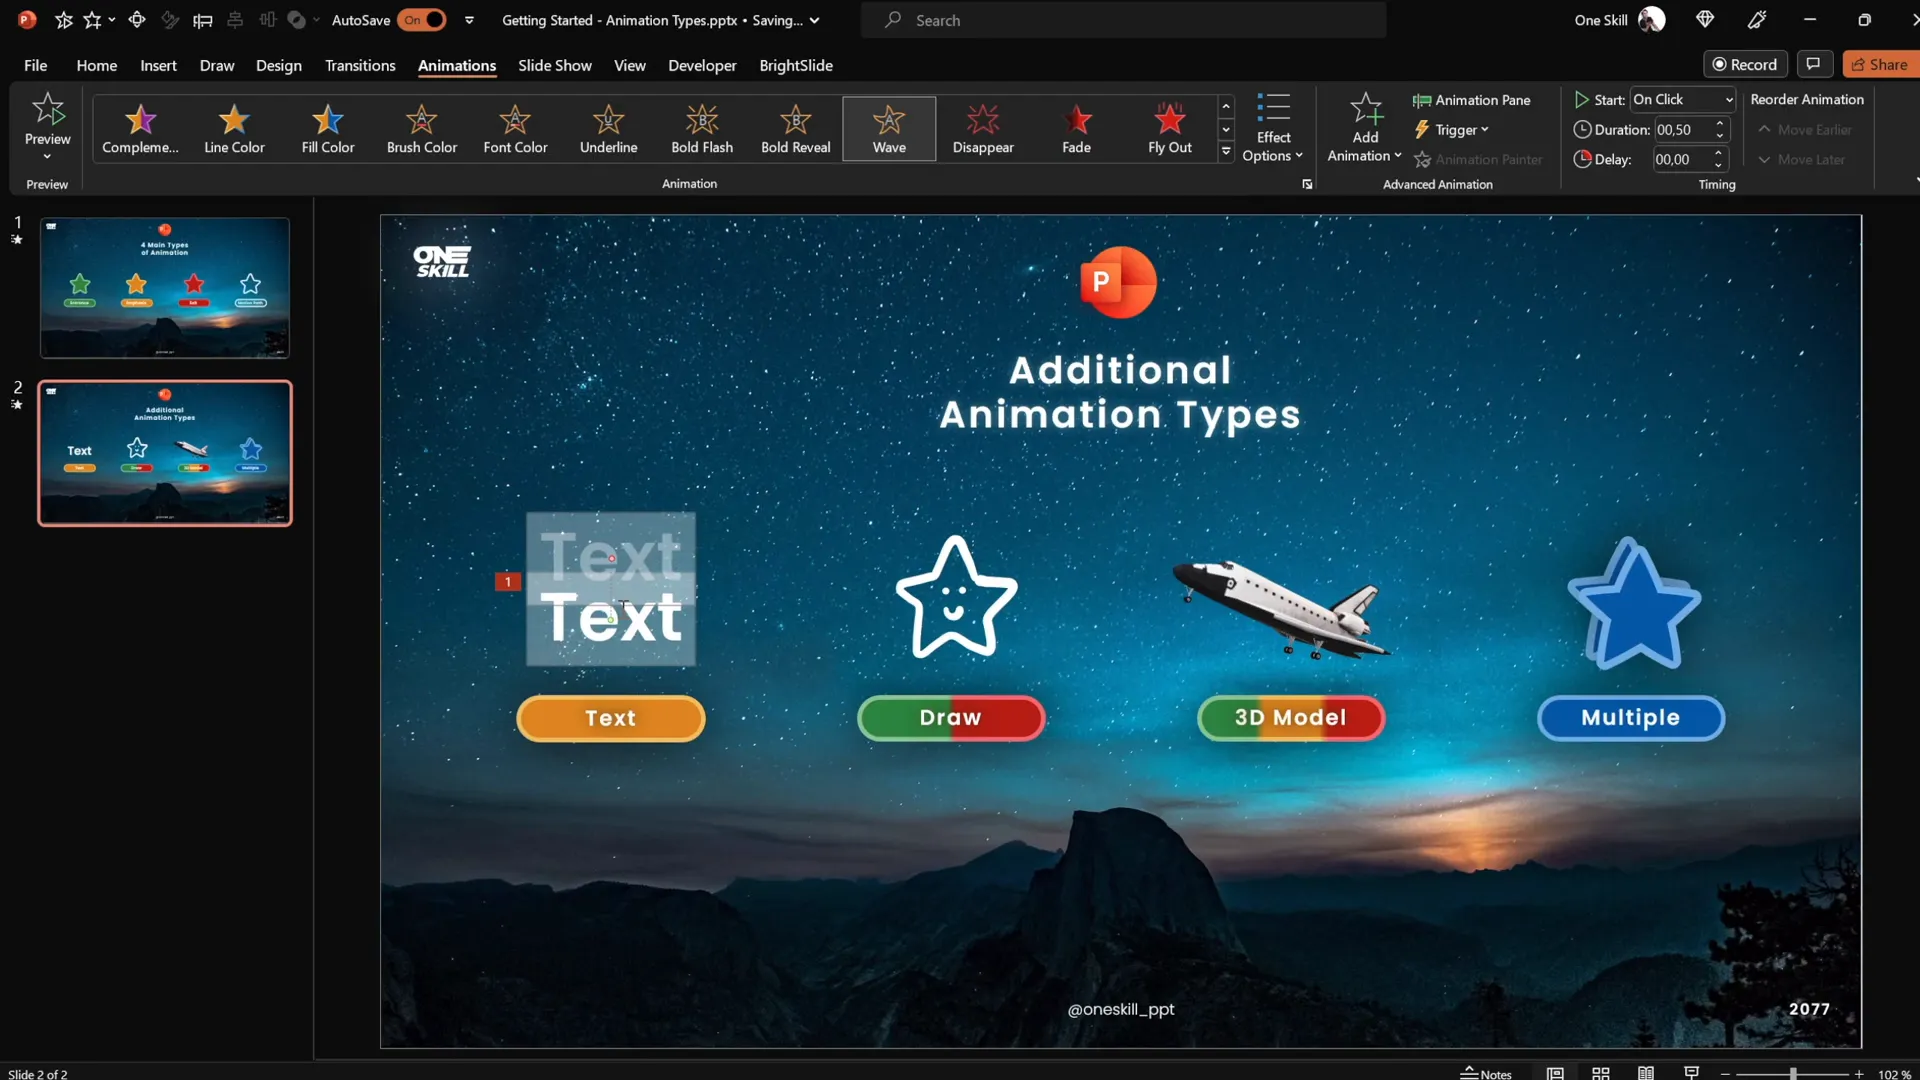
Step 2: Open the Animations Tab
On the PowerPoint ribbon, click the Animations tab. You’ll see a preview of some common animations right away.
Step 3: Choose an Animation
Click the dropdown arrow to open the full list of animations, which are categorized into Entrance, Emphasis, Exit, and Motion Paths.
Tips for Choosing Animations:
- Basic animations like Fly In are great for simple, clean effects.
- Subtle animations such as Fade and Zoom add gentle transitions.
- Moderate animations like Flow Down add a bit more flair.
- Exciting animations (e.g., Pinwheel) are eye-catching but should be used sparingly.
Step 4: Adjust Animation Options
Most animations come with customizable options. For example, with the Fly In animation, you can choose the direction (from top, bottom, left, right).
Step 5: Add Multiple Animations
You can apply multiple animations to a single object, but be careful how you add them:
- Use the Add Animation button rather than selecting a new animation from the main list to avoid replacing existing animations.
- In the Animation Pane, you can see and manage all animations applied to your slide.
Step 6: Control Animation Timing
In the Animation Pane, you can set when animations start:
- On Click: Animation starts when you click the mouse or keyboard.
- With Previous: Animation starts simultaneously with the previous one.
- After Previous: Animation starts immediately after the previous one finishes.
You can also adjust the duration (how long the animation lasts) and delay (how long before the animation starts).

Advanced Animation Techniques
Once you’ve mastered the basics, PowerPoint offers even more powerful animation tools to create truly unique presentations.
1. Text Animations
Text animations belong to the emphasis category and can be applied only to text. They allow you to animate text in creative ways such as color changes, waves, and more.
Example text animations include:
- Color Pulse
- Wave
- Teeter
You can adjust the intensity or height of effects like the wave to customize the animation.
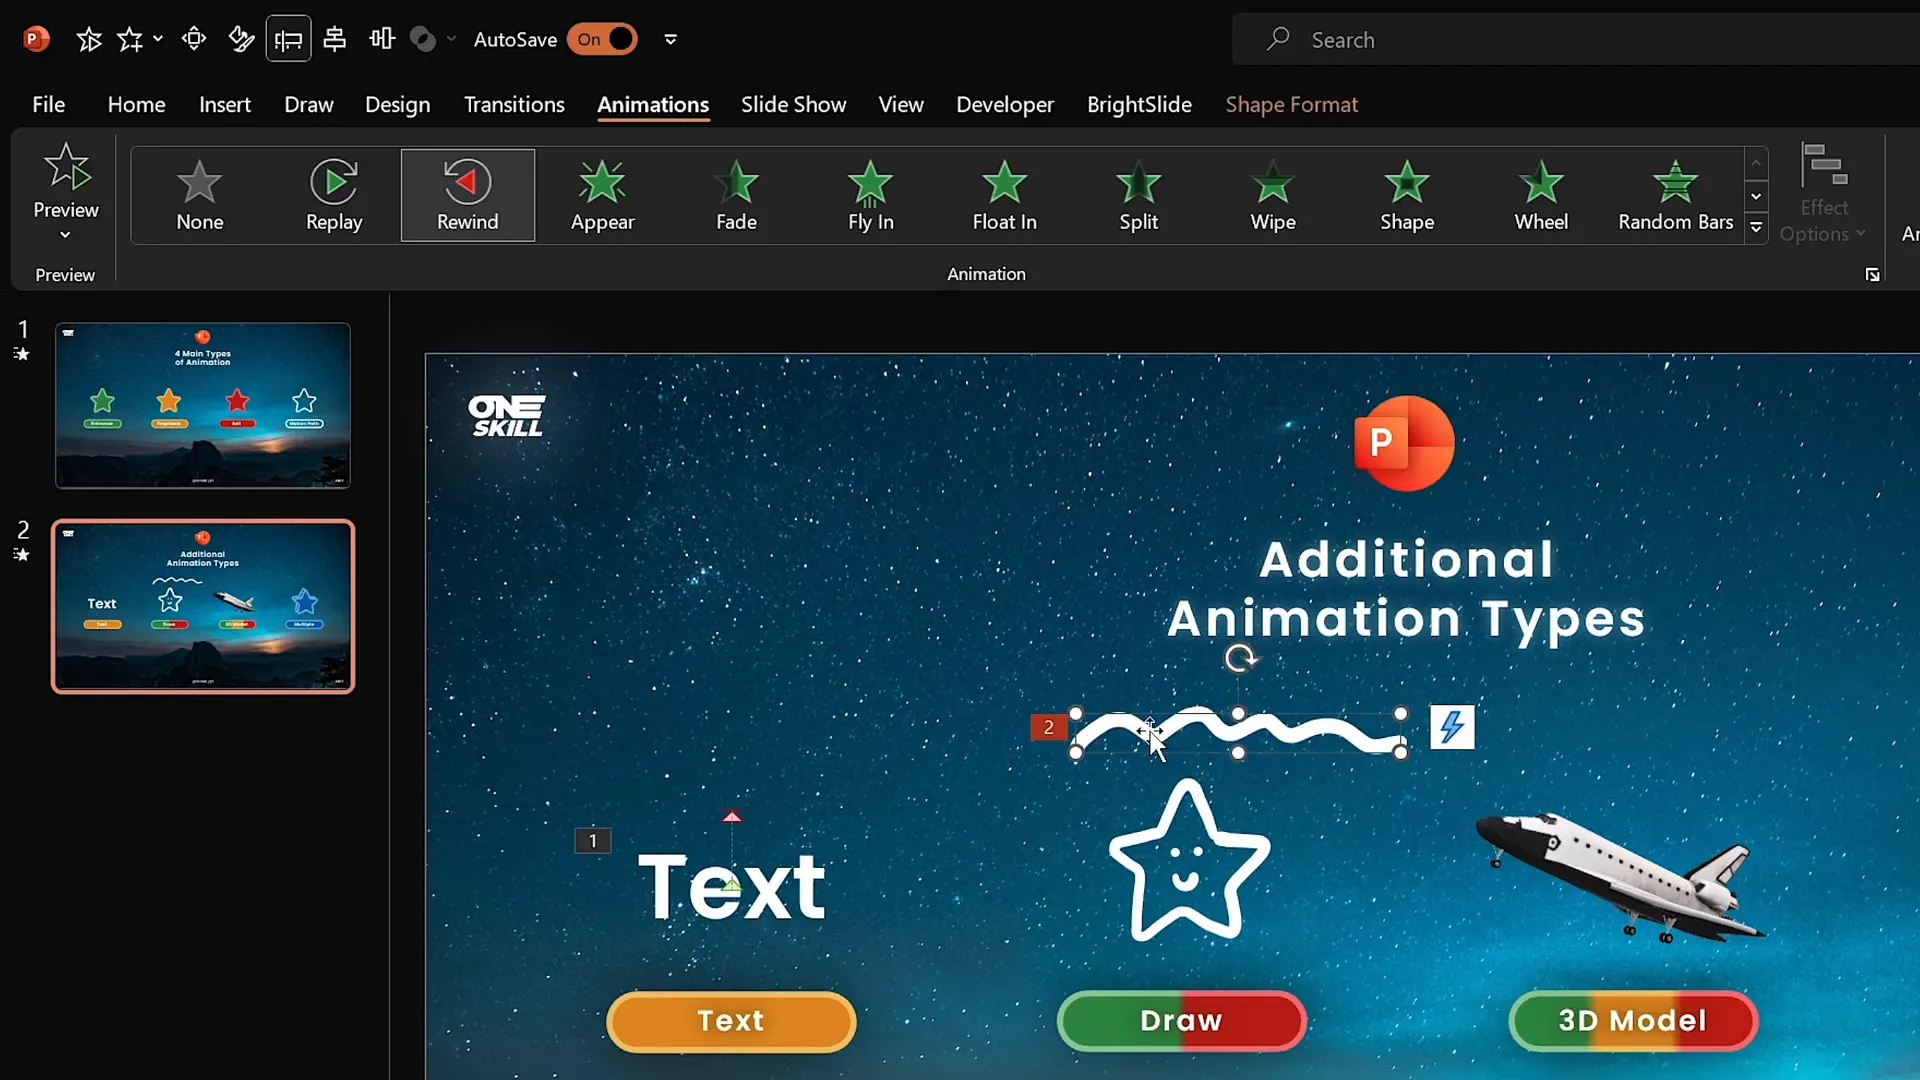
2. Draw Animations
If your version of PowerPoint supports the Draw feature, you can draw freehand shapes or lines and animate them.
Two special ink animations are available for drawings:
- Replay Animation: Replays your drawing stroke by stroke.
- Rewind Animation: Plays the drawing animation backward.
This is ideal for illustrating processes, sketches, or handwritten notes dynamically.
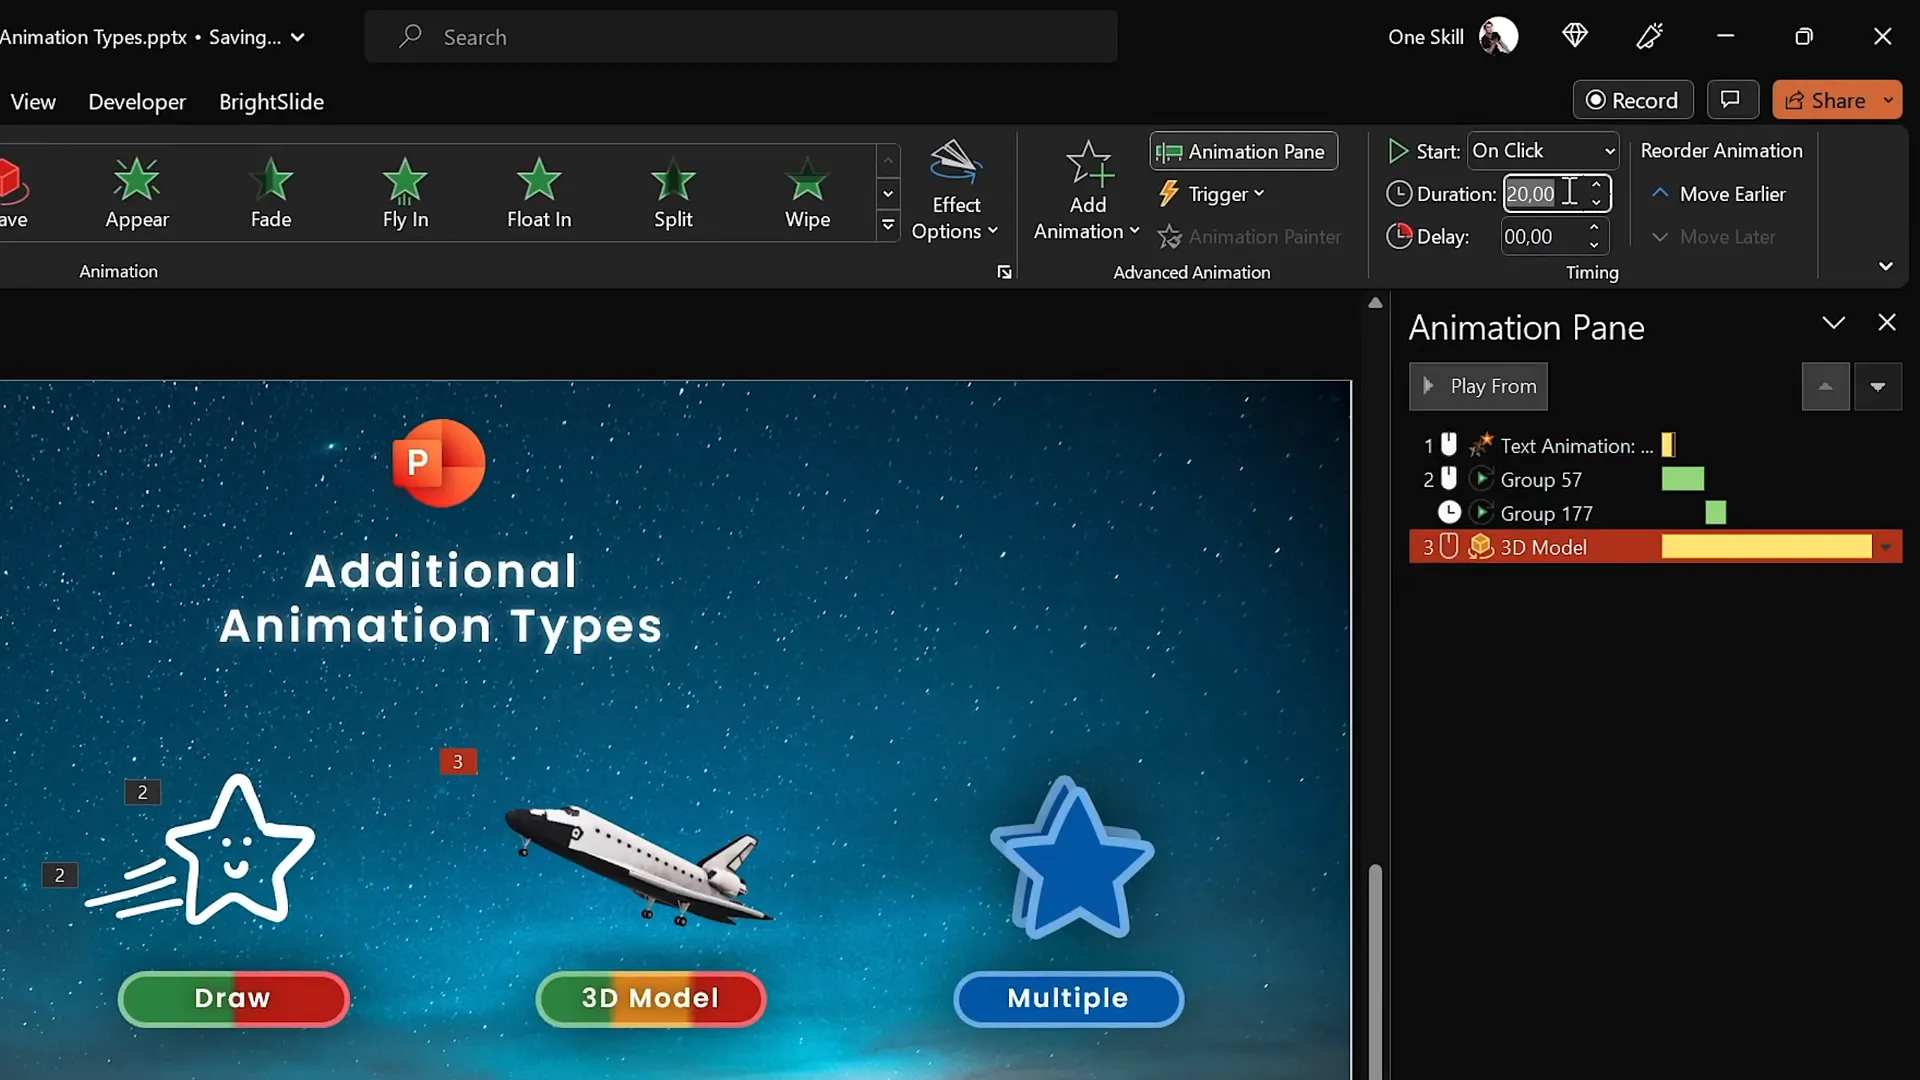
3. 3D Model Animations
PowerPoint also supports 3D models, which you can animate with specific entrance, emphasis, and exit animations.
For example, you can insert a 3D model of a space shuttle and apply the Turntable animation to make it spin around.
You can adjust the speed of the animation to control how fast the model rotates or moves.
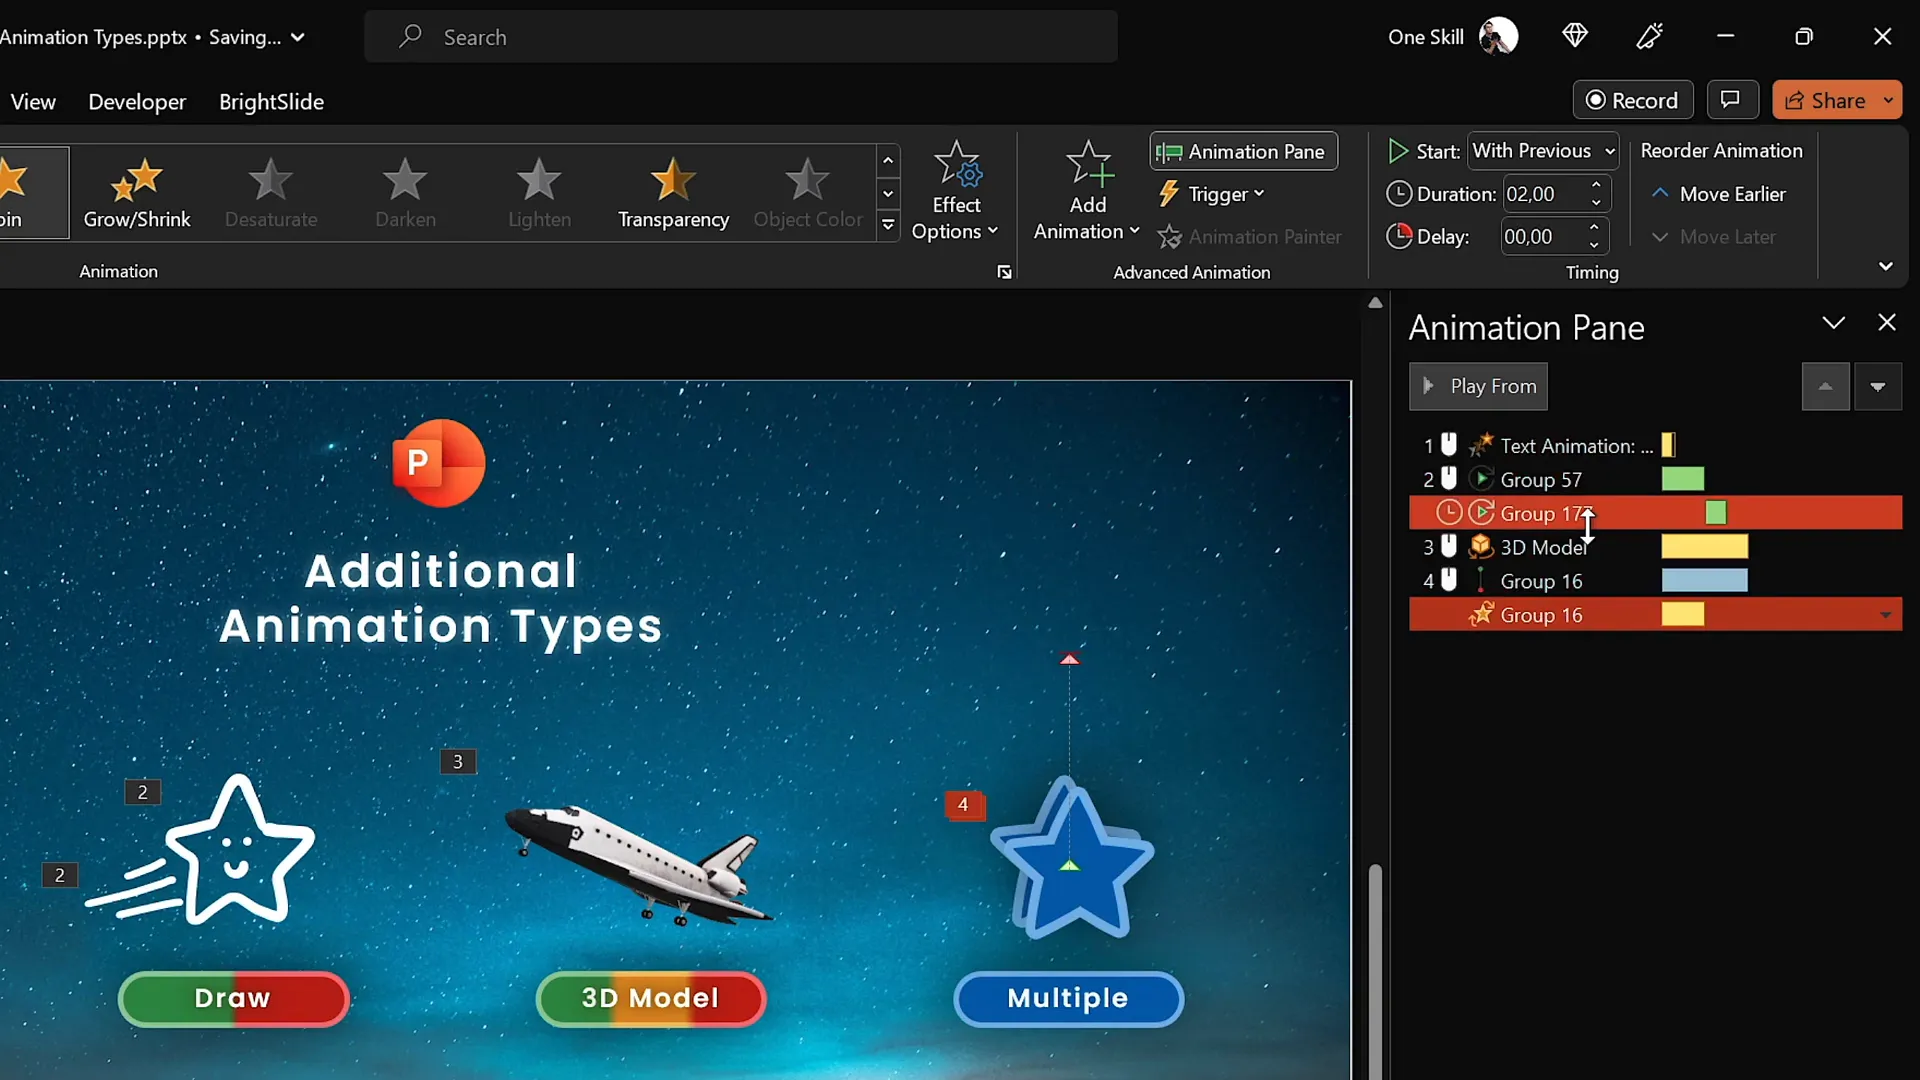
4. Multiple Animations on One Object
Combining multiple animations on a single object allows for complex, custom effects. For instance, you can apply a motion path and a spin animation simultaneously.
Here’s how to do it effectively:
- Select the object or group.
- Apply the first animation (e.g., motion path).
- Use the Add Animation button to add a second animation (e.g., spin).
- Manage the timing in the Animation Pane to synchronize effects.
- Adjust the duration of each animation so they run smoothly together.
Additionally, you can enable the Auto Reverse option on motion paths to make the object return to its starting position, doubling the animation duration.
Animation smoothing is another advanced feature to create softer, more natural transitions by adjusting the smooth start and smooth end sliders.
Tips for Using PowerPoint Animations Effectively
While animations can be exciting and engaging, it’s important to use them wisely to maintain professionalism and clarity. Here are some expert tips:
- Keep it Simple: Avoid overwhelming your audience with too many animations on one slide.
- Consistency: Use similar animation styles across your presentation for a cohesive look.
- Purposeful Animations: Every animation should support your message, not distract from it.
- Test Your Animations: Run your slideshow to ensure animations trigger as expected and are timed well.
- Use Animation Pane: Manage and preview animations easily to fine-tune their order and timing.
- Advanced Features: Use motion paths and multiple animations to create custom effects, but keep usability in mind.
- Software Version: Use PowerPoint 2019, 2021, or Microsoft 365 on Windows for the best animation features, including the advanced animation timeline.
Frequently Asked Questions
Q1: What are the four main types of animations in PowerPoint?
The four main types are Entrance, Emphasis, Exit, and Motion Path animations. Each serves a different purpose, such as introducing content, highlighting it, removing it, or moving it along a path.
Q2: How can I add multiple animations to the same object?
Use the Add Animation button instead of the main animation list to add additional animations without replacing existing ones. Then manage the animations in the Animation Pane.
Q3: Can I animate 3D models in PowerPoint?
Yes, PowerPoint supports 3D models, which can be animated with specific entrance, emphasis, and exit animations like Turntable and Swing.
Q4: What is the best PowerPoint version for animations?
PowerPoint 2019, 2021, and Microsoft 365 on Windows are recommended because they include the advanced animation timeline and other powerful features. Mac versions have limited animation capabilities.
Q5: How do draw animations work in PowerPoint?
If your PowerPoint version has the Draw feature, you can create hand-drawn elements and animate them using Replay or Rewind animations, which play your drawing strokes forward or backward.
Q6: How do I control the timing of animations?
In the Animation Pane, you can set animations to start On Click, With Previous, or After Previous. You can also adjust the duration and delay of each animation.
Conclusion
Mastering PowerPoint animations is a game-changer for anyone looking to make their presentations stand out. From the basics of entrance, emphasis, exit, and motion path animations to advanced techniques like text effects, draw animations, 3D model animations, and combining multiple animations, you now have a roadmap to create stunning slides that captivate your audience.
Remember, the key to incredible PowerPoint animations is not just knowing the tools but using them purposefully to enhance your story. Practice regularly, explore the animation pane, and don’t hesitate to experiment with timing and effects to find the perfect balance.
With the right knowledge and creativity, you’ll soon be able to craft presentations that are not only informative but also visually mesmerizing. So, start animating today and turn your ideas into dynamic experiences!
Check out the full video: The Secret to INCREDIBLE PowerPoint Animations! 🤫✨


