

If you’ve ever wondered how to create impressive animations in PowerPoint that can captivate your audience, you’re in the right place. In this comprehensive guide, we will explore how to build a beautiful, customizable 3D laptop opening animation using just PowerPoint — no 3D models needed! This tutorial will take you step-by-step through the process of creating this engaging effect, inserting your own text, images, or even videos, and refining the animation with PowerPoint’s powerful tools.
Whether you’re a beginner or an experienced PowerPoint user, mastering PowerPoint animations skills like these will elevate your presentations and give you a professional edge. Let’s dive in!
Table of Contents
- Introduction to the Laptop Animation Concept
- Setting Up the Slide Background
- Building the Basic Laptop Shapes
- Creating a Custom Rotation Center for Realistic Animation
- Adding 3D Depth and Bevel Effects
- Aligning and Finalizing the Laptop Parts
- Animating the Laptop Opening with Morph Transition
- Creating a Realistic Laptop Using a Photo
- Inserting Text, Pictures, and Videos into the Laptop
- Final Thoughts and FAQ
Introduction to the Laptop Animation Concept
Creating eye-catching animations in PowerPoint doesn’t require complex 3D models or advanced software. You can achieve stunning effects by cleverly combining simple shapes, photos, and PowerPoint’s 3D rotation and morph transition features.
This tutorial, inspired by the excellent work of PowerPoint designer Parpon Skills, will show you how to create a laptop opening animation that is fully customizable. You can insert your own text, images, or even videos inside the laptop screen, making it a versatile tool for various presentation needs.
The key to this animation is using 3D perspective rotations combined with the morph transition to simulate the laptop opening and closing in a smooth and visually appealing way.
This approach is not only fun but also practical, allowing you to impress your audience with interactive and professional-looking slides.
Setting Up the Slide Background
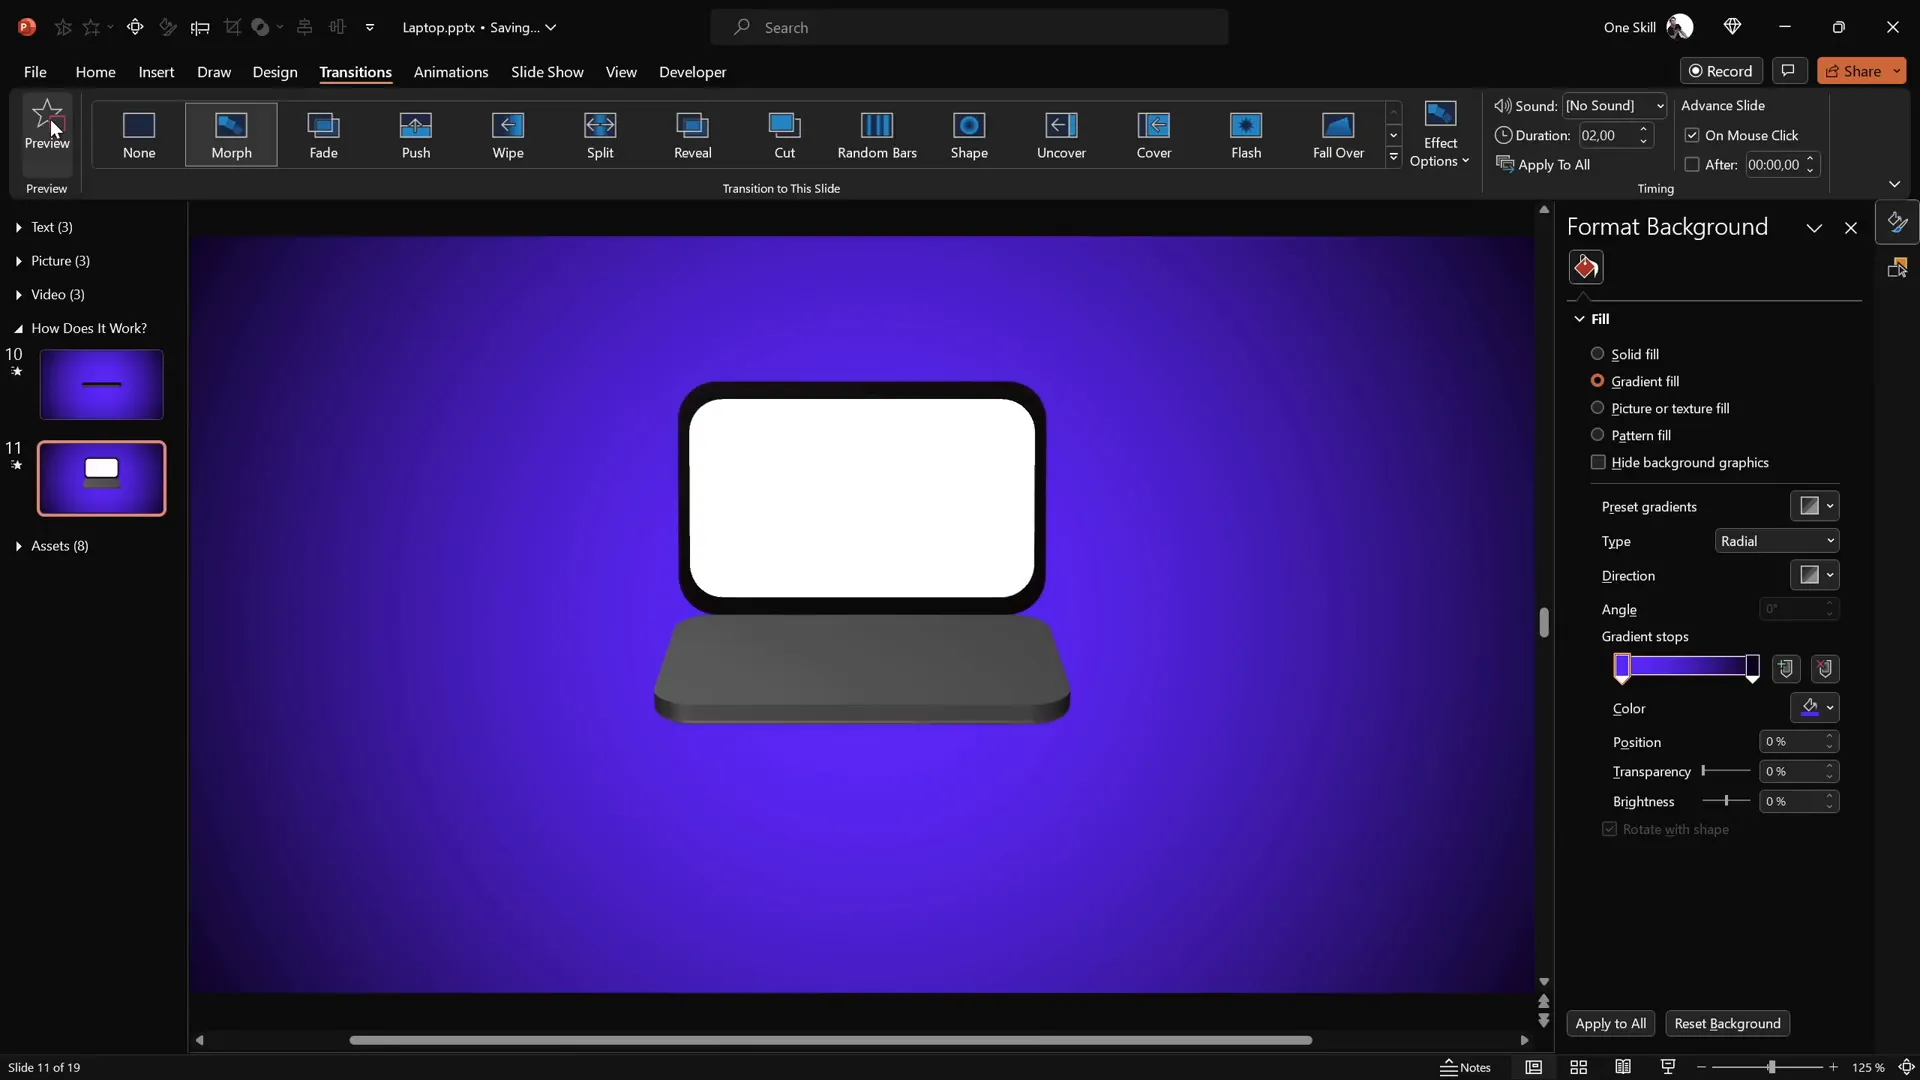
Before building the laptop, it’s important to set a visually appealing backdrop to enhance the overall look of your animation. Although not mandatory, a gradient background adds depth and professionalism.
Here’s how to set it up:
- Right-click on the slide background and select Format Background.
- Choose Gradient Fill from the options.
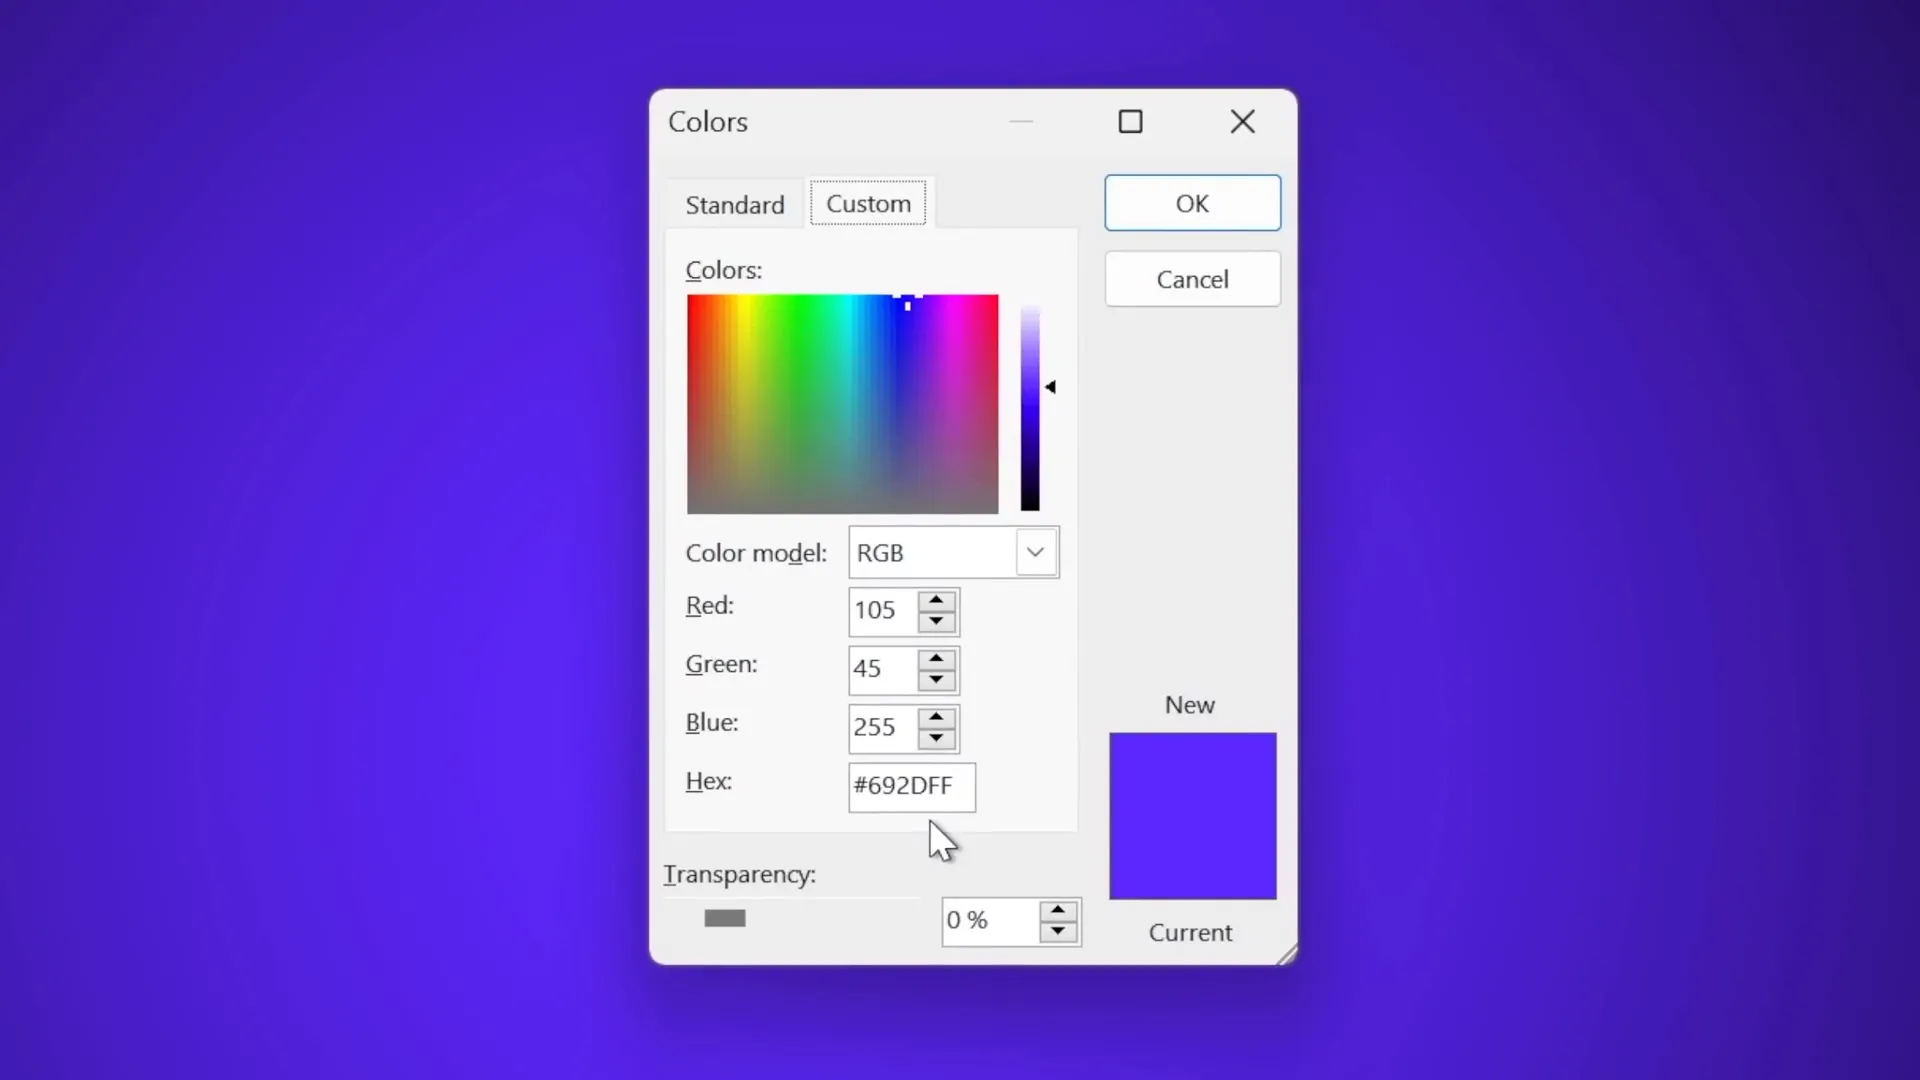
- Apply a two-color gradient using the following hex codes for a beautiful blue-purple gradient:
- First color:
#692DFF - Second color:
#0D002C
- First color:
This subtle gradient makes your laptop animation pop and adds a modern touch to your presentation.
Building the Basic Laptop Shapes
Now, let’s create the basic structure of the laptop using simple shapes:
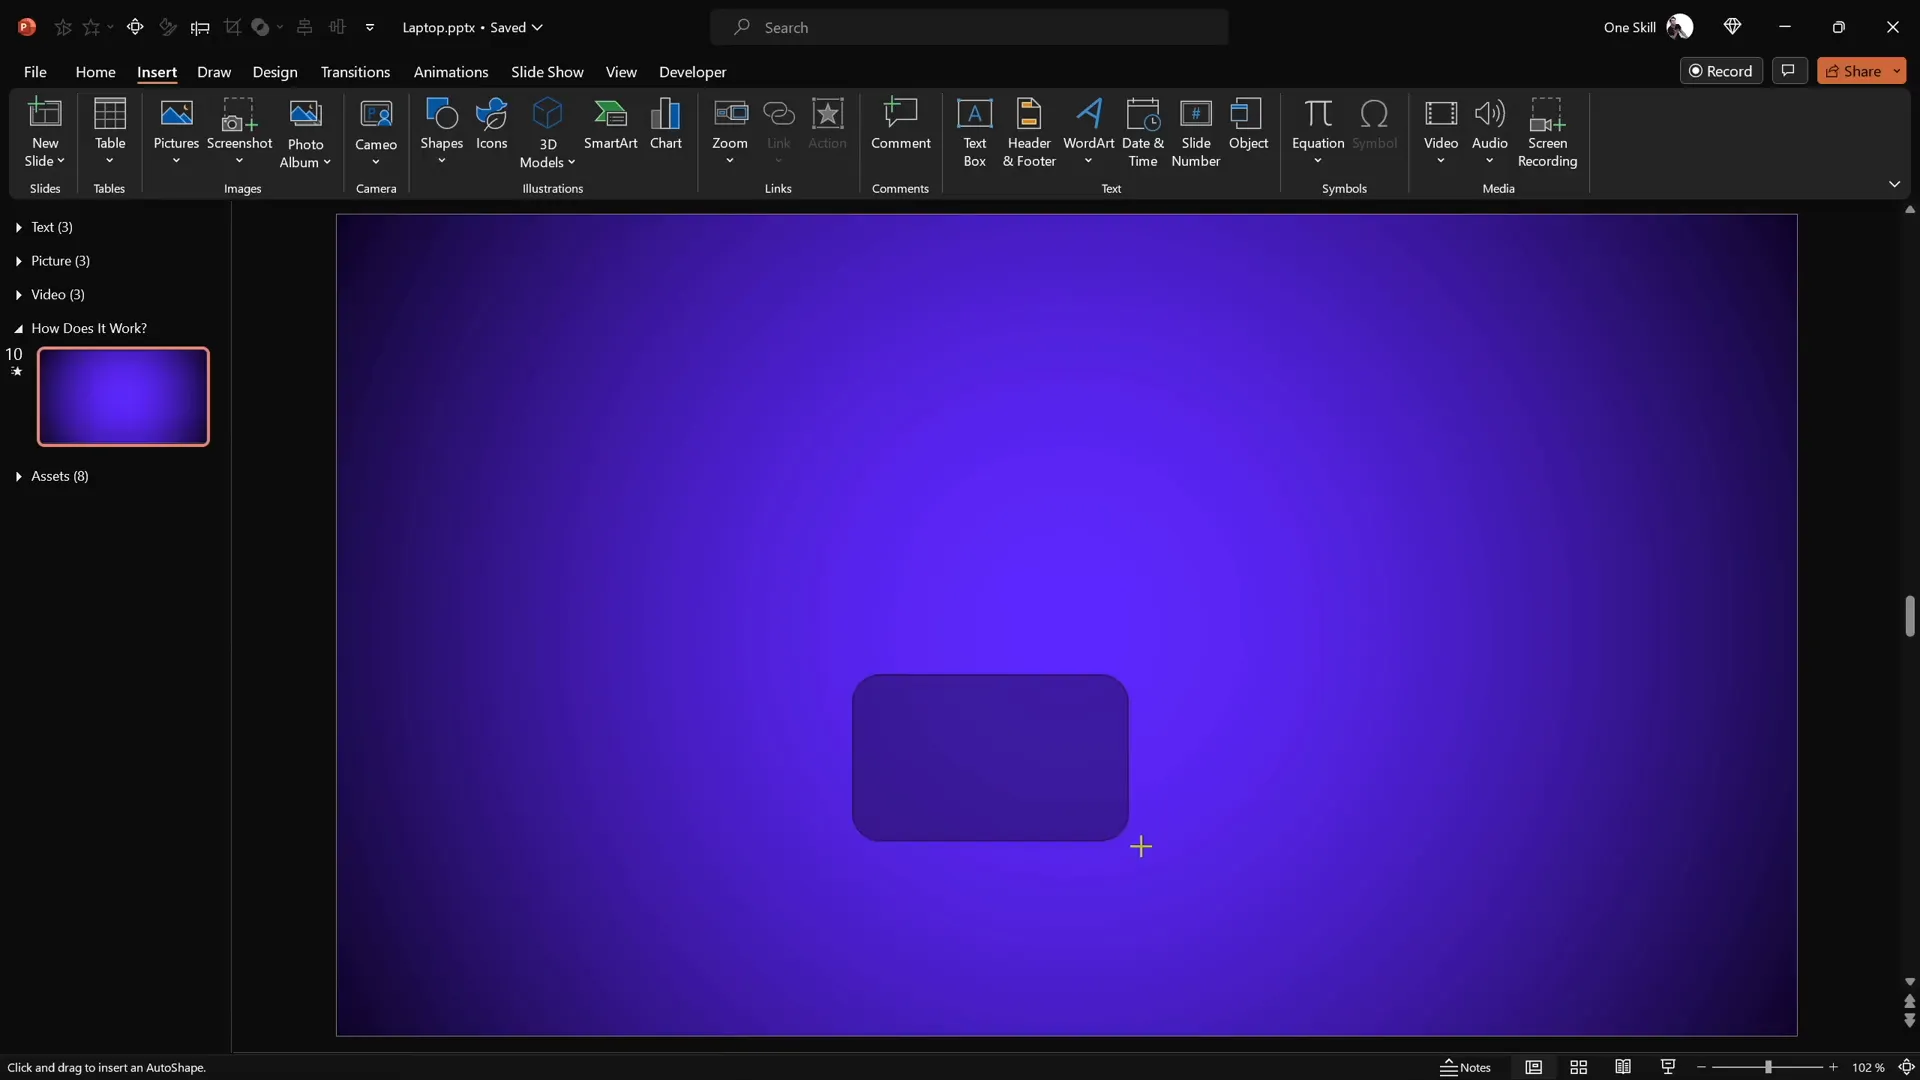
- Insert a rounded rectangle shape to represent the keyboard base. Make sure to align it to the center of the slide.
- Remove any outline and set the fill color to a dark gray to simulate the keyboard surface.
- Duplicate this rounded rectangle (hold Ctrl + Shift) and drag the copy upwards to create the laptop screen.
- Change the screen’s fill color to black.
- Duplicate the black screen shape, change its fill to white, resize it slightly smaller, and center it inside the black screen to represent the laptop’s display area.
- Select the black and white screen shapes and group them (Ctrl + G).
At this point, you have two main parts: the keyboard and the screen, which will later be animated to open and close.
Creating a Custom Rotation Center for Realistic Animation
By default, PowerPoint rotates shapes around their center, but for a realistic laptop opening animation, you want the keyboard and screen to rotate around their connecting edge.
Here’s how to set a new rotation center:
- Reset any existing rotation on the keyboard shape.
- Duplicate the keyboard shape and position the copy directly above or below the original so that together they form a shape with a rotation point on the edge where the screen and keyboard meet.
- Select both shapes and group them. You will see two rotation handles (“bubbles”) indicating the new rotation center.
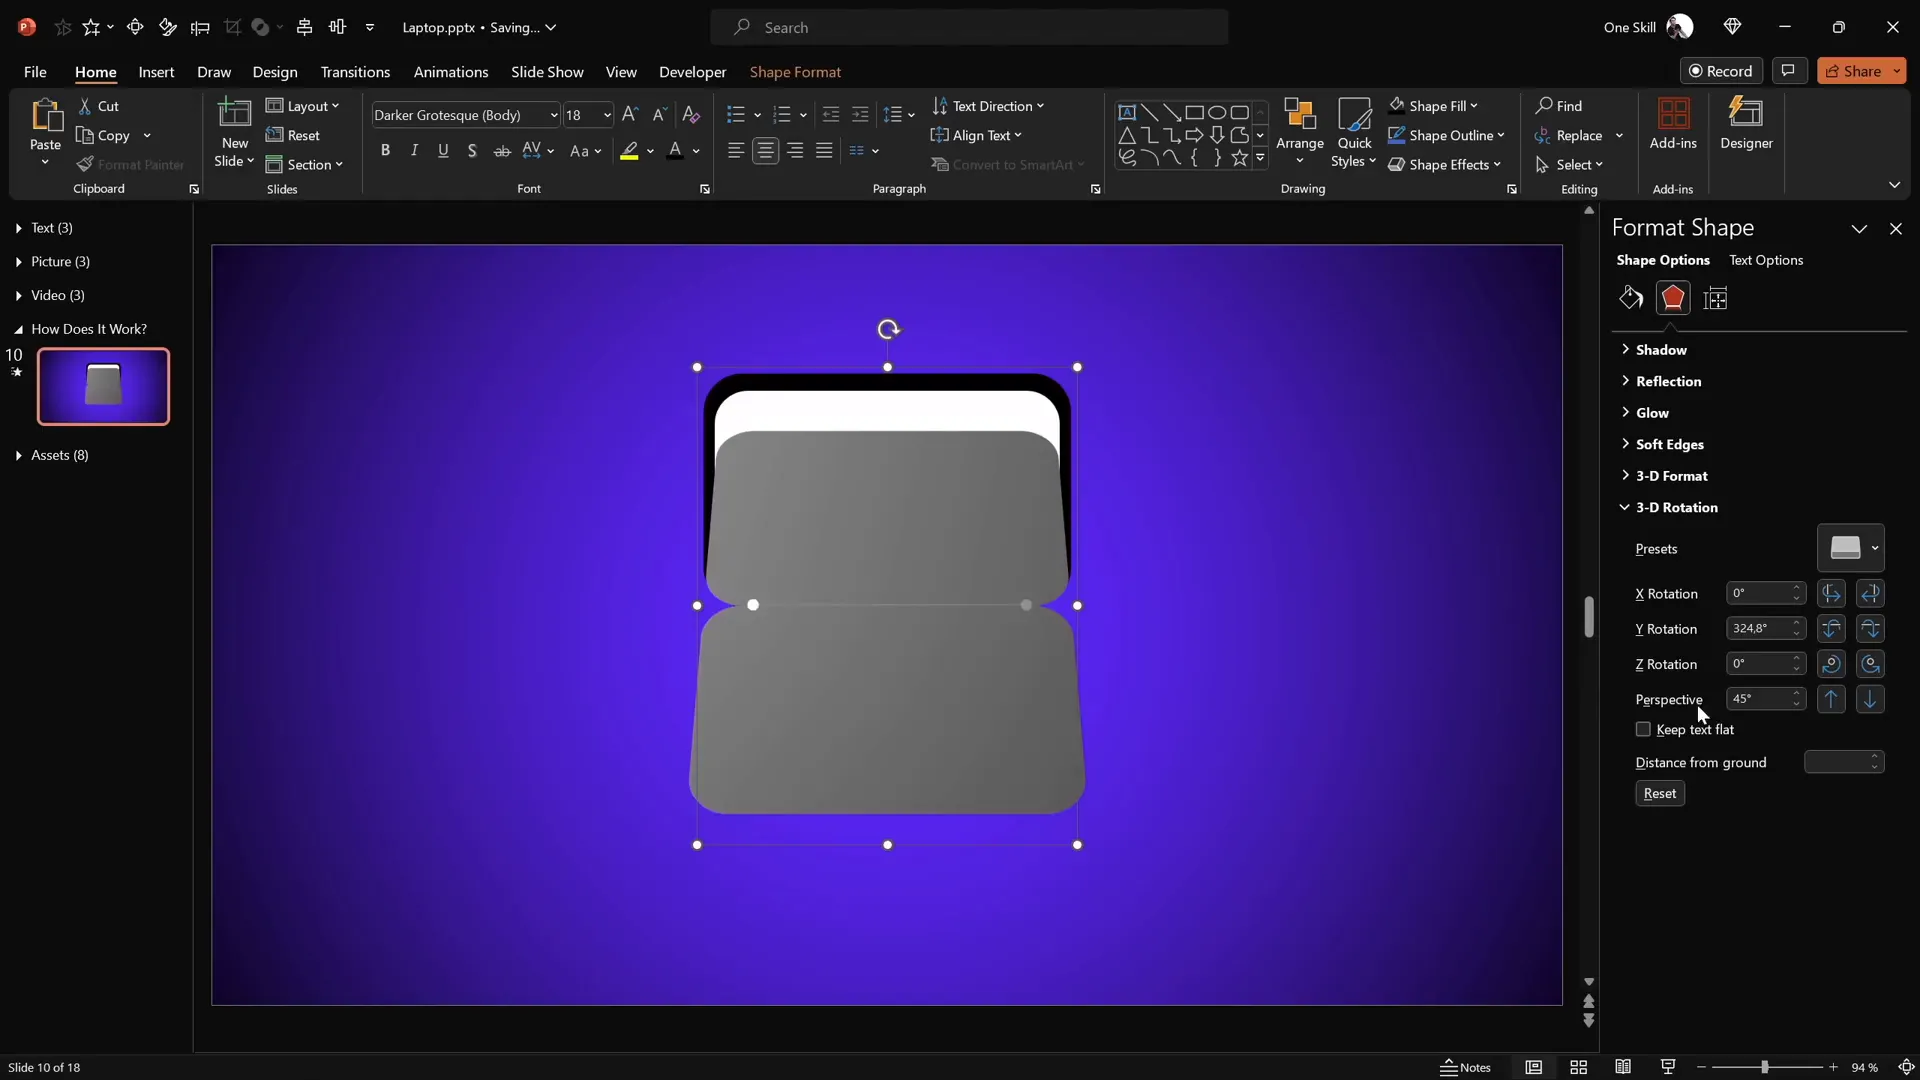
- Apply a 3D perspective rotation preset (e.g., “Perspective Relaxed and Moderately”) on this group.
- Make the duplicated shape invisible by setting its fill to no fill and removing its outline, so only the visible keyboard remains.
Now, when you rotate this group, it will hinge along the edge, simulating the laptop keyboard flipping open.
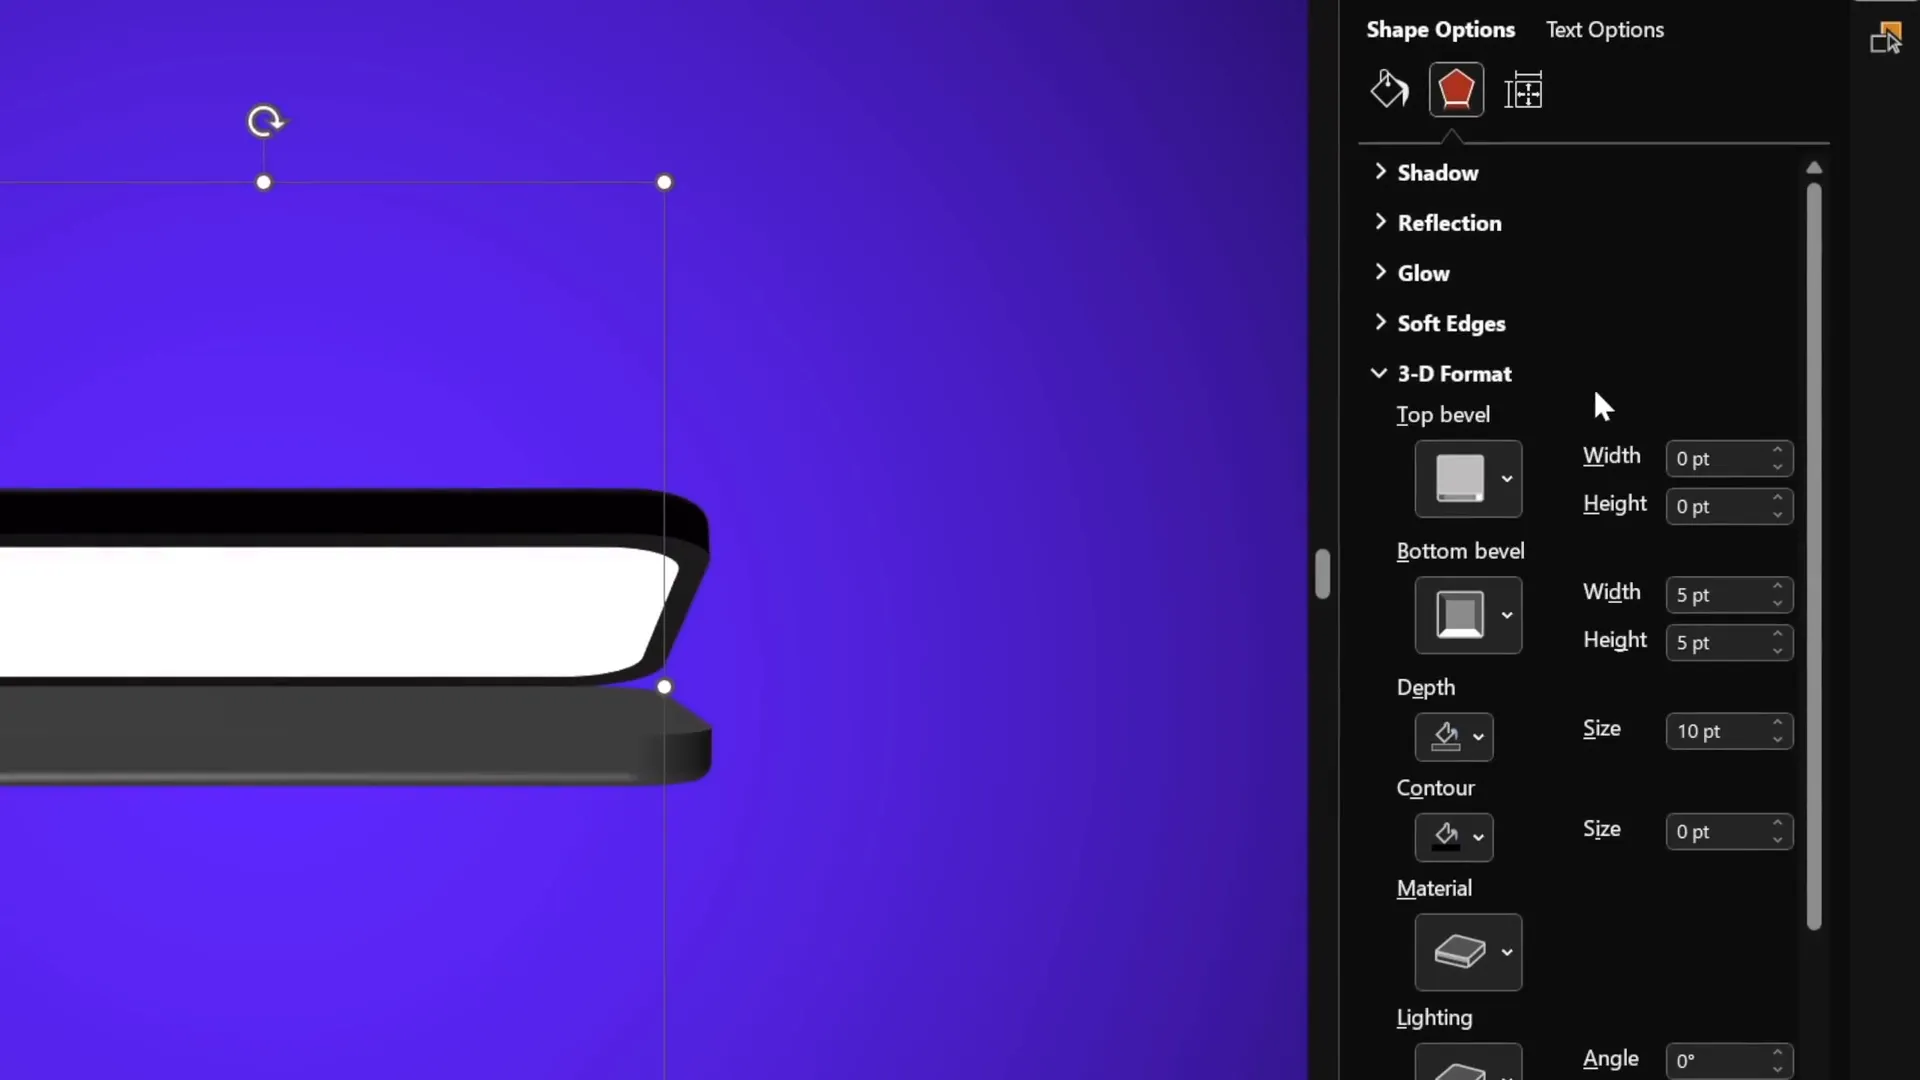
Adding 3D Depth and Bevel Effects
To enhance the realism of the laptop parts, it’s important to add 3D depth and bevel effects:
- Select the keyboard shape (or group).
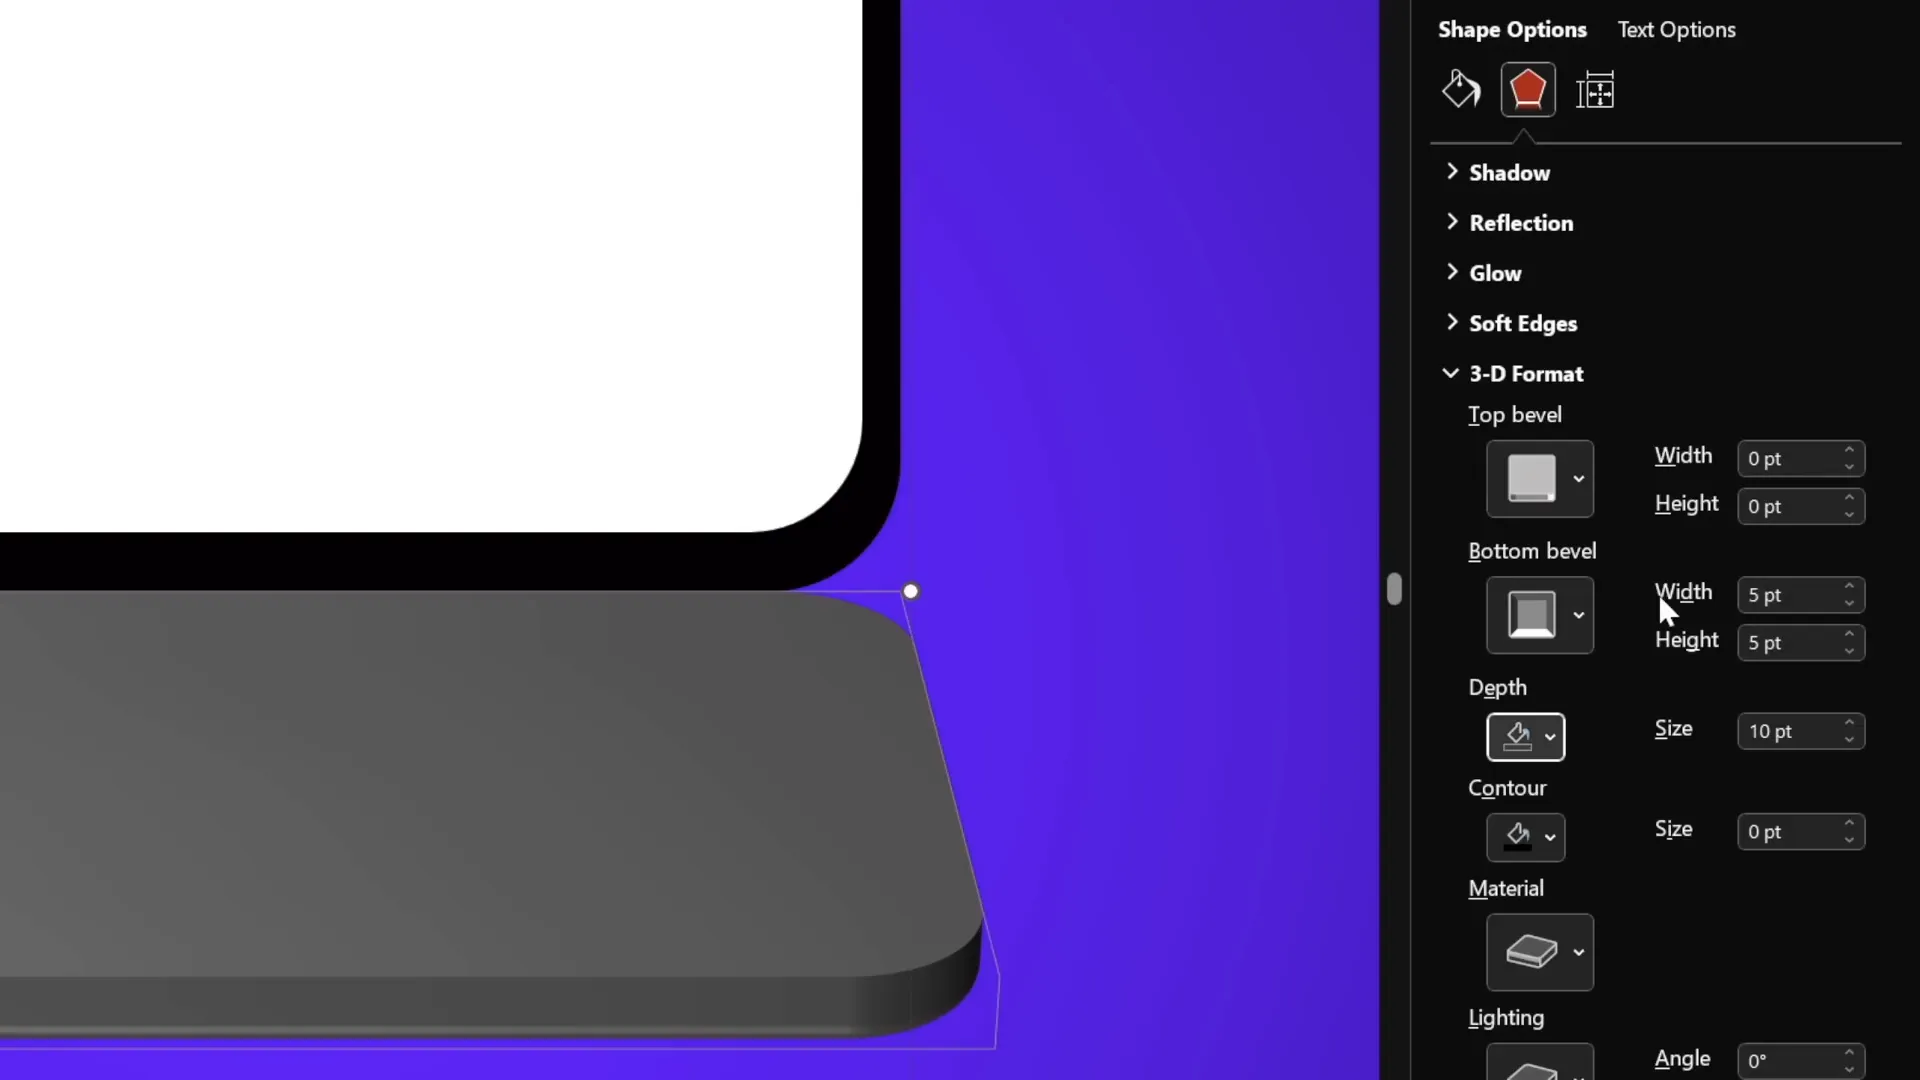
- Open the 3D Format options.
- Add depth, e.g., 10 points, to give thickness to the keyboard.
- Add a bottom bevel with 5 points for width and height to soften the edges, creating a rounded, smooth look.
- Rotate the keyboard shape slightly upwards to preview the bevel effect.
Repeat the same process for the screen group:
- Duplicate the screen shapes and group them to create a new rotation center for the screen.
- Make the duplicated shapes invisible by setting no fill and no outline.
- Apply the same 3D perspective rotation preset used for the keyboard.
- Add 3D depth and bevel effects similar to the keyboard.
This step adds a tangible feel to the laptop, making it more visually appealing.
Aligning and Finalizing the Laptop Parts
Proper alignment is crucial for smooth animation:
- Turn on slide guides to help with alignment.
- Select the screen group and align it to the center of the slide horizontally and vertically.
- Do the same for the keyboard group.
- Turn off slide guides once alignment is confirmed.
- Set the laptop to a fully closed position by rotating:
- Screen: 90 degrees on the Y-axis
- Keyboard: 270 degrees on the Y-axis
Now, the laptop parts are perfectly positioned for the animation to open and close.
Animating the Laptop Opening with Morph Transition
PowerPoint’s Morph transition is the magic behind this animation. It smoothly animates shape transformations between slides.
- Duplicate the slide with the closed laptop.
- On the duplicate slide, select the screen and set its Y rotation to 0 degrees (fully open).
- Select the keyboard and adjust its Y rotation to around 290 degrees to simulate the keyboard lowering slightly.
- Apply the Morph transition between the two slides with a duration of 2 seconds.
- Play the slide show to see the laptop open smoothly.
- Going back reverses the animation, closing the laptop.
This simple yet effective technique creates an engaging and professional 3D laptop opening effect.
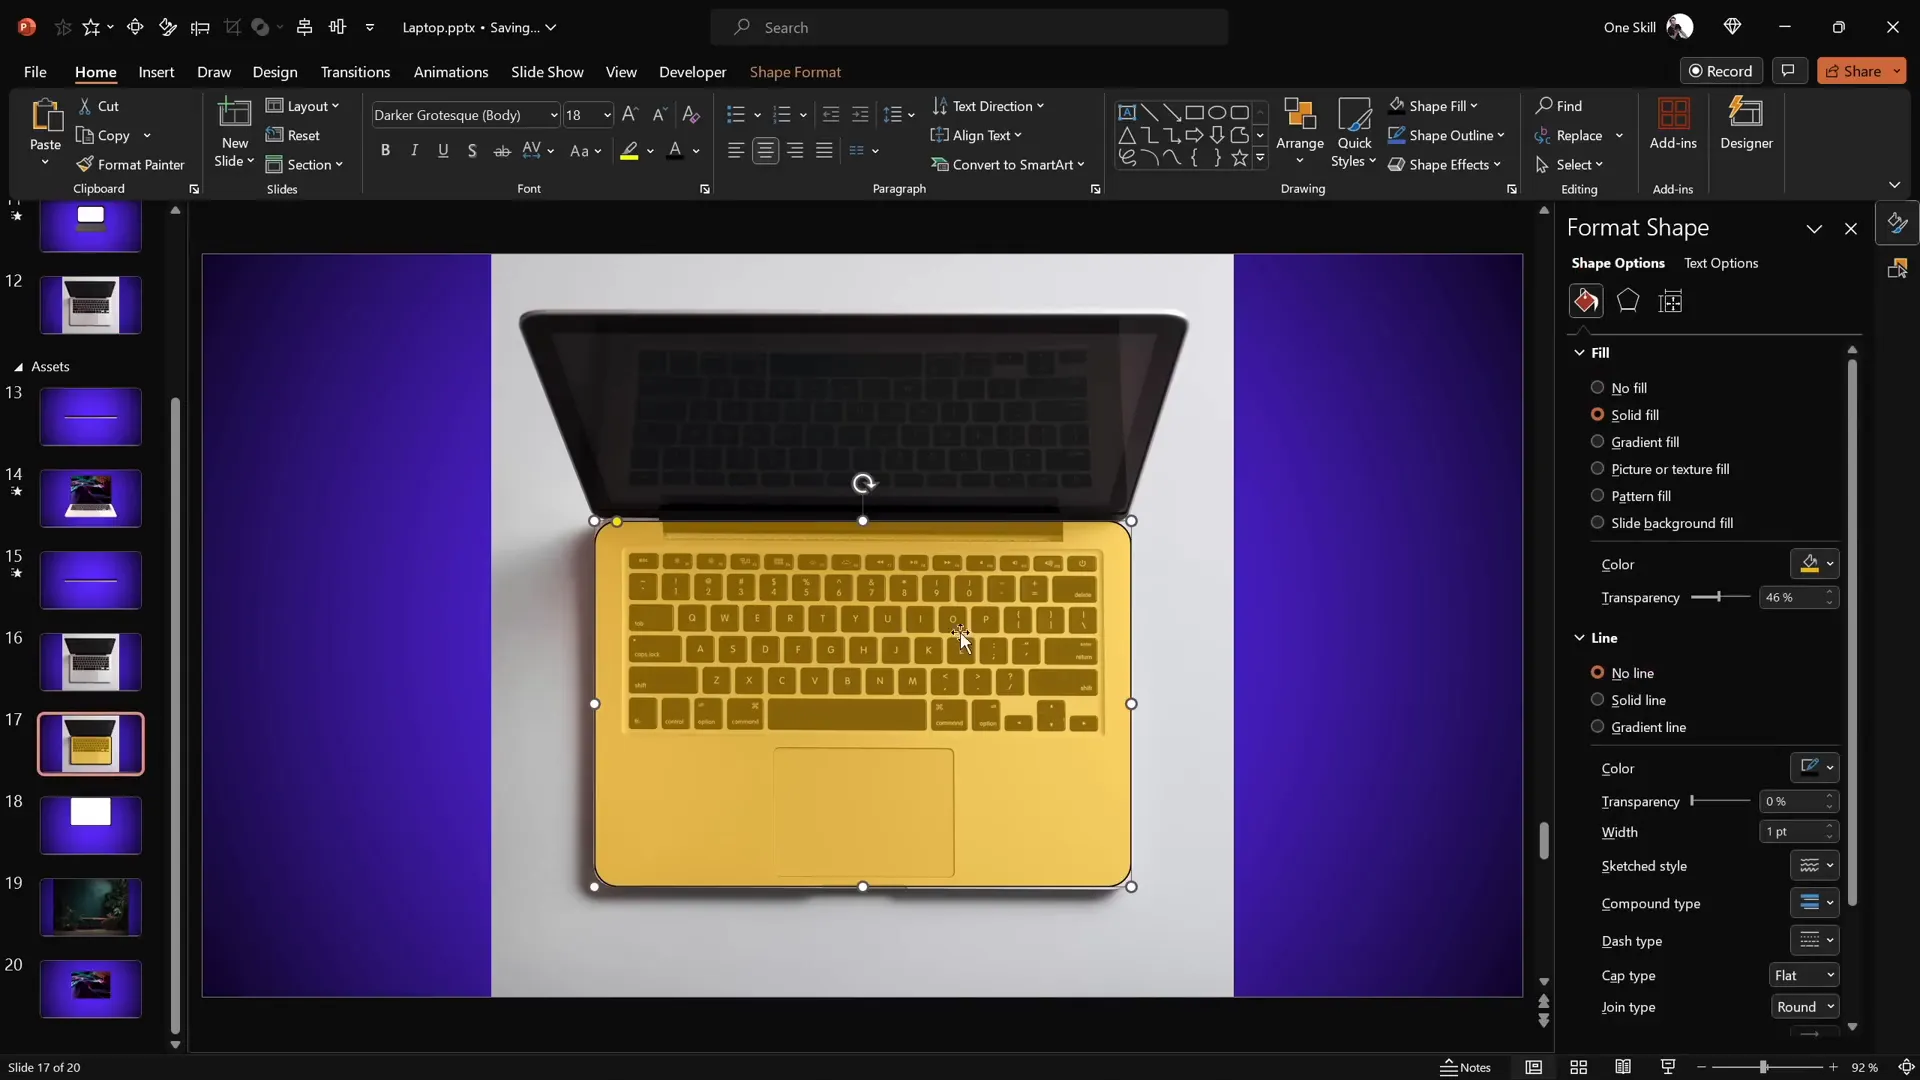
Creating a Realistic Laptop Using a Photo
For a more photorealistic effect, you can use an actual photo of a laptop instead of simple shapes.
Steps to create the keyboard and screen from a photo:
- Insert a top-view photo of a laptop (e.g., from Freepik).
- Use a rounded rectangle shape to cover the keyboard area.
- Select both the photo and the shape, then use Merge Shapes → Intersect to cut out the keyboard portion precisely.
- Repeat or adjust the shape for better accuracy as needed.
- Create a duplicate shape with the same dimensions as the keyboard to serve as the new rotation center.
- Group the keyboard photo and the invisible shape, setting the shape to no fill and no line to keep it invisible.
- Add 3D perspective rotation and depth/bevel effects as before.
For the screen, you can use the same method as with the simple shapes:
- Create black and white rounded rectangles matching the dimensions of the keyboard photo.
- Group them and create a duplicate group to establish the rotation center.
- Make the duplicate group invisible (no fill, no line).
- Apply 3D perspective rotation and depth/bevel effects.
Finally, align the keyboard and screen groups centrally and set their rotation angles to the closed position (screen at 90°, keyboard at 270°).
Inserting Text, Pictures, and Videos into the Laptop
One of the most exciting parts of this animation is the ability to customize the laptop screen with your own content — text, images, or videos.
Adding Text
Since the laptop screen is a grouped shape, you can add text directly:
- Double-click the white screen shape to enter text editing mode.
- Type your desired text.
- Copy the text box and paste it onto the other slide (open or closed laptop) to keep the text consistent during animation.
- Adjust font color to white or any color that contrasts well with the background.
This allows you to create dynamic presentations with animated text appearing as the laptop opens.
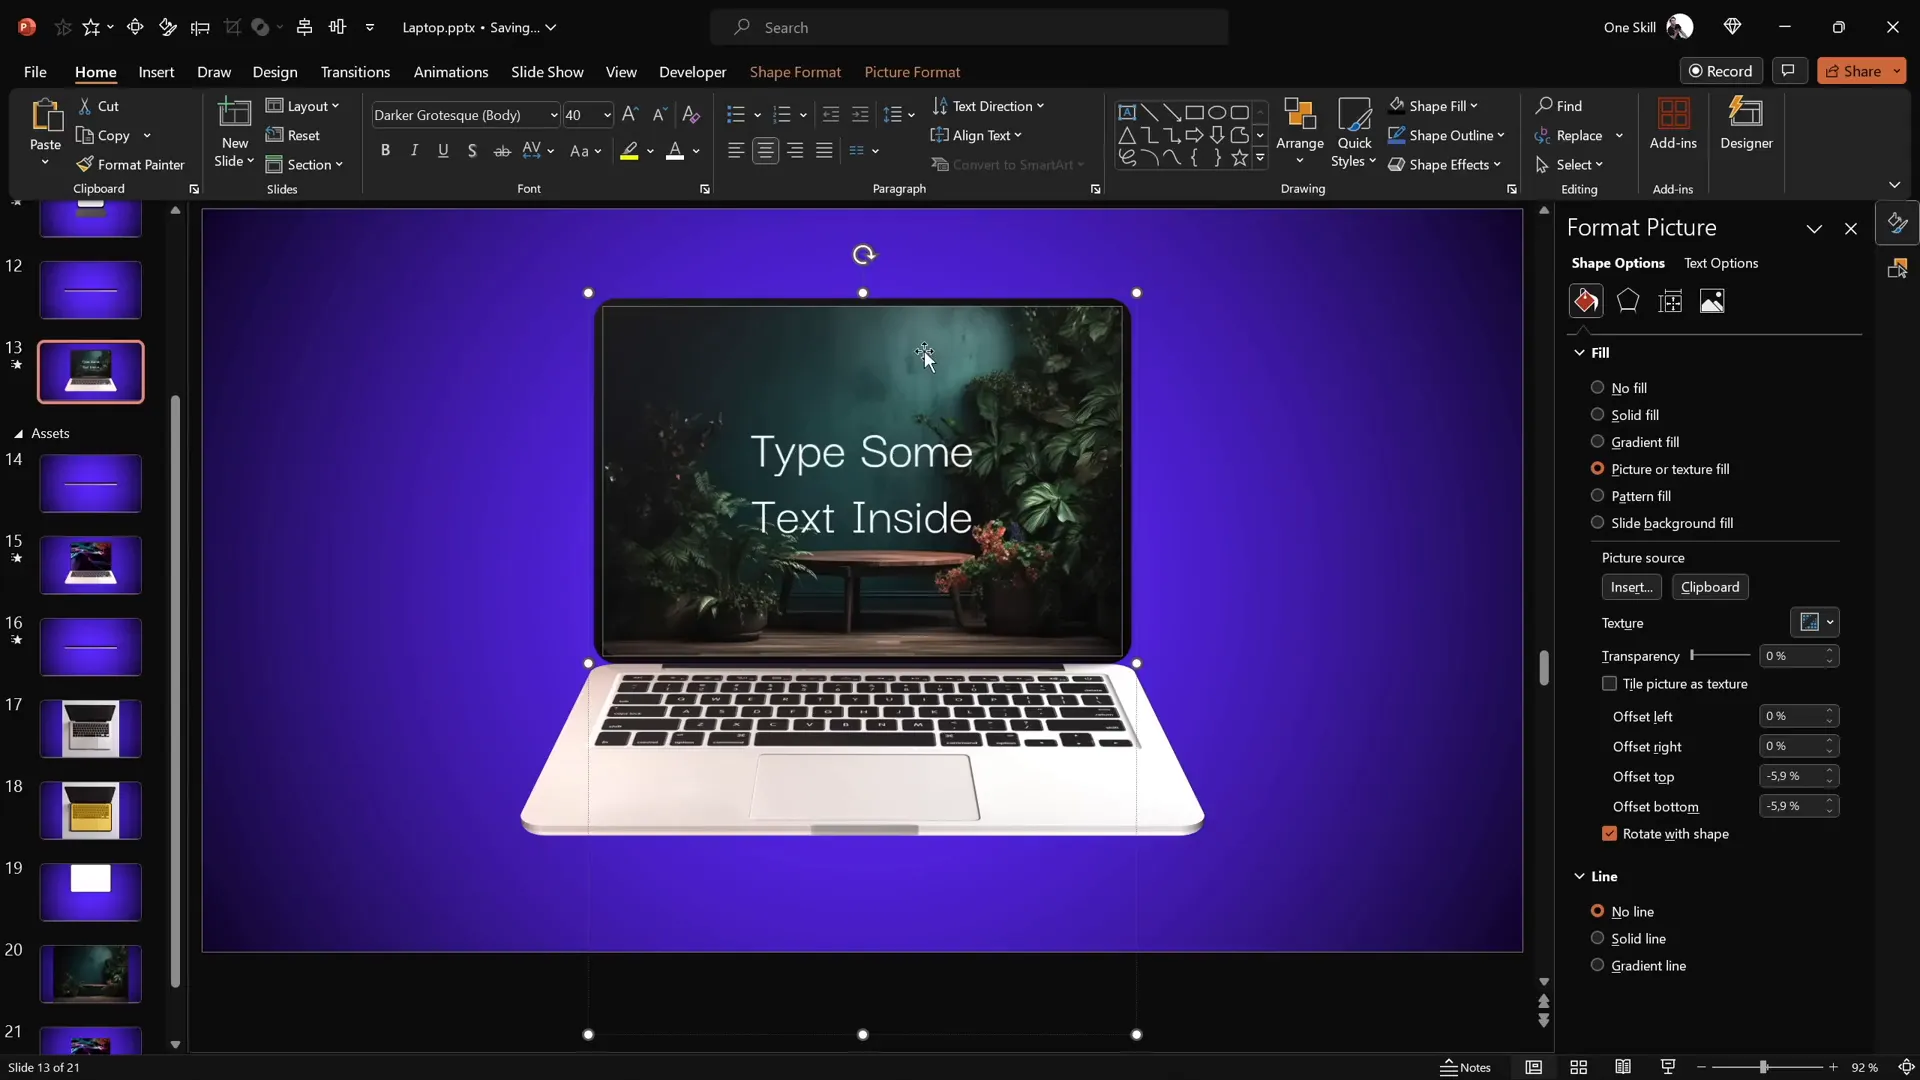
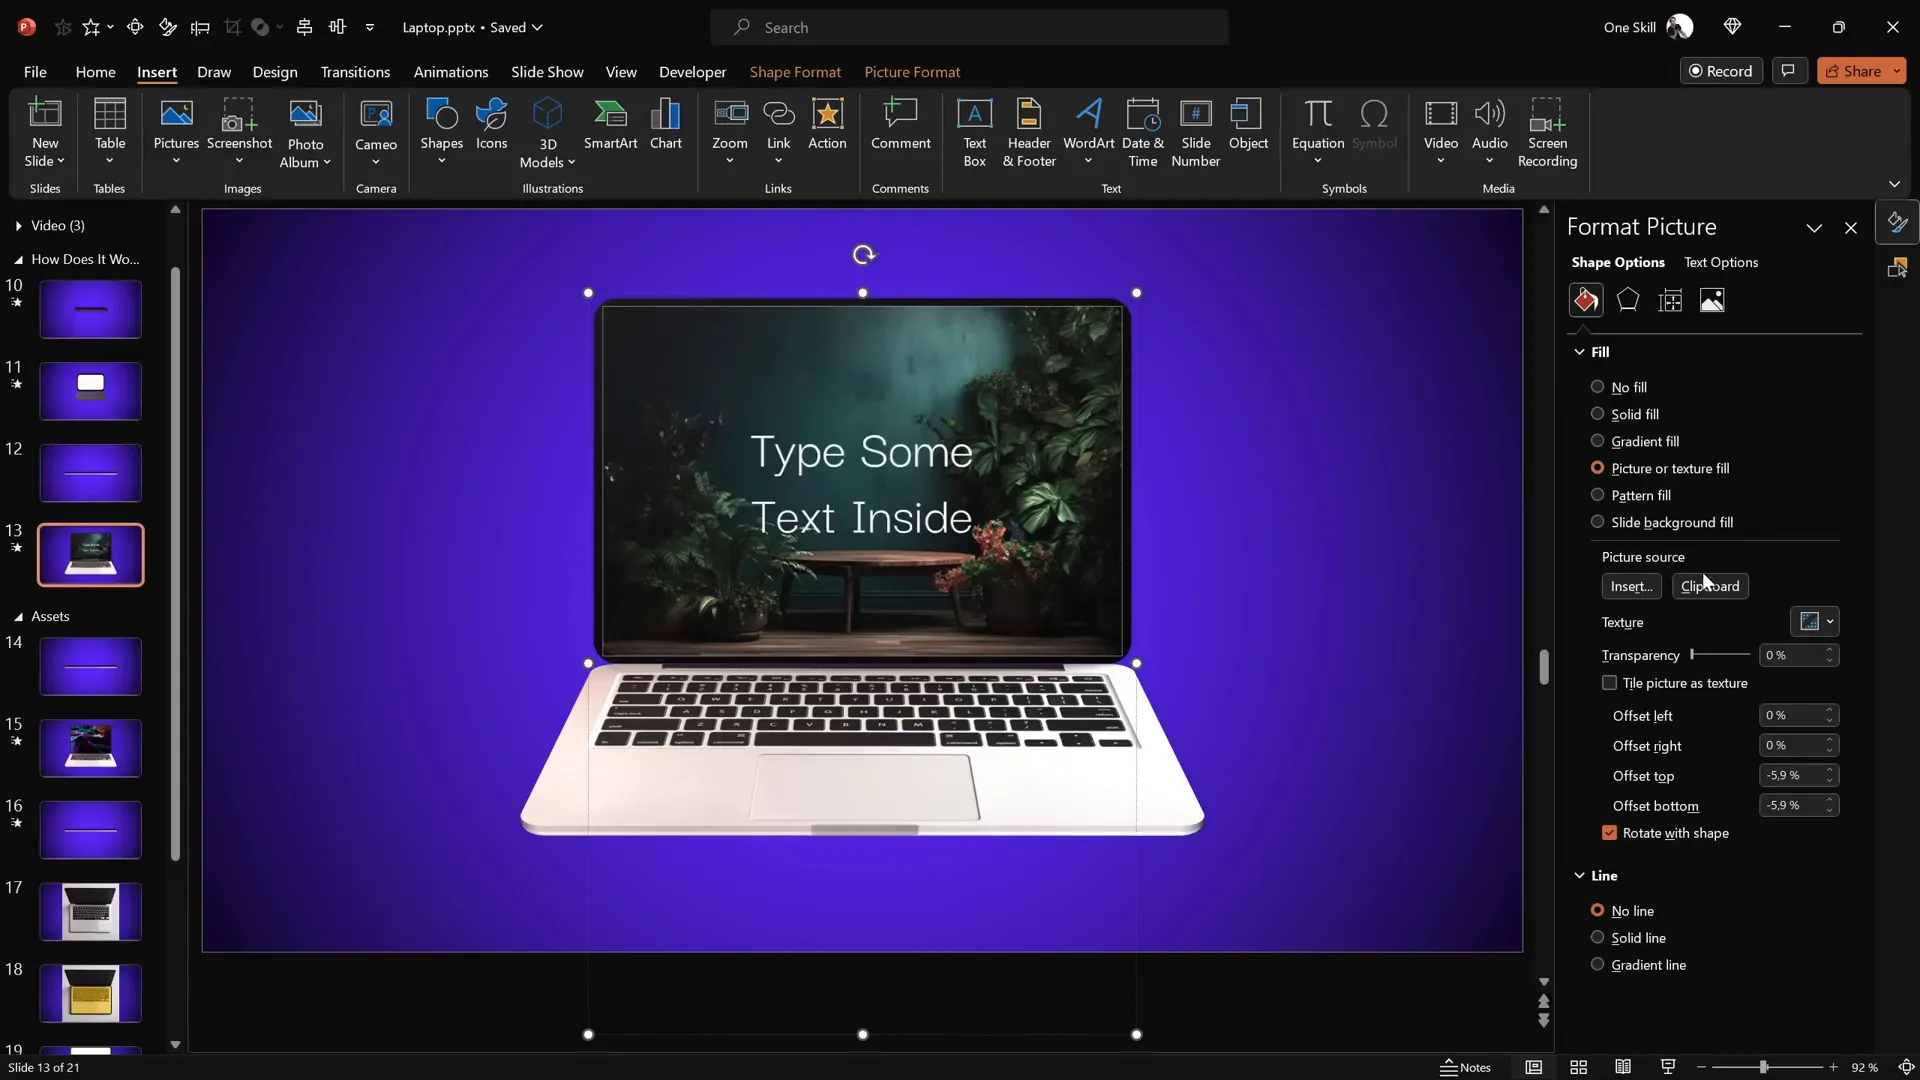
Inserting Pictures
To insert an image inside the laptop screen:
- Copy your desired image (for example, a photo from Freepik).
- Select the white screen shape.
- Go to the fill options and choose Picture or texture fill.
- Paste the image from the clipboard to fill the screen shape.
- Copy the style (Ctrl + Shift + C) from the filled screen and paste it (Ctrl + Shift + V) onto the screen on the other slide to keep consistency during animation.
Now your laptop screen beautifully displays your chosen picture, enhancing your presentation’s visual appeal.
Embedding Videos
Embedding videos adds a dynamic and engaging element to your laptop screen.
- Insert a stock video or any video file using Insert → Video → Stock Videos (available in PowerPoint 365).
- Resize and crop the video to match the laptop screen shape using the same rounded rectangle shape for precise cropping.
- Select both the video and the screen shape, then use Merge Shapes → Intersect to crop the video perfectly.
- Copy the cropped video and paste it inside the laptop screen shape’s fill as a picture fill for the closed laptop slide.
- Paste the actual video over the screen shape on the open laptop slide and align it precisely.
- Add animations to the video:
- Fade in animation with a 1-second duration starting with previous.
- Set the video to start playing automatically with previous.
This setup creates a seamless effect where the video appears and plays inside the laptop screen as it opens.
Final Thoughts and FAQ
Congratulations! You now have the skills to create a stunning, customizable 3D laptop opening animation in PowerPoint using simple shapes, photos, and videos. This technique not only impresses your audience but also showcases your mastery of PowerPoint animations skills.
Feel free to experiment with different colors, shapes, and content inside the laptop to suit your presentation’s theme. Remember, the key is mastering the 3D perspective rotation and morph transition for smooth and realistic animations.
To further enhance your skills, consider exploring dedicated courses like the Parpawn Animation Mastery course, which offers structured learning on PowerPoint animations.
Frequently Asked Questions (FAQ)
1. Do I need advanced PowerPoint versions to create this animation?
You’ll need Microsoft PowerPoint 365 or a recent version that supports 3D rotation and morph transitions. Older versions may lack these features.
2. Can I insert any type of video inside the laptop?
Yes, PowerPoint supports various video formats, but it’s best to use common formats like MP4. Videos inserted should be compatible with your PowerPoint version.
3. Is the laptop model a real 3D object?
No, the laptop is created from simple 2D shapes and photos enhanced with 3D depth and perspective rotation presets. This approach is lightweight and easier to customize.
4. How do I keep text and images consistent between the closed and open laptop slides?
Use the Duplicate Slide feature and copy-paste styles (Ctrl + Shift + C and Ctrl + Shift + V) to maintain consistency between slides.
5. Can I customize the animation duration?
Yes, the morph transition duration can be adjusted to speed up or slow down the laptop opening effect, depending on your preference.
6. How do I create smooth rotation around the laptop’s hinge?
By creating a duplicate shape positioned to define a new rotation center and grouping them, you can control the axis of rotation, making the animation realistic.
7. Is it possible to use my own laptop photos?
Absolutely! Use your own high-quality laptop photos, cut out the keyboard and screen areas with PowerPoint’s merge shapes tool, and apply the same animation techniques.
8. Can I use this animation for other devices?
Yes, the same principles apply to animating phones, tablets, or any device using shapes, photos, and morph transitions.
Summary Table: Key Steps for Creating the 3D Laptop Animation
| Step | Action | PowerPoint Feature | Tip |
|---|---|---|---|
| 1 | Set gradient background | Format Background → Gradient Fill | Use hex codes #692DFF and #0D002C |
| 2 | Create keyboard and screen shapes | Insert → Shapes → Rounded Rectangle | Group screen shapes for easier animation |
| 3 | Create new rotation center | Duplicate shapes, position, Group | Make duplicate invisible with no fill |
| 4 | Add 3D depth and bevel | Format Shape → 3D Format | Depth: 10 pts, Bevel: 5×5 pts for smooth edges |
| 5 | Align shapes centrally | Arrange → Align → Align to Slide | Use slide guides for precision |
| 6 | Set closed laptop rotation | 3D Rotation → Y Rotation | Screen: 90°, Keyboard: 270° |
| 7 | Duplicate slide and open laptop | Morph Transition | Screen Y Rotation: 0°, Keyboard Y Rotation: 290° |
| 8 | Insert text, pictures, or videos | Fill options, Insert Video, Animations | Use fade and autoplay animations for videos |
Mastering these steps will enhance your PowerPoint animations skills and enable you to create professional, engaging presentations that stand out.


