If you’ve ever wanted to add dynamic, eye-catching animations to your PowerPoint slides but didn’t quite know where to start, you’re in the right place. Maybe you’ve tried to create advanced animations but found the process daunting or confusing. Well, the wait is over! This comprehensive guide will unlock the secrets to mastering PowerPoint animations and help you create presentations that truly stand out.
Welcome to an exploration of PowerPoint animations with insights from Kaspare, the creator behind One Skill PPT, who has crafted tutorials for nearly a decade and helped millions elevate their presentations. In this article, you’ll learn everything from the fundamentals of animations to more advanced techniques, including text animations, draw animations, 3D model animations, and combining multiple animations for custom effects.
By the end of this guide, you’ll be equipped to create breathtaking animations that engage and impress your audience. Whether you’re a beginner or an experienced user looking to sharpen your skills, this article is perfect for designers, educators, entrepreneurs, business professionals, and students alike.
Table of Contents
- Introduction to PowerPoint Animations
- The Four Main Types of PowerPoint Animations
- How to Add and Manage Animations in PowerPoint
- Advanced Animation Techniques
- Four More Awesome Ways to Animate in PowerPoint
- FAQ About PowerPoint Animations
- Conclusion
Introduction to PowerPoint Animations
Animations add life and motion to your PowerPoint slides, making your presentations more engaging and memorable. But mastering animations can feel overwhelming without the right guidance. Kaspare’s PowerPoint Animation Mastery course aims to fill this gap by teaching you everything from the basics to the most advanced animation tricks.
Here’s what you can expect to learn:
- Animation fundamentals
- Animating text, photos, and videos
- Creating animated intros, illustrations, and infographics
- Draw animations and GIF animations
- Combining animations for custom effects
Kaspare recommends using PowerPoint 2019, 2021, or Microsoft 365 on Windows for the best experience, especially because the advanced animation timeline is available only on Windows versions. Mac users can still follow along but may have limited access to some advanced features.
And the course is always evolving based on user feedback, so you can request lessons on topics like animated slide design or illustrations.

The Four Main Types of PowerPoint Animations
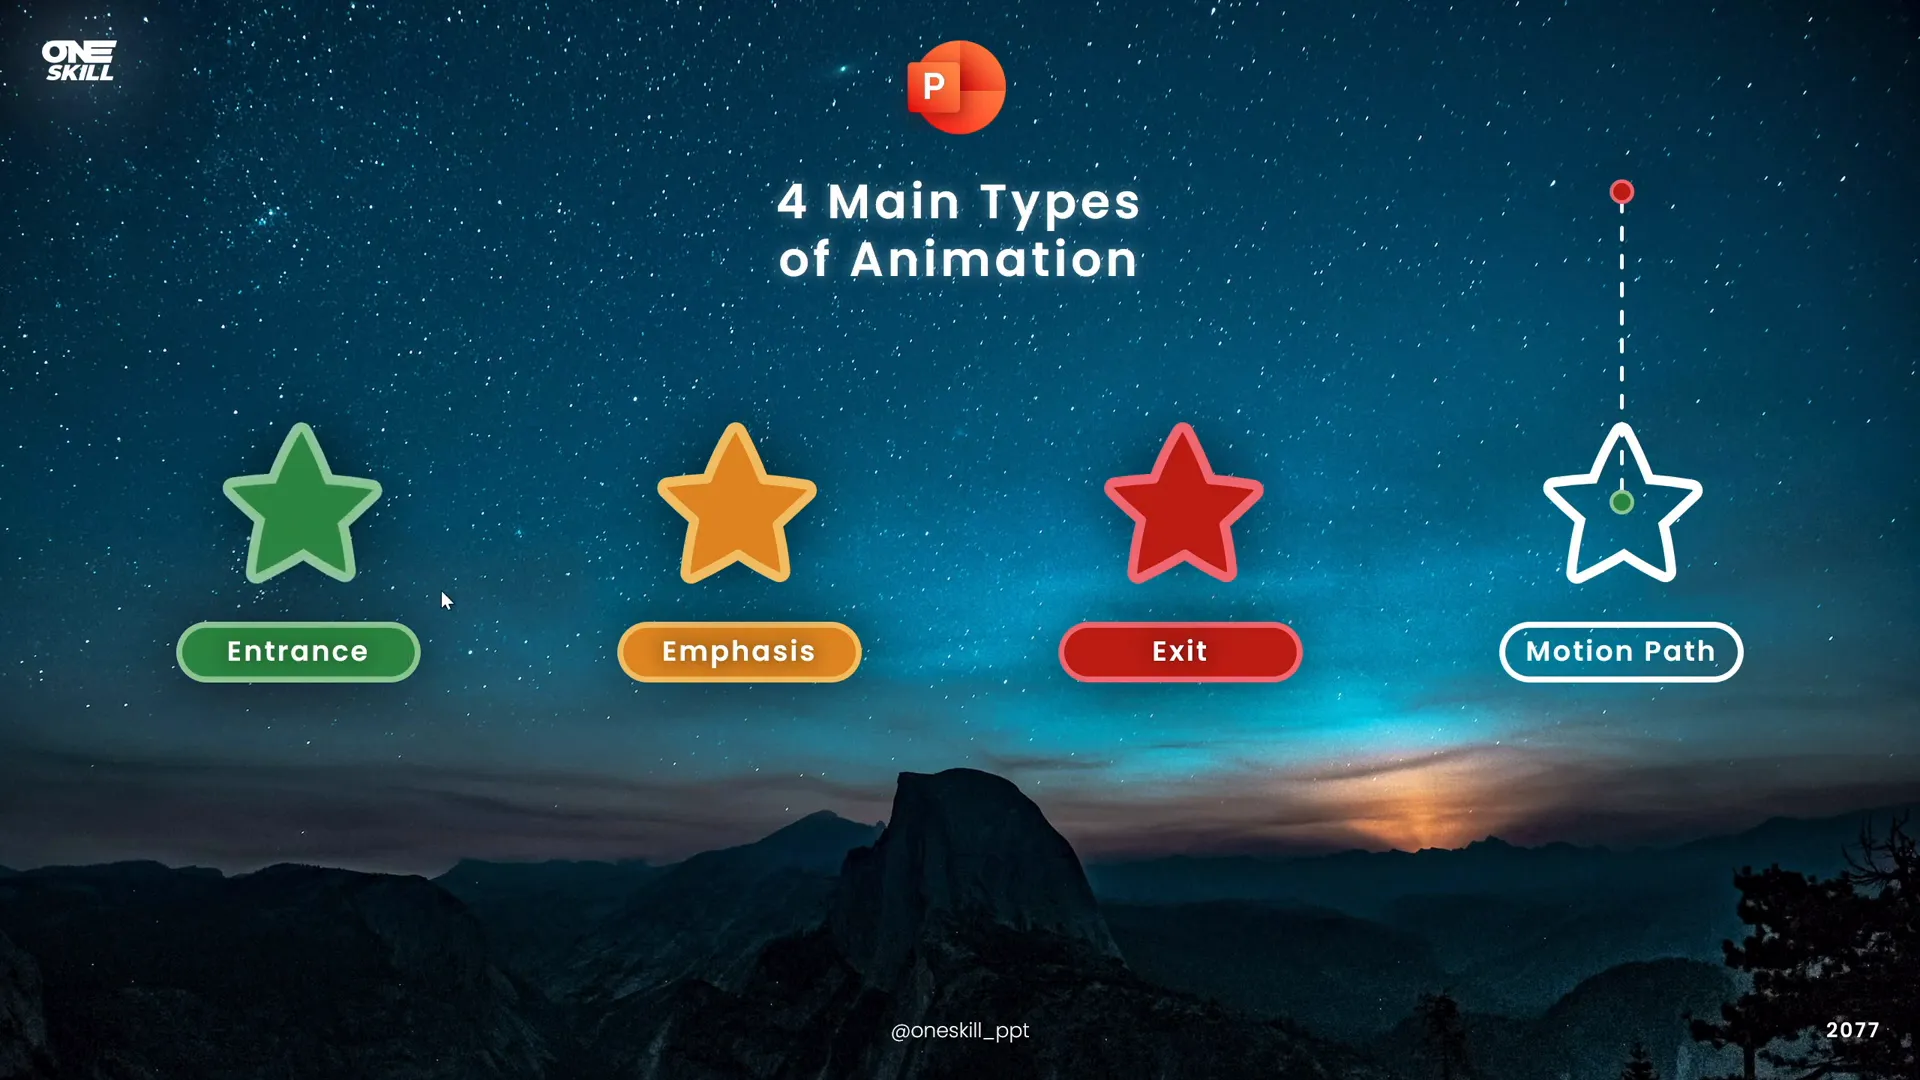
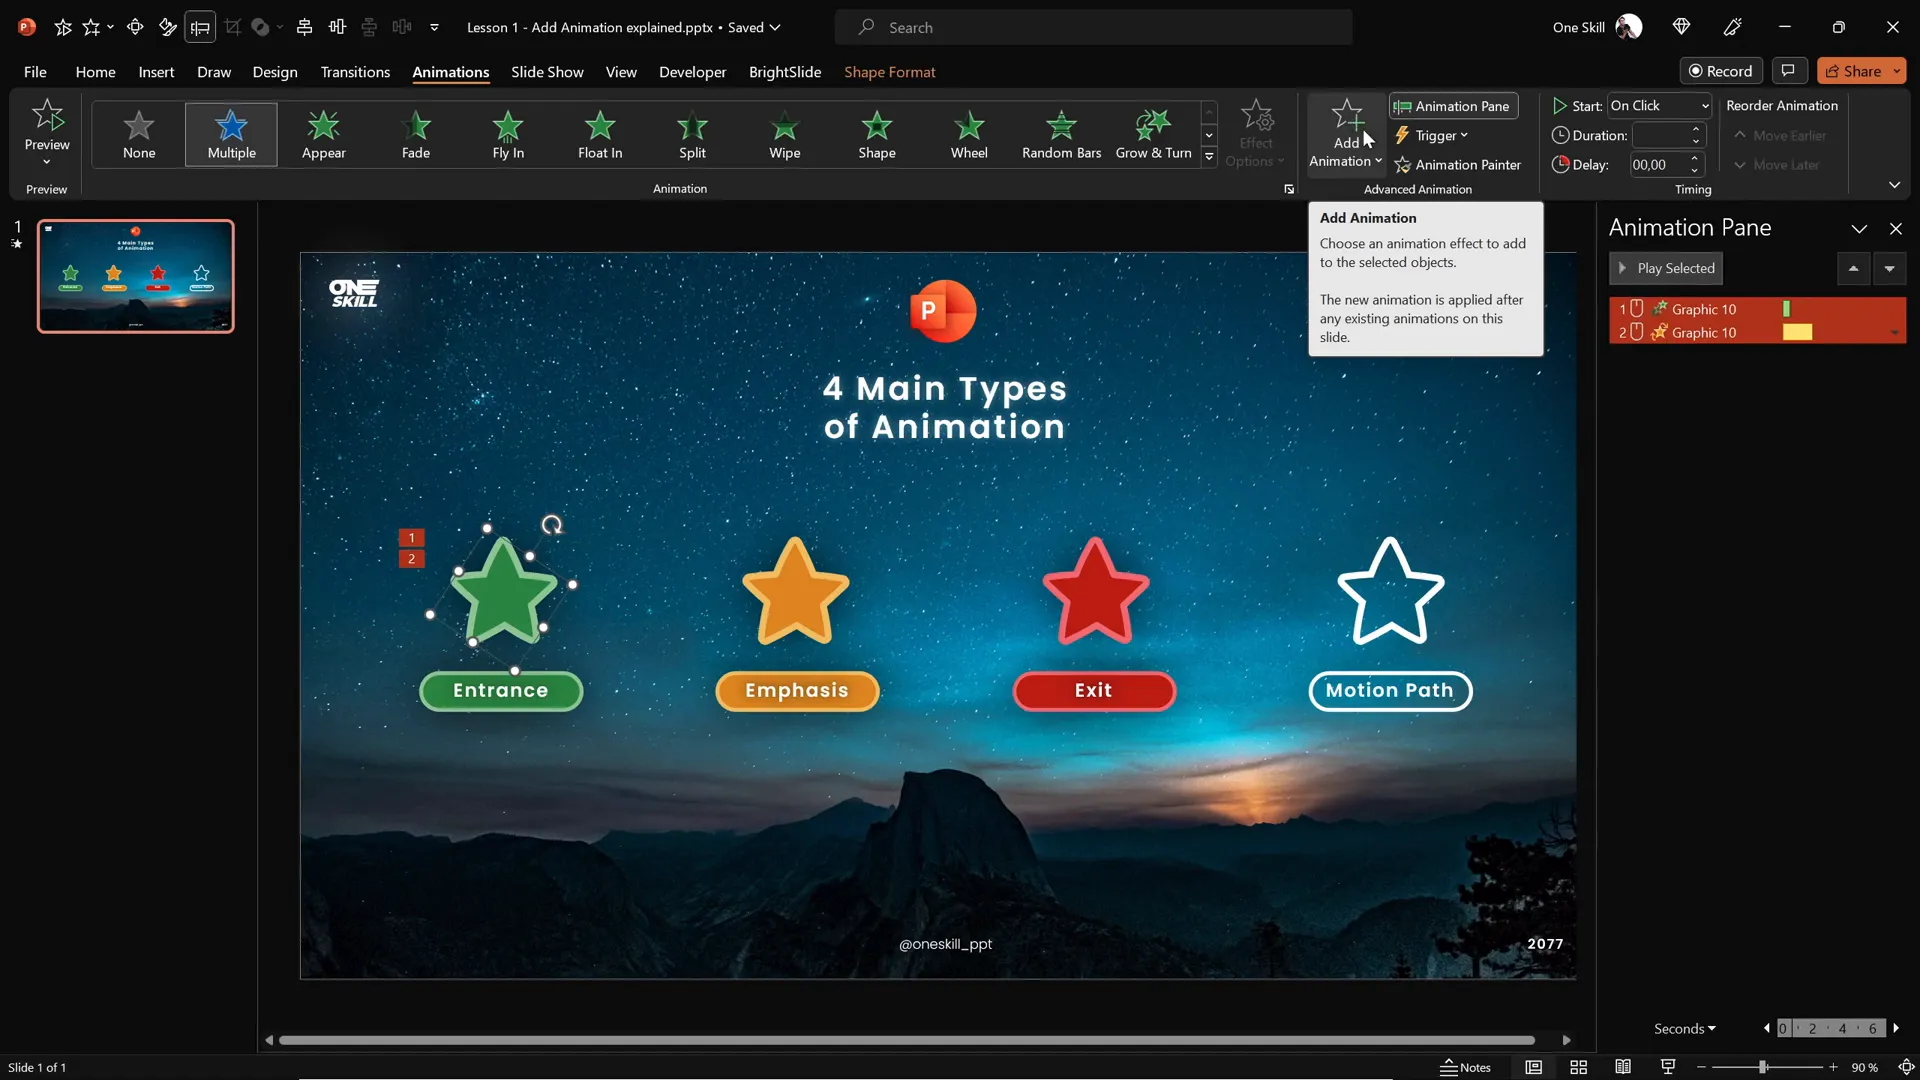
Understanding the core animation types in PowerPoint is the foundation for creating compelling slides. Kaspare breaks down animations into four primary categories:
| Animation Type | Purpose | Description | Example |
|---|---|---|---|
| Entrance Animations | Introduce content | Used to bring objects like text, images, or videos onto the slide | Flying in from the top |
| Emphasis Animations | Highlight content | Draw attention to an object already on the slide by animating it | Spinning an object |
| Exit Animations | Remove content | Used to make an object disappear or move off the slide | Zooming out to disappear |
| Motion Path Animations | Move content along a path | Allows objects to follow a custom path on or off the slide | Moving along a line or circle path |
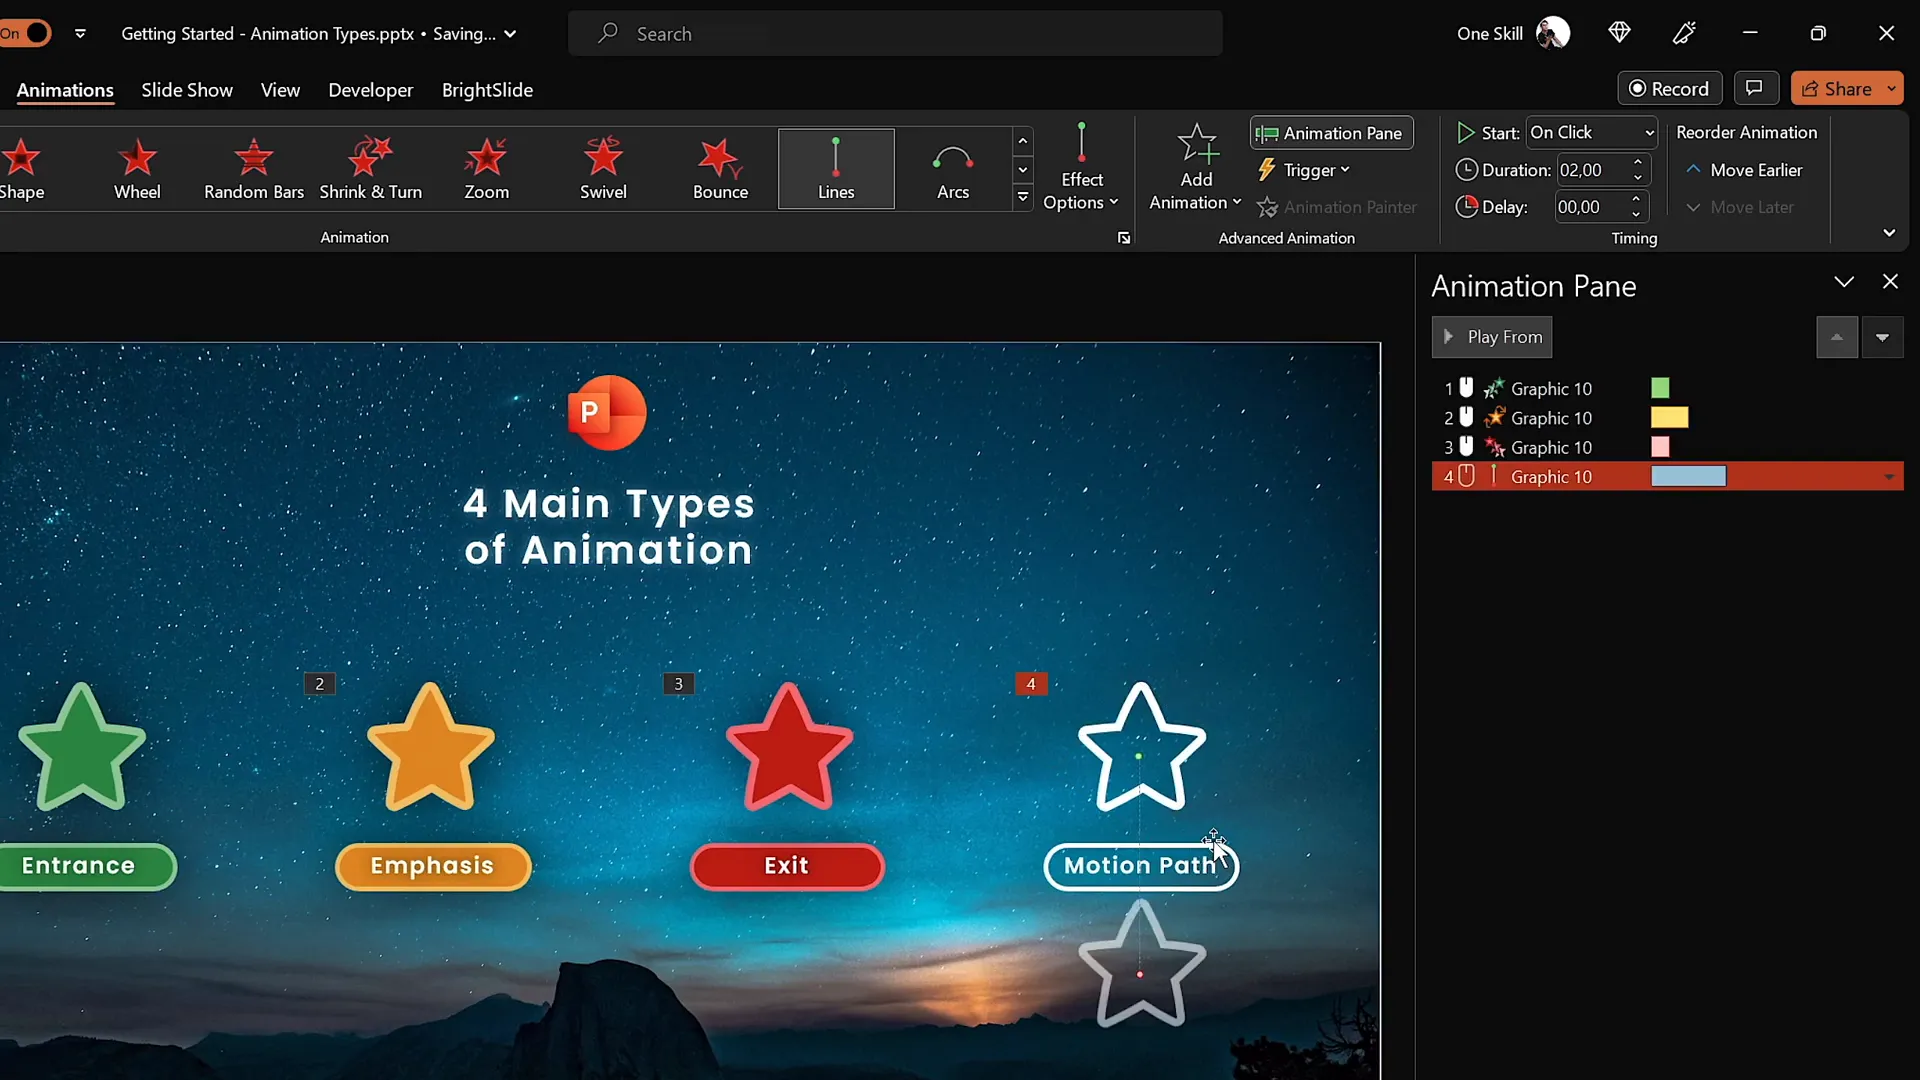
For motion path animations, PowerPoint shows two key points: a green bubble marking the starting position and a red bubble marking the ending position. You can adjust these points to customize the path your object follows.
How to Add and Manage Animations in PowerPoint
Now that you know the types of animations, let’s explore how to add and manage them in your slides effectively.
Adding Animations
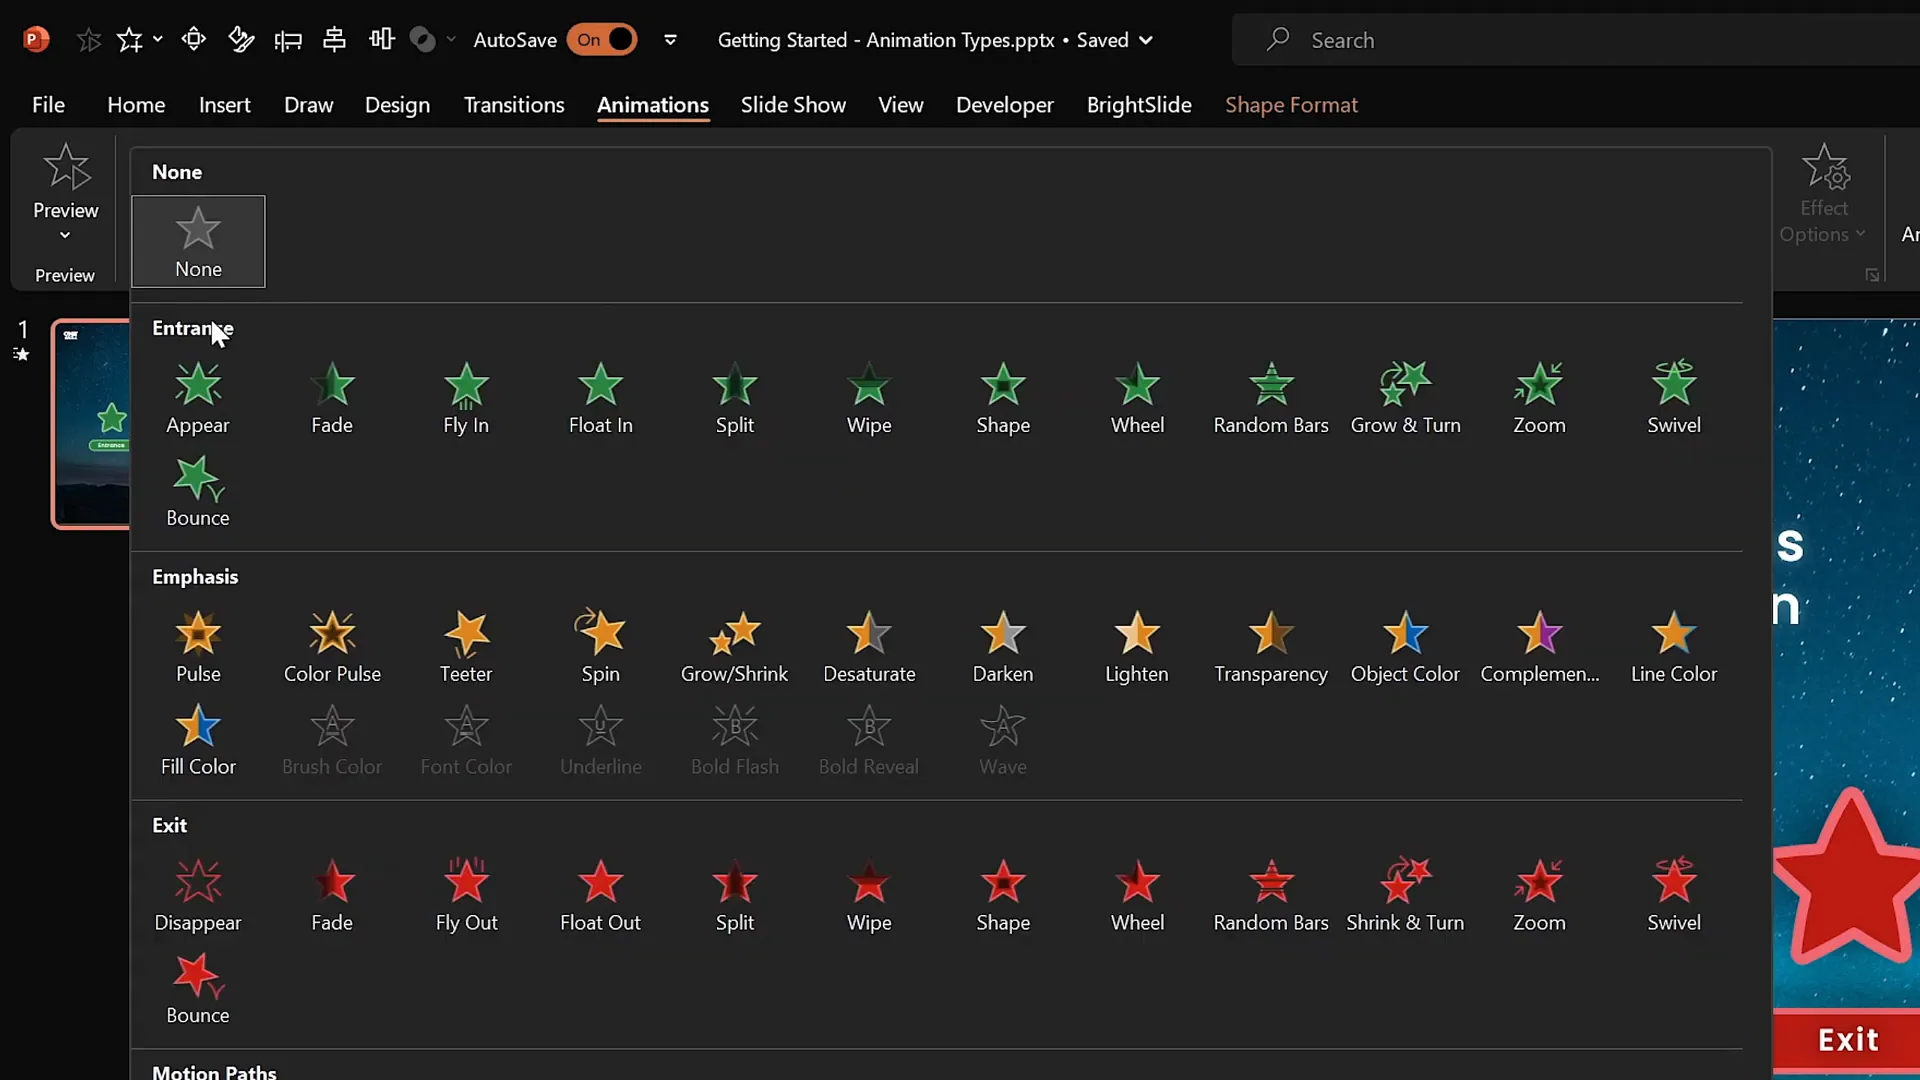
You can animate almost anything on your slide — shapes, text boxes, pictures, videos, and more. To add an animation:
- Select the object you want to animate.
- Go to the Animations tab in the PowerPoint ribbon.
- Choose an animation from the quick list or click the dropdown arrow to see more options.
- For more animations, click on the Add Animation button to add multiple effects without replacing existing ones.
Animations are color-coded:
- Green indicates entrance animations
- Yellow indicates emphasis animations
- Red indicates exit animations
Remember, using the Add Animation button is key when you want to apply multiple animations to the same object. Clicking an animation from the list directly will replace any existing animation on that object.
Animation Options and Settings
Most animations come with additional options. For example, the flying animation allows you to choose the direction from which the object flies in (top, bottom, left, right). You can customize these settings to fit your presentation style.
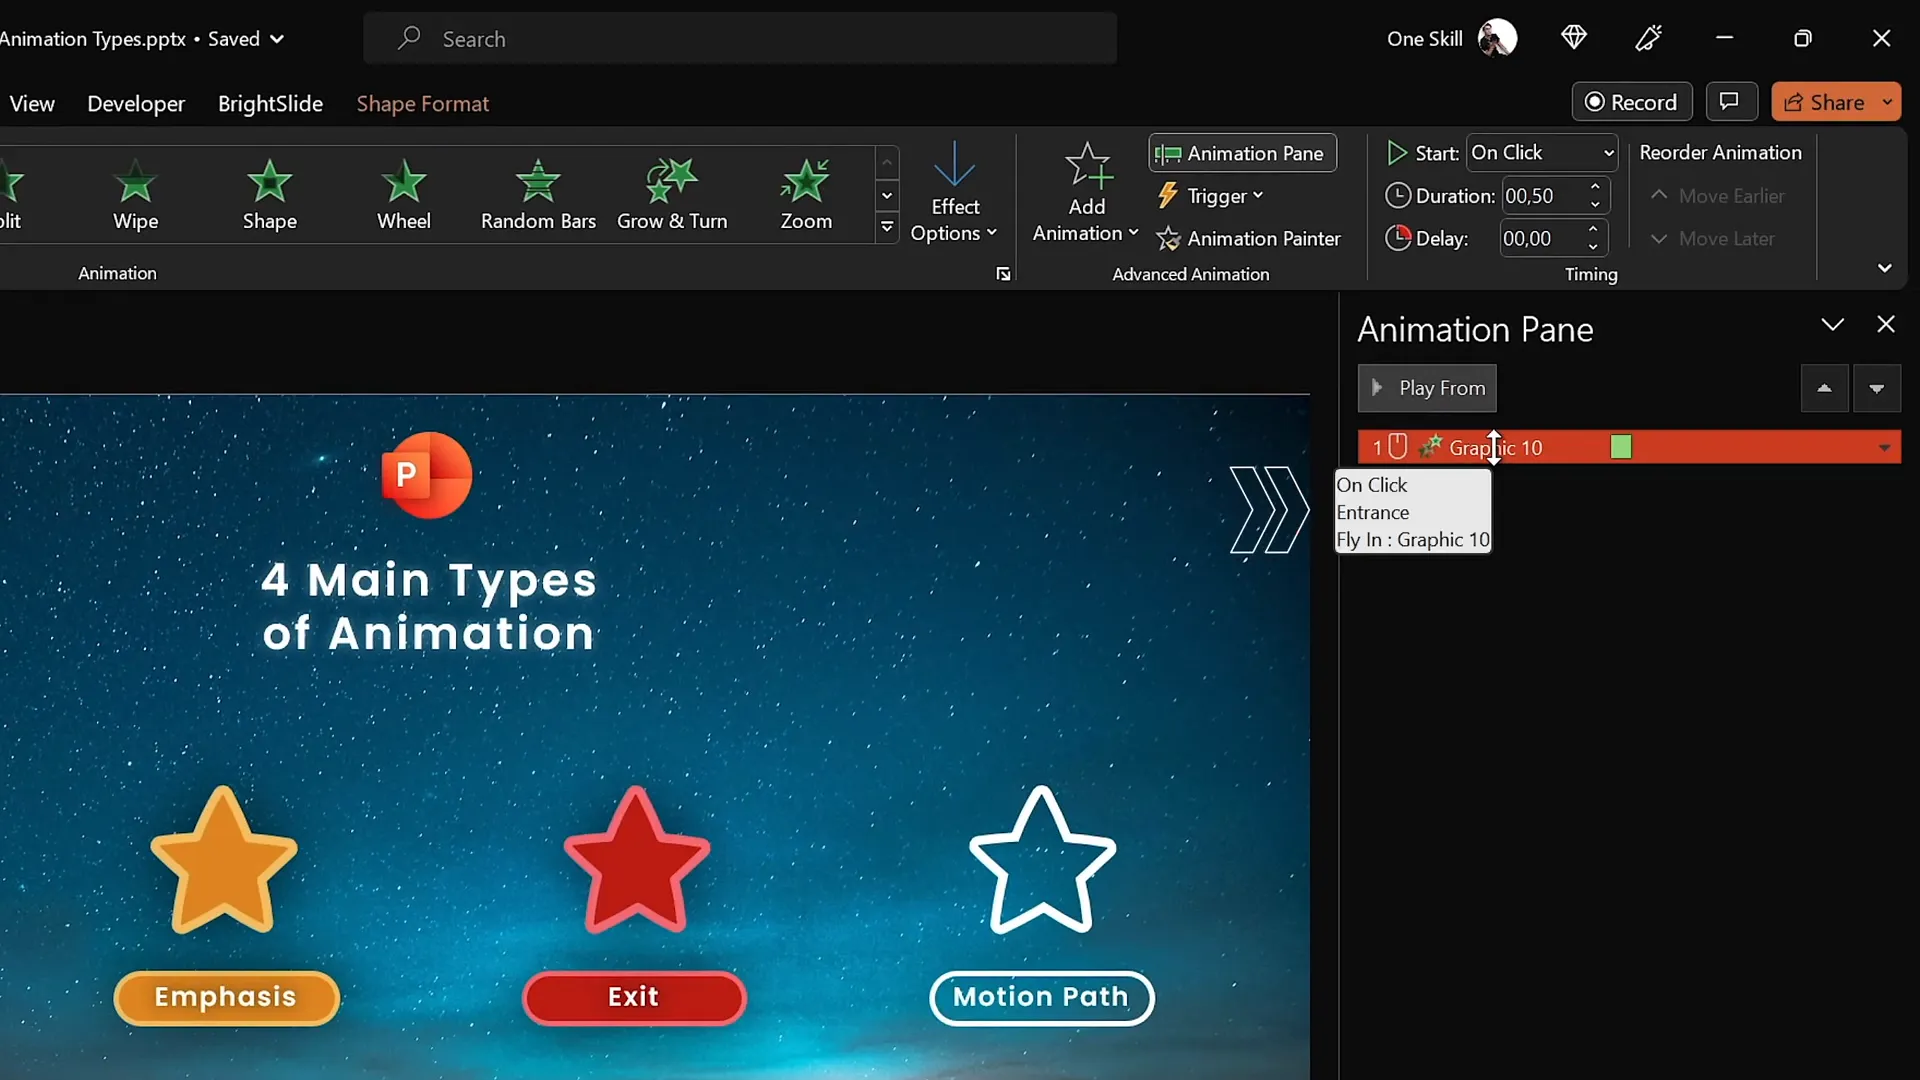
Once animations are applied, use the Animation Pane to manage them. This pane shows all animations on the current slide and lets you:
- See the order of animations
- Change when animations start (on click, with previous, after previous)
- Adjust duration and delay
- Access effect options for more control
For instance, you can set one animation to start automatically after the previous one finishes or wait for a mouse click to trigger the next effect.
Example: Animating Multiple Effects on One Object
Imagine a green star you want to animate flying in and then spinning. Here’s how to do it:
- Apply the flying entrance animation first.
- Click Add Animation and select the spin emphasis animation.
- In the Animation Pane, set the spin animation to start after previous so it plays right after the flying animation.
- Adjust durations to control speed — for example, set spin duration to 1 second for a quicker spin.
This layering creates a smooth, professional animation sequence.
Exit and Motion Path Animations
Next, let’s animate an object to exit the slide. Pick an exit animation like zoom out, which makes the object shrink and disappear.
For motion path animations, select a path like a straight line and adjust the direction. You can drag the red endpoint to set where the object moves.
A handy feature is Auto Reverse, which makes the object travel the path and then return back, creating a looping effect.
Advanced Animation Techniques
PowerPoint animations don’t stop at the basics. Kaspare’s course reveals several advanced animation tools and techniques that unlock even more creative possibilities.
1. Text Animations
Text animations belong to the emphasis category and apply exclusively to text elements. These can animate text color changes, waves, or other visual effects that bring your words to life.
For example, use a wave animation to make text gently rise and fall, adding subtle motion that draws attention without distraction.
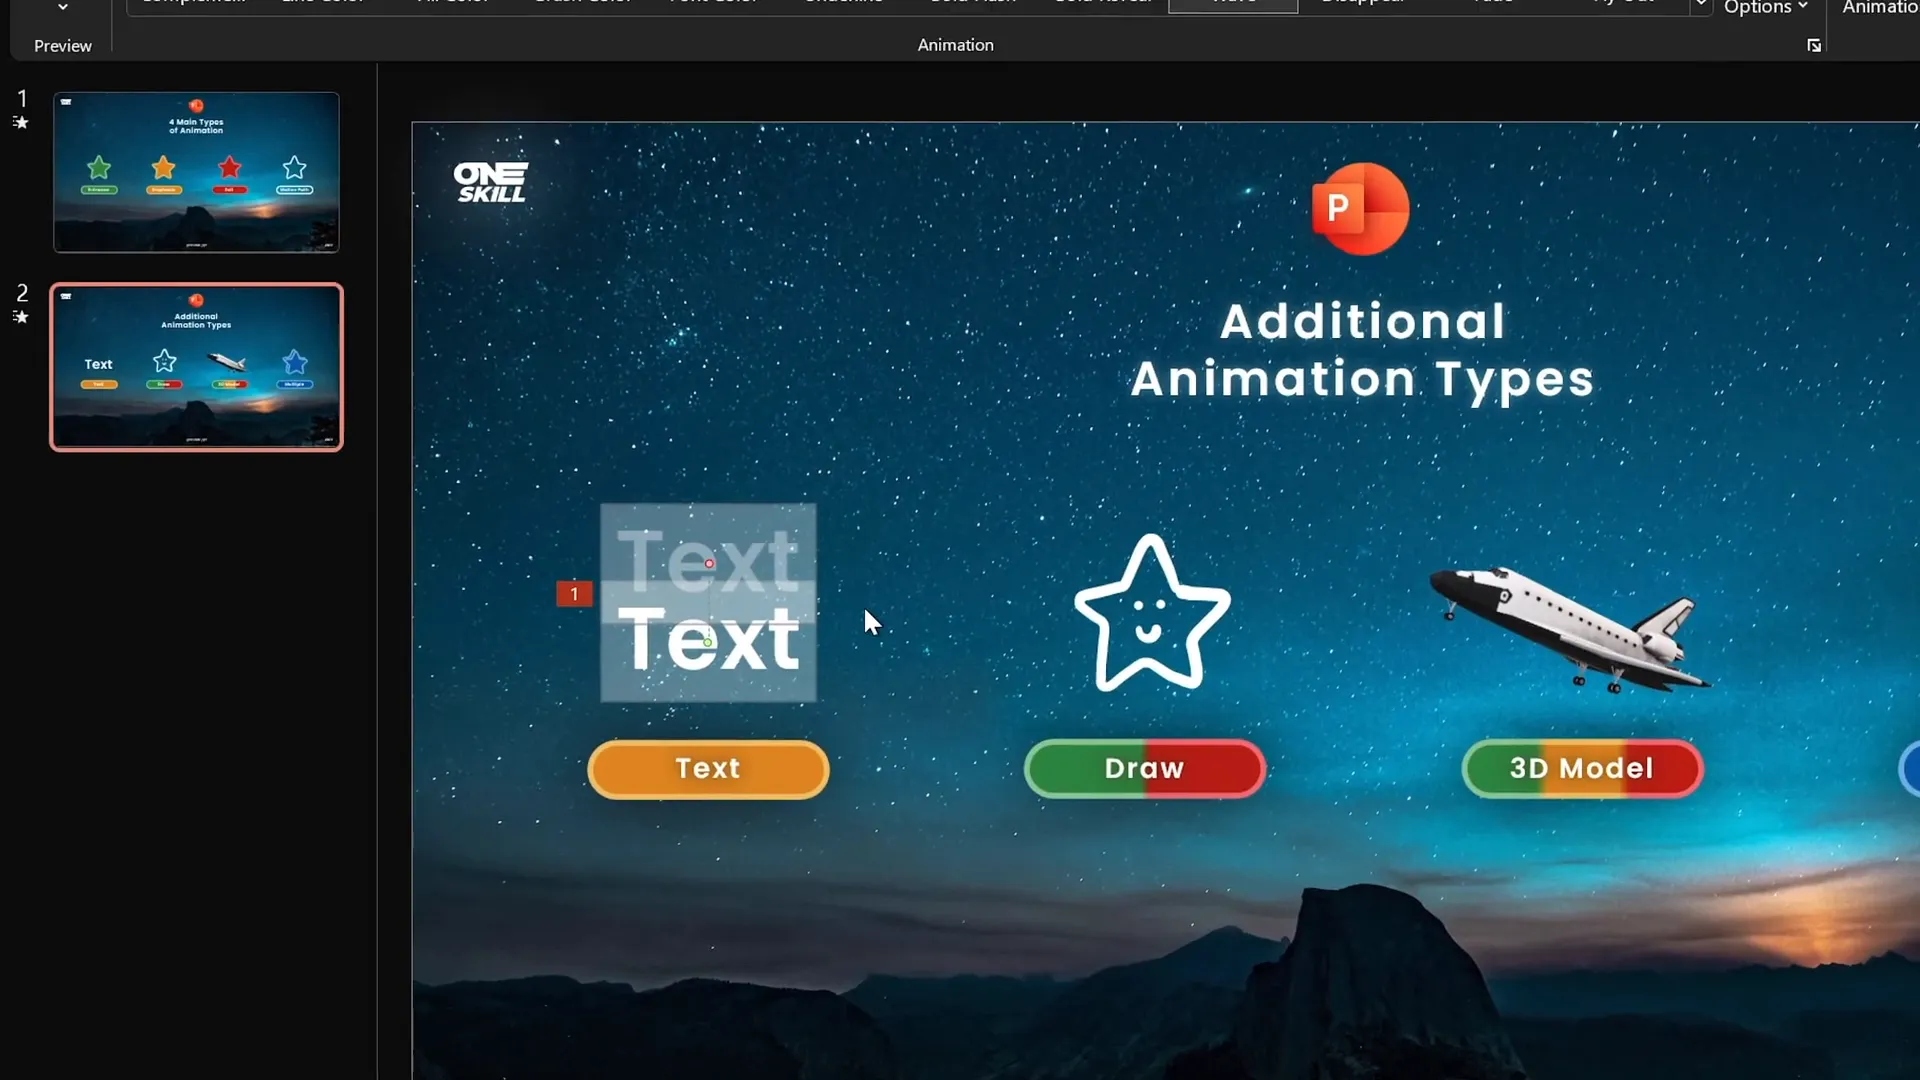
2. Draw Animations
If your version of PowerPoint supports the Draw feature, you can create custom drawings with a pen tool and animate them using replay and rewind effects. This makes your hand-drawn elements appear to be sketched live during the presentation.
Steps to use draw animations:
- Go to the Draw tab.
- Select a pen style and thickness.
- Draw your shape or line.
- Select your drawing and apply the Replay or Rewind animation.
This feature is perfect for adding personal touches or emphasizing key points dynamically.

3. 3D Model Animations
PowerPoint now supports 3D models, enabling you to insert and animate 3D objects with entrance, emphasis, and exit animations designed specifically for them.
For example, a 3D space shuttle model can be animated with a Turntable emphasis animation, causing it to slowly spin. You can adjust the duration to speed up or slow down the spin.
3D animations add a cutting-edge look to your slides and can help illustrate complex ideas more vividly.
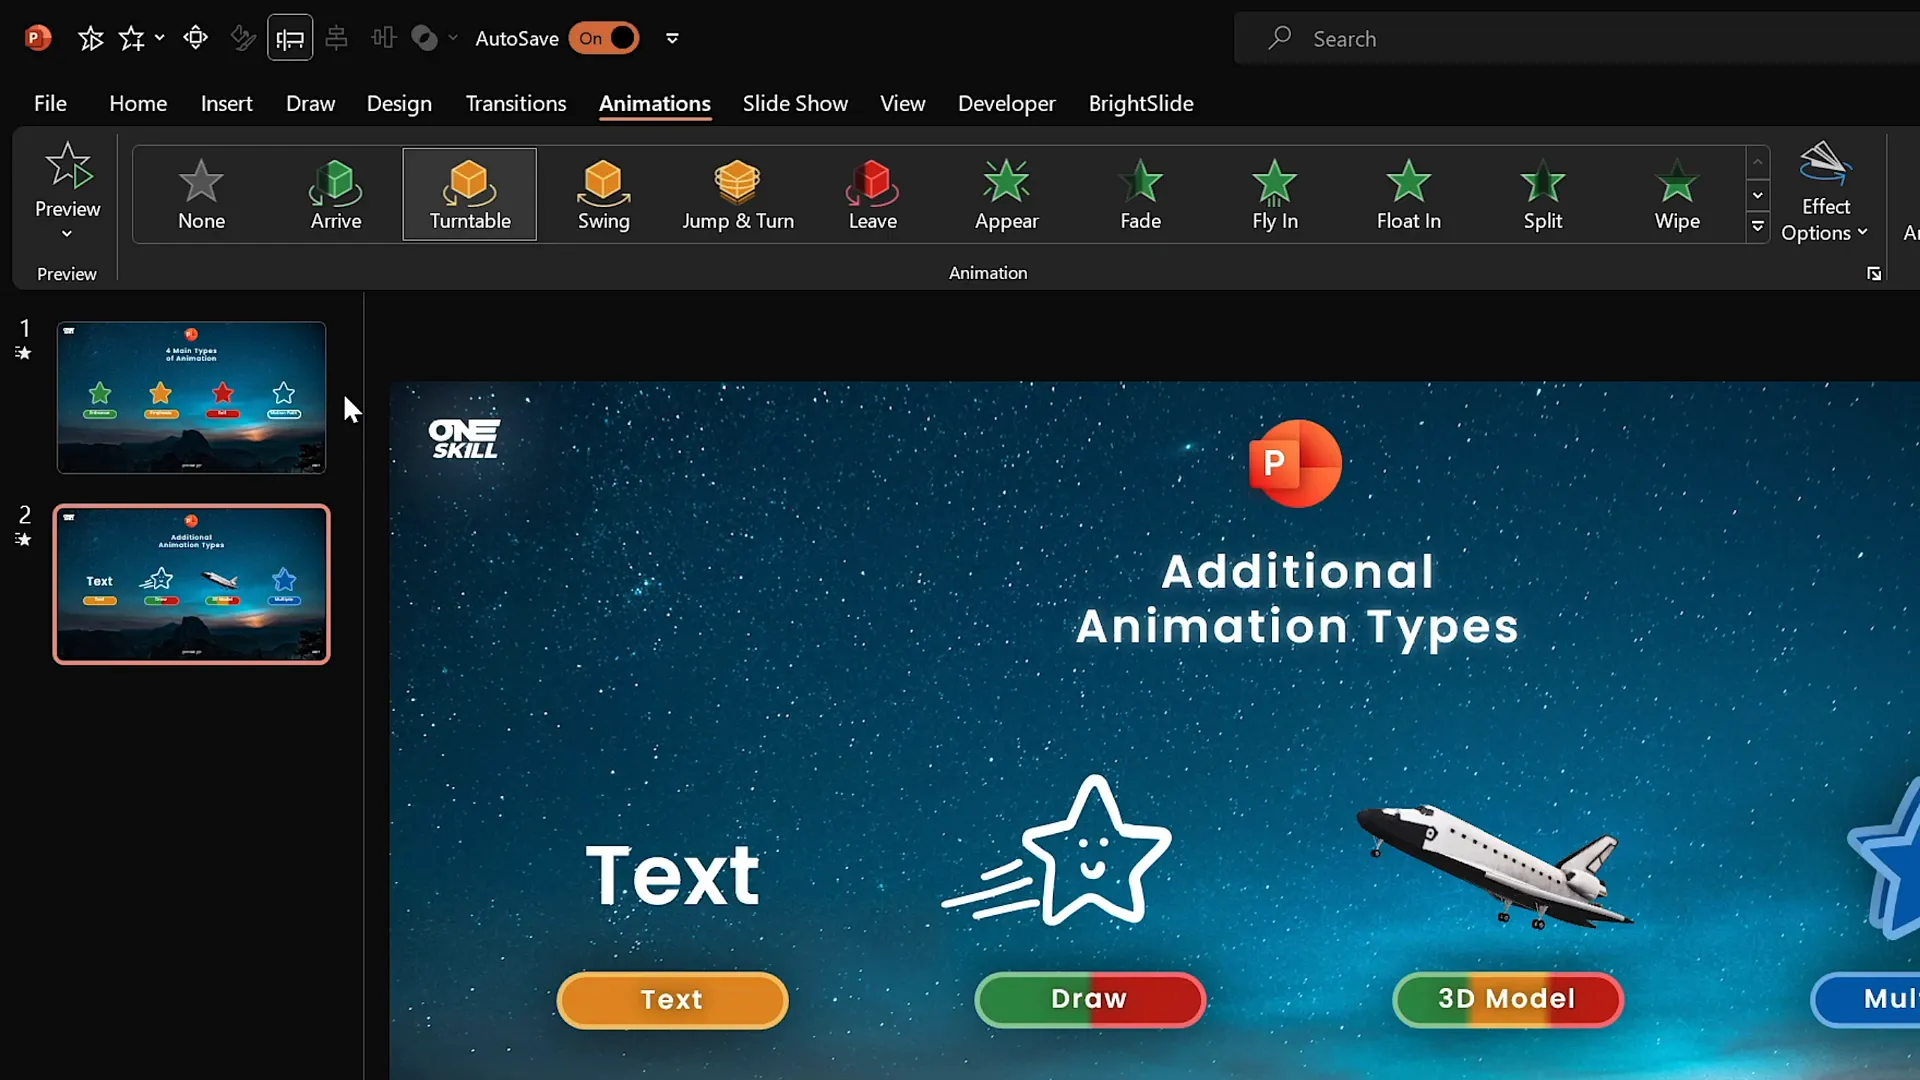
4. Multiple Animations on One Object
Combining animations unlocks custom effects. For example, group two blue stars and apply both a motion path line animation and a spin animation simultaneously.
Steps:
- Select the group and apply a motion path animation moving upward.
- Enable Auto Reverse for a back-and-forth effect.
- Add a spin animation via the Add Animation button.
- Set the spin to start with previous so both animations play together.
- Adjust durations so both animations sync perfectly.
You can also add smoothing to animations with the Smooth End slider, making movements softer and more polished.
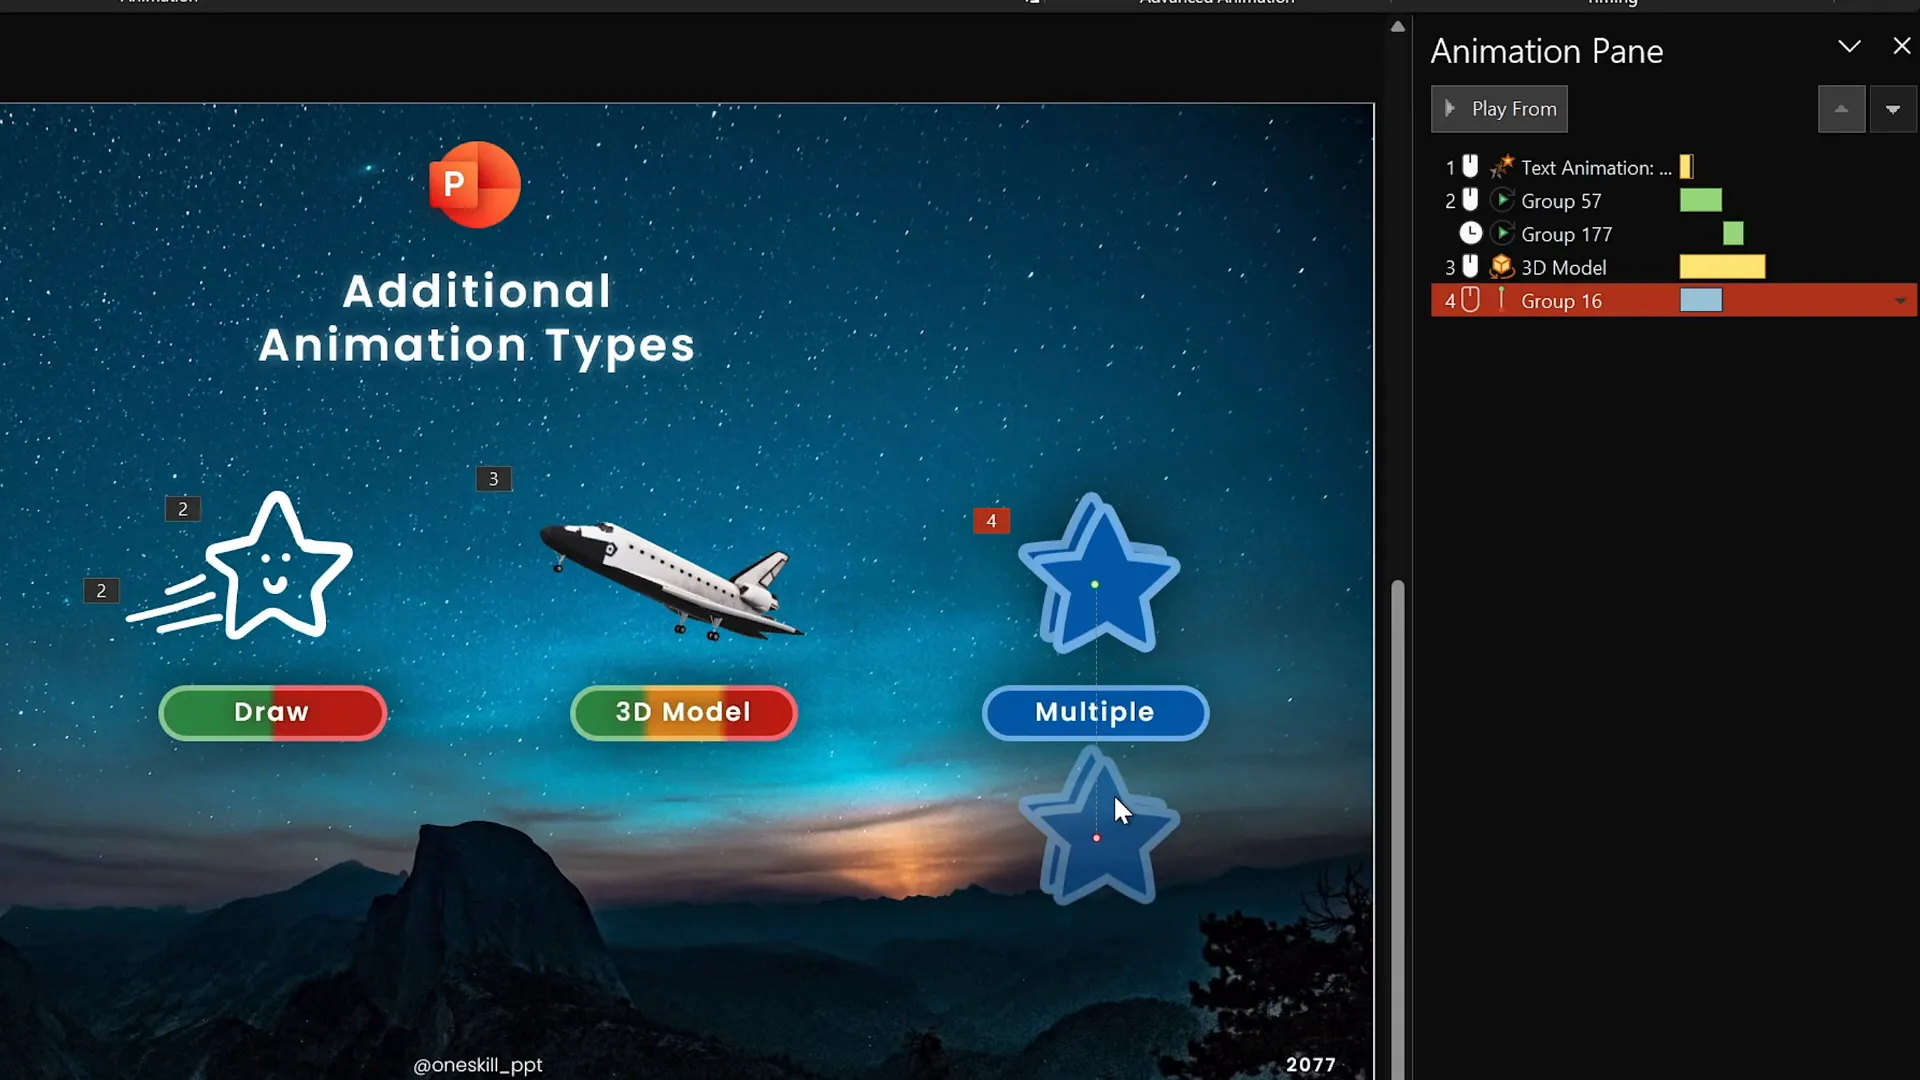
Four More Awesome Ways to Animate in PowerPoint
Kaspare emphasizes that the world of PowerPoint animations is vast and continually expanding. Beyond the four main animation types, these additional methods provide even more creative freedom:
| Animation Method | Description | Ideal For |
|---|---|---|
| Text Animations | Emphasis animations tailored for text elements | Highlighting key words and phrases |
| Draw Animations | Animating hand-drawn shapes and lines with replay and rewind effects | Personalized, sketch-style presentations |
| 3D Model Animations | Specialized animations for 3D objects | Demonstrating products or concepts in 3D |
| Multiple Animations | Combining several animations on one object for custom effects | Complex, layered animations |
These animation methods combined with the fundamentals empower you to create slides that are not only visually stunning but also highly effective in communicating your message.
FAQ About PowerPoint Animations
Q1: What are the best PowerPoint versions for animations?
A: PowerPoint 2019, 2021, and Microsoft 365 versions on Windows are recommended for the best animation features, including the advanced animation timeline. Mac versions support animations but have some limitations.
Q2: Can I apply multiple animations to one object?
A: Yes! Use the Add Animation button to add multiple animations without replacing the existing one. This allows you to combine effects like flying in, spinning, and motion paths on a single object.
Q3: How can I make animations smoother?
A: In the Animation Pane, select your animation and adjust the Smooth Start and Smooth End sliders to create softer, more natural movements.
Q4: What are draw animations and how do I use them?
A: Draw animations allow you to animate hand-drawn shapes created with the Draw tab’s pen tools. You can apply replay to show the drawing being created or rewind to reverse the drawing.
Q5: How do 3D model animations work in PowerPoint?
A: Insert 3D models from stock or external sources, then apply specialized entrance, emphasis, or exit animations designed for 3D objects, such as turntable spins or rotations.
Q6: How do I control when animations start?
A: In the Animation Pane, you can set animations to start:
- On Click: Animation plays when you click the mouse or keyboard.
- With Previous: Animation starts simultaneously with the previous animation.
- After Previous: Animation starts automatically after the previous one finishes.
Q7: Can I preview animations before presenting?
A: Yes, use the Preview button on the Animations tab or play from the Animation Pane to see how animations will look.
Conclusion
Mastering PowerPoint animations transforms your presentations from static slideshows into dynamic storytelling experiences. With the fundamentals of entrance, emphasis, exit, and motion path animations, combined with advanced tools like text animations, draw animations, 3D model animations, and multiple animation layering, you can captivate any audience.
Kaspare’s PowerPoint Animation Mastery approach is designed to guide you step-by-step, building your skills gradually so you can confidently create any animation you imagine. Whether you’re a designer, educator, entrepreneur, or student, these animation techniques will elevate your presentations and help communicate your message with impact.
Remember, great animations complement your content—they don’t overpower it. Use them thoughtfully to highlight key points, illustrate ideas, and keep your audience engaged.
Ready to start creating your own incredible PowerPoint animations? Dive into the tutorials, practice regularly, and watch your presentations come alive!
For more in-depth lessons, check out Kaspare’s PowerPoint Animation Mastery course and use the coupon code ONESKILL100 for $100 off (valid until November 1st). You can also watch free introductory lessons linked in the course description.
Happy animating, my friends!


