
Welcome to an exciting journey into the world of presentation design! In this comprehensive tutorial, you will learn how to create stunning glossy circles using Microsoft PowerPoint and bring them to life with smooth, eye-catching animations. Inspired by the artistic works of Kitka from Adobe Stock, this guide breaks down the process step-by-step, making it accessible whether you’re a beginner or looking to polish your design skills.
By the end of this article, you will have mastered the technique to design realistic glossy circles with vibrant colors, subtle shadows, and delicate highlights. Plus, you’ll discover how to animate these shapes using the Morph transition and motion paths to add dynamic flair to your presentations. Let’s dive in!
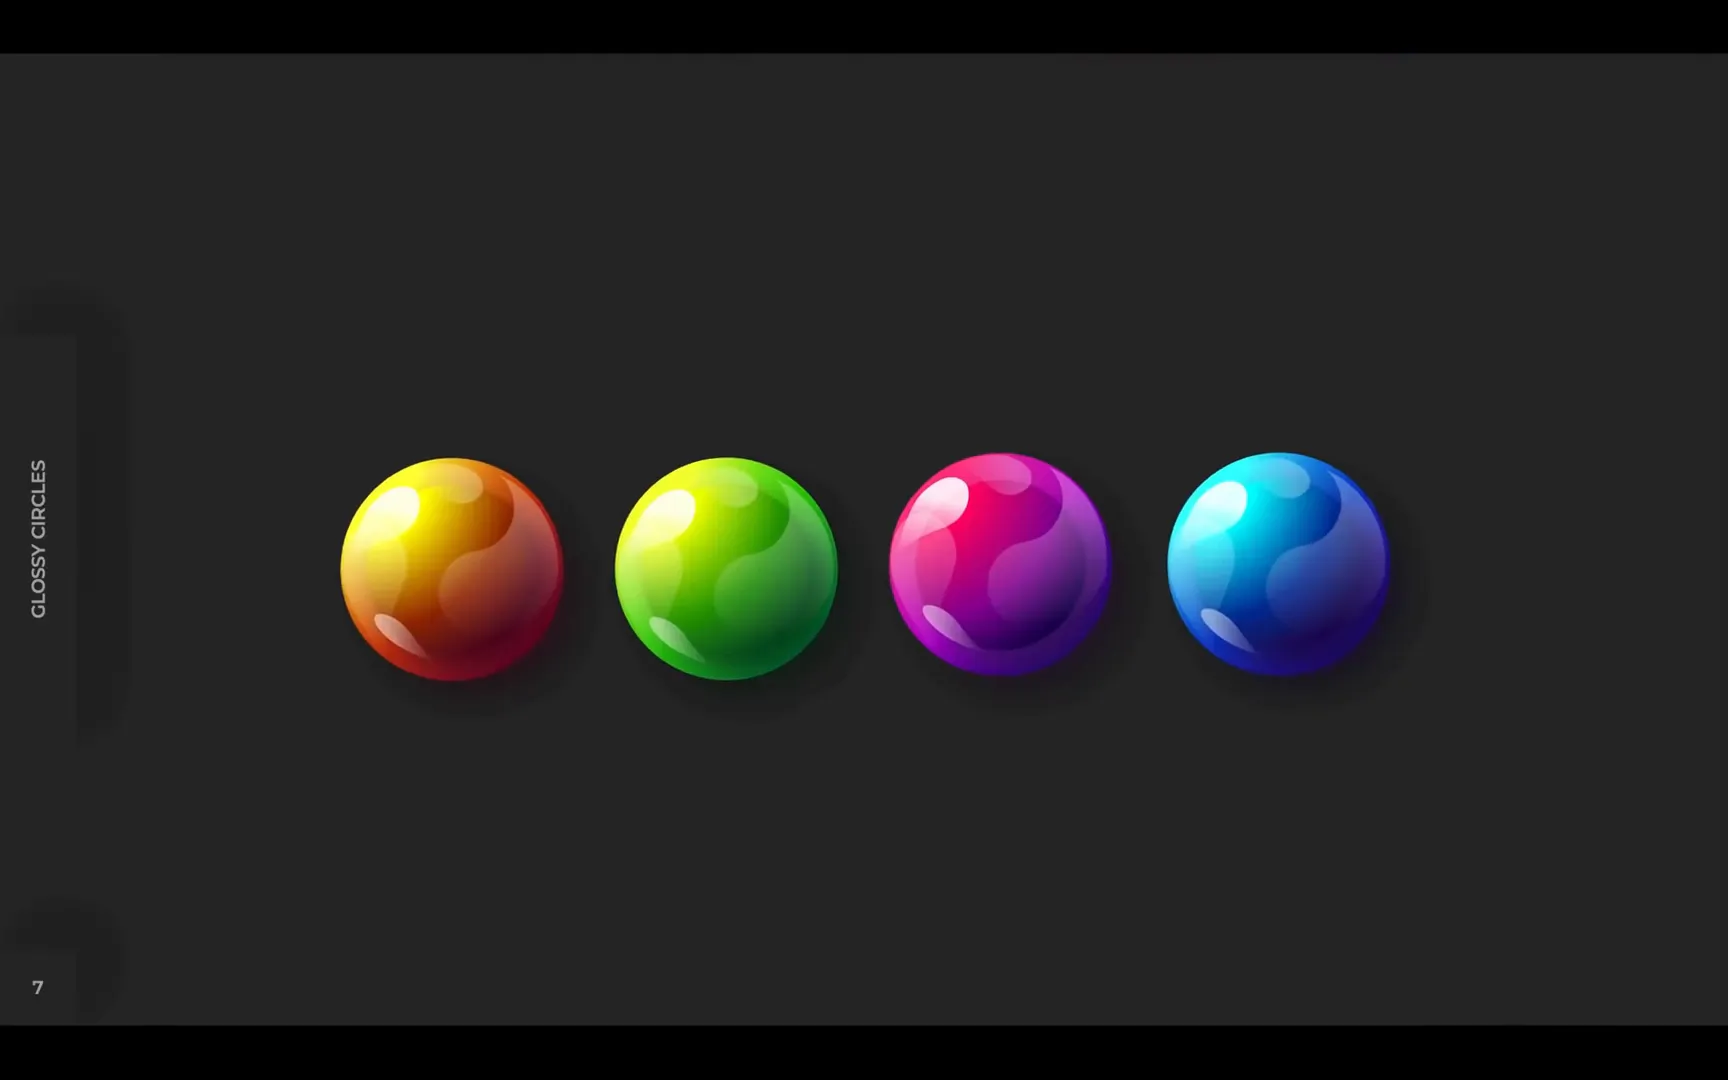
Table of Contents
- Why Glossy Circles? Inspiration Behind the Design
- Setting Up Your PowerPoint Environment
- Breaking Down Glossy Circles: Understanding the Layers
- Step-by-Step Guide: Creating the Base Glossy Circle
- Creating Realistic Highlights
- Animating Glossy Circles: Bringing Your Design to Life
- Tips for Mastering Glossy Circle Designs in PowerPoint
- Frequently Asked Questions (FAQ)
- Conclusion
Why Glossy Circles? Inspiration Behind the Design
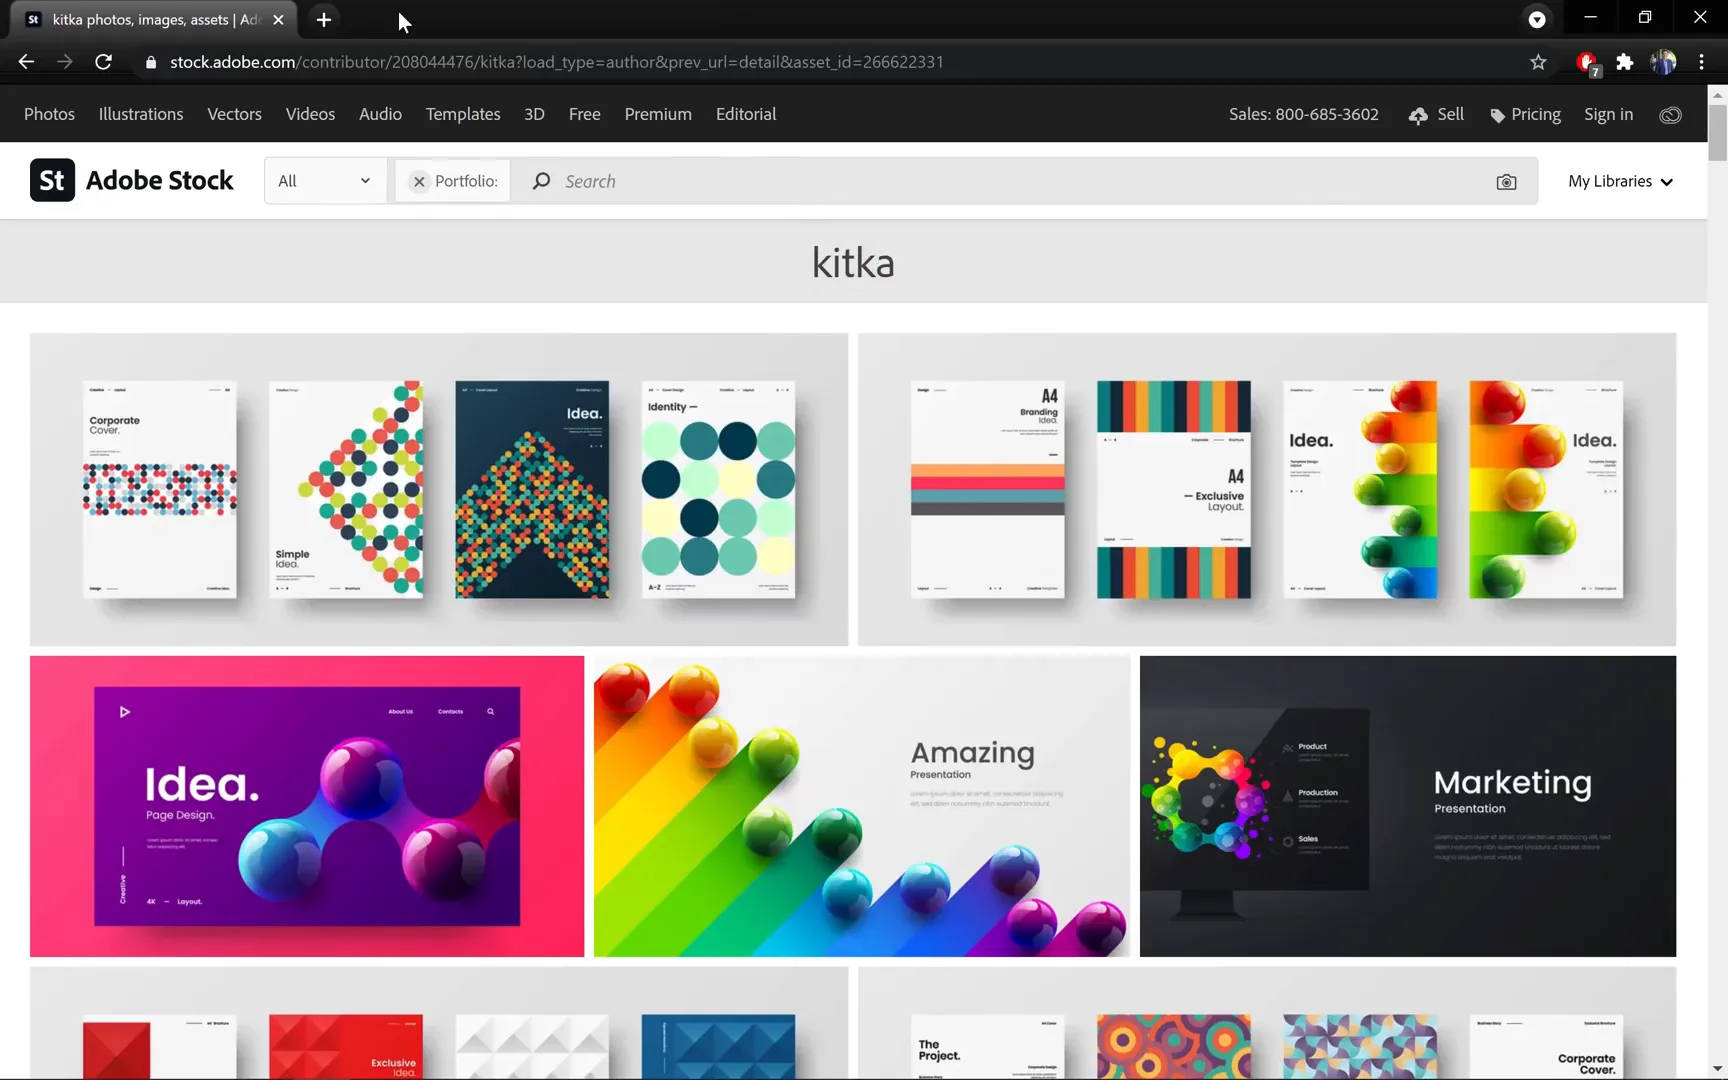
The inspiration for these glossy circles comes from the creative works of Kitka, a talented artist featured on Adobe Stock. Kitka’s designs showcase beautiful, glossy shapes that catch the eye with their depth and shine. When I first saw these circles, I wondered if I could replicate something similar using PowerPoint’s native tools. The answer was a resounding yes!
Glossy circles are a fantastic design element because they add a modern, polished look to your slides. Their subtle gradients and highlights create a sense of depth and realism, making your presentation visually appealing without overwhelming your content.
If you want to explore Kitka’s amazing portfolio, you can find it on Adobe Stock (link provided in the video description). Drawing inspiration from professional designers helps us push the boundaries of what’s possible in PowerPoint.
Setting Up Your PowerPoint Environment
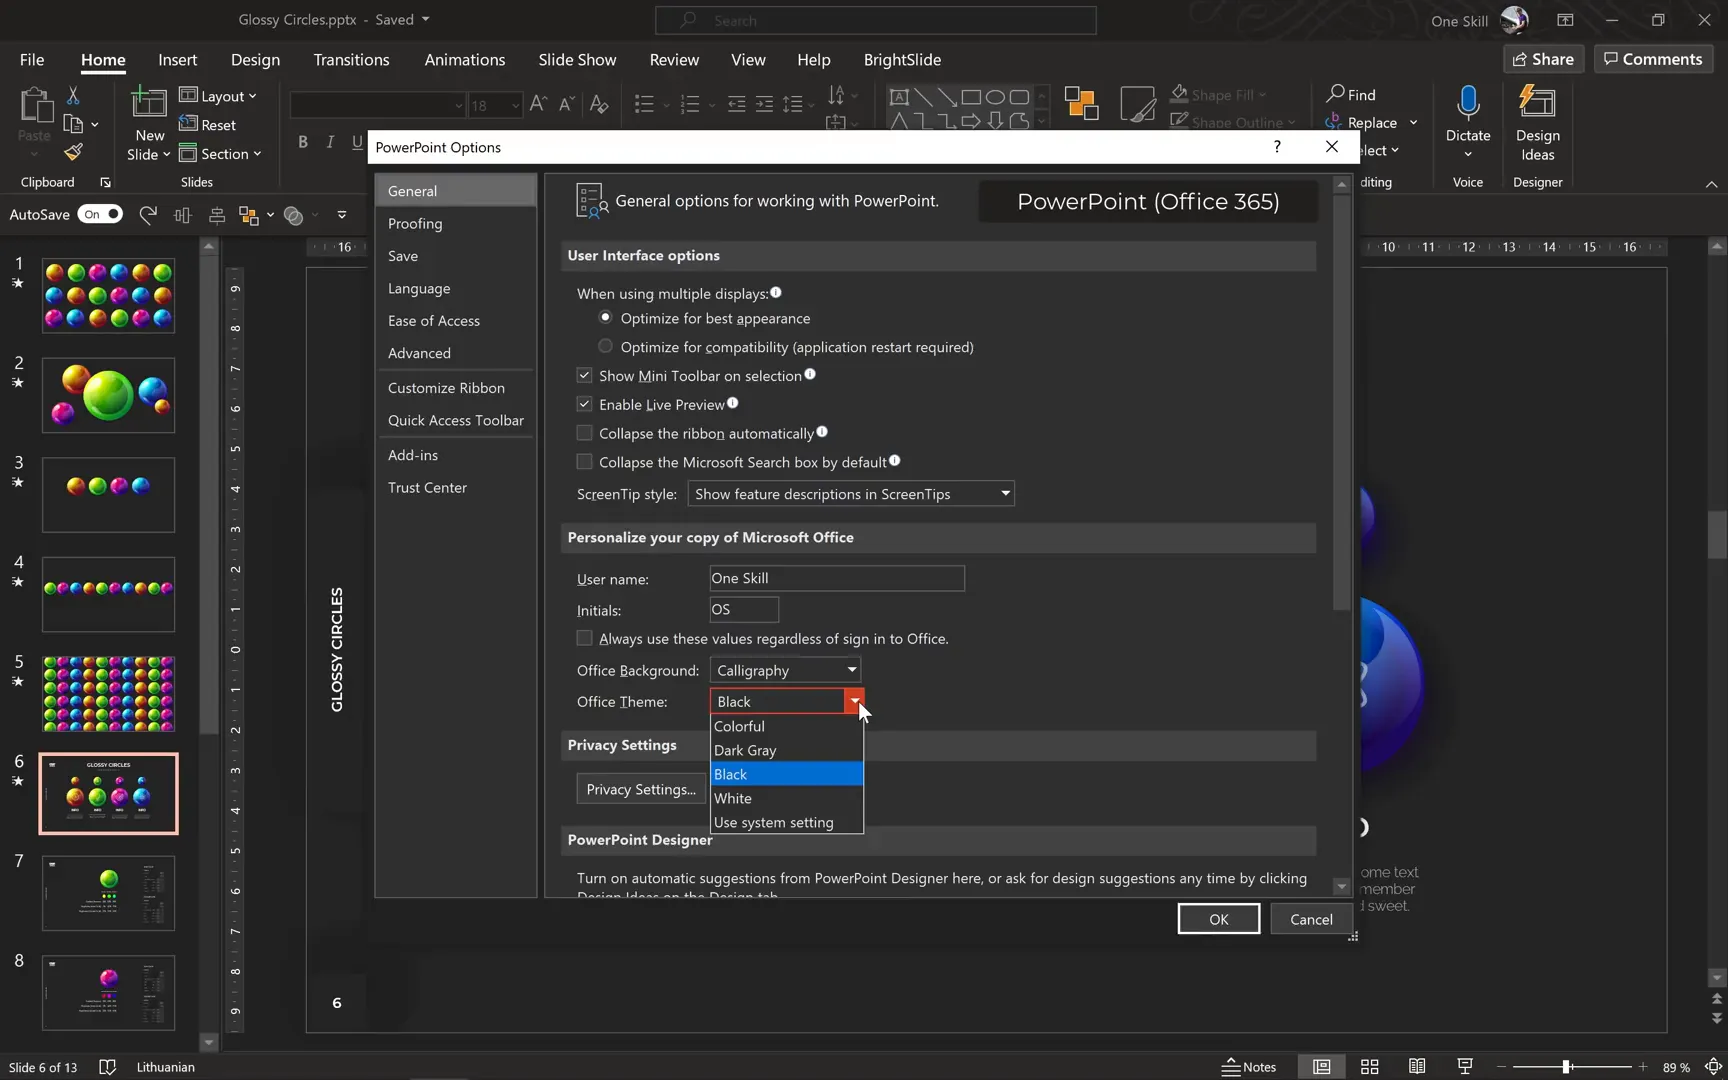
Before we start crafting our glossy circles, it’s helpful to set up your PowerPoint environment to enhance your workflow and visual comfort. One quick tip is to switch PowerPoint’s theme to dark mode, which not only looks sleek but also reduces eye strain during long design sessions.
To change your PowerPoint theme to black:
- Go to File > Options.
- In the General tab, find Office Theme.
- Select Black from the dropdown menu.
I’m using Microsoft PowerPoint 365 for Windows, which supports this feature seamlessly. A dark background makes it easier to spot subtle gradients and highlights on your shapes.
Breaking Down Glossy Circles: Understanding the Layers
The glossy circles are composed of multiple layers that work together to create the final polished look. Understanding these layers is crucial before we start designing.
Each glossy circle consists of three main layers:
- Highlights: These are the bright spots that simulate light reflection, giving the illusion of glossiness.
- Inner Circle: A smaller circle inside the main shape, usually darker and with a radial gradient to add depth.
- Outer Circle: The larger base circle, typically brighter with a radial gradient and subtle shadows.
Both the inner and outer circles use radial gradients made from three carefully selected colors. The outer circle is brighter, while the inner circle is darker, achieved by adjusting the brightness of the colors used.
Additionally, subtle shadows enhance the three-dimensional effect of the circles. These shadows are applied differently on the inner and outer circles to maintain visual balance.
Step-by-Step Guide: Creating the Base Glossy Circle
Let’s jump into PowerPoint and start creating our glossy circle from scratch. Follow along with these detailed instructions:
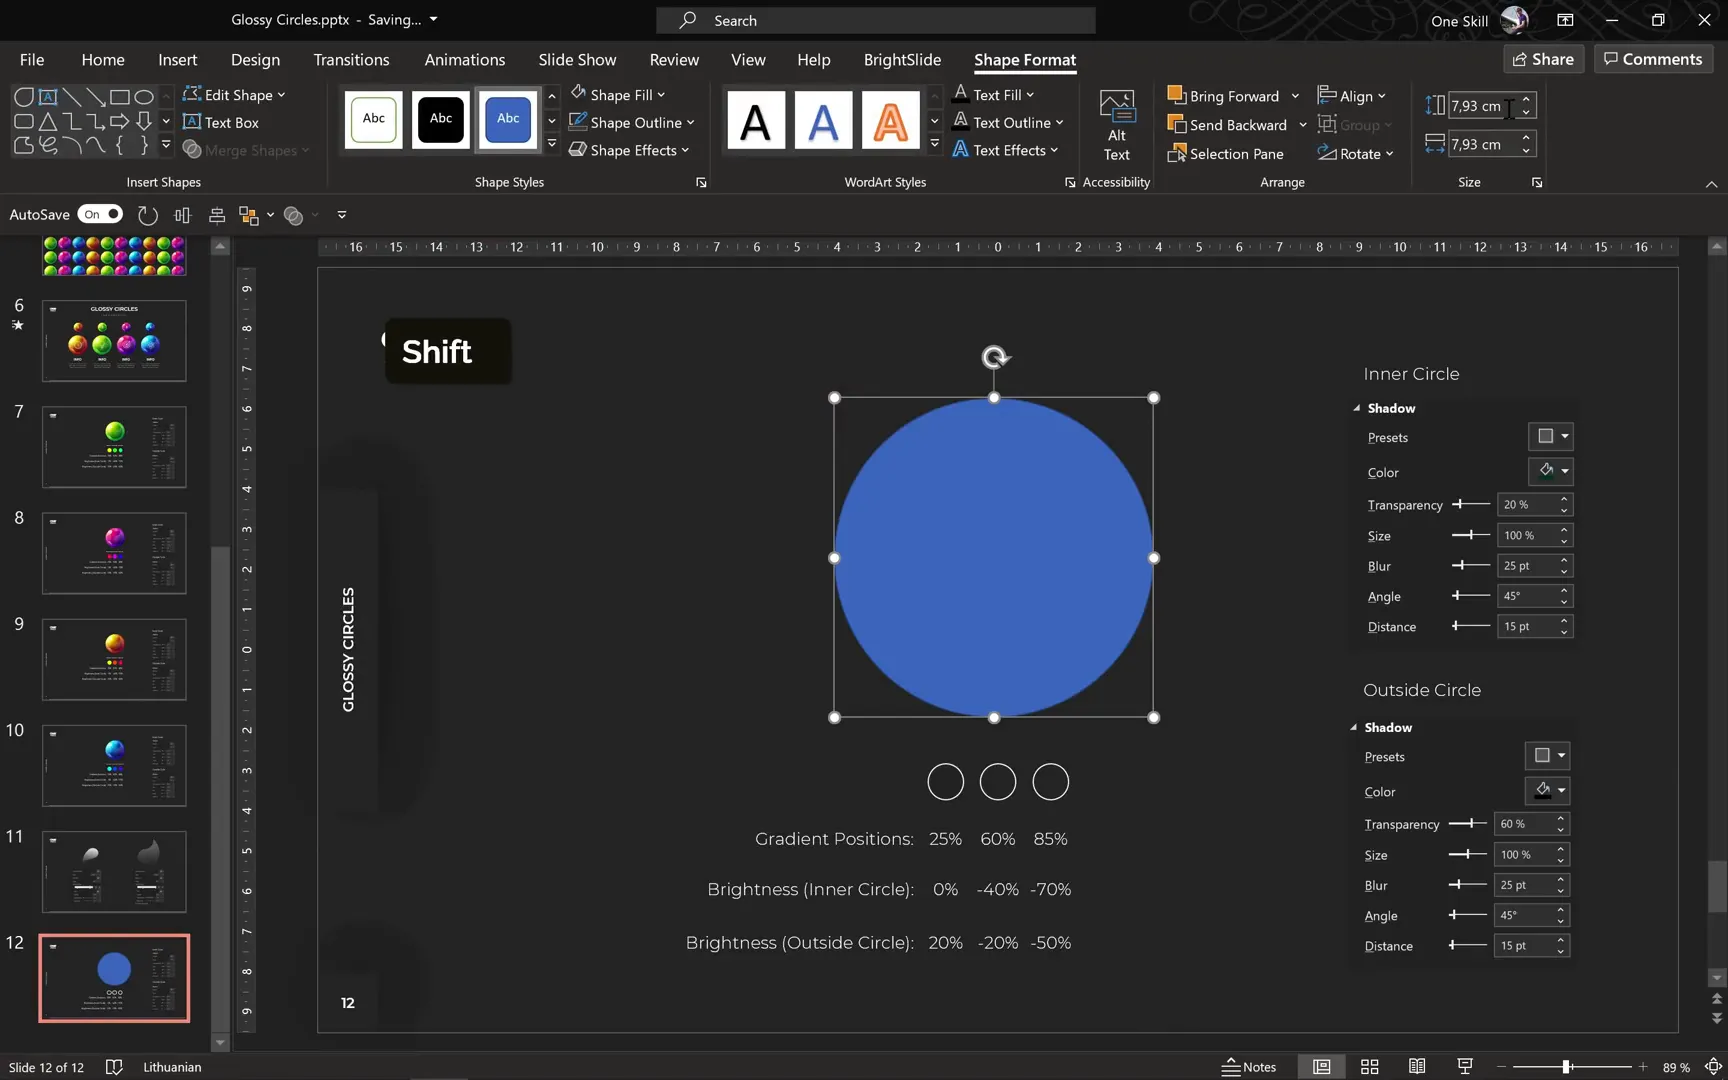
1. Insert the Outer Circle
- Go to Insert > Shapes and select the Oval (circle) tool.
- Hold down the Shift key to draw a perfect circle.
- Set the dimensions to 10 cm by 10 cm for consistency.
- Center the circle on your slide using the Align options.
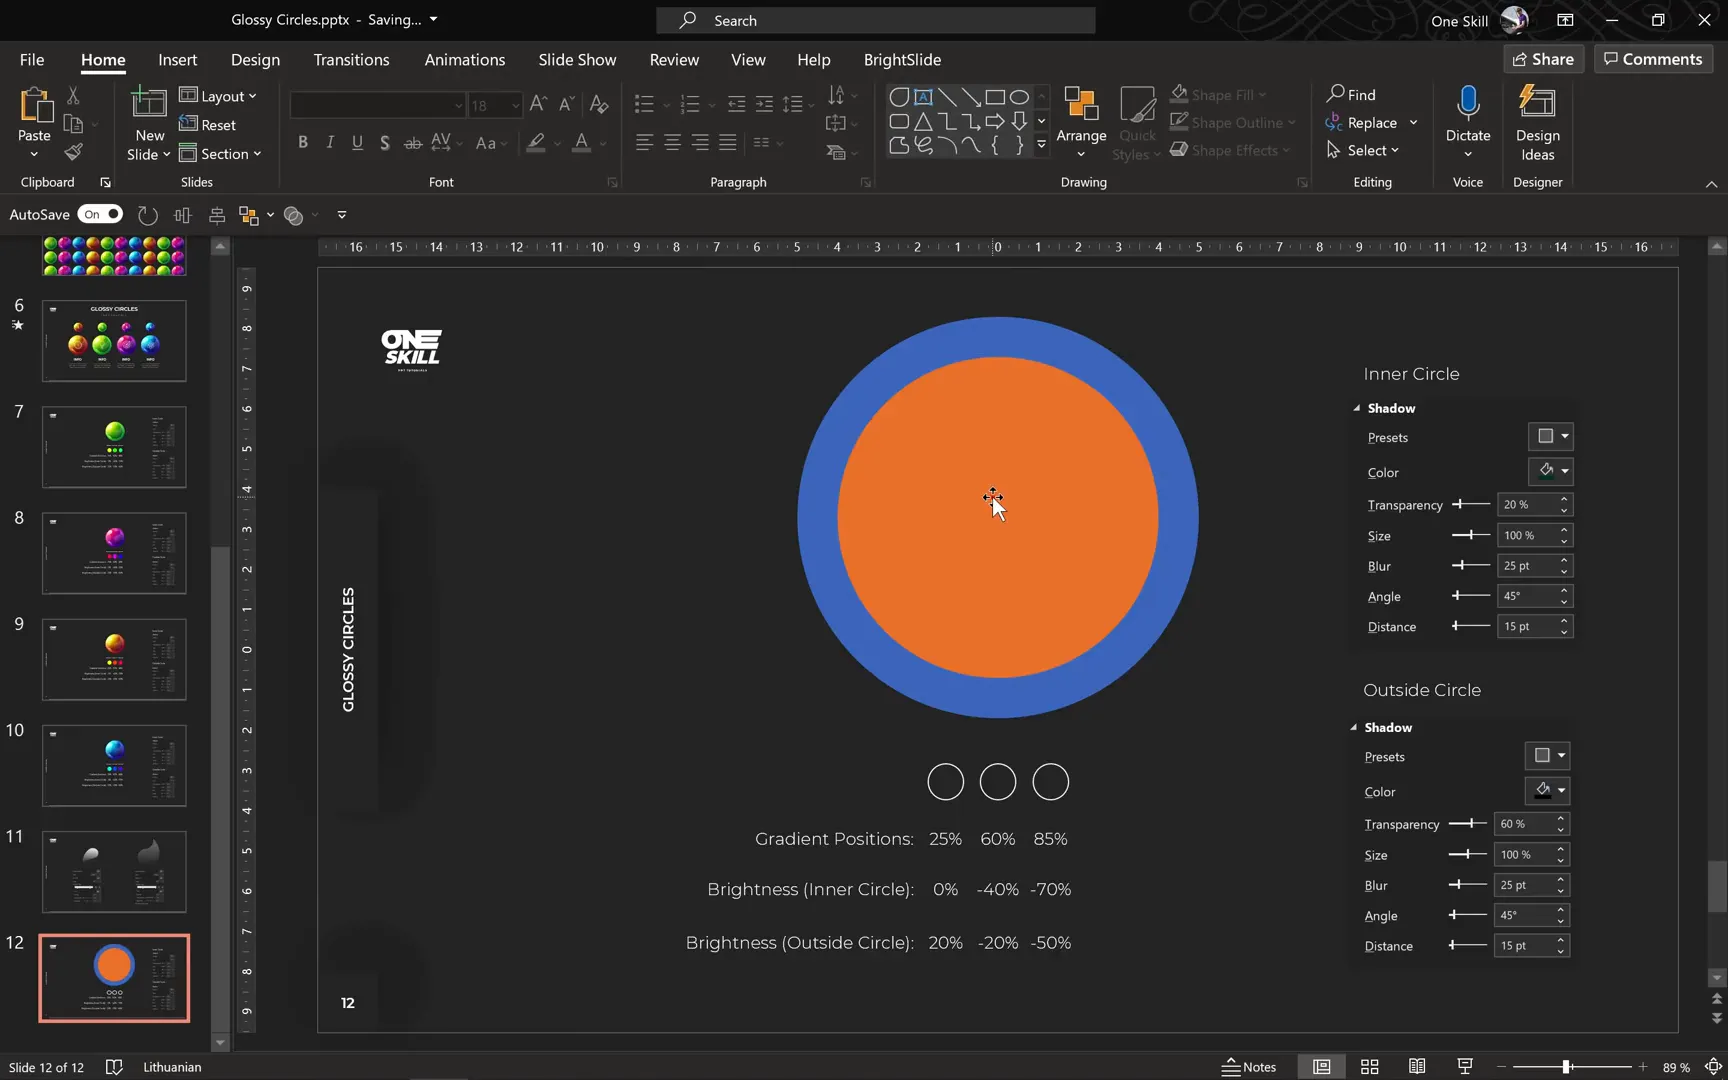
2. Insert the Inner Circle
- Duplicate the outer circle (Ctrl + D).
- Change the fill color of this duplicate to orange (as a placeholder for now).
- Resize it to 8 cm by 8 cm to fit inside the larger circle.
- Align it perfectly centered over the outer circle.
- Remove the outlines from both circles for a clean look.
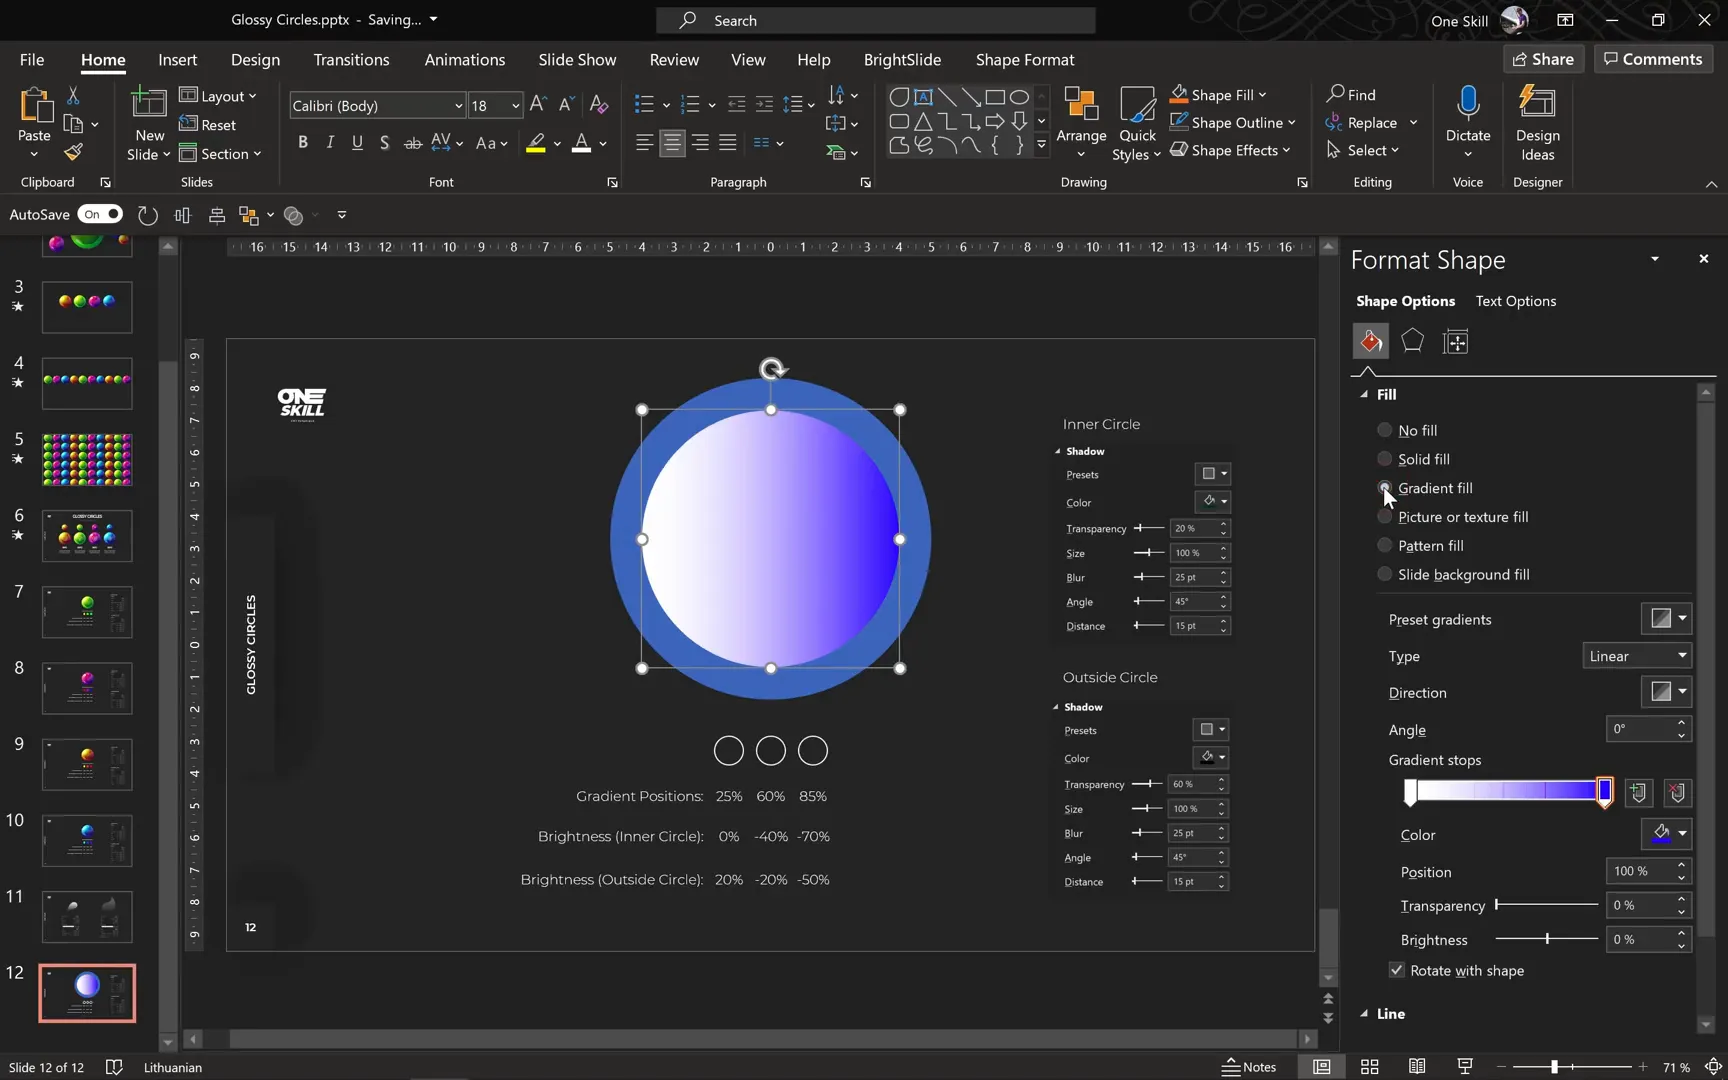
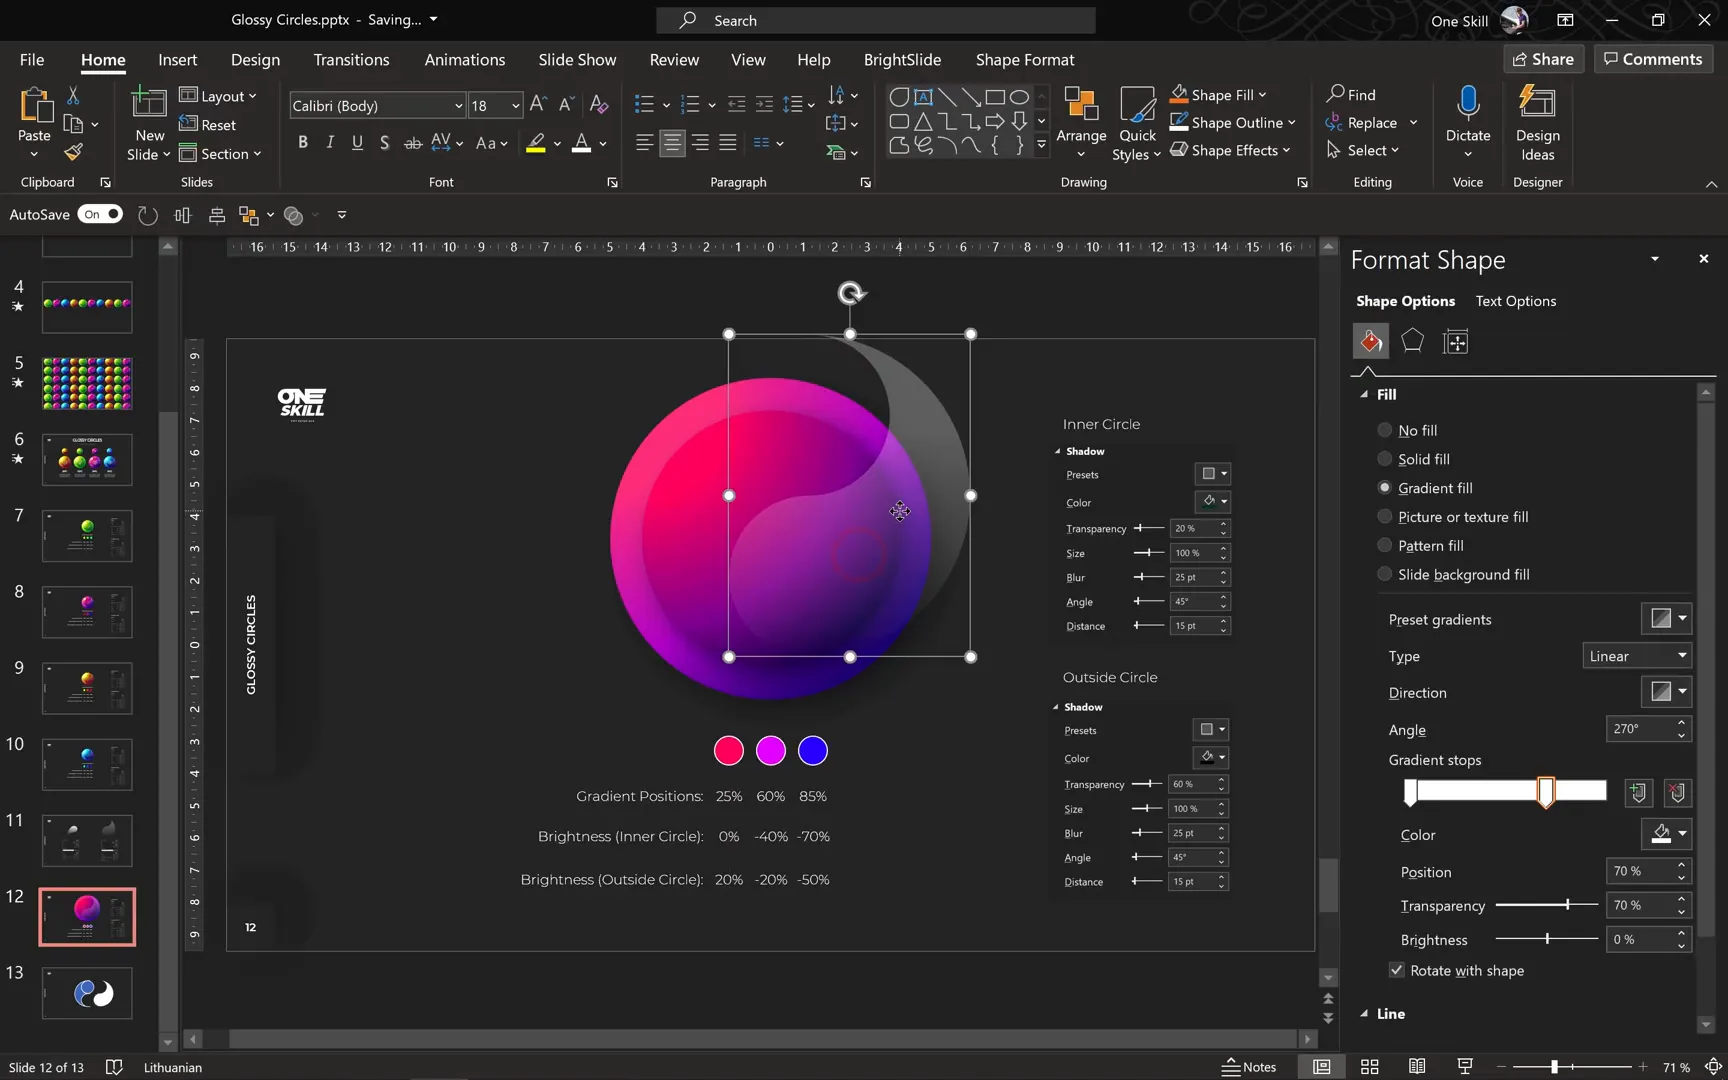
3. Apply Radial Gradient Fill
Both circles will have a radial gradient fill consisting of three color stops. Here’s how to apply this effect:
- Select the inner (orange) circle.
- Right-click and choose Format Shape.
- Under Fill, select Gradient Fill.
- Choose Radial as the gradient type.
- Set the gradient direction to From Top Left Corner (or a similar direction that suits your design).
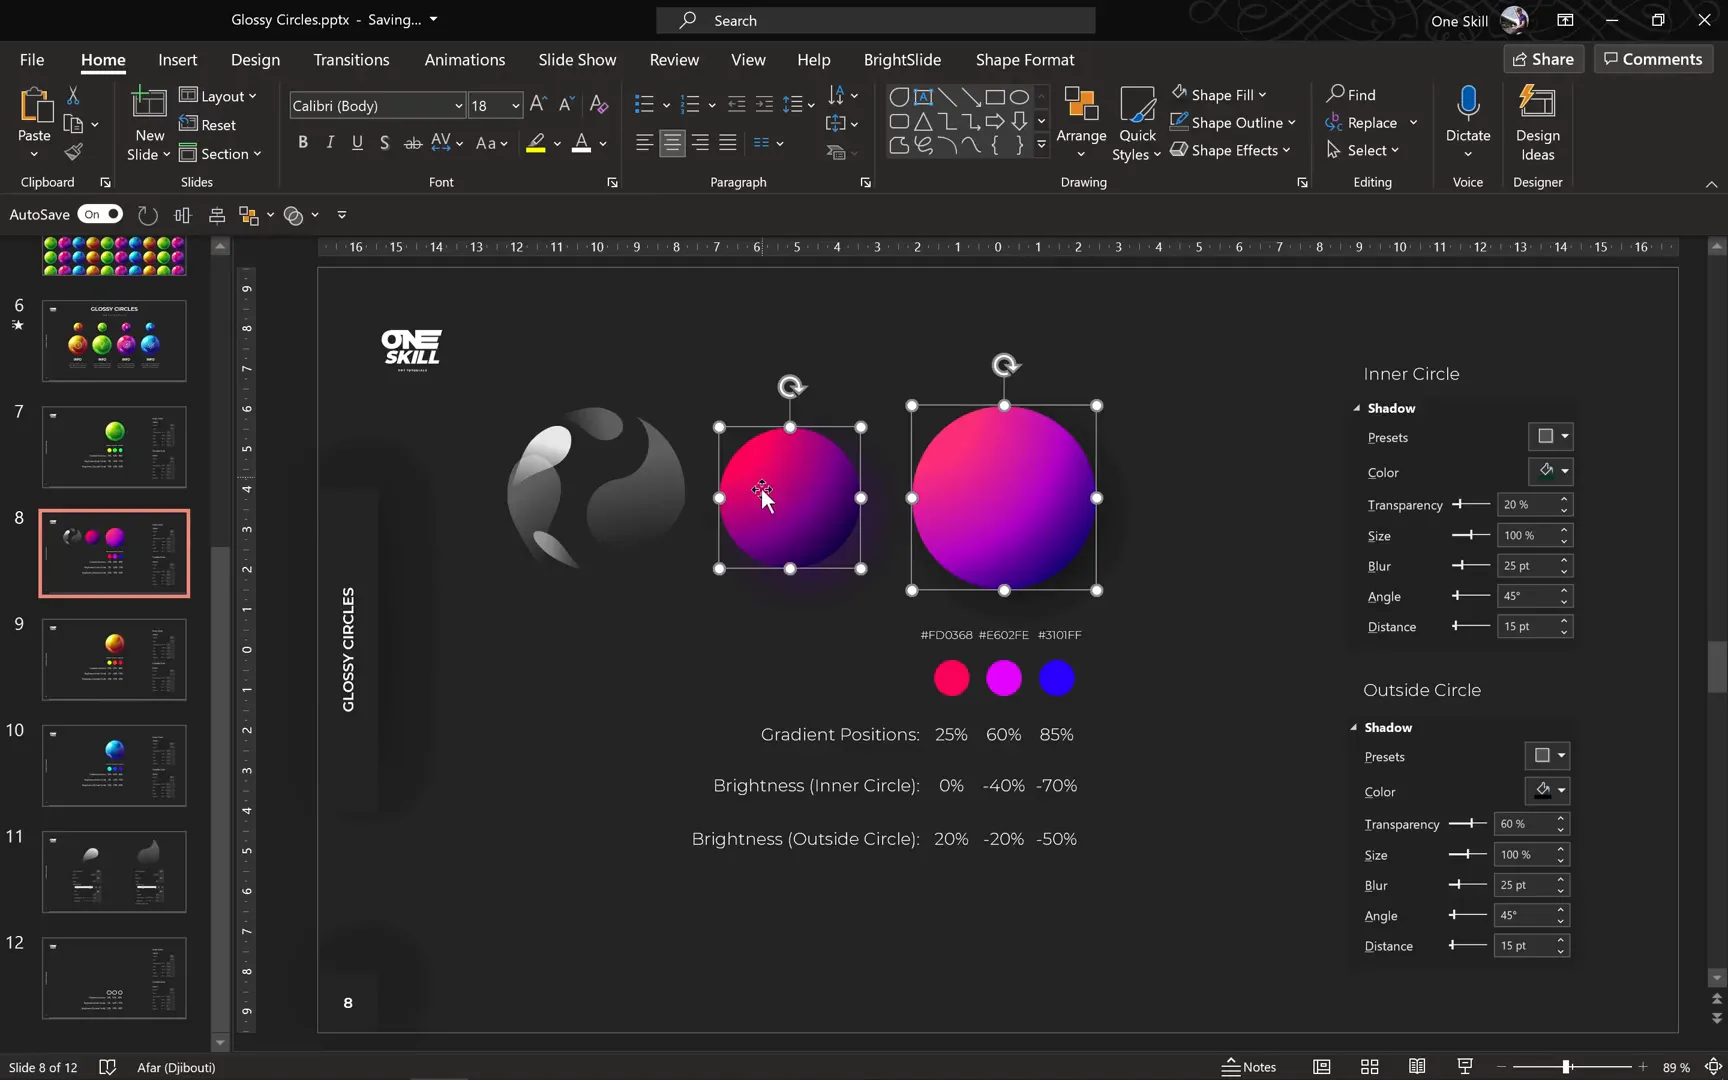
- Add three color stops positioned at 25%, 60%, and 85% respectively.
4. Choosing Colors Using HSL Model
A key part of achieving the glossy look is selecting harmonious colors with the right hue, saturation, and luminosity. PowerPoint’s HSL (Hue, Saturation, Luminosity) color model is perfect for this.
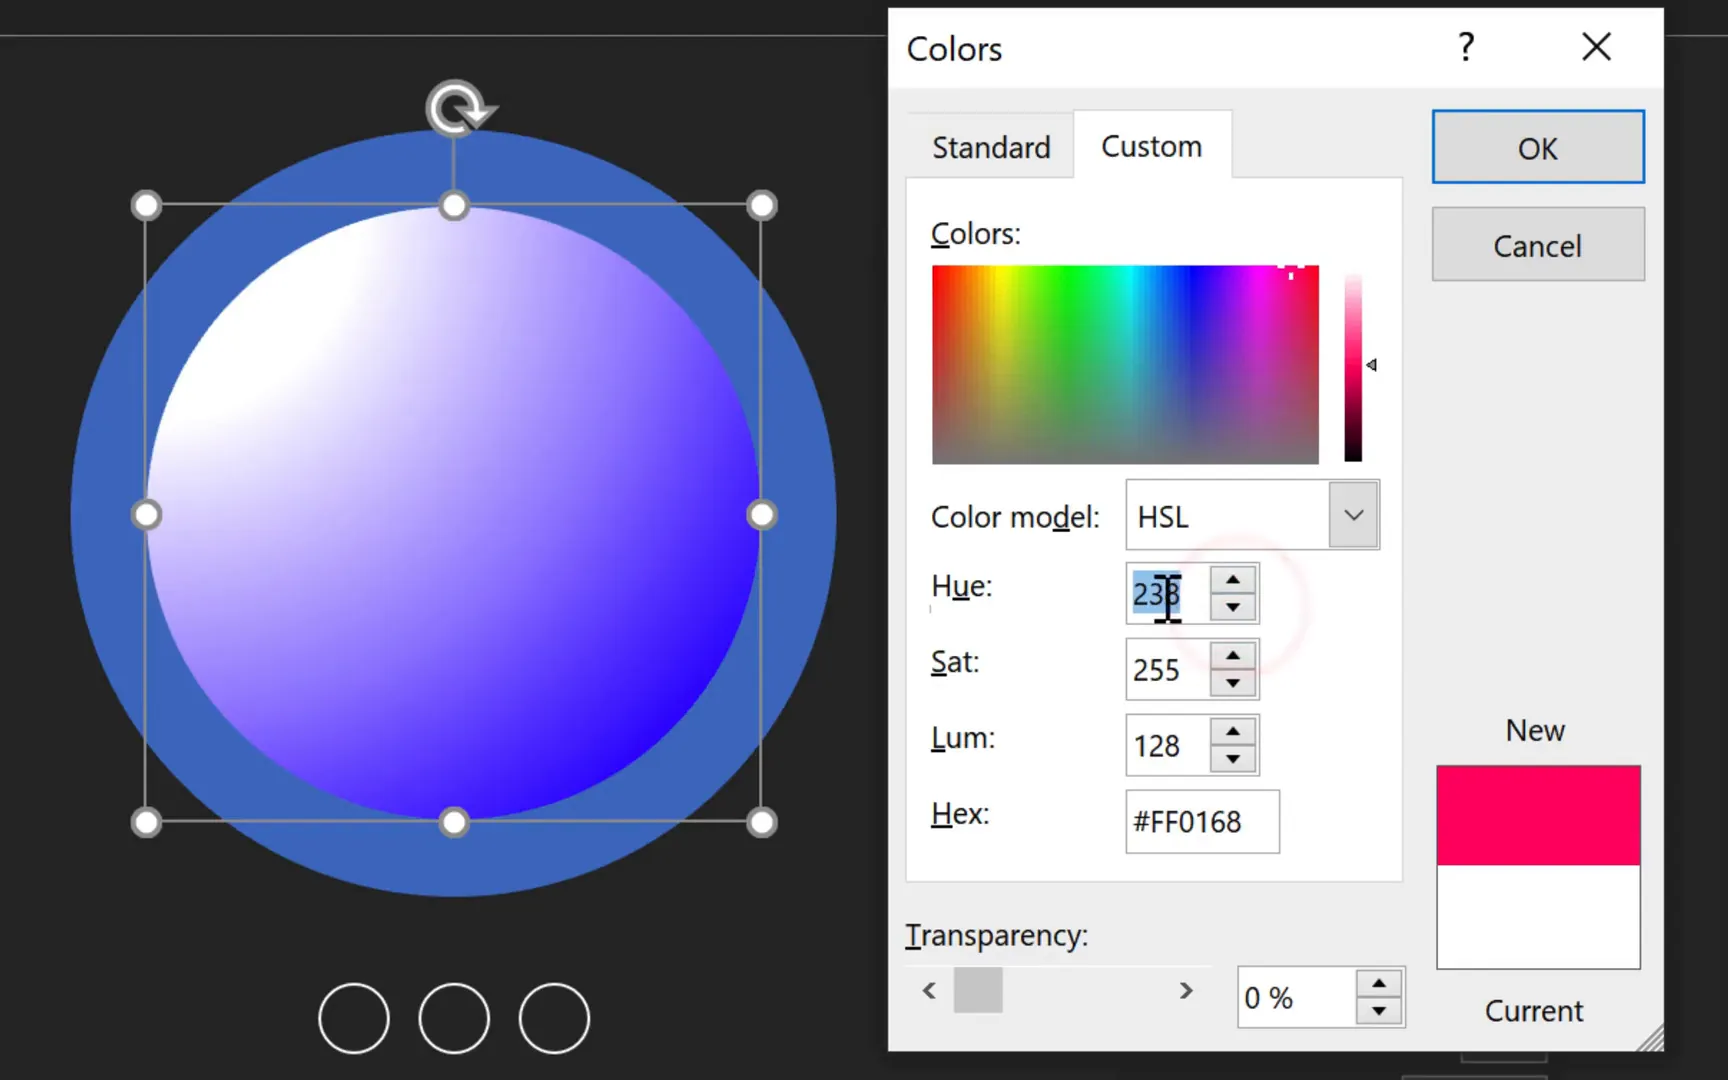
Here’s how I selected the colors:
- Pick the first color stop and open the More Colors dialog.
- Switch to the Custom tab and select HSL color model.
- Move the color picker upward to maximize saturation (255).
- Adjust luminosity to 128 (~50%) for balanced brightness.
- Keep saturation and luminosity fixed, then change the hue to select your base color (e.g., hot pink at 238°).
For the second and third color stops, subtract 30 from the hue value of the previous stop to get a smooth gradient transition:
- Second color stop: Hue 208° (238 – 30)
- Third color stop: Hue 178° (208 – 30)
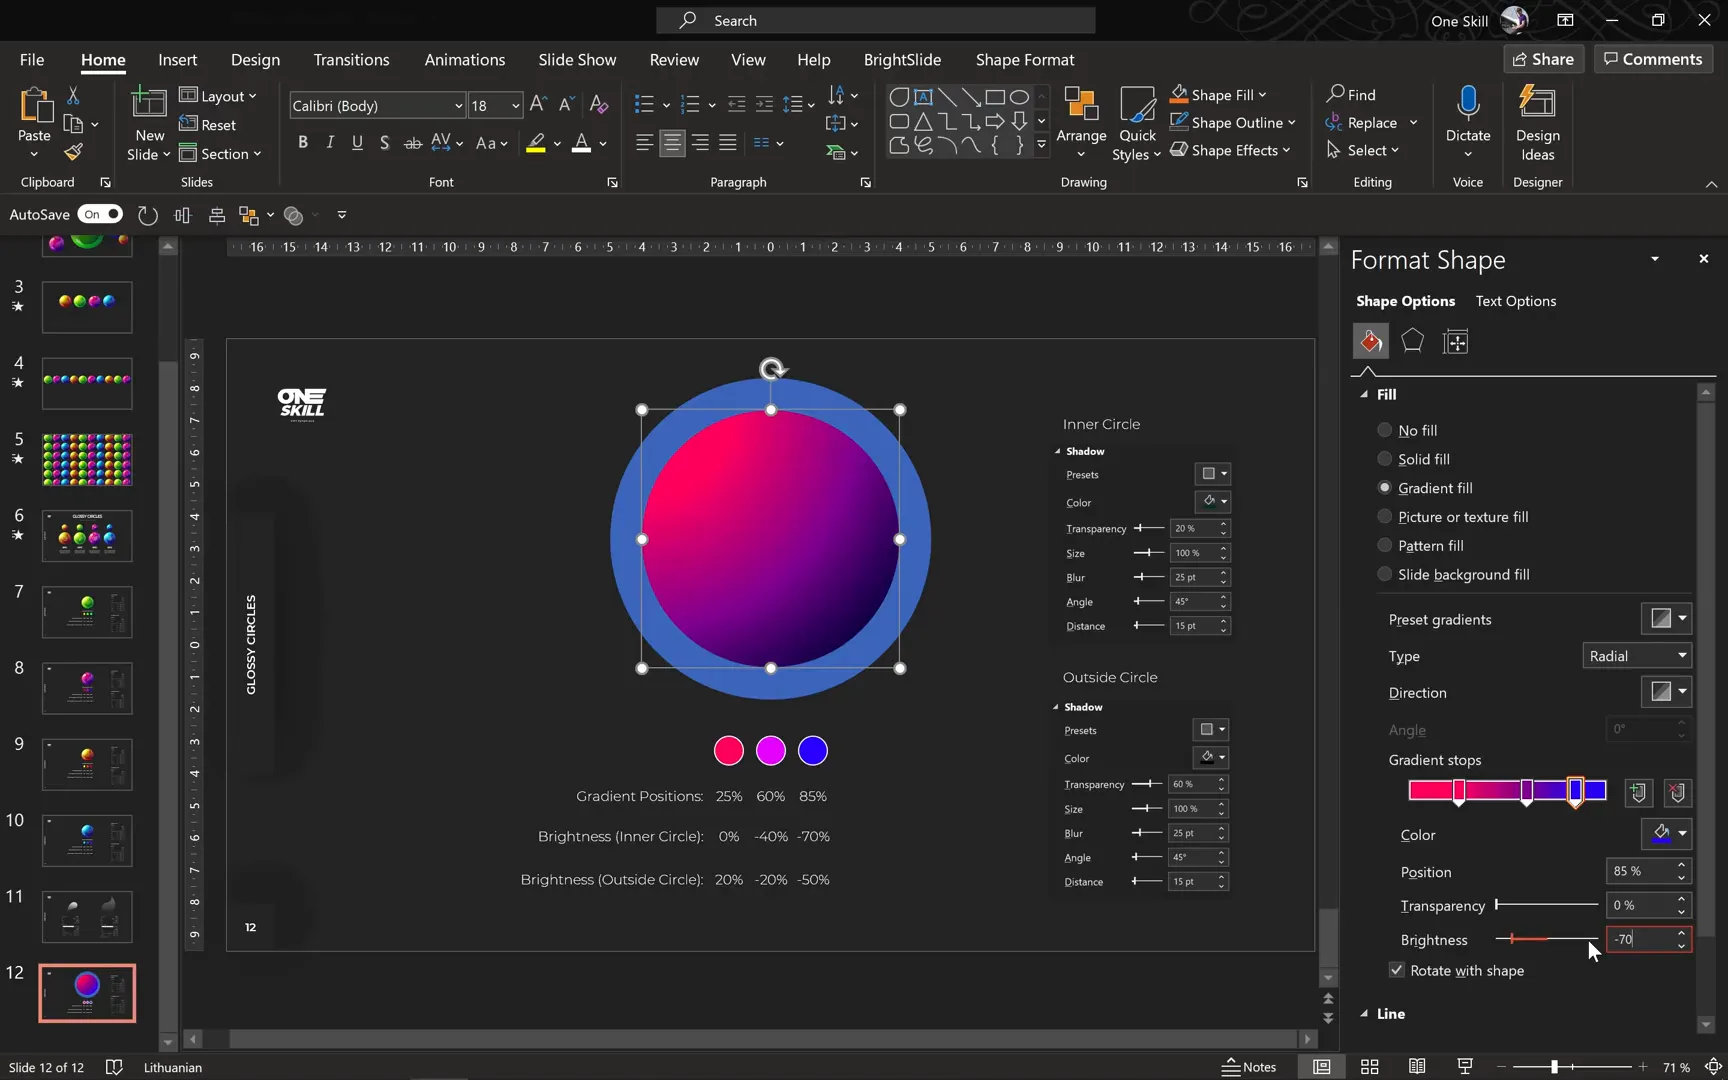
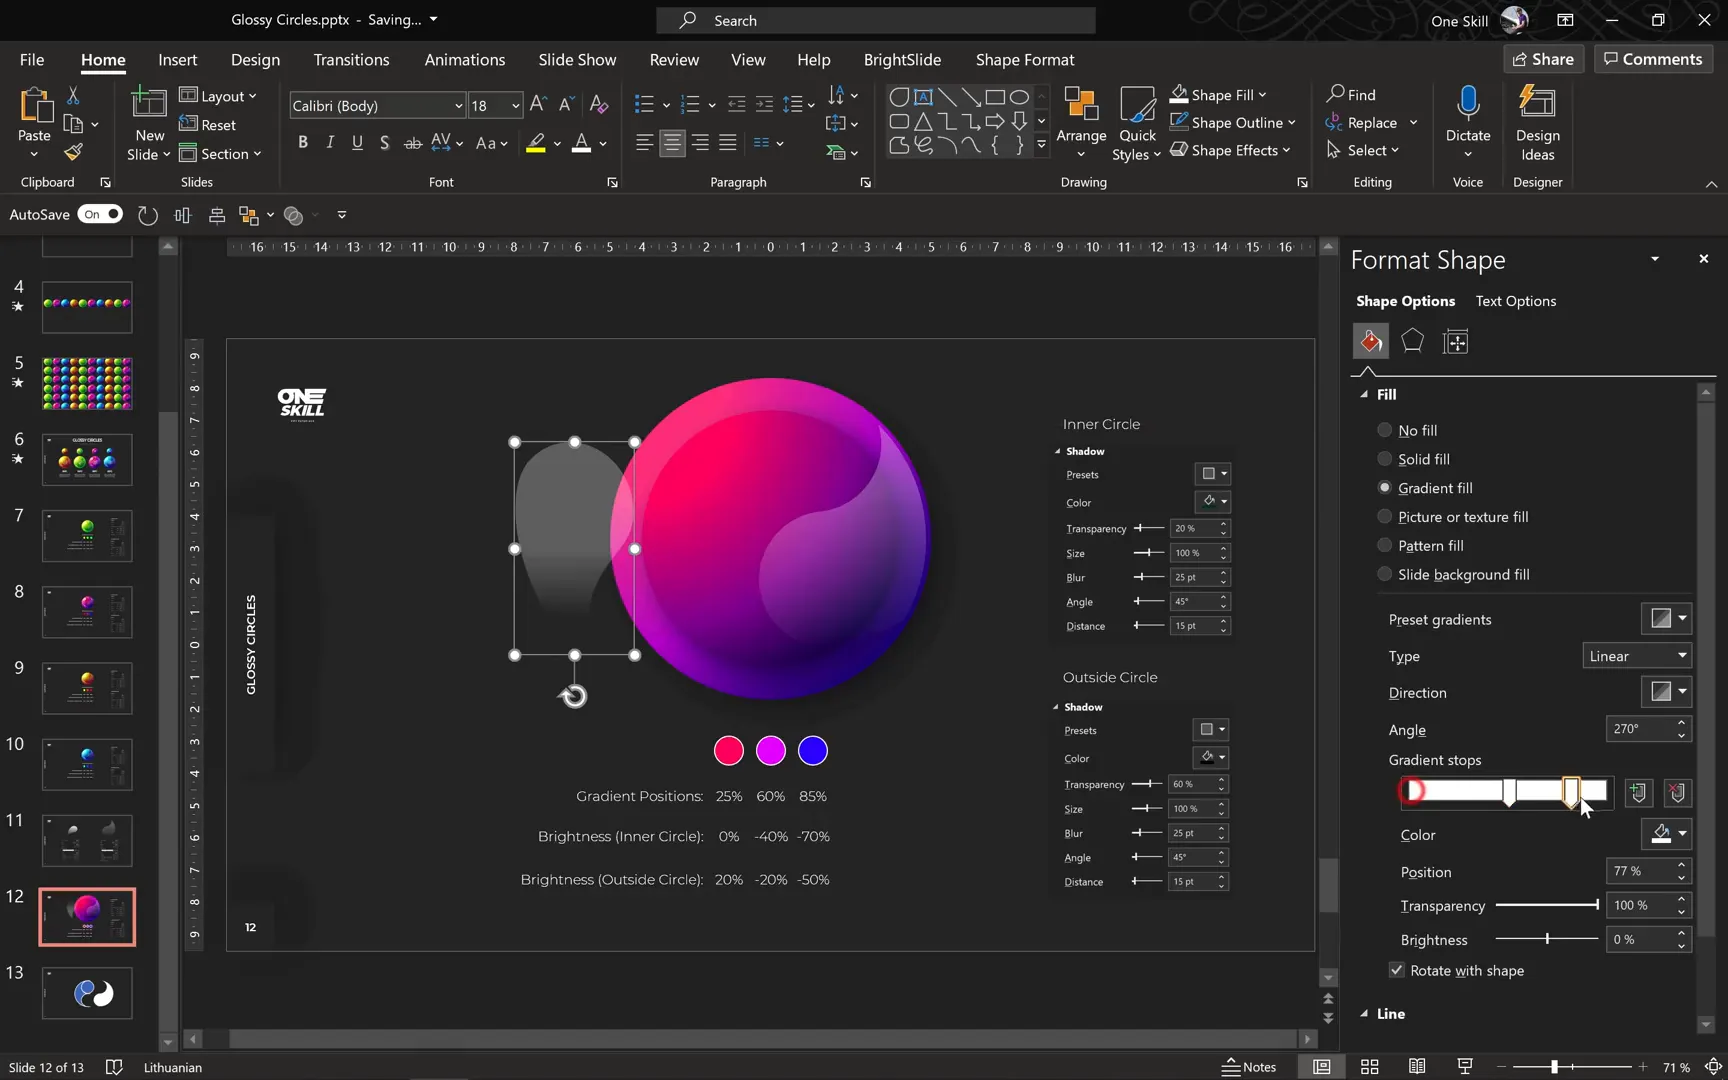
5. Adjusting Brightness for Gradient Stops
Brightness adjustments are essential for creating depth in your gradients:
- First color stop: no brightness adjustment (0).
- Second color stop: decrease brightness by 40 (-40).
- Third color stop: decrease brightness by 70 (-70).
This method creates a smooth gradient that transitions from bright to darker shades, enhancing the 3D effect.
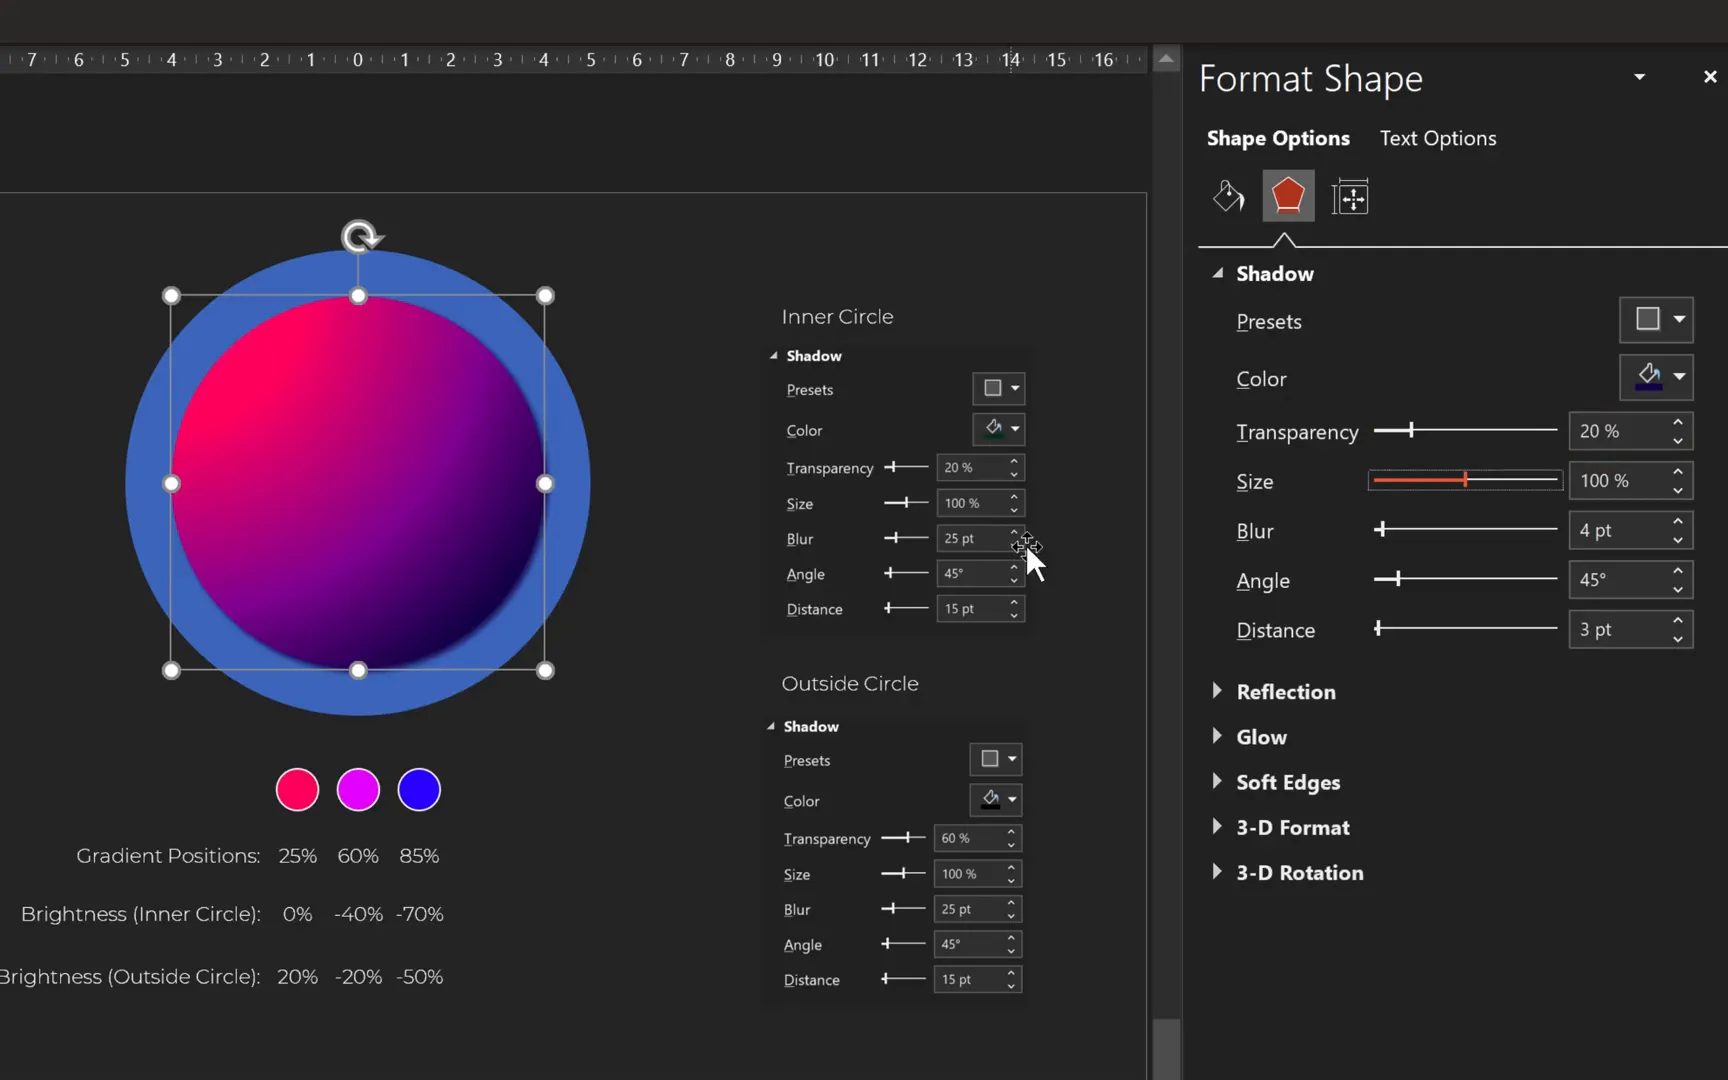
6. Adding Shadows for Depth
Shadows add realism by simulating light and depth:
- Select the inner circle and open Shadow Options.
- Choose the preset Offset Bottom Right.
- Use the eyedropper tool to pick a dark edge color from the circle.
- Set transparency to 20%.
- Keep size at 100%, blur at 25 points, angle at 45°, and distance at 15 points.
Use the Format Painter to copy these shadow settings to the outer circle.
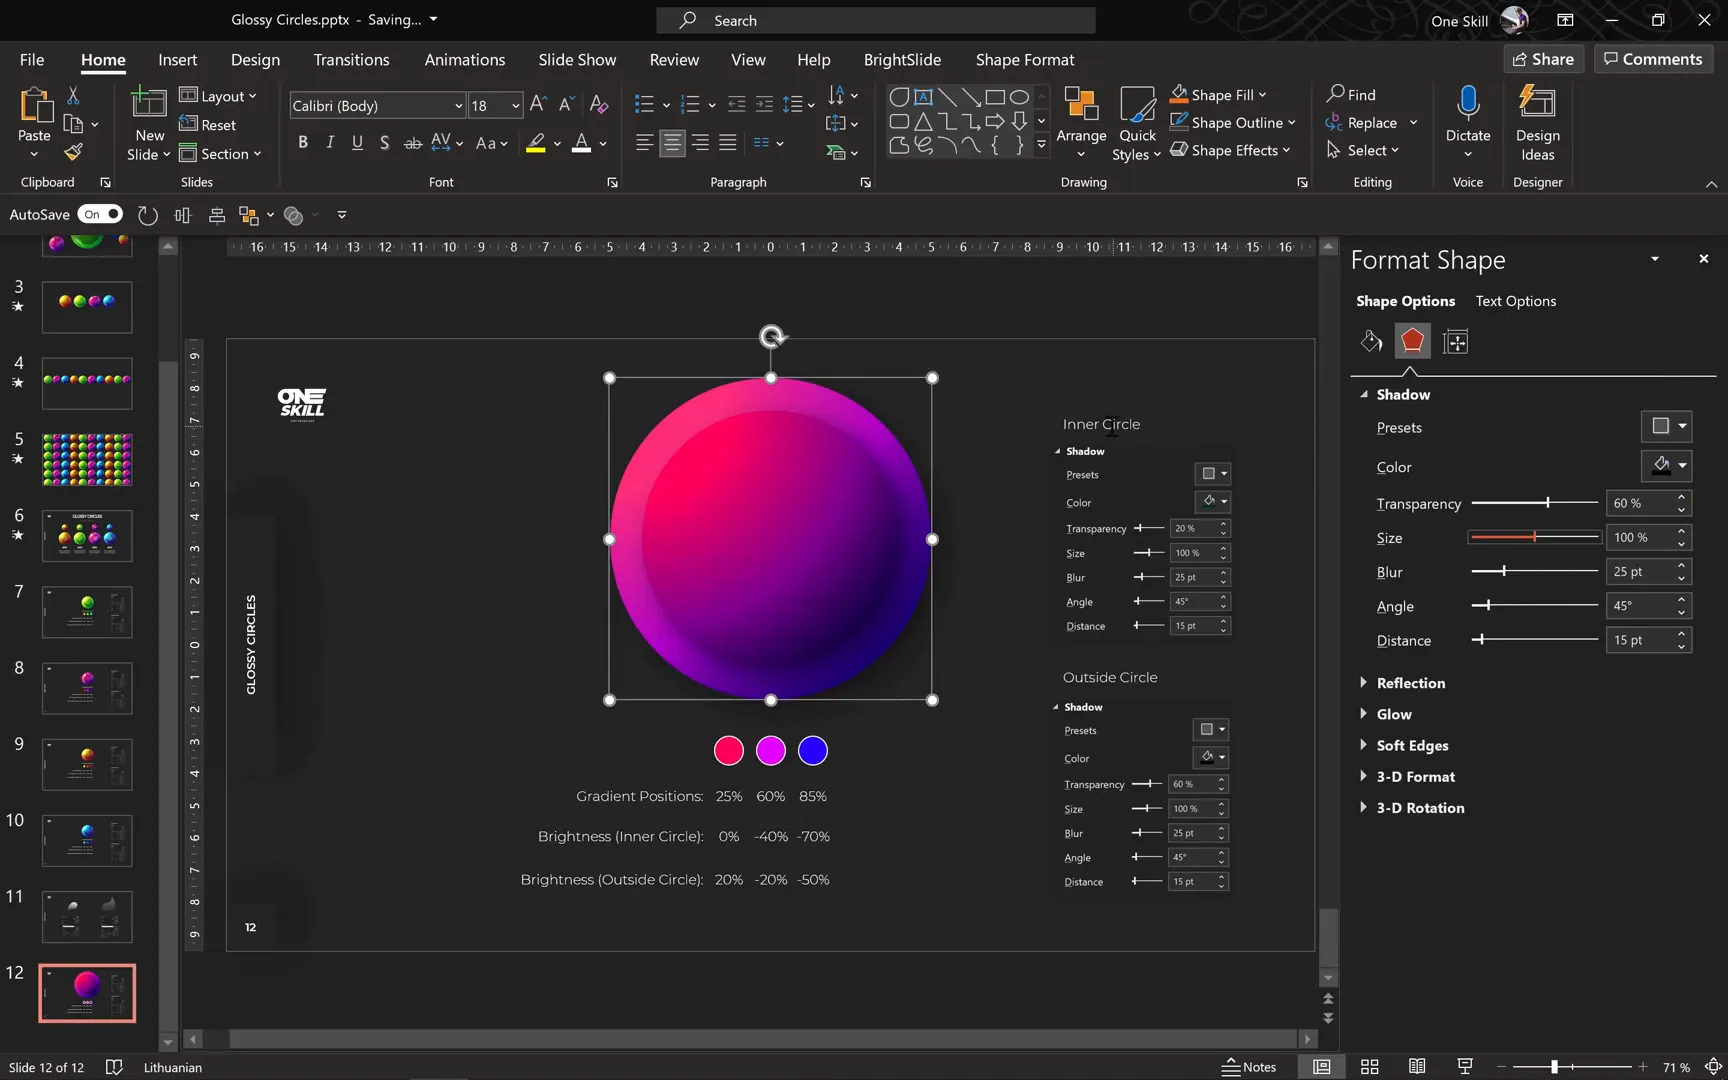
7. Brighten the Outer Circle Gradient and Adjust Shadow
The outer circle should be slightly brighter than the inner one. To achieve this:
- Increase brightness of each gradient stop by 20% on the outer circle.
- Adjust the shadow color to pure black with 60% transparency.
This contrast between the inner and outer circles adds a sophisticated layered effect.
Creating Realistic Highlights
Highlights simulate reflected light and make your glossy circles pop. Here’s how to create and position them:

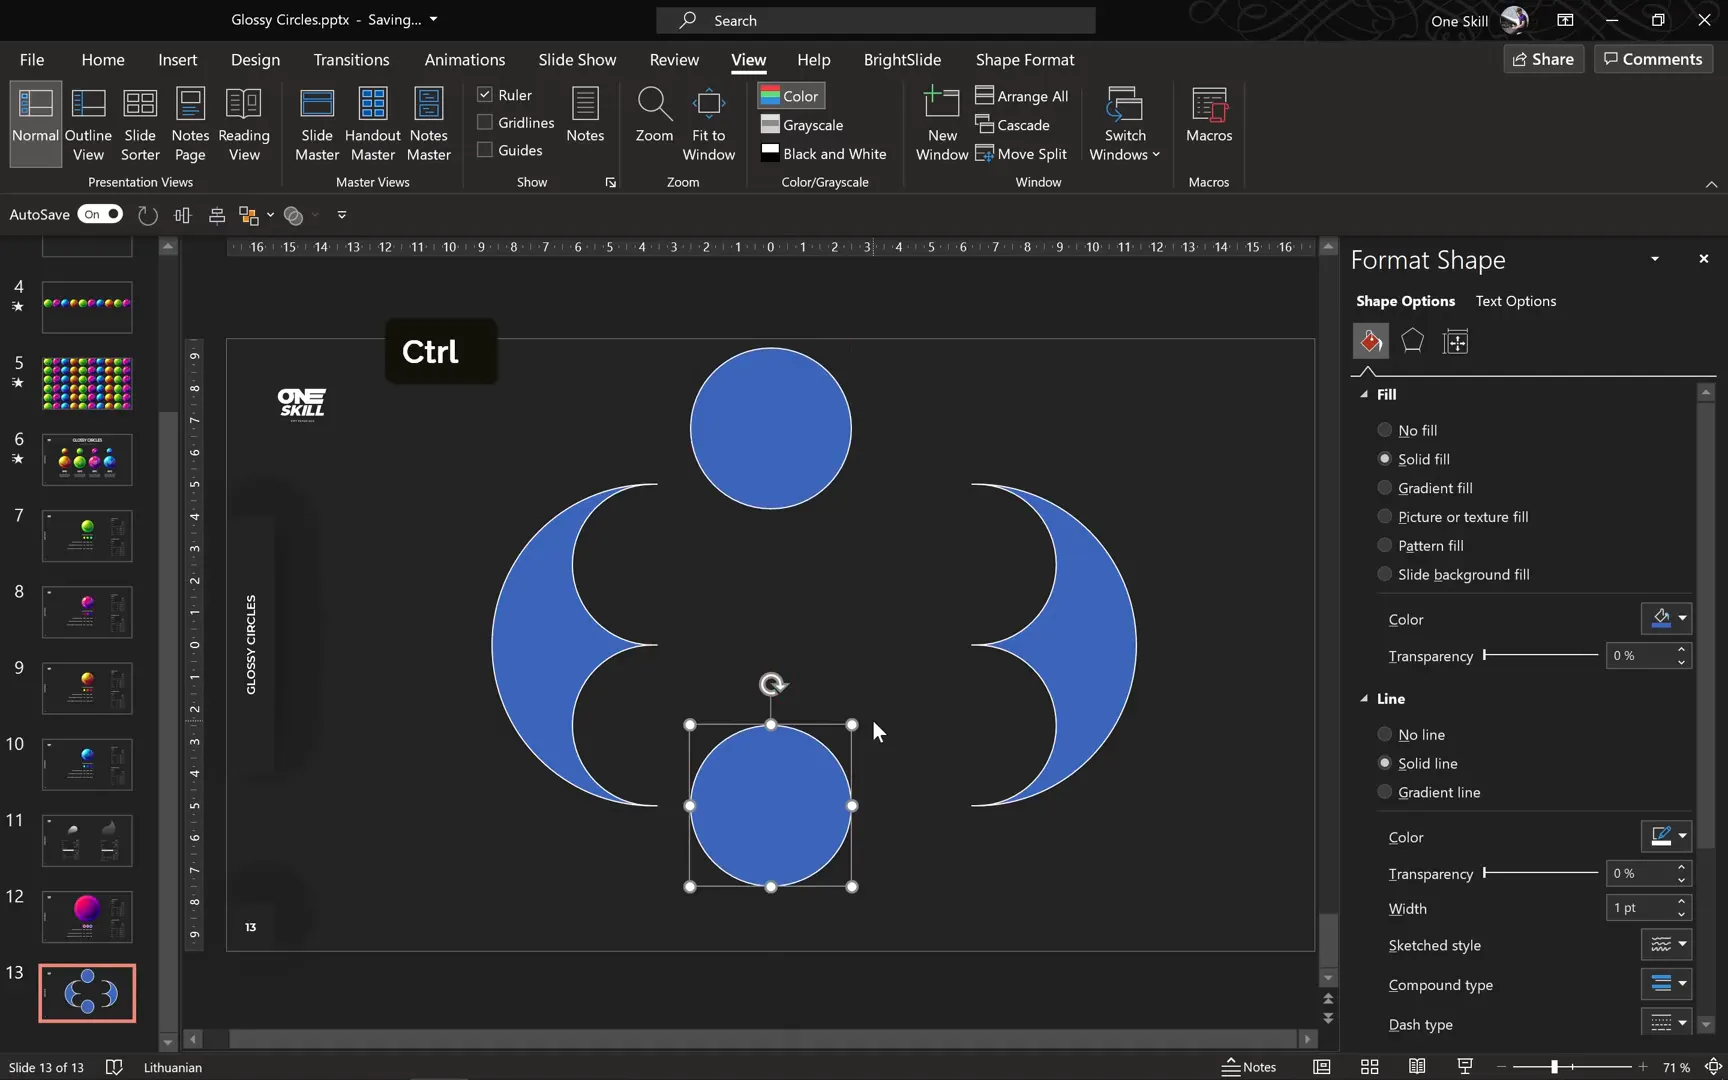
1. Prepare Circles for Highlight Shapes
- Create a new slide to work on highlights separately.
- Insert a 10 cm circle with a white outline for visibility.
- Duplicate it and resize the copy to 5 cm.
- Enable slide guides and align the smaller circle to the top center of the larger circle.
- Copy the smaller circle and position it at the bottom center of the larger circle.
- Select all circles and use Merge Shapes > Fragment to split shapes into segments.
After fragmenting, you will have four distinct shapes, including the two smaller circles and two side shapes.
2. Create the Main Highlight Shape
- Select the bottom smaller circle and the shape on the right side.
- Use Merge Shapes > Union to combine them.
- Fill this new shape with white and remove the outline.
- Paste this highlight shape onto your glossy circle slide.
- Reduce the fill transparency for subtlety.
- Align the highlight shape to the top right of the outer circle for a natural light effect.
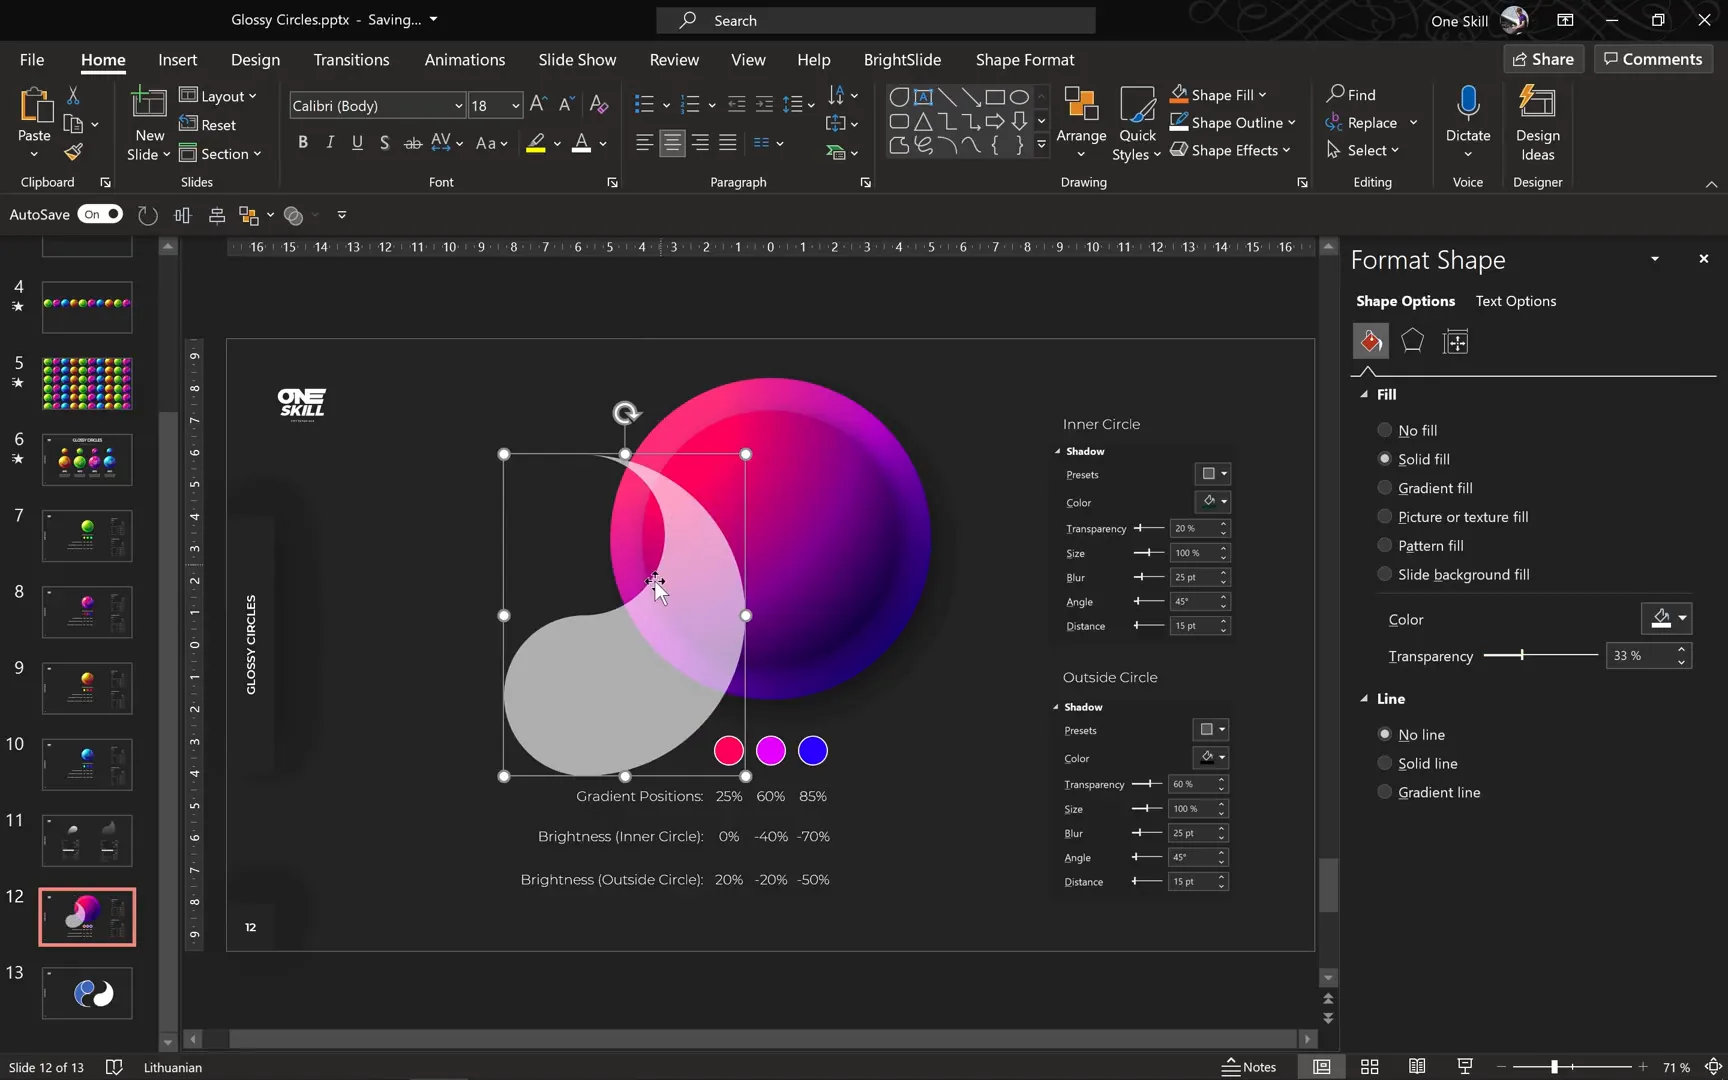
3. Enhance Highlight with Gradient Fill
Instead of a flat white fill, a gradient adds depth:
- Change the fill type to Gradient Fill.
- Switch to a linear gradient with two color stops.
- Set the first stop to white with 100% transparency.
- Set the second stop to white with 17% transparency at position 17%.
- Adjust the gradient direction so the highlight fades naturally.
Resize and rotate the highlight for a perfect fit. You can even duplicate and mirror it for consistency on both sides of the circle.
4. Create a Secondary Left-Side Highlight
- Insert a white triangle shape with no outline.
- Flip it vertically.
- Right-click and select Edit Points.
- Convert the two top points to smooth points.
- Adjust the shape by dragging points and handles until it resembles a soft highlight.
- Apply the same gradient fill style using the Format Painter.
- Reverse the gradient stops so the white is on top and transparent at the bottom, increasing intensity.
- Rotate and resize as needed, then position on the left side of the circle.
5. Final Touches on Highlights
Add a few more subtle highlights using similar shapes and gradient fills. These touches create a realistic glossy effect that mimics light reflecting off a shiny surface.
Once complete, group all the shapes (Ctrl + G) to easily move and resize the entire glossy circle as a single object.

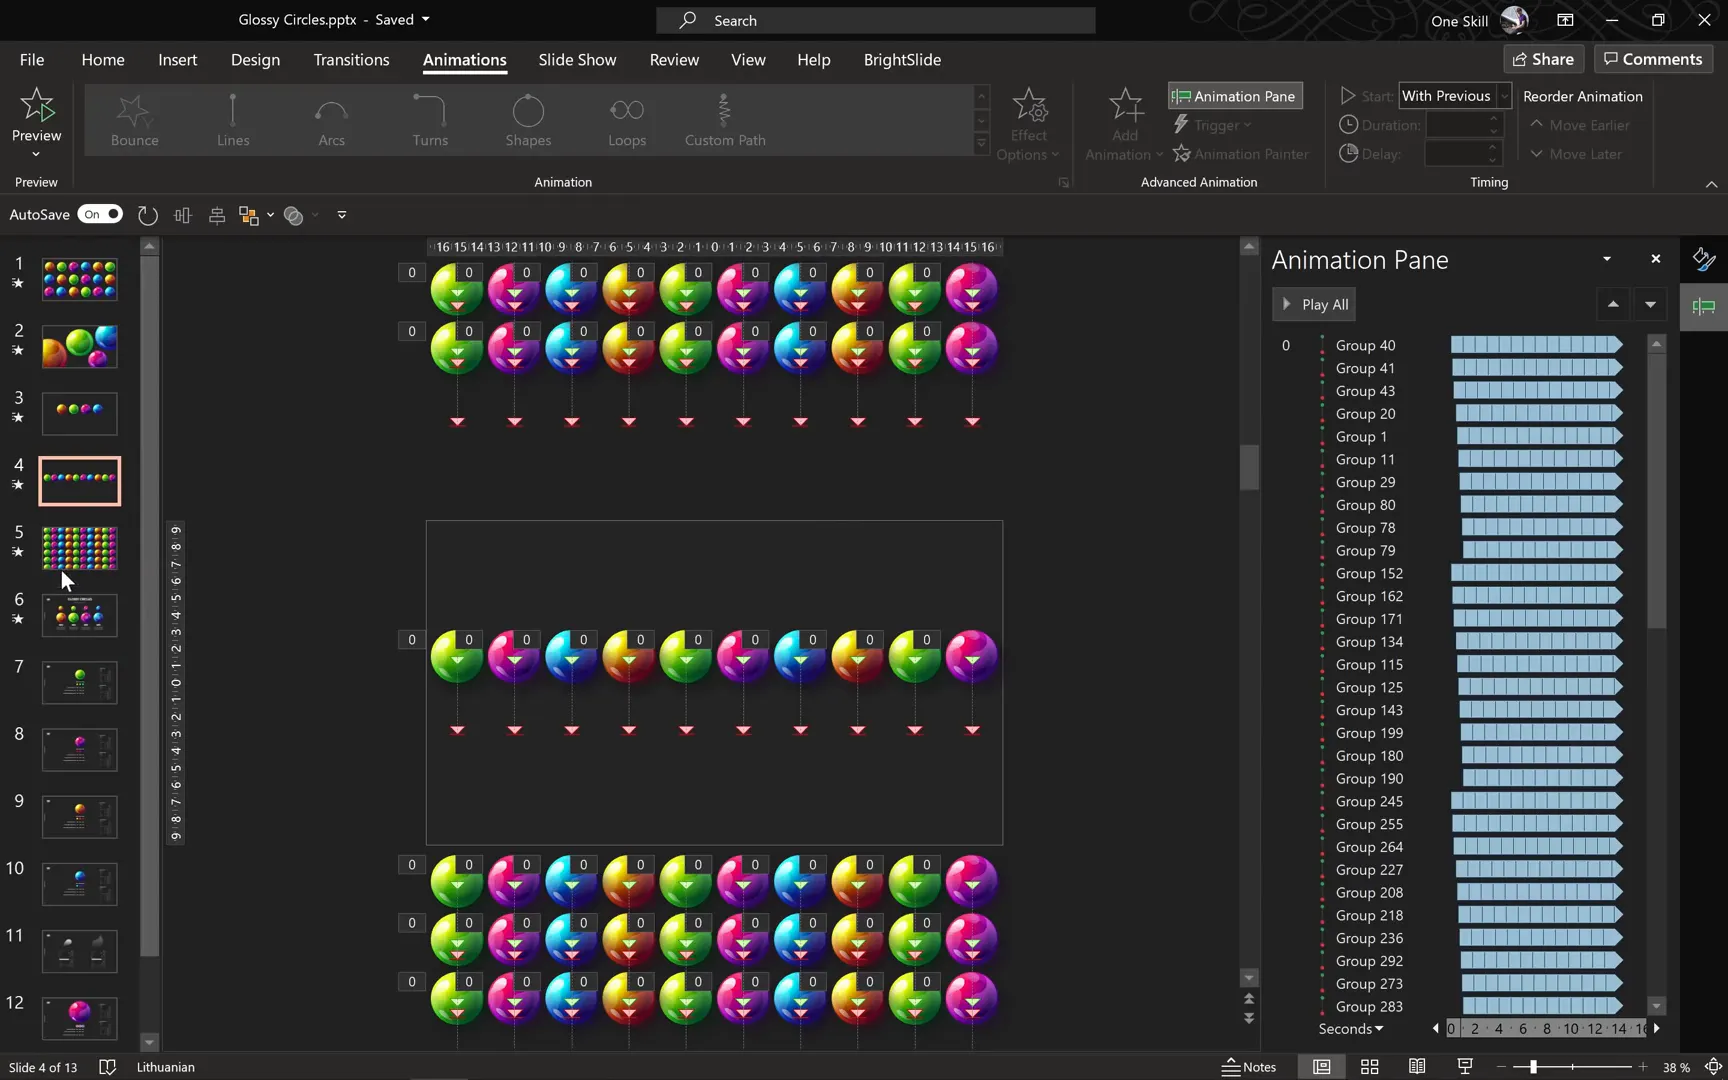
Animating Glossy Circles: Bringing Your Design to Life
Now that you have your glossy circles designed, let’s make them dynamic with animations. This adds a professional edge to your presentations, capturing audience attention effectively.
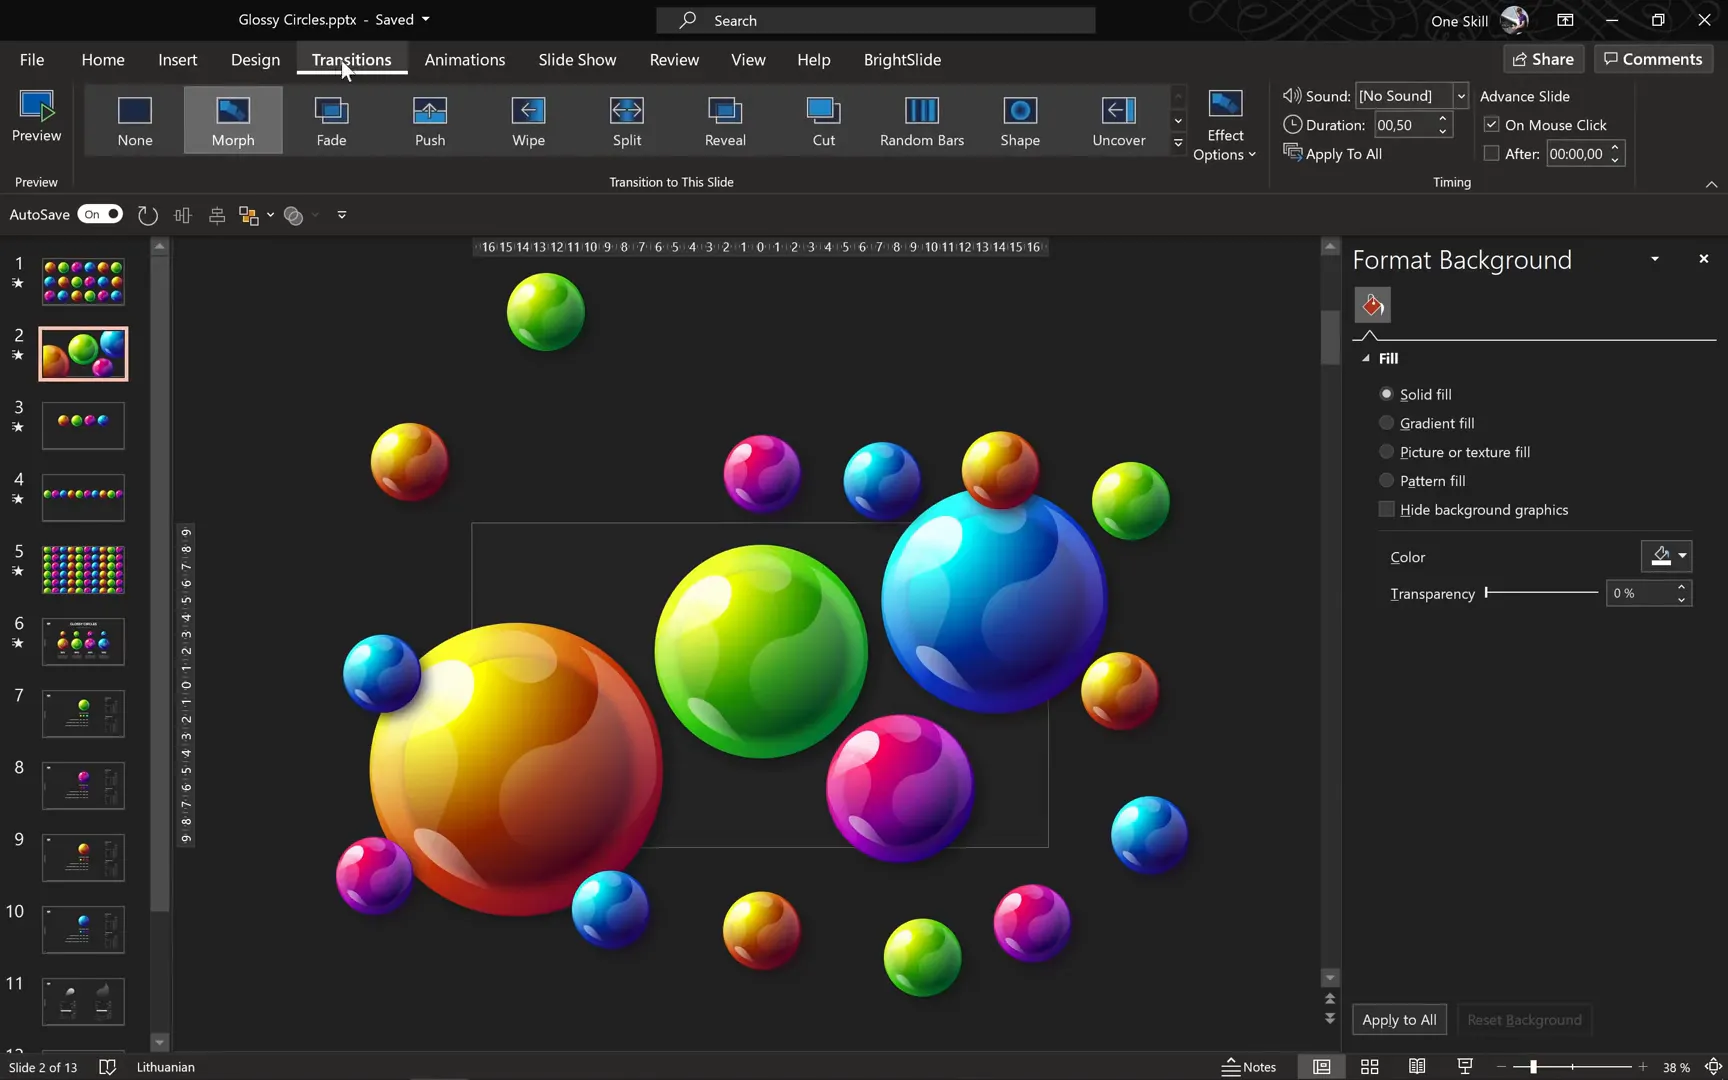
Using Morph Transition for Smooth Animations
The Morph transition is a powerful tool in PowerPoint that creates seamless animation effects between slides. Here’s how I used it for the glossy circle animations:
- Duplicate your initial slide containing the glossy circles.
- On the second slide, resize some circles to be larger and move others to different positions.
- Apply the Morph transition between these slides.
This technique makes circles appear to fly, grow, or shrink smoothly without complex animation setups.
Motion Path Animations for Subtle Movements
For more controlled and detailed animations, motion paths are used to move circles along specific trajectories. Here’s a quick guide:
- Select a circle you want to animate.
- Go to Add Animation > Motion Paths and choose Line.
- Set the direction of the motion path (e.g., downwards).
- Adjust the duration (I used 0.5 seconds for smoothness).
- In Effect Options, enable Auto Reverse and Repeat until end of slide.
- Add staggered delays to each circle’s animation to create a wavy, natural effect.
This approach makes the circles gently float up and down, adding a lively vibe to your slide.

Combining Morph and Motion Paths
In the intro slides, I combined Morph transitions with motion path animations to create complex yet smooth animations where circles grow, shrink, and float around the slide. This layered animation technique elevates your presentation’s visual storytelling.
For those wanting to dive deeper into these animation techniques, I recommend checking out tutorials on Neumorphic PowerPoint designs, which use similar animation principles.
Tips for Mastering Glossy Circle Designs in PowerPoint
- Experiment with Colors: Use the HSL color model to pick harmonious colors with controlled saturation and brightness.
- Use Slide Guides: Align shapes precisely with slide guides to maintain symmetry and balance.
- Group Elements: Group your shapes after finishing designs to simplify moving and resizing.
- Leverage Format Painter: Quickly copy styles between shapes for consistency.
- Layer Shadows and Highlights: Don’t underestimate subtle shadows and highlights—they add realism.
- Animate Thoughtfully: Combine Morph and motion paths to create natural, fluid movements.
- Use Dark Mode: Switch to a dark PowerPoint theme to better see gradients and subtle effects while designing.
Frequently Asked Questions (FAQ)
Q1: Can I create glossy circles in older versions of PowerPoint?
While the core techniques like gradient fills and shape merging are available in older versions, some features like the Morph transition are only in PowerPoint 2016 and later (including Office 365). You can still create static glossy circles in older versions but may need alternative methods for animations.
Q2: How do I choose the best colors for my glossy circles?
Using the HSL color model helps maintain consistent saturation and brightness while adjusting hues. Choose a base hue and create variations by shifting the hue value in increments (e.g., 30 degrees) to get harmonious gradients.
Q3: What is the benefit of using radial gradients for the circles?
Radial gradients simulate the way light naturally falls on curved surfaces, creating depth and volume. This makes your circles look three-dimensional and realistic rather than flat.
Q4: How can I make my animations smoother?
Use the Morph transition for seamless transformations between slides. When using motion paths, set short durations (around 0.5 seconds), enable auto-reverse, and add staggered delays to avoid all animations occurring simultaneously.
Q5: Can I use these techniques for other shapes?
Absolutely! The principles of gradient fills, shadows, highlights, and animations apply to many shapes. Experiment with different forms to create unique glossy effects.
Conclusion
Creating and animating glossy circles in PowerPoint is a powerful way to enhance your presentation’s visual appeal. By layering radial gradients, adjusting brightness, adding shadows and highlights, and applying smooth animations, you can craft professional-looking designs that captivate your audience.
Remember, the key is in the details: subtle shadows, carefully chosen colors, and thoughtful animation timing all contribute to a polished final product. With practice, these techniques will become second nature, empowering you to design stunning slides effortlessly.
Stay creative, keep experimenting, and most importantly, have fun designing your next presentation masterpiece!
Happy designing!
Check out the full video: Presentation Design Tutorial 🔥 Glossy Circles 🔥


