

If you’ve ever wanted to elevate your PowerPoint presentations with eye-catching, animated infographics, you’re in the right place. In this comprehensive guide, we’ll walk you through how to create an impressive animated roadmap infographic in PowerPoint from scratch. You’ll learn the best methods for designing smooth, curvy roadmap shapes, incorporating custom animations, and even adding dynamic elements like a moving car that follows the path.
This tutorial not only focuses on design but also dives deep into PowerPoint design animation techniques that bring your slides to life. Whether you’re a beginner or looking to sharpen your skills, this step-by-step walkthrough will help you create professional, engaging presentations that captivate your audience.
Table of Contents
- Getting Started: Setting Up Your Slide
- Designing the Curvy Roadmap Shape with Figma
- Importing and Customizing the Roadmap in PowerPoint
- Adding Road Details: Dashed Lines, Outlines, and Shadows
- Creating Location Pins for Milestones
- Adding a Moving Car for Visual Impact
- Creating a Smooth Zoom-in Animation with Slow Motion Effect
- Animating the Car to Follow the Road with Turns
- Advanced Tips: Slide Zooms for Interactive Presentations
- Frequently Asked Questions (FAQ)
- Conclusion
Getting Started: Setting Up Your Slide
We begin with a blank PowerPoint slide, setting the foundation for our animated roadmap. The first step is to add a visually appealing background that complements your infographic. In this tutorial, a subtle paper-textured background is used, which you can find for free on Freepik (link here).
This kind of textured background adds a tactile feel and helps the roadmap stand out without overwhelming the slide’s content. You can download the background and insert it into your slide from the Insert > Pictures menu in PowerPoint.
Designing the Curvy Roadmap Shape with Figma
Designing smooth, curvy shapes like a roadmap directly in PowerPoint can be challenging and time-consuming if you rely solely on tools like the freeform shape or block art tool. Instead, using a dedicated vector design tool like Figma can significantly speed up the process.
Figma is a free, online vector design tool widely used for web and app design, but it also excels at creating custom illustrations and infographics. One of its standout features is the ability to export your designs as SVG files, which PowerPoint can import and edit.
Before diving into the roadmap design, if you’re new to Figma, consider checking out classes on Skillshare, such as Illustrate and Figma: Create Your First Digital Illustration by Ludvicus de Samiches. Skillshare offers a vast library of creative courses, and the first 500 people to sign up via the provided link get a one-month free trial — perfect for learning Figma and other design tools.
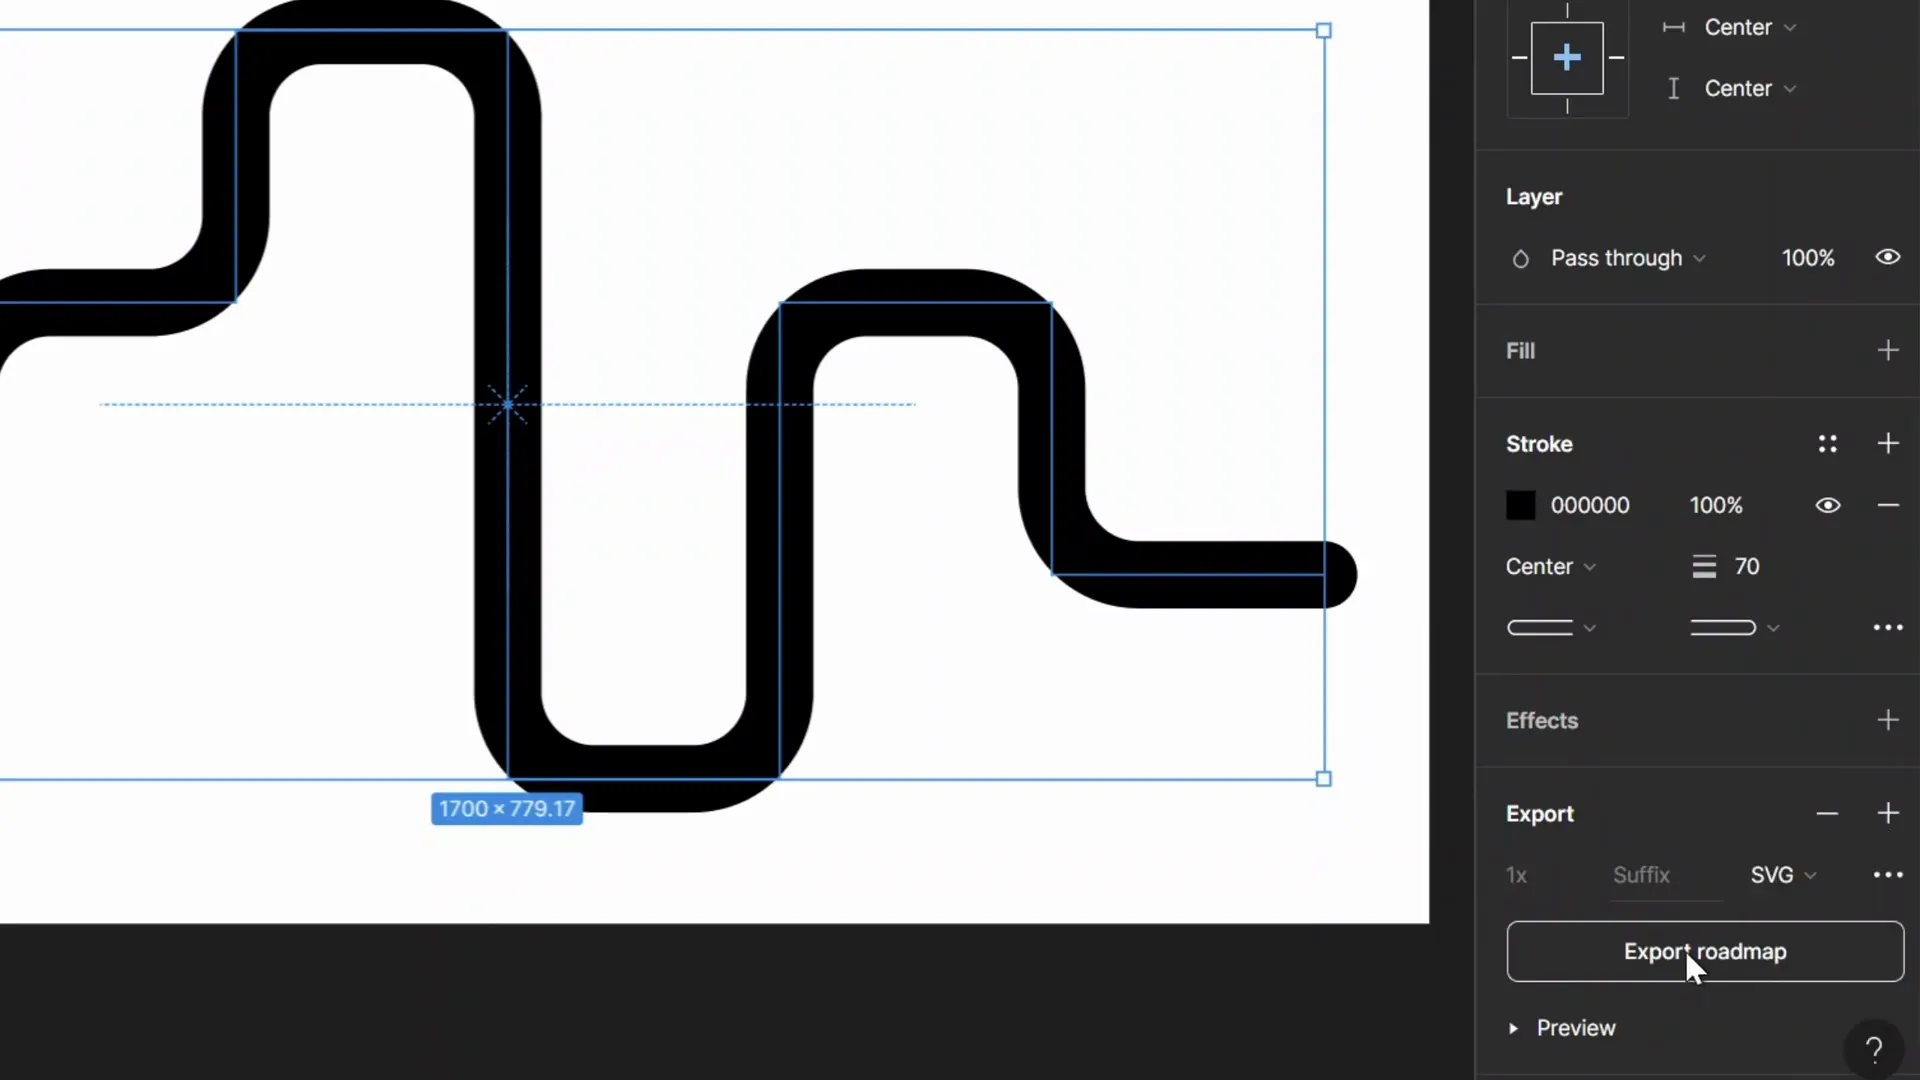
Step-by-Step Roadmap Shape Creation in Figma
- Create a new Figma file: After logging in, click the blue button to create a new file, and select Drafts as the destination.
- Setup the frame: Use the frame tool (press
F) and select the Presentation layout on the right, matching PowerPoint slide dimensions. - Enable the grid: Hold
Ctrland scroll to zoom until the pixel grid appears. Make sure Pixel Grid and Snapping to Pixel Grid are enabled for precise drawing. - Draw the roadmap: Activate the pen tool (
P) and click to plot points snapping to the grid. The example roadmap follows a pattern of four-square movements horizontally and vertically to create a curvy path. - Adjust the stroke: Set the stroke width thinner initially (e.g., 0.5) for easy editing.
- Scale the shape: Use the scale tool (
K) withAltto scale the roadmap proportionally until it fits your desired size. - Set exact dimensions: Lock the aspect ratio and set the width to 1700 pixels for a good size.
- Make the shape rounded: Increase the stroke width to 70 and set line caps and joins to round. Use the corner radius tool to round the corners subtly (e.g., 90).
- Rename and export: Rename the shape to “roadmap” and export it as an SVG file.
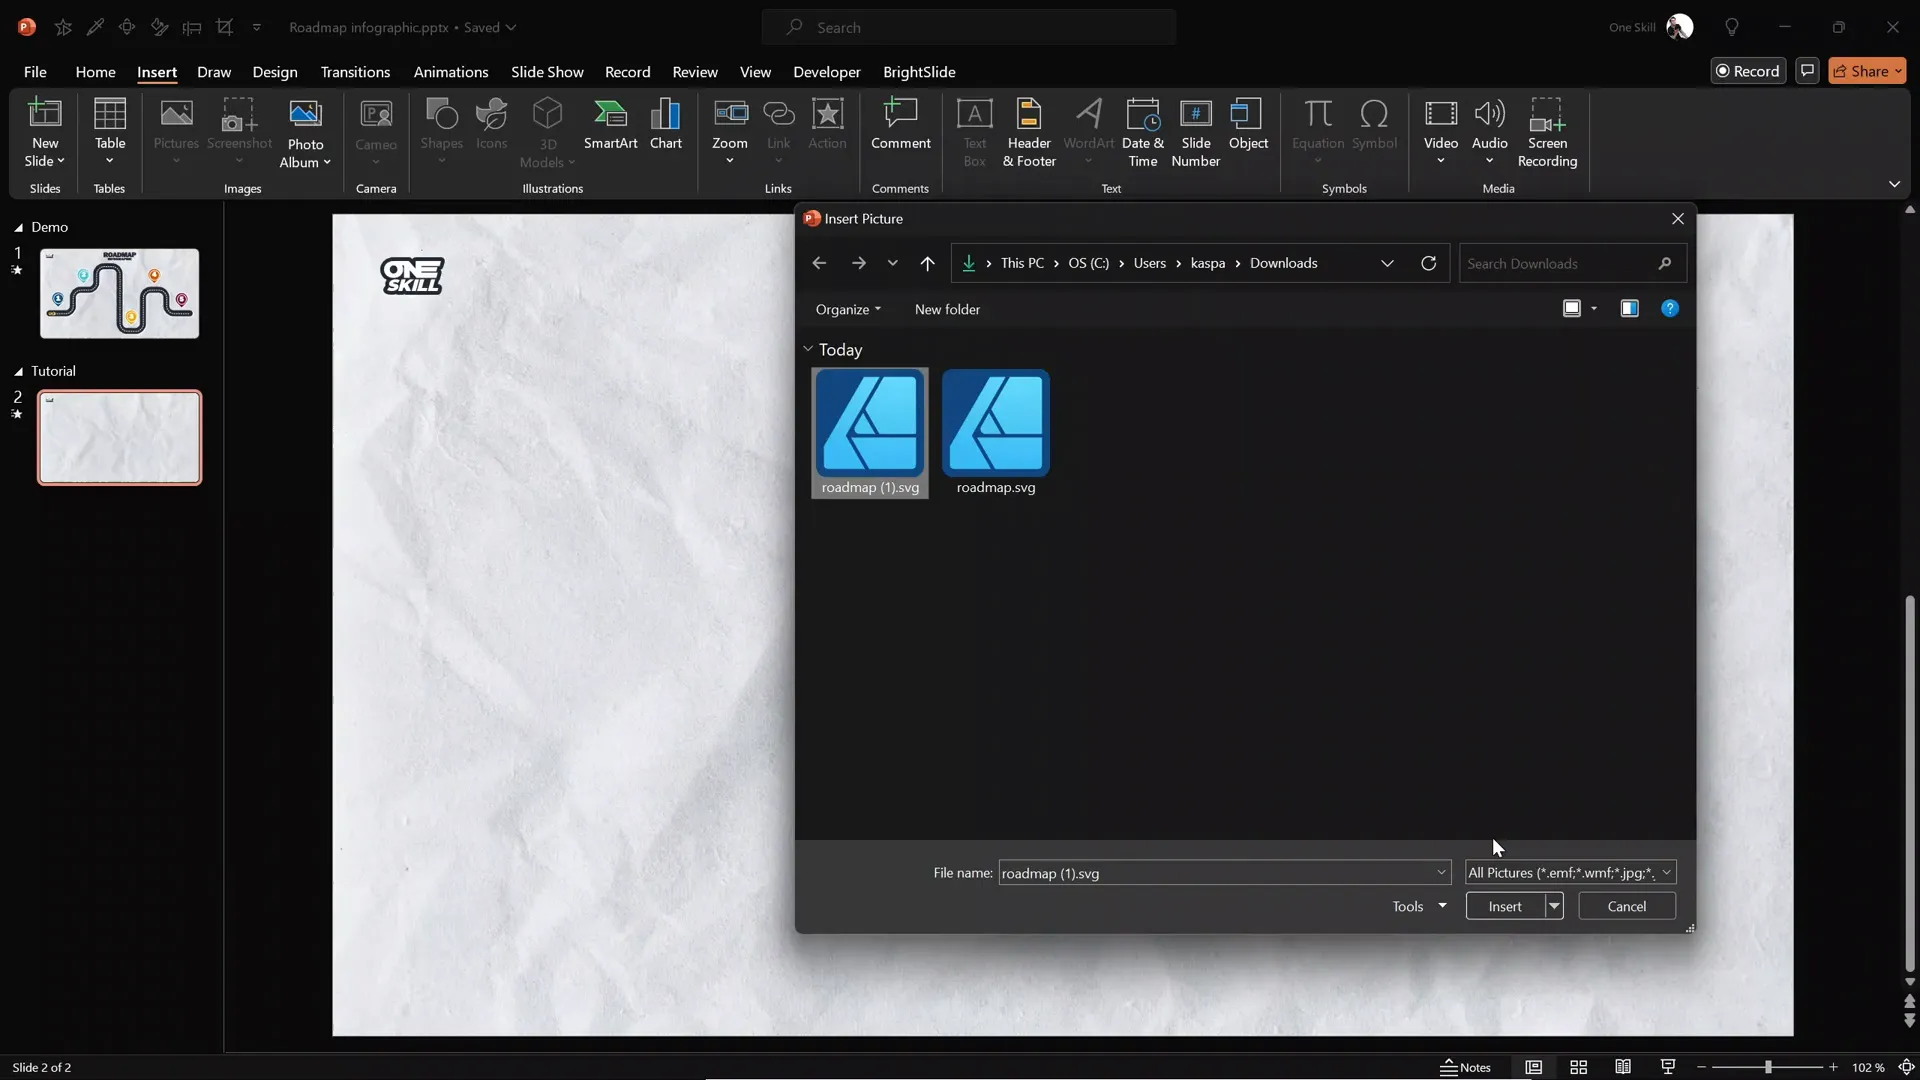
Importing and Customizing the Roadmap in PowerPoint
Once you have your SVG roadmap file exported from Figma, it’s time to bring it into PowerPoint and prepare it for animation and styling.
Steps to Import and Format the Roadmap
- Insert the SVG file: Go to Insert > Pictures and select your exported SVG roadmap.
- Convert to shape: Right-click the SVG and choose Convert to Shape to enable editing of the vector elements.
- Resize proportionally: Lock the aspect ratio and set the width to 30 centimeters (or your preferred size).
- Align the shape: Center the roadmap on the slide for balanced composition.
- Customize the color: Open Format Shape and change the stroke color to your desired shade (e.g., green).
This process gives you a fully editable roadmap shape within PowerPoint, ready for further design enhancements and animations.
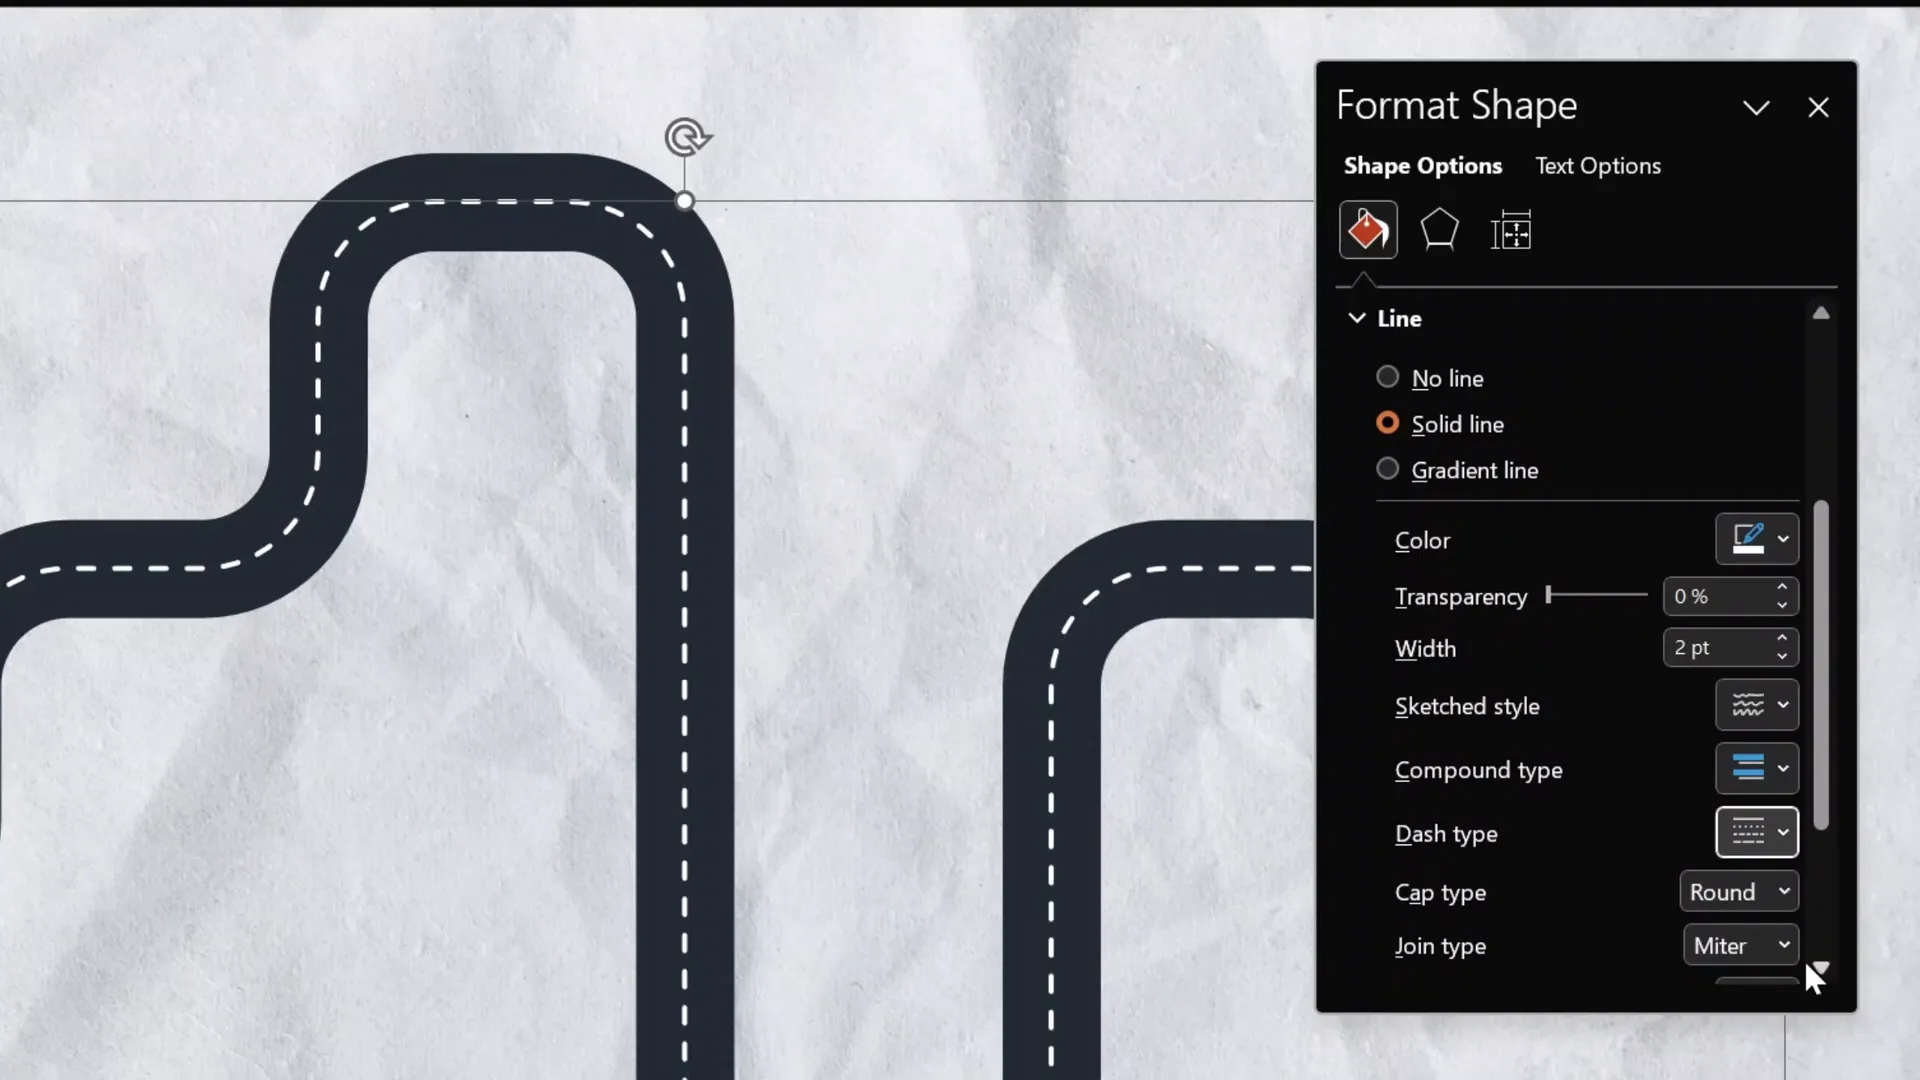
Adding Road Details: Dashed Lines, Outlines, and Shadows
To make the roadmap visually realistic and engaging, adding details like dashed center lines, outlines, and shadows is essential. These elements add depth and clarity to your infographic.
Creating the Dashed Center Line
- Duplicate the roadmap shape: Select the original roadmap and press
Ctrl + Dto duplicate it. - Format the duplicate: Change the line color to white.
- Thin the stroke: Reduce the width to 2 points.
- Apply dashed style: In Format Shape > Line options, select a dashed line type that mimics a road’s center line.
- Align perfectly: Ensure the white dashed line is exactly centered over the green roadmap.
Adding a White Outline and Shadow
- Duplicate the original roadmap again: This will serve as the white outline.
- Make the outline wider: Increase the stroke width slightly (e.g., 42 points) to create a visible border around the roadmap.
- Send it to back: Use Send to Back so it appears behind the main roadmap line.
- Group all lines: Select the green roadmap, white dashed line, and white outline, then press
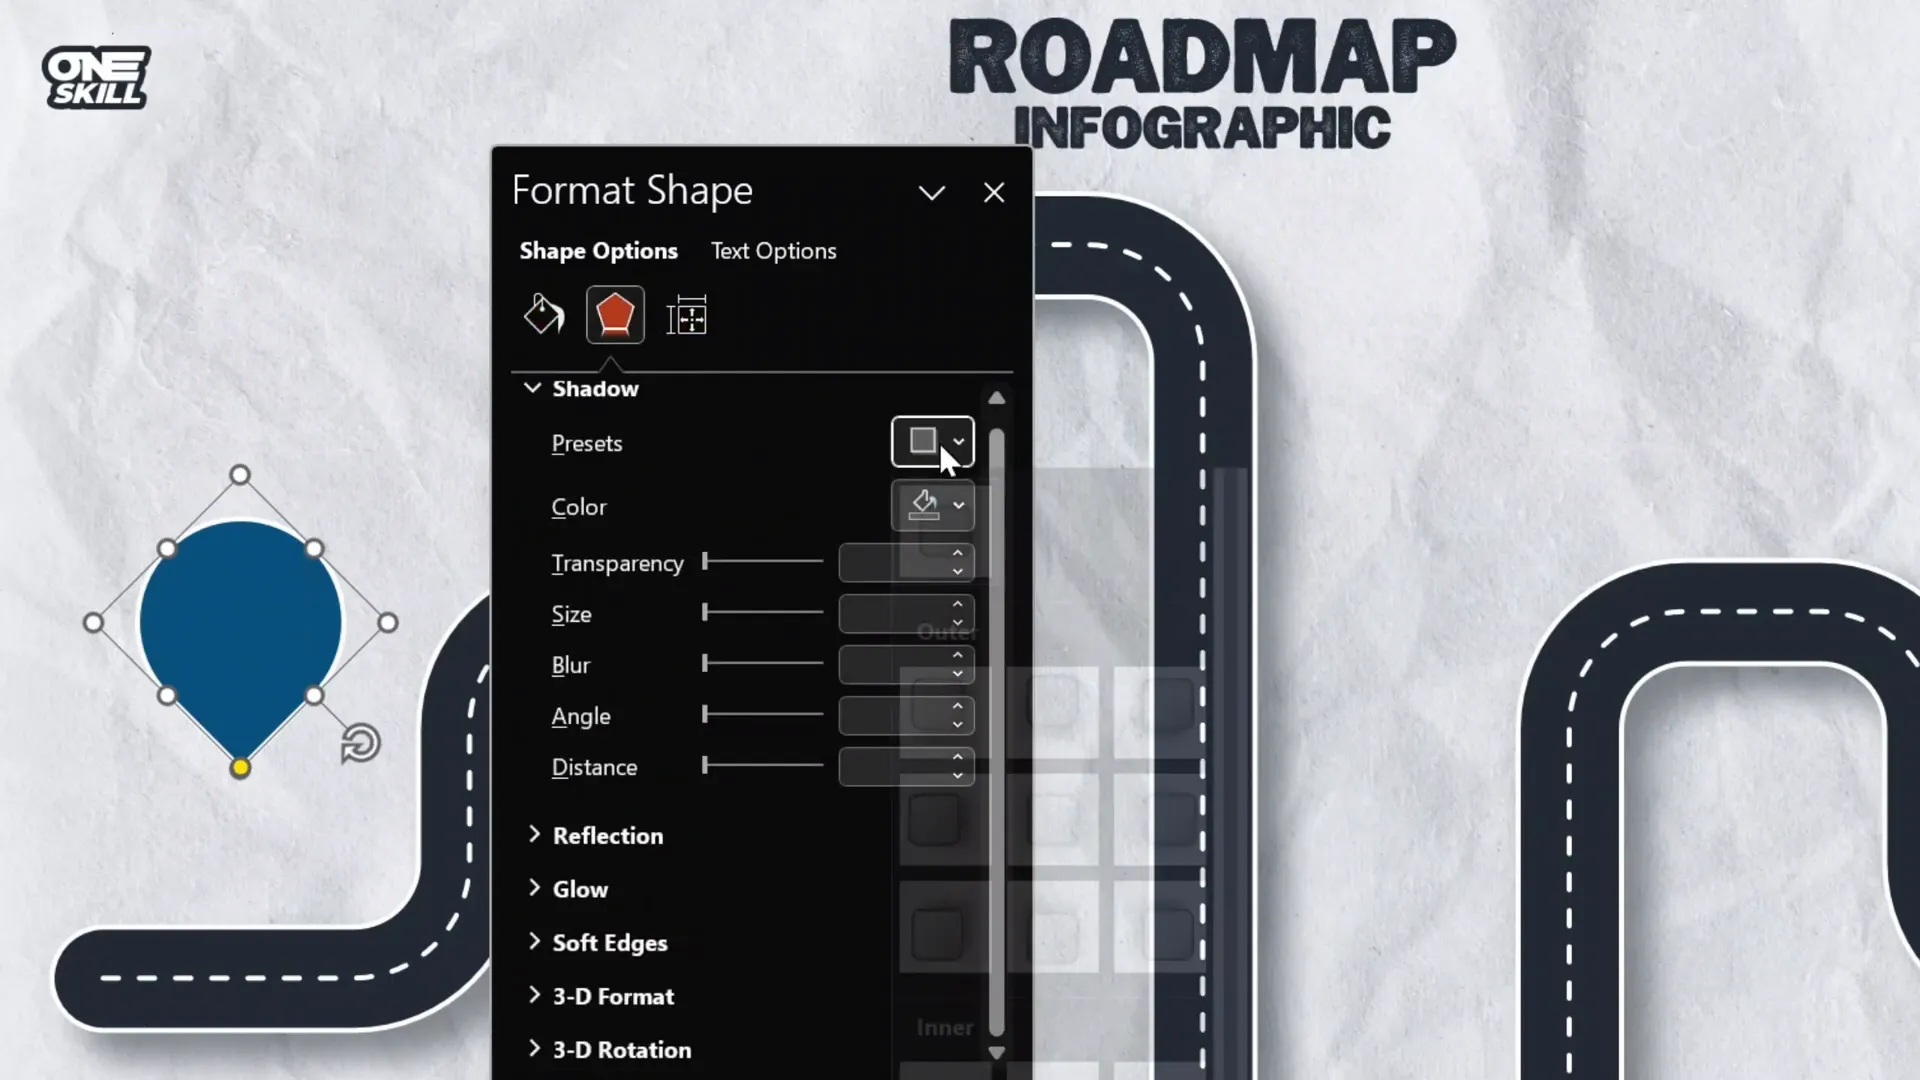
Ctrl + Aand group them. - Add shadow: In Format Shape > Shadow, choose a preset shadow style. Adjust color to gray, transparency to 50%, blur to 15 points, and distance to 15 points for a subtle but effective shadow.
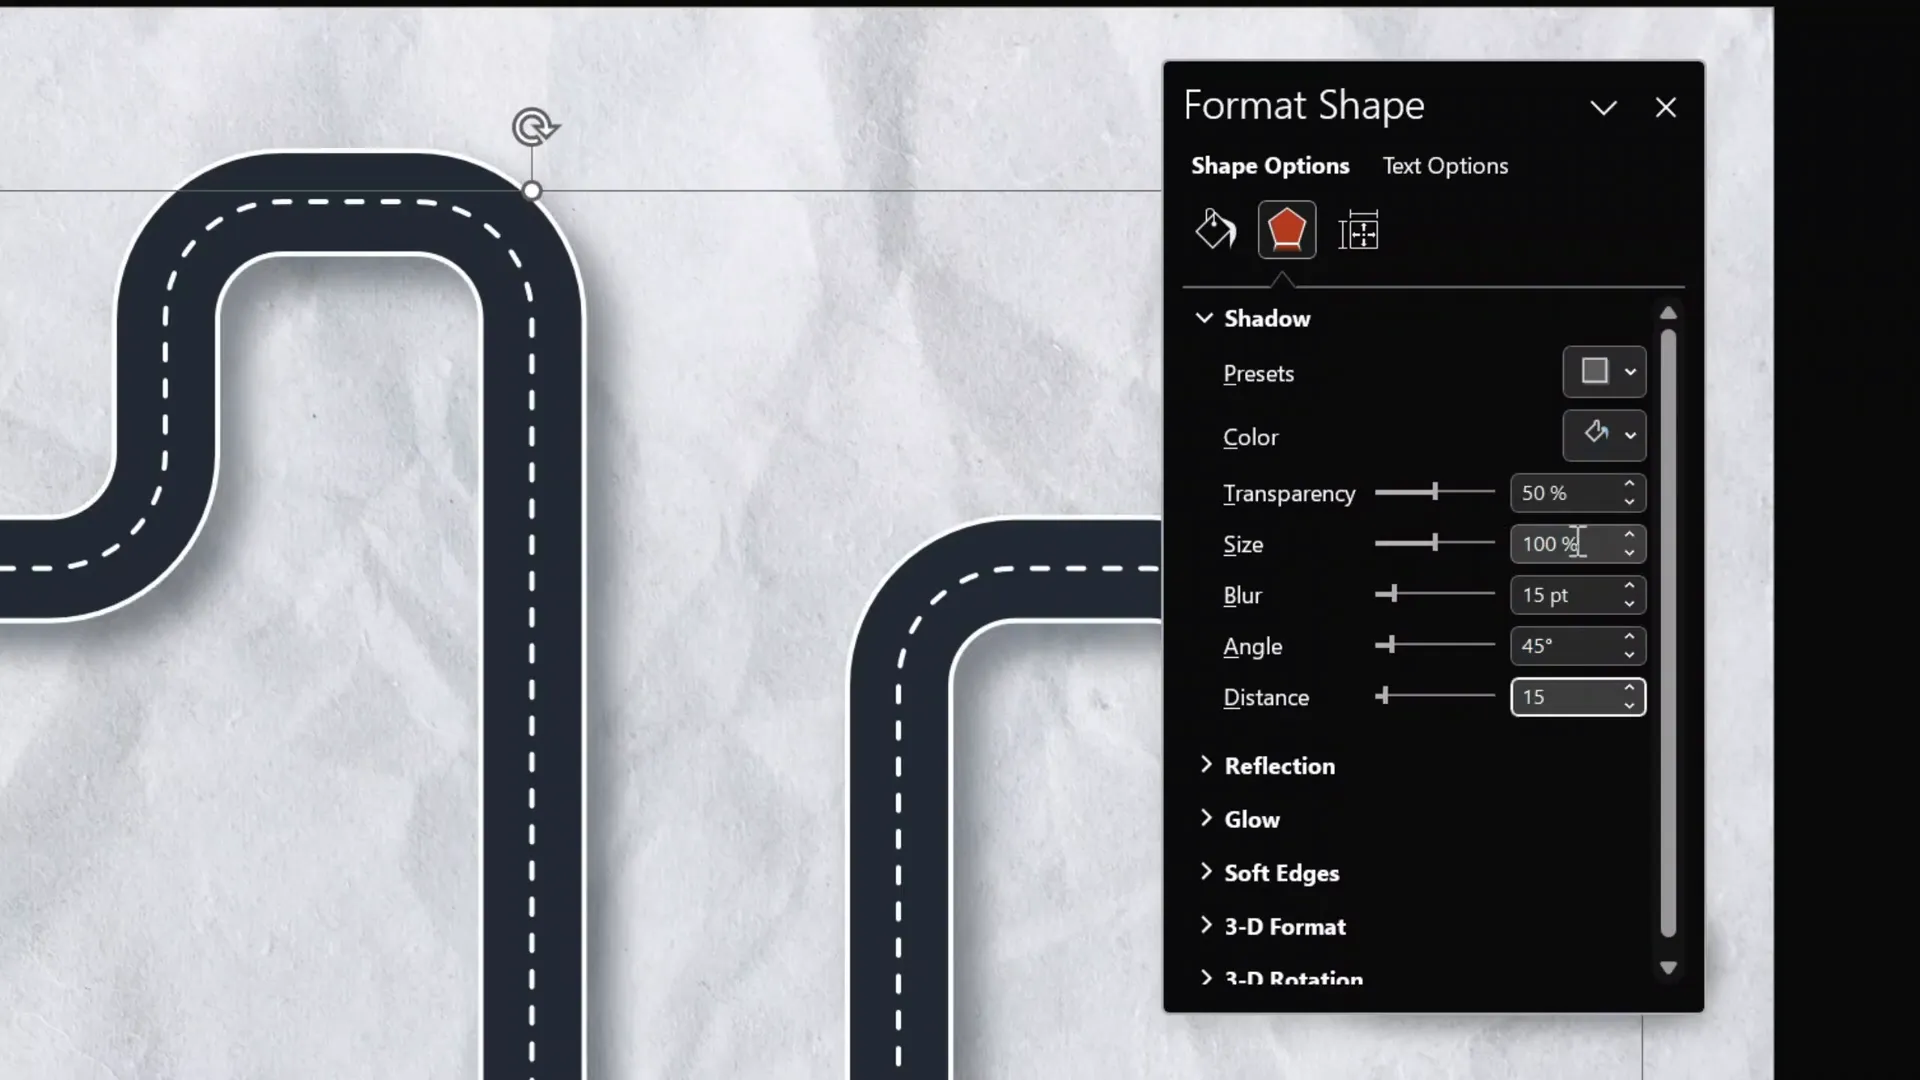
These finishing touches enhance the roadmap’s appearance, making it look polished and professional.
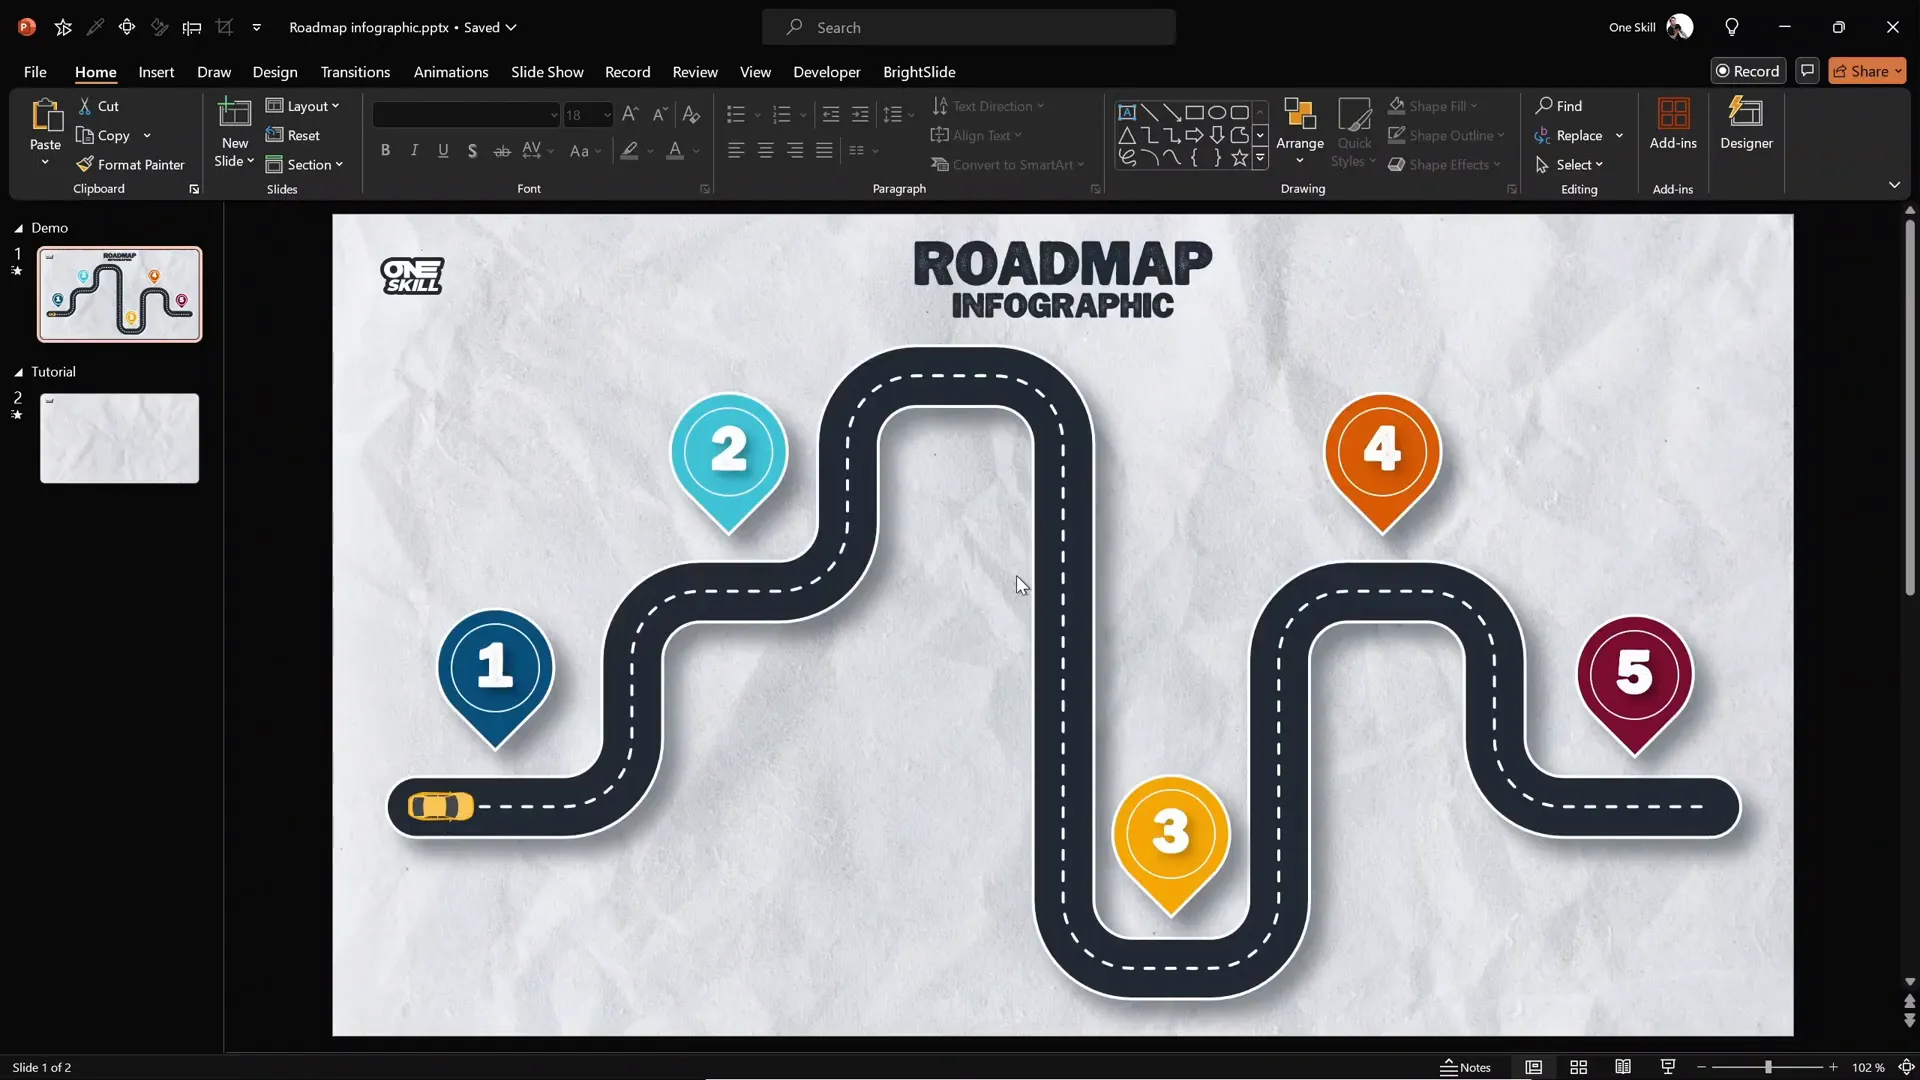
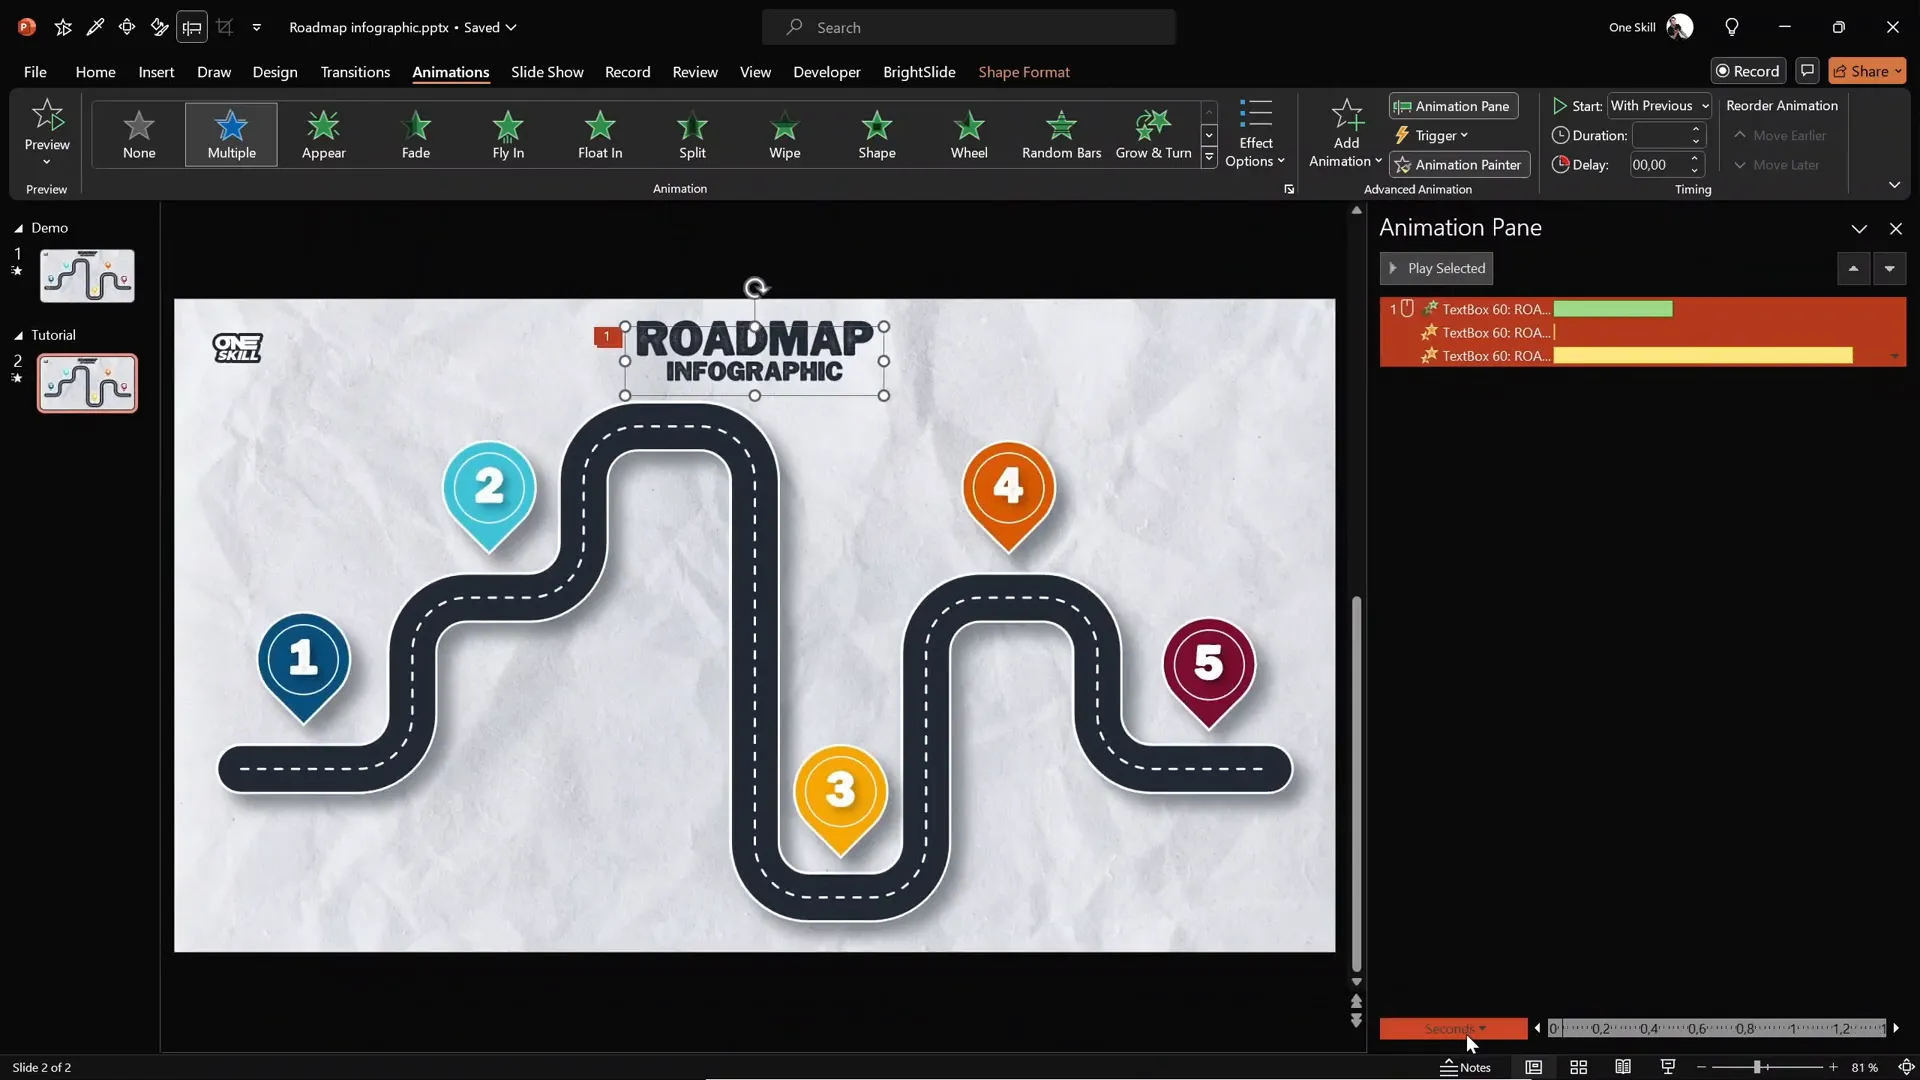
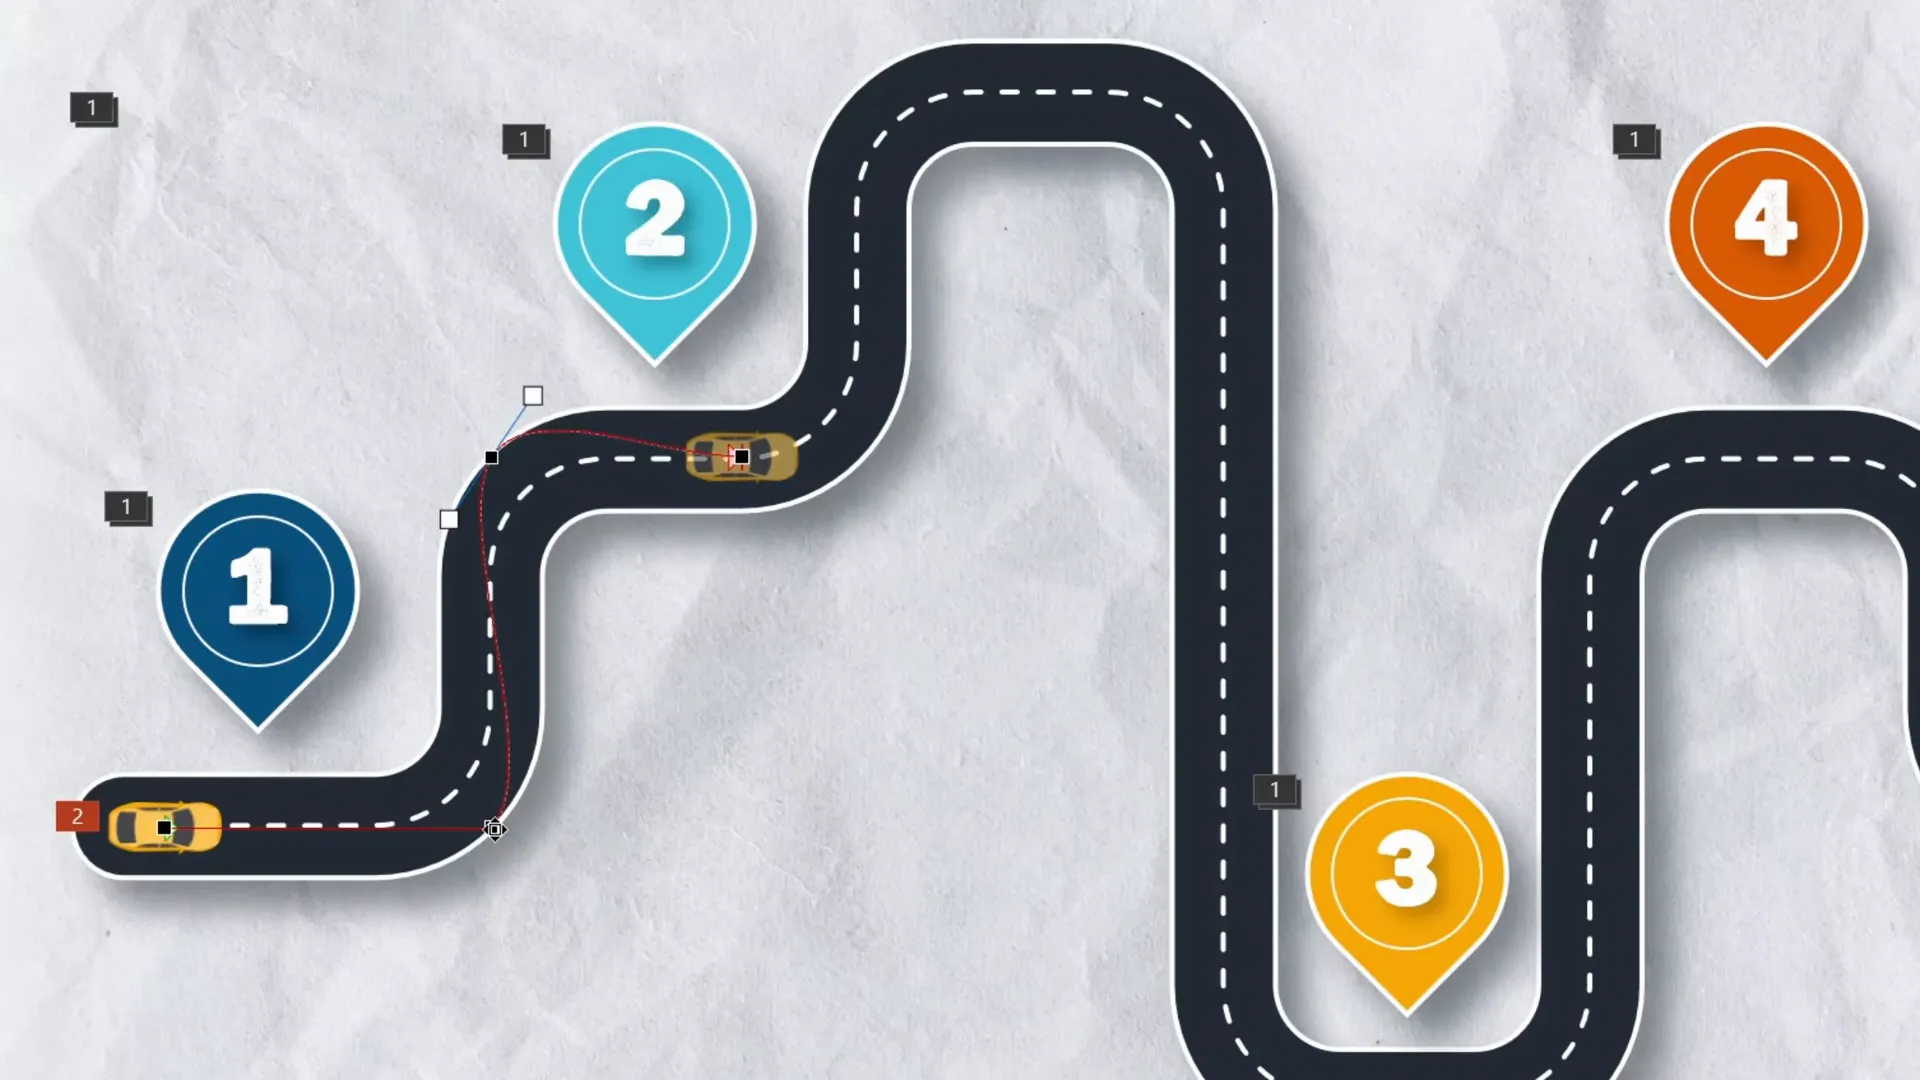
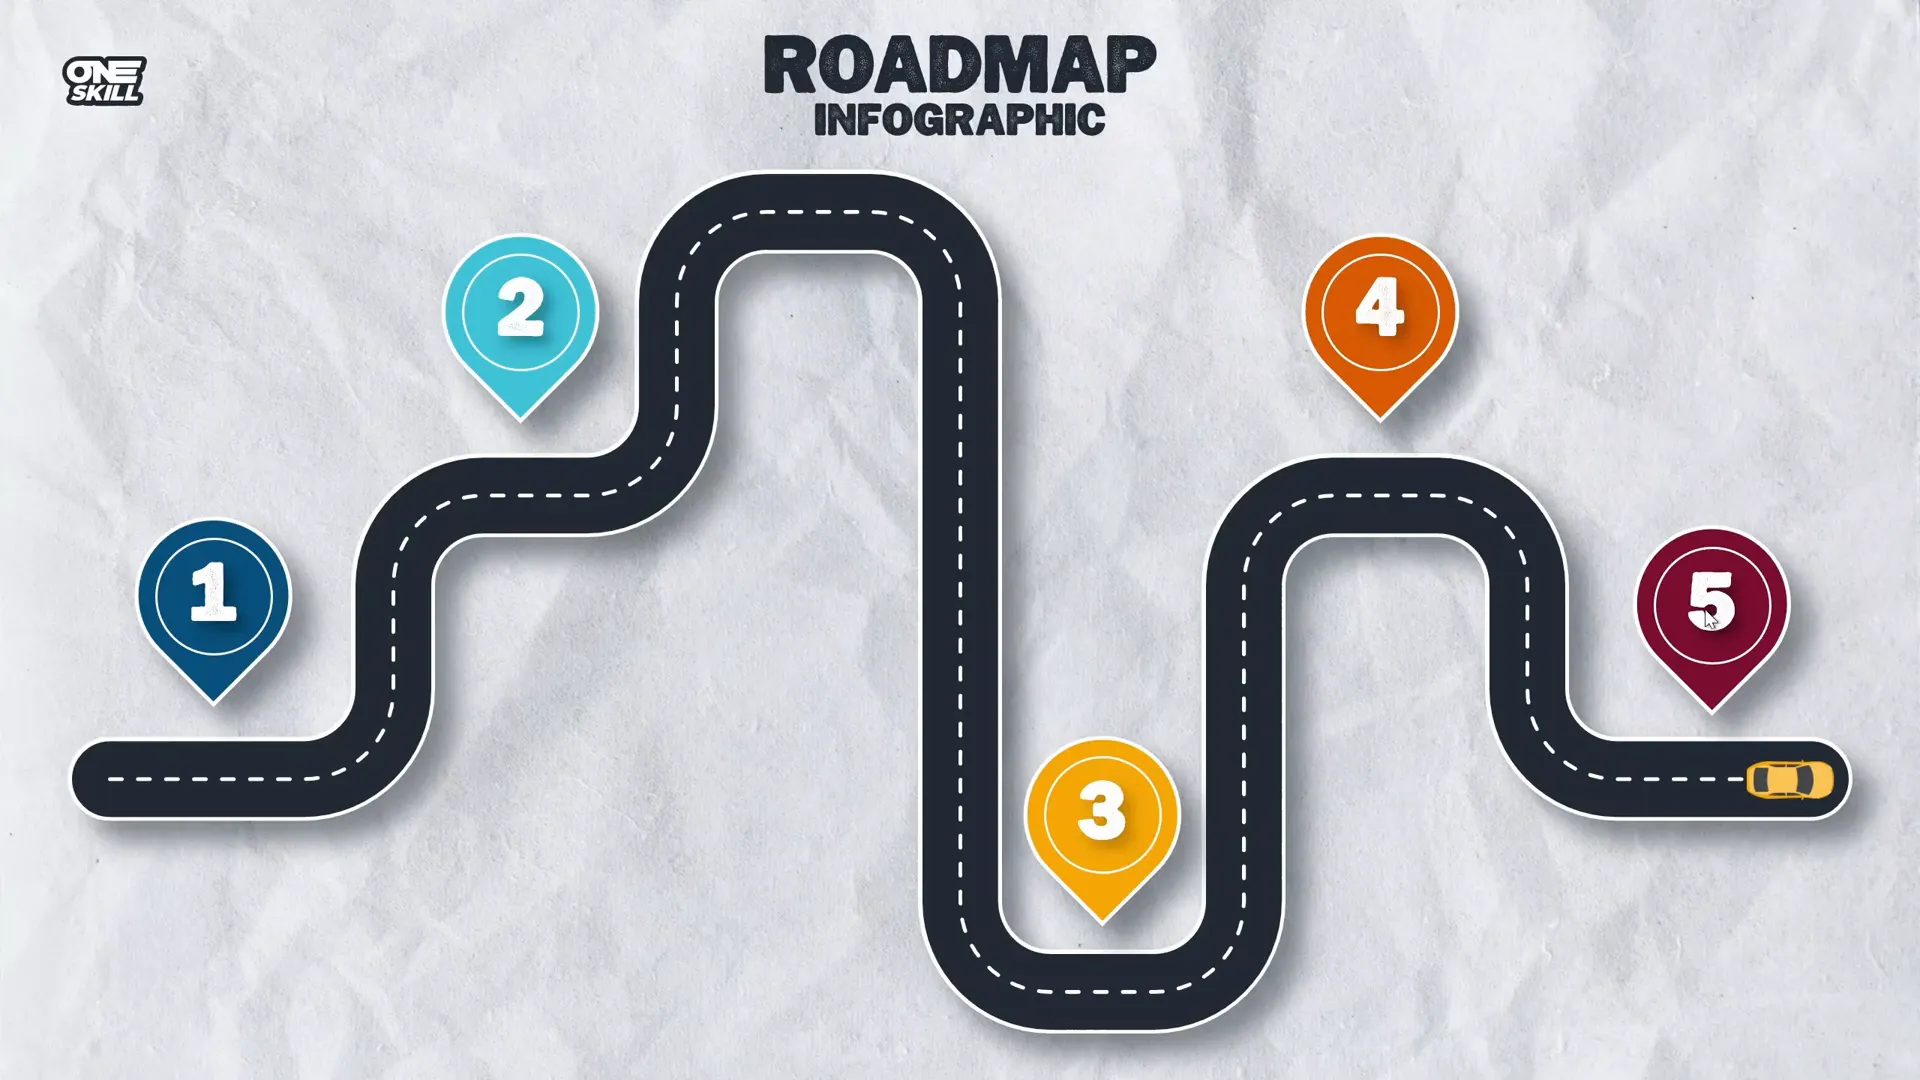
Creating Location Pins for Milestones
Milestones or key points along the roadmap are best represented with pins or markers. These pins help guide the audience’s attention and visually segment your roadmap into meaningful sections.
Designing Pins in PowerPoint
- Insert a teardrop shape: Go to Insert > Shapes and select the teardrop shape.
- Draw and rotate: Draw the teardrop and rotate it so the point faces downward.
- Fill and outline: Choose any fill color you like. Add a white outline with 2-point thickness for contrast.
- Add shadow: Apply the same shadow settings used for the roadmap for visual consistency.
- Add a circle for numbering: Insert a perfect circle (hold
Shiftwhile drawing) inside the pin. - Format the circle: Remove fill and add a white 1-point outline.
- Insert text: Double-click the circle and enter the milestone number.
- Adjust text formatting: Use the Joyful Mountain font (available free online) at size 36 pt, and add top margin padding to center the text vertically.
Once you have created one pin, you can copy and paste it along your roadmap to mark all milestones efficiently.
Adding a Moving Car for Visual Impact
One of the most engaging elements you can add to your roadmap infographic is a moving car that follows the route. This adds a dynamic storytelling element and keeps your audience visually engaged.
The car asset used here comes from Freepik (link here), and you can insert it as an image on your slide.

Creating a Smooth Zoom-in Animation with Slow Motion Effect
Let’s start by animating the slide elements with a stylish zoom-in effect that ends with a slow motion, making your presentation feel polished and professional.
How to Create the Zoom Effect
This effect is not a default animation in PowerPoint, but you can create it by combining three animations:
| Animation Type | Settings | Description |
|---|---|---|
| Zoom | Duration: 0.5 seconds | Basic zoom-in animation |
| Grow/Shrink (Shrink) | Shrink to 50%, Duration: 0.01 seconds | Quick shrink for smooth transition |
| Grow/Shrink (Grow) | Grow to 200%, Duration: 1.25 seconds, Smooth end: maximum | Slow motion zoom effect |
By layering these animations on your objects (such as titles, pins, and shapes), you achieve a zoom that slows elegantly at the end.
Applying the Animation to Multiple Objects
After setting the animations on one object, use the animation painter tool to copy and paste the animation settings onto other objects on the slide. Set the first animation to start on mouse click and subsequent animations to start with previous, so everything animates smoothly with one click.
Animating the Car to Follow the Road with Turns
Animating the car to follow the curvy roadmap is a multi-step process that combines custom motion paths and spin animations to simulate turns.
Step 1: Create a Custom Motion Path
- Select the car image.
- Go to Add Animation > Motion Paths > Custom Path.
- Click on the center of the car to start drawing the path.
- Click on each corner of the roadmap where the car should turn.
- Double-click to finalize the path.
- Right-click the path and choose Edit Points to smooth corners and adjust the path so the car follows the dashed center line precisely.
Step 2: Add Spin Animations for Turns
Since the car does not automatically rotate on the motion path, add spin animations at each turn:
- Select the car and add a spin animation.
- Set the spin to 90 degrees (adjust direction to clockwise or counterclockwise depending on the turn).
- Set the spin animation to start with previous and adjust the delay so the spin occurs at the right moment on the path.
- Repeat for each turn along the roadmap.
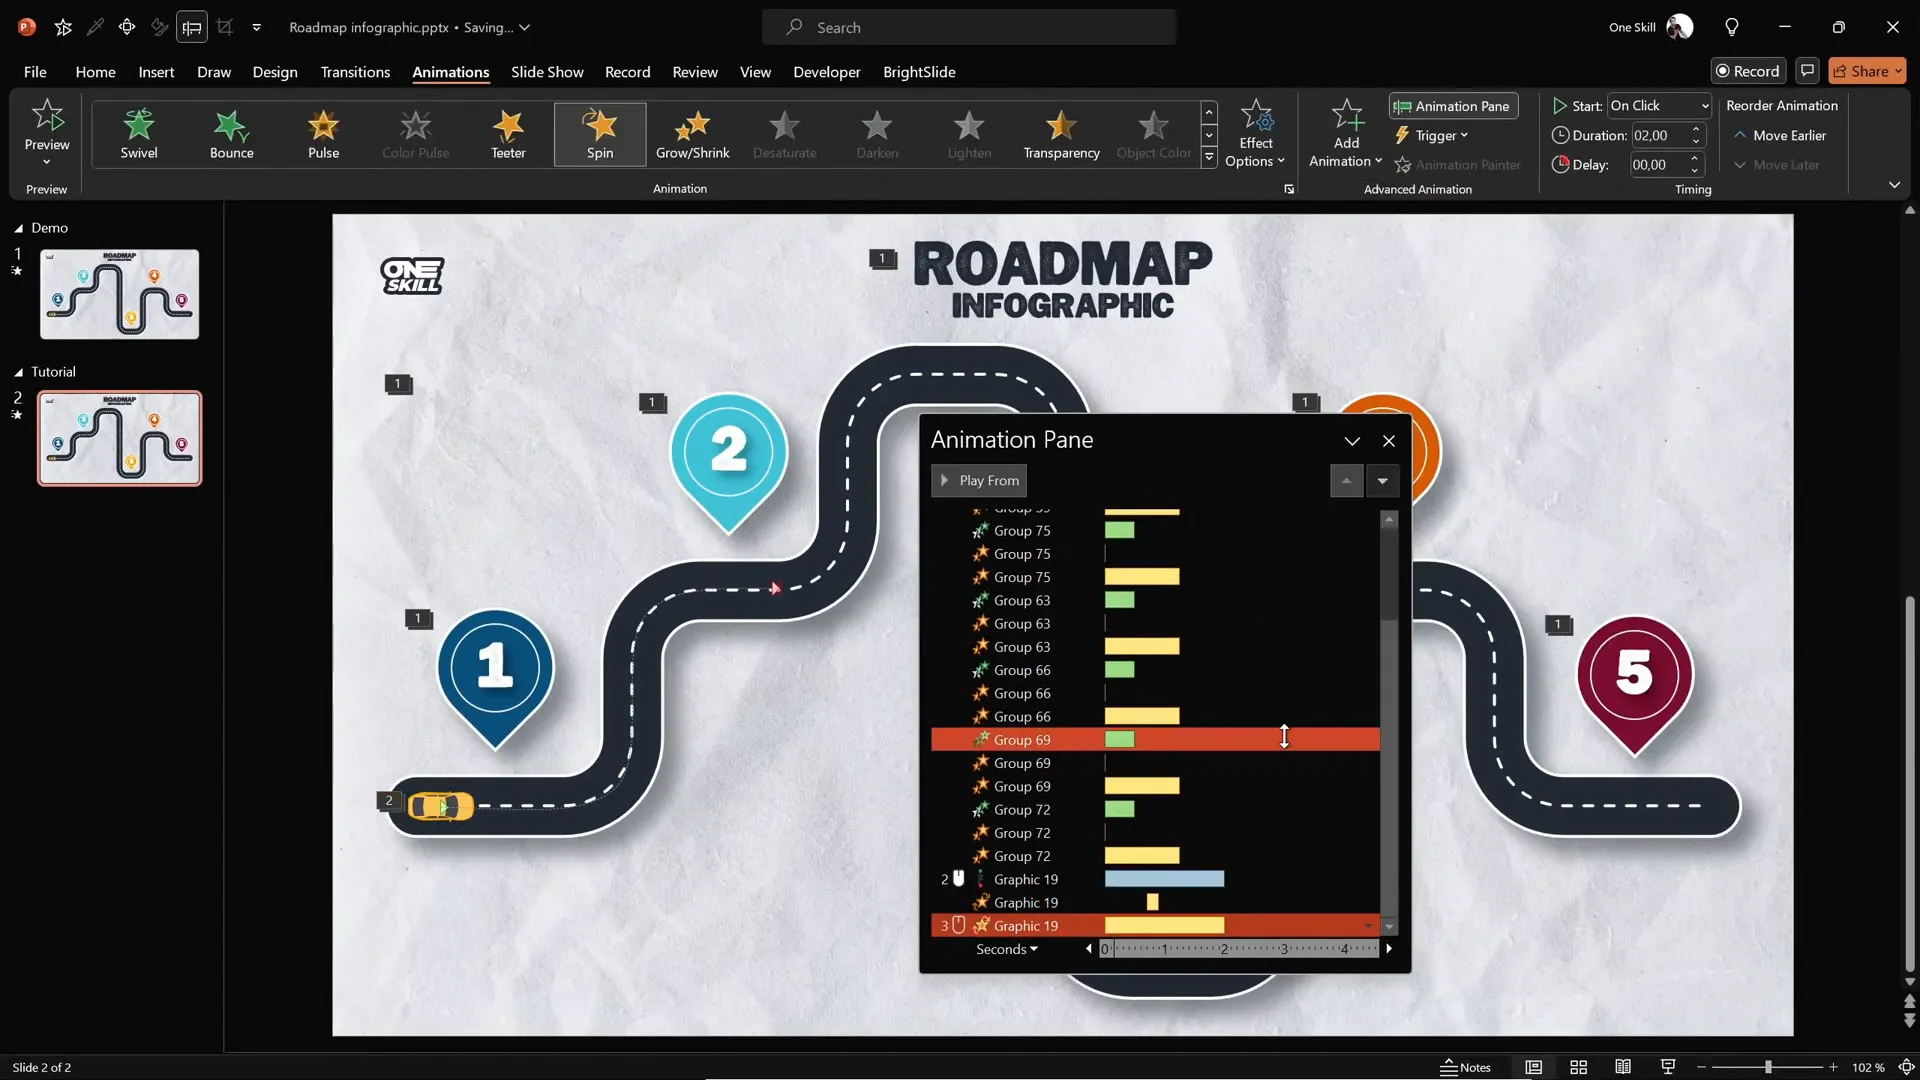
Step 3: Add a Fly-in Entrance
To introduce the car smoothly, add a Fly In animation from the left, placing it above the motion path animation in the animation pane. Set its duration to 0.5 seconds with a smooth start.
This sequence creates a polished effect where the car appears, then follows the roadmap with realistic turns.
Advanced Tips: Slide Zooms for Interactive Presentations
To make your roadmap infographic even more interactive, consider adding slide zooms on each pin. Slide zooms allow you to click on a pin and zoom into additional slides with detailed information about that milestone.
This technique adds a layer of interactivity and depth to your presentation, making it ideal for detailed project roadmaps, timelines, or educational content.
If you want to learn how to add slide zooms, check out the related tutorial video linked in the original source.
Frequently Asked Questions (FAQ)
What is the easiest way to create curvy shapes for infographics in PowerPoint?
The easiest and most efficient way is to design your shape in a vector tool like Figma, then export it as an SVG and import it into PowerPoint. This method offers precision and flexibility that PowerPoint’s native tools struggle to provide.
Can I animate SVG shapes imported into PowerPoint?
Yes! Once converted to shapes in PowerPoint, SVGs can be animated just like any other PowerPoint object, including applying motion paths, spin, grow/shrink, and other effects.
How do I create a smooth zoom animation with slow motion effect in PowerPoint?
Combine three animations on the object: a quick zoom in, a very brief shrink, and then a slow grow with maximum smooth end. This layering creates a zoom effect that slows down elegantly.
Can the car on the roadmap turn realistically following the path?
Yes. By combining a custom motion path with spin animations timed to the turns, the car can rotate realistically as it moves along the roadmap.
Is Figma free to use?
Yes, Figma offers a free plan that is sufficient for creating vector illustrations and exporting SVGs for use in PowerPoint.
Where can I find assets like backgrounds and car illustrations?
Freepik.com is a great resource for free and premium backgrounds and illustrations. Links to specific assets used in this tutorial are provided in the video description.
Conclusion
Mastering PowerPoint design animation can transform your presentations from static slides into engaging visual stories. By leveraging tools like Figma to create custom roadmap shapes, importing them into PowerPoint, and applying layered animations, you can create compelling animated roadmap infographics that captivate your audience.
This tutorial covered everything from the initial design setup to detailed animation techniques, including how to make a car follow a curvy path with realistic turns. Plus, with tips on adding interactive slide zooms, you’re equipped to make your presentations more dynamic and user-friendly.
Remember, the key to successful animations is subtlety and timing—overdoing effects can distract rather than enhance. Use these techniques to complement your narrative, and your presentations will stand out with professional polish.
Ready to try it yourself? Start by downloading the free assets mentioned, exploring Figma, and experimenting with these animation techniques. You’ll be amazed by the impact well-executed PowerPoint design animation can have.
For more advanced tips and tutorials on PowerPoint animations and interactive presentations, be sure to check out related videos and courses linked in the video description. Happy presenting!


