
If you’re looking for a fresh and eye-catching Powerpoint design idea to elevate your presentations, you’re in the right place. Today, we’re diving deep into how to create an impressive animated conic gradient effect in PowerPoint. This tutorial will guide you step-by-step on how to bring dynamic and colorful visuals to your slides, even if PowerPoint doesn’t natively support conic gradients.
Whether you use Office 365 or an earlier version, this tutorial is designed to work across most PowerPoint versions. We’ll also explore how to make the gradient spin and add fun animated elements — like flying cats — to make your slides lively and engaging.
Table of Contents
- What Is a Conic Gradient?
- Why Use Figma to Create Conic Gradients?
- Step-by-Step Guide to Creating the Animated Conic Gradient Effect
- Customizing the Gradient and Background Colors
- Adding Spin Animation in PowerPoint
- Enhancing Your Slide with Content and Illustrations
- Pro Tips and Tricks for Better Effects
- Frequently Asked Questions (FAQ)
- Conclusion
What Is a Conic Gradient?
Before diving into the how-to, let’s understand the concept of a conic gradient. Unlike traditional gradients that transition colors linearly or radially, a conic gradient is a type of gradient that sweeps colors around a central point, creating a circular, cone-like effect.
Imagine the colors rotating around the center of a circle, blending smoothly as they go. This creates a dynamic and visually appealing radial effect that can add depth and movement to your slides.

PowerPoint, by default, offers several gradient types such as linear, radial, rectangular, and path gradients. However, it doesn’t support conic gradients natively, which requires a workaround to achieve this effect.
Why Use Figma to Create Conic Gradients?
The inspiration for this tutorial comes from UI Adrian, who created stunning conic gradients using Figma, a popular web design tool.
Since PowerPoint doesn’t directly support conic gradients, the solution is to create the gradient in Figma — which offers an easy way to generate angular (conic) gradients — and then export it as a PNG image to use inside PowerPoint.
Figma is free and user-friendly, making it accessible for anyone wanting to create custom gradients and graphics for their presentations.
Step-by-Step Guide to Creating the Animated Conic Gradient Effect
Here’s how you can create this stunning animated conic gradient effect in PowerPoint, even if the software doesn’t support it natively.
1. Create the Conic Gradient in Figma
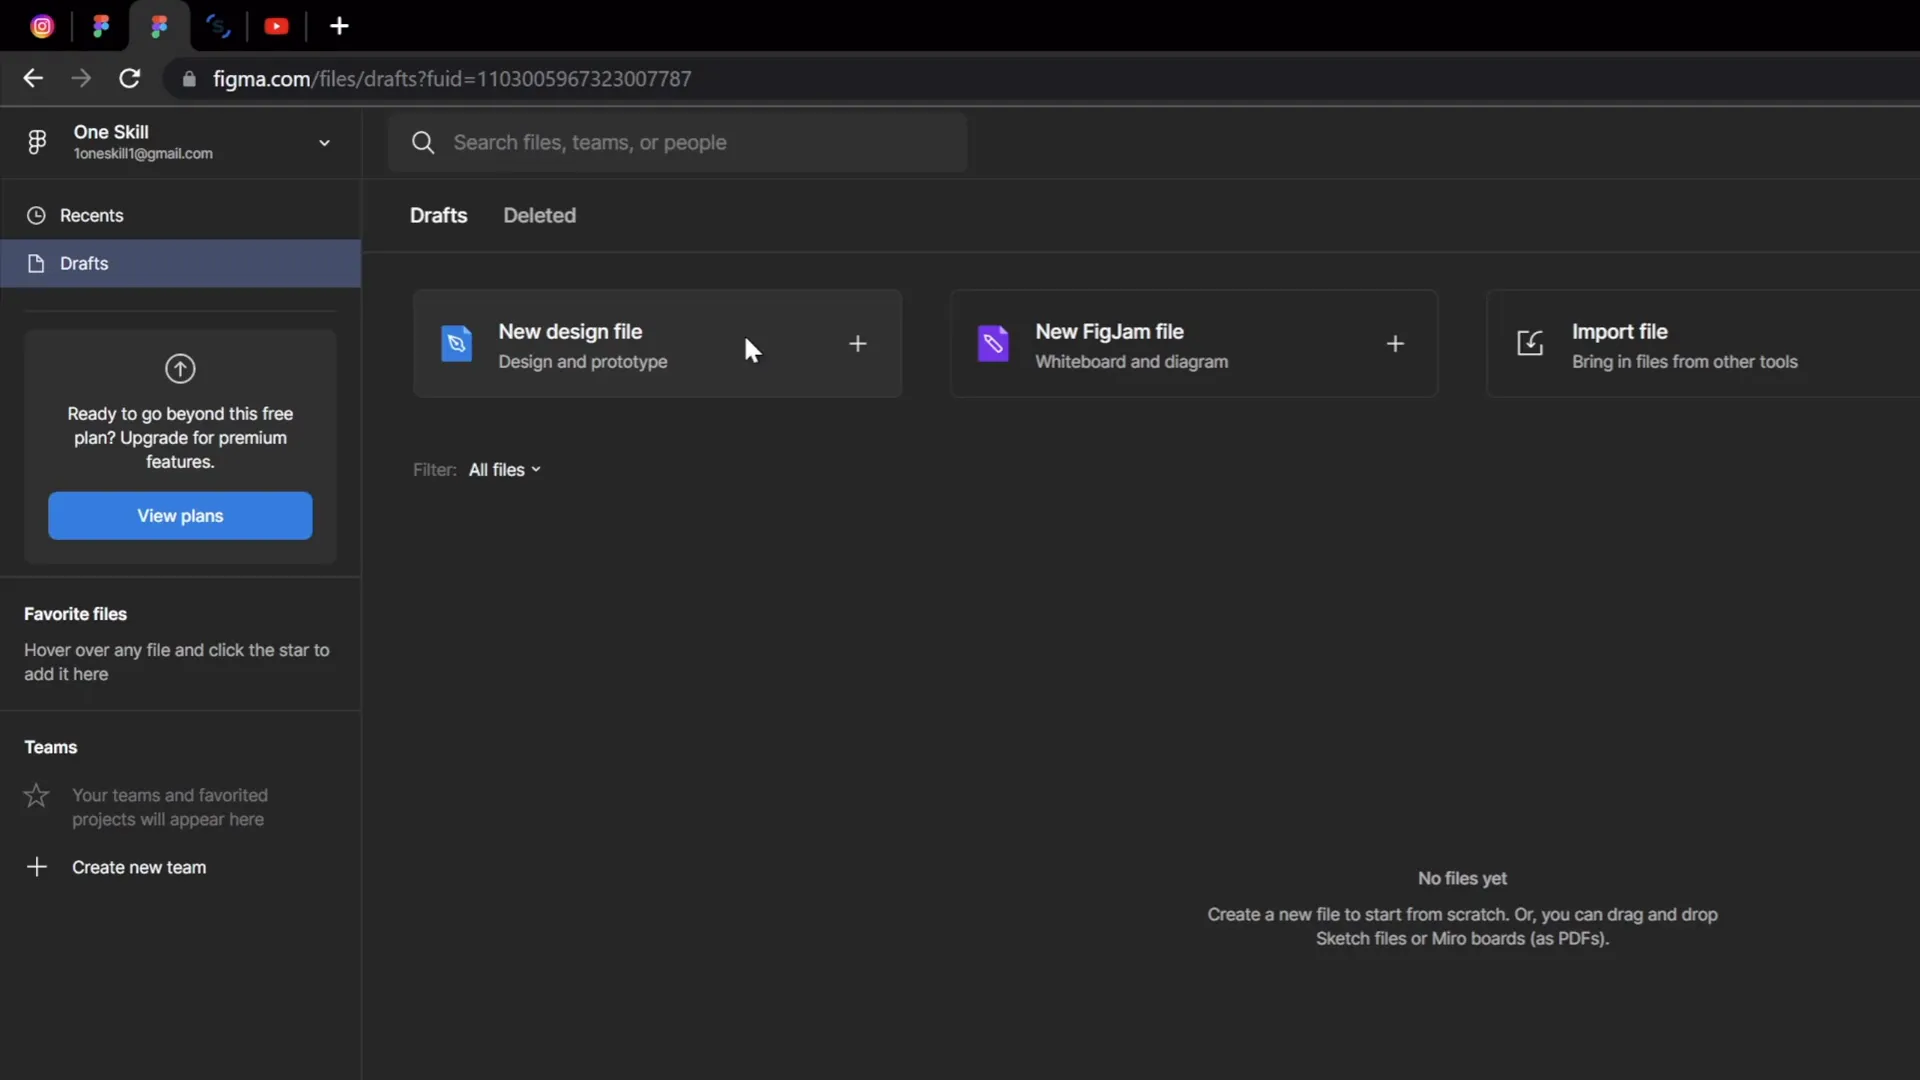
- Log into Figma using your Google account or sign up for a free account.
- Click on New Design File to start a blank canvas.
- Insert a frame (which acts like a page) by clicking the frame tool.
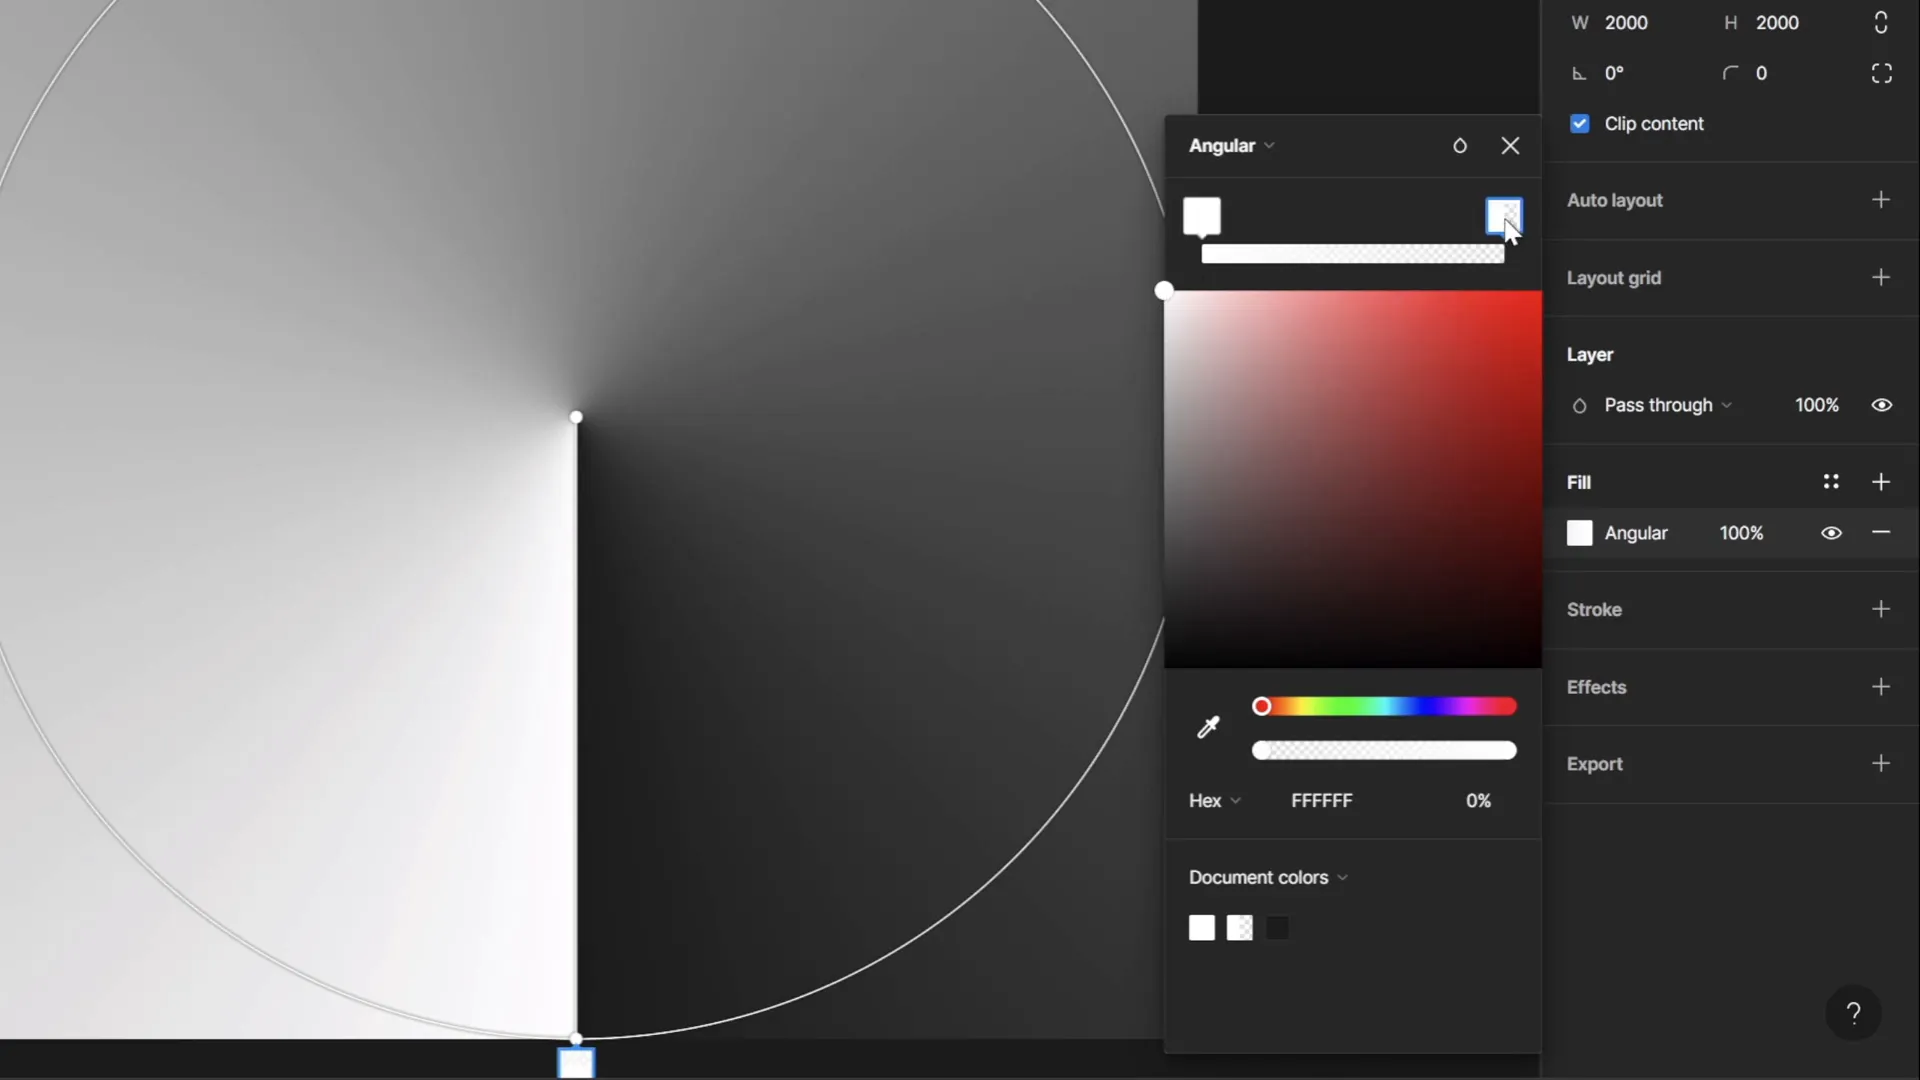
- On the right panel, set the frame dimensions to 2000 pixels width and 2000 pixels height. This large size ensures high-quality export and easier scaling in PowerPoint.
- Click on the Fill option and select Angular Gradient from the gradient types. This is Figma’s version of the conic gradient.
- Adjust the gradient stops: set the left side to pure white and the right side to fully transparent white. This creates a flexible gradient that can adapt to different background colors in PowerPoint.
- Optionally, experiment with colors if you want, but for maximum flexibility, stick with white and transparent white.
- Rename the frame to “Conic Gradient” for easy identification.
- Export the frame as a PNG file by clicking the export button.
2. Import the Conic Gradient Image into PowerPoint
- Open PowerPoint and create a new slide with a colored background (not white) to better see the gradient effect.
- Go to Insert > Pictures and select the PNG file you exported from Figma.
- Resize the gradient image by holding Ctrl + Shift and dragging the corner to enlarge it until it covers the entire slide.
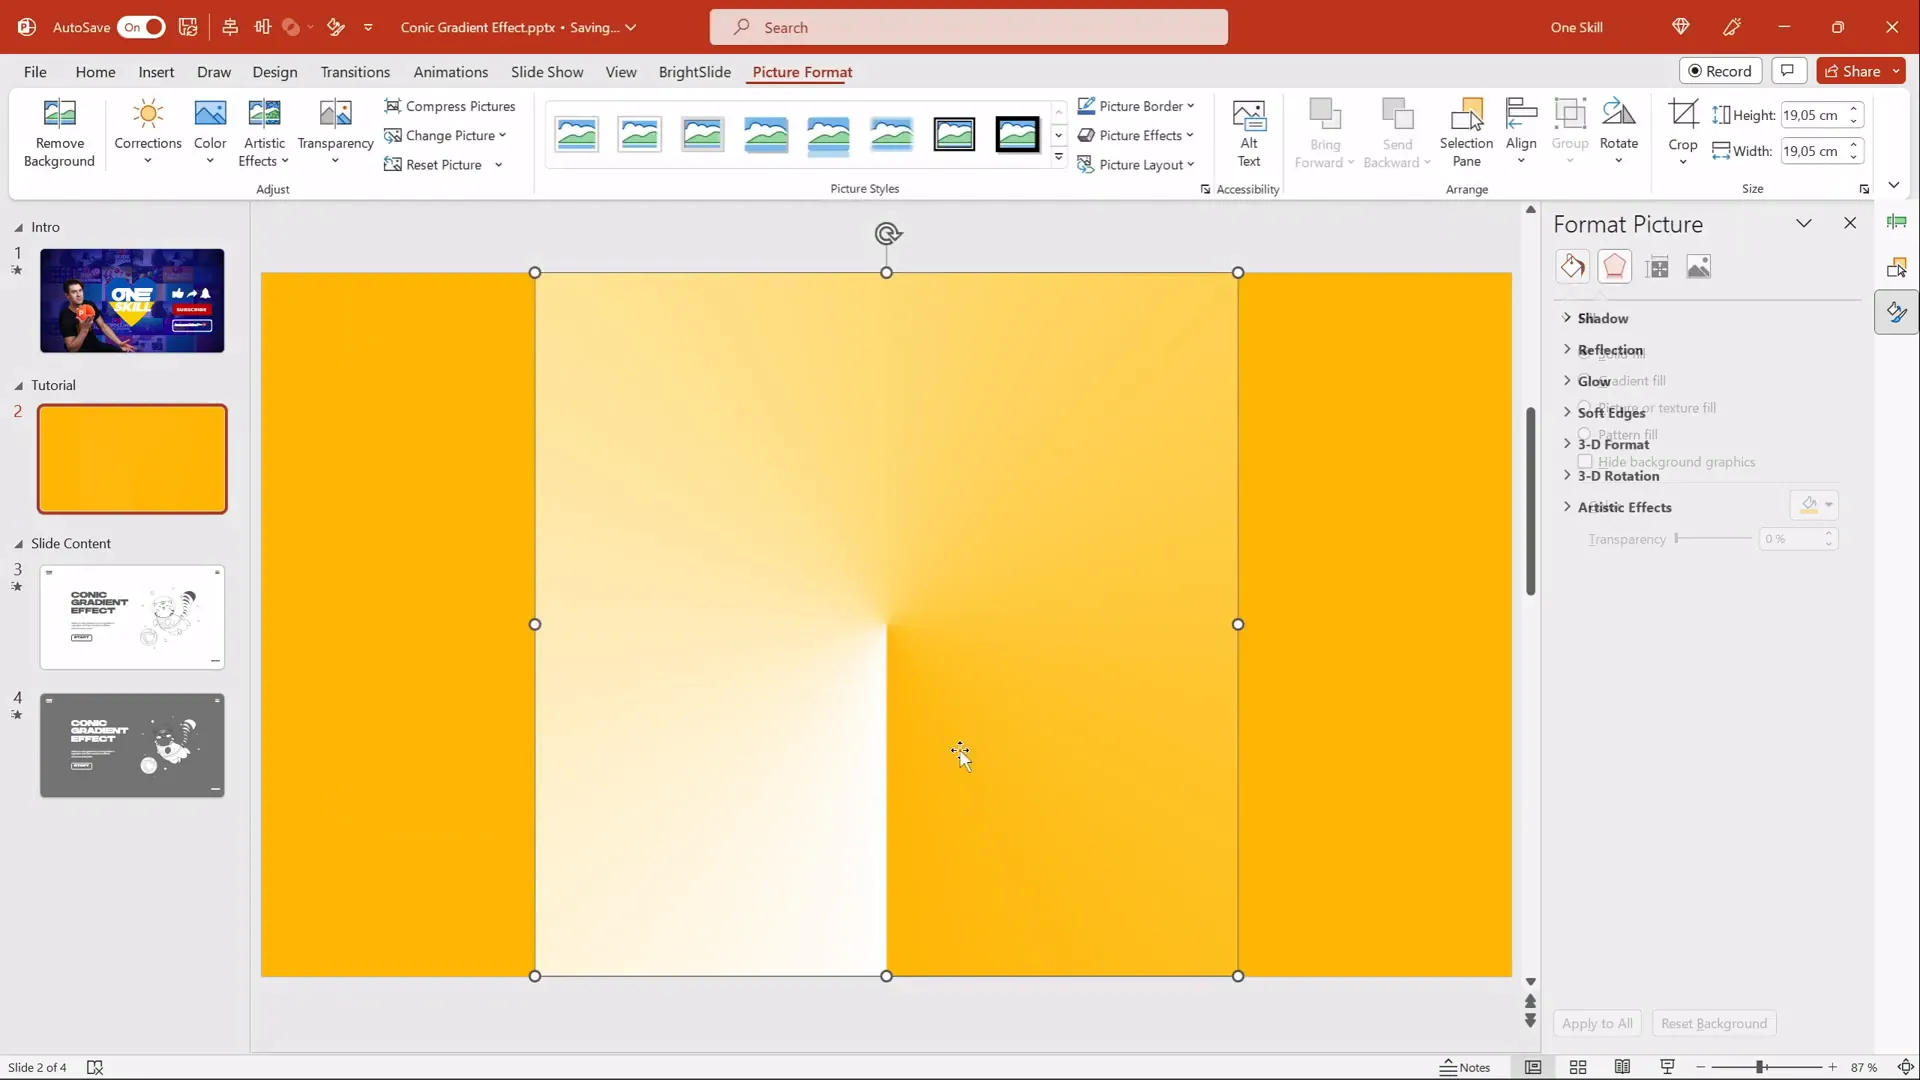
3. Crop the Gradient into a Circular Shape for Full Coverage
When you animate the gradient to spin, the corners of the slide may sometimes be uncovered if the gradient image is rectangular. To fix this, crop the gradient into a circle slightly larger than the slide.
- Insert a circle shape by holding Shift while drawing to keep it perfectly round.
- Center the circle on the slide.
- Make the circle’s fill fully transparent so you can see the gradient behind it.
- Resize the circle to be slightly bigger than the slide itself.
- Resize the gradient image to be slightly bigger than the circle.
- Select the gradient image, then hold Shift and select the circle.
- Go to Shape Format > Merge Shapes > Intersect. This crops the gradient image to the shape of the circle.
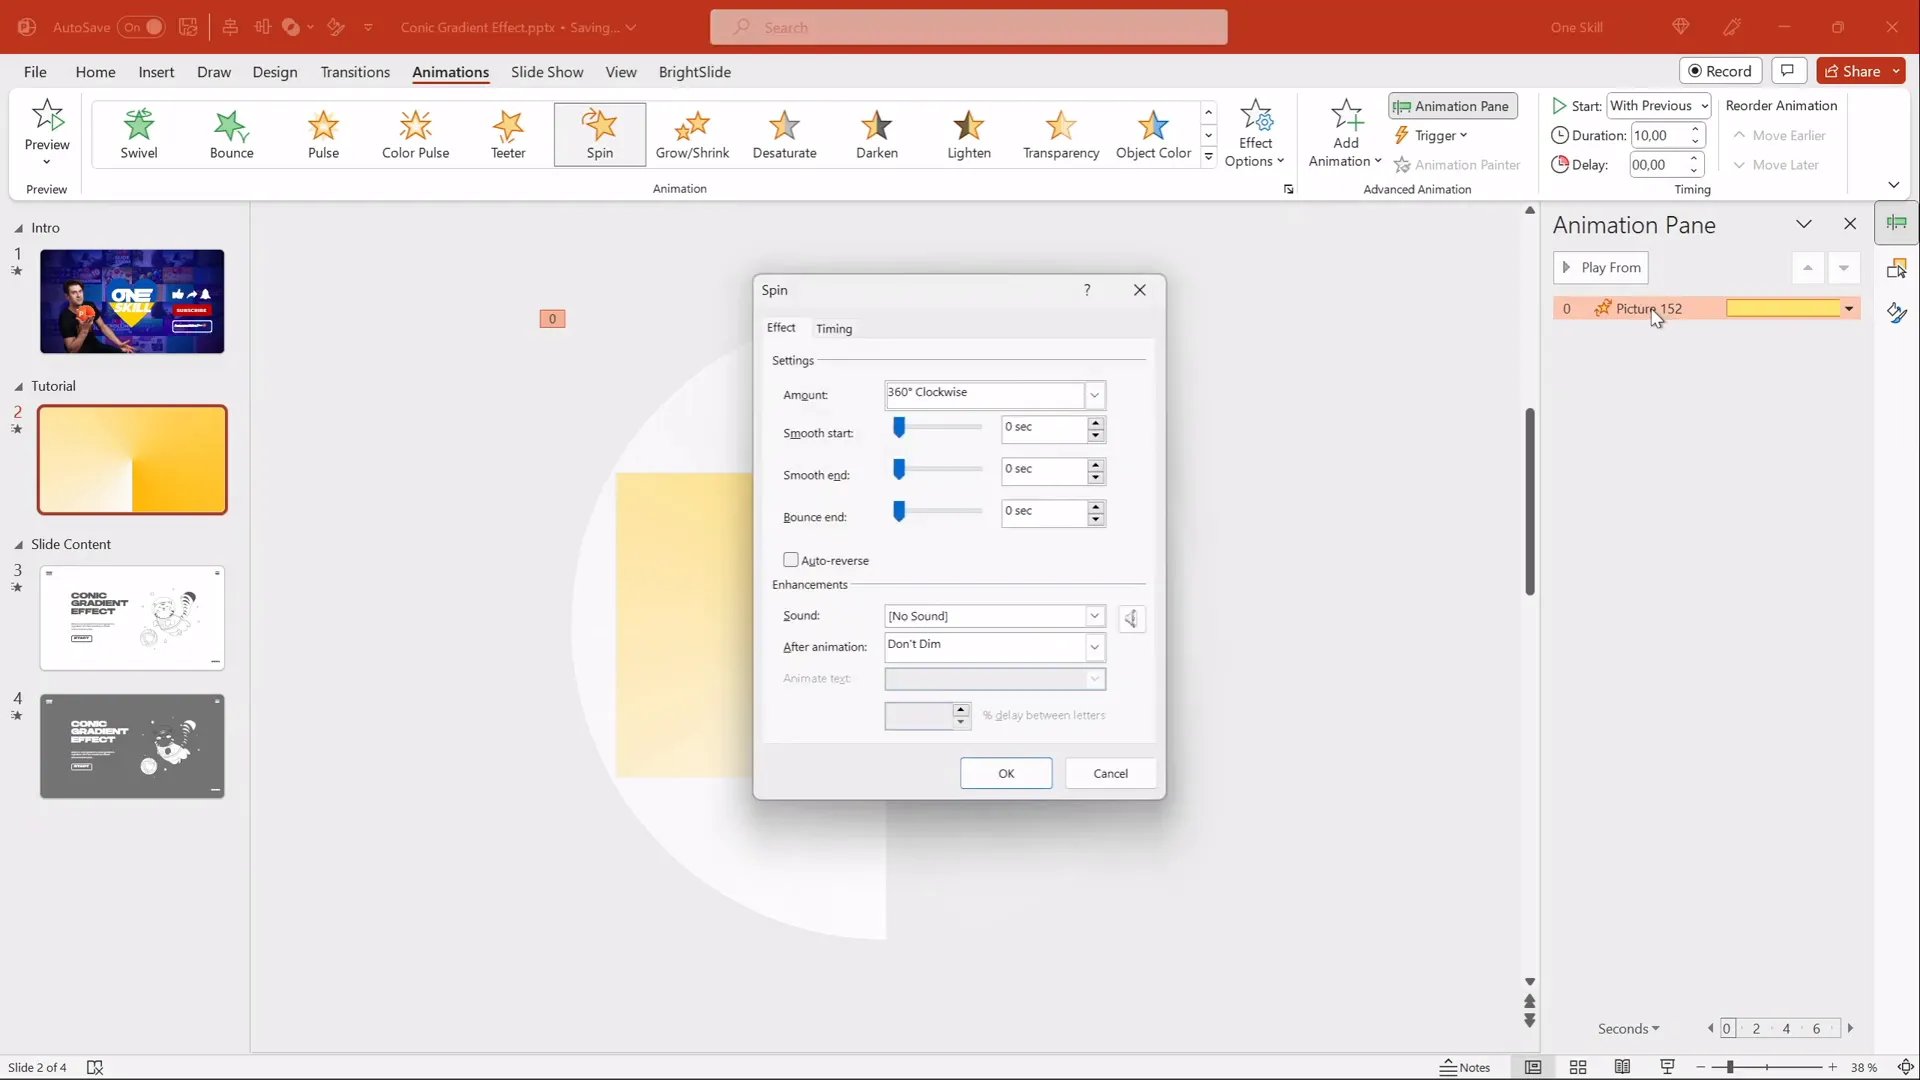
4. Add a Spin Animation to the Gradient
- Select the cropped gradient image.
- Go to the Animations tab and add the Spin animation.
- In the animation options, set the rotation to Clockwise and choose a Full Spin (360 degrees).
- Set the animation to start With Previous and set the duration to 10 seconds.
- Choose to repeat the animation Until End of Slide to make it spin continuously.
- Disable smooth start and smooth end for a consistent spin speed.
Preview your slide to see the rotating conic gradient effect in action. Congratulations — you’ve just created a stunning animated gradient effect in PowerPoint!
Customizing the Gradient and Background Colors
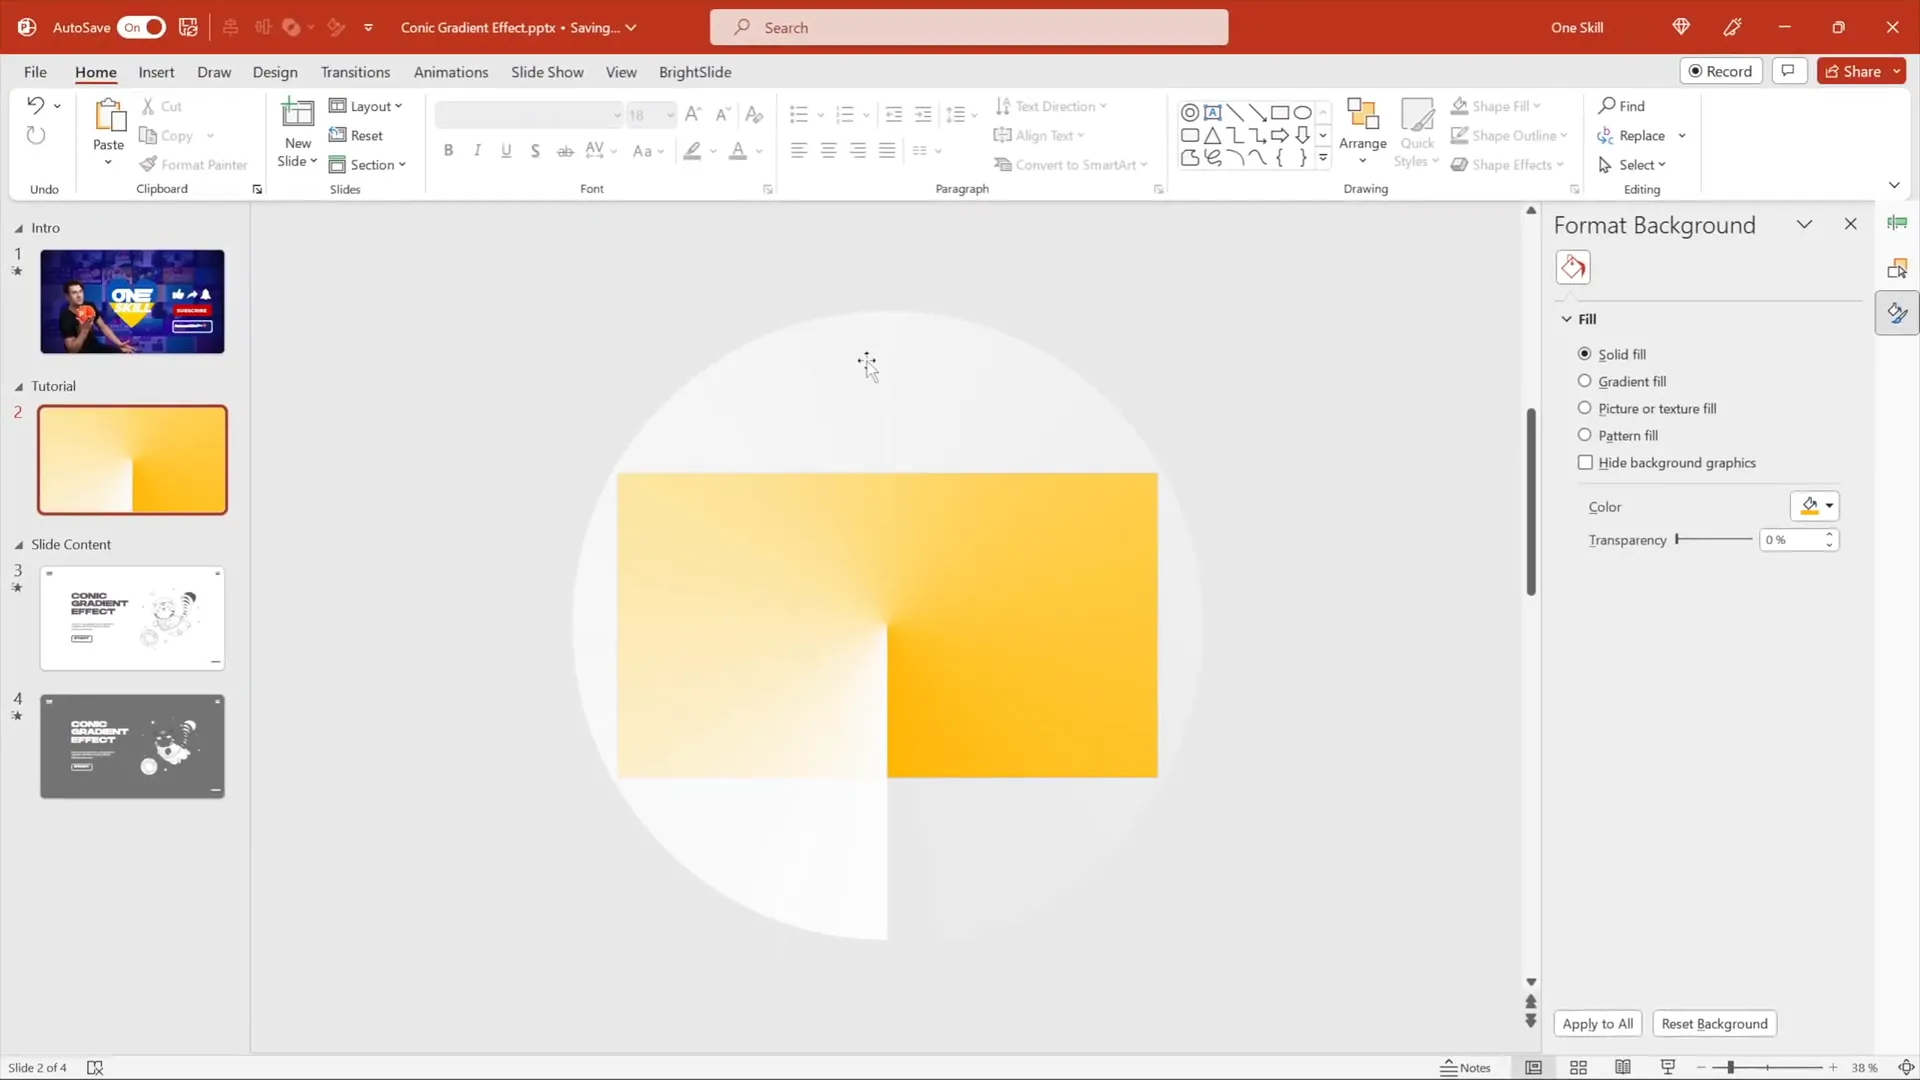
One of the best features of this method is the flexibility it offers for color customization. Since the gradient is white fading to transparent, you can easily change the slide background color in PowerPoint to create different gradient color effects.
How to Change Slide Background Color
- Duplicate the slide containing the gradient effect.
- Right-click the slide background and select Format Background.
- Choose a new background fill color (e.g., light purple, blue, or any color you prefer).
- Observe how the conic gradient adapts to the new background color, creating a fresh look.
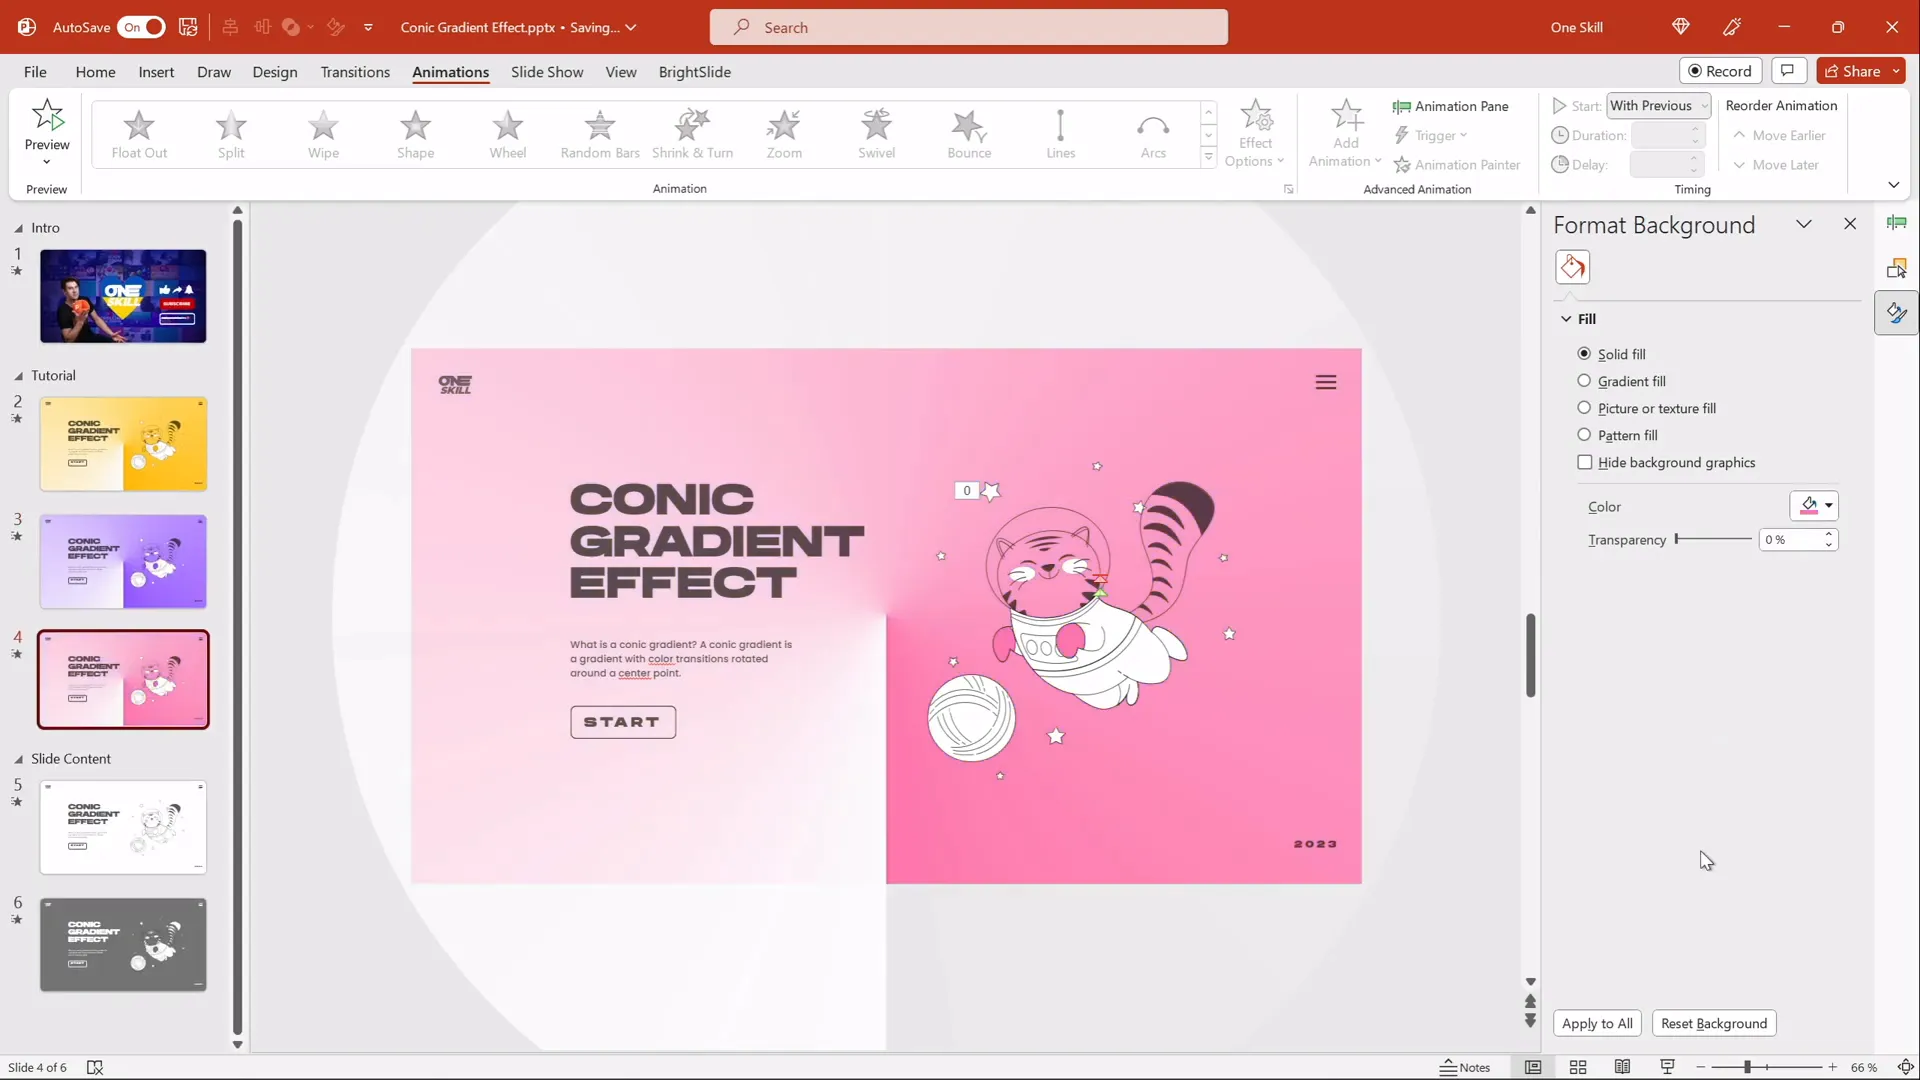
This method allows you to create endless variations of the conic gradient effect by simply changing the slide background color without editing the gradient image itself.
Turning the Gradient Dark
If you want to create a dark gradient effect, you can adjust the brightness and transparency of the gradient image in PowerPoint.
- Select the gradient image.
- Go to Picture Format > Corrections.
- Use the Brightness slider to reduce brightness, making the gradient darker.
- Adjust the Transparency slider if the effect is too strong and you want it subtler.
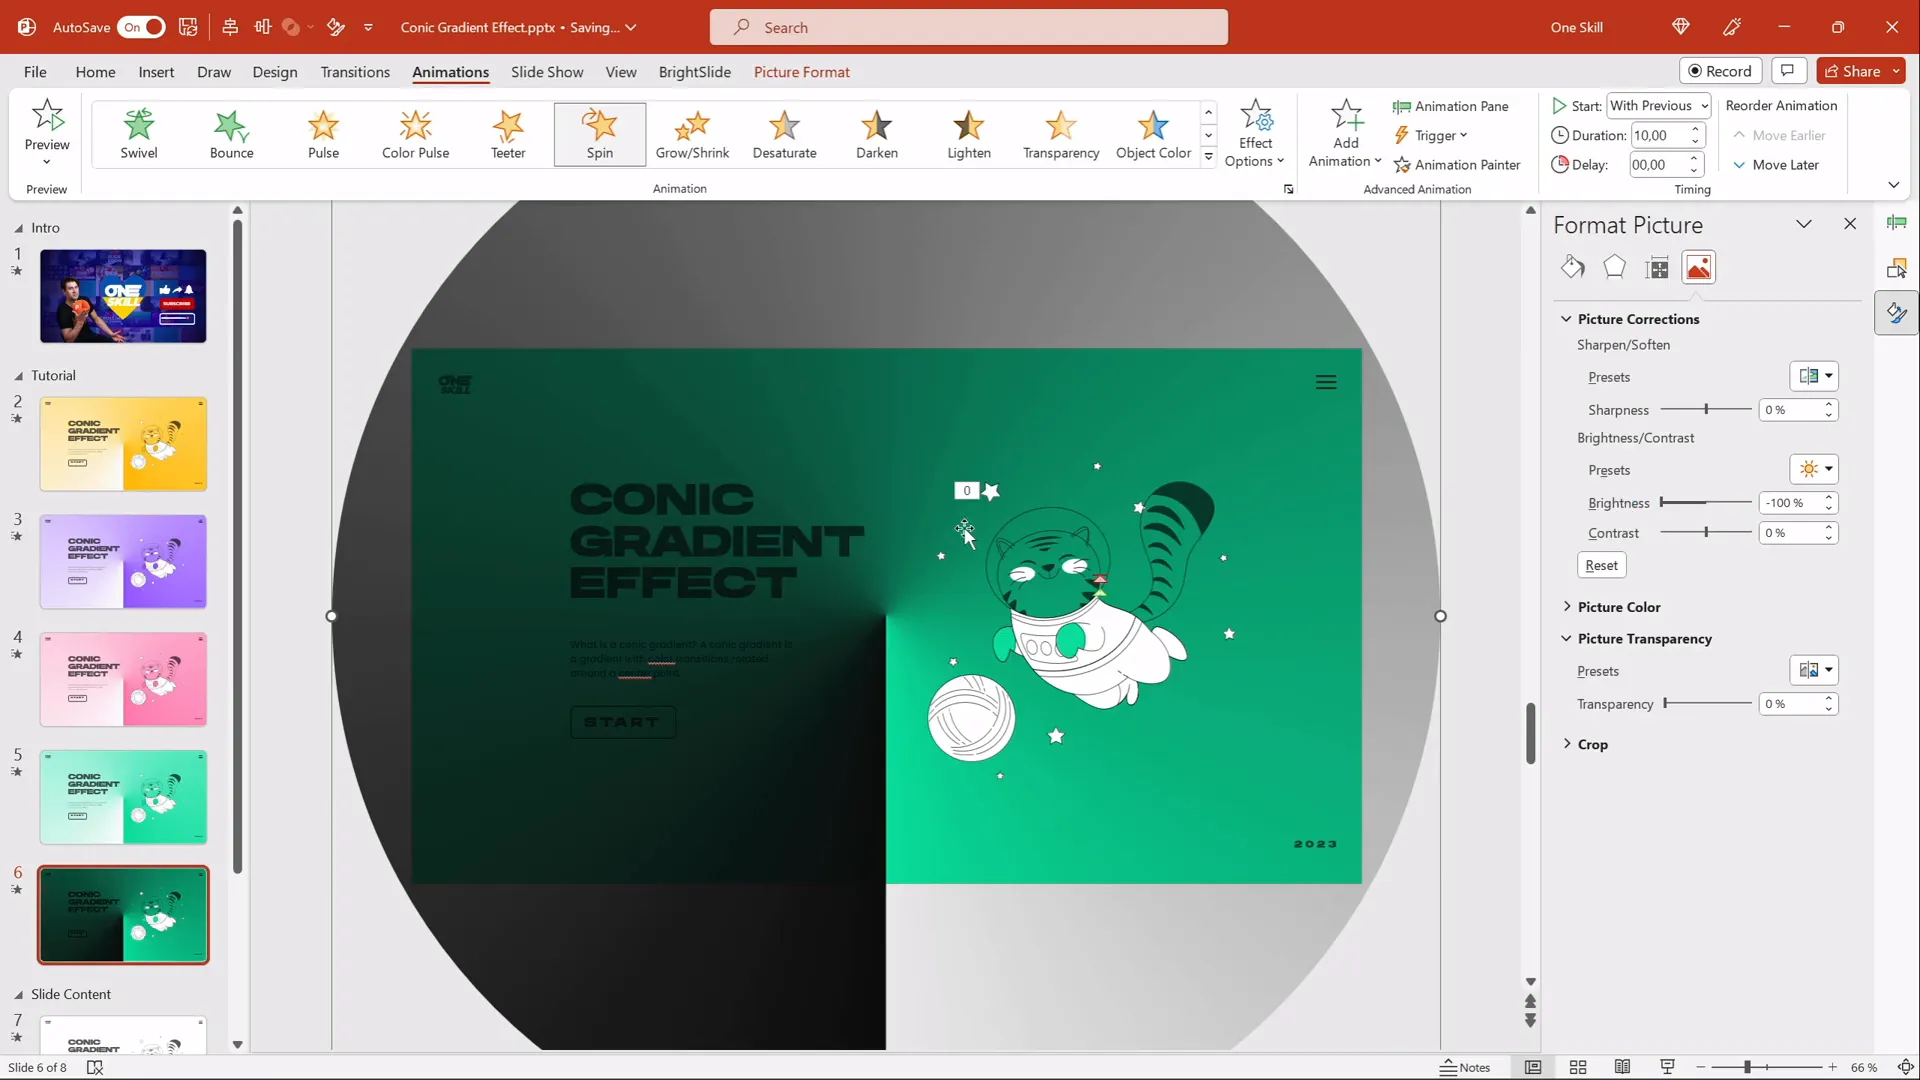
Try pairing dark gradients with lighter text colors (such as white) for better readability and visual impact.
Adding Spin Animation in PowerPoint
We already touched on adding the spin animation, but here’s a quick summary to ensure your animated gradient spins smoothly and continuously:
| Step | Action | Details |
|---|---|---|
| 1 | Select Gradient Image | Make sure the cropped conic gradient is selected. |
| 2 | Add Spin Animation | Animations tab → Add Spin. |
| 3 | Set Direction | Effect Options → Clockwise rotation. |
| 4 | Duration | Set to 10 seconds for a smooth spin. |
| 5 | Repeat | Repeat Until End of Slide. |
| 6 | Start | Start With Previous (automatic start). |
| 7 | Smoothness | Disable smooth start and smooth end for consistent speed. |
This creates a continuous spinning effect that will impress your audience without distracting from your message.
Enhancing Your Slide with Content and Illustrations
To showcase how this conic gradient effect can be used in practice, you can add text boxes, shapes, or illustrations on top of the animated background. For example, the tutorial includes:
- Text boxes aligned on the left side with a stylish font called “Hands On” (available for free online).
- A cute flying cat illustration on the right side, sourced from Storyset.

To add illustrations:
- Download SVG illustrations from sites like Storyset for easy editing.
- Insert them into PowerPoint and animate if desired (e.g., flying or floating effects).
- Use the Insert > Pictures or Insert > Icons features to add visual elements.
If you want to learn more about animating illustrations in PowerPoint, check out tutorials on animating SVGs and shapes to make your presentations truly come alive.
Pro Tips and Tricks for Better Effects
Here are some extra tips to make the most out of your conic gradient design and PowerPoint presentation:
1. Use Larger Gradient Images for Smoothness
Export your conic gradient from Figma at a large size (e.g., 2000×2000 pixels) to ensure it looks crisp and smooth even when enlarged in PowerPoint.
2. Crop Gradient with Shapes for Perfect Coverage
Cropping the gradient with a circle shape avoids corner artifacts when spinning the gradient, ensuring full slide coverage.
3. Experiment with Background Colors
Because the gradient fades from white to transparent, changing the slide’s background color instantly changes the gradient’s color effect.
4. Adjust Brightness and Transparency
Modify the gradient image’s brightness and transparency in PowerPoint to create variations like dark mode or subtle overlays.
5. Keep Animations Smooth and Continuous
Set the spin animation to repeat indefinitely and avoid smooth start/end effects for a constant, hypnotic rotation.
6. Use Fun Illustrations to Engage
Add themed illustrations or icons on top of the gradient to create visually engaging slides that maintain professional appeal.
7. Use Consistent Fonts and Colors
Choose fonts that complement your presentation style and ensure text contrasts well with the background for readability.
Frequently Asked Questions (FAQ)
Can I create a conic gradient directly in PowerPoint?
Currently, PowerPoint does not support conic gradients natively. The workaround is to create the gradient in a design tool like Figma and import it as an image.
Is Figma free to use for this purpose?
Yes, Figma offers a free tier which is sufficient for creating and exporting conic gradients as PNG files.
Will this method work on all versions of PowerPoint?
The tutorial uses Office 365, but the method should work on most PowerPoint versions that support image insertion and animation features.
How do I make the gradient spin continuously?
Add the spin animation from the Animations tab, set it to start with the slide, last 10 seconds, and repeat until the end of the slide without smooth start or end.
Can I customize the colors of the gradient after importing into PowerPoint?
Not directly on the image, but by using a white-to-transparent gradient and changing the slide background color, you can simulate different gradient colors.
What if the gradient looks pixelated when enlarged?
Make sure to export the gradient image from Figma at a high resolution (e.g., 2000×2000 pixels) for crisp visuals.
How do I add animations to illustrations like the flying cat?
Insert SVG or PNG images and use PowerPoint’s animation features (e.g., motion paths, fades) to animate illustrations.
Where can I find free fonts and illustrations?
- Fonts: Hands On Font
- Illustrations: Storyset
Conclusion
This Powerpoint design idea of using an animated conic gradient effect is a fantastic way to make your presentations stand out. By leveraging Figma’s angular gradient capabilities and PowerPoint’s animation features, you can create dynamic, colorful backgrounds that add energy and professionalism to your slides.
Remember, the key steps involve:
- Creating the conic gradient in Figma using angular gradients
- Exporting and importing the gradient as a PNG image into PowerPoint
- Cropping the gradient with a circle shape to avoid corner gaps
- Adding a spin animation for continuous rotation
- Customizing the slide background color to change the gradient’s color effect
- Enhancing slides with text and fun illustrations to engage your audience
This method is accessible, creative, and flexible, making it a valuable addition to your PowerPoint design toolkit. Plus, the tutorial author generously provides free tutorial slides on Patreon to help you get started quickly.
Whether you’re creating business presentations, educational content, or creative portfolios, this animated conic gradient effect will add a modern and captivating touch to your work.
Happy presenting and keep innovating with your PowerPoint designs!
Credits: This tutorial is inspired by UI Adrian and created by One Skill PPT.


