
In today’s fast-paced professional world, the concept of work-life balance has never been more significant. Communicating this balance effectively in presentations can help underscore its importance to your audience. Whether you’re leading a team meeting, delivering a corporate training session, or sharing insights with colleagues, a visually compelling PowerPoint slide on work-life balance can make your message resonate.
In this comprehensive guide, we’ll walk you through creating a dynamic, interactive work-life balance slide using PowerPoint. This tutorial, inspired by expert techniques from POWERPOINT UNIVERSITY, will equip you with the skills to design a professional slide that combines aesthetics with functionality. From crafting 3D shapes to adding meaningful icons and animations, you’ll learn how to build a slide that truly captures the essence of balancing work and life.
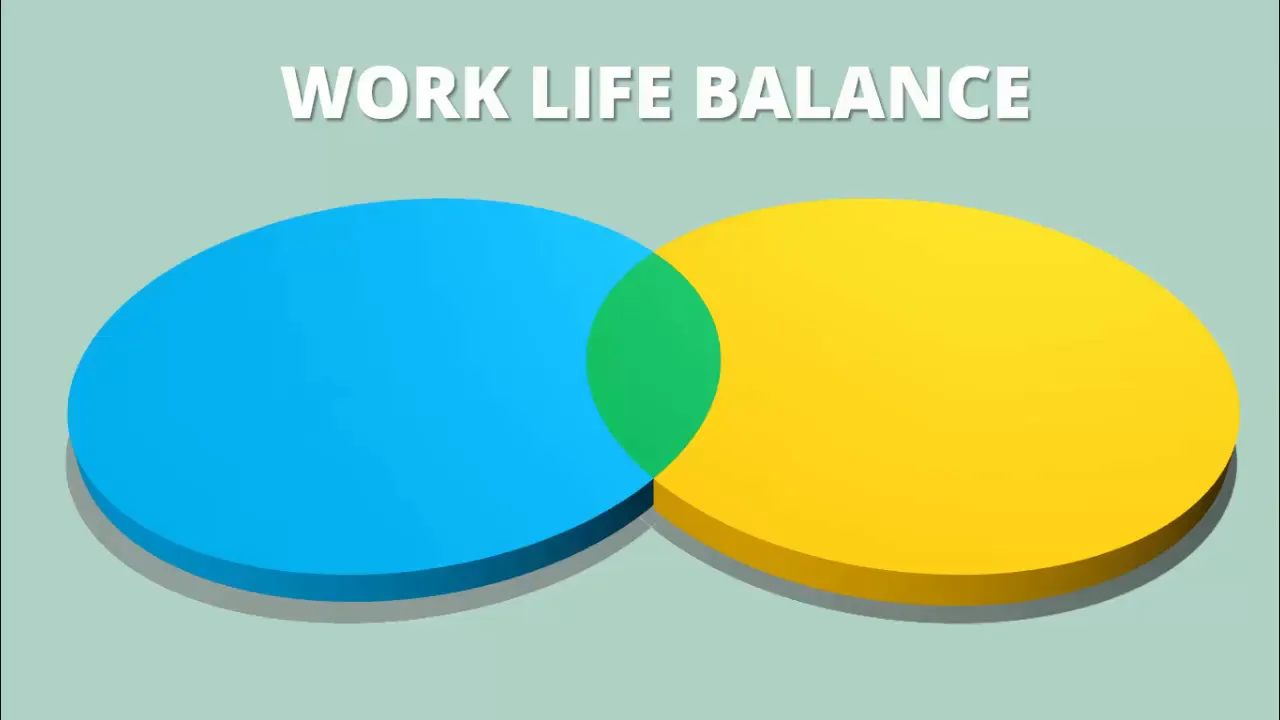
Table of Contents
- Understanding the Slide Structure
- Designing the 3D Oval Shapes
- Creating the Balance Effect with Shape Merging
- Applying 3D Effects and Shadows
- Inserting Relevant Icons and Images
- Adding Text and Animation Effects
- Finalizing Your Work-Life Balance Slide
- Frequently Asked Questions (FAQ)
Understanding the Slide Structure
Before diving into design, it’s essential to understand the conceptual framework of the slide. The work-life balance slide is essentially composed of two overlapping oval shapes representing the spheres of “work” and “life.” The overlapping section signifies the “balance” between these two important aspects.
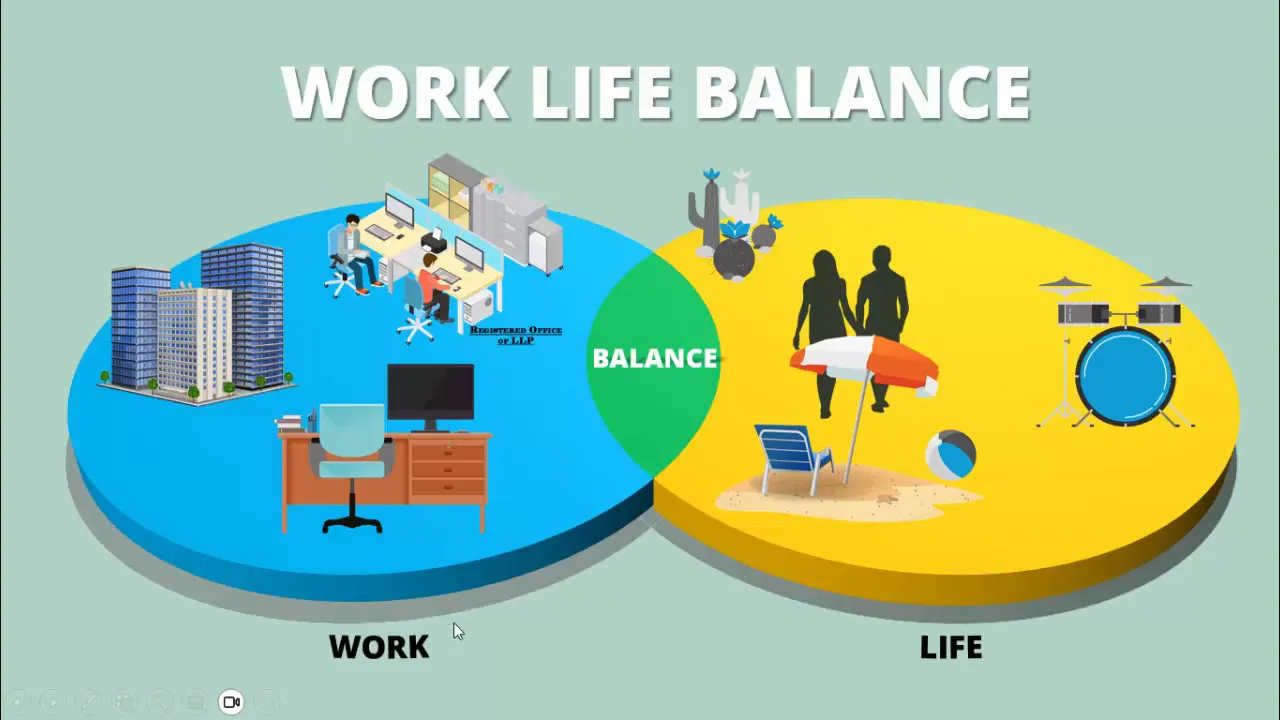
This design is not only visually appealing but also interactive. Clicking on the “work” side reveals images related to professional life, while clicking on the “life” side shows objects related to personal life. Adding text labels such as “Work,” “Life,” and “Balance” enhances clarity and reinforces the message.
Designing the 3D Oval Shapes
Start by adding a new slide in PowerPoint and setting a light, soothing background color to avoid visual clutter. A light aqua shade works well, striking a balance between vibrancy and subtlety.
Next, enable the guides from the View tab to help align your shapes precisely. Guides ensure your ovals are symmetric and positioned correctly, which is crucial for a professional look.
Step-by-Step: Creating the Ovals
- Go to Insert > Shapes and select the Oval from the basic shapes.
- Hold the Shift key while drawing to create a perfect circle or oval depending on your requirement.
- Remove the outline by selecting Shape Outline > No Outline.
- Position the oval on the left-hand side of the slide.
- Duplicate this oval by holding Ctrl + Shift and dragging it to the right, creating a second oval.
- Change the fill colors: make one oval a blue shade (for “Work”) and the other a yellow or orange shade (for “Life”).
These colors not only visually differentiate the two areas but also create a warm and professional palette. Adjust the transparency of these shapes temporarily to see how much they overlap, which is important for the next step.
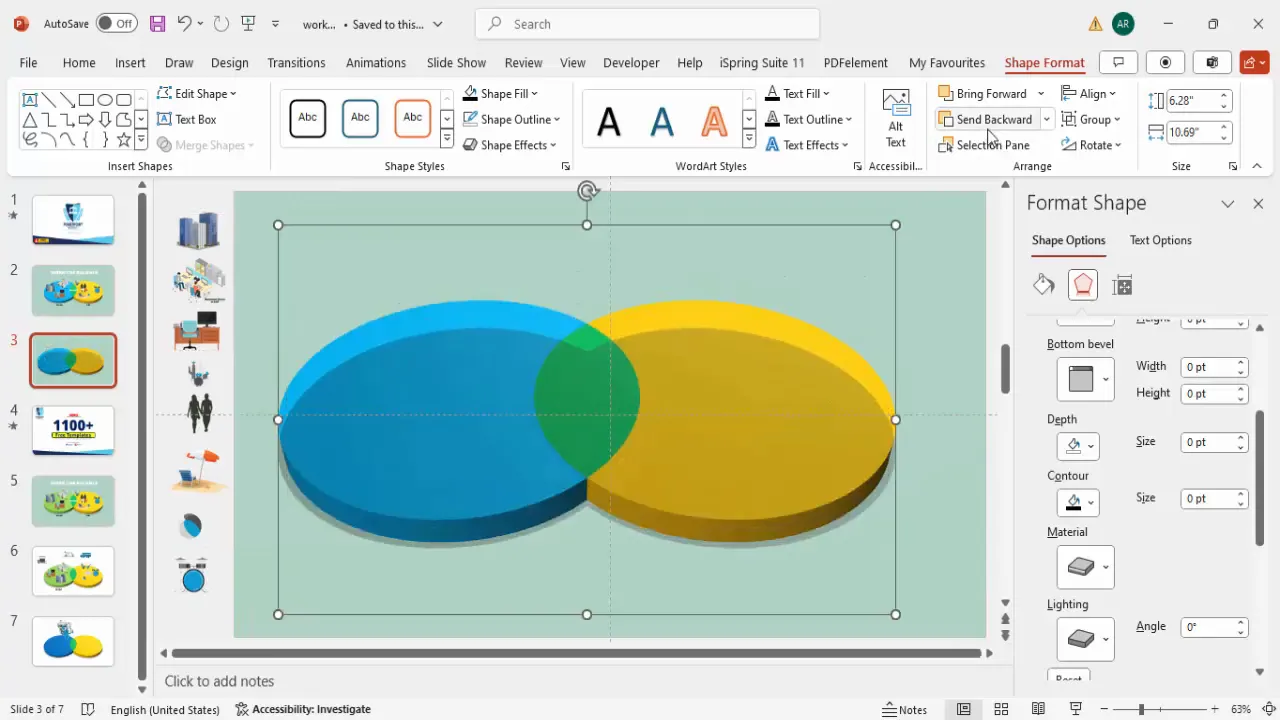
Creating the Balance Effect with Shape Merging
To create the overlapping “balance” area, use the Merge Shapes feature in PowerPoint.
How to Merge Shapes for the Balance Area
- Select both ovals.
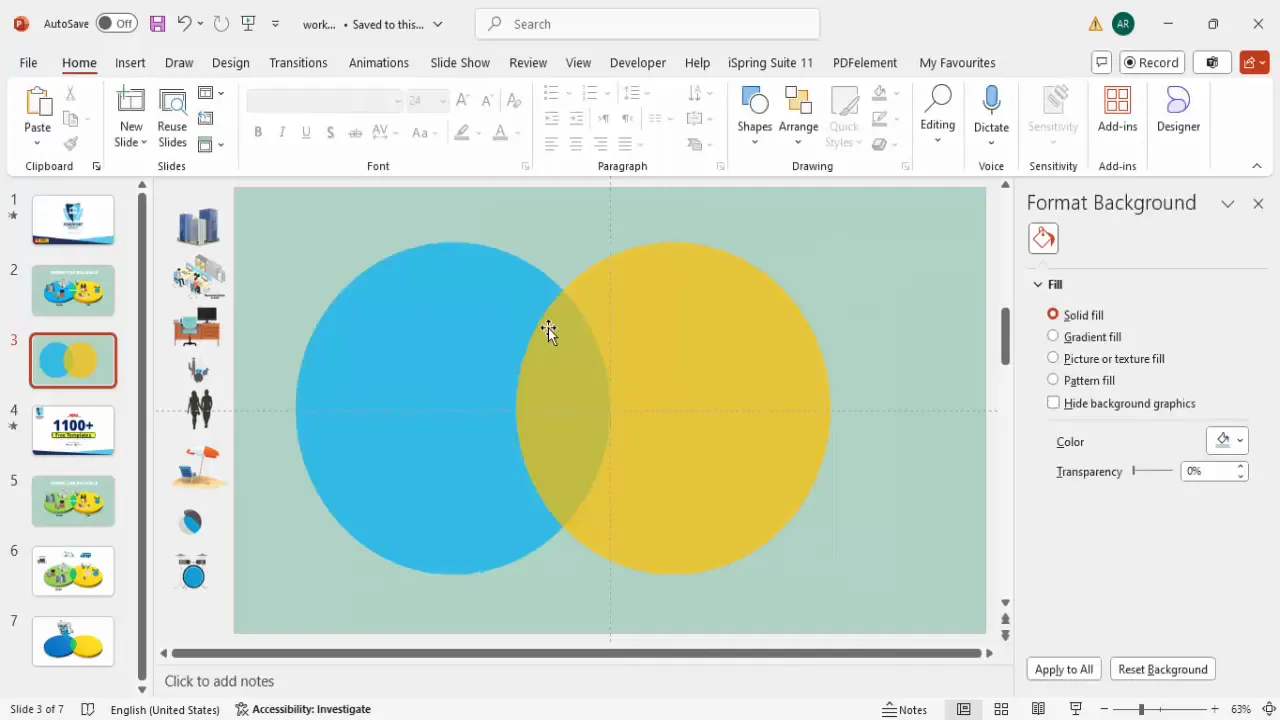
- Right-click and choose Format Shape.
- Adjust the transparency of one or both ovals to visualize the overlapping area.
- In the Shape Format tab, go to Merge Shapes and select Fragment.
- This action breaks the ovals into separate fragments, including the overlapping portion.
- Select the overlapping fragment and assign it a new color (e.g., green) to represent “Balance.”
- Set transparency back to 0% for all fragments.
- Group the three shapes (work, life, and balance) together by pressing Ctrl + G.

This fragmentation and recoloring technique visually highlights the balance between work and life, making your slide both meaningful and attractive.
Applying 3D Effects and Shadows
To give your slide depth and a polished look, add 3D rotation and shadow effects.
Steps to Add 3D Rotation and Depth
- Select the grouped shapes.
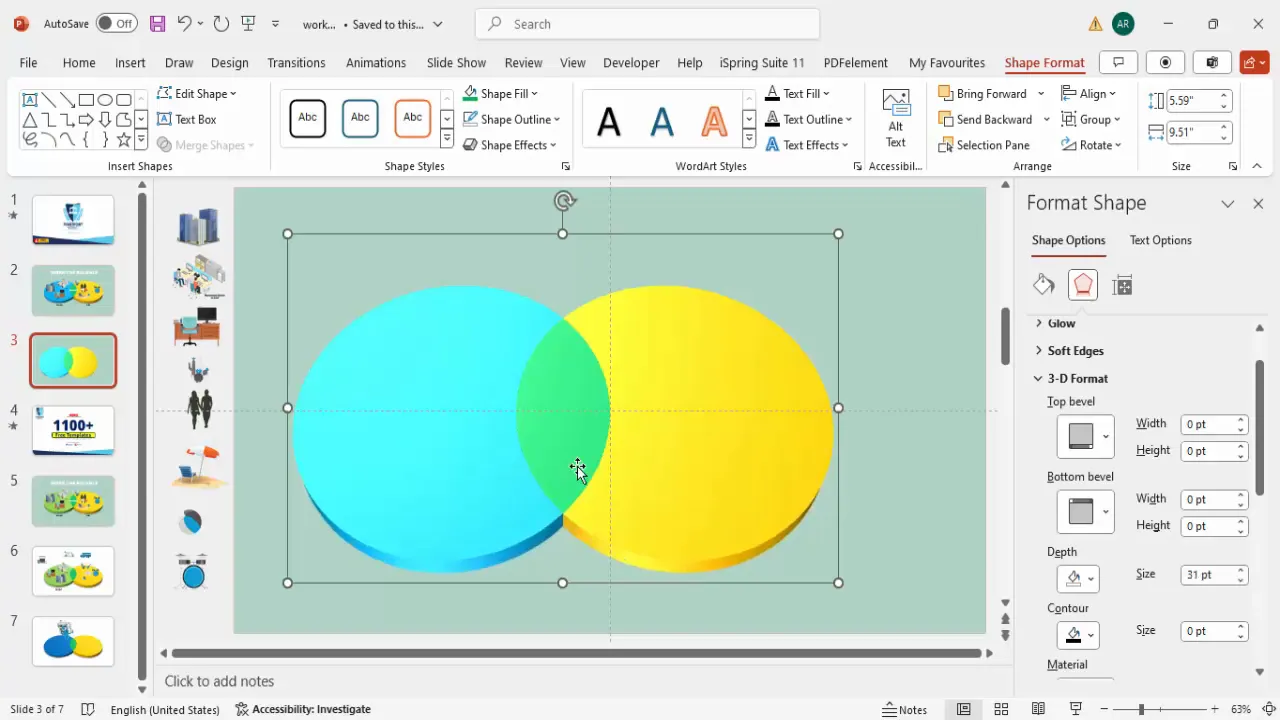
- Go to the Shape Format tab, then Effects > 3D Rotation.
- Choose the Perspective Relaxed Moderately preset.
- Adjust the Rotation properties, especially the Y Rotation, to flatten the shapes for a more natural perspective.
- Increase the Depth in the 3D Format settings to add thickness to the ovals.
- Select a suitable Lighting option (e.g., “Special”) to darken edges and enhance the 3D effect.
- Choose a Material style that complements your design, such as Matte or Plastic.
Creating a Shadow Effect
Adding shadows gives your slide a professional, layered look.
- Duplicate the grouped shapes by pressing Ctrl + D.
- Change the fill of the duplicate to black.
- Make this shape more transparent by adjusting the transparency slider.
- Set the Depth of the duplicate to zero to flatten it.
- Position the shadow shape slightly offset behind the original group.
- Send this shape to the back using Right-click > Send to Back.
The shadow adds subtle depth and makes the shapes pop against the background, enhancing visual appeal.
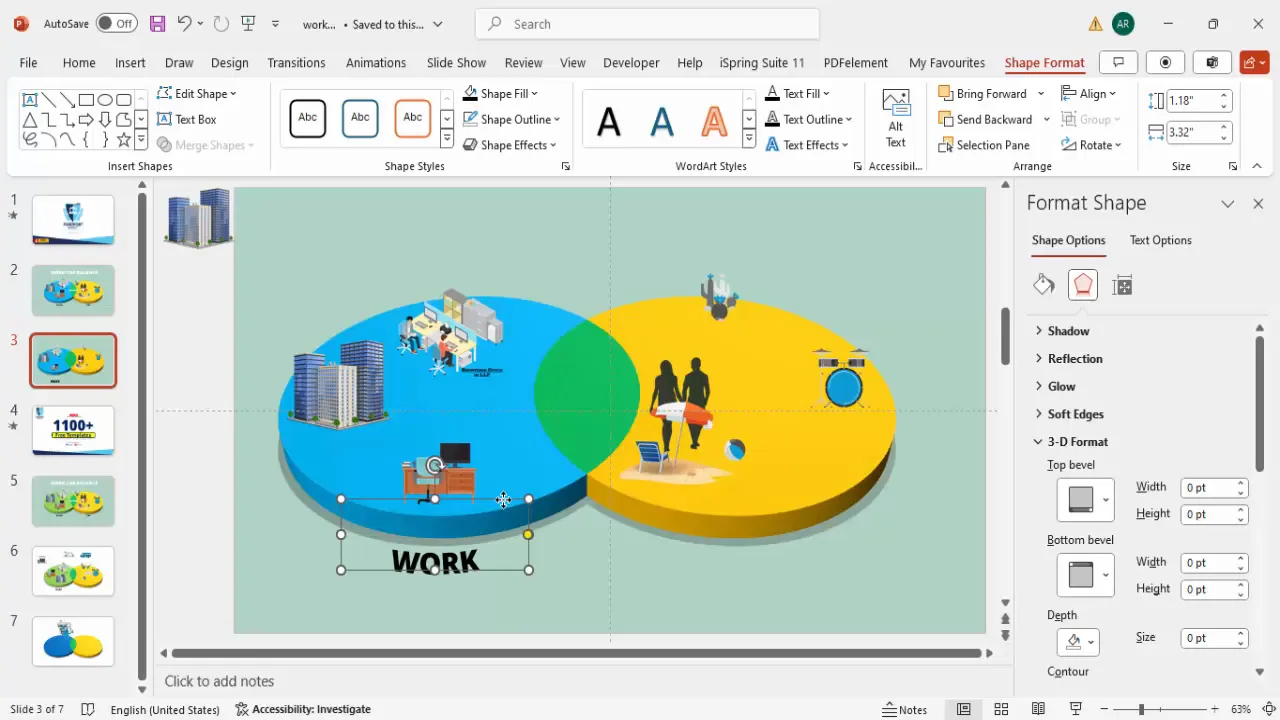
Inserting Relevant Icons and Images
Icons and images reinforce your message by providing visual cues related to work and life.
How to Insert Icons and Images
- Go to Insert > Pictures > Online Pictures.
- Type keywords related to your slide content, for example, “office vector PNG” for work-related images.
- Browse the search results and select images with transparent backgrounds (PNG format) for better integration.
- Insert the chosen images and resize them appropriately.
- Position work-related images on the blue oval side and life-related images on the yellow/orange oval side.

Examples of work-related icons include office desks, buildings, or computers. For life, you might include icons like a football, family, or leisure activities. These images make the slide relatable and visually engaging.
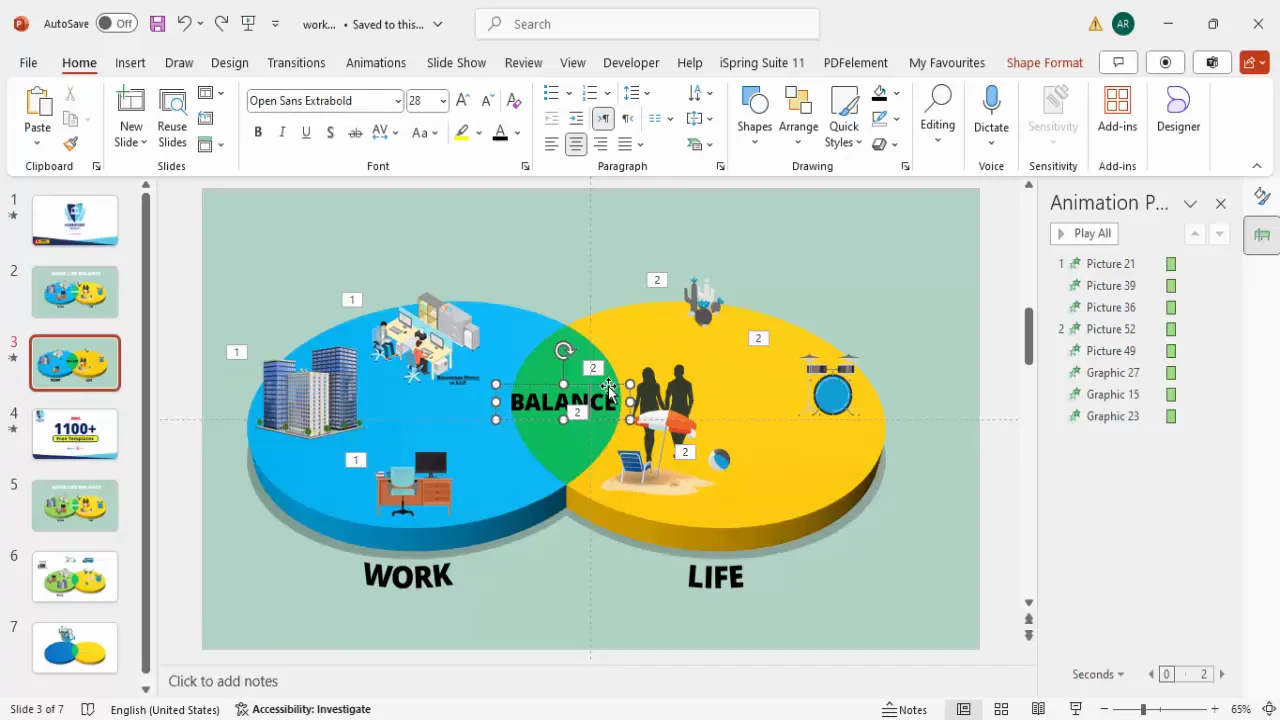
Adding Text and Animation Effects
Text labels and animations bring your slide to life and clarify its message.
Adding Text Labels
- Insert text boxes and type “Work,” “Life,” and “Balance.”
- Use a bold, clear font such as Open Sans Extra Bold for readability.
- Center-align the text and choose a color that contrasts well with the background, typically black.
- Apply text effects such as Arch Down to curve “Work” and “Life” text along the ovals.
- Position the “Balance” text in the overlapping area.
Adding Animation Effects
Animations help emphasize key points and make your slide interactive.

- Select the text or objects you want to animate.
- Go to the Animations tab and open the Animation Pane.
- Choose Add Animation > More Entrance Effects.
- Select Basic Zoom for a smooth entrance effect and click OK.
- Apply the same animation to both “Work” and “Life” text boxes for consistency.
- Preview the slideshow to ensure animations behave as expected.

These animations make the slide more engaging during presentations and help draw attention to important elements.
Finalizing Your Work-Life Balance Slide
Once all elements are in place, review the slide for balance, alignment, and visual harmony.
Tips for Final Touches
- Ensure all objects are properly aligned using guides and alignment tools.
- Check that colors complement each other and text is legible.
- Add a slide title if necessary, using a font consistent with the rest of the presentation.
- Test the slide in slideshow mode to verify animations and interactivity.
- Save your presentation and consider exporting it as PDF or video if needed.
By following these steps, you create a professional and visually appealing work-life balance slide that effectively communicates a vital message.
Frequently Asked Questions (FAQ)
What is the best color scheme for a work-life balance slide?
Choose contrasting yet harmonious colors to represent “work” and “life.” For example, blue for work (professional and calm) and yellow or orange for life (warm and energetic). The overlapping balance can be green to symbolize harmony.
How do I make my PowerPoint slide interactive?
Use PowerPoint’s animation and hyperlink features to create clickable areas that reveal additional content or images. In this tutorial, clicking on the “work” or “life” ovals can trigger animations or display related icons.
Can I use free icons and images in my presentation?
Yes, but ensure you use images labeled for free use or those with Creative Commons licenses. PowerPoint’s Online Pictures feature allows you to search for such images directly within the app.
Which fonts work best for professional presentations?
Fonts like Open Sans, Calibri, and Arial are clean and easy to read. For emphasis, use bold weights and avoid overly decorative fonts that can distract.
How do I ensure my animations run smoothly?
Keep animations simple and consistent. Use the Animation Pane to control timing and order. Preview the slideshow multiple times to catch any glitches.
Can I customize the 3D effects further?
Absolutely. PowerPoint allows you to adjust rotation angles, depth, lighting, and material to match your presentation’s style. Experiment with these settings to find the perfect look.
Is this slide design suitable for all presentation types?
This slide is versatile and works well in corporate, educational, and informal presentations where the theme of work-life balance is relevant. Adjust the design elements to fit your audience’s preferences and your presentation’s tone.
Conclusion
Creating an impactful PowerPoint for work presentations requires a blend of strong design principles and clear messaging. The work-life balance slide, as detailed in this guide, is a powerful tool to communicate one of the most critical topics in today’s professional environment.
By mastering shape creation, 3D effects, image insertion, and animation, you can elevate your presentation and engage your audience effectively. Remember, the key to success lies in simplicity, clarity, and consistency.
For those eager to explore more PowerPoint design techniques and access free templates, consider following expert channels and resources dedicated to PowerPoint mastery.
Now it’s your turn: open PowerPoint, apply these steps, and craft a work-life balance slide that stands out and delivers your message with impact.
Check out the full video: PPT on Work Life Balance


