
Welcome to this comprehensive guide on creating an impressive horizontal parallax animation in PowerPoint. Whether you’re a beginner or an experienced presenter looking to add some flair to your slides, this tutorial will walk you through every step of building a smooth, eye-catching parallax effect using PowerPoint’s built-in tools. This technique leverages the powerful Morph transition alongside custom slide layouts to produce a dynamic, horizontal sliding effect that will captivate your audience.
This tutorial is inspired by the expert guidance of One Skill PowerPoint, whose clear and engaging teaching style makes mastering PowerPoint animations accessible and fun. By the end of this article, you’ll know how to set up image placeholders, configure the morph transition, and add stylish text boxes that move in harmony with your images to create a beautiful horizontal parallax effect.
Table of Contents
- What is Horizontal Parallax Animation?
- Getting Started: Setting Up Your PowerPoint Environment
- Creating a Custom Slide Layout with Image Placeholders
- Adding Images to Your Slides
- Applying the Morph Transition
- Enhancing the Animation with Text Boxes
- Fine-Tuning and Testing Your Animation
- Additional Tips for Creating Impactful PowerPoint Animations
- Why Use PowerPoint for Parallax Animations?
- Bonus: Using PDFelement 7 for Document Creation and Editing
- Frequently Asked Questions (FAQ)
- Wrapping Up: Mastering Horizontal Parallax Animation in PowerPoint
What is Horizontal Parallax Animation?
Before diving into the technical steps, let’s clarify what a horizontal parallax animation is. Parallax animation is a technique where background and foreground elements move at different speeds or directions, creating an illusion of depth and motion. In a horizontal parallax, images slide horizontally across the screen, often with accompanying text moving in the opposite direction to enhance the dynamic feel.
This effect is widely used in web design and video editing to add visual interest, but PowerPoint users can also harness it creatively to elevate presentations. By combining multiple images and carefully animating their positions slide-to-slide, you can simulate a smooth horizontal scrolling effect that adds professionalism and style.
Getting Started: Setting Up Your PowerPoint Environment
To create this animation, you’ll start with a fresh PowerPoint presentation. Here’s what you need to do first:
- Open PowerPoint and create a new blank presentation.
- Increase your window size for easier editing and better visibility.
- Set the slide layout to blank to avoid distractions from default placeholders or text boxes.
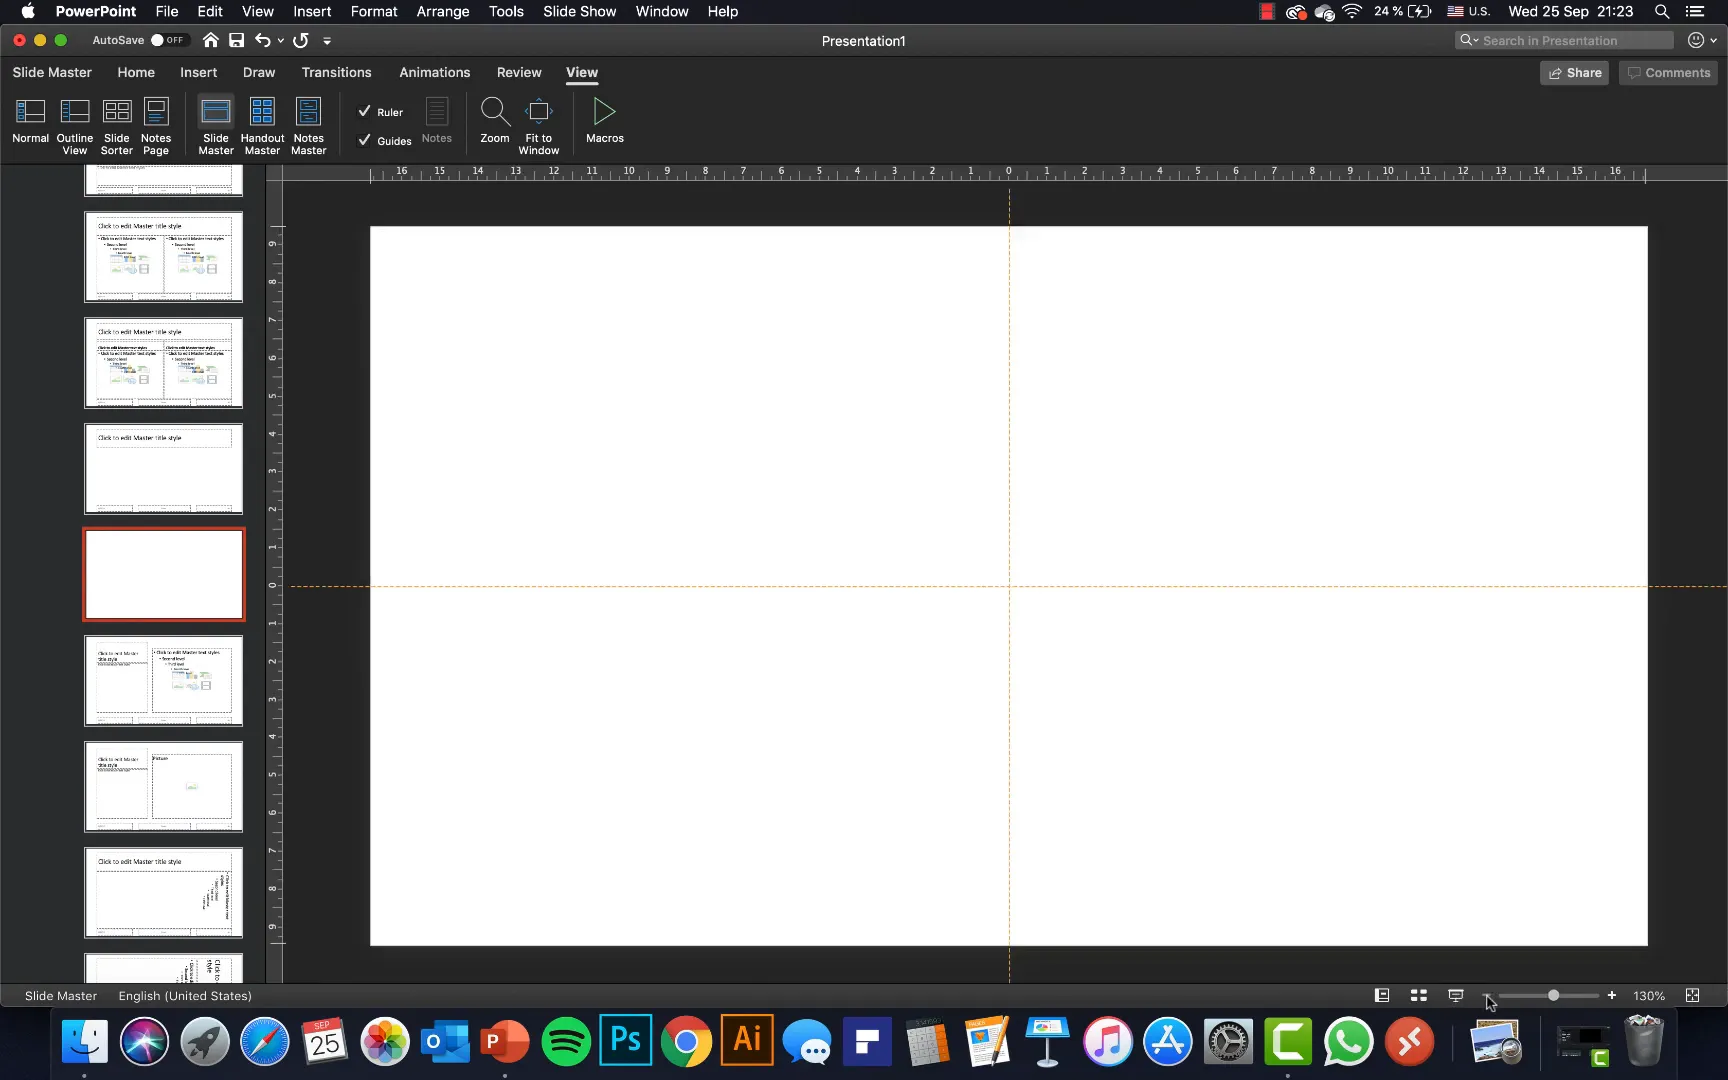
- Enable slide guides to help you align elements precisely. You can do this from View > Guides.
Using guides is essential for ensuring that your images and text align perfectly across slides, which is critical for the morph transition to work seamlessly.
Creating a Custom Slide Layout with Image Placeholders
Next, you’ll create a custom slide layout in the Slide Master view. This layout will have three image placeholders positioned side by side, enabling the horizontal sliding effect.
Follow these steps carefully:
- Go to View > Slide Master to open the Slide Master interface.
- Select a blank slide layout to start fresh.
- Delete any existing text boxes or placeholders that you don’t need.
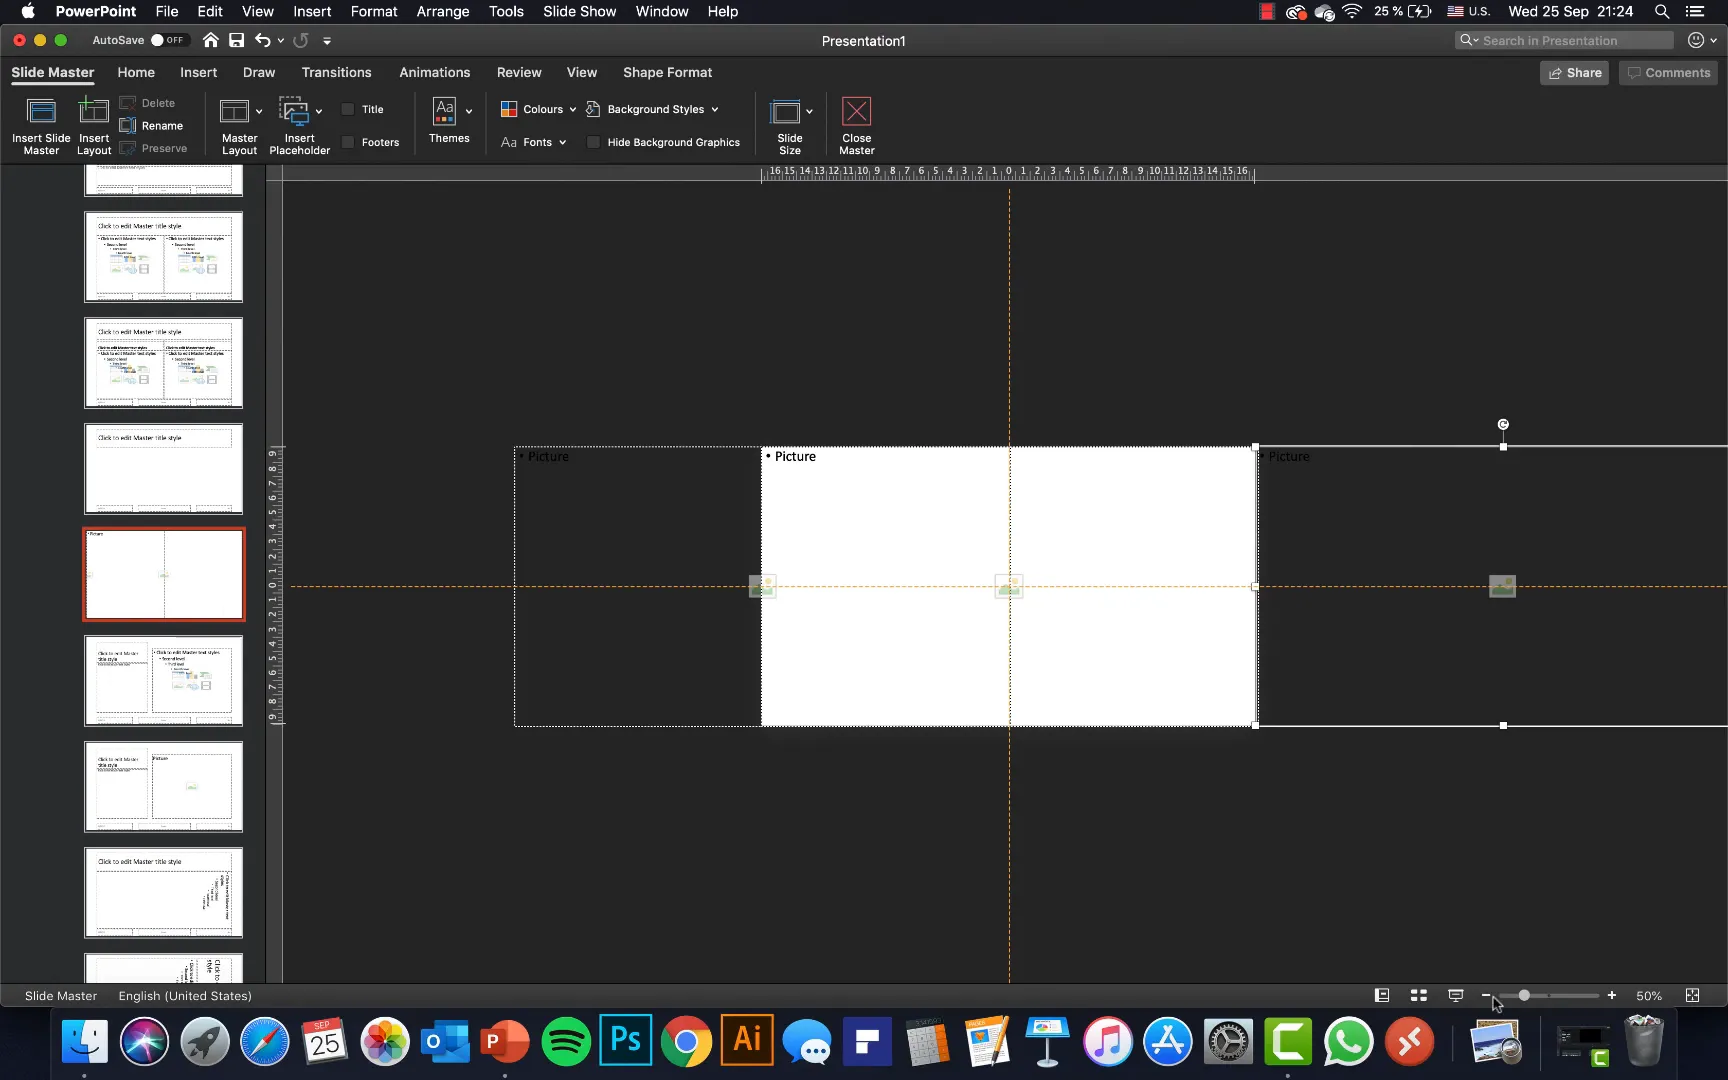
- Insert a picture placeholder that covers the entire slide. You can do this via Insert Placeholder > Picture.
- Duplicate this picture placeholder twice (using Cmd + D on Mac or Ctrl + D on Windows).
- Position one placeholder on the left edge of the slide, one in the center, and one on the right edge. Make sure the left and right placeholders partially extend beyond the slide edges to create a smooth transition effect.
- Send the left placeholder to the back so the central one remains on top visually.
- Close the Slide Master view when done.
This custom layout is the backbone of the horizontal parallax animation. It allows images to slide from right to center to left seamlessly across the slides.
Adding Images to Your Slides
Now that your custom layout is ready, it’s time to add images to your slides. Here’s how to proceed:
- Apply the custom slide layout you just created to your first slide.
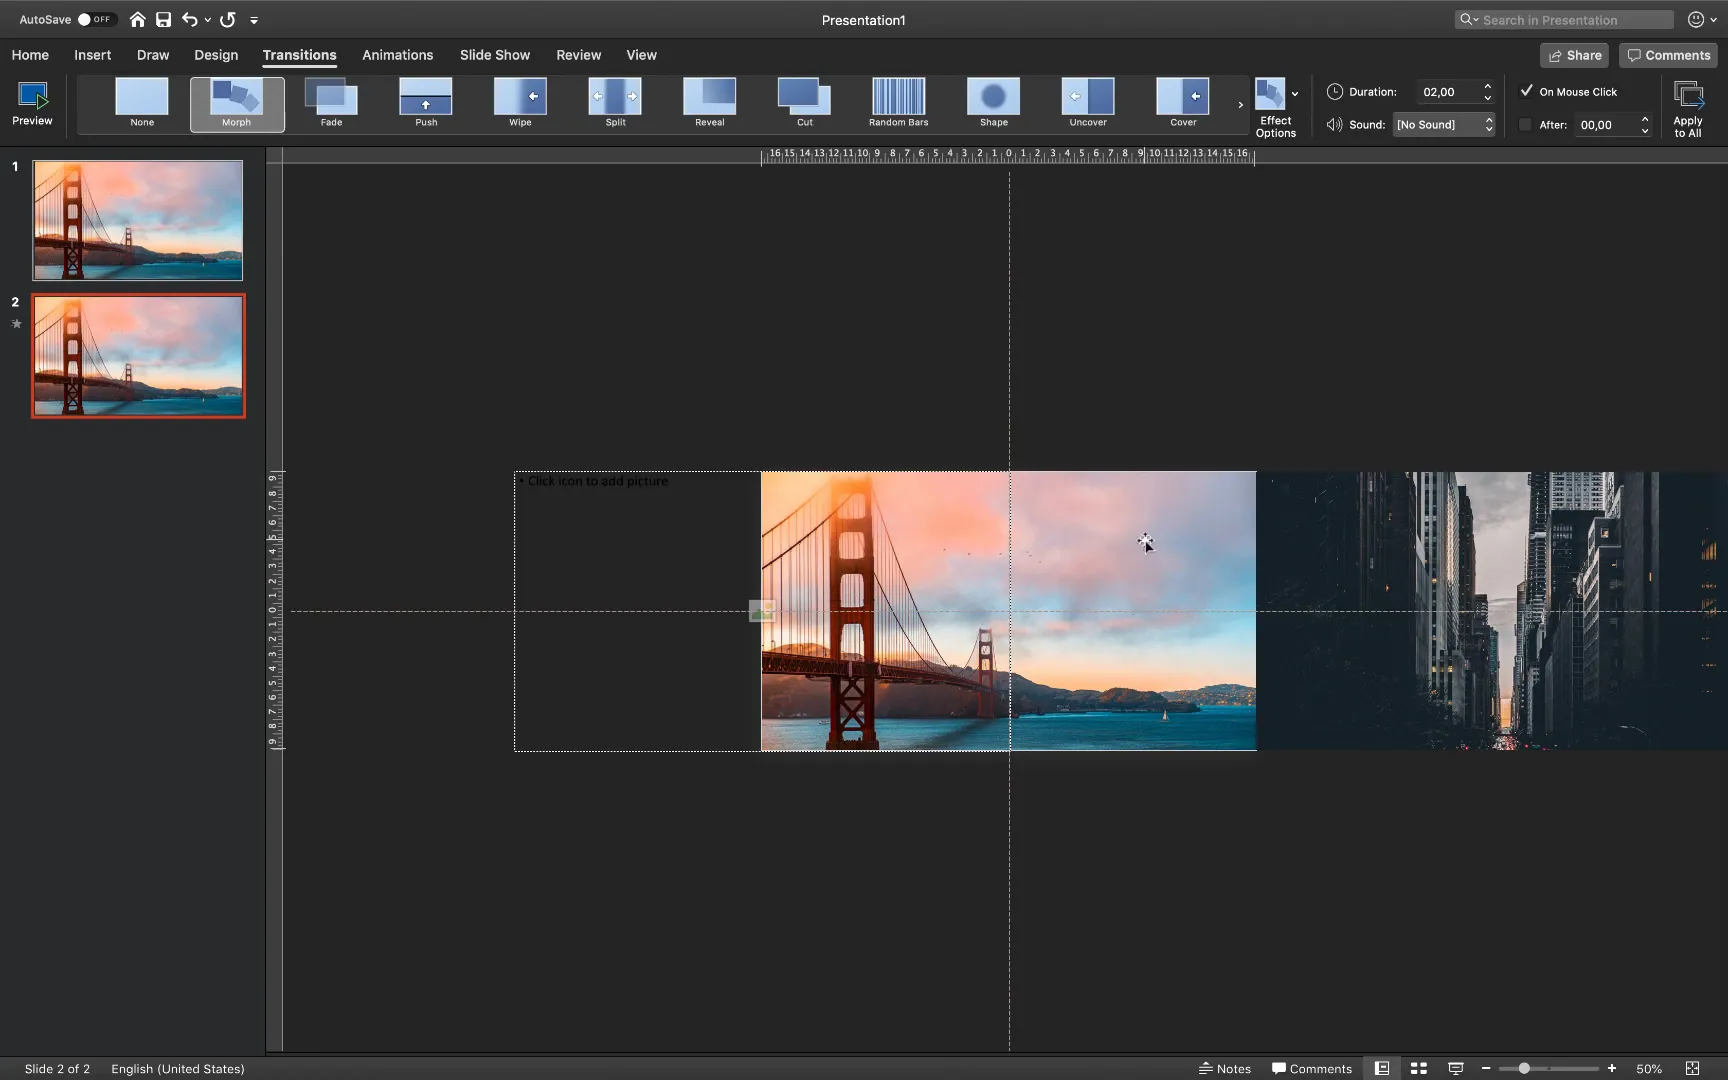
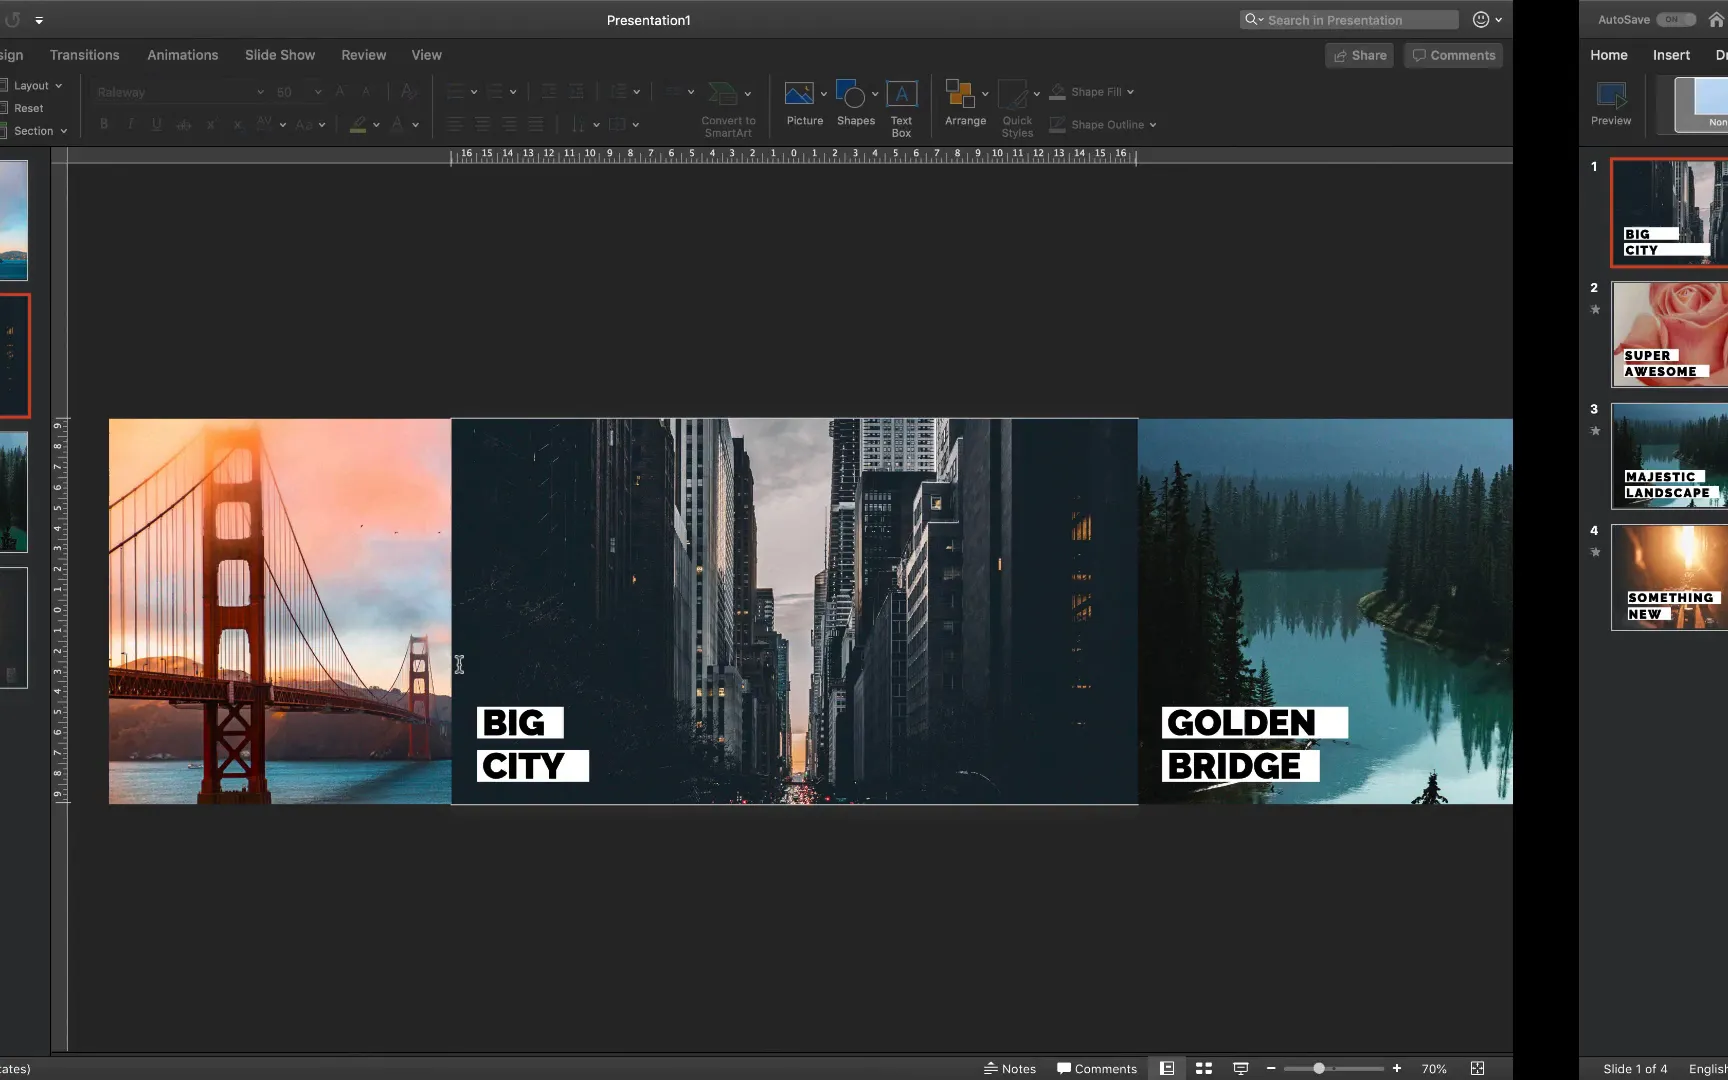
- Insert your images into the placeholders. For example, place a photo of a golden bridge in the center placeholder and a city photo on the right placeholder. You can leave the left placeholder empty initially.
- Duplicate this slide to create the second slide.
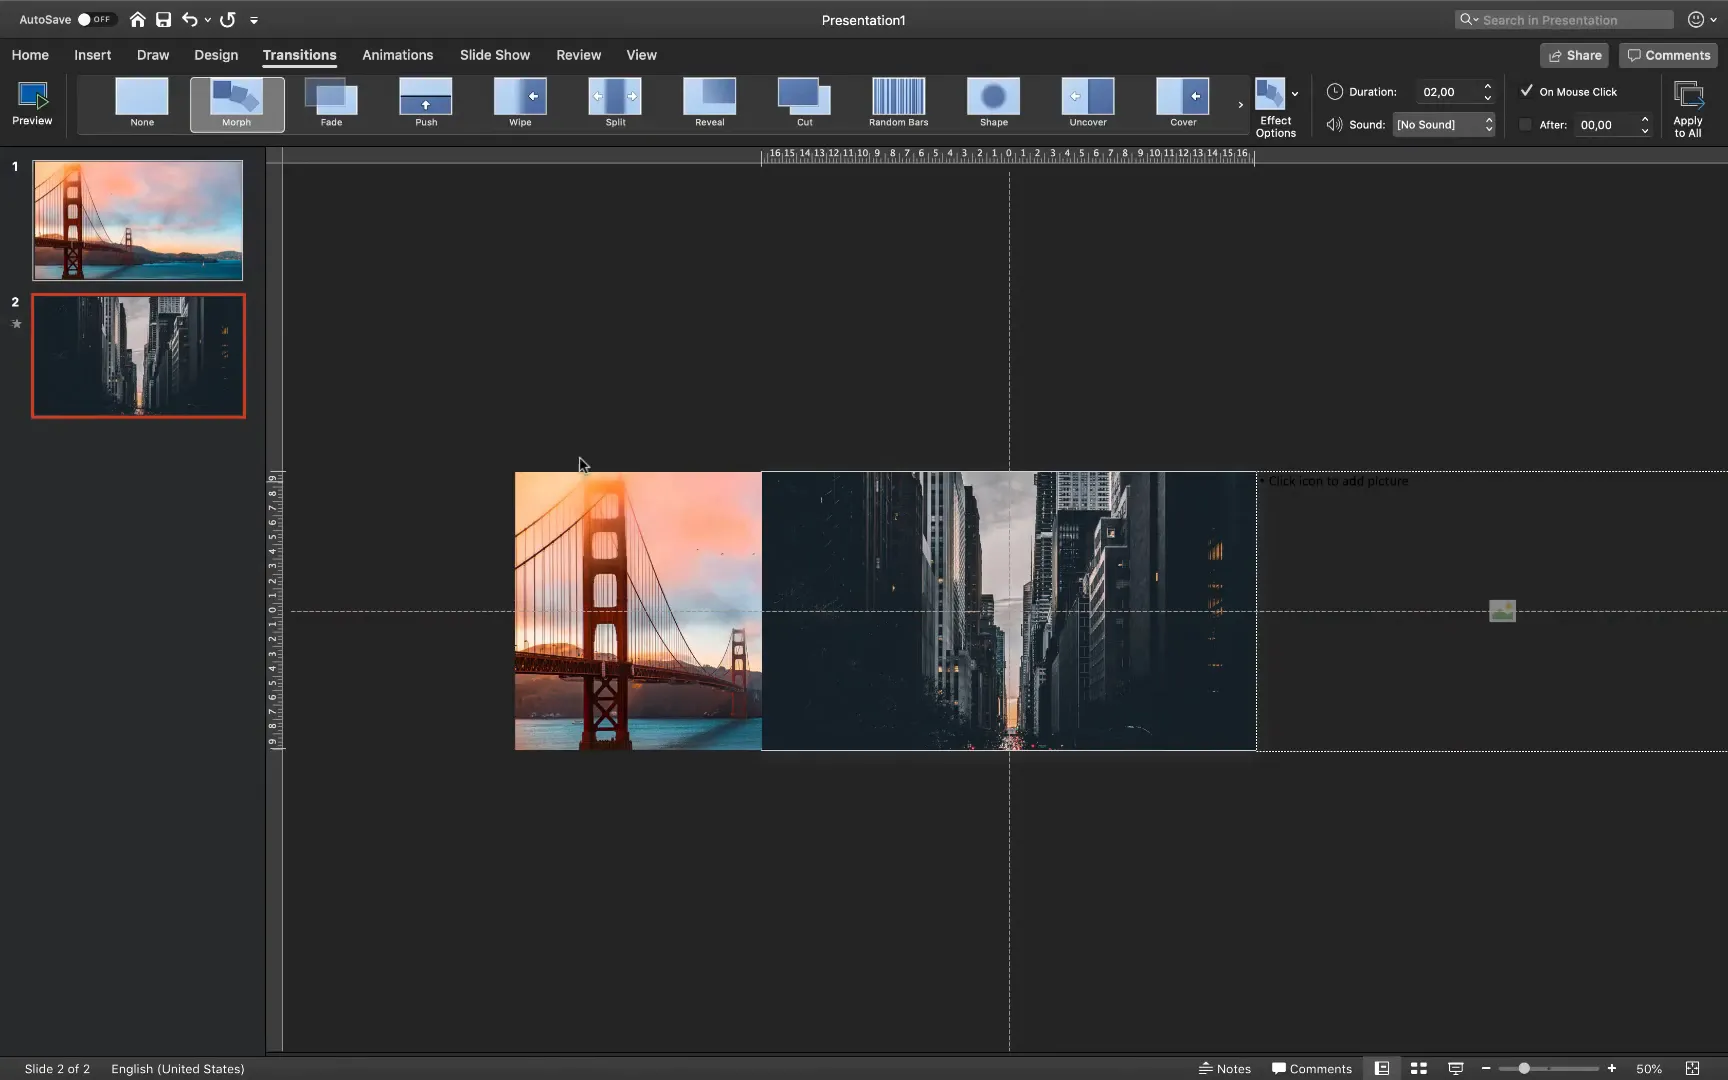
- On the second slide, rearrange the images by moving the golden bridge photo from center to left, the city photo from right to center, and insert a new photo on the right placeholder.
- Repeat this process for subsequent slides, shifting images leftward each time and adding new images on the right as needed.
By shifting the images leftwards slide by slide, you create the illusion that the photos are sliding horizontally. The Morph transition will take care of animating the movement smoothly.
Applying the Morph Transition
The Morph transition is the magic behind this animation. It calculates the difference in object positions between slides and animates the movement automatically.
To apply it:
- Select the slide where you want the animation to start (usually slide 1).
- Go to the Transitions tab.
- Choose Morph from the list of transitions.
- Repeat this for all slides where you want the horizontal sliding effect.
- Adjust the duration of the transition if desired (default is usually 2 seconds).
When you run the slideshow, you’ll see the images slide horizontally from right to left, creating a seamless parallax effect.
Enhancing the Animation with Text Boxes
Adding text labels to your images helps provide context and adds polish to your presentation. Here’s how to add stylish, moving text boxes that complement the parallax animation:
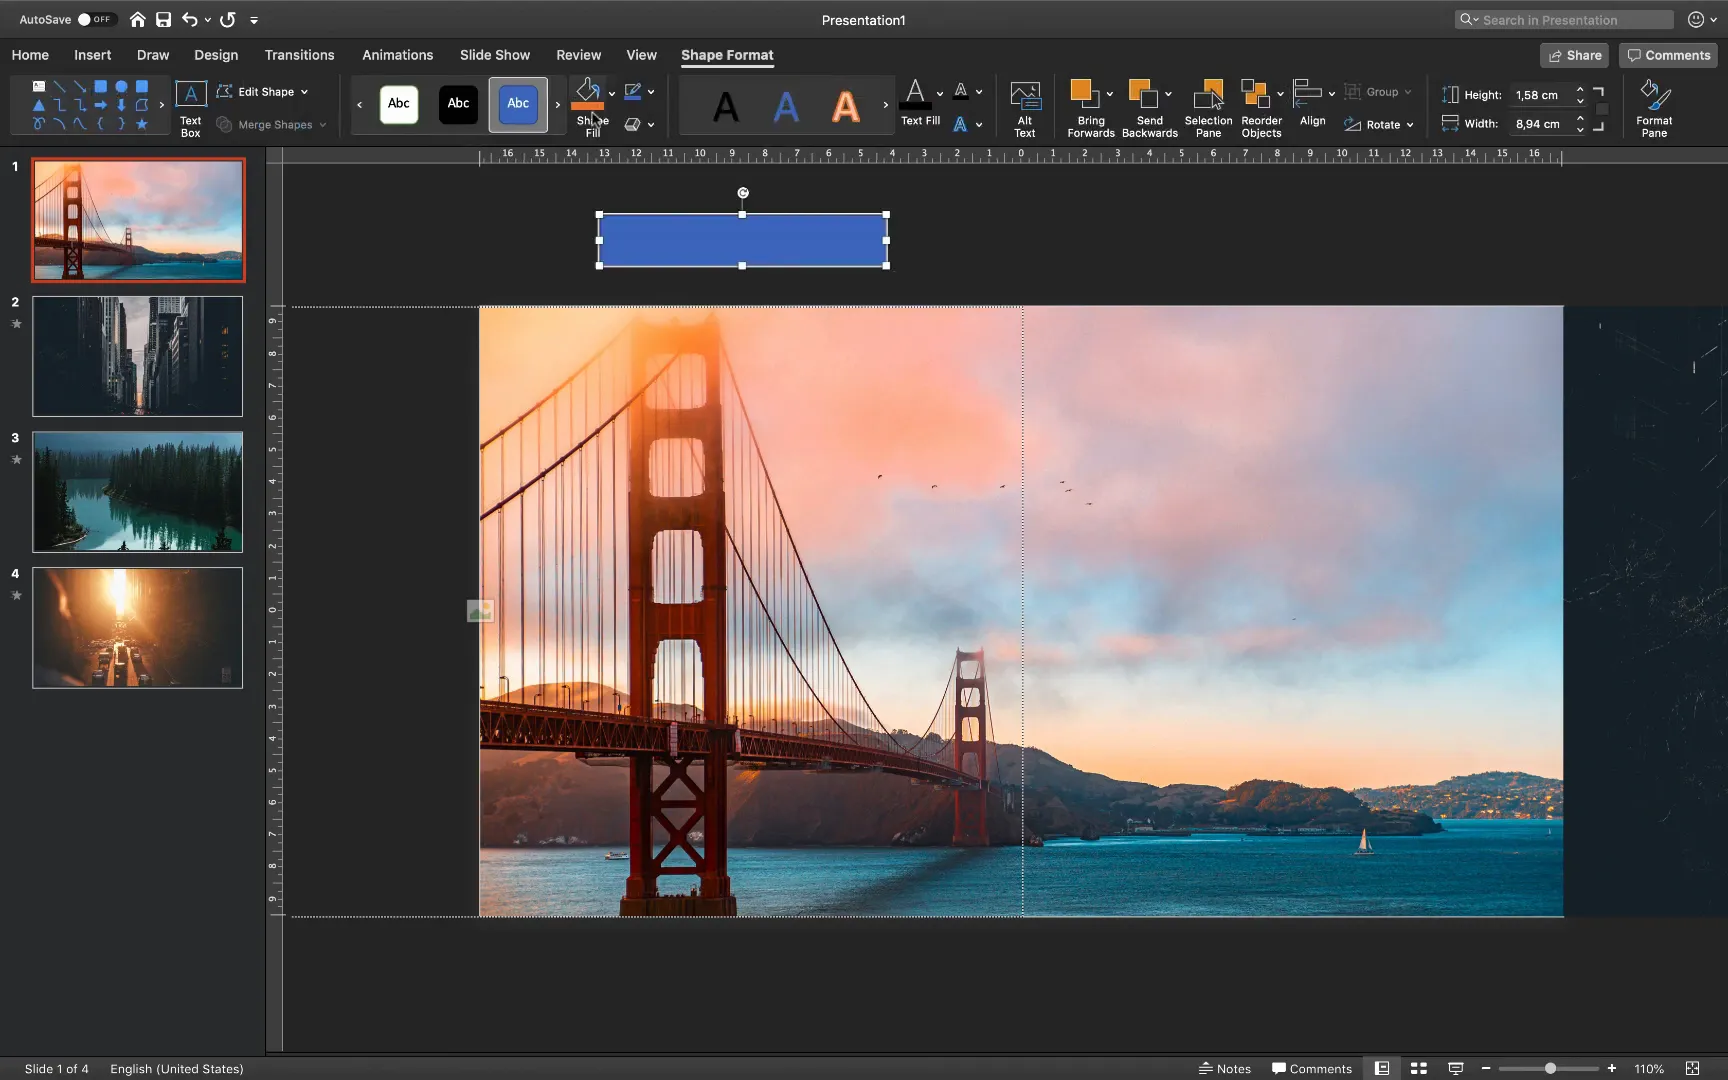
- On the first slide, insert a rectangle shape to serve as a background for your text.
- Set the shape’s fill color to white and remove the outline for a clean look.
- Insert a text box inside the rectangle and type your text, for example, “Golden”.
- Format the text: use black font color, a large font size (around 60), a clean font like Raleway, and set the weight to black for boldness.
- Duplicate the text box and type the second word, e.g., “Bridge”, adjusting the font size slightly smaller (around 50) to provide spacing.
- Group the two text boxes together to move them as a single unit.
- Copy the grouped text box and position the copy on the slide where you want the second set of text to appear, such as “Big City”.
- Copy and paste these grouped text boxes onto subsequent slides, repositioning them to move in the opposite direction of the images to enhance the parallax effect.
By moving the text boxes oppositely to the images, you create a dynamic visual tension that makes the animation more engaging and professional.
Fine-Tuning and Testing Your Animation
Once your images and text boxes are in place and the morph transitions are applied, it’s time to test your animation:
- Start the slideshow from the first slide.
- Watch the images slide horizontally across the screen, with text boxes moving in the opposite direction.
- Check for any misalignments or jumps in the animation.
- Return to editing mode to adjust the positioning of images and text boxes as necessary.
- Repeat testing until the animation is smooth and visually balanced.
Remember, the key to a great morph animation is consistent object sizes and precise positioning across slides. Use guides and zoom in for pixel-perfect alignment.

Additional Tips for Creating Impactful PowerPoint Animations
- Use high-quality images: Crisp, vibrant photos make your animation pop and look professional.
- Limit the number of slides: Too many slides can slow down your presentation and dilute the effect.
- Keep text concise: Use short, impactful phrases or titles to complement your images.
- Leverage consistent fonts and colors: Maintain a cohesive look by sticking to your brand or theme colors.
- Practice your timing: Adjust morph transition durations to match your speaking pace or desired effect.
Why Use PowerPoint for Parallax Animations?
Many designers and presenters might turn to advanced video editing or web design tools to create parallax effects. However, PowerPoint offers several advantages:
- Accessibility: Most professionals already have PowerPoint installed and are familiar with its interface.
- Ease of use: The Morph transition simplifies complex animations without requiring coding or advanced skills.
- Integration: PowerPoint animations are easily incorporated into presentations for live or recorded delivery.
- Export options: You can export your animated slides to video or other formats for sharing.
With a bit of creativity and attention to detail, PowerPoint can produce animations that rival those made with specialized software.
Bonus: Using PDFelement 7 for Document Creation and Editing
Before we conclude, it’s worth mentioning the sponsor tool featured in this tutorial: PDFelement 7, a powerful PDF editor available on the Mac App Store.
PDFelement 7 offers a variety of features that complement your workflow if you often work with PDFs, such as:
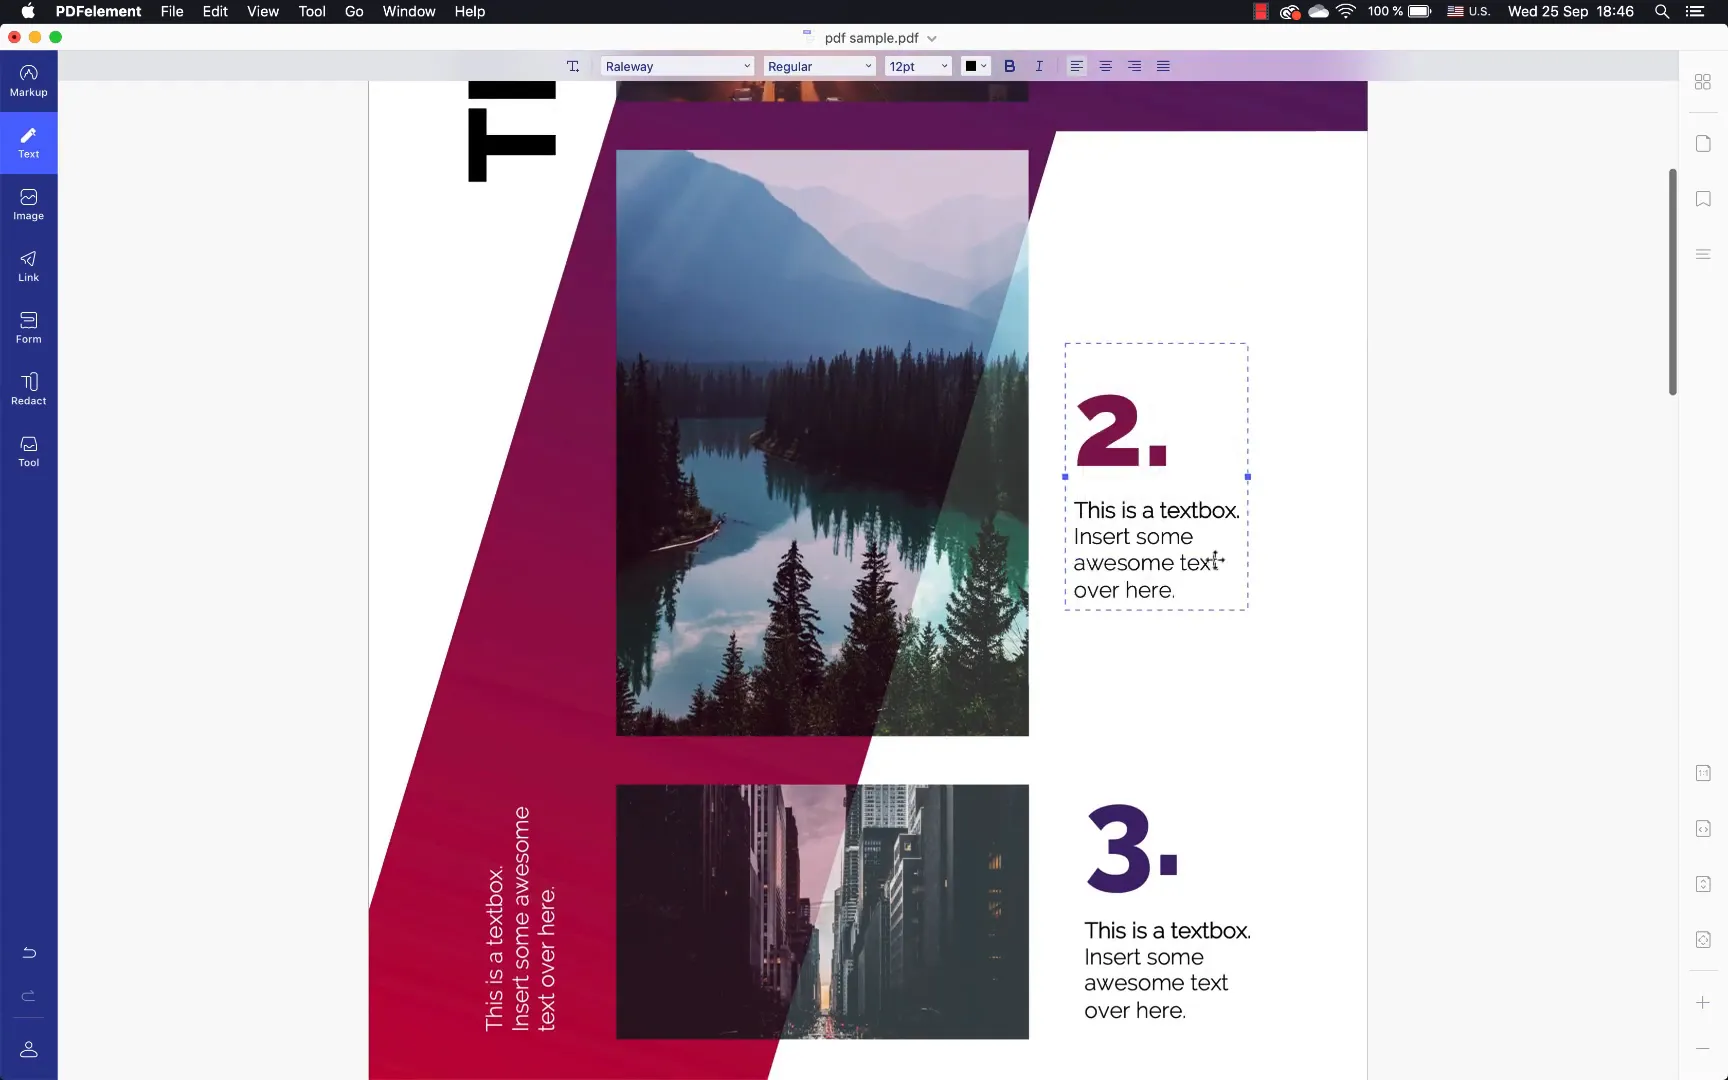
- Creating new PDFs from scratch by dragging and dropping images and adding text boxes.
- Editing existing PDFs by repositioning text boxes, changing font styles, sizes, and colors.
- Annotating documents with highlights, pencils, callouts, and sticky notes.
- Resizing, cropping, or replacing images within PDFs.
- Adding fillable form fields for interactive documents.
- Signing PDFs digitally for secure approvals.
- Exporting PDFs to other formats like PowerPoint for further editing.
If your creative projects involve PDFs alongside PowerPoint, PDFelement 7 can be a valuable addition to your toolkit.
Frequently Asked Questions (FAQ)
What version of PowerPoint do I need to create this horizontal parallax animation?
You need PowerPoint 2016 or later, preferably Office 365, as the Morph transition is only available in these versions.
Can I use any images for this animation?
Yes, you can use any images you like. For the best effect, use images with similar dimensions and high resolution.
How do I make sure the Morph transition works smoothly?
Ensure that the same objects (images and text boxes) are present on consecutive slides, and only their positions change. Also, keep the size and shape consistent.
Can I customize the text boxes’ appearance?
Absolutely! You can change font type, size, color, and background shapes to match your presentation style.
Is it possible to export the animation as a video?
Yes, PowerPoint allows you to export your presentation as a video file, preserving the animations and transitions.
Can this technique be used for vertical parallax animations?
While this tutorial focuses on horizontal movement, the same principles apply for vertical parallax by adjusting the image placeholders and object positions vertically.
What if I don’t want to use the Morph transition? Are there alternatives?
The Morph transition is the easiest way to achieve this effect. Without it, you would need to create complex animations using motion paths, which can be more time-consuming and less smooth.
Wrapping Up: Mastering Horizontal Parallax Animation in PowerPoint
Creating a horizontal parallax animation in PowerPoint is a fantastic way to make your presentations stand out. By following the steps outlined here—setting up a custom slide layout with image placeholders, applying the Morph transition, and adding dynamic text boxes—you can produce a professional, engaging visual effect that holds your audience’s attention.
Remember to:
- Use the Slide Master to create reusable layouts.
- Position images and text carefully for smooth transitions.
- Leverage the Morph transition for effortless animation.
- Test and refine your slides to ensure a polished final product.
With practice, you’ll be able to adapt this technique to various themes and presentation styles, adding a modern and creative touch to your work. So go ahead, experiment with your own images and text, and impress your audience with your newfound PowerPoint skills!
Thank you for reading, and happy animating!
Check out the full video: PowerPoint Tutorial 2019 🔥Horizontal Parallax 🔥


