Welcome to an exciting journey into the world of PowerPoint animation! In this comprehensive guide, you will learn how to create a stunning looping sticker animation that will captivate any audience. Whether you are preparing a summer-themed presentation, showcasing your favorite travel destination, or simply want to add a dynamic flair to your slides, this tutorial has got you covered.
This article is inspired by the creative work of One Skill PowerPoint, who masterfully demonstrates how to blend video backgrounds, smooth text animations, and charming hand-drawn illustrations into a vibrant, eye-catching slide. By following along, you will gain skills that elevate your PowerPoint presentations from ordinary to extraordinary.
Table of Contents
- Why Use Looping Animations in PowerPoint?
- Gathering the Assets: Illustrations and Video Backgrounds
- Step 1: Setting Up the Video Background
- Step 2: Creating Animated Wavy Text
- Step 3: Adding and Animating Illustrations
- Tips for Perfecting Your Looping Sticker Animation
- Exploring the Creative Potential
- Frequently Asked Questions (FAQ)
- Conclusion: Elevate Your PowerPoint Presentations with Looping Animations
Why Use Looping Animations in PowerPoint?
Animations in PowerPoint are more than just decorative effects; they serve to engage your audience, emphasize key points, and bring your content to life. Looping animations, in particular, create a seamless and continuous visual experience that can maintain viewer interest throughout your presentation.
Imagine a summer slide brimming with sunglasses, cocktails, umbrellas, and waves—all animated in a smooth, continuous loop. This style not only looks professional but also adds a playful, dynamic vibe that resonates well with audiences.
Looping animations are ideal for:
- Background visuals that set the mood without distracting
- Highlighting thematic elements like seasons, holidays, or events
- Adding personality to corporate or educational presentations
- Creating memorable title slides or transitions
Gathering the Assets: Illustrations and Video Backgrounds
Before diving into animation, you need to collect the right assets. In this tutorial, a beautiful video background paired with hand-drawn summer illustrations creates an immersive scene. Here’s what you’ll need:
Video Background
A high-quality, looping video sets the perfect backdrop. The example uses a serene beach shoreline clip downloaded from Artlist.io. This video adds movement and atmosphere, making the slide feel alive.
Summer Illustrations
Hand-drawn illustrations add charm and personality. The tutorial features a delightful collection by digital artist Raminta, available on Etsy. These illustrations are provided in PNG format with transparent backgrounds, making them easy to layer and animate in PowerPoint.
- Sunglasses
- Headphones
- Lemons
- Stickers
- Luggages and cars
- Kindle reader
- Cocktail glass
- Sunscreen bottle
- Umbrella
These assets are not only visually appealing but also versatile. You can adapt them to fit themes beyond summer, such as travel, culture, or personal interests.
Step 1: Setting Up the Video Background
Start by opening a new blank slide in Microsoft PowerPoint 365. Paste your selected video onto the slide. To ensure the video plays automatically and loops continuously, follow these steps:
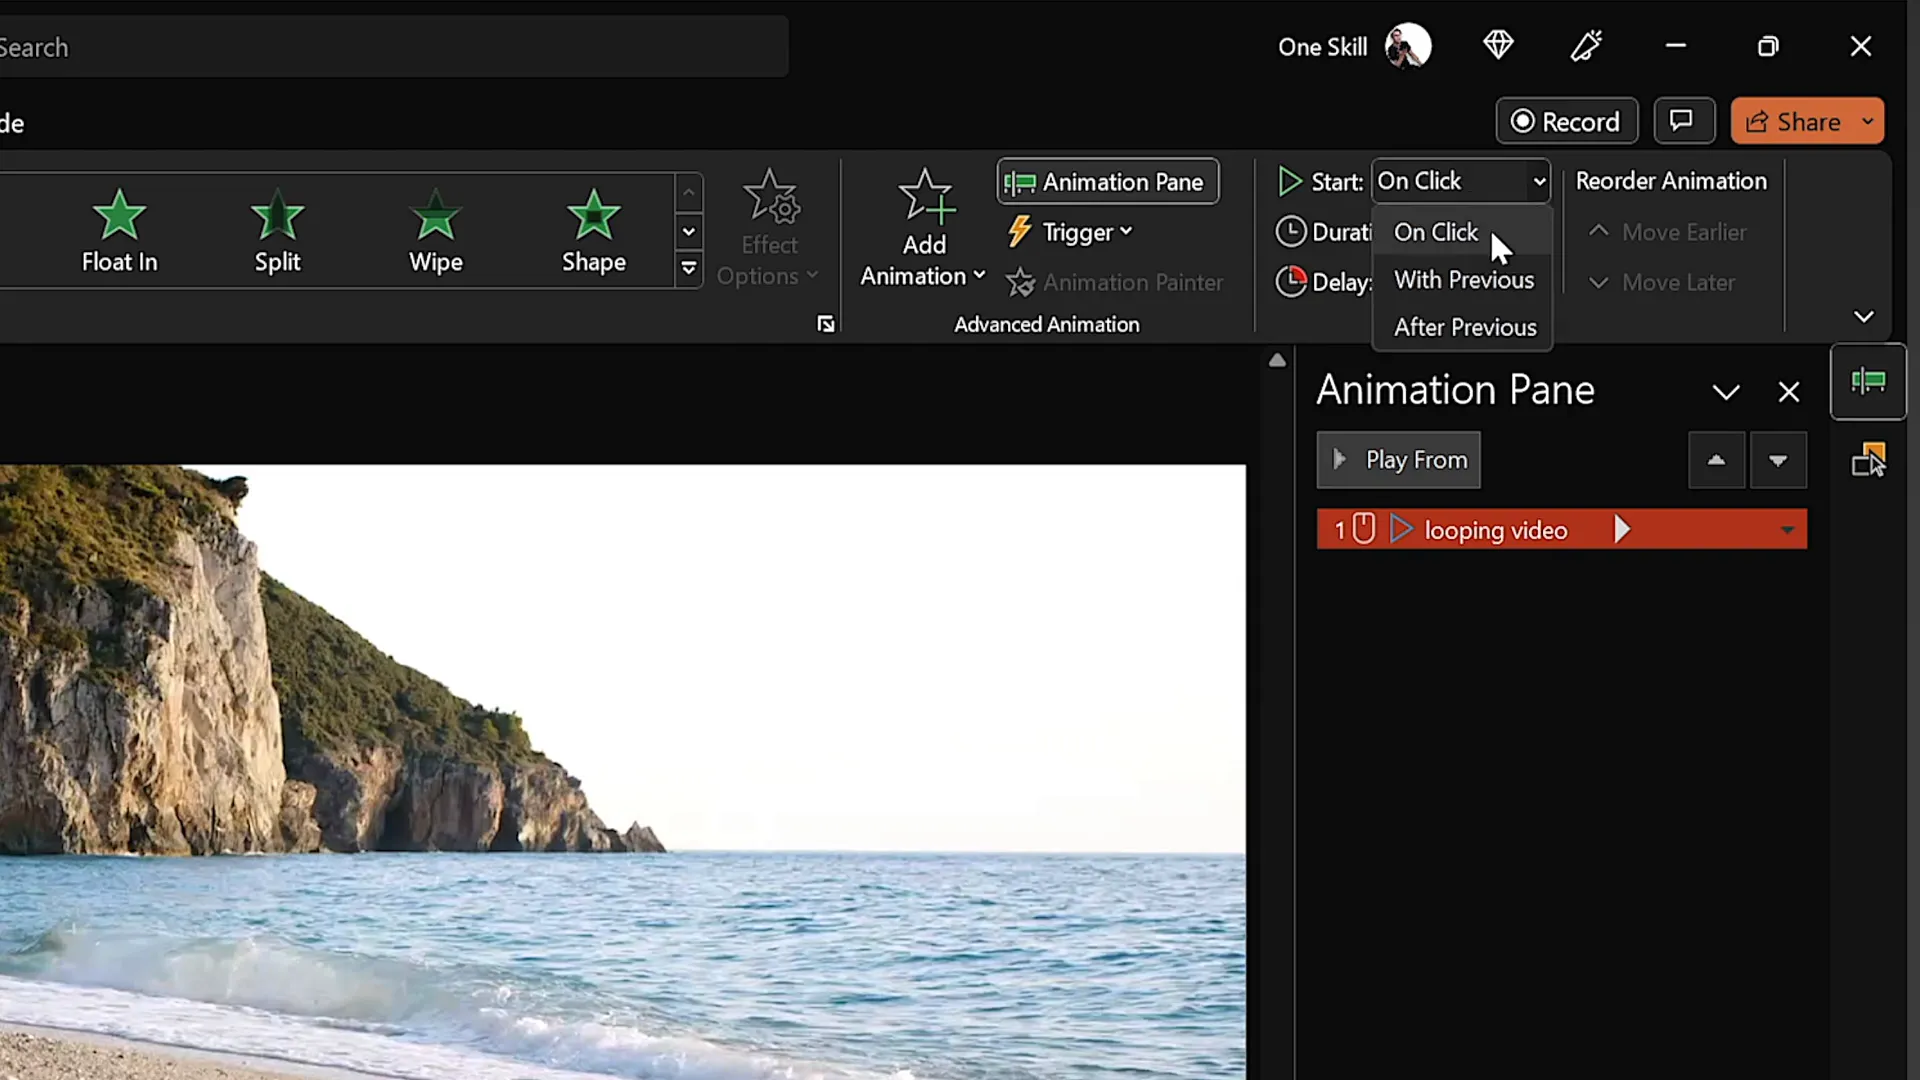
- Select the video and add a Play animation.
- Set the animation to start With Previous so it begins as soon as the slide loads.
- In the playback options, enable Loop until Stopped to keep the video running indefinitely.
To enhance the viewer experience, hide the video player controls by going to the Slideshow tab and unchecking Show Media Controls. This way, the video plays seamlessly without distracting buttons.
Preventing Unwanted Video Clicks
When presenting, clicking on the video can sometimes reset it, which might interrupt the flow. To avoid this, insert a transparent rectangle covering the entire slide:
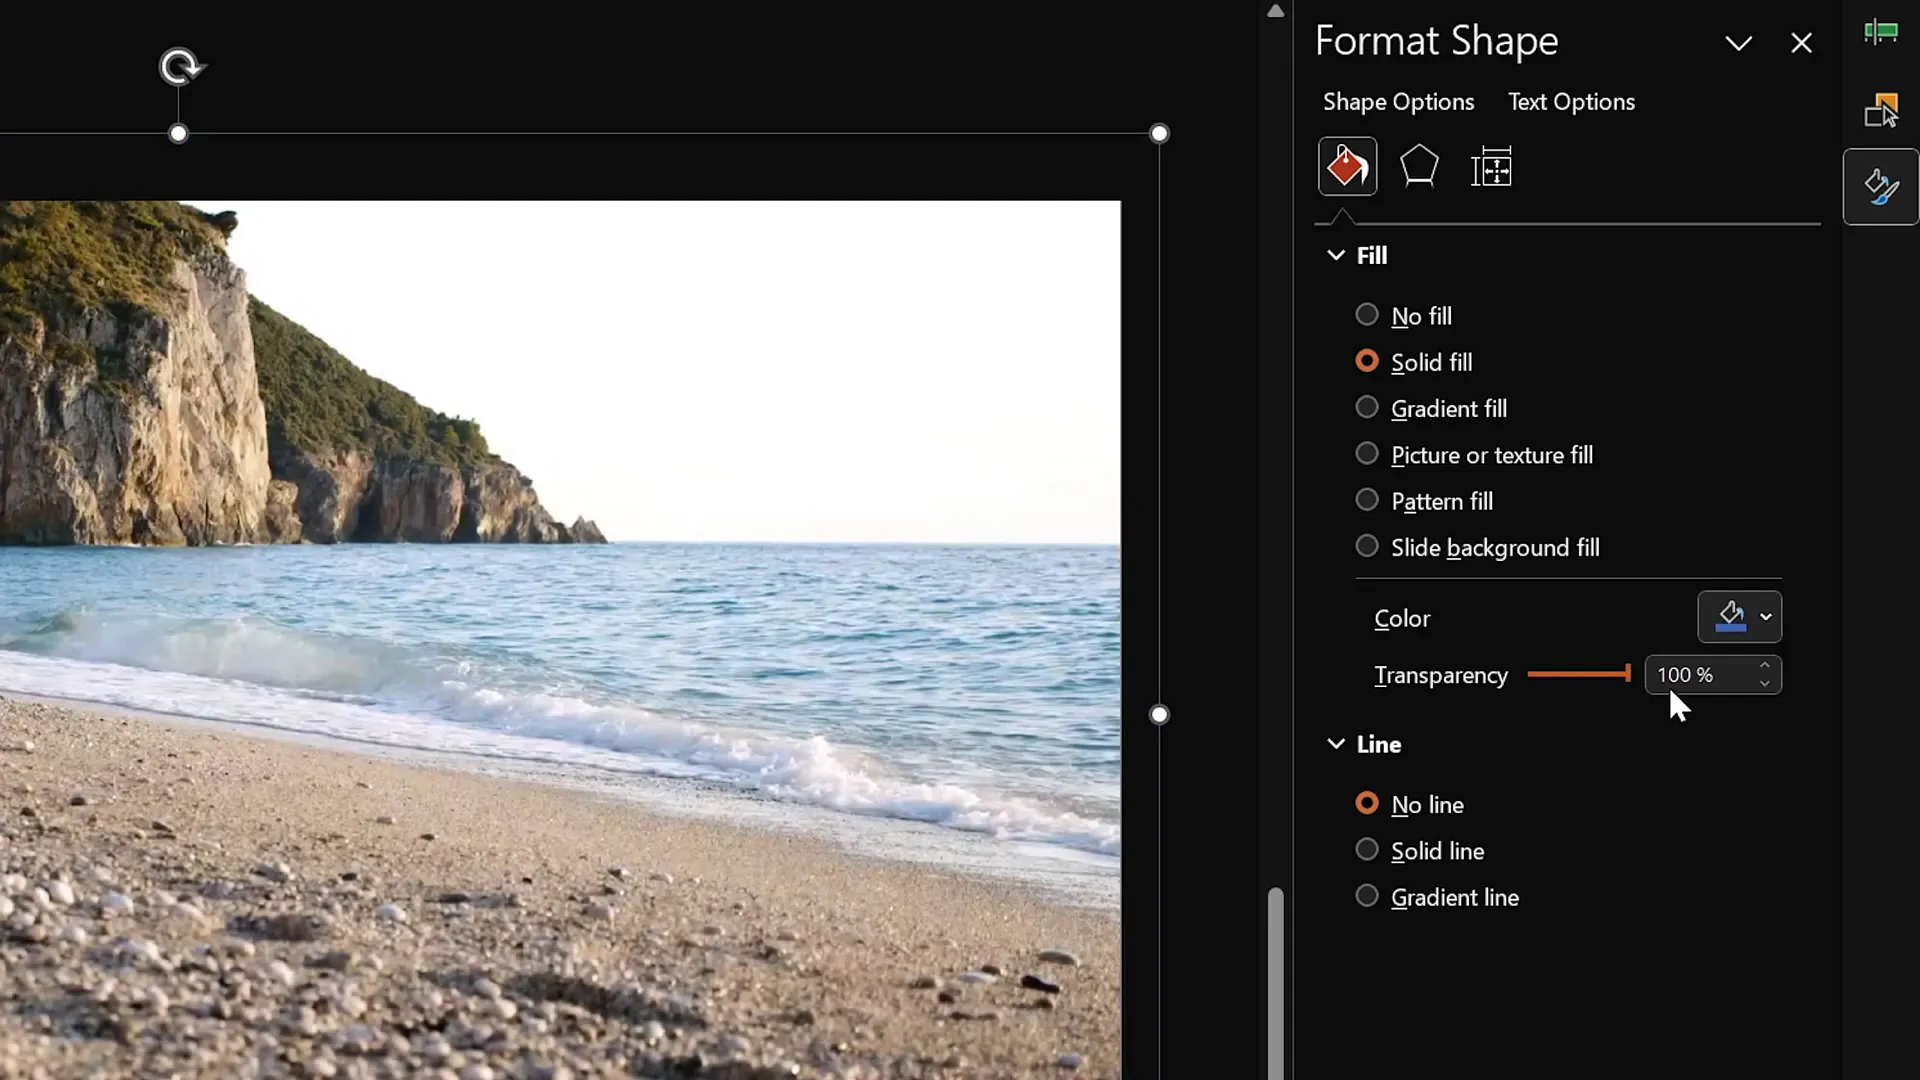
- Go to Insert > Shapes and select the rectangle tool.
- Draw a rectangle that covers the whole slide.
- Remove the outline and set the fill to 100% transparent.
- Rename the shape in the selection pane for easy management.
This invisible layer blocks mouse clicks on the video while preserving the video’s visibility and playback.
Step 2: Creating Animated Wavy Text
Next, add an engaging slide title with a wavy animation effect. This adds a dynamic and playful touch to your presentation’s headline. Here’s how:
- Insert a text box and type your title, e.g., “Summer Vibes.”
- Use the Sweet Purple font at a large size (e.g., 115pt) for maximum impact.
- Position the text centrally, preferably just above any other animated elements like water or waves.
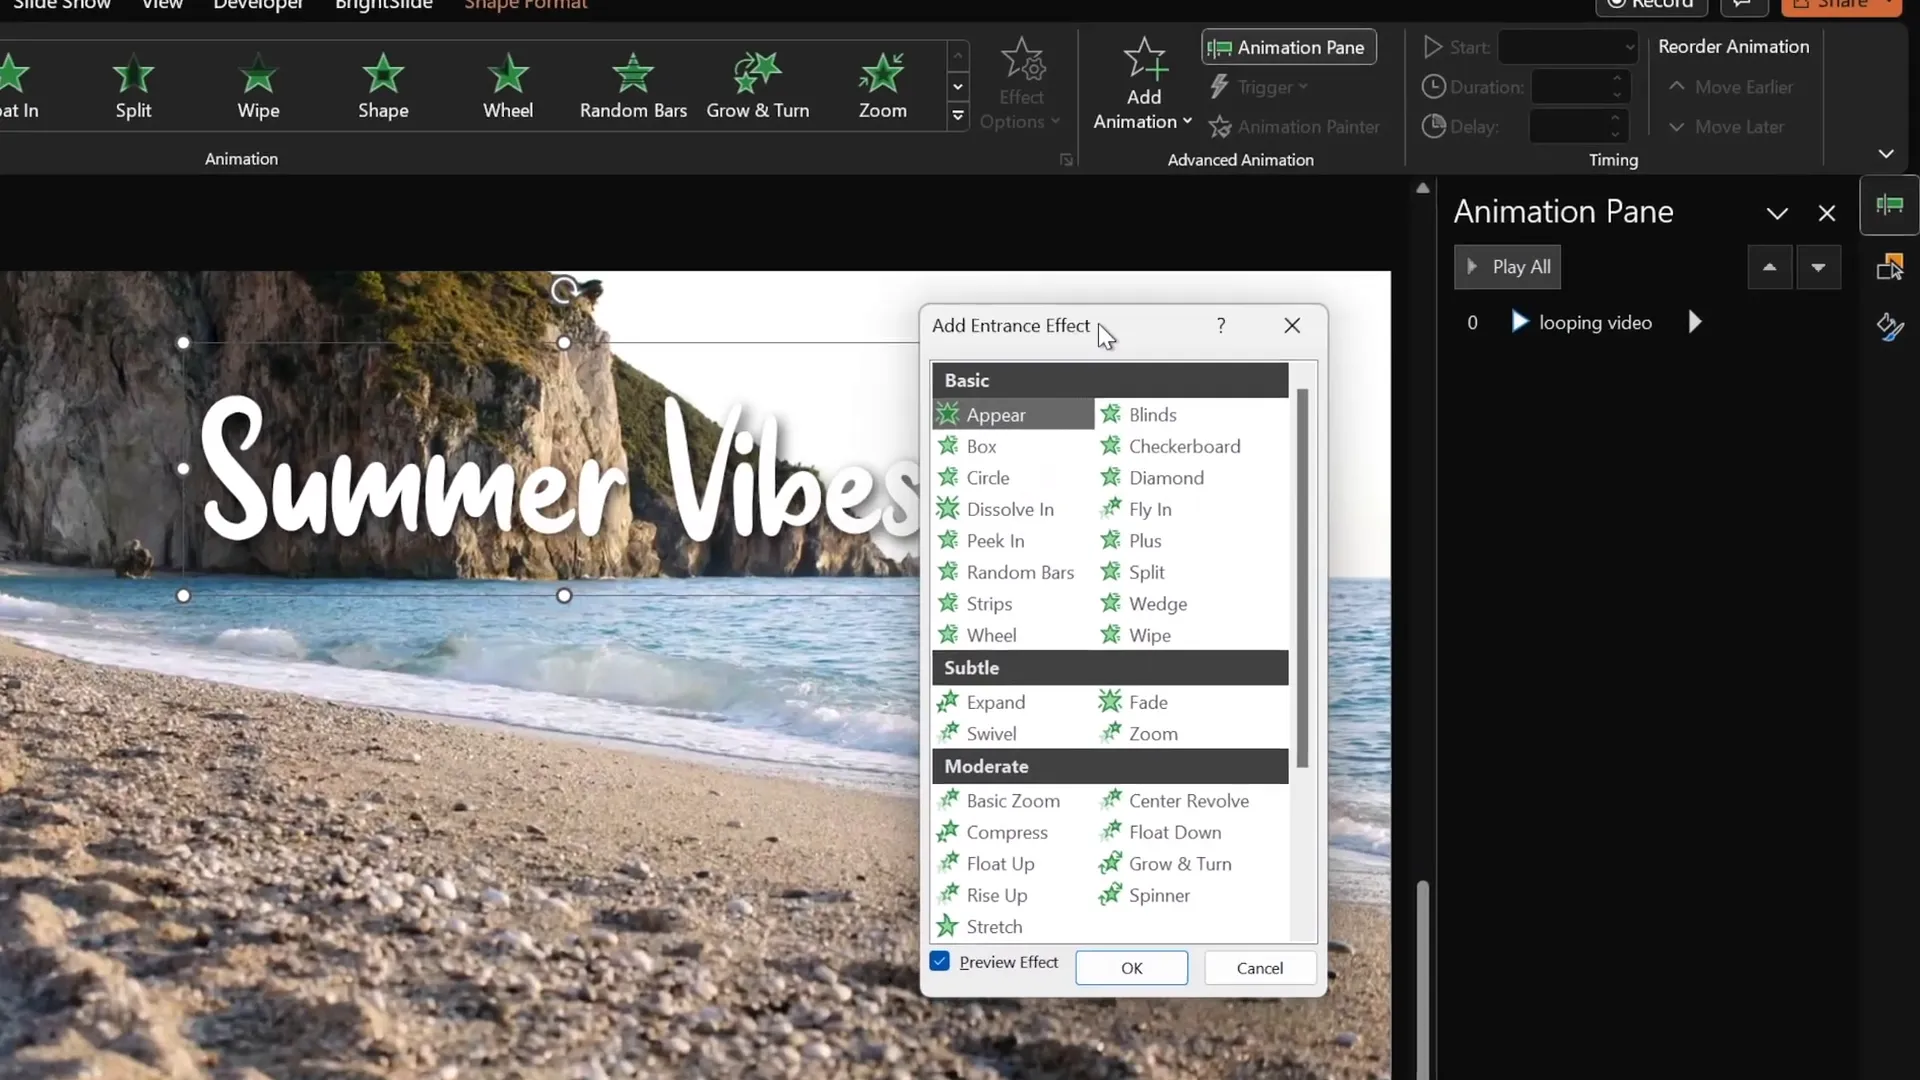
- Open the Animation Pane and add a Basic Zoom entrance animation.
- Set the animation to start on click, duration 0.5 seconds, and animate by letter with a 10% delay between letters.
- Next, add a Wave animation starting with the previous animation, duration 2 seconds, animated by letter with a 5% delay and set to repeat until the end of the slide.
This combination creates a smooth zoom-in effect followed by a continuous waving motion, making your title text visually lively.
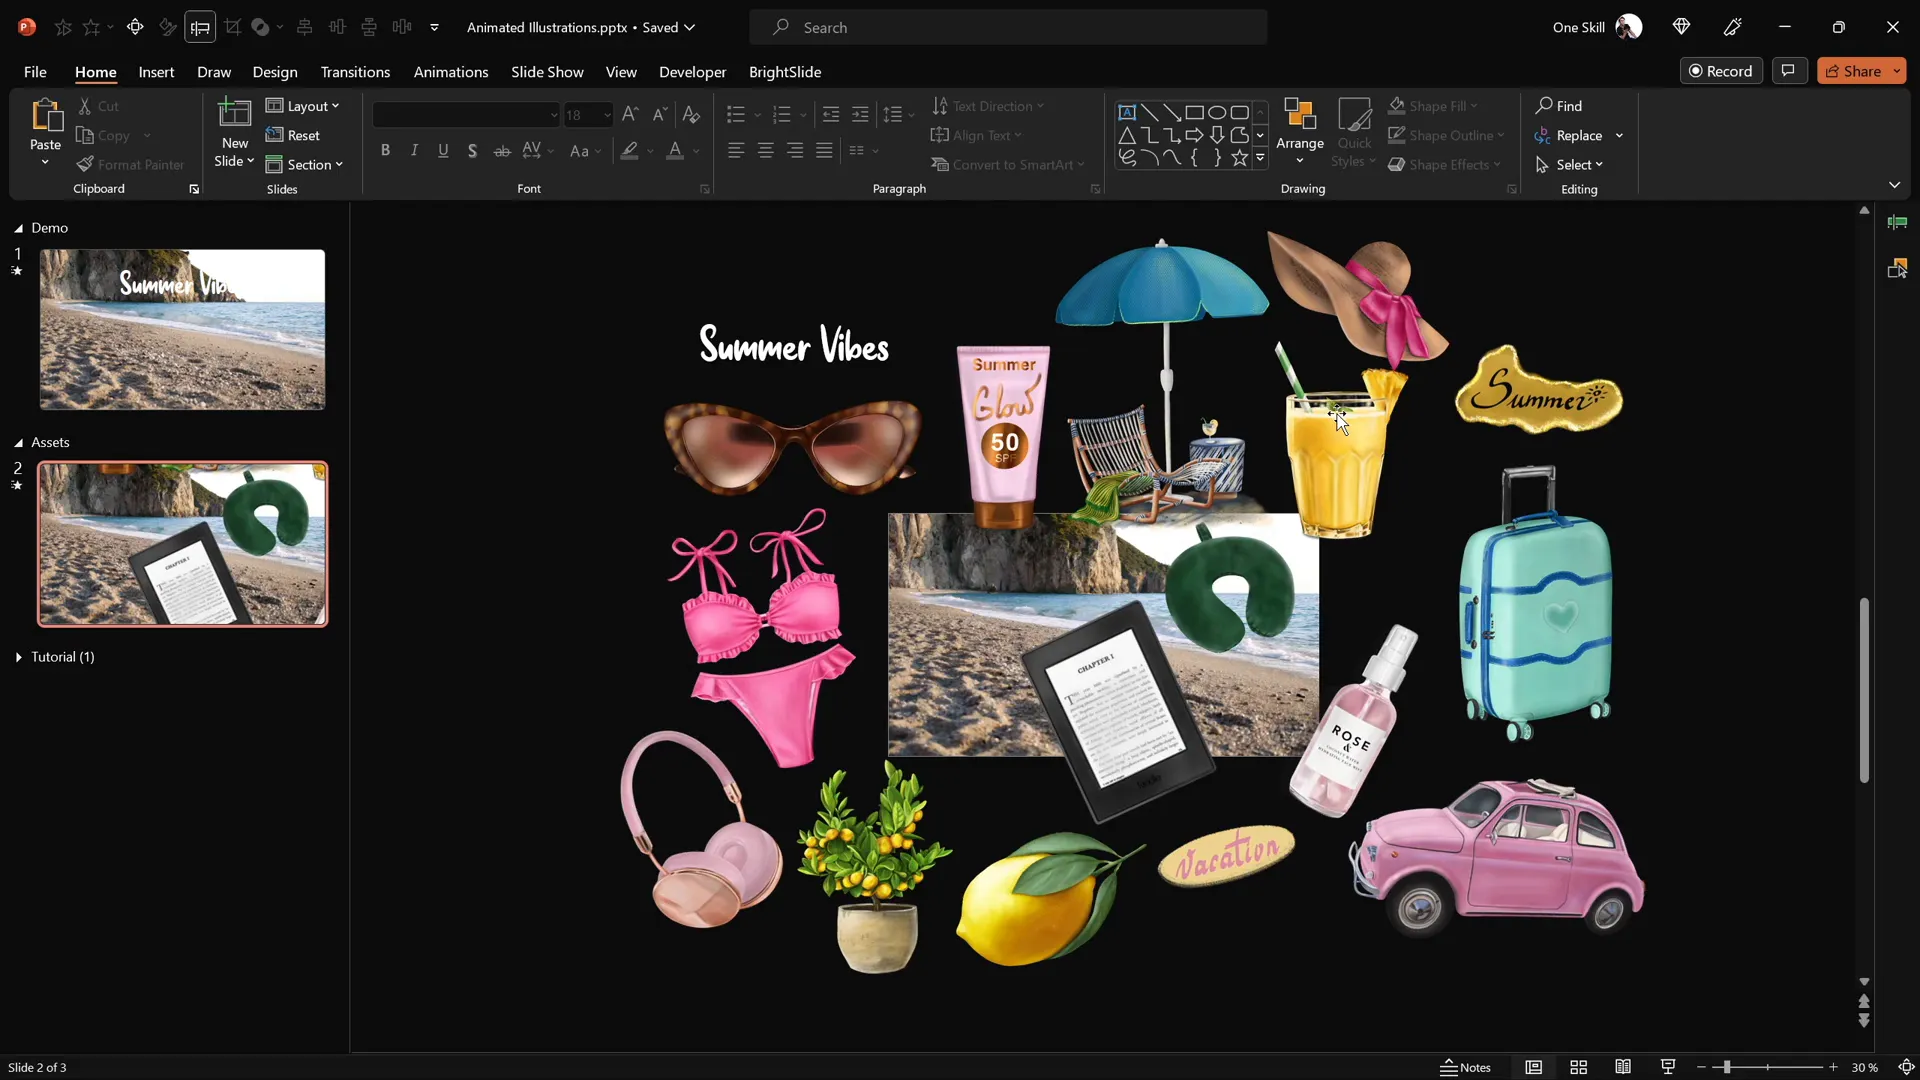
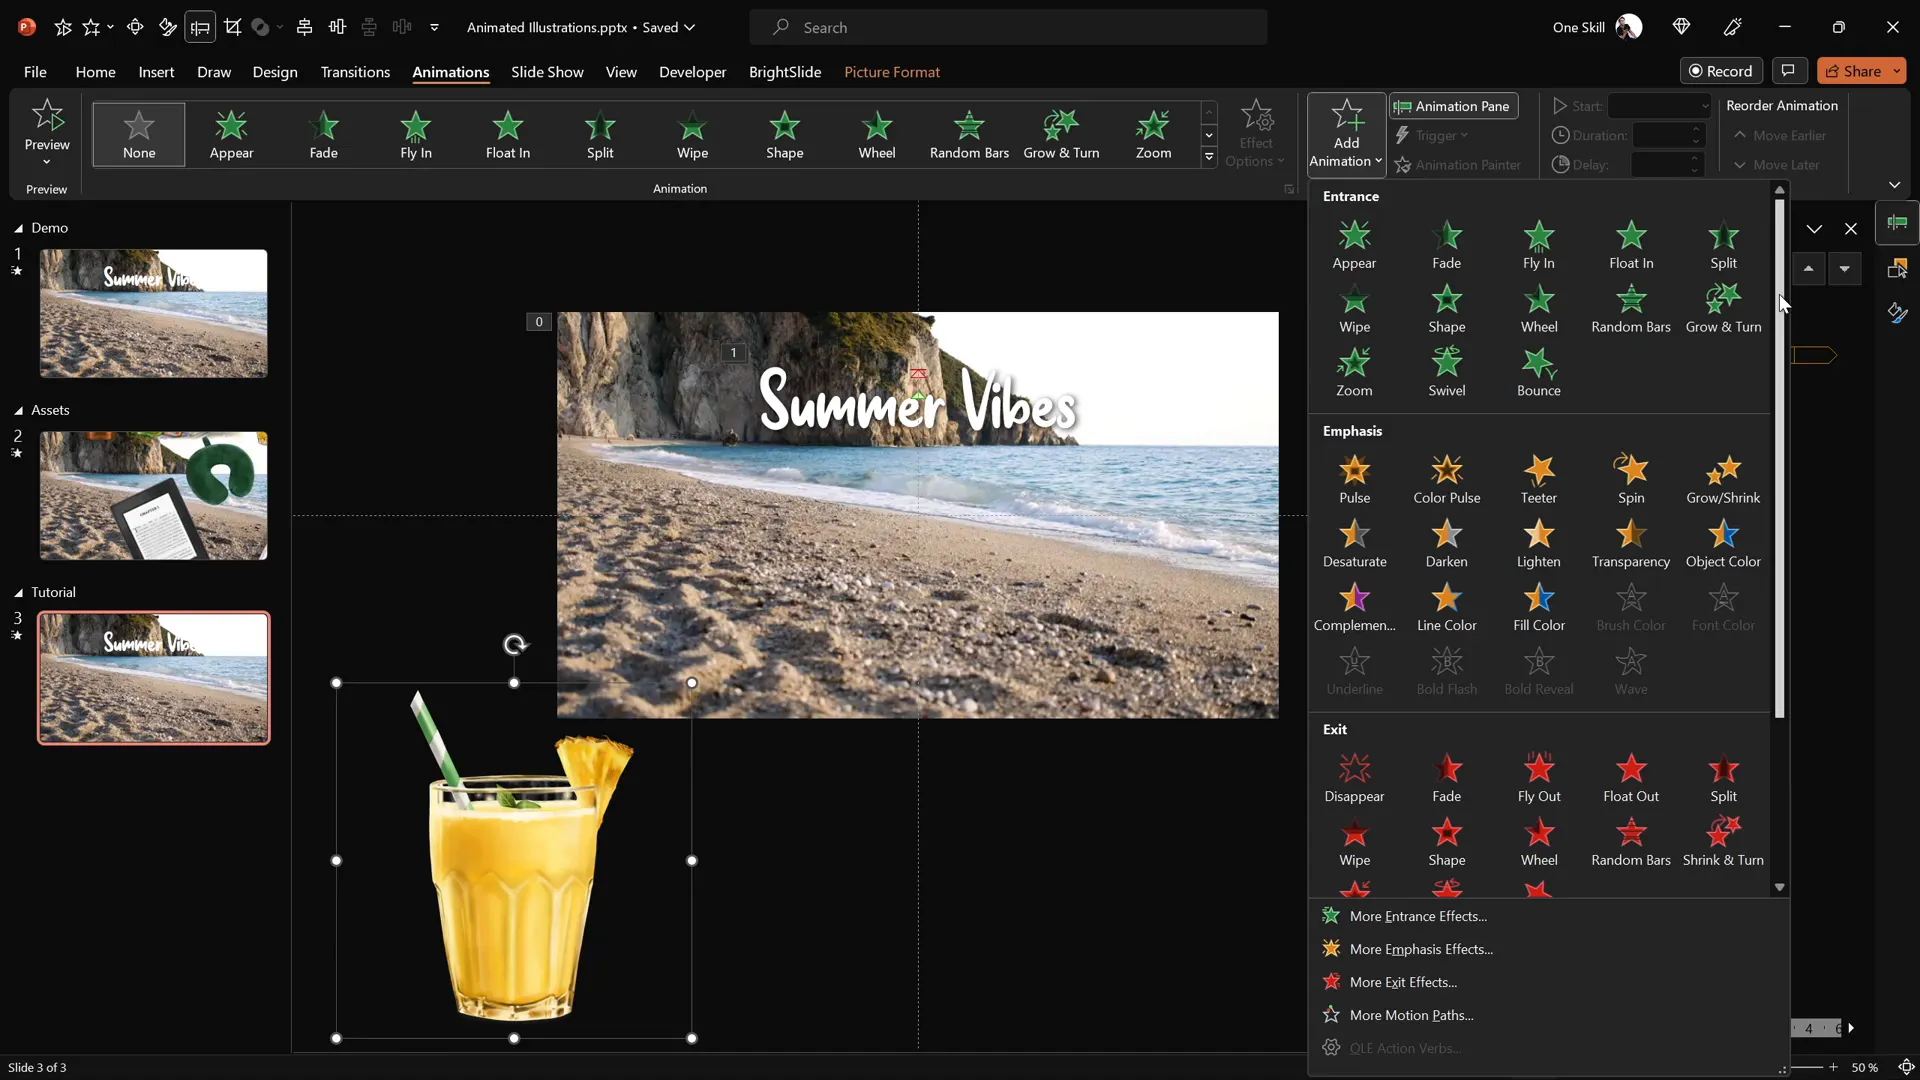
Step 3: Adding and Animating Illustrations
With the background video and animated title in place, it’s time to bring in the summer illustrations. The key is to make each illustration move in a looping motion path, adding life and movement to the slide.
Animating the Cocktail Glass
- Copy the cocktail glass illustration and paste it onto the slide.
- Position it in the bottom left corner.
- Activate slide guides to find the slide’s center for animation alignment.
- Select the glass and add a Motion Path Line animation.
- Adjust the motion path so the animation starts from the slide center and moves to just above the center.
- Reverse the motion path so the starting point is the center of the slide, creating a natural motion.
- Set the animation to start with previous, duration 4 seconds, with a smooth start effect.
- Repeat the animation until the end of the slide.
- Since the glass appears too large initially, add a Basic Zoom entrance animation starting with previous, duration 4 seconds, also looping indefinitely.
This setup makes the glass appear to grow and move smoothly across the slide, creating a captivating visual.
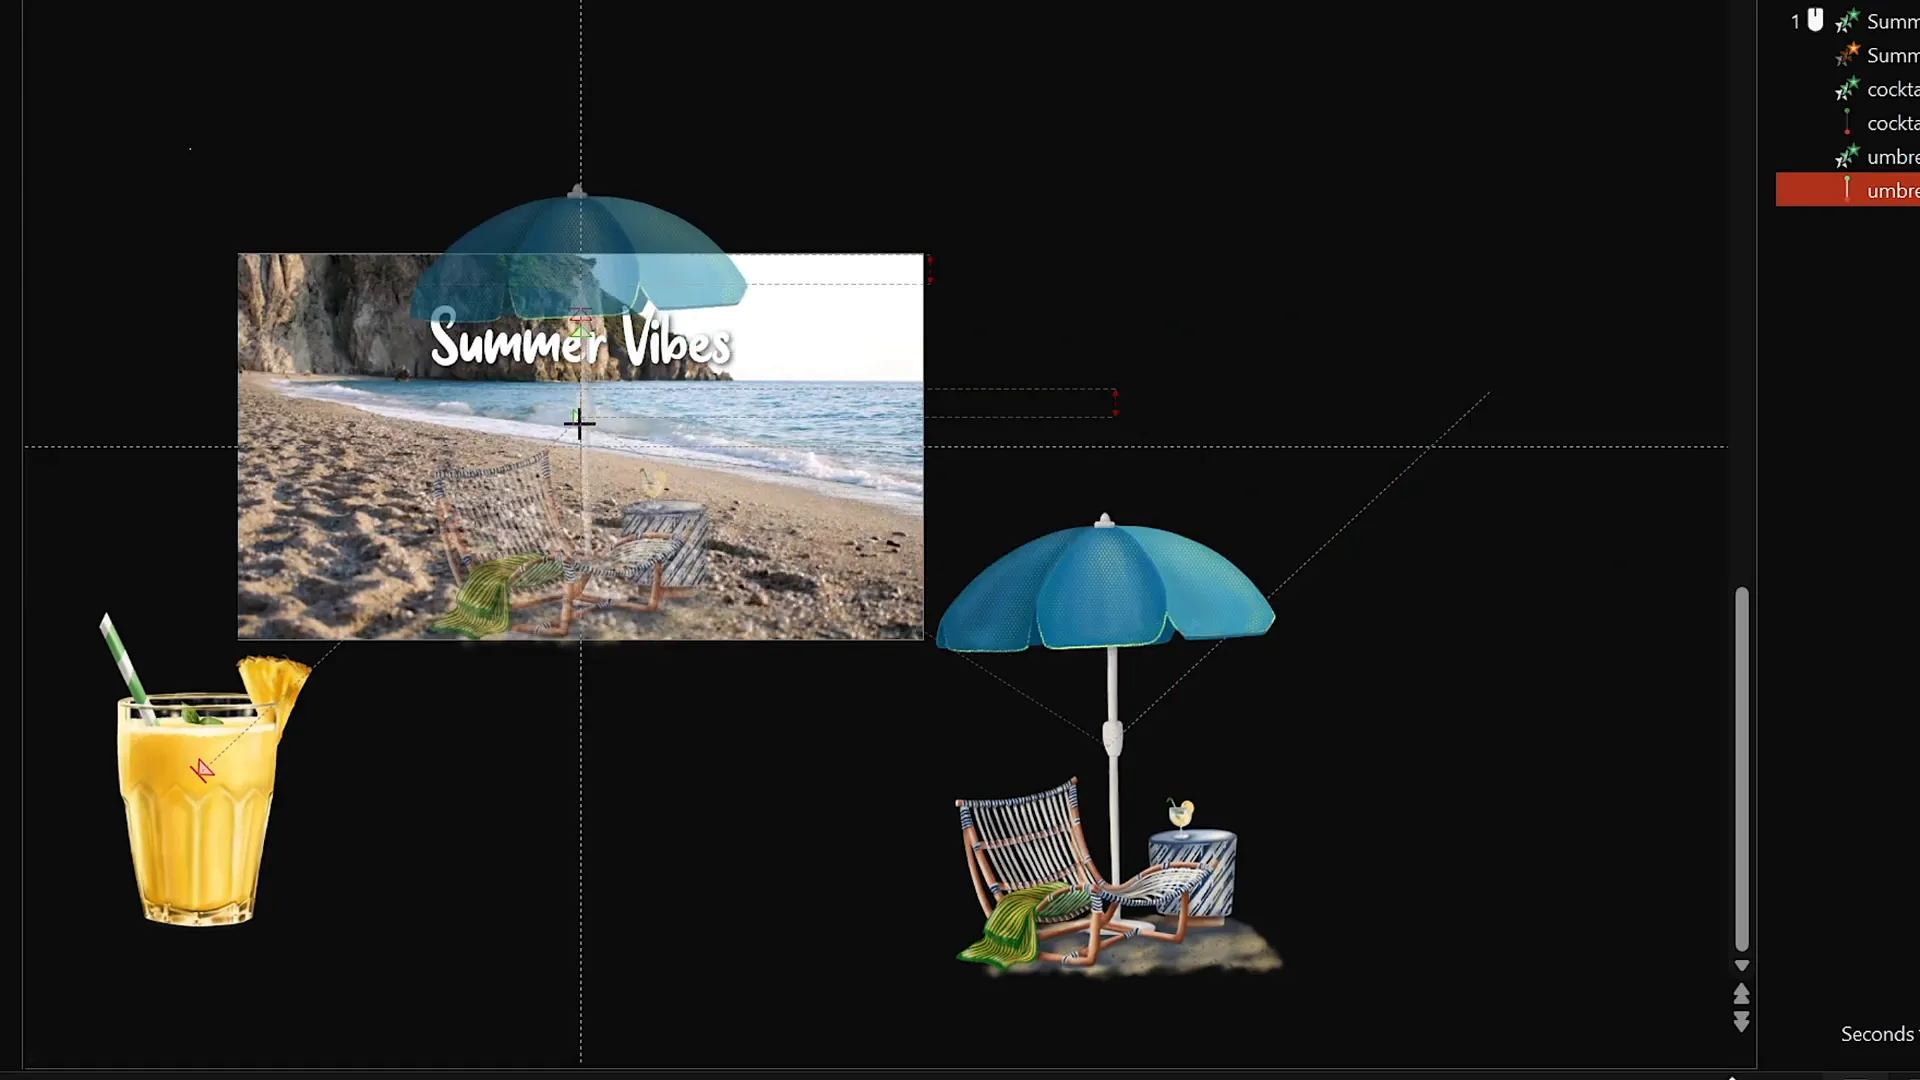
Animating Additional Illustrations with Variety
To make the slide more dynamic, add more illustrations with staggered animation delays:

- Umbrella: Paste it in the bottom right corner. Use the animation painter to copy the cocktail glass animations. Add a 1-second delay to create variety.
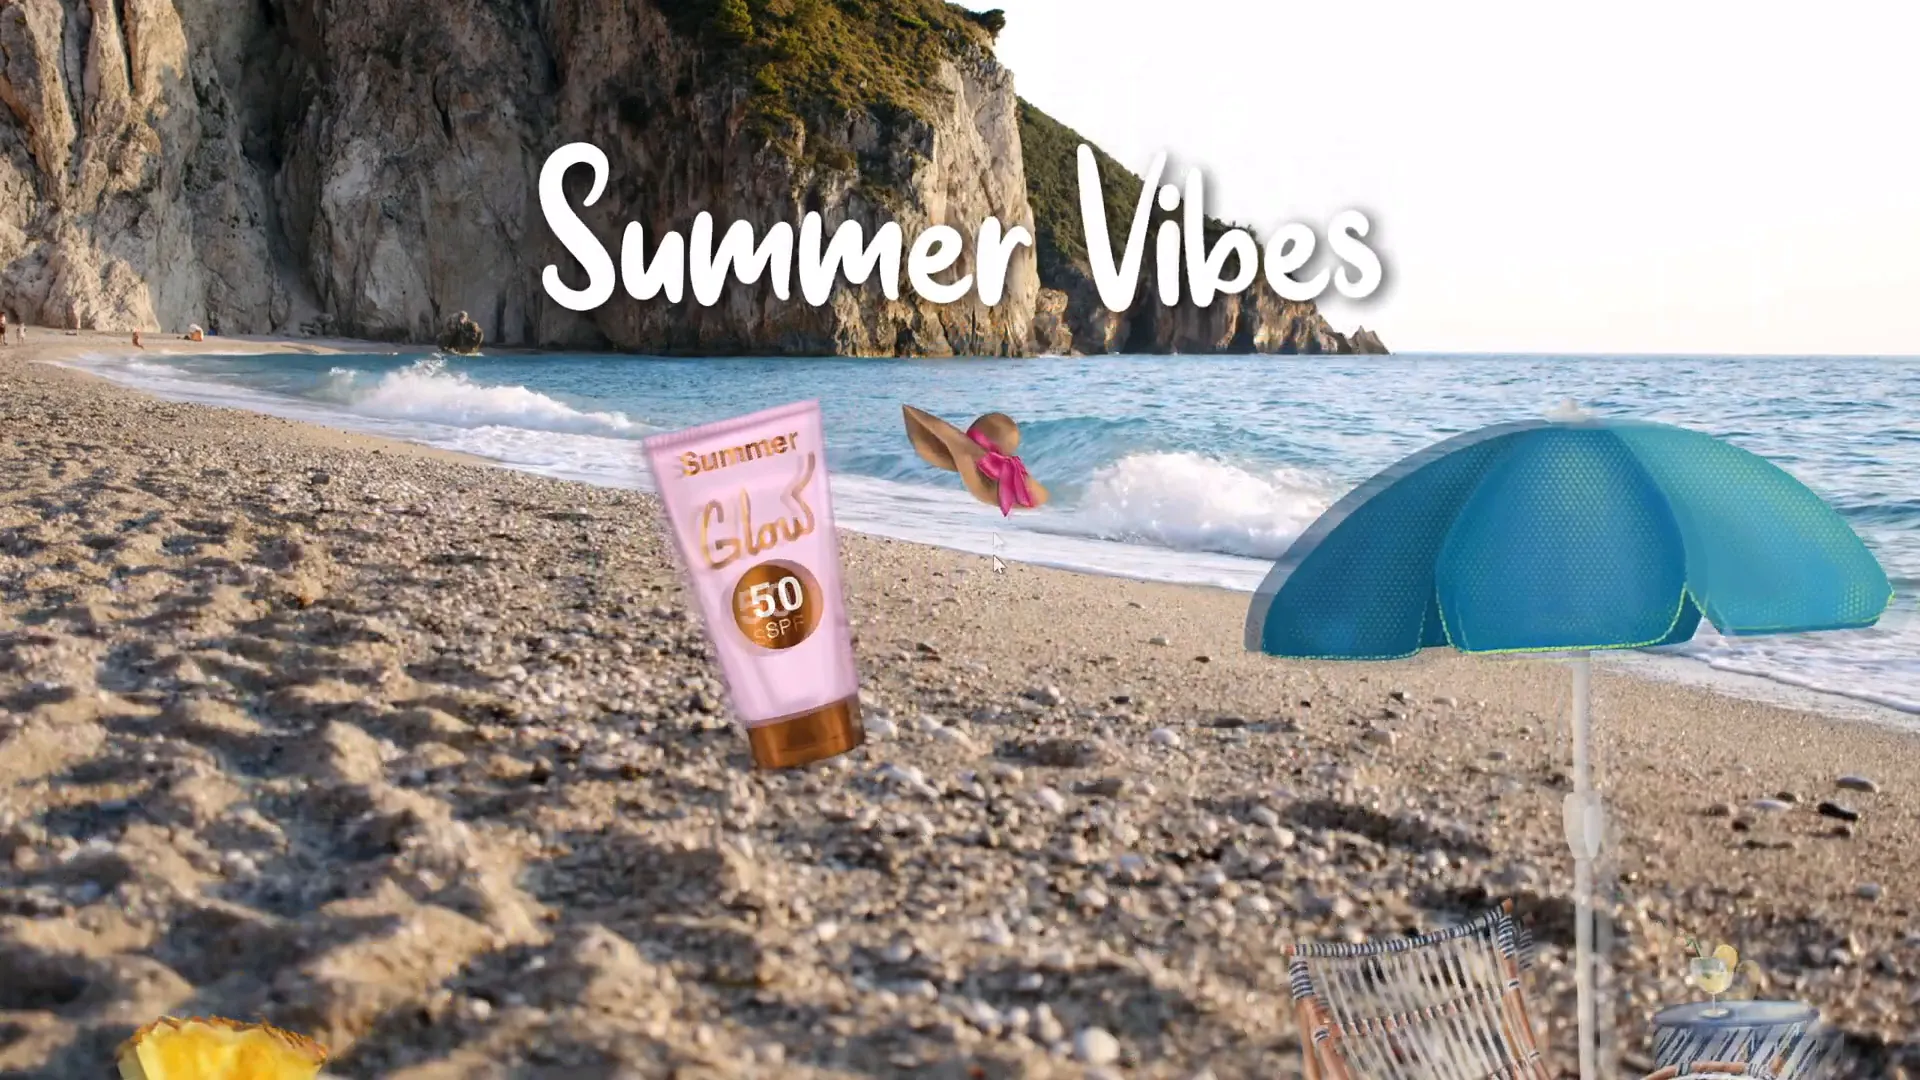
- Sunscreen Bottle: Place it near the umbrella, rotate slightly for natural placement. Use animation painter again and add a 2-second delay.
- Hat: Position near the umbrella. Copy animations and set a 3-second delay.
Adjust the layering order in the selection pane to ensure proper overlap, with the cocktail glass above the umbrella, and the sunscreen just below the umbrella.
This staggered animation sequence adds depth and keeps the viewer’s eye moving across the slide.
Tips for Perfecting Your Looping Sticker Animation
Here are some additional tips to help you create smooth, professional-looking animations:
- Use Transparent PNGs: Ensure your illustrations have transparent backgrounds to blend seamlessly with the video.
- Loop Animations: Set all animations to repeat until the end of the slide to maintain continuous motion.
- Adjust Timing and Delays: Stagger animation delays to avoid all elements moving simultaneously, which can look chaotic.
- Use Slide Guides: Align elements precisely using slide guides for a balanced composition.
- Manage Layers: Use the selection pane to organize the layering of objects, ensuring foreground and background elements display correctly.
Exploring the Creative Potential
While this tutorial focuses on a summer theme, the technique is versatile. You can adapt the concept to fit any theme or topic by replacing the illustrations and video background. For example, create a travel-themed slide with landmarks and maps, a festive holiday slide with seasonal icons, or a corporate slide with branded graphics.
The combination of video backgrounds, text animations, and looping motion paths offers a powerful toolkit for making your presentations stand out.
Frequently Asked Questions (FAQ)
Can I use any video as a background in PowerPoint?
Yes, you can use most video formats supported by PowerPoint (such as MP4). Make sure the video is high quality and loops well to avoid abrupt transitions.
How do I make animations loop continuously in PowerPoint?
In the animation pane, select the animation, open the timing options, and set it to repeat Until End of Slide. This makes the animation run repeatedly as long as the slide is displayed.
What if I don’t have access to hand-drawn illustrations?
You can use any PNG images with transparent backgrounds. Many free and paid illustration resources are available online, or you can create your own graphics using design tools like Adobe Illustrator or Canva.
Can I use this technique in older versions of PowerPoint?
Some features like animation painter and advanced motion paths are available in PowerPoint 2013 and later. However, Microsoft 365 provides the smoothest experience and access to the latest updates.
How do I prevent the video from resetting when clicked during a presentation?
Place a transparent shape over the video to block mouse clicks. This prevents accidental resets while keeping the video visible and playing.
Conclusion: Elevate Your PowerPoint Presentations with Looping Animations
Mastering looping sticker animations in PowerPoint opens up a world of creative possibilities. By combining a video background with animated text and charming illustrations, you create slides that are visually captivating and professionally polished.
This tutorial empowers you to impress your audience with dynamic, seamless animations that enhance your message without overwhelming it. Whether delivering a business pitch, educational content, or a fun summer presentation, these skills will make your slides memorable and engaging.
Remember to explore different themes, experiment with animation timings, and personalize your slides to fit your style and audience. And don’t forget to check out the incredible hand-drawn illustrations by Raminta, which add a unique artistic touch to your work.
Stay creative, keep practicing, and watch your PowerPoint presentations transform into captivating stories that your audience will love!
Resources:
Check out the full video: PowerPoint Presentation Skills: Looping Sticker Animation! ✨


