
PowerPoint presentation skills are essential for anyone looking to impress their audience with engaging, dynamic slides. Whether you’re presenting a business pitch, a travel story, or a creative project, adding animations and multimedia elements can transform a dull presentation into an unforgettable experience. In this comprehensive guide, you will learn how to create a beautiful looping animation slide in PowerPoint, featuring a video background, animated text, and moving stickers that loop seamlessly. Inspired by the creative tutorial from One Skill PPT, this article walks you step-by-step through the process of designing a vibrant summer-themed slide, adaptable to any topic you choose.
By mastering these techniques, you’ll not only improve your PowerPoint presentation skills but also stand out with visually captivating slides that keep your audience engaged from start to finish.
Table of Contents
- Preparing Your Assets: Illustrations and Video Background
- Setting Up the Video Background with Automatic Looping
- Creating the Wavy Animated Title Text
- Animating Summer Stickers with Motion Paths and Looping
- Tips for Polishing Your Animation and Presentation
- Frequently Asked Questions (FAQ)
- Conclusion
Preparing Your Assets: Illustrations and Video Background
Before diving into PowerPoint, it’s important to gather all the assets you’ll need for your slide. For the summer-themed animation, you will require:
- A video background that loops seamlessly
- Hand-drawn summer illustrations in PNG format with transparent backgrounds
- A stylish font for your animated slide title
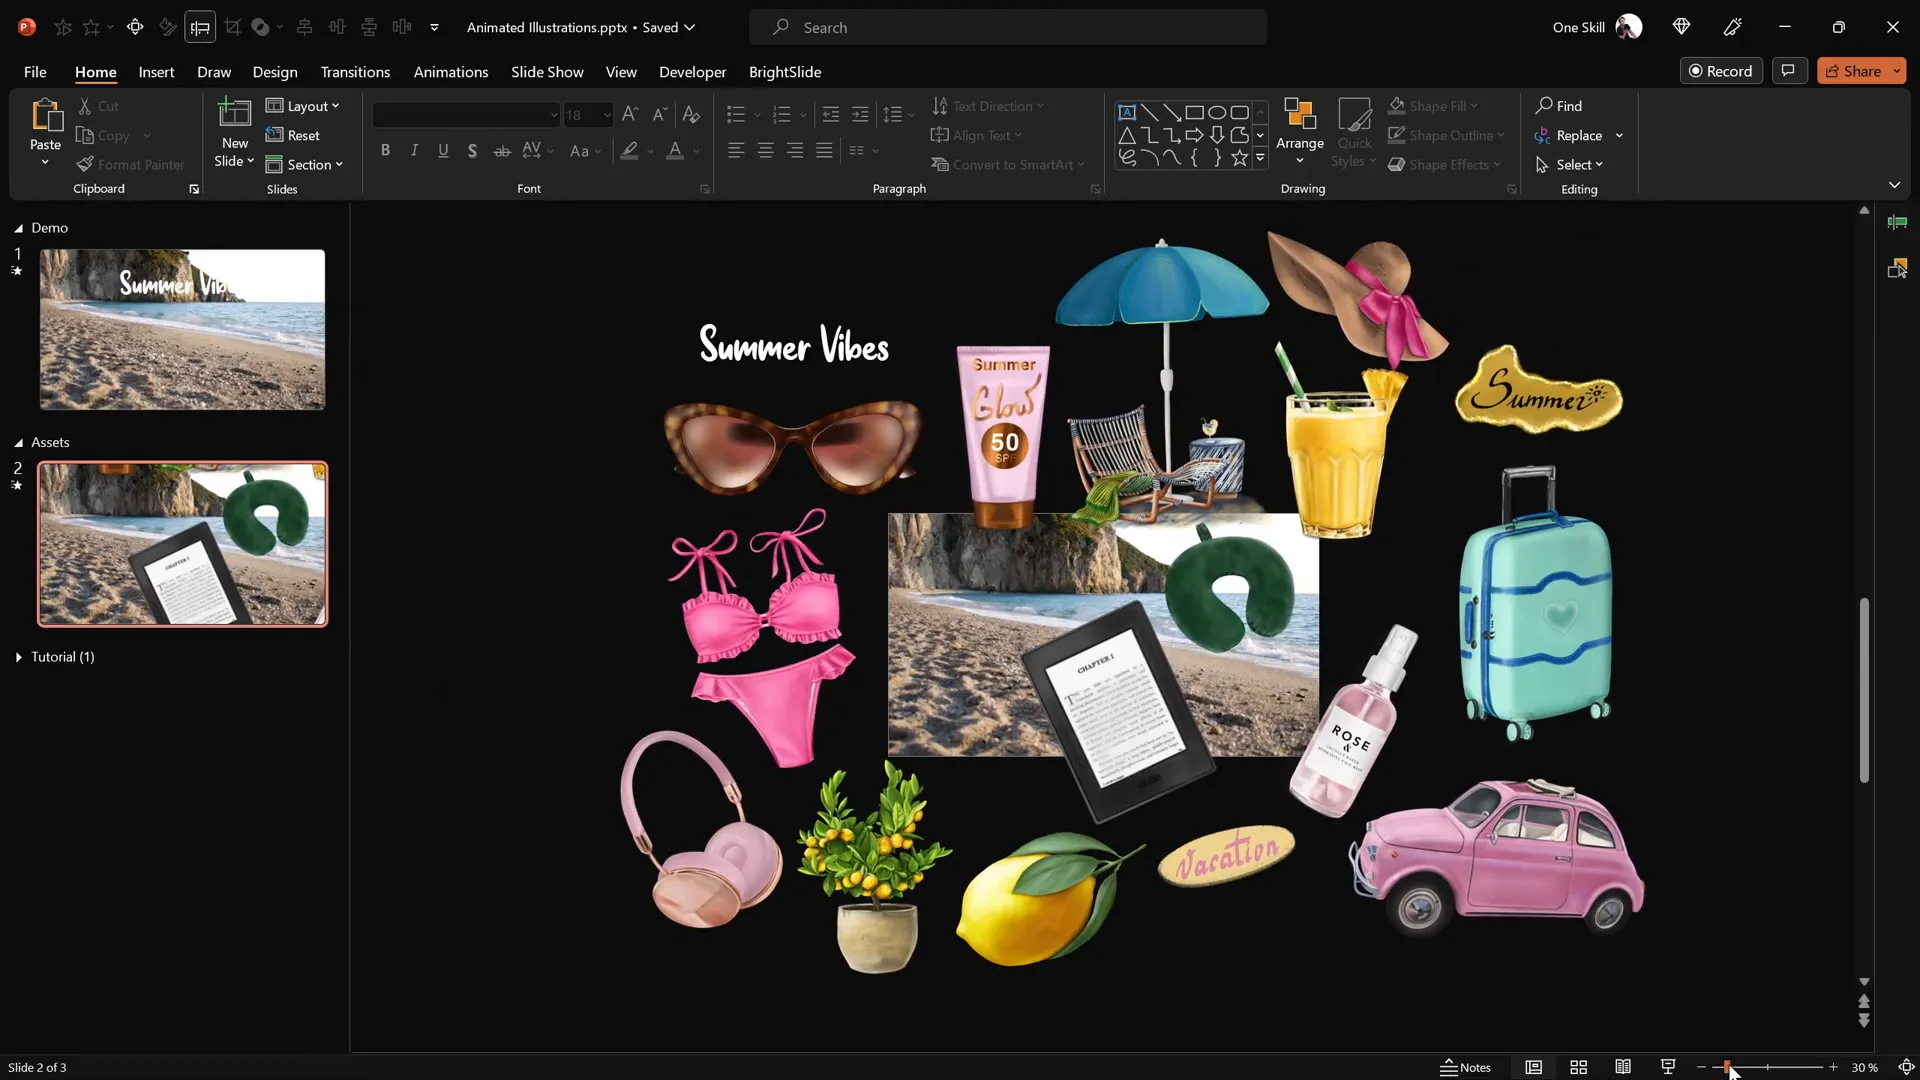
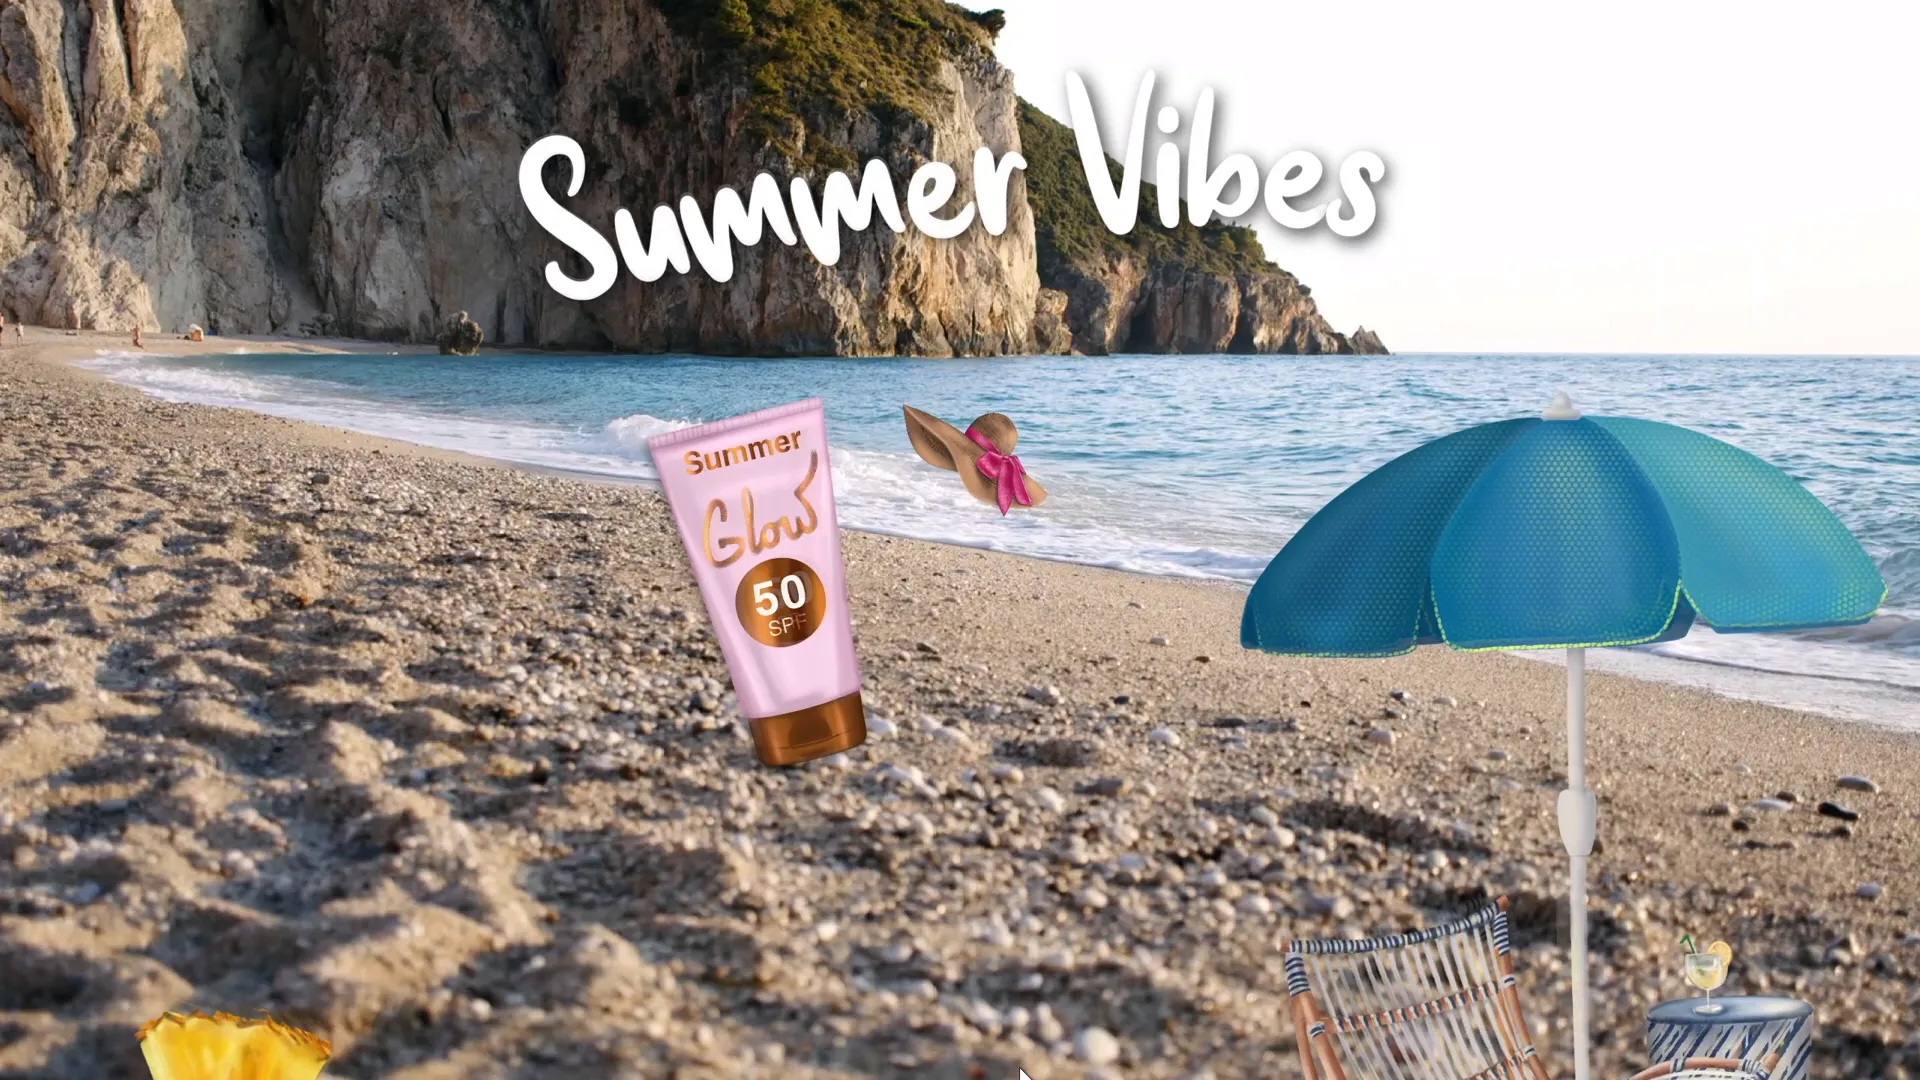
Summer Illustrations
To create a lively and colorful animation, we use a set of summer-themed illustrations such as sunglasses, headphones, lemons, luggage, cars, cocktail glasses, sunscreen bottles, and umbrellas. All of these illustrations are hand-drawn by the talented digital artist Raminta. These PNG images come with transparent backgrounds, making them easy to layer and animate in PowerPoint without any distracting borders or backgrounds.
Pro tip: You can find these beautiful illustrations on Raminta’s Etsy store. The price is very affordable, and now is a great time to grab them. Using high-quality, ready-made illustrations saves you time and ensures a professional look.
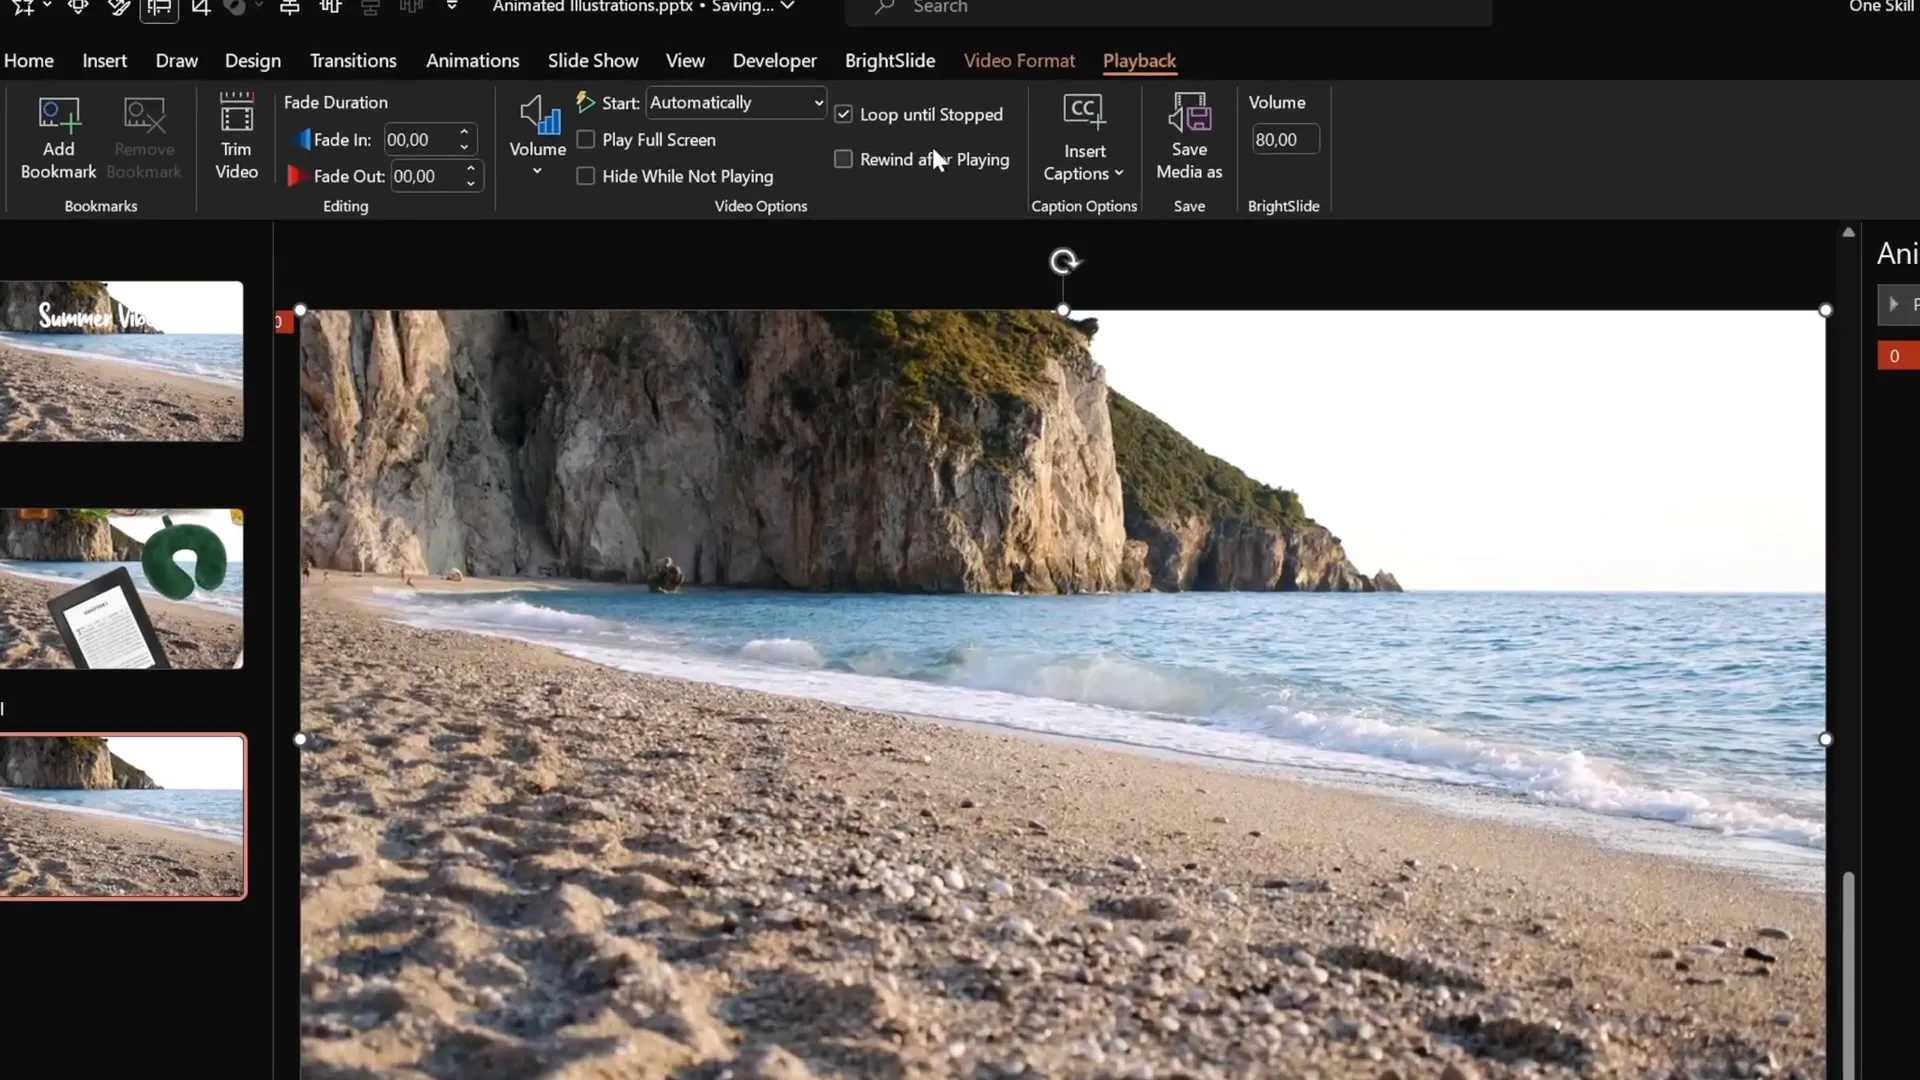
Video Background
Adding a video background instantly elevates the dynamic feel of your slide. For this tutorial, a beach shoreline video from Artlist.io is used. The video lasts about 23 seconds and loops smoothly, providing a relaxing summer vibe. You can use any video that fits your presentation theme, such as cityscapes, nature scenes, or abstract animations.
Tip: Always choose videos that loop seamlessly and don’t distract from your content.
Setting Up the Video Background with Automatic Looping
Once you have your video downloaded, here’s how to insert and configure it for an automatic, looping background in PowerPoint:
- Insert the video: Copy and paste your video onto a fresh blank slide.
- Set the video to play automatically: Select the video, go to the Animations tab, and add a Play animation.
- Configure animation timing: Set the play animation to Start With Previous, so it plays as soon as the slide loads.
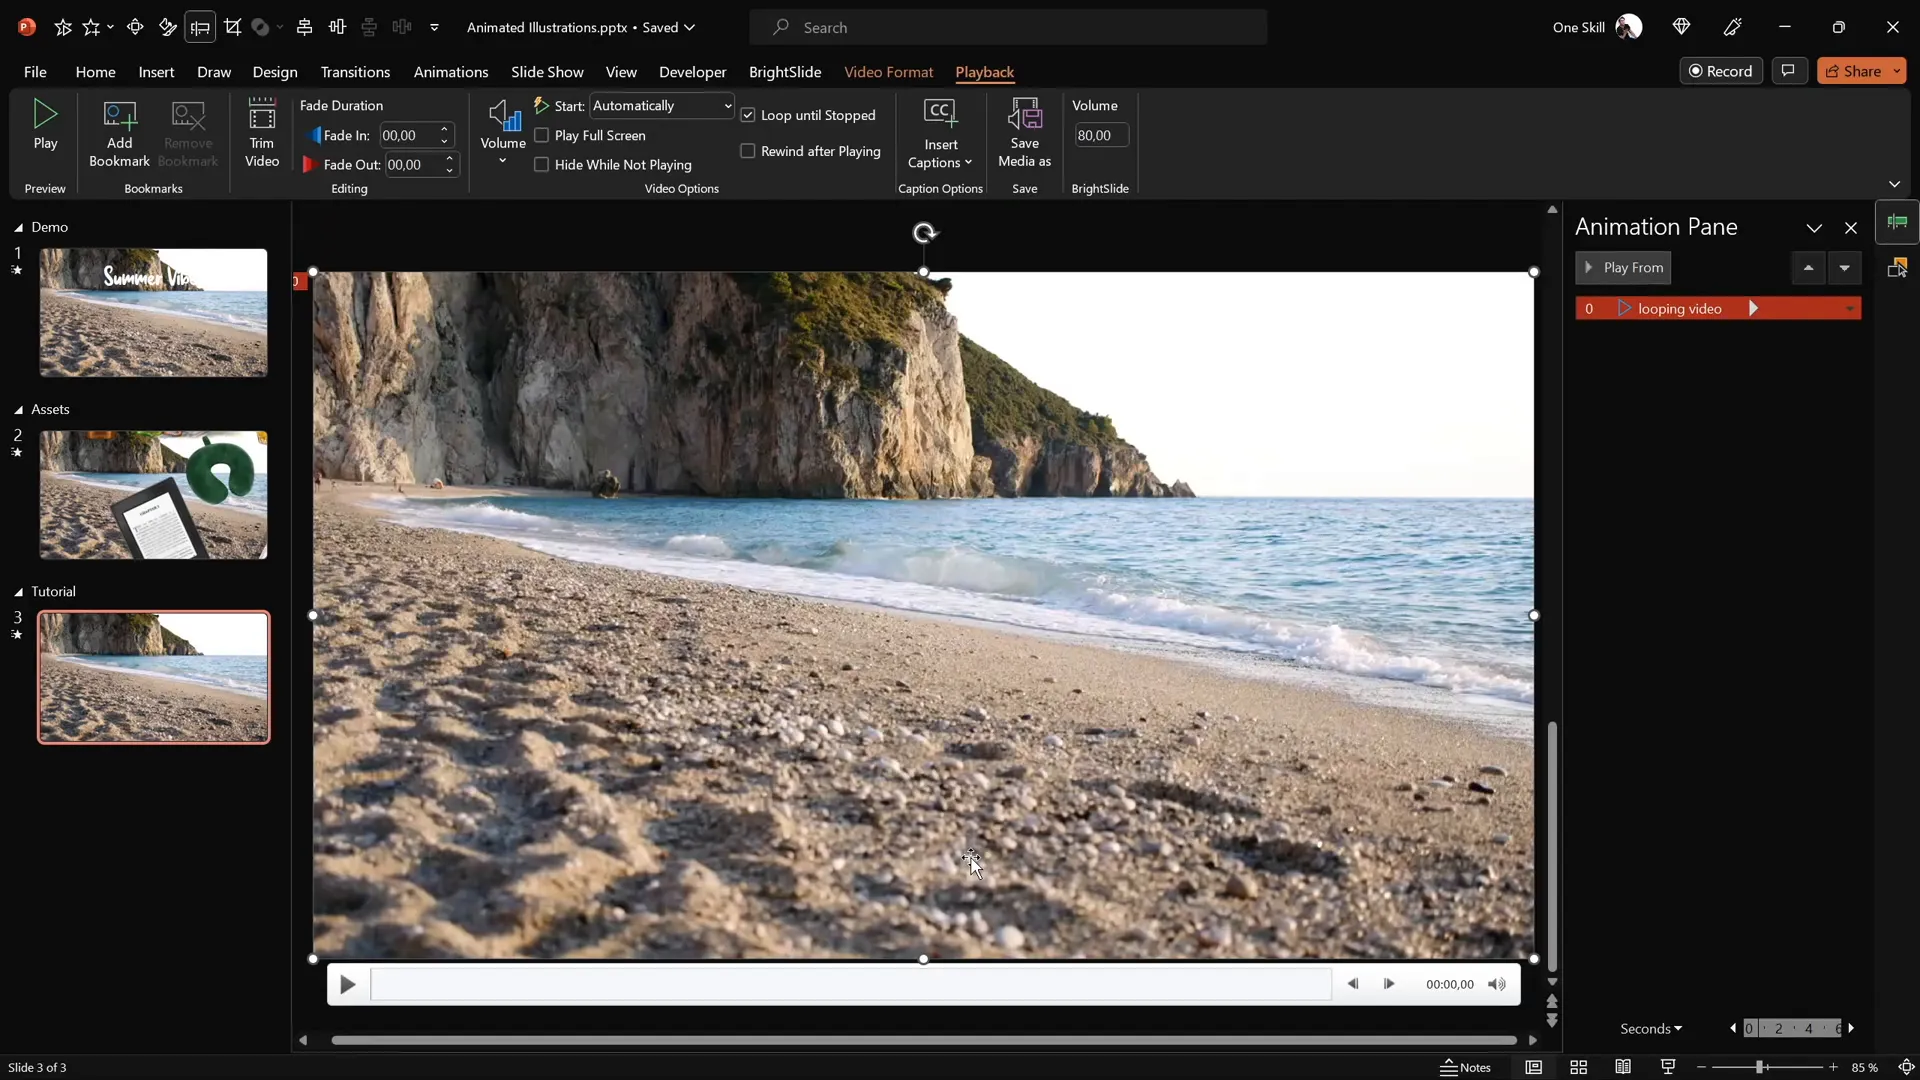
- Enable looping: In the Playback tab, check the box for Loop until Stopped to ensure the video plays continuously.
- Hide video controls: To remove distracting player controls, go to the Slideshow tab and uncheck Show Media Controls.
Now your video will start automatically and loop perfectly while your slide is displayed.
Preventing Video Click Interference
One issue you might notice is that the video is clickable by default, which can reset the video playback if clicked during the presentation. To prevent this:
- Insert a transparent rectangle shape that covers the entire slide.
- Remove any outline from the shape.
- Set the fill transparency to 100% so it’s invisible.
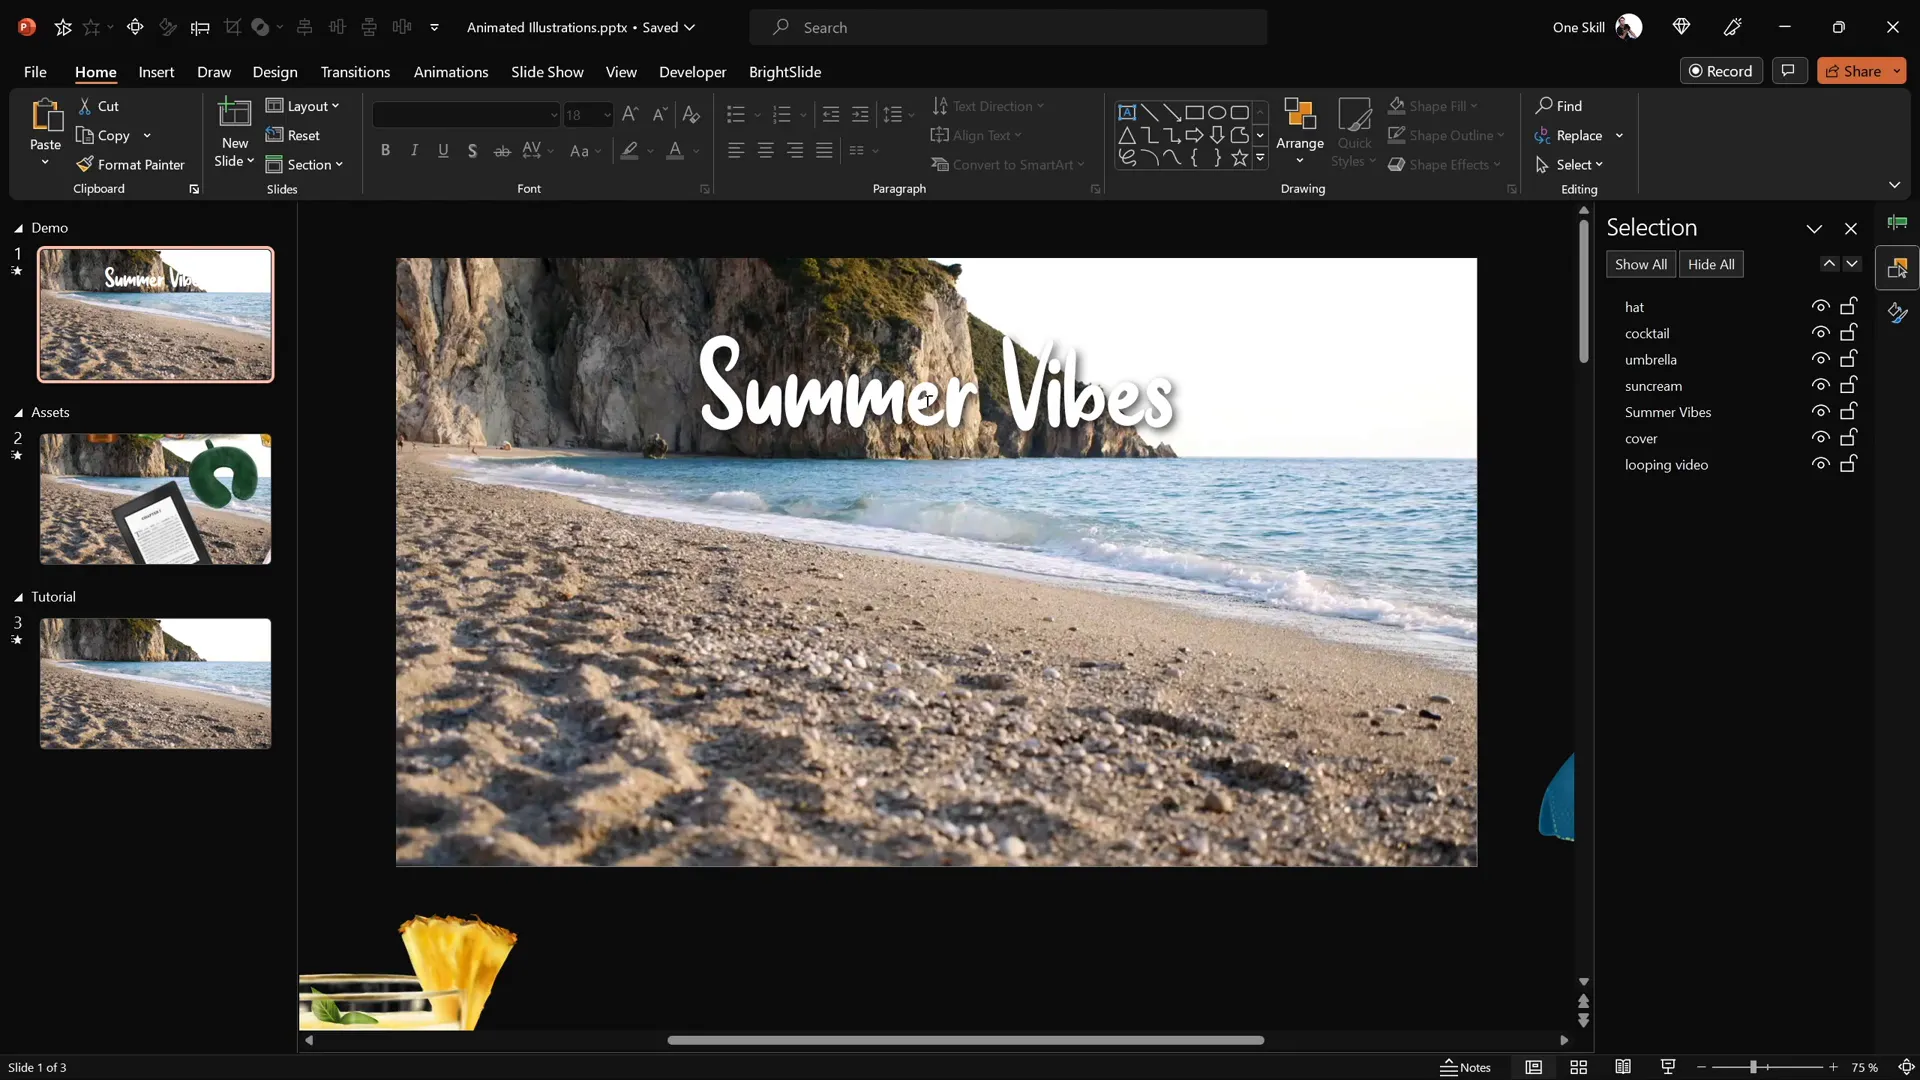
- Rename the shape in the Selection Pane for easy identification (e.g., “Overlay”).
This invisible overlay blocks mouse clicks from affecting the video, ensuring smooth playback throughout your presentation.
Creating the Wavy Animated Title Text
With the video background set, the next step is to make your slide title visually captivating using animation effects. Here’s how to create a wavy, looping animation for your text:
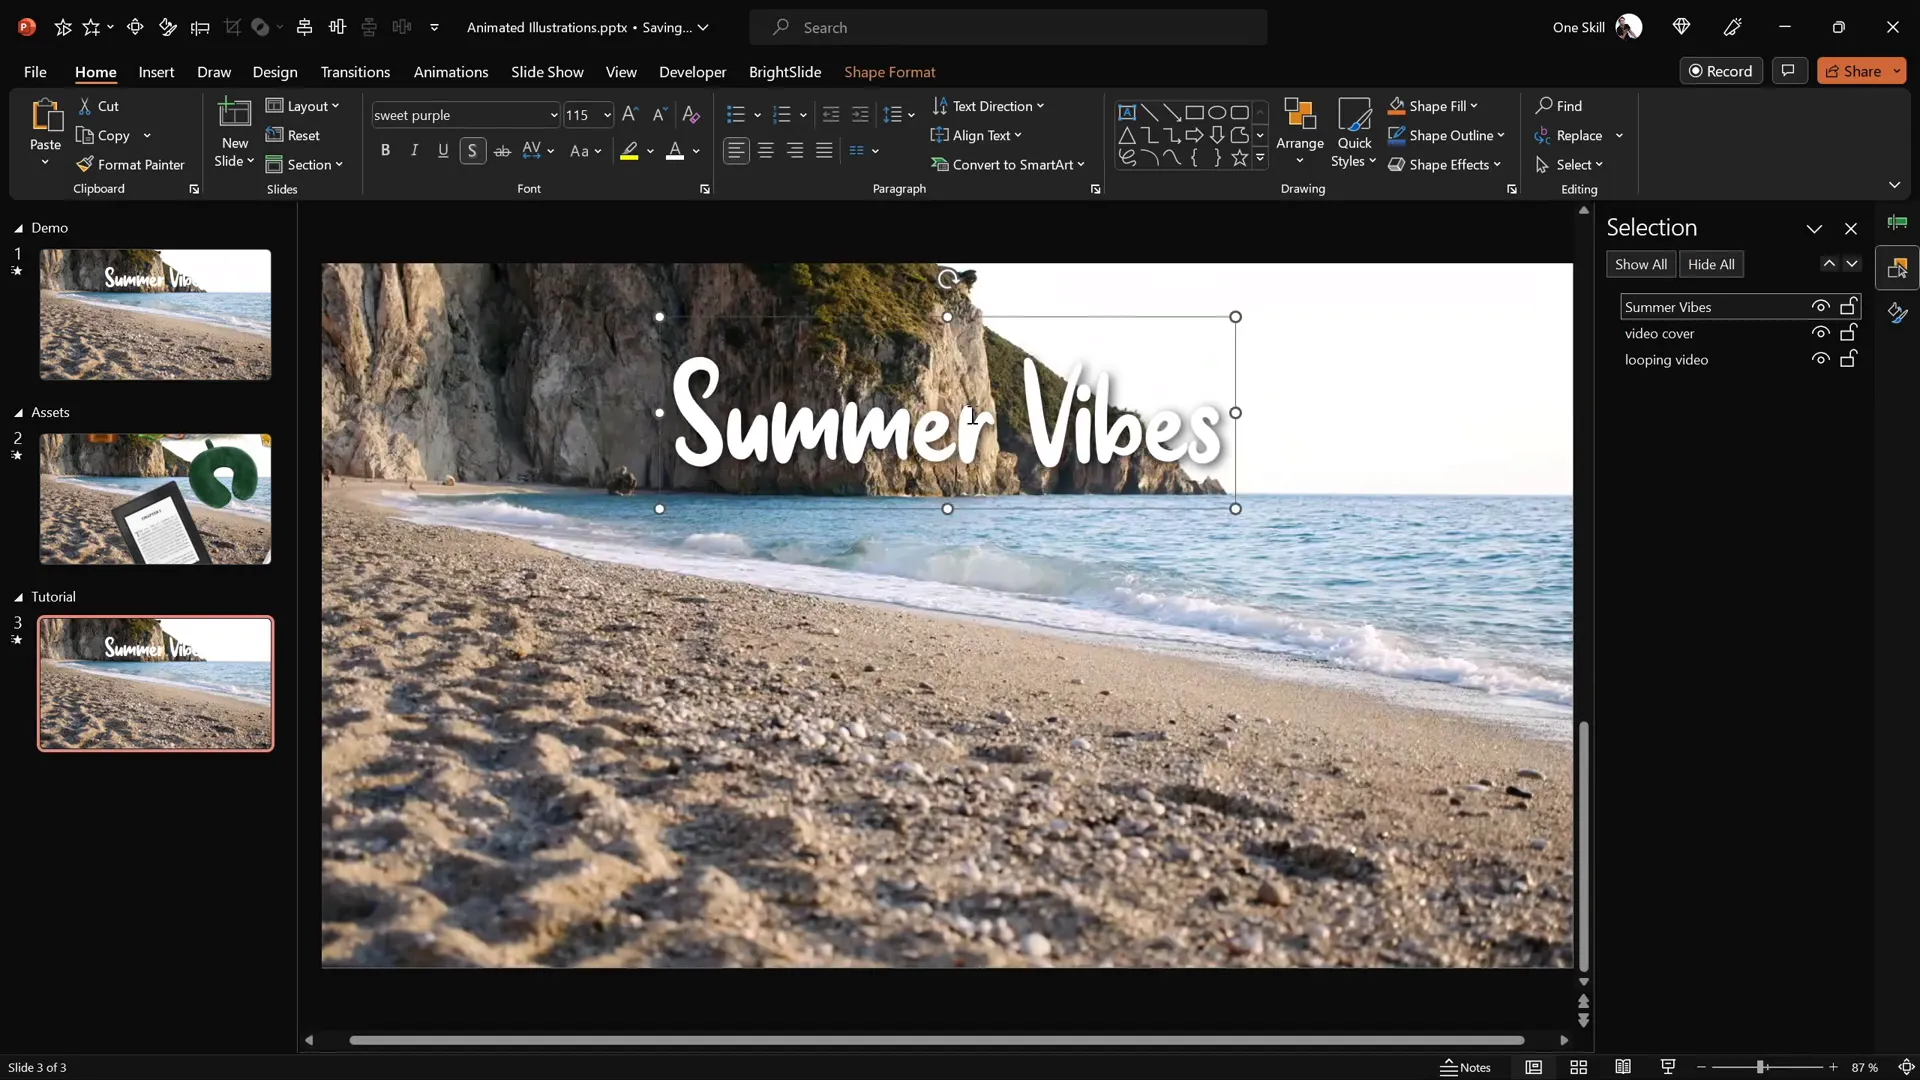
Choosing the Font and Positioning
The font used in this tutorial is Sweet Purple, a playful and elegant font available for free on DaFont. Set the font size to around 115 points for maximum impact.
Place your text box toward the top center of the slide, just above the wave or water area in the video background.
Applying the Zoom Entrance Animation
To make the text appear with flair:
- Select your text box.
- Go to the Animations tab and click Add Animation.
- Choose More Entrance Effects, then select Basic Zoom.
- Set the animation to start On Click with a duration of 0.5 seconds.
- Under Effect Options, animate the text By Letter with a delay of 10% between letters.
This creates a charming effect where each letter zooms in sequentially on mouse click.
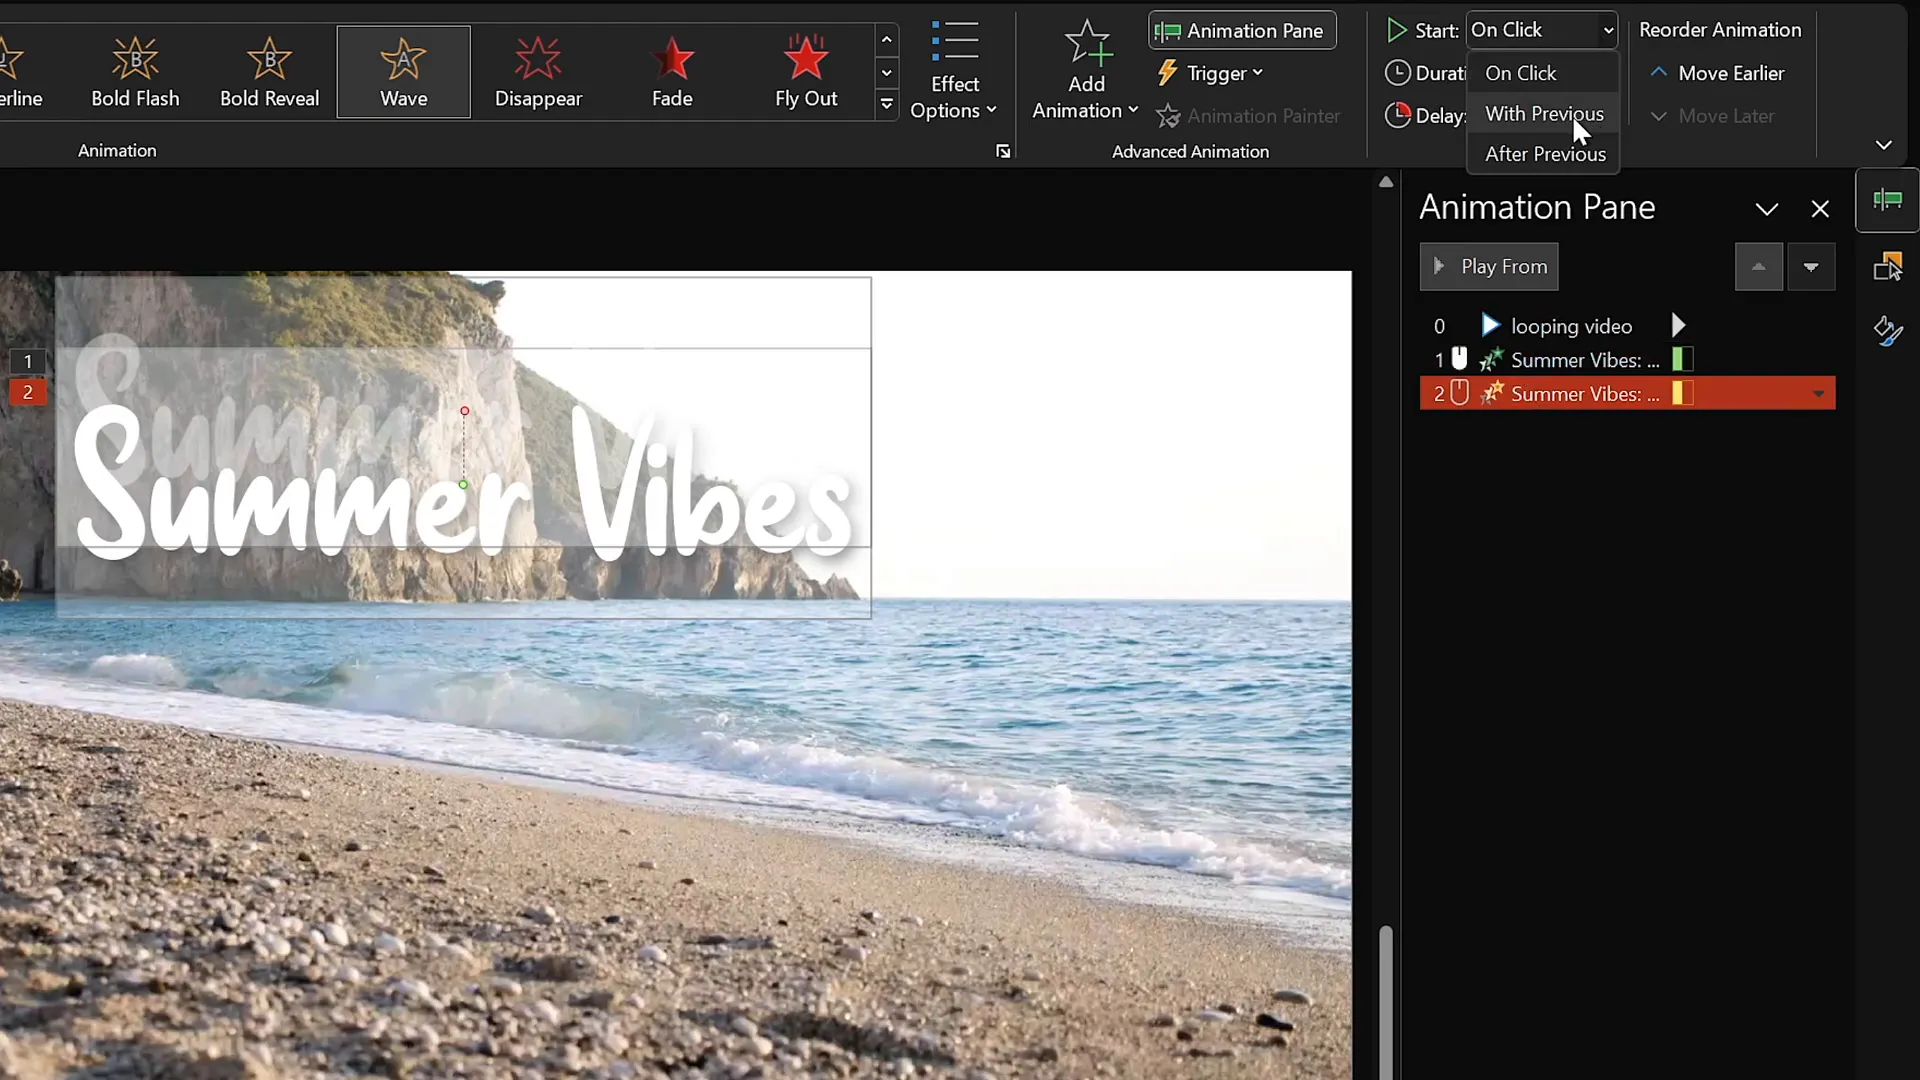
Adding the Wavy Text Animation
To bring the title to life beyond the entrance animation, add the Wave animation:
- With the text box still selected, add a second animation: Wave.
- Set it to start With Previous (so it begins immediately after the zoom finishes).
- Set the duration to 2 seconds.
- Animate the text By Letter with a delay of 5% between letters.
- In the Timing tab, set the animation to Repeat Until End of Slide.
The result is a smooth, continuous wave effect on your title that loops for the duration of the slide.

Animating Summer Stickers with Motion Paths and Looping
Adding animated stickers that move across the slide enhances the dynamic feel and complements the video background. Here’s how to animate your summer illustrations effectively:
Selecting and Positioning Your Stickers
Choose your preferred illustrations and paste them onto your slide. For example, start with the cocktail glass and position it in the bottom left corner.
Activate slide guides to help align objects relative to the slide center and edges.


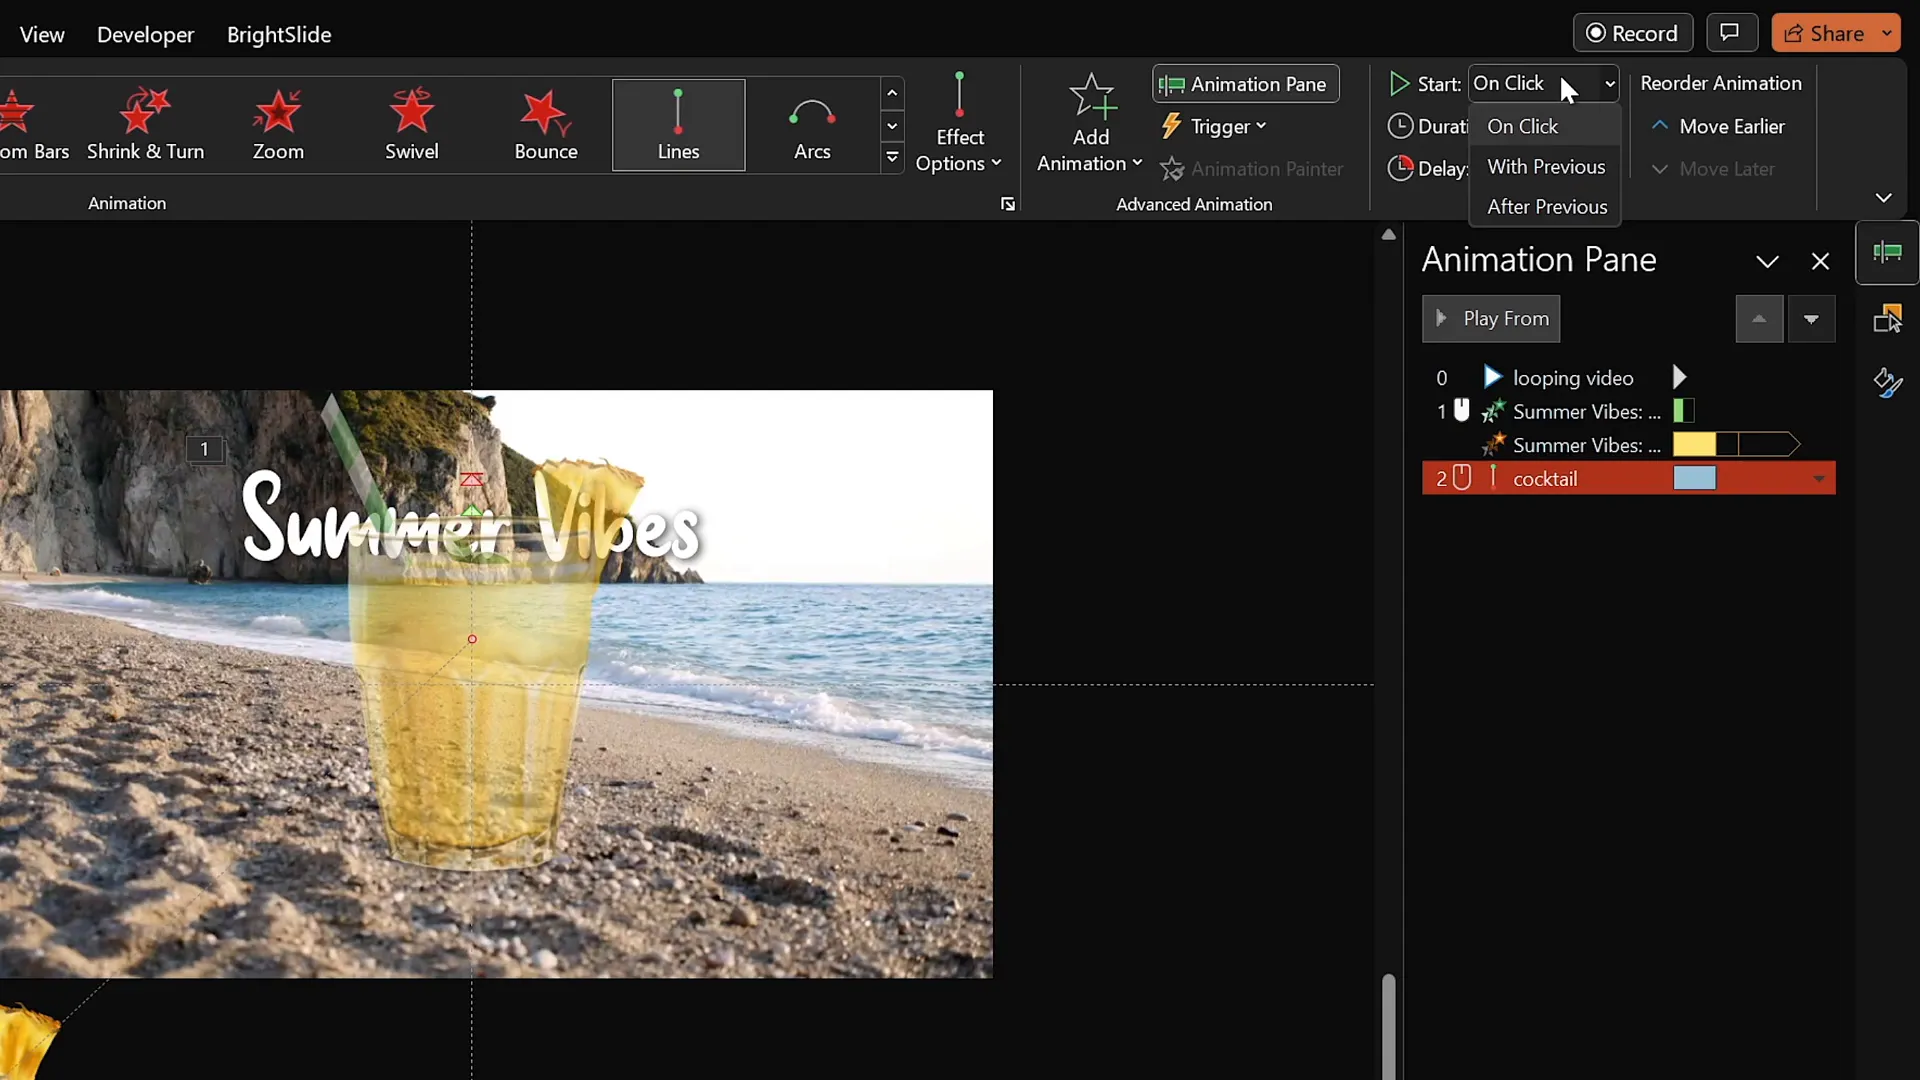
Adding Motion Path Animation
To animate the sticker smoothly across the slide:
- Select the sticker.
- Go to Animations and add a Motion Path – Line animation.
- Drag the red endpoint of the motion path to just above the slide center.
- Reverse the motion path so the animation starts from the center and moves outward.
- Set the animation to start With Previous and duration of 4 seconds.
- In the animation options, set a smooth start for fluid motion.
- Set the animation to repeat Until End of Slide.
This creates a looping motion where the sticker moves gently from the center to its final position.
Adding Zoom Entrance Animation
To improve the sticker’s appearance, add a zoom entrance animation that increases the sticker size gradually as it moves:
- Add a Basic Zoom entrance animation.
- Set it to start With Previous, before the motion path animation.
- Match the duration to 4 seconds.
- Set it to repeat Until End of Slide.
This combined effect makes the sticker appear to grow and move simultaneously, enhancing visual interest.

Duplicating Animation for Other Stickers
To save time and maintain consistency, use the Animation Painter tool to copy animations from one sticker to others:
- Select the sticker with the desired animations.
- Click Animation Painter in the Animations tab.
- Click the target sticker to apply the same animations.
Adjust the motion path starting point and add delays to stagger the animations for a more natural, varied look.
Example Animation Delay Schedule
| Sticker | Animation Delay | Position |
|---|---|---|
| Cocktail Glass | 0 seconds | Bottom left corner |
| Umbrella | 1 second | Bottom right corner |
| Sunscreen Bottle | 2 seconds | Near umbrella, rotated slightly |
| Hat | 3 seconds | Near umbrella, top layer |
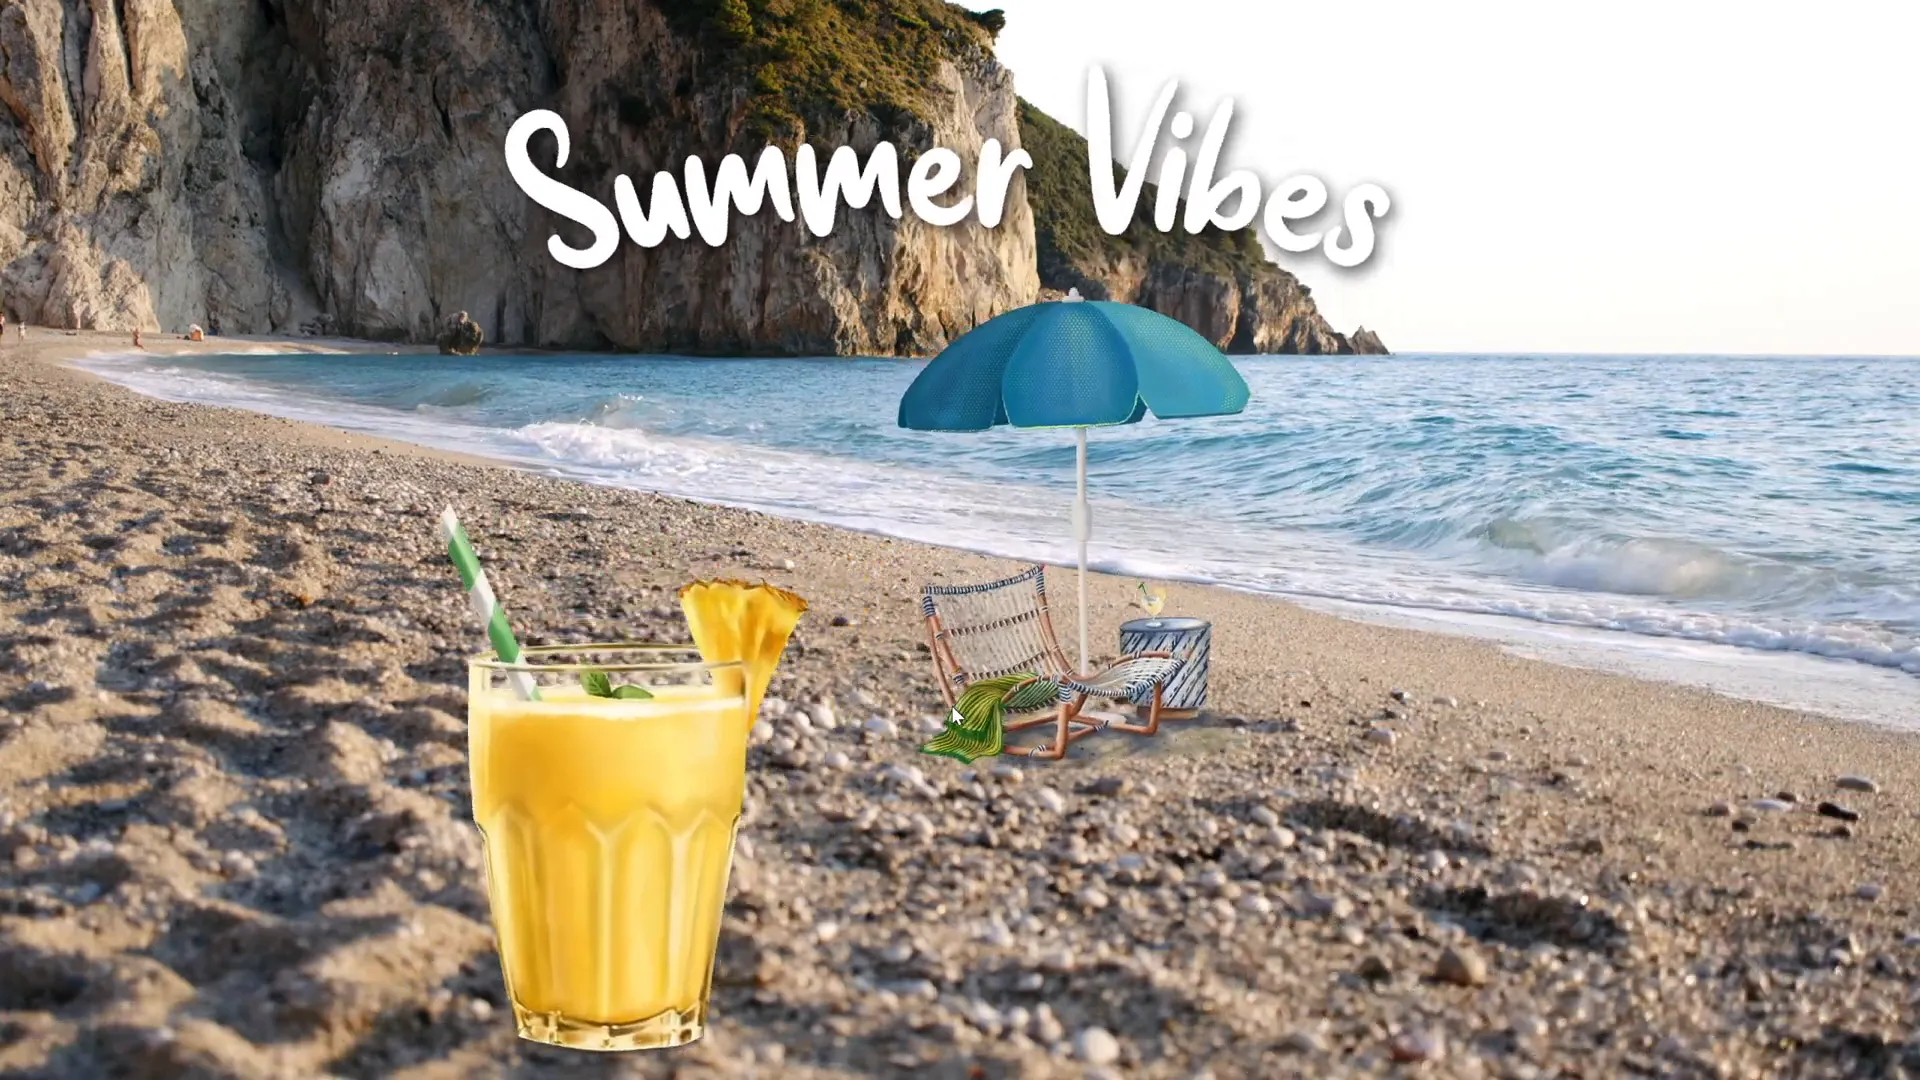
This staggered timing ensures each sticker’s animation starts at a different moment, preventing a cluttered or mechanical feel.
Tips for Polishing Your Animation and Presentation
- Use Slide Guides and Selection Pane: These tools help position and layer your objects precisely, ensuring a clean and professional layout.
- Adjust Animation Timing: Experiment with delays, durations, and repeat options to create smooth, continuous loops that don’t overwhelm the viewer.
- Rename Objects in Selection Pane: Giving clear names to shapes, text boxes, and stickers helps you manage complex animations easily.
- Test Your Slide in Full Screen: Always preview your animations in presentation mode to check timing, smoothness, and visual flow.
- Maintain Consistent Style: Use matching fonts, colors, and illustration styles to create a cohesive and polished look.
- Optimize Video Quality: Use high-quality videos that balance performance and visual appeal. Compress videos if necessary to avoid lag during playback.
By applying these tips, your PowerPoint animation will look professional and impress your audience with seamless motion and stylish design.
Frequently Asked Questions (FAQ)
Can I use these animation techniques for other themes besides summer?
Absolutely! The principles of video backgrounds, motion paths, and text animations are versatile. You can apply them to any theme such as travel, business, education, or personal projects by swapping the illustrations and background video accordingly.
What version of PowerPoint do I need to create these animations?
This tutorial uses Microsoft PowerPoint 365, which supports advanced animation features including motion paths and video playback options. Some features may not be available or behave differently in older versions.
How do I ensure my video background loops smoothly?
Choose videos designed for looping or edit your video to seamlessly loop using video editing software. In PowerPoint, enable Loop until Stopped in the Playback tab to make it repeat automatically.
Can I add multiple videos or animations on one slide?
Yes, but be mindful of performance and visual clarity. Multiple videos can slow down your presentation and clutter the slide. Use animations and videos purposefully to enhance your message without overwhelming your audience.
How can I prevent animations from restarting when I click during the presentation?
Use transparent shapes as overlays to block mouse clicks on videos or animations that you don’t want to be interactive. This technique prevents accidental resets or interruptions during your presentation.
Are there recommended fonts for animated text in PowerPoint?
Choose fonts that are clear and readable even when animated. Avoid overly decorative fonts that can be hard to read. The Sweet Purple font used here is a great example of a stylish yet legible font that works well for animated titles.
Conclusion
Mastering PowerPoint presentation skills means not only knowing how to create slides but also how to breathe life into them with animations, multimedia, and thoughtful design. This step-by-step guide has shown you how to create a captivating looping sticker animation slide with a video background, animated wavy text, and smooth motion path effects.
By combining these elements, you can craft presentations that impress and engage your audience, whether you’re sharing summer vibes, showcasing your favorite travel destinations, or delivering a professional pitch.
Remember, the key to effective PowerPoint presentations lies in balance—using animations to enhance your message without overwhelming it. Experiment with timing, layering, and multimedia to find the perfect flow for your content.
Happy presenting, and may your slides always captivate and inspire!
Check out the full video: PowerPoint Presentation Skills: Looping Sticker Animation! ✨


