
Mastering PowerPoint presentation skills is essential for anyone looking to create impactful, professional slides that capture attention and communicate ideas effectively. Whether you’re preparing for a business pitch, an educational lecture, or a creative showcase, the ability to design well-balanced and visually appealing slides can make all the difference.
In this comprehensive guide, you’ll learn how to design a stunning PowerPoint slide from scratch like a pro. We’ll walk through creating balanced layouts, applying modern typography, choosing harmonious color schemes, and adding engaging visual effects — all within PowerPoint itself. Plus, you’ll discover tips for incorporating beautiful shapes and images to make your slides truly stand out.
Let’s dive into the step-by-step process that will elevate your presentation design skills and help you craft slides that impress every time.
Table of Contents
- Creating a Balanced Slide Layout
- Applying Beautiful Typography for a Modern Look
- Choosing the Right Colors
- How to Create a Green Effect in PowerPoint
- Designing Beautiful Shapes to Enhance Visual Appeal
- Incorporating High-Quality Images
- Design Session: Bringing It All Together
- Frequently Asked Questions
- Conclusion
Creating a Balanced Slide Layout
One of the foundational PowerPoint presentation skills is knowing how to create a balanced slide layout. A well-balanced layout ensures that your slide looks organized, professional, and easy to follow for your audience. Here’s how to achieve it:
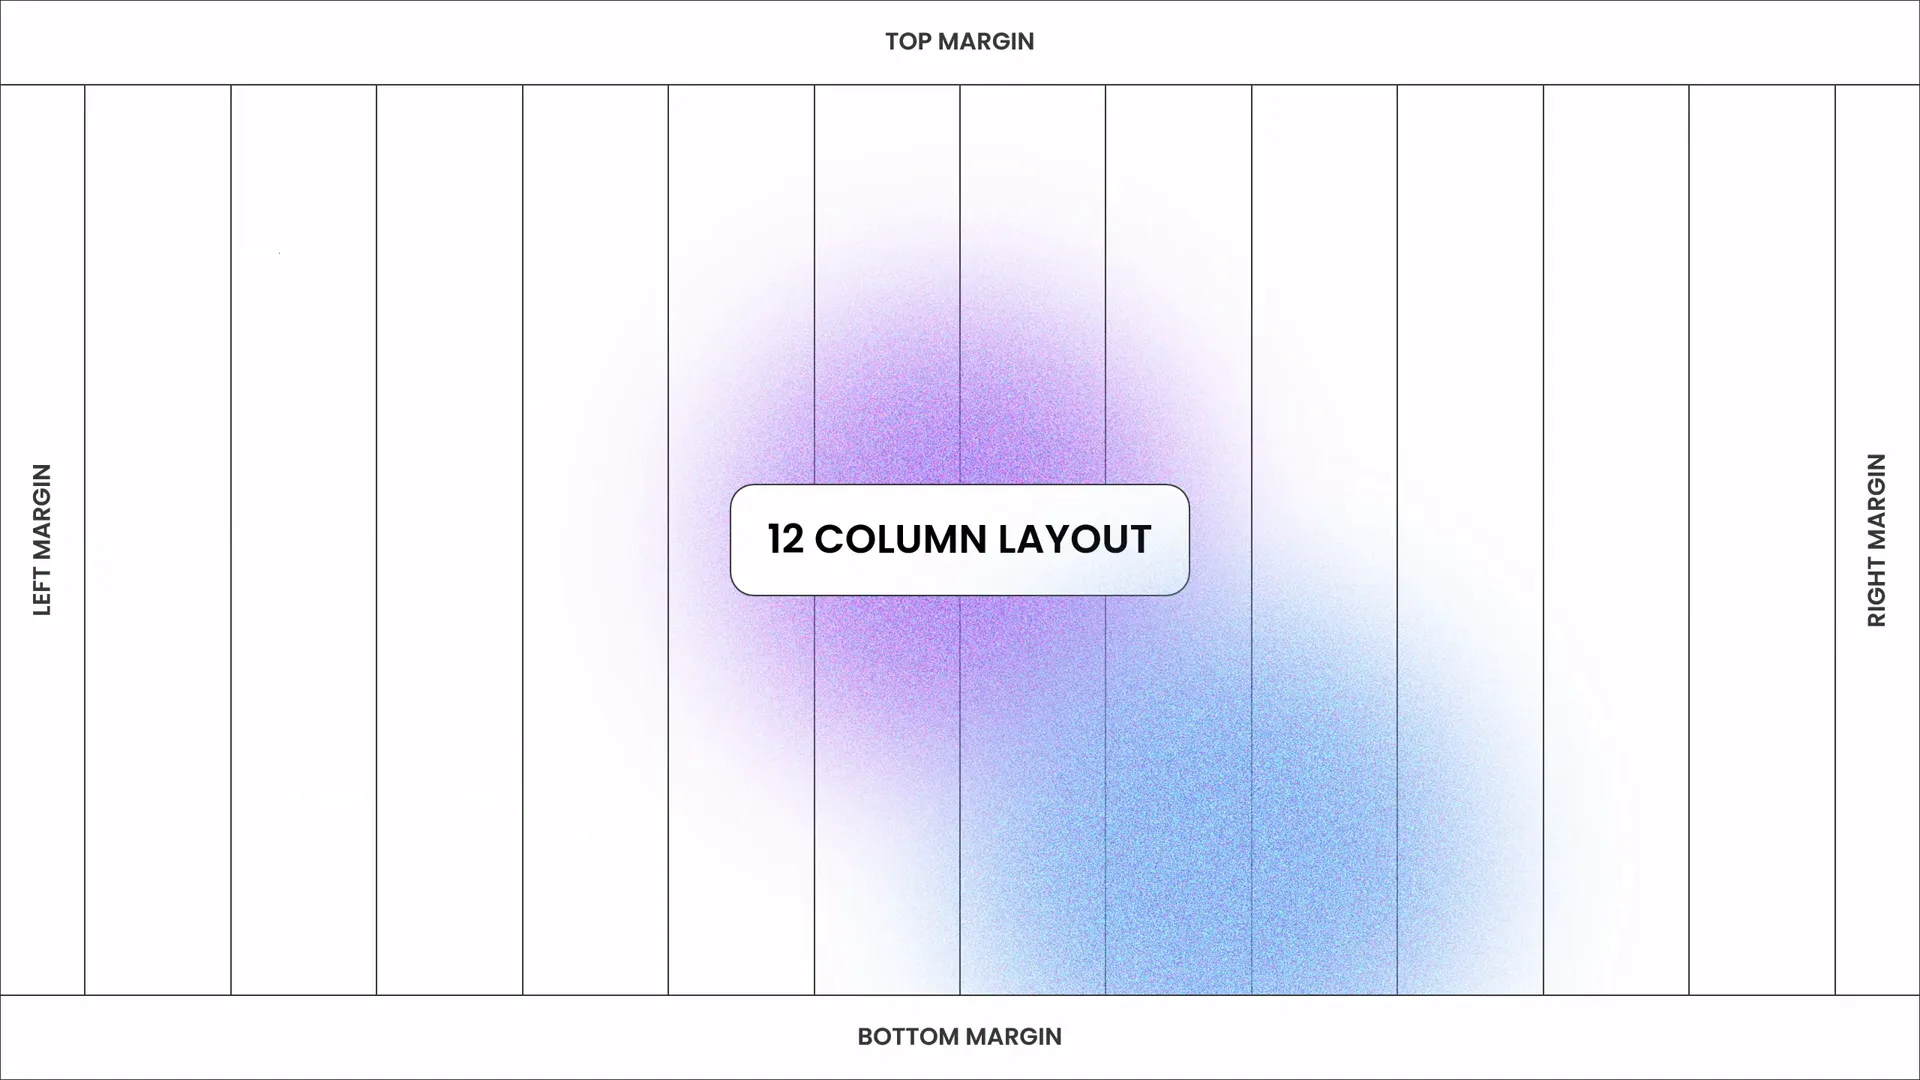
1. Understand the Rule of Thirds
Imagine dividing your slide into a 3×3 grid. Place your main elements along these lines or at their intersections to create natural focal points. This technique helps distribute content evenly and guides the viewer’s eye smoothly across the slide.
2. Use Grids and Guides
- Enable PowerPoint’s gridlines and guides (View > Grid and Guides) to align objects precisely.
- Snap objects to the grid for consistent spacing and alignment.
3. Balance Text and Visuals
Don’t overcrowd your slide with too much text or too many images. Aim for a harmonious relationship between text blocks and visuals, so the slide neither looks cluttered nor empty.
4. Leave White Space
White space, or negative space, is crucial for readability and aesthetics. It prevents your slide from feeling cramped and helps important elements stand out.
5. Create Visual Hierarchy
Establish a hierarchy by varying element sizes, colors, and positions. For example, your slide title should be the most prominent, followed by subtitles and body text.
Applying Beautiful Typography for a Modern Look
Typography plays a vital role in the overall impact of your presentation. Choosing the right fonts and formatting can elevate your slides from amateur to professional instantly.
Key Typography Tips
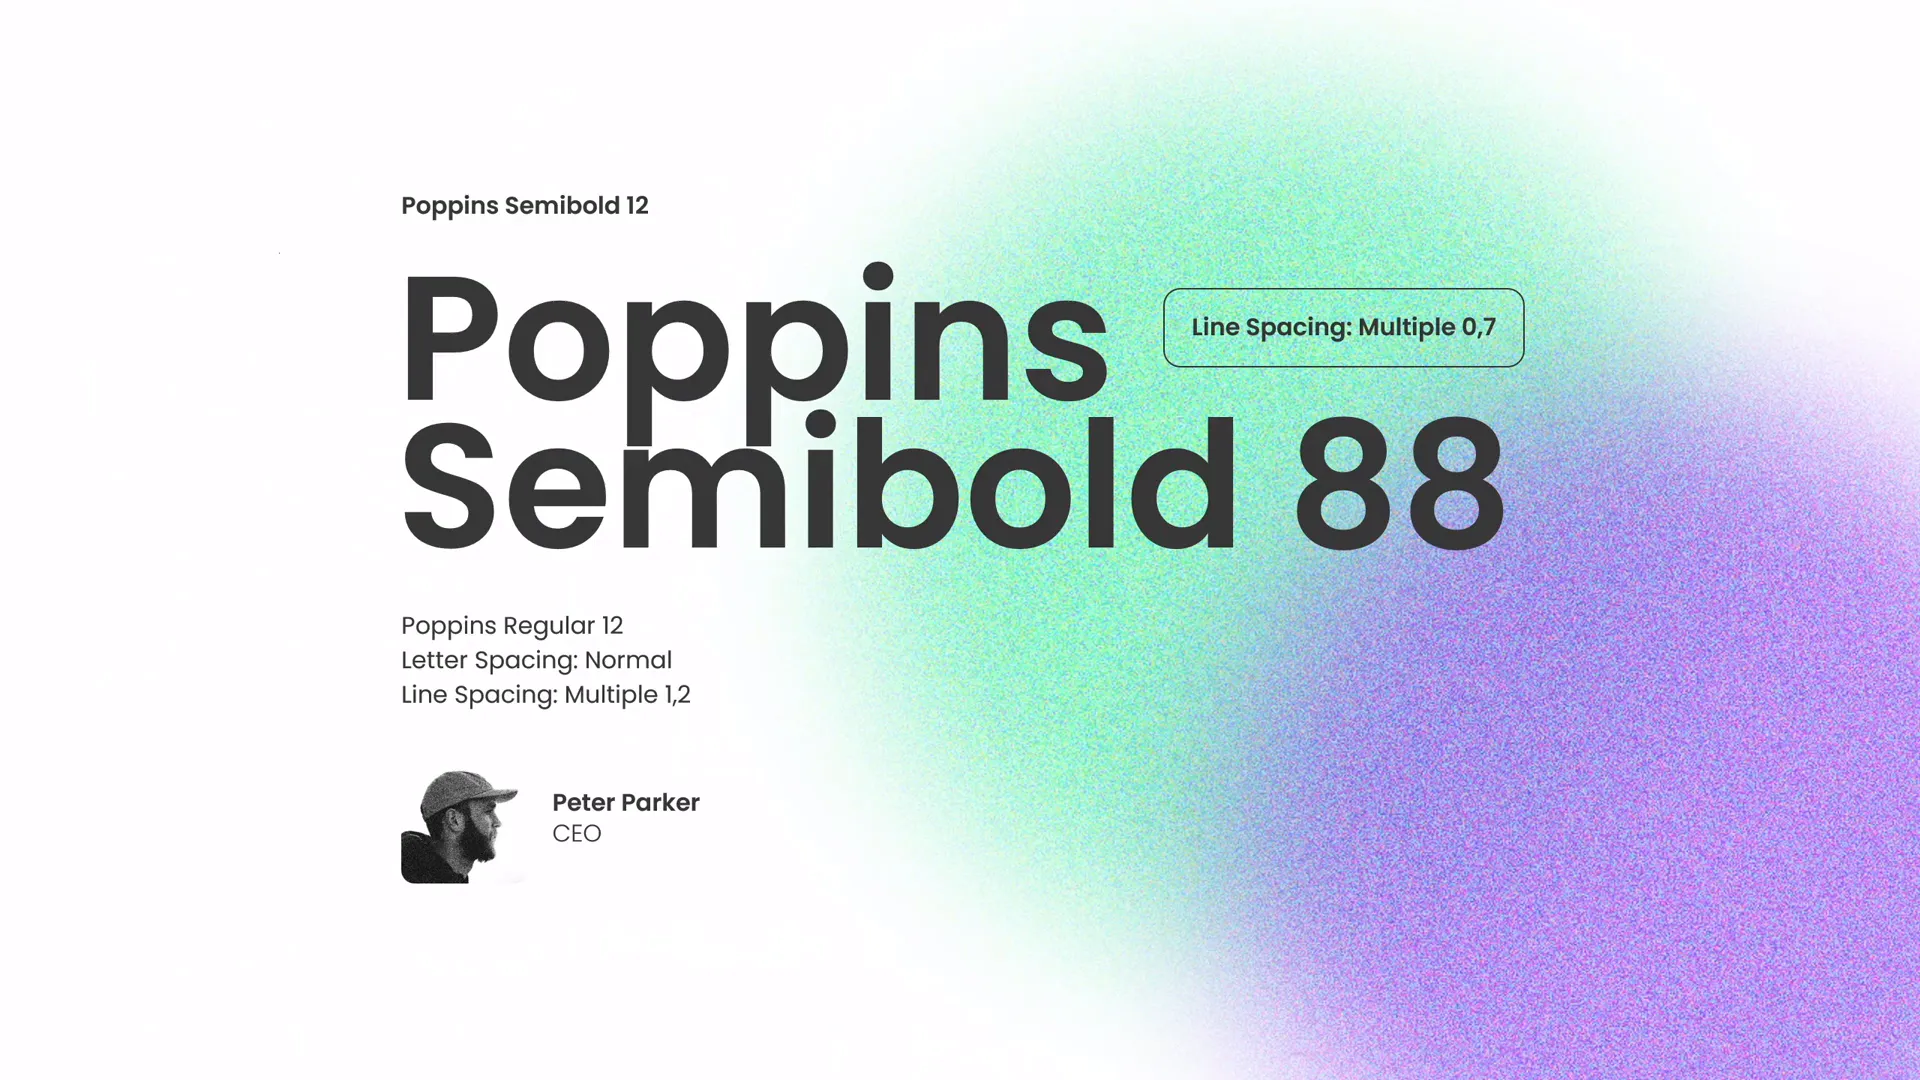
- Choose clean, modern fonts: Fonts like Poppins offer a sleek and contemporary feel that works well in presentations.
- Limit fonts: Use no more than two complementary fonts to keep your design cohesive.
- Set appropriate font sizes: Titles should be large (around 36-44 pt), subtitles medium (28-32 pt), and body text clear and readable (24-28 pt minimum).
- Use font weights and styles: Bold for emphasis, italics sparingly for contrast.
- Maintain line spacing: Ensure enough spacing between lines for readability, usually 1.2 to 1.5 line height.
Creating a Modern Look
Modern typography often favors simplicity and minimalism—avoid excessive decoration or complex fonts. Use all caps for titles if it suits your style, and pair sans-serif fonts with clean layouts.
Choosing the Right Colors
Color choice can make or break your presentation’s visual appeal. Using a harmonious color palette enhances readability, evokes emotions, and strengthens brand identity.
How to Pick Your Colors
- Start with a limited palette: Choose 3-5 colors that work well together.
- Use color theory: Complementary, analogous, or triadic schemes can help you select balanced colors.
- Consider accessibility: Ensure enough contrast between text and background for readability.
- Leverage brand colors: If applicable, incorporate your company or project’s official colors.
Color Roles on Your Slide
| Role | Purpose | Example |
|---|---|---|
| Primary Color | Used for main backgrounds or large elements | Soft green or blue |
| Accent Color | Highlights and call-to-action elements | Bright yellow or orange |
| Neutral Color | Text and secondary backgrounds | White, gray, black |
For this design, we’ll use a beautiful palette of greens and complementary hues to create a fresh and modern vibe.

How to Create a Green Effect in PowerPoint
Adding subtle effects like a green overlay or gradient can spice up your slides and add depth without overwhelming your content.
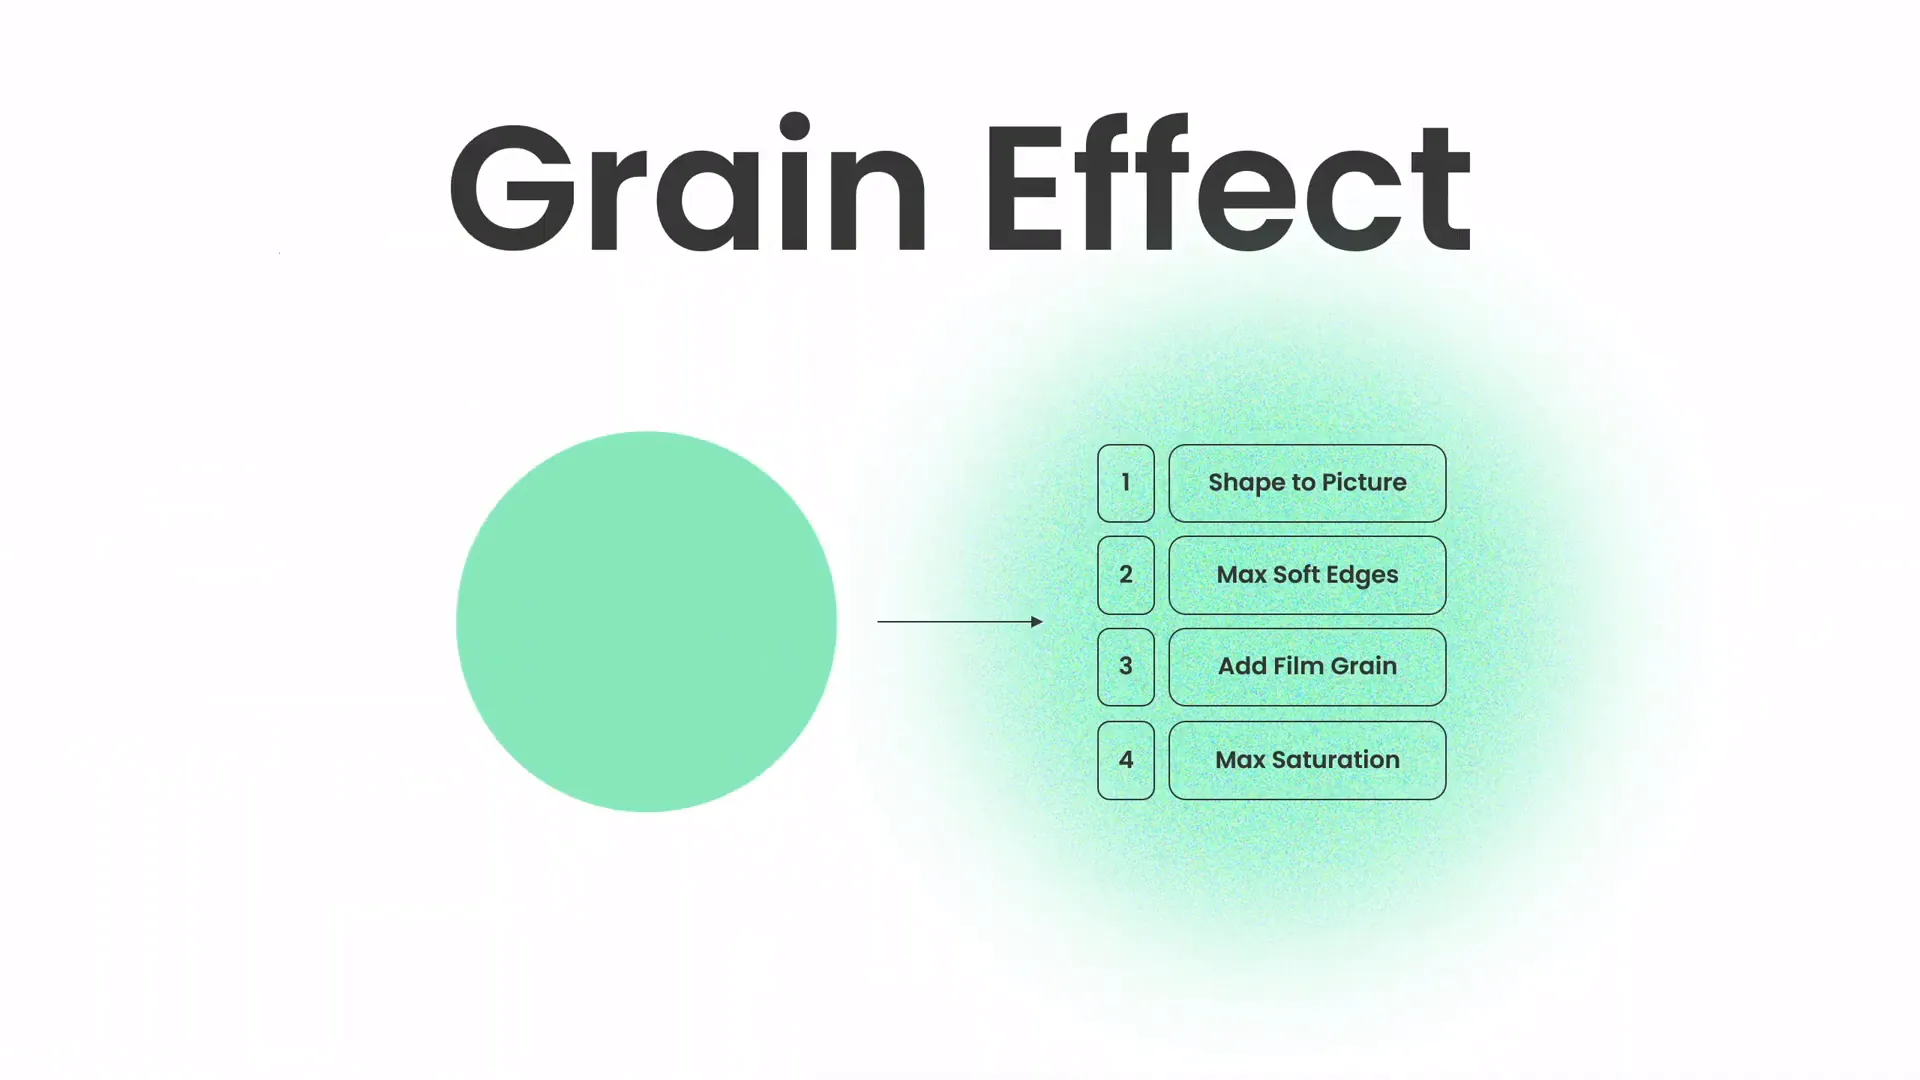
Step-by-Step: Creating a Green Overlay Effect
- Insert a rectangle shape covering the entire slide or the image area where you want the effect.
- Set the fill color to a green shade from your palette.
- Adjust the transparency of the shape to around 30-50% so the underlying image remains visible.
- Apply a soft gradient if desired, fading from green to transparent.
This effect adds a professional tint that unifies your slide visuals and reinforces brand colors.
Designing Beautiful Shapes to Enhance Visual Appeal
Shapes are powerful design elements that help organize content, add interest, and guide the viewer’s focus.
Tips for Using Shapes Effectively
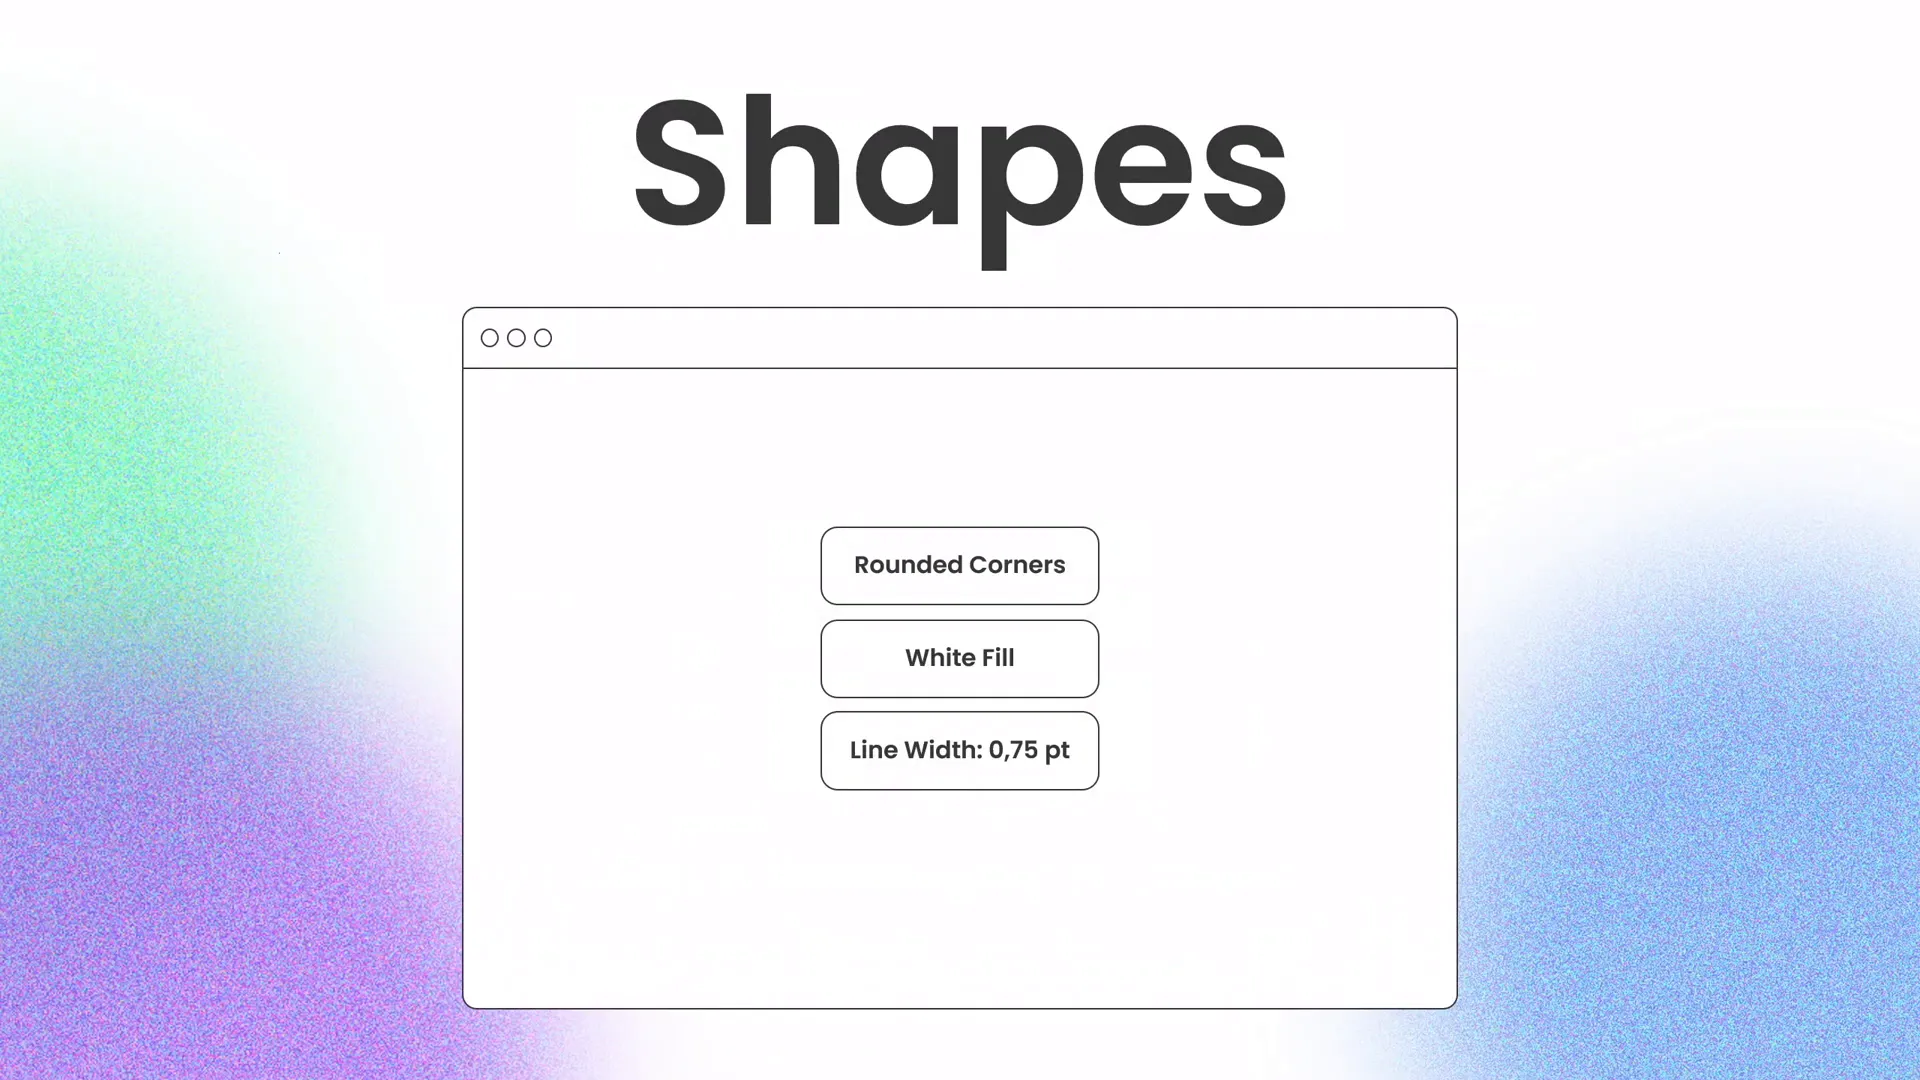
- Use shapes to frame or highlight text: Place text inside colored shapes to create emphasis.
- Combine shapes for unique designs: Overlay circles, rectangles, and custom shapes for layered effects.
- Adjust transparency: Semi-transparent shapes can add subtle texture without overpowering the slide.
- Use shapes to create dividers and sections: Break the slide into clear areas to improve readability.
Creating Custom Shapes
PowerPoint allows you to merge, subtract, and intersect shapes to create custom visuals:
- Select multiple shapes.
- Go to the Shape Format tab.
- Use the Merge Shapes dropdown to combine shapes as needed.
This technique enables you to create unique design elements that match your brand or presentation theme.
Incorporating High-Quality Images
Images are crucial for making your slides visually engaging and supporting your message.

Where to Find Great Images
Use free, high-resolution photos from trusted sources like Unsplash. They provide beautiful photos that are free to use and add a professional touch to your slides.
Tips for Using Images in PowerPoint
- Choose relevant images: Ensure the photo supports your presentation topic and adds value.
- Crop for focus: Use PowerPoint’s cropping tools to highlight important parts of the image.
- Maintain consistency: Use similar styles or color tones across images for a cohesive look.
- Use image effects sparingly: Avoid over-editing; subtle shadows or borders can enhance without distracting.
For this slide design, photos from Unsplash provide a vibrant and professional look that complements the overall aesthetic.
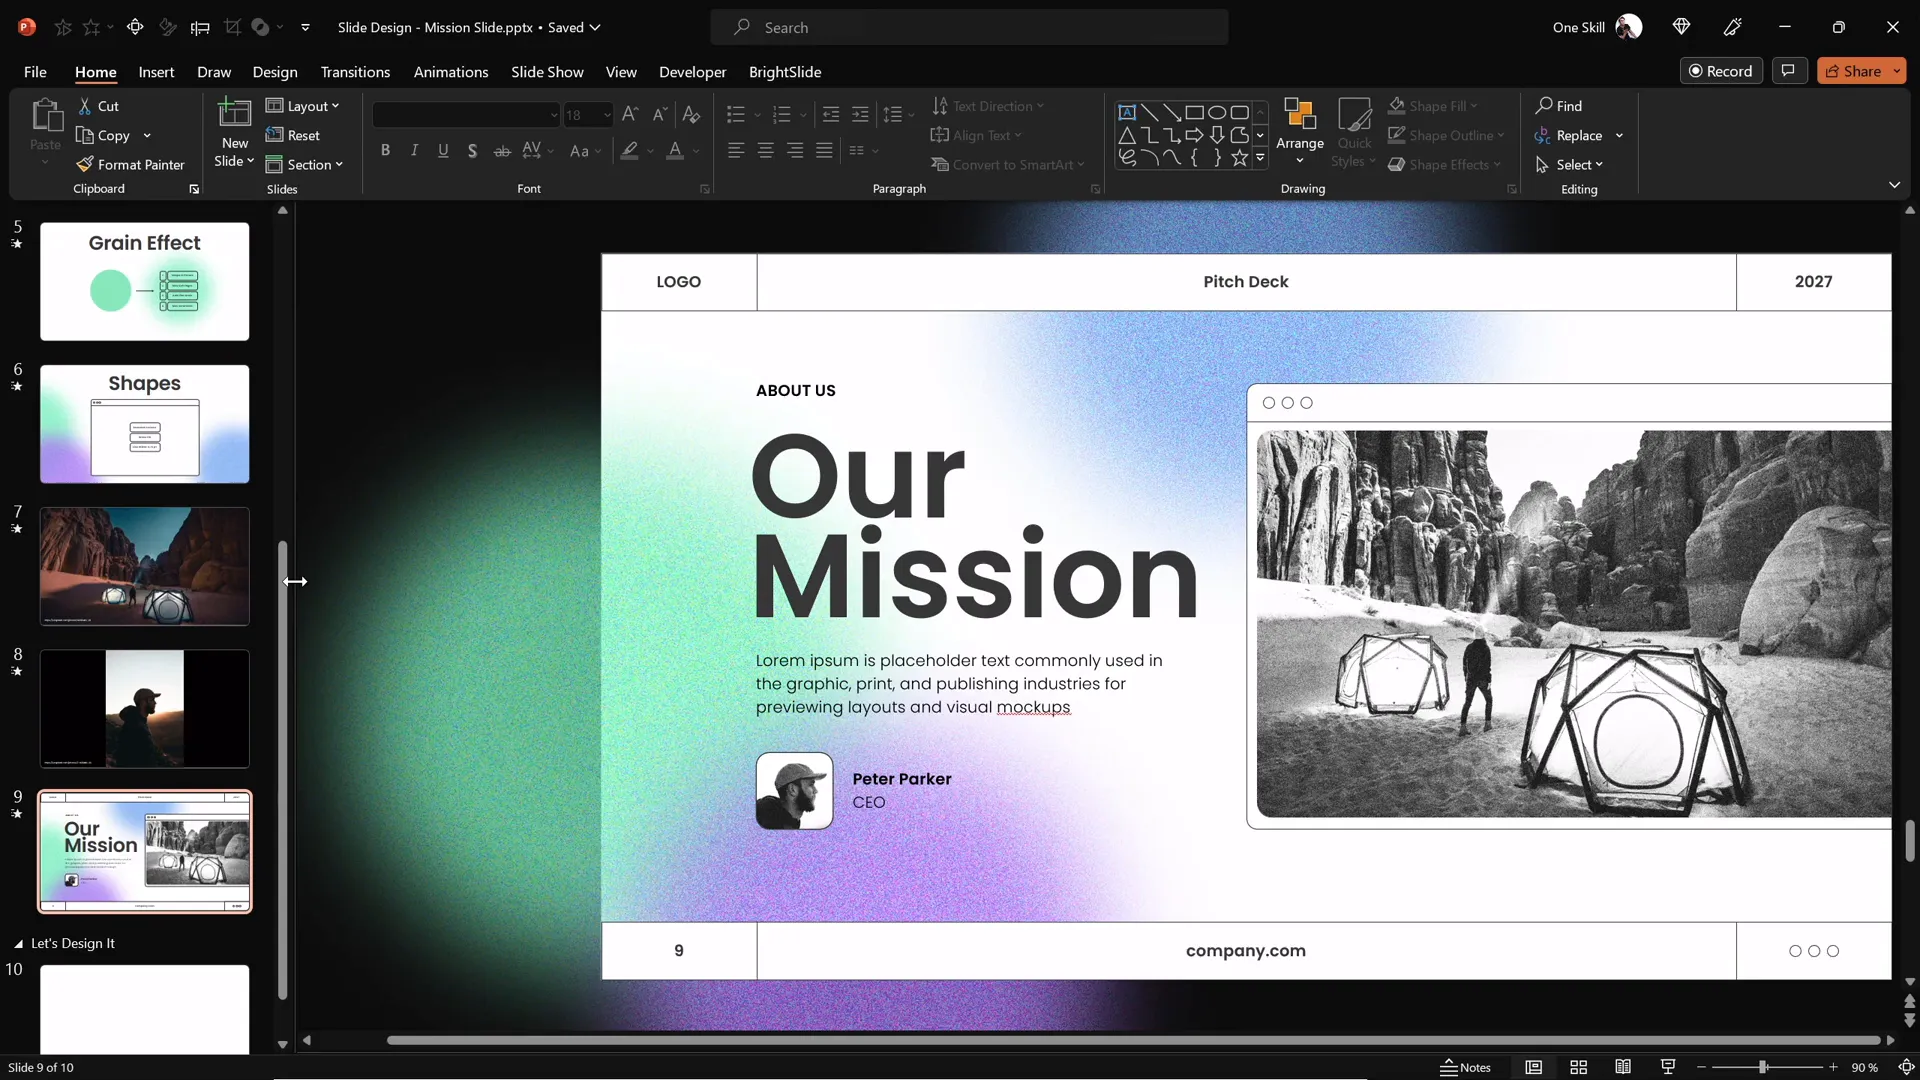
Design Session: Bringing It All Together
Now that you understand the key components of creating a professional slide layout, typography, color, effects, shapes, and images, it’s time to put it all into practice.
During the design session, you’ll:
- Apply balanced layouts using grids and guides.
- Choose and apply modern typography with the Poppins font.
- Use the selected color palette, including green overlay effects.
- Create and customize shapes to enhance visual structure.
- Add high-quality images from Unsplash.
- Fine-tune spacing, alignment, and layering for a polished finish.
This hands-on approach not only builds your skills but also helps you internalize the design principles that make presentations stand out.
Frequently Asked Questions
1. How can I make my PowerPoint slides look professional?
Focus on balanced layouts, consistent typography, a harmonious color palette, and high-quality visuals. Use grids and guides to align elements precisely and avoid clutter by leaving ample white space.
2. What fonts are best for PowerPoint presentations?
Sans-serif fonts like Poppins, Arial, Helvetica, and Calibri are great choices. They are clean, easy to read, and convey a modern, professional look.
3. How do I choose colors that work well together?
Use color theory principles such as complementary, analogous, or triadic color schemes. Limit your palette to 3-5 colors and ensure sufficient contrast between text and background for readability.
4. Can I create custom shapes in PowerPoint?
Yes! Use the ‘Merge Shapes’ feature under the Shape Format tab to combine, subtract, or intersect shapes and create unique designs tailored to your presentation.
5. Where can I find free images for my slides?
Unsplash (https://unsplash.com) is an excellent resource for free, high-quality photos that you can legally use in presentations.
6. How do I add special effects like overlays in PowerPoint?
Create a shape over your image, fill it with a color, and adjust its transparency. Applying gradients and soft edges can add depth and interest without distracting from your content.
Conclusion
Developing strong PowerPoint presentation skills is about mastering the art of combining layout, typography, color, and visuals in a way that supports your message and captivates your audience. By following the steps outlined above — from creating balanced layouts to applying modern typography and using beautiful images — you’ll be able to design slides that look polished and professional every time.
Remember, the key to great slide design is practice and experimentation. Don’t hesitate to try different layouts, colors, and effects until you find what works best for your content and style. Use tools like PowerPoint’s guides and shape merging features to customize your slides uniquely.
With these skills in your toolkit, you’ll confidently create presentations that engage your audience and communicate your ideas clearly. Stay creative, keep learning, and watch your presentation impact grow!
Stay happy, stay healthy, and keep designing like a pro!
Check out the full video: PowerPoint Presentation Skills: Design Slides Like a Pro! ✨


