
If you want to elevate your PowerPoint presentation skills and truly impress your audience, mastering animation techniques is essential. This comprehensive guide will walk you through creating a captivating looping sticker animation in PowerPoint, complete with a video background, animated text, and hand-drawn summer-themed illustrations. Whether you’re designing a summer-themed presentation or want to apply these animation techniques to any topic, this tutorial offers practical steps and tips to enhance your slides and keep your audience engaged.
In this article, you’ll learn how to:
- Integrate a looping video background for dynamic slides
- Create animated, wavy text titles
- Incorporate hand-drawn illustrations with smooth motion path animations
- Loop animations seamlessly for continuous effect
- Optimize your PowerPoint slides for professional presentation delivery
Let’s dive into the magical world of PowerPoint animation and transform your slides into an engaging visual experience.
Table of Contents
- Getting Started: Setting Up Your PowerPoint Environment
- Adding a Looping Video Background
- Creating Animated Wavy Text Titles
- Animating Summer Illustrations with Motion Paths
- Looping Animations for Continuous Playback
- Final Touches and Presentation Tips
- Frequently Asked Questions
Getting Started: Setting Up Your PowerPoint Environment
Before you begin creating your animated slide, ensure you are working in the right version of PowerPoint. This tutorial uses Microsoft PowerPoint 365, which supports advanced animation features and seamless video integration.
Gather the assets you will need, including:
- A looping video background (e.g., beach or summer-themed footage)
- Hand-drawn PNG illustrations with transparent backgrounds
- A suitable font for your slide title (in this tutorial, the Sweet Purple font is used)
For this tutorial, the summer illustrations were created by the talented digital artist Raminta, available on her Etsy store. These illustrations include sunglasses, headphones, lemons, luggage, cocktail glasses, sunscreen bottles, umbrellas, and more—all in PNG format for easy use.
Having these assets ready will streamline your workflow and help you create professional-looking animated slides.
Adding a Looping Video Background
A video background adds depth and movement to your slide, making it visually appealing and immersive. Here’s how to add and configure a looping video background in PowerPoint:
Step 1: Insert the Video
- Download a suitable video clip. For example, a 23-second beach shoreline video was used, sourced from Artlist.io.
- Open a new blank slide in PowerPoint and paste the video onto the slide.
Step 2: Set Video Playback Options
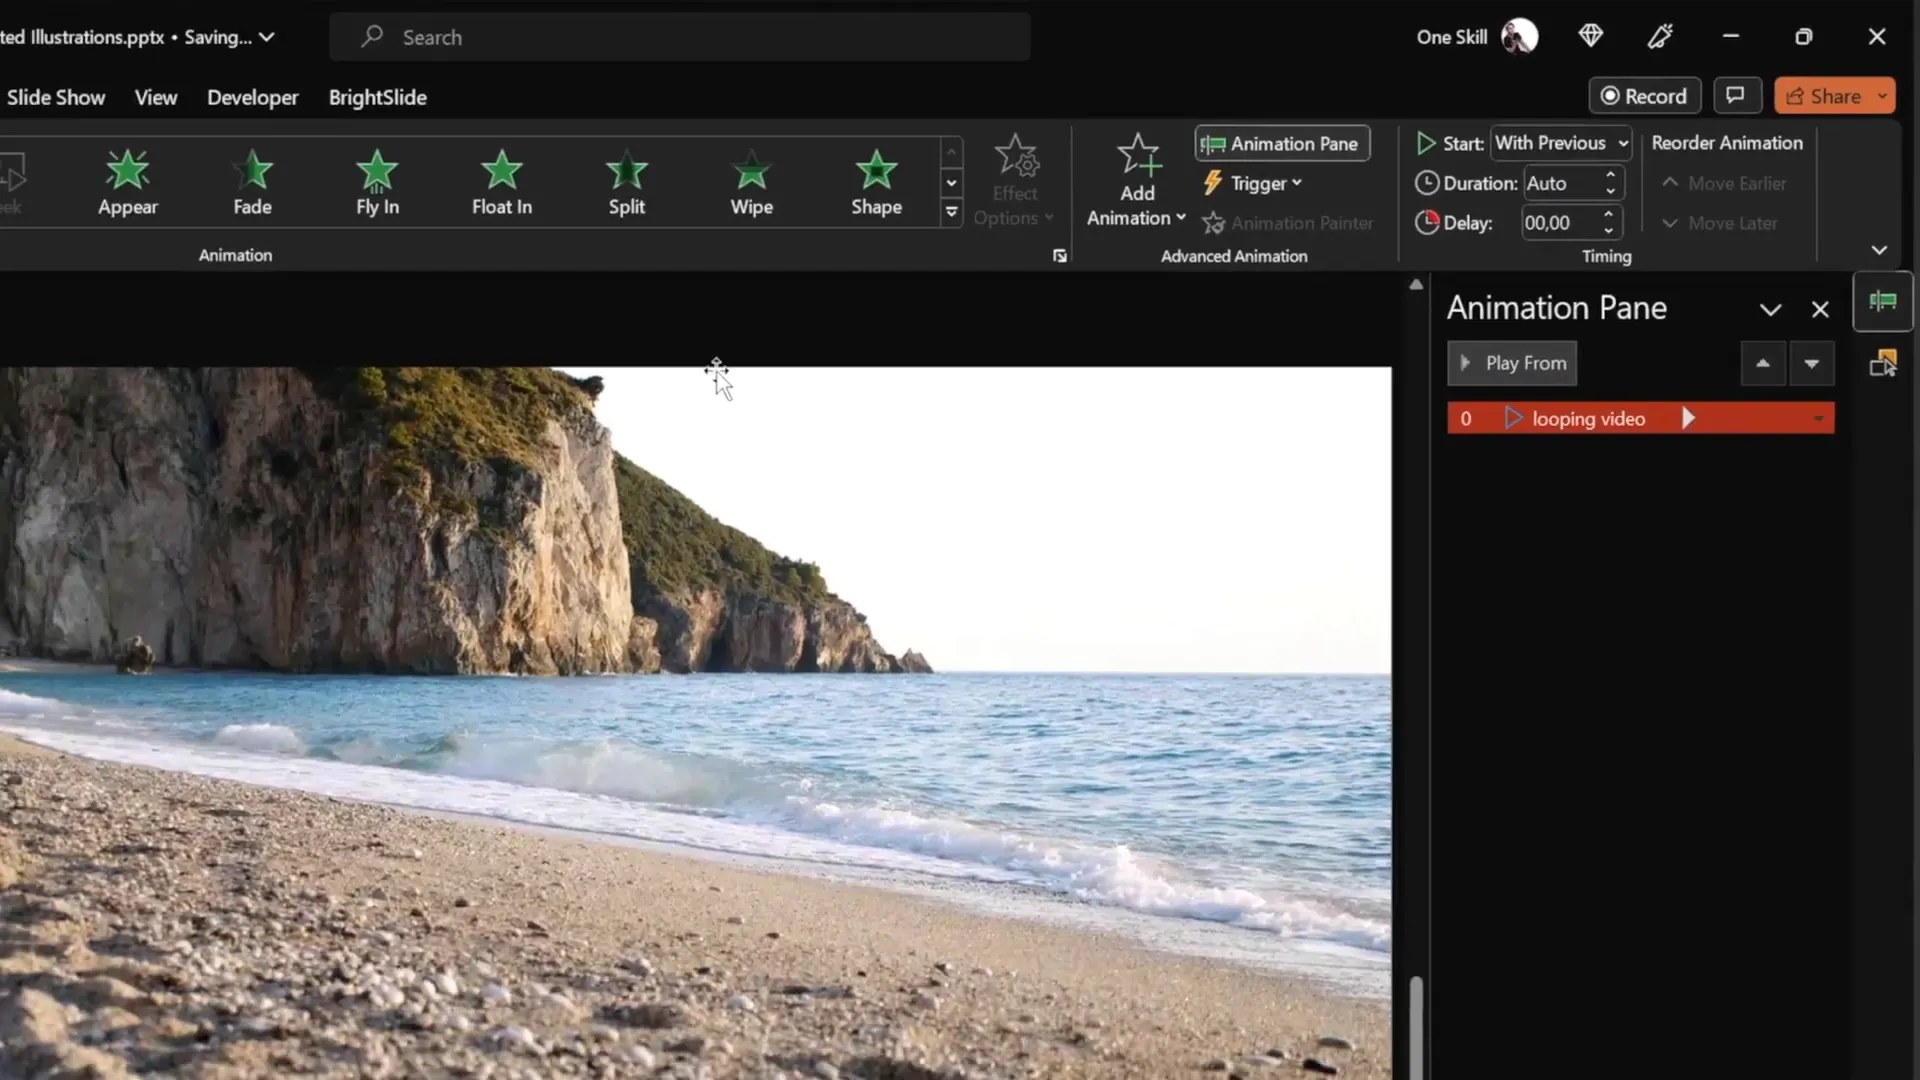
- Select the video on the slide.
- Go to Animations and add a Play animation.
- In the animation pane, set the Play animation to start With Previous. This ensures the video starts automatically when the slide loads.
- In the Playback tab, check the option for Loop until Stopped to make the video loop continuously.
Step 3: Hide Video Controls
To create a clean look without video player controls:
- Go to the Slide Show tab.
- Uncheck the box for Show Media Controls.
Step 4: Prevent Video Click Reset
By default, clicking on the video during the presentation resets it. To avoid this:
- Insert a transparent rectangle shape that covers the entire slide.
- Remove the outline and set the fill transparency to 100% (fully transparent).
- Rename the rectangle in the selection pane to keep your workspace organized.
This transparent rectangle prevents the video from being clickable and resetting during the presentation.
Creating Animated Wavy Text Titles
To add an engaging title with animation, follow these steps to create a wavy text effect that loops continuously:
Step 1: Insert Your Text
- Use a stylish font like Sweet Purple with a large font size (e.g., 115 pt) for a bold title.
- Position the text box centrally on the slide, ideally above the video background or other design elements.
Step 2: Add Basic Zoom Animation
- Select the text box.
- Go to Animations → Add Animation → More Entrance Effects.
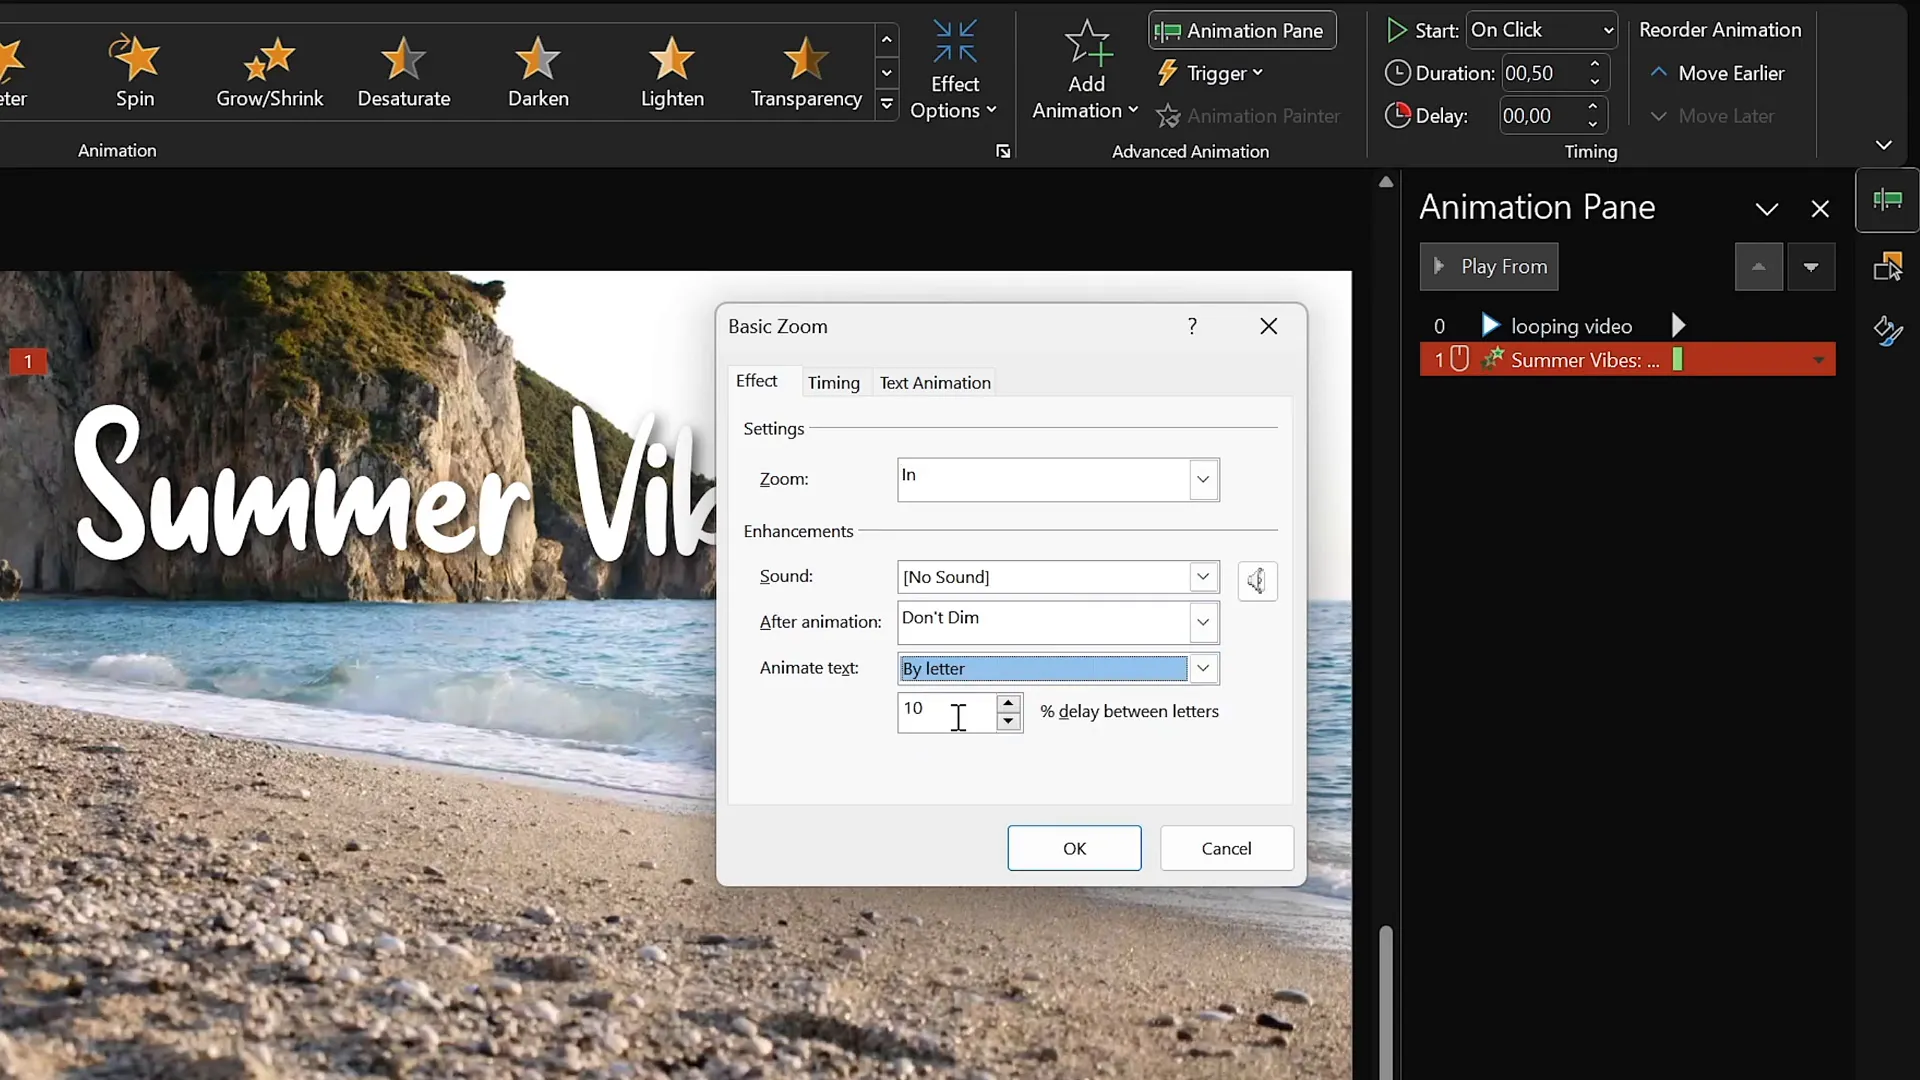
- Choose Basic Zoom and click OK.
- Set the animation to start On Click with a duration of 0.5 seconds.
- Under Effect Options, animate the text By Letter with a delay of 10% between letters.
Step 3: Add Text Wave Animation
- With the text box still selected, add a second animation: Text Wave (found under Emphasis effects).
- Set this animation to start With Previous and set the duration to 2 seconds.
- Set the animation to animate By Letter with a delay of 5%.
- In the timing tab, set the animation to repeat Until End of Slide.
Step 4: Preview Your Animated Title
Run the slide show and click once to trigger the basic zoom animation, followed immediately by the continuous wavy animation. You can adjust the height of the text wave to customize the effect.
Animating Summer Illustrations with Motion Paths
Adding animated illustrations enriches your slide with dynamic visual elements. Here’s how to animate summer-themed PNG illustrations with smooth motion path animations:
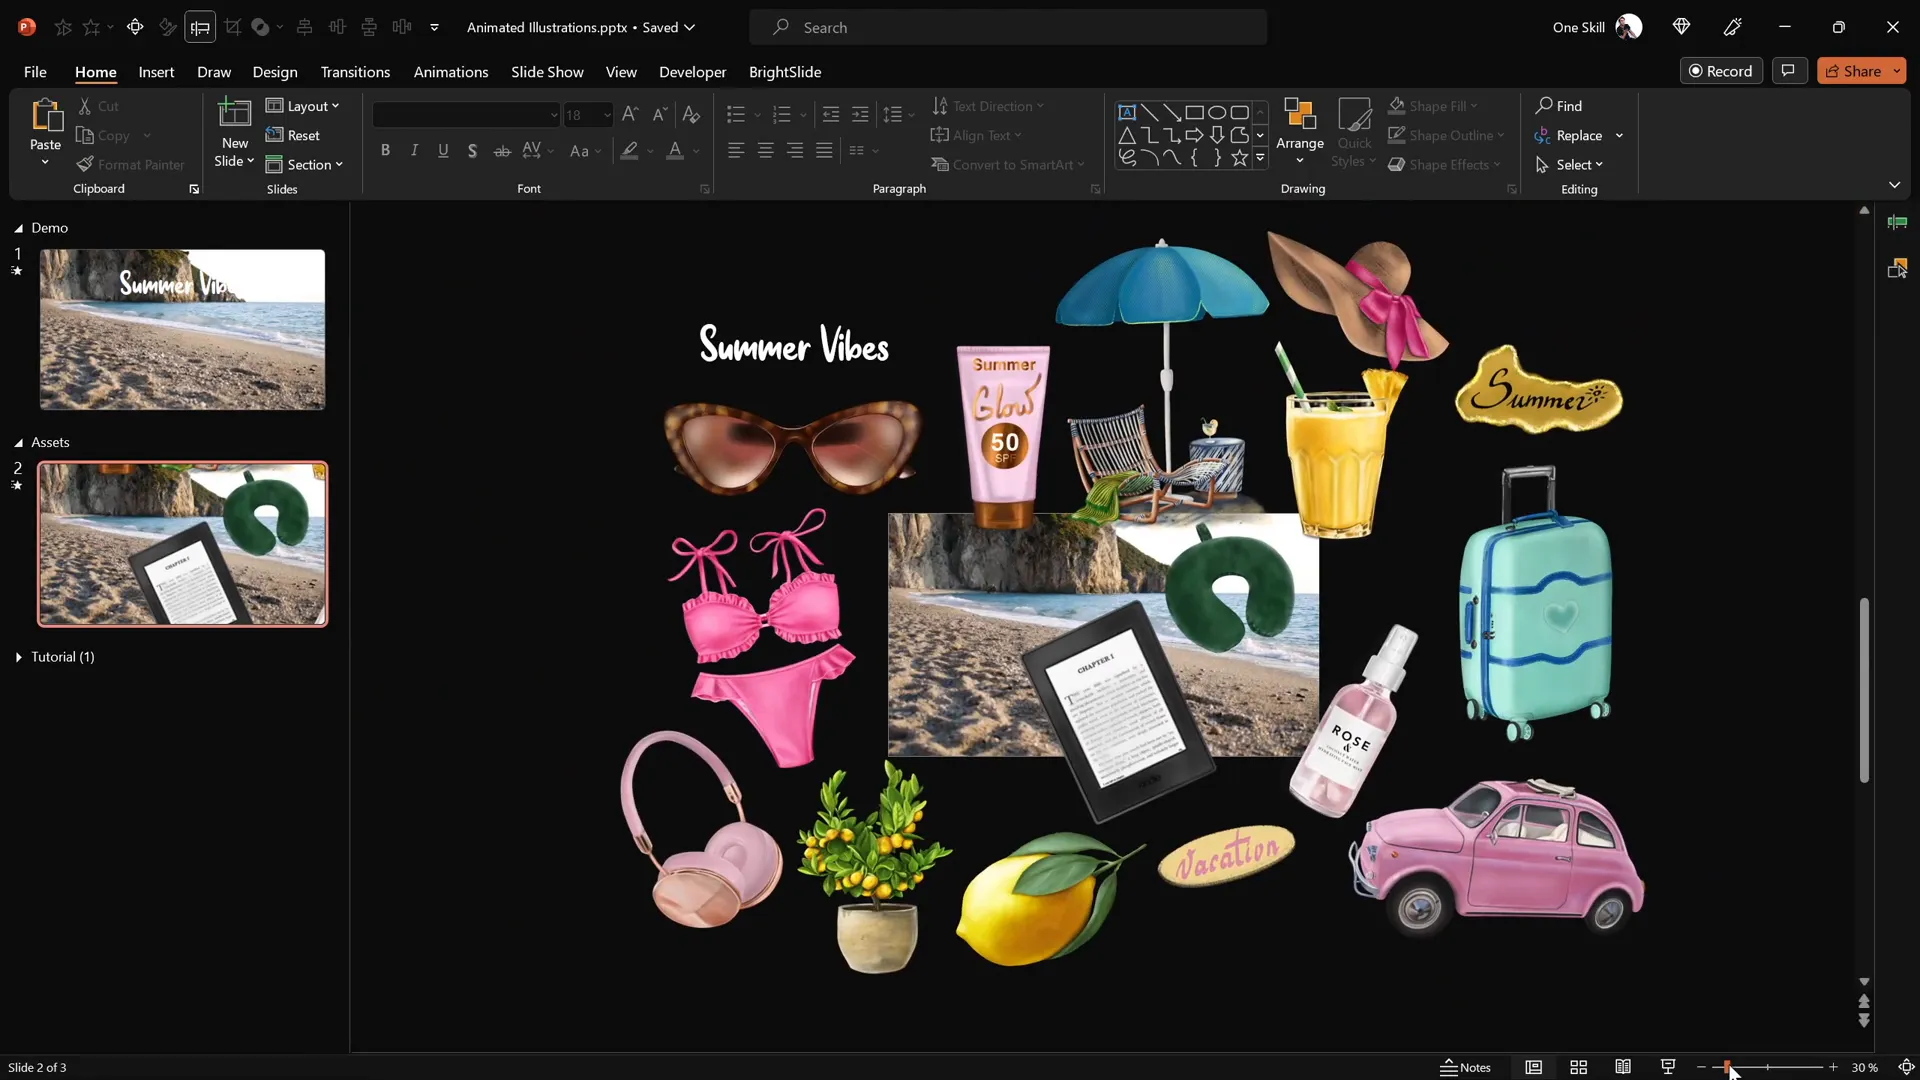
Step 1: Insert Illustrations
- Copy your desired summer illustration (e.g., cocktail glass) from your assets and paste it onto your slide.
- Position the illustration at the bottom corner of the slide.
- Enable slide guides to help align objects relative to the slide center.
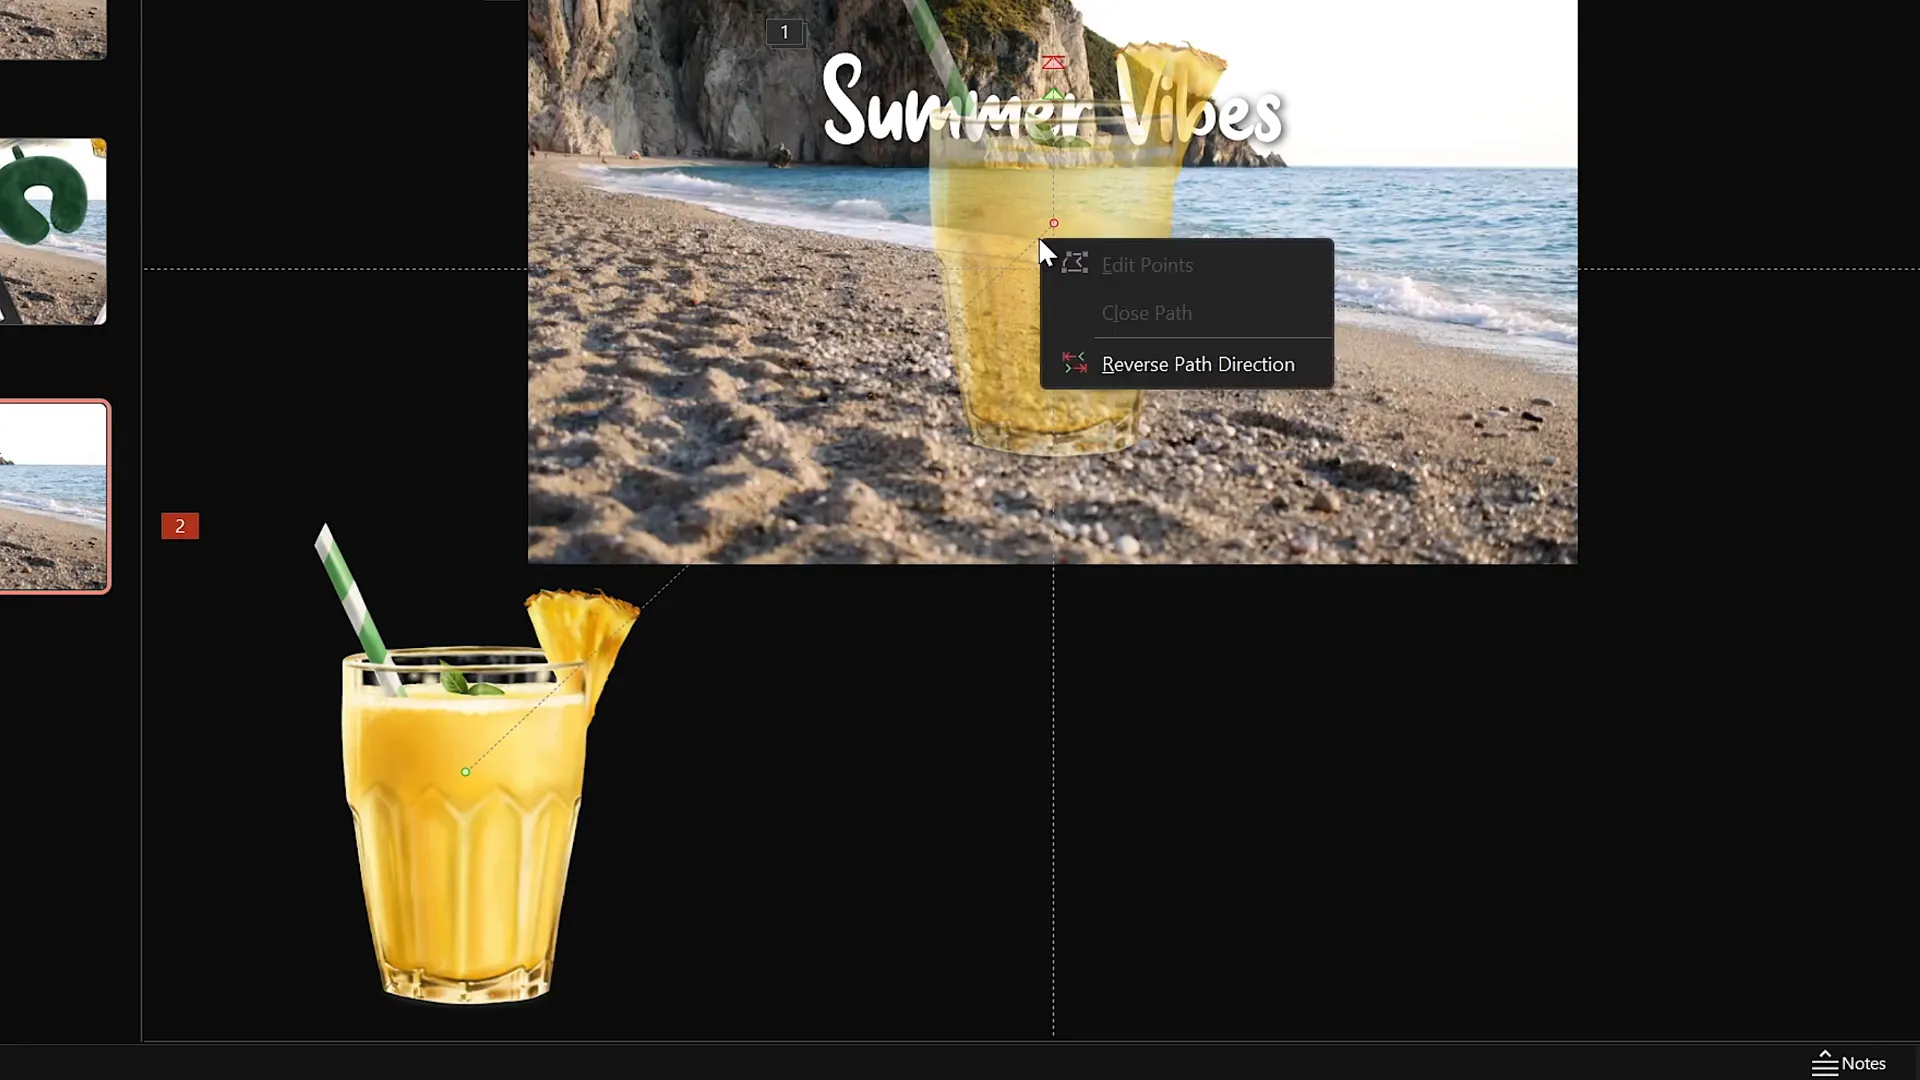
Step 2: Apply Motion Path Animation
- Select the illustration.
- Go to Animations → Add Animation → Motion Paths → Line.
- Adjust the end point (red bubble) of the motion path to a position near the slide center but above the waterline or main content area.
- Reverse the motion path so the animation starts at the center and moves toward the illustration’s original position.
- Set the animation to start With Previous and duration to 4 seconds.
- In effect options, apply a smooth start for more natural movement.
- Set the animation to repeat Until End of Slide.
Step 3: Add Entrance Zoom Animation
To improve visual appeal, add a Basic Zoom entrance animation to the illustration:
- Add Basic Zoom entrance animation and set it to start With Previous.
- Set the duration to 4 seconds, matching the motion path animation.
- Set this animation to repeat Until End of Slide.
Step 4: Duplicate Animations for Other Illustrations
You can quickly apply the same animation settings to other illustrations (e.g., umbrella, sunscreen bottle, hat) using the Animation Painter tool:
- Select the animated illustration.
- Click the Animation Painter button.
- Click on the new illustration to apply the same animations.
- Adjust the starting point of the motion path and add delays to stagger animations for variety.
Step 5: Layering and Ordering
Use the Selection Pane to arrange the layering of illustrations, ensuring they overlap appropriately (e.g., cocktail glass above umbrella).
Looping Animations for Continuous Playback
Looping animations keep your slide dynamic throughout the presentation, especially for background or decorative elements. Here’s how to effectively loop your animations:
| Animation Type | Settings for Looping | Effect |
|---|---|---|
| Video Play Animation | Start: With Previous Playback: Loop until Stopped |
Video plays automatically and loops seamlessly |
| Text Wave Animation | Start: With Previous Duration: 2 seconds Repeat: Until End of Slide |
Continuous wavy text effect |
| Motion Path Animation (Illustrations) | Start: With Previous Duration: 4 seconds Repeat: Until End of Slide |
Illustrations move smoothly in a loop |
| Basic Zoom Entrance Animation (Illustrations) | Start: With Previous Duration: 4 seconds Repeat: Until End of Slide |
Illustrations gradually increase in size, looping continuously |
Adding delays to the start times of animations prevents all elements from moving simultaneously, creating a more natural and engaging effect.
Final Touches and Presentation Tips
Now that your slide is animated and visually appealing, consider these tips to ensure your presentation runs smoothly and professionally:
- Test Your Slide: Run the slideshow to verify all animations play as intended without glitches.
- Organize Your Layers: Use the selection pane to arrange objects properly to avoid overlapping issues.
- Keep Animations Purposeful: Avoid overusing animations to distract from your message; use them to enhance engagement.
- Use High-Quality Assets: Ensure your video and illustrations are high resolution to avoid pixelation on large screens.
- Optimize Slide Size: Set slide dimensions before adding assets to prevent skewing.
- Practice Your Delivery: Familiarize yourself with when animations trigger to synchronize your speech smoothly.
By integrating these animated elements thoughtfully, you’ll elevate your PowerPoint presentation skills and captivate your audience.
Frequently Asked Questions
1. Can I use any video for the background?
Yes, you can use any video that fits your presentation theme. Ideally, choose a loopable video with subtle movement that doesn’t distract from your content.
2. How do I find or create PNG illustrations with transparent backgrounds?
You can purchase or download free illustrations from platforms like Etsy, Envato, or free stock sites. Make sure the files are in PNG format with transparency to easily overlay them on your slides.
3. What if my PowerPoint version doesn’t support these animations?
Animations like motion paths and text effects are best supported in Microsoft PowerPoint 365 or recent versions. Older versions may have limited capabilities, so consider upgrading or using alternative methods.
4. How do I prevent video controls from showing during the presentation?
Go to the Slide Show tab and uncheck Show Media Controls. This hides the video player controls and keeps the slide clean.
5. Can I use this animation technique for presentations other than summer themes?
Absolutely! The techniques shown here are versatile and can be customized with different videos, illustrations, and text to suit any topic or theme.
6. How do I add delays to animations to stagger their start times?
In the animation pane, select the animation, open the Timing options, and add a delay in seconds. This staggers the animations so they don’t all play simultaneously.
7. How do I loop animations indefinitely?
In the animation’s Timing tab, set the Repeat option to Until End of Slide or specify a number of repeats to create continuous looping.
Conclusion
Mastering PowerPoint presentation skills requires both creativity and technical know-how. By integrating looping video backgrounds, animated text, and motion path animations with hand-drawn illustrations, you can create visually stunning slides that engage and impress your audience.
This tutorial has given you a step-by-step guide to building a summer-themed looping animation slide, but the techniques are widely applicable to any presentation topic. Remember to use animations purposefully, keep your design clean, and practice your delivery for maximum impact.
For more inspiration and resources, check out the amazing illustration sets by Raminta on Etsy, use stylish fonts like Sweet Purple, and explore high-quality stock videos to bring your slides to life.
Happy presenting! Stay creative, and keep honing your PowerPoint presentation skills to make every slide count.


