
If you’re looking to elevate your PowerPoint presentation skills and captivate your audience, this comprehensive tutorial will walk you through creating a stunning, looping sticker animation slide. Designed around a vibrant summer theme but adaptable to any subject, this tutorial demonstrates how to combine video backgrounds, motion paths, looping animations, and custom text effects to produce a truly engaging presentation slide.
Whether you’re a beginner or looking to add fresh animation techniques to your PowerPoint toolbox, this guide breaks down every step with clear instructions, tips, and tricks. Plus, you’ll learn how to use hand-drawn illustrations and seamless animations to impress your viewers and keep their attention focused on your content.
Table of Contents
- Getting Started: Setting Up PowerPoint and Assets
- Creating a Looping Video Background
- Designing Animated Wavy Slide Titles
- Adding Looping Summer Illustrations with Motion Paths
- Animation Tips and Best Practices
- Conclusion and Additional Resources
- Frequently Asked Questions (FAQ)
Getting Started: Setting Up PowerPoint and Assets
Before diving into animation, it’s essential to prepare your workspace and gather the necessary assets. The tutorial uses Microsoft PowerPoint 365, which supports advanced animation and video playback features. Here’s how to start:
Gathering Illustrations and Video Assets
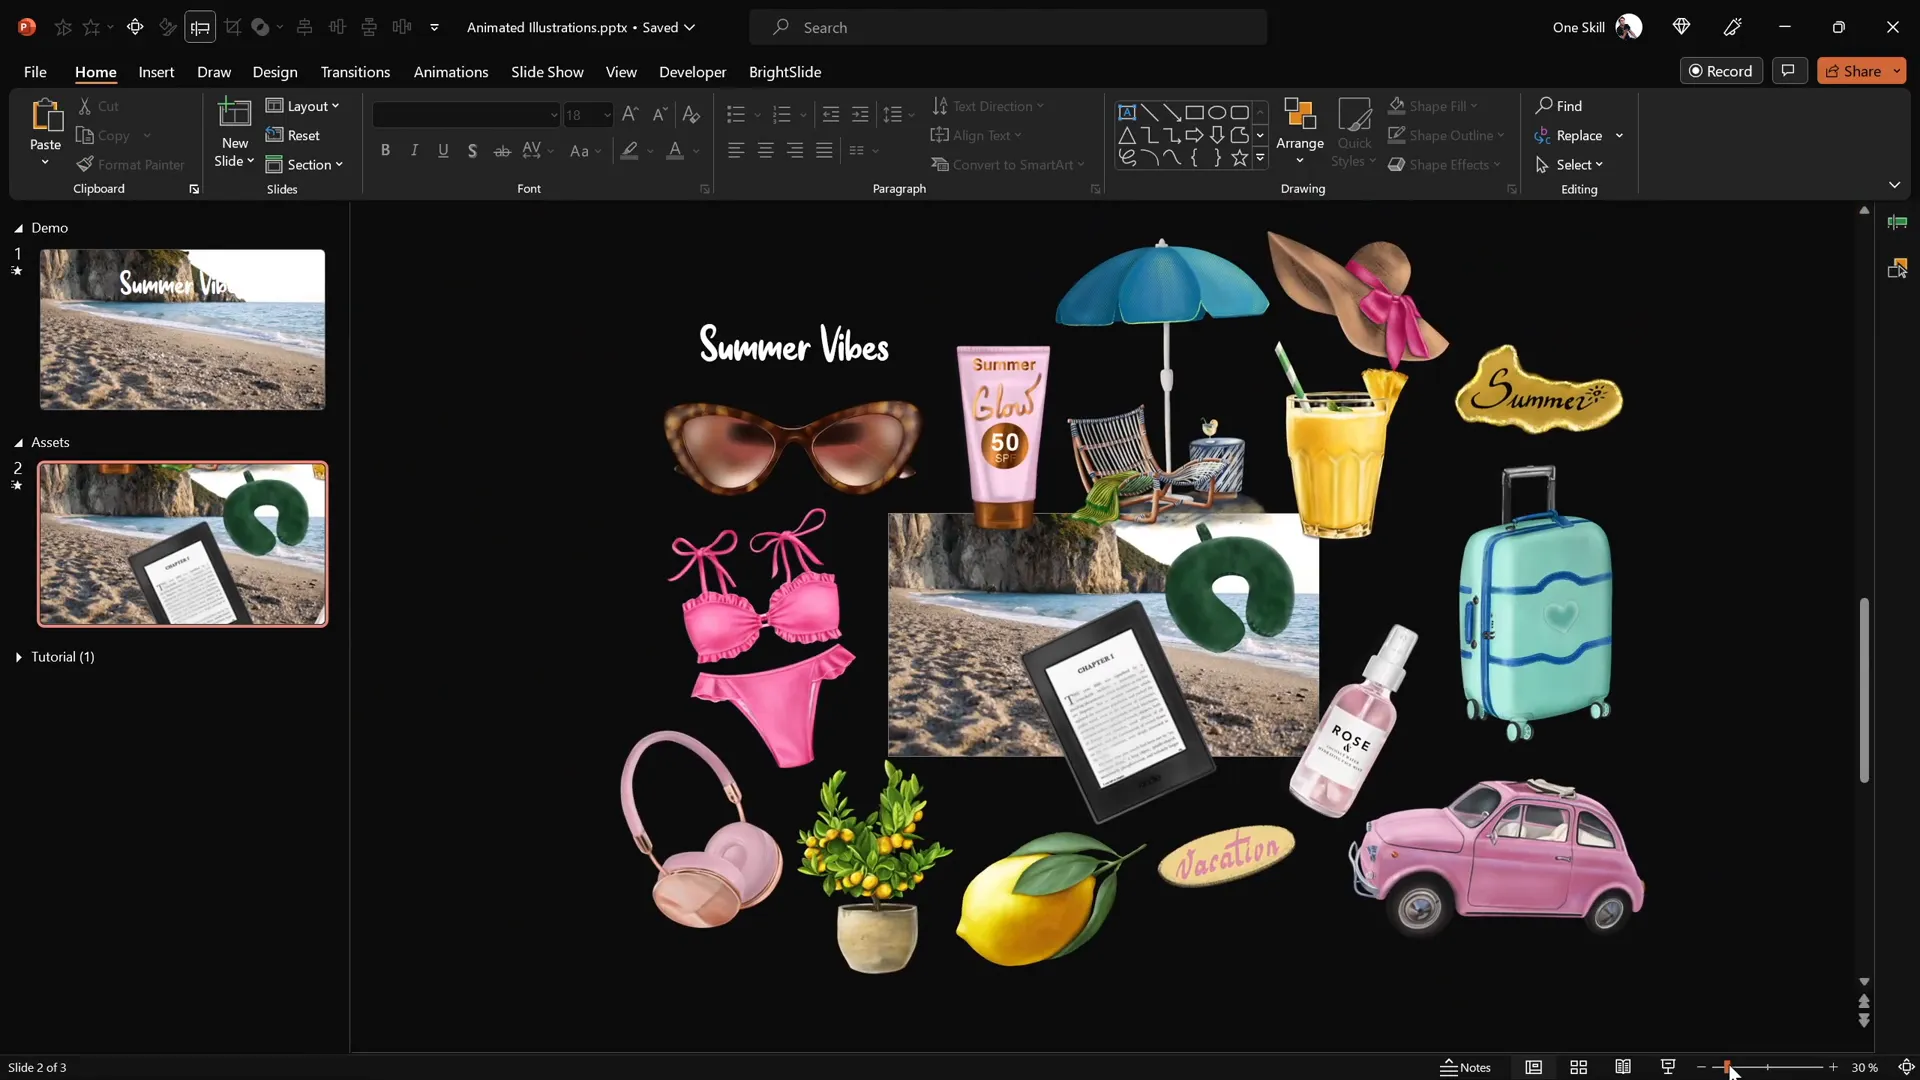
The tutorial features a delightful collection of summer-themed illustrations, including sunglasses, headphones, lemons, stickers, luggage, cars, a Kindle reader, cocktail glasses, sunscreen bottles, and umbrellas. These were designed by the talented digital artist Raminta, whose hand-drawn style adds a personal and vibrant touch to the presentation.
All illustrations come in PNG format with transparent backgrounds, making them easy to layer and animate in PowerPoint. You can find these assets via Raminta’s Etsy store (link also in the video description). Now is a great time to grab these affordable and beautifully crafted illustrations to enhance your presentations.
Additionally, the video background used in this tutorial was downloaded from Artlist.io, providing a serene seaside ambiance that perfectly complements the summer theme.
Opening PowerPoint and Preparing Your Slide
Launch Microsoft PowerPoint 365 and create a fresh blank slide. This clean starting point allows you to build your animation from scratch without distractions or pre-existing elements.
With your assets ready, you’re now set to start building the video background that forms the foundation of the animated slide.
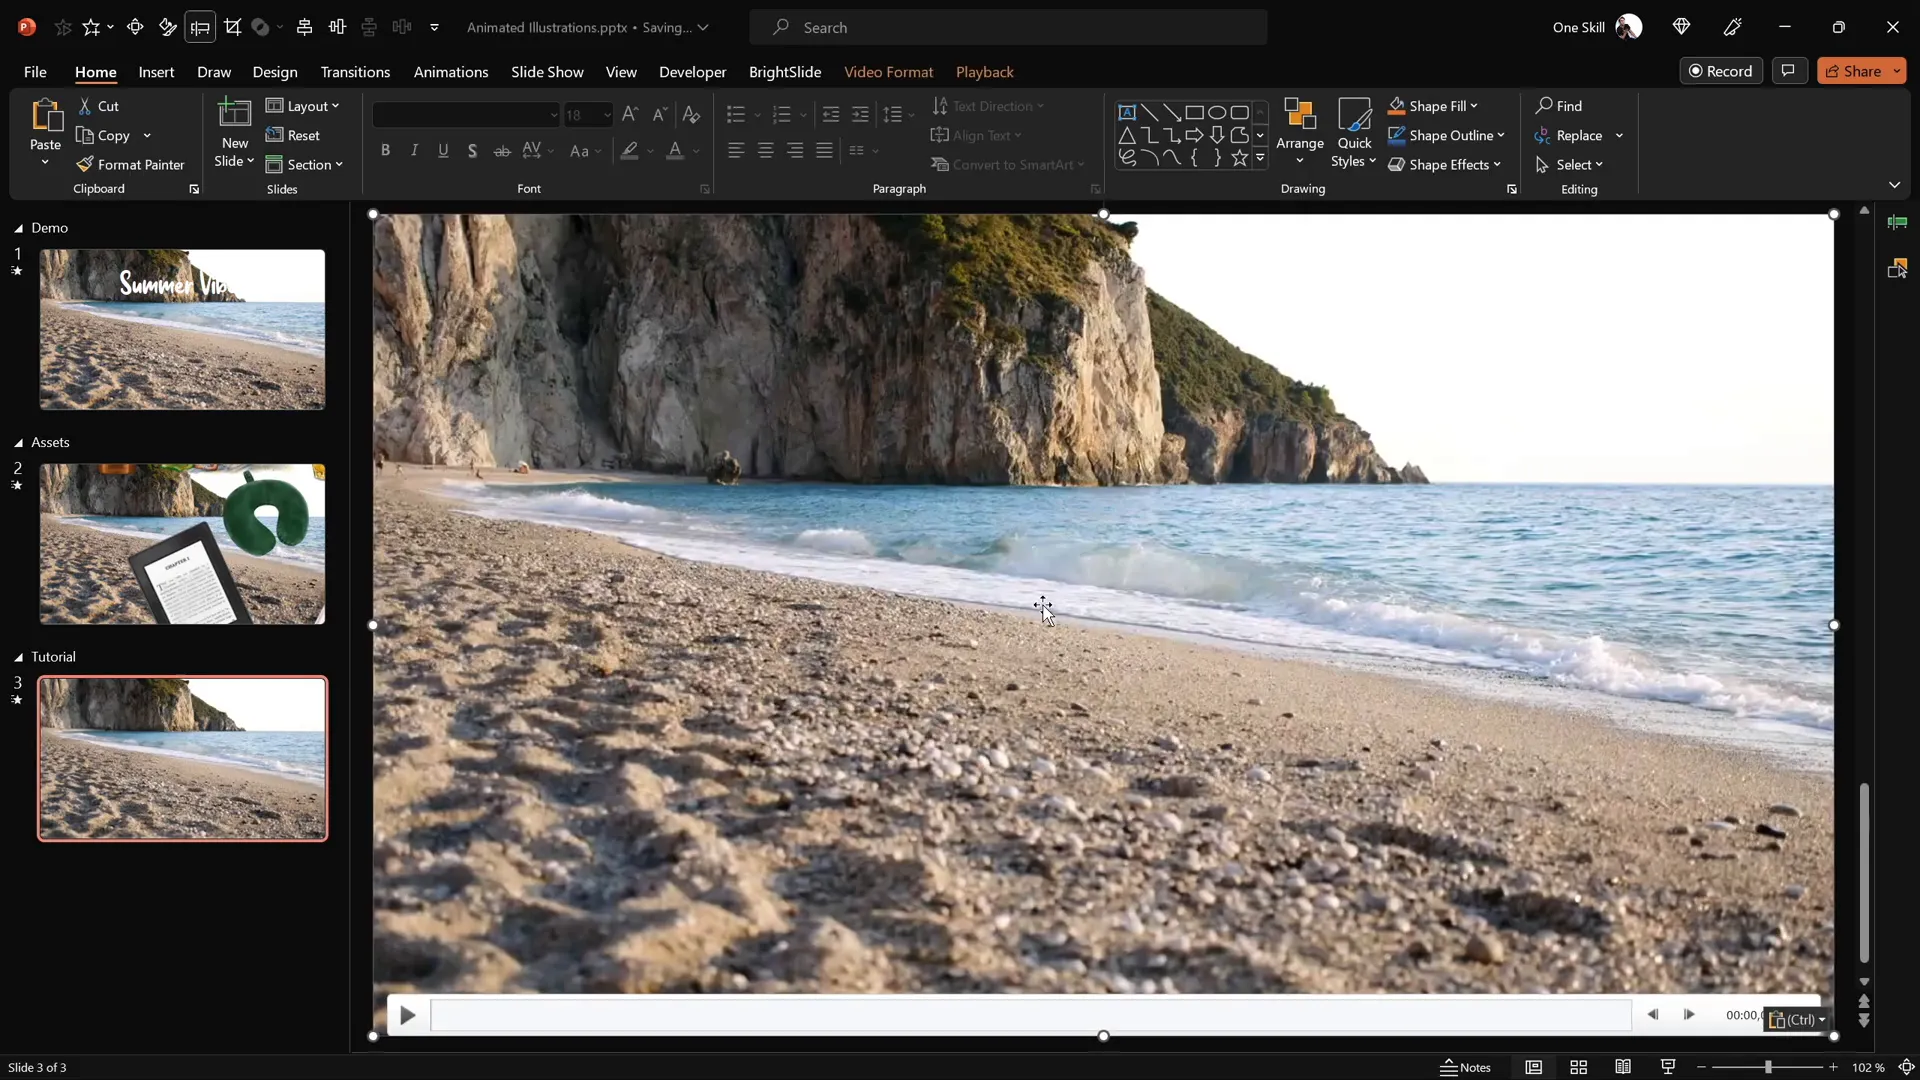
Creating a Looping Video Background
A dynamic video background can instantly transform the visual appeal of your presentation. Here’s how to add and configure a looping video background in PowerPoint:
Inserting the Video
- Copy the downloaded video file from Artlist.io.
- Paste it directly onto your blank slide in PowerPoint.
- Resize the video as needed to cover the entire slide area.
Once the video is in place, it becomes the canvas on which you will layer animations and illustrations.
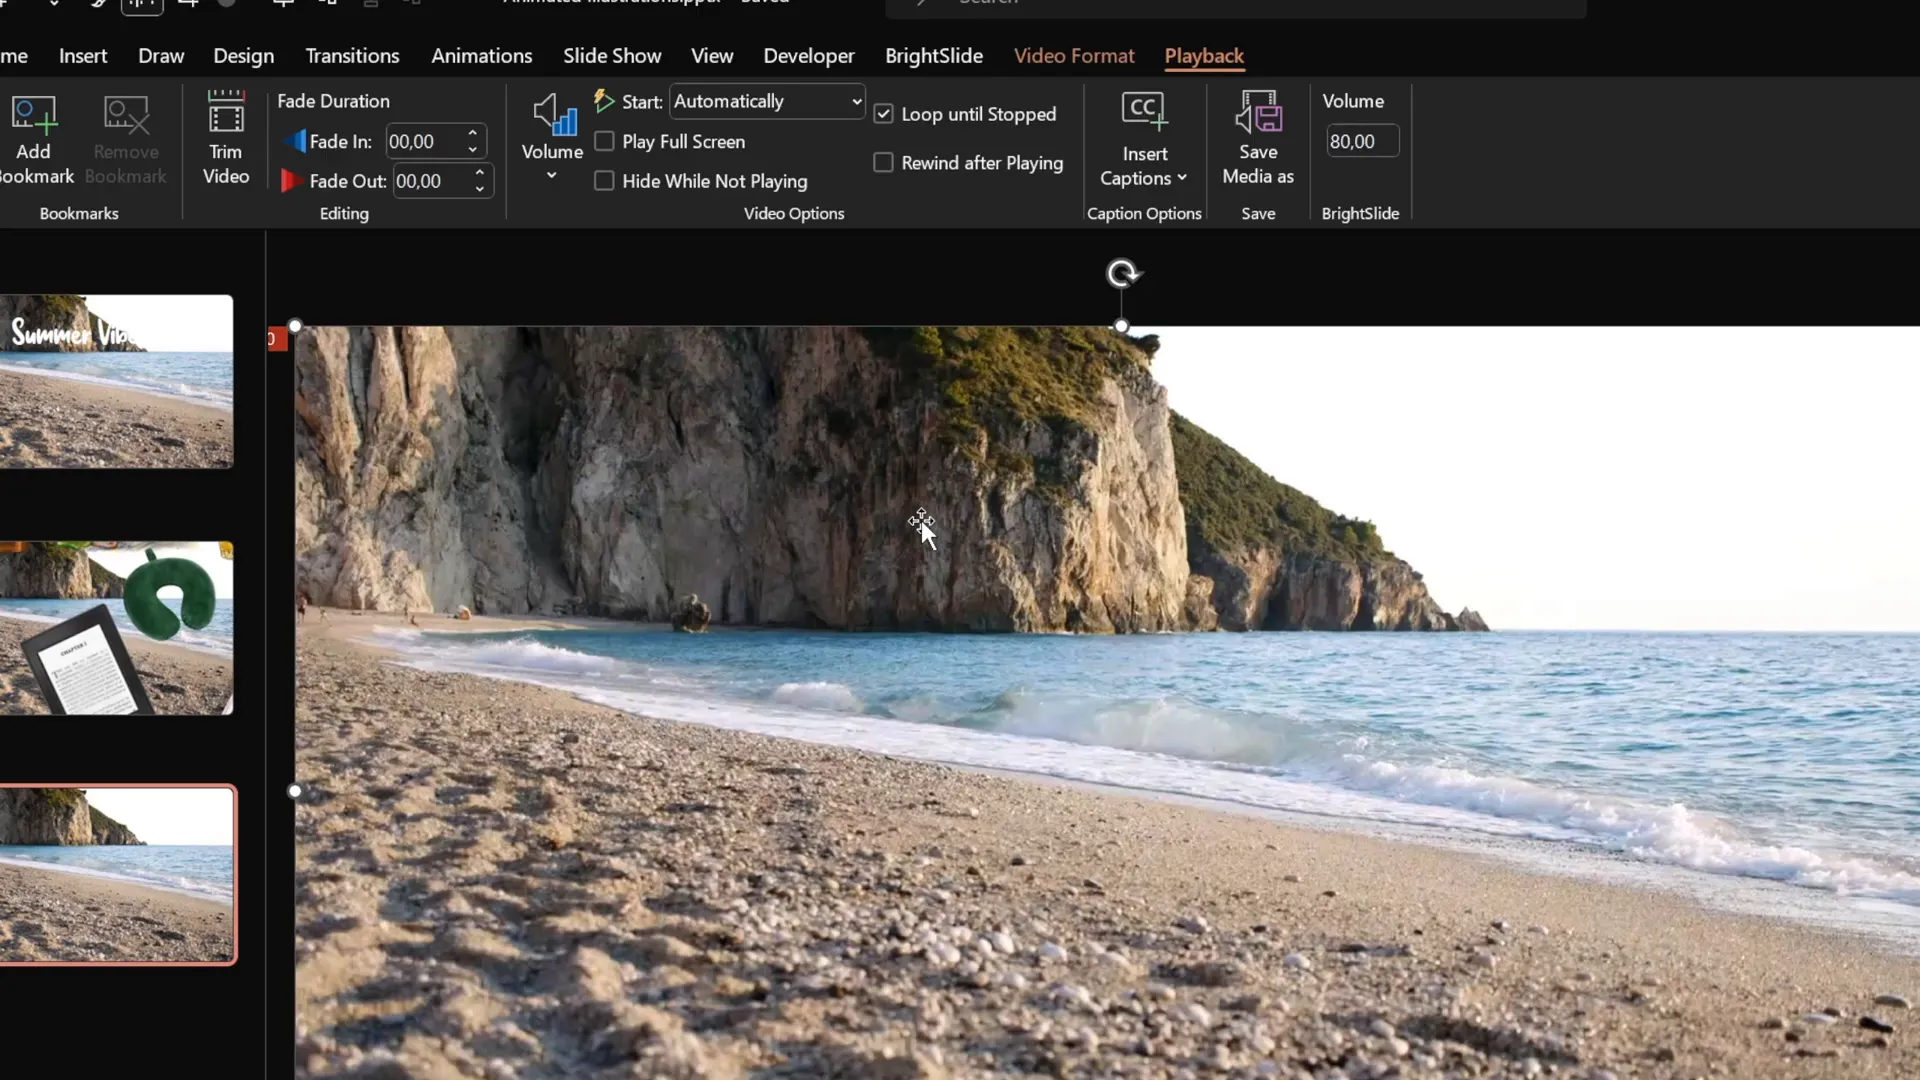
Setting the Video to Play Automatically and Loop
To ensure the video plays seamlessly during your presentation, configure the playback and animation settings as follows:
- Select the video on the slide.
- Go to the Animations tab and add a Play animation.
- Set the Play animation to start With Previous so it begins automatically when the slide loads.
- In the Playback tab, enable Loop until Stopped so the video repeats continuously.
To tidy up the presentation interface, you can hide the video player controls at the bottom:
- Go to the Slide Show tab.
- Uncheck the Show Media Controls box.
This setup guarantees a smooth, distraction-free video background that plays on an endless loop.
Preventing Video Click Interactions
By default, clicking the video during a presentation resets it, which may interrupt the flow of your animation. To prevent this:
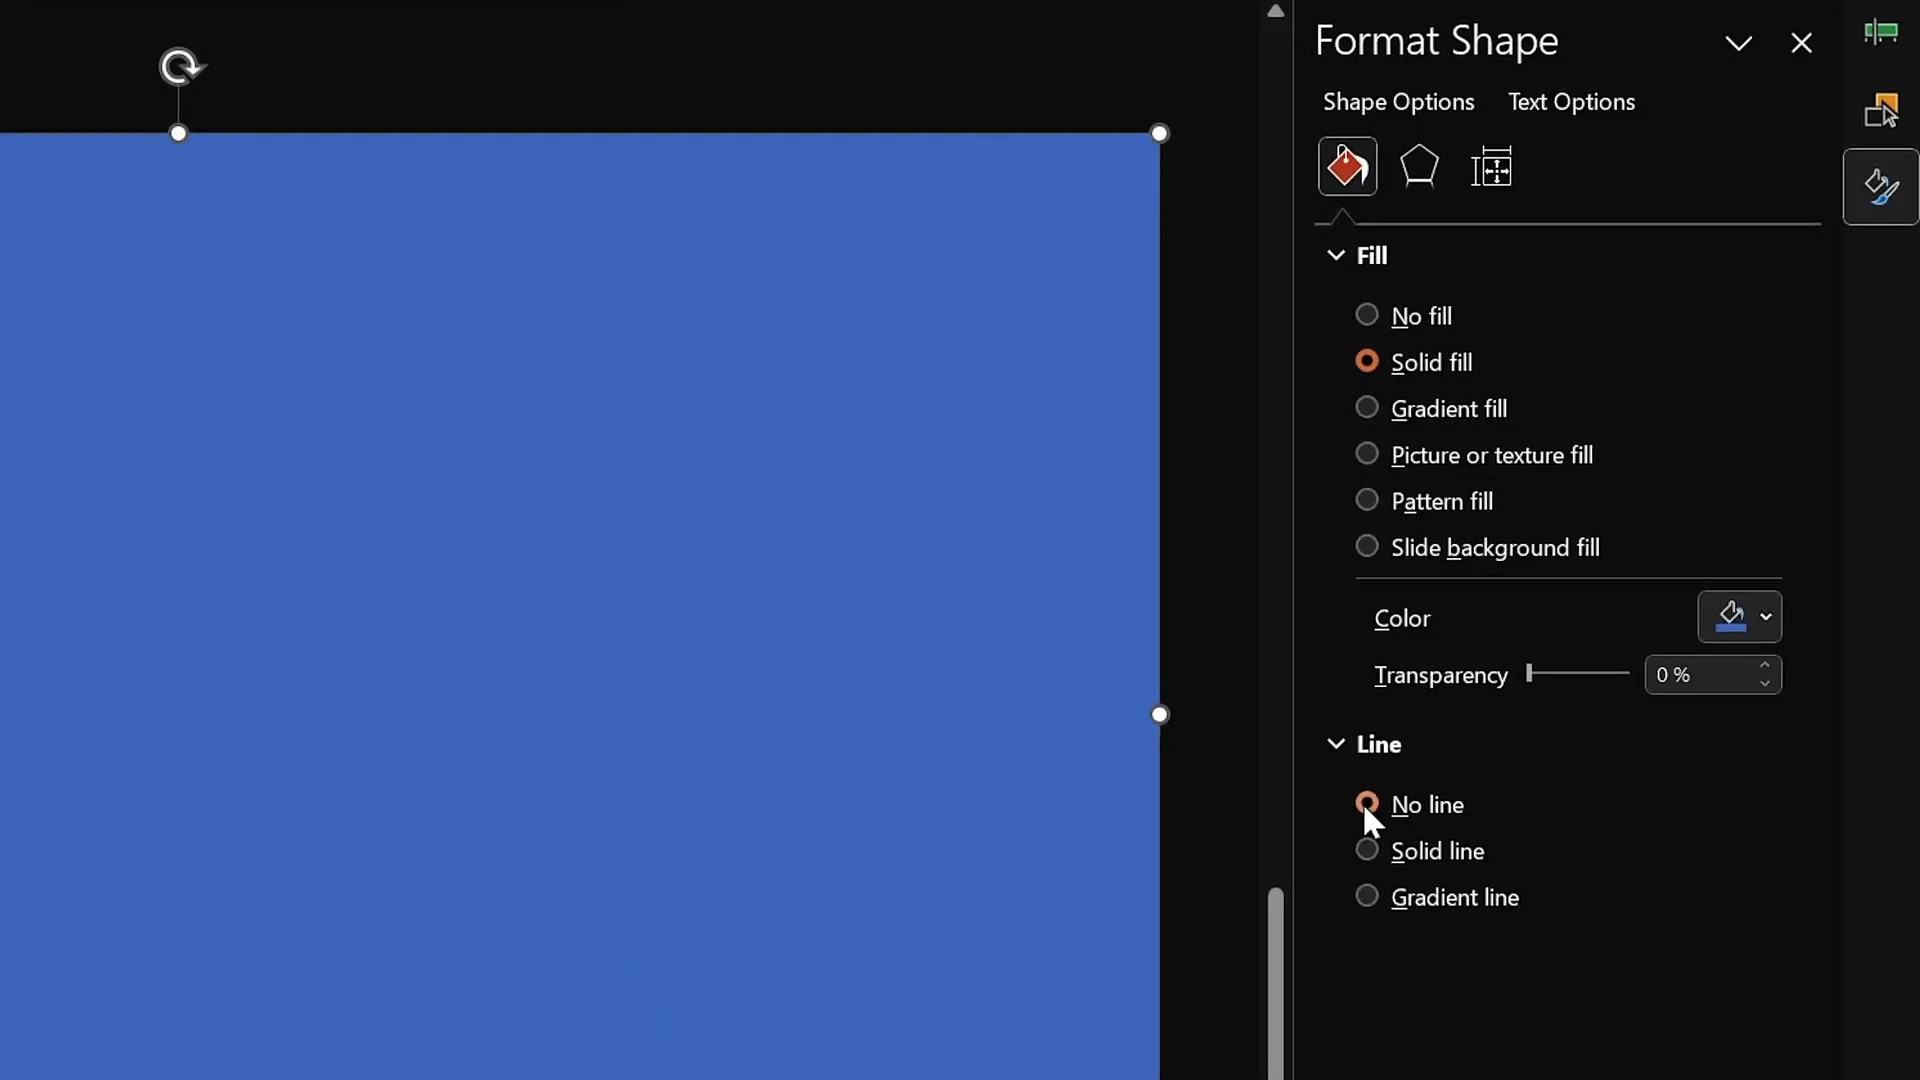
- Go to the Insert tab and choose Shapes, then select the Rectangle tool.
- Draw a rectangle covering the entire slide.
- Format the shape by removing its outline and setting the fill transparency to 100%, making it invisible.
- Rename the shape in the Selection Pane for easy identification.
This invisible shape acts as a click blocker, preventing accidental interruptions of your video playback.
Designing Animated Wavy Slide Titles
Captivating titles set the tone for your slides and can highlight your message. This tutorial demonstrates how to create a wavy, animated text effect that adds a dynamic flair to your slide title.
Choosing and Inserting the Font
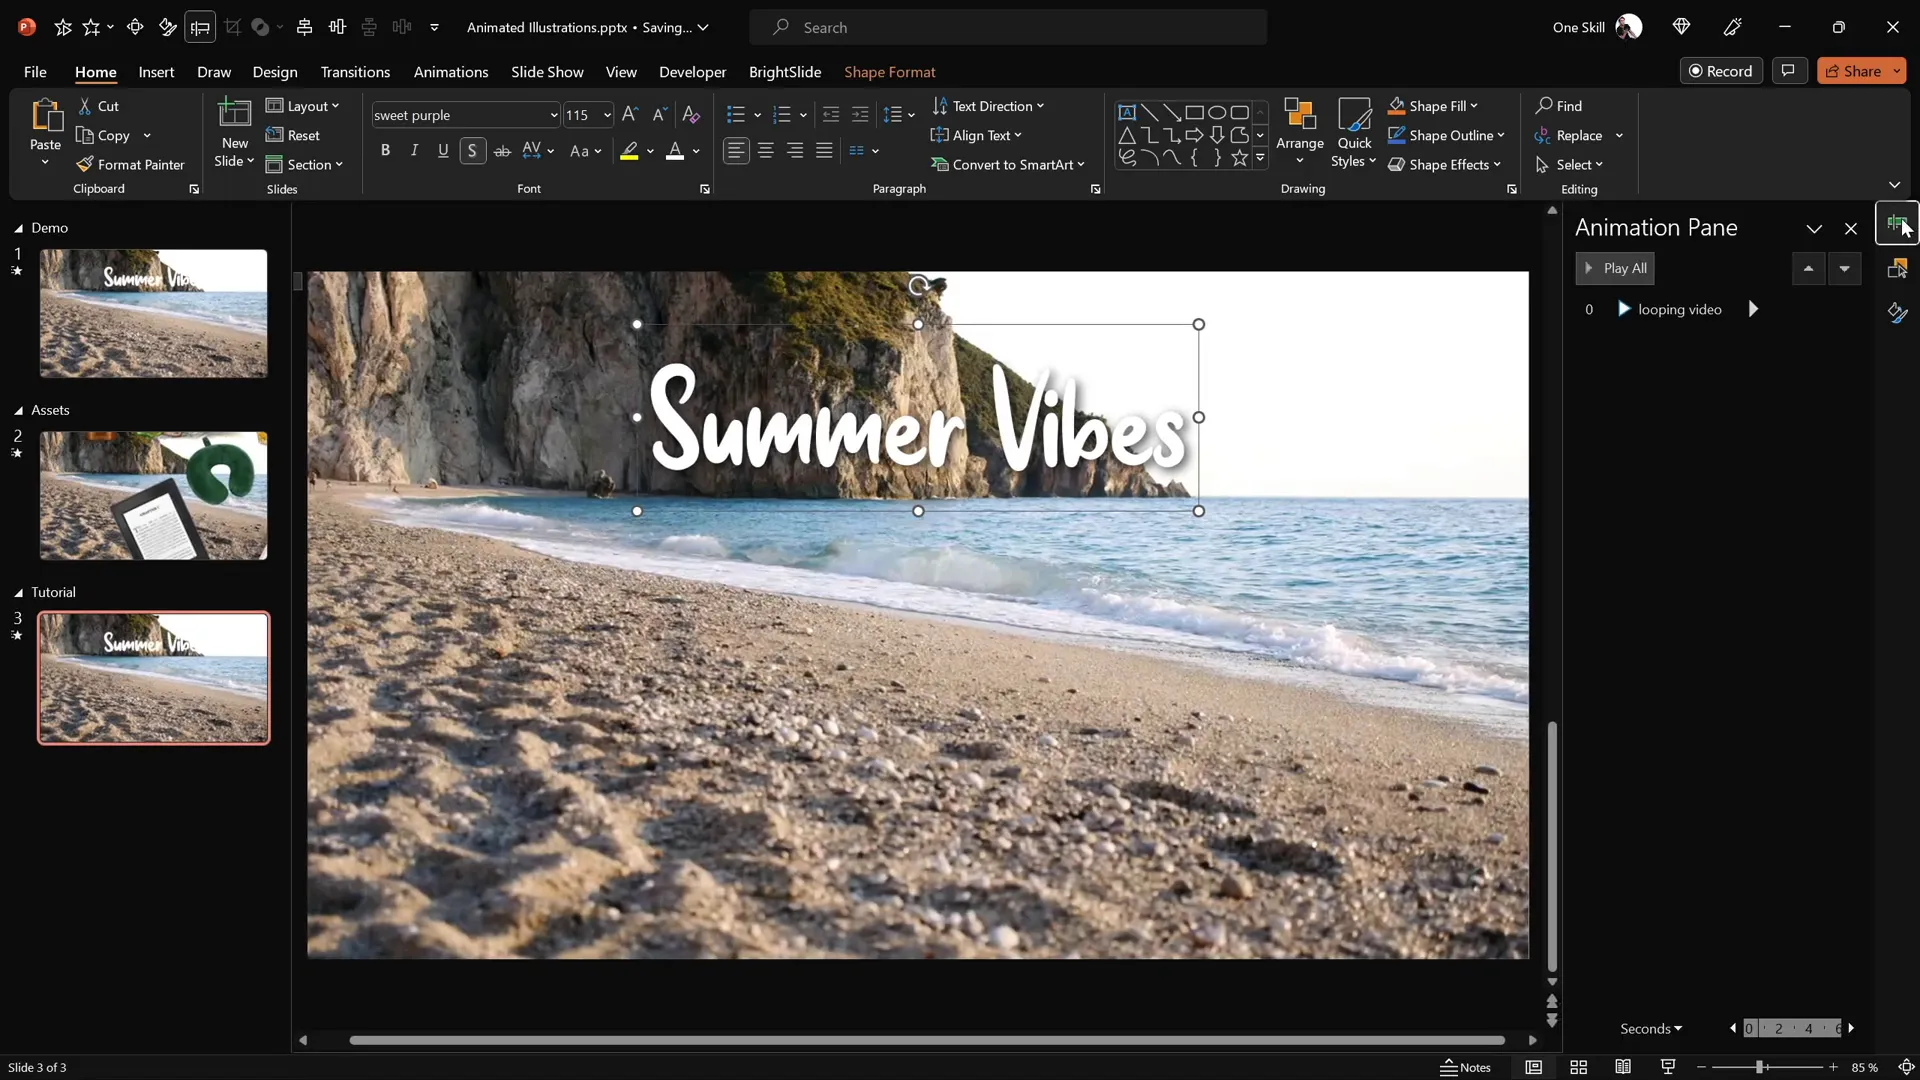
The tutorial uses a playful and elegant font named Sweet Purple with a large size (115 pt) to make the title stand out. You can download this font from DaFont.com if you want the exact style.
- Copy the text box containing your slide title (e.g., “Summer Vibes”) or create a new text box.
- Paste or type the title and position it centrally just above the waterline in your slide.
Applying Zoom Entrance Animation
To animate the title, add a Basic Zoom entrance animation:
- Select the text box.
- Go to the Animations tab and click Add Animation.
- Choose More Entrance Effects, then select Basic Zoom.
- Set the animation to start On Click with a duration of 0.5 seconds.
- Modify the effect options to animate the text By Letter with a 10% delay between letters for a cascading zoom effect.
Preview the animation to see each letter zoom in one by one, creating an engaging entrance.
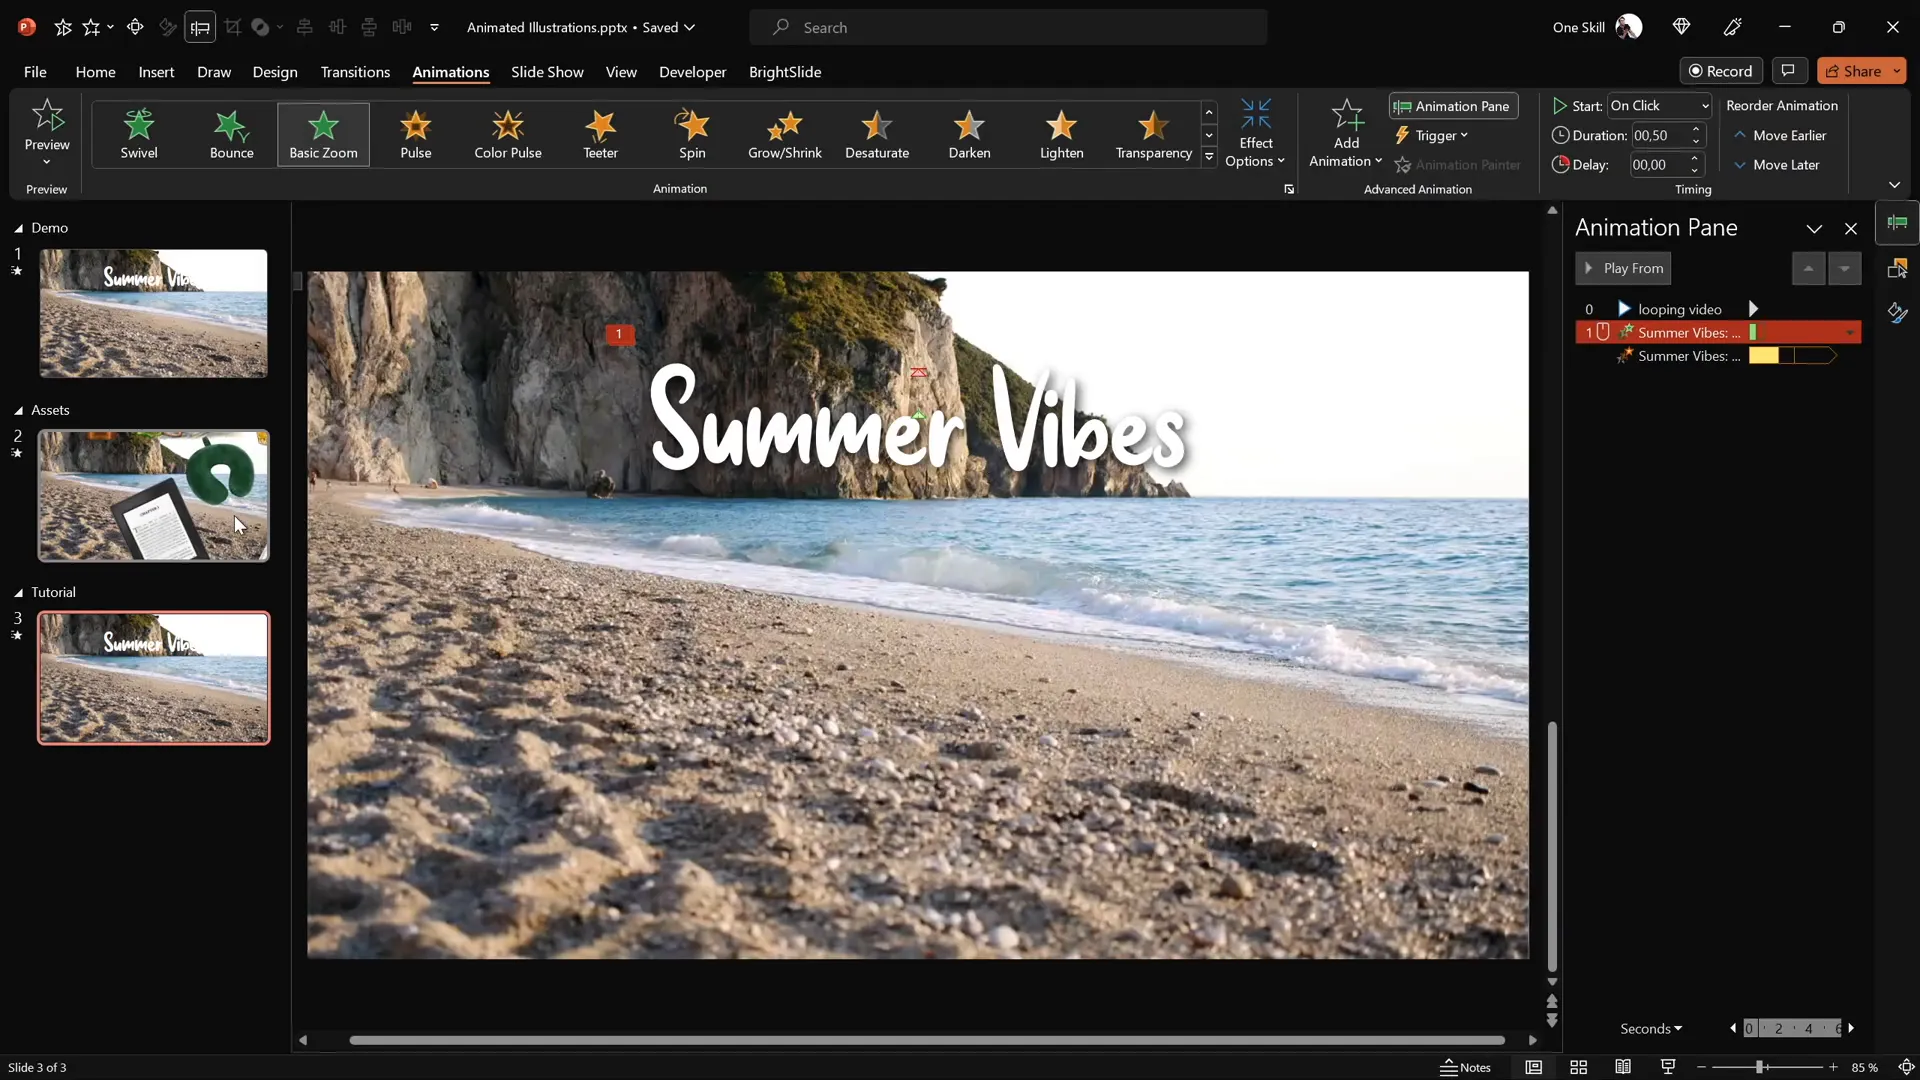
Adding the Wavy Text Animation
Next, layer a wave animation for a continuous wavy effect:
- With the text box still selected, add a second animation: Text Wave.
- Set this animation to start With Previous (immediately after the zoom).
- Set the duration to 2 seconds.
- Configure the effect options to animate By Letter with a 5% delay.
- In the Timing tab, set the animation to Repeat Until End of Slide.
This creates a smooth and visually appealing waving motion on your slide title that loops continuously.
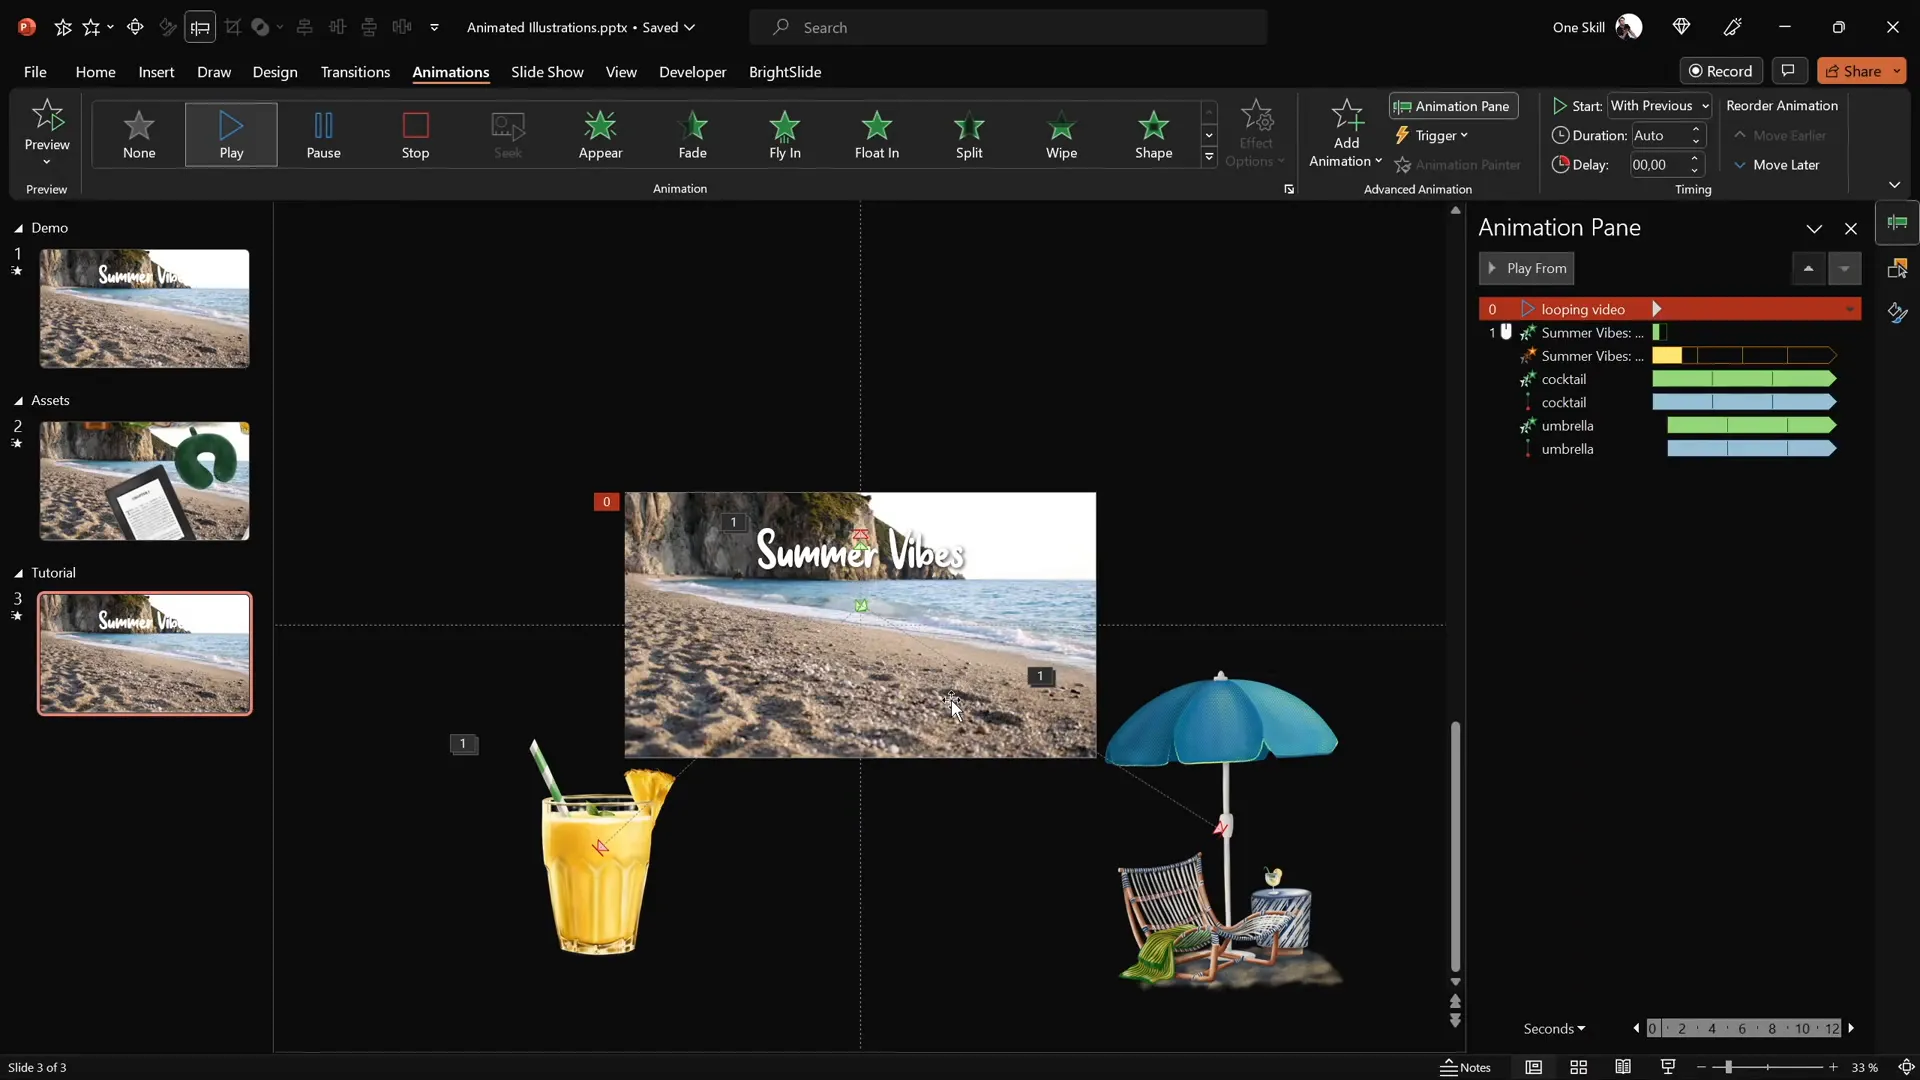
Adding Looping Summer Illustrations with Motion Paths
Now that the video background and animated title are set, it’s time to add the summer-themed illustrations and animate them for continuous looping motion. This section guides you through inserting illustrations and applying motion path animations with looping and delays to create a lively scene.
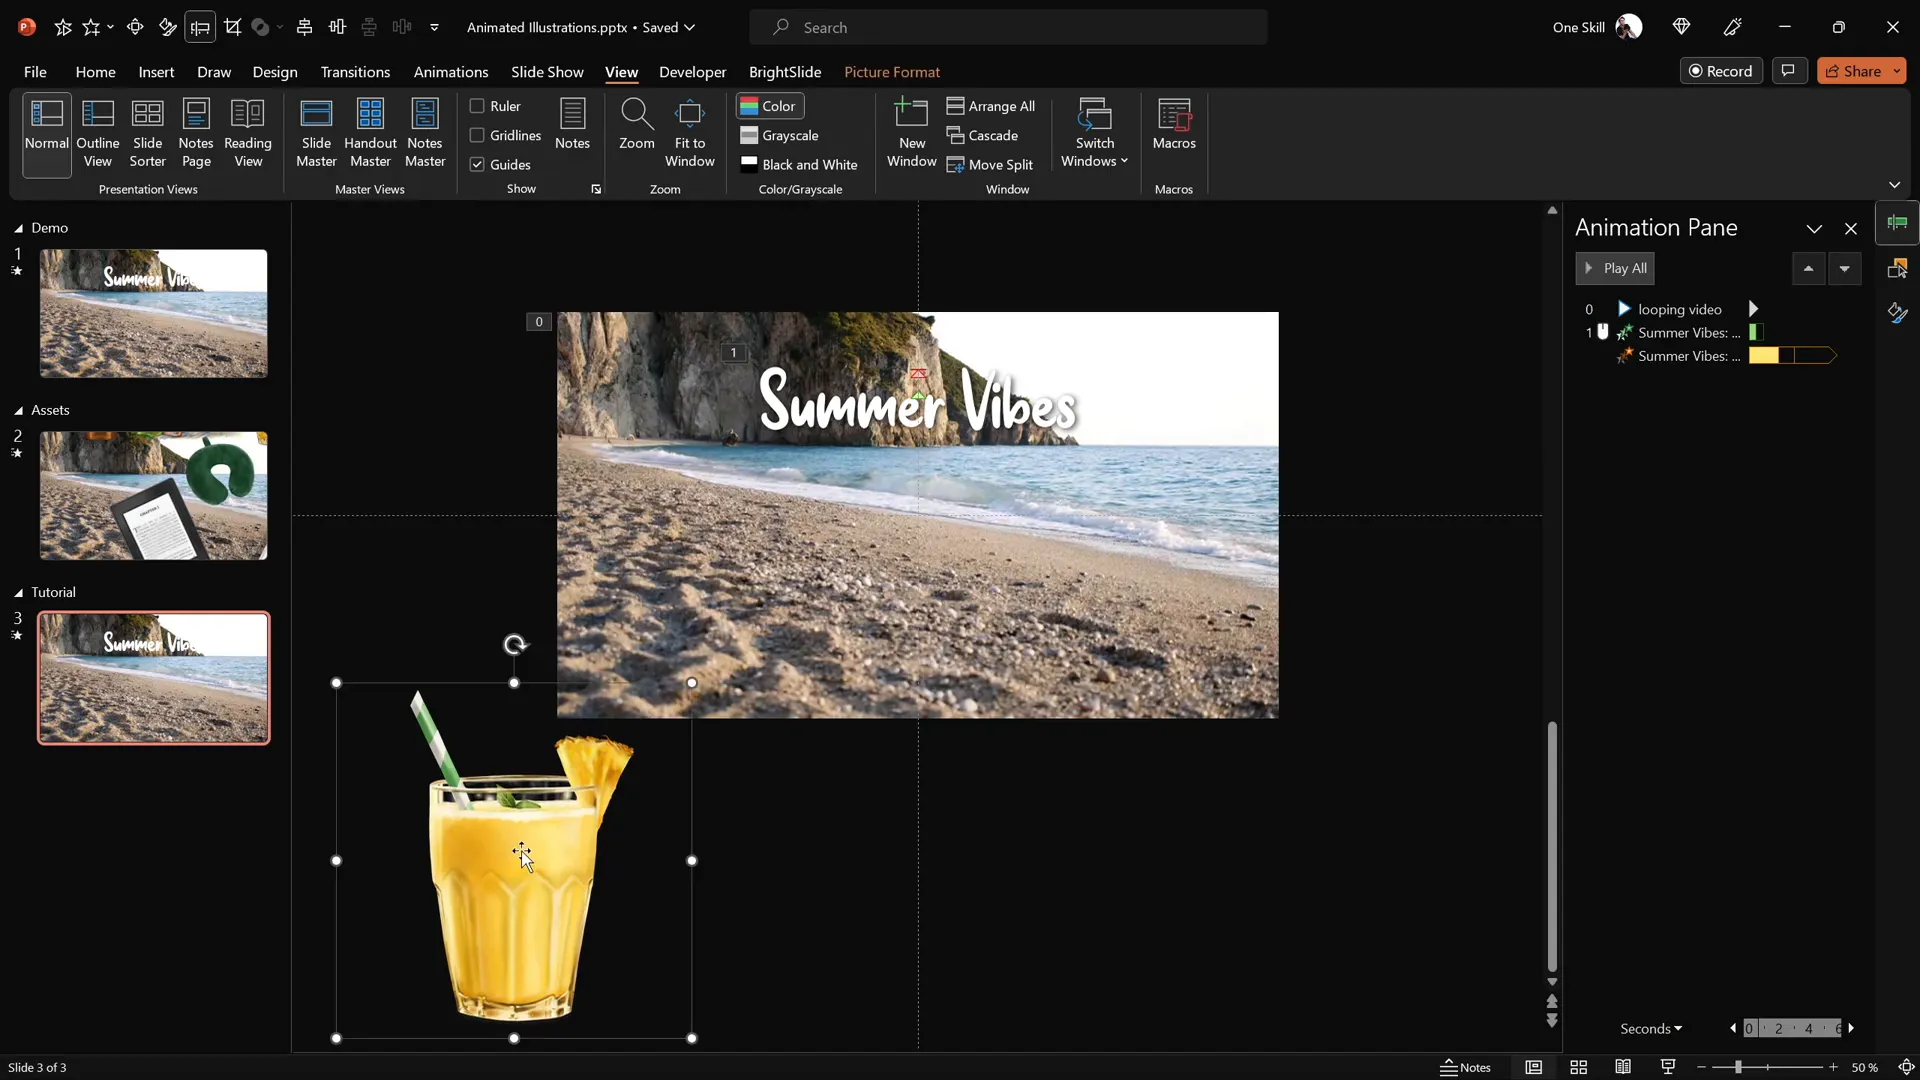
Inserting and Positioning Illustrations
- Copy any illustration from your collection (e.g., a cocktail glass).
- Paste it onto your slide and position it in a corner (e.g., bottom-left).
- Activate slide guides for precise alignment by enabling them in the View tab.
Adding Motion Path Animation
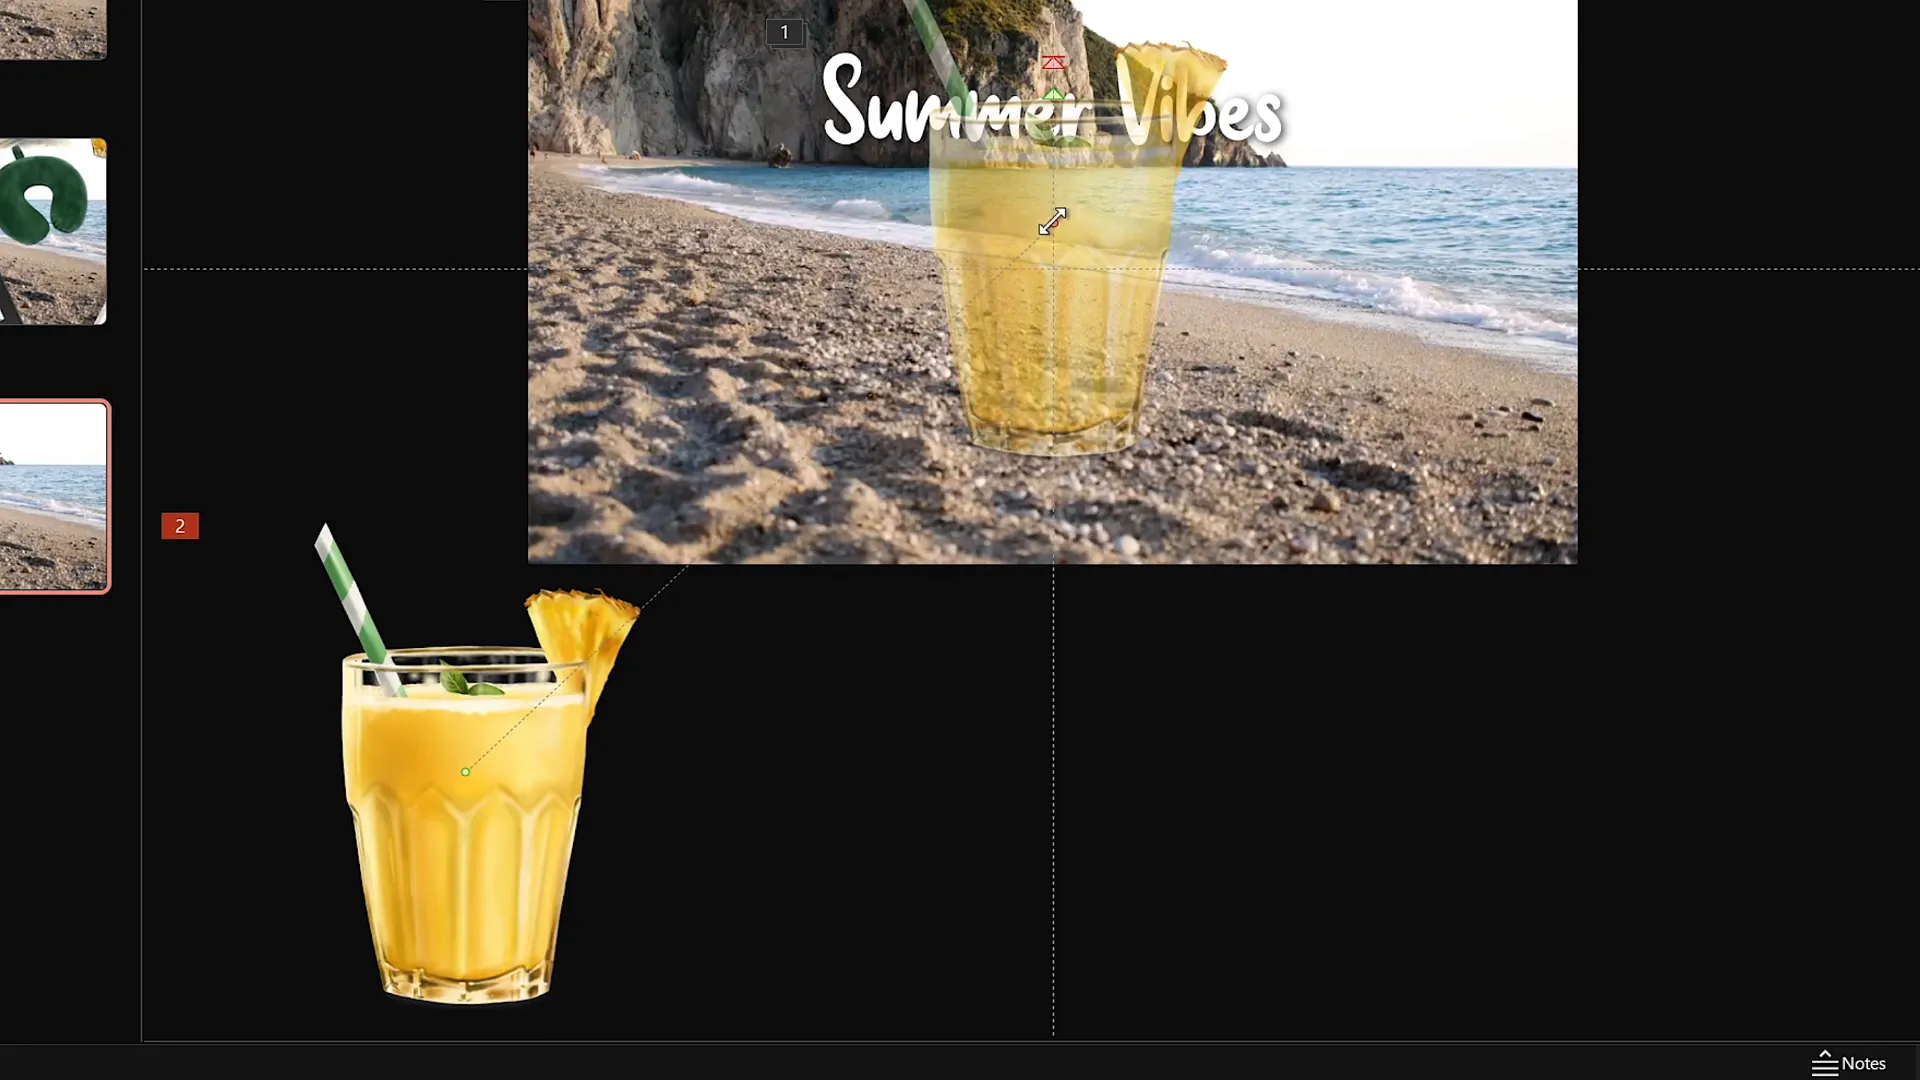
To make the illustration move smoothly:
- Select the illustration.
- Go to the Animations tab and add a Motion Path: Line animation.
- Adjust the end point of the motion path to a position just above the slide center.
- Reverse the motion path so the animation starts at the slide center and moves outward to the illustration’s final position.
- Set the motion path animation to start With Previous and duration to 4 seconds.
- In the Effect Options, apply a Smooth Start for a natural movement.
- Set the animation to repeat Until End of Slide for continuous looping.
Adding Zoom Entrance Animation to Illustrations
To improve the visual impact, add a zoom entrance animation so the illustration grows as it moves:
- Add a Basic Zoom entrance animation to the illustration.
- Set this animation to start With Previous and duration to 4 seconds (matching the motion path).
- Ensure the zoom animation plays before the motion path animation in the Animation Pane.
- Set it to repeat Until End of Slide to loop continuously.
This layered animation creates a natural effect where the illustration appears from the center and grows as it moves to its position.

Duplicating Animations with Different Illustrations and Delays
To build complexity and variety in your animation scene, replicate the animation effects on other illustrations, adjusting their starting positions and delays:
| Illustration | Position on Slide | Animation Delay | Animation Order |
|---|---|---|---|
| Cocktail Glass | Bottom Left | 0 seconds (start immediately) | First |
| Umbrella | Bottom Right | 1 second | Second |
| Sunscreen Bottle | Near Umbrella, rotated | 2 seconds | Third |
| Hat | Near Umbrella | 3 seconds | Fourth |
Use the Animation Painter tool to copy animations from one illustration to another efficiently:
- Select the illustration with the desired animations (e.g., the cocktail glass).
- Click the Animation Painter icon.
- Click the target illustration to apply the same animations.
- Adjust the motion path start position and delay as needed for variety.
Finally, organize the layering of illustrations in the Selection Pane to ensure the correct stacking order, so no illustration unintentionally obscures another.
Animation Tips and Best Practices
Creating smooth and professional animations in PowerPoint requires attention to detail and some best practices. Here are key tips from the tutorial to help you master looping animations:
- Loop Animations Seamlessly: Use the Repeat Until End of Slide option to keep animations running continuously without breaks.
- Coordinate Animation Timing: Use delays strategically to stagger animations and avoid cluttered movements.
- Use Motion Paths Creatively: Reverse motion paths to control animation direction and starting points.
- Combine Entrance and Motion Animations: Layer zoom entrance with motion paths for more dynamic effects.
- Prevent Unwanted Click Interactions: Use transparent shapes to block clicks on interactive elements like videos.
- Use Slide Guides and Selection Pane: Align elements precisely and manage layering order effectively.
By following these tips, you can create complex, looping animations that appear effortless and professional.
Conclusion and Additional Resources
Congratulations! You’ve now learned how to craft a stunning PowerPoint slide featuring a looping video background, animated wavy text, and various hand-drawn illustrations moving in seamless loops. This tutorial not only enhances your PowerPoint presentation skills but also equips you with creative animation techniques that can be adapted for any theme or presentation style.
A special thanks to Raminta for providing the beautiful summer illustrations that add charm and personality to this project. Be sure to check out her Etsy store for more inspiring artwork.
Remember, the key to mastering PowerPoint presentation skills lies in experimentation and practice. Try applying these techniques to your own topics, whether it’s a travel destination, a business pitch, or a personal project.
For more tutorials and templates, consider subscribing to One Skill PPT on YouTube and explore their rich library of PowerPoint resources.
Frequently Asked Questions (FAQ)
What version of PowerPoint is required for these animations?
This tutorial uses Microsoft PowerPoint 365, which supports advanced animations and video playback features. Earlier versions may have limited capabilities.
Can I use these animation techniques for themes other than summer?
Absolutely! While the tutorial uses summer-themed assets, the animation techniques are universal and can be applied to any topic or illustration set.
How can I prevent my video background from being clickable during the presentation?
Add a transparent rectangle shape covering the entire slide with 100% transparency and no outline. This blocks mouse clicks from interacting with the video.
Where can I find the summer illustrations used in this tutorial?
The illustrations are created by Raminta and are available for purchase on her Etsy store via the link in the video description.
Can I loop animations indefinitely in PowerPoint?
Yes. Use the animation pane’s timing settings to set animations to repeat until the end of the slide, creating infinite loops during your presentation.
Is it possible to customize the wave height of the animated text?
Yes, PowerPoint allows you to adjust the amplitude of the wave animation in the effect options, giving you control over how high or subtle the text waves.
How do I ensure my animations run smoothly without glitches?
Make sure to use consistent animation durations, avoid overlapping conflicting animations, and test your slide in full-screen presentation mode. Also, keep your PowerPoint software updated.
Can these animation techniques be used in Google Slides?
Google Slides has more limited animation capabilities compared to PowerPoint. While some effects can be replicated, the advanced motion paths and looping video background features may not be fully supported.
How do I add delays between animations?
In the Animation Pane, select the animation and set the Delay property under timing options. This staggers the animations and adds variety to your slide.
Where can I learn more about PowerPoint presentation skills?
Explore channels like One Skill PPT on YouTube and blogs such as HubSpot’s marketing blog for detailed tutorials, templates, and design tips to improve your PowerPoint skills.


