
PowerPoint is a tool often underestimated for its creative potential. But with the right skills, it can bring dynamic, engaging visuals to life — even 3D-like animations without using actual 3D models! In this guide, you’ll learn how to create a stunning laptop open animation using only simple shapes, photos, and PowerPoint’s powerful 3D rotation and morph transition features.
This tutorial will equip you with essential PowerPoint presentation skills that go beyond the basics, helping you build captivating animations that can be customized with your own text, images, or even videos. Whether you’re a beginner or an intermediate PowerPoint user, these step-by-step instructions will unlock new creative possibilities in your presentations.
Let’s dive into the world of PowerPoint animation mastery and explore how to craft an elegant, realistic laptop animation that you can tailor to your needs.
Table of Contents
- Getting Started: Setting Up Your Slide Background
- Building a Simple Laptop with Shapes
- Creating Realistic Rotation with Custom Rotation Centers
- Enhancing 3D Depth and Rounded Edges
- Aligning Components and Closing the Laptop
- Animating with Morph Transition
- Building a Realistic Laptop with Photos
- Customizing the Laptop Screen with Text, Pictures, and Videos
- Conclusion and Next Steps
- Frequently Asked Questions
Getting Started: Setting Up Your Slide Background
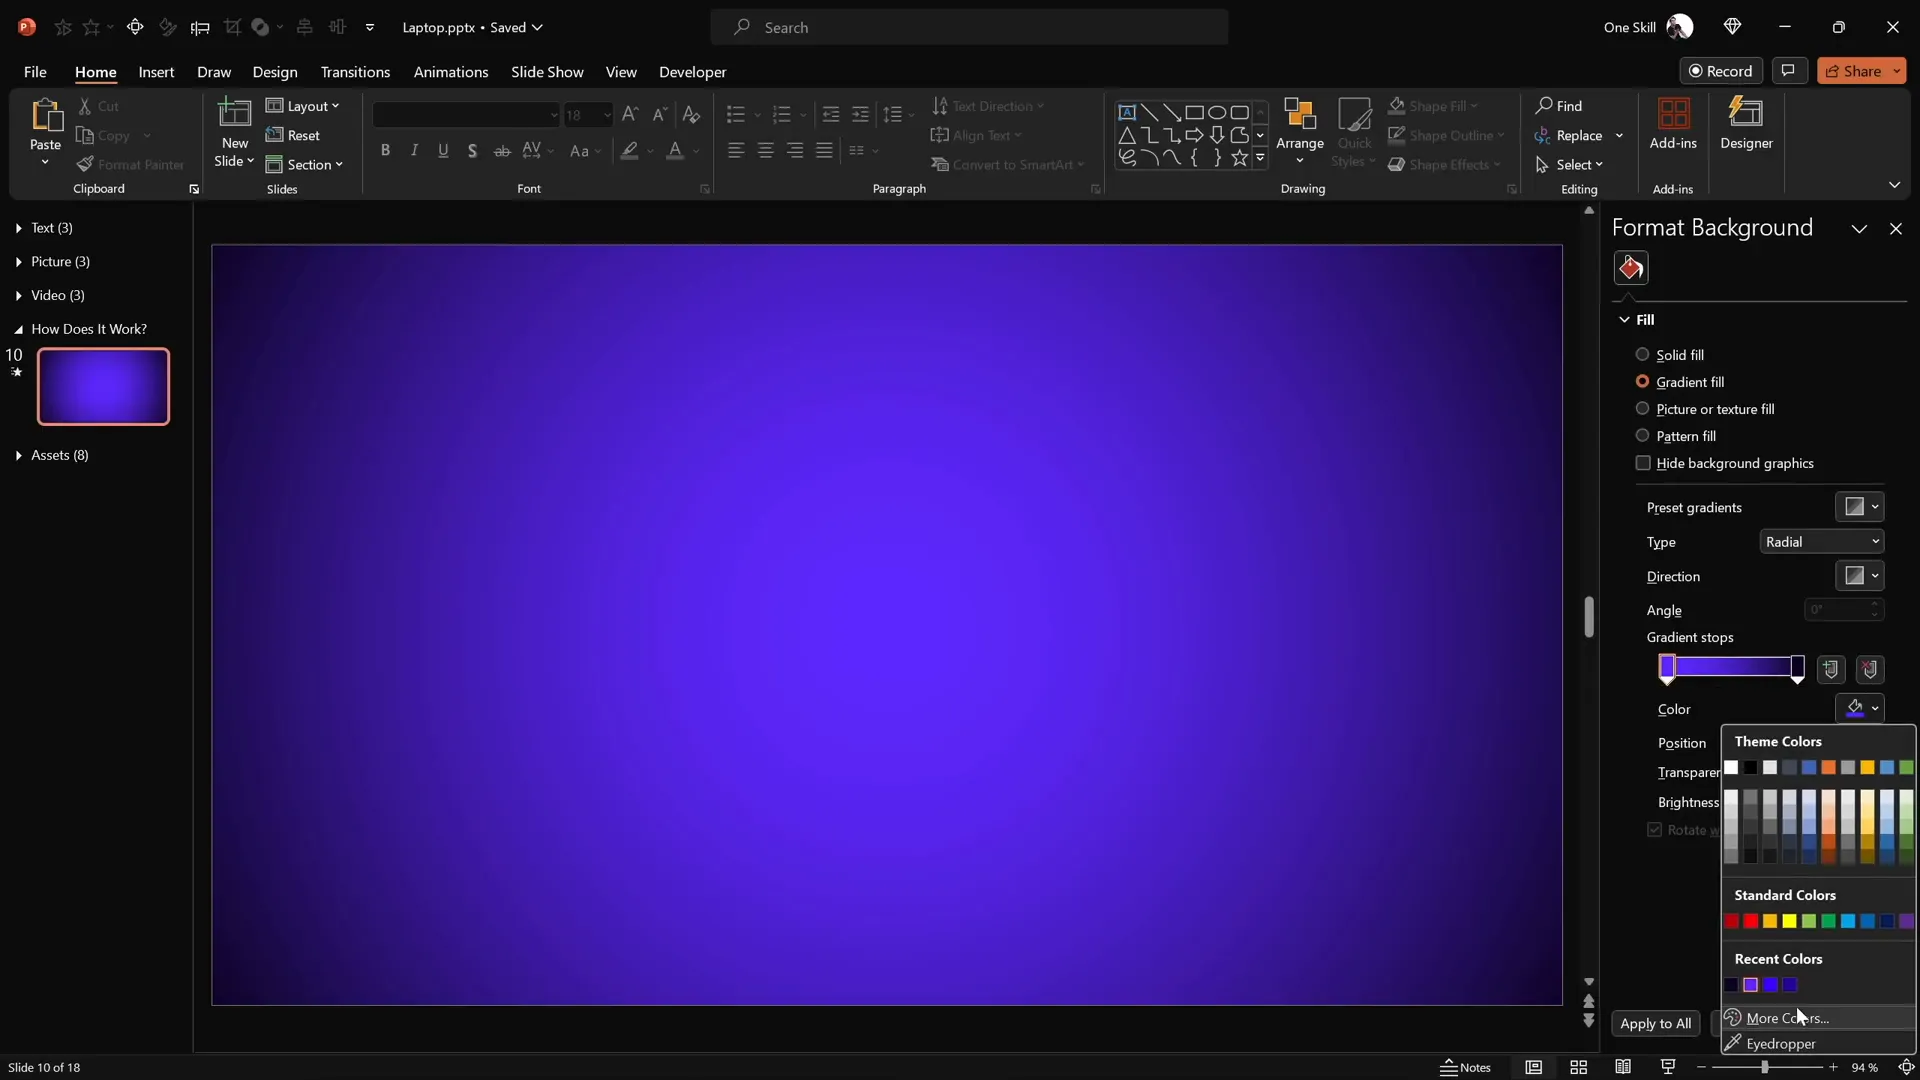
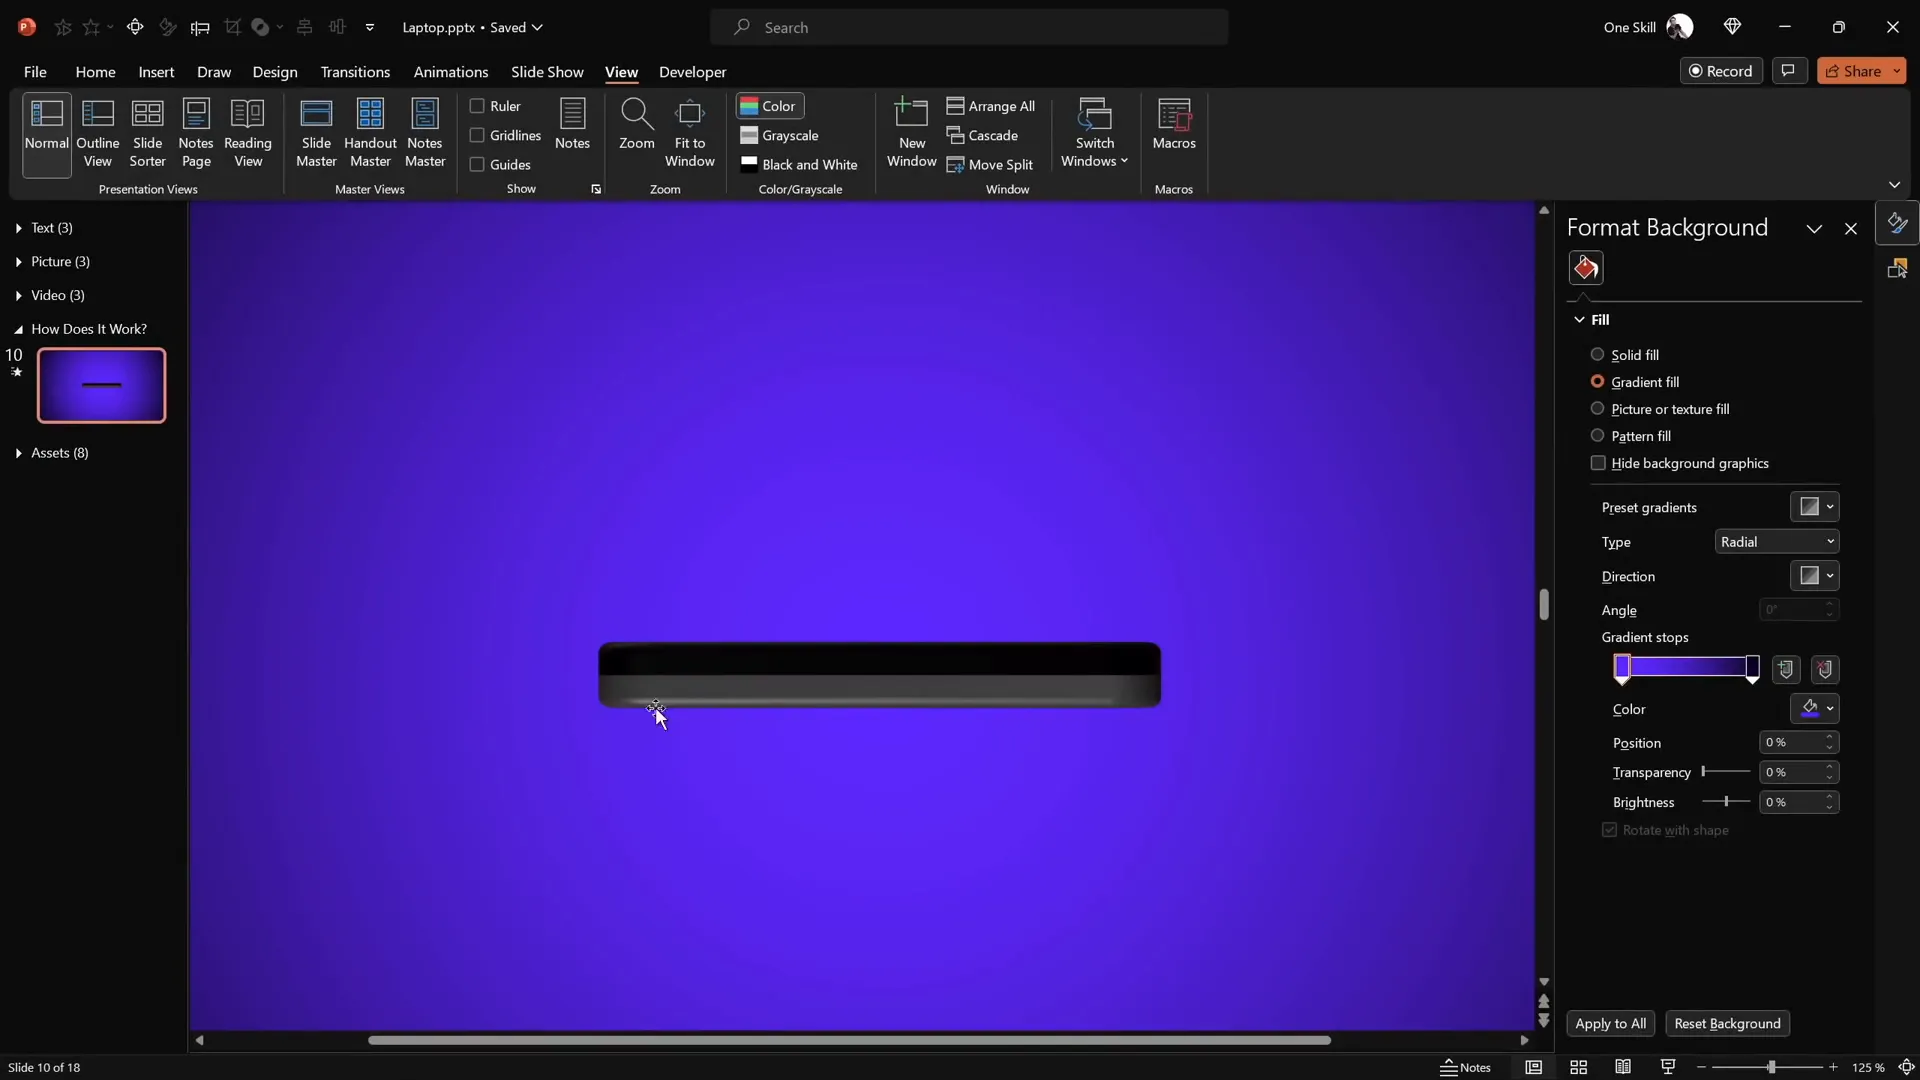
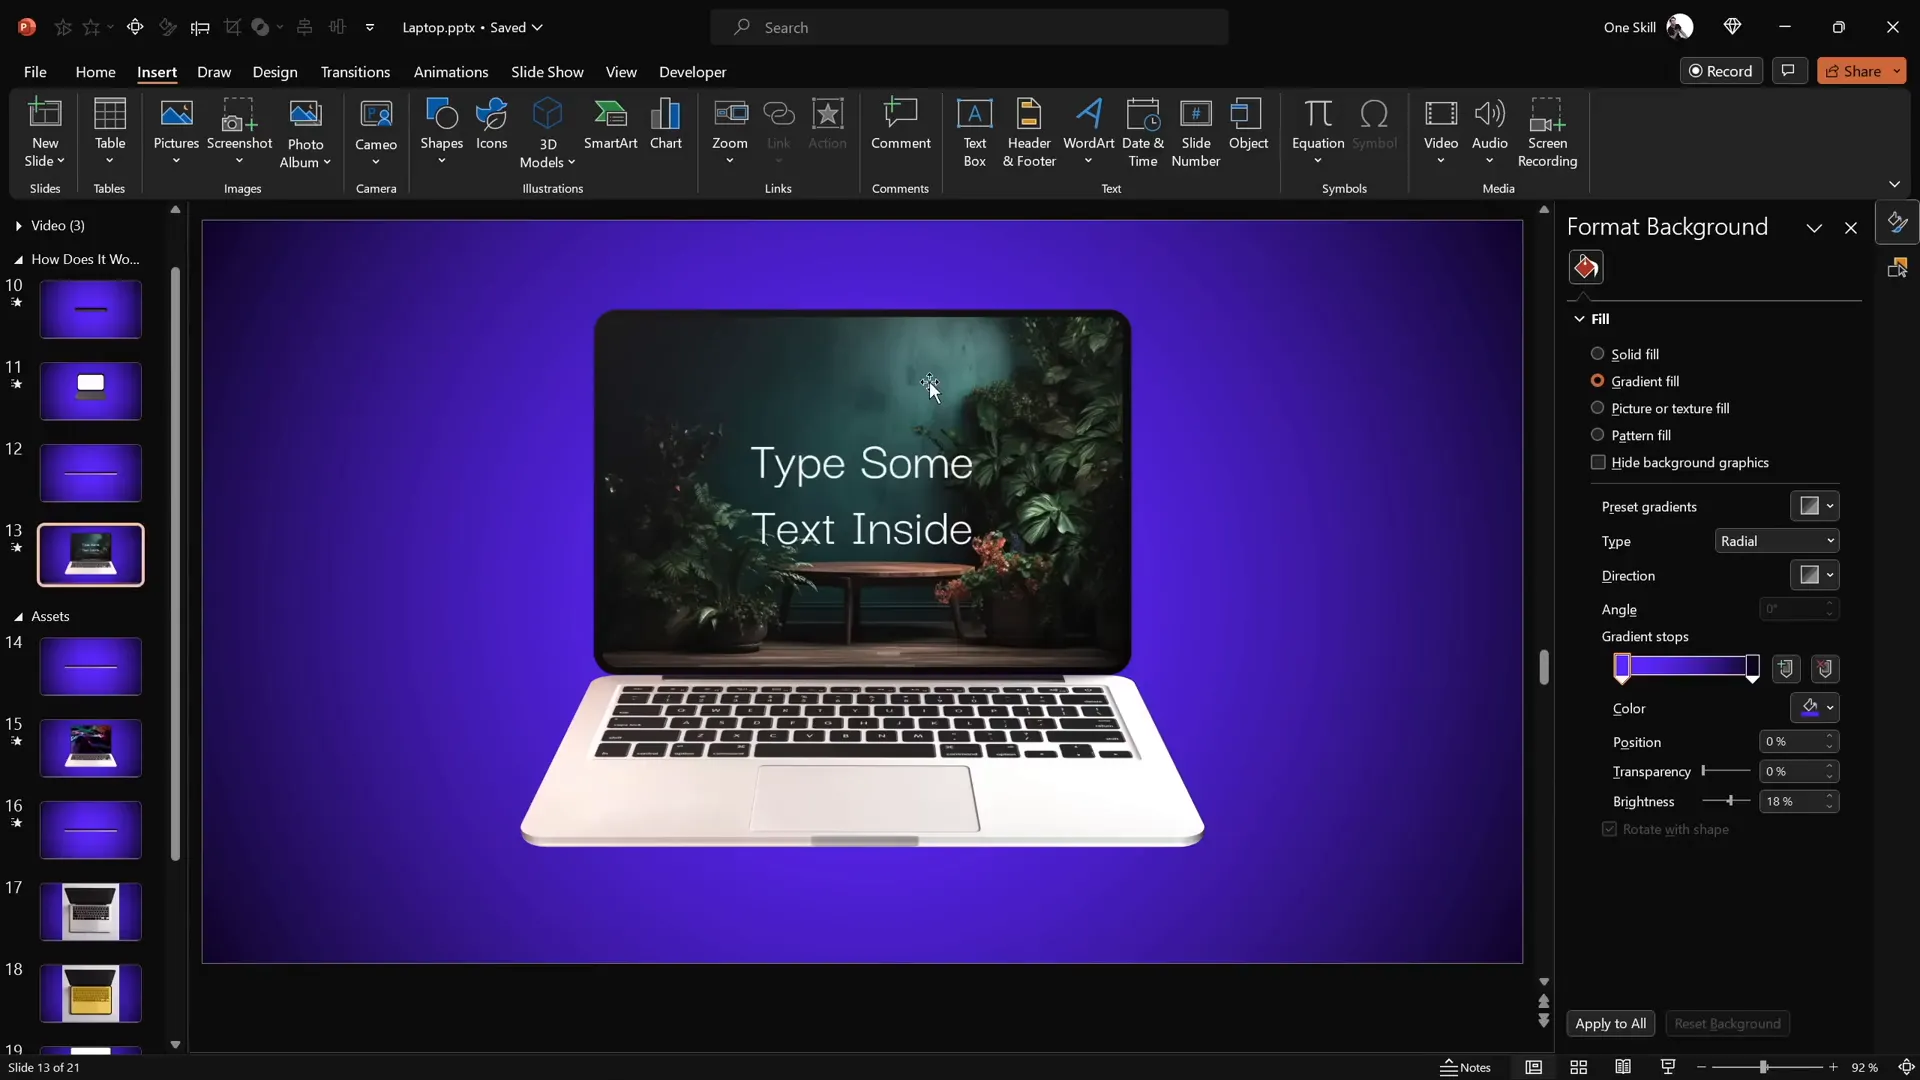
Before creating the laptop animation, a visually appealing background sets the stage for your design. A gradient fill adds depth and professionalism to your slide, though it’s optional for the animation itself.
To set the gradient background:
- Right-click on the slide and select Format Background.
- Choose Gradient Fill.
- Apply the following hex color stops for a smooth blend:
- First color:
#692dff - Second color:
#0d002c
- First color:
This gradient creates a deep, vibrant backdrop that complements the laptop animation.
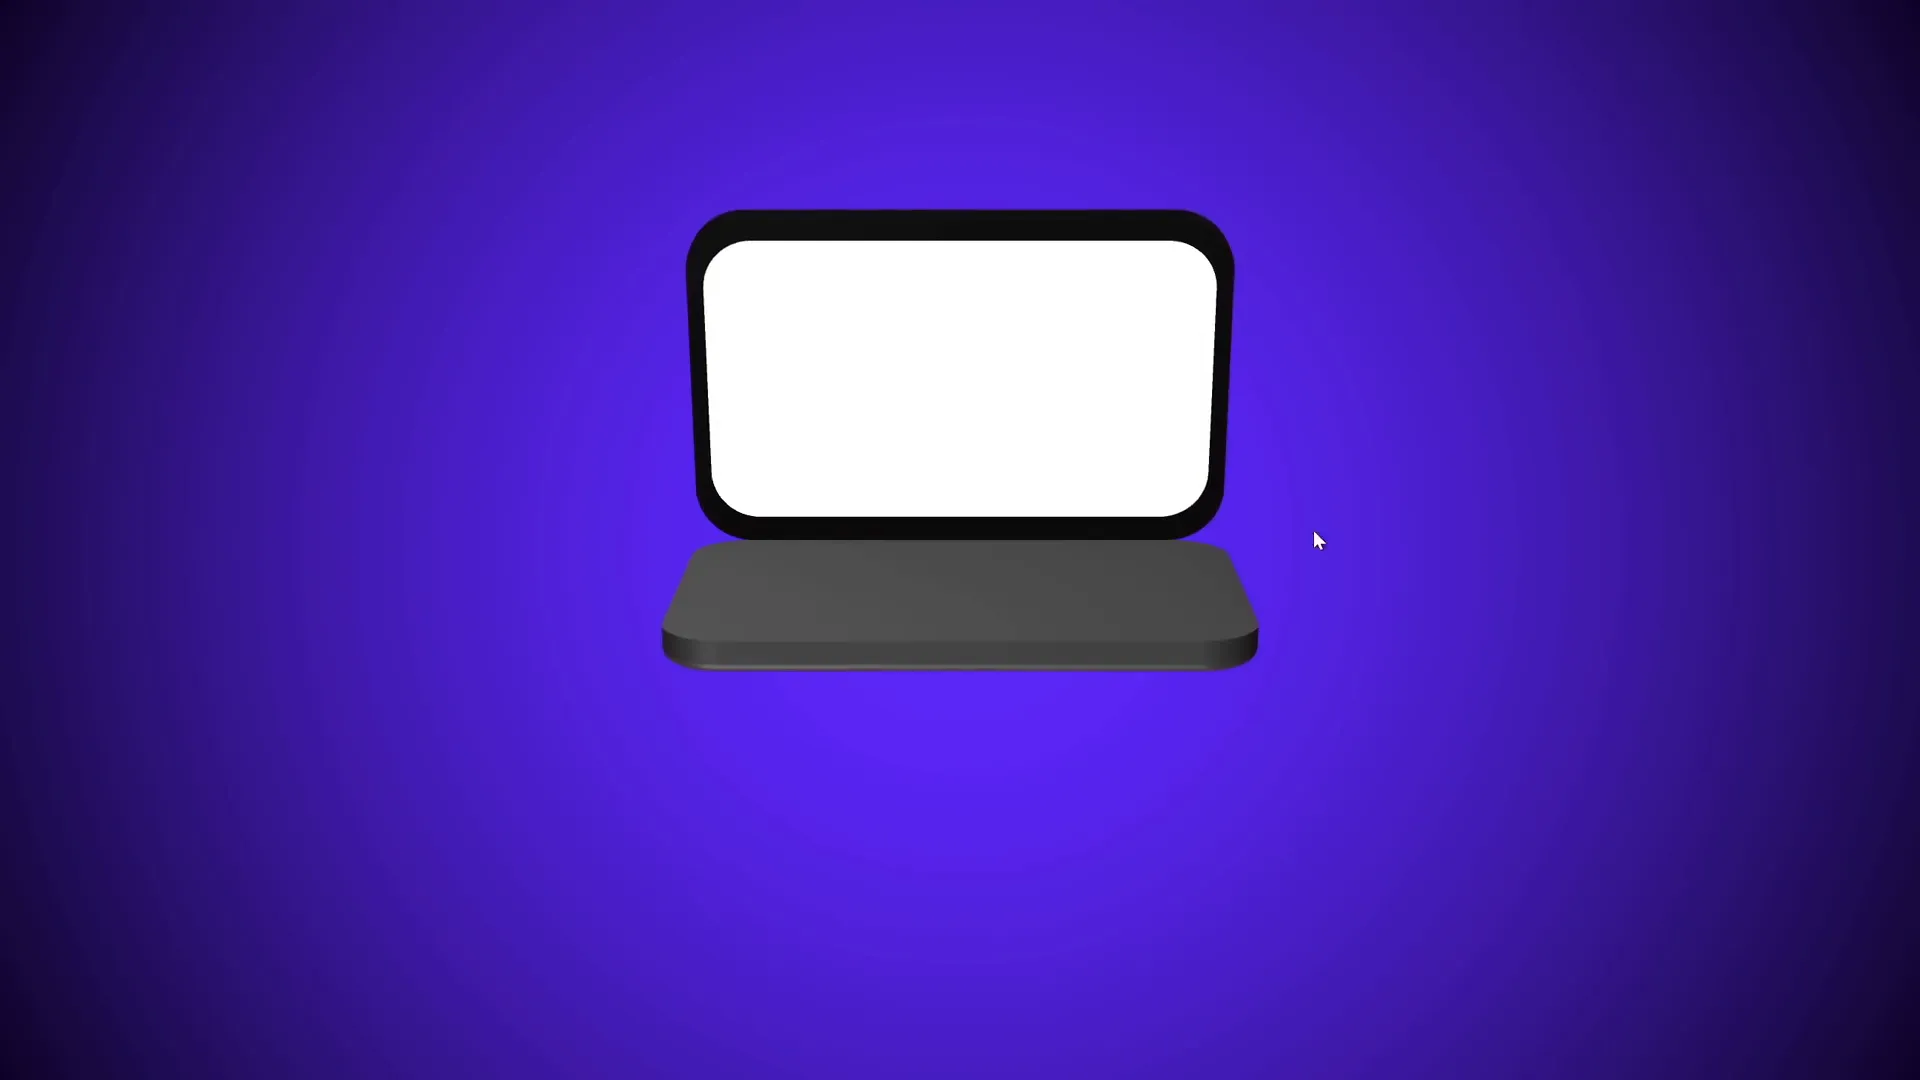
Building a Simple Laptop with Shapes
Now, let’s create the laptop using basic shapes — no 3D models required. This approach uses simple rounded rectangles and color fills to simulate laptop parts.
Step 1: Create the Keyboard
- Go to Insert > Shapes and select the Rounded Rectangle tool.
- Draw a rounded rectangle in the middle of the slide — this will be the keyboard.
- Remove any outline and set the fill color to a dark gray tone for realism.
Step 2: Create the Laptop Screen
- Duplicate the keyboard shape by holding Ctrl + Shift and dragging upwards.
- Change the fill color of this duplicate to black — this will be the laptop frame.
- Align it directly above the keyboard.
Step 3: Add the Screen Content Area
- Duplicate the black screen shape with Ctrl and drag it slightly to create a white rectangle inside the black frame.
- Resize and center the white rectangle to simulate the laptop screen’s display area.
- Select both black and white screen shapes and group them (Ctrl + G).
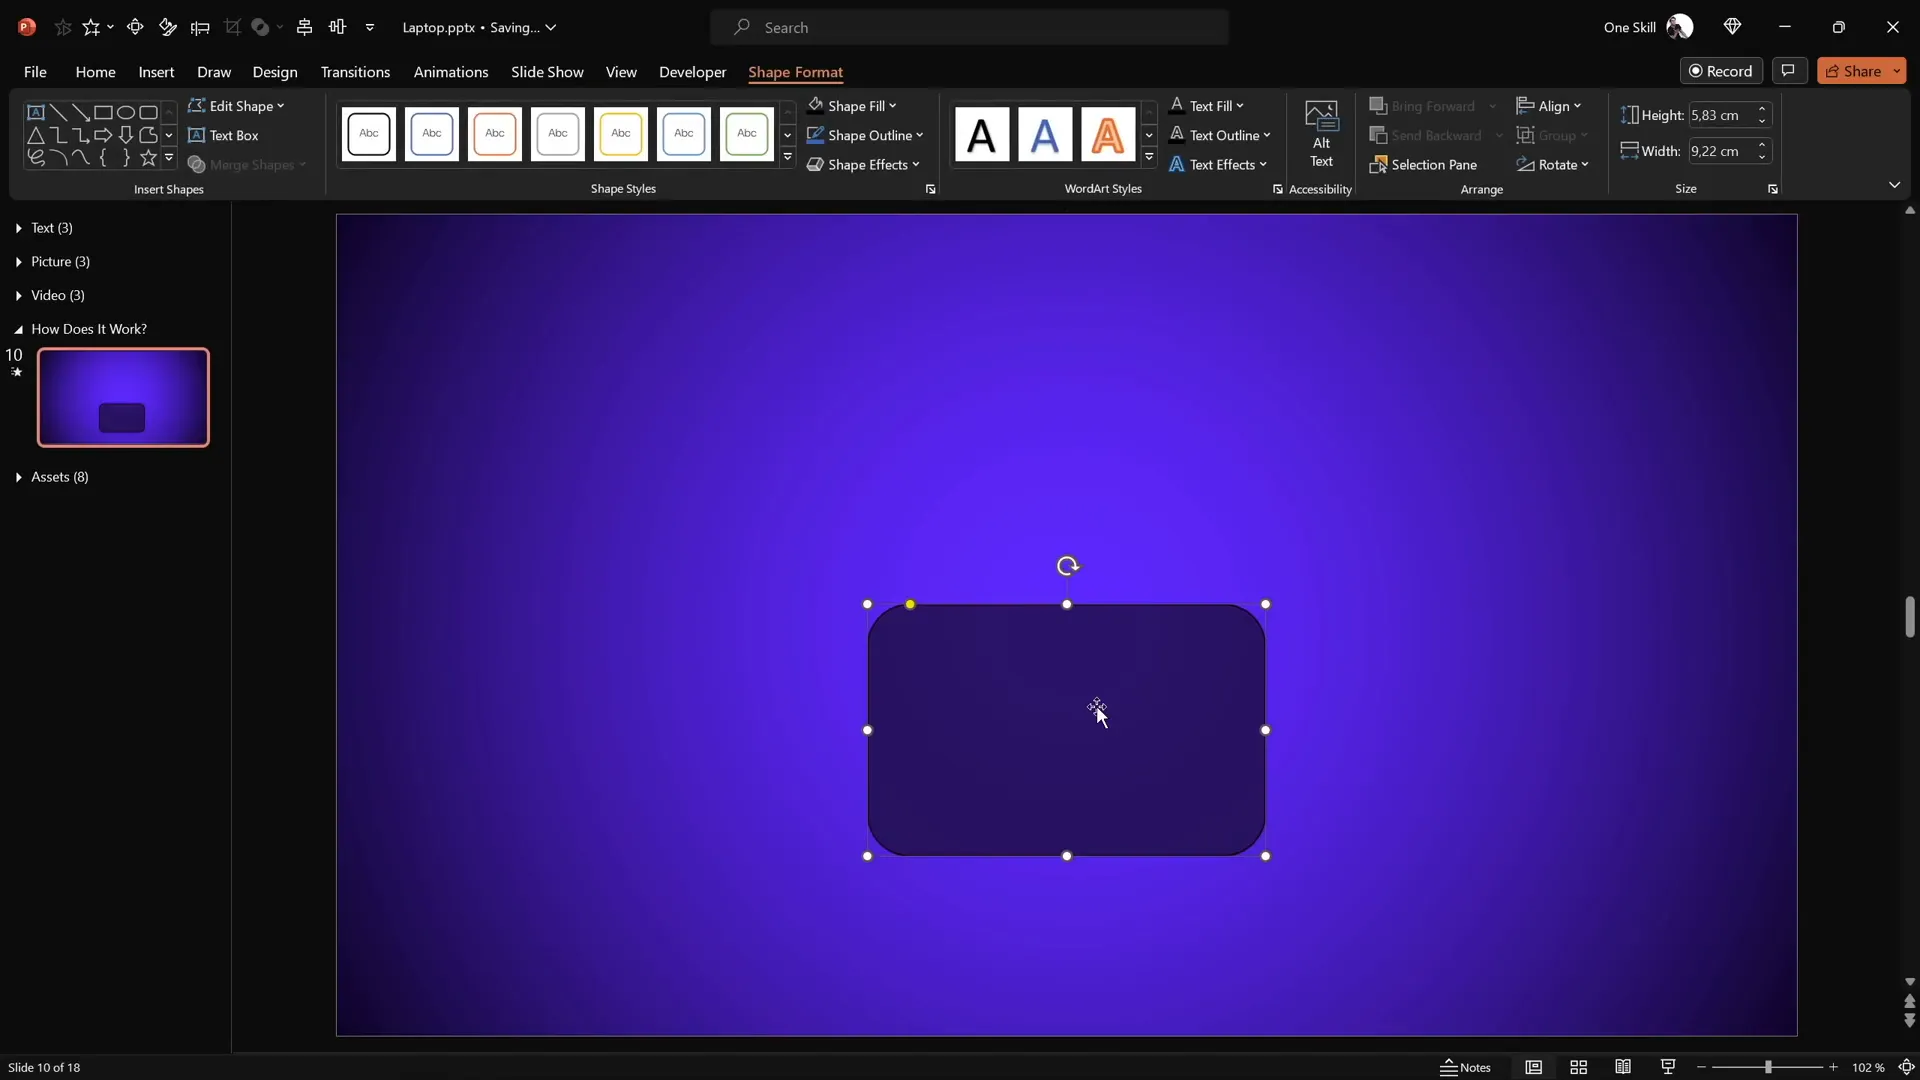
Creating Realistic Rotation with Custom Rotation Centers
When rotating shapes in PowerPoint, the default rotation axis is the center of the object. To achieve a realistic laptop open animation, the keyboard and screen must rotate along their connecting edge, not their center.
Understanding Default Rotation
If you apply a 3D rotation to the keyboard shape, it flips around its middle axis, which looks unnatural for a laptop hinge.
Setting a Custom Rotation Center
- Duplicate the keyboard shape and position the duplicate directly below the original, aligning their edges.
- Select both shapes and group them. PowerPoint sets the rotation axis at the center of this new group, effectively shifting the pivot point to the connecting edge.
- Make the duplicate shape invisible by selecting it, going to fill options, and choosing No Fill.
Now, when you rotate the grouped keyboard, it pivots along the edge, simulating a laptop hinge.
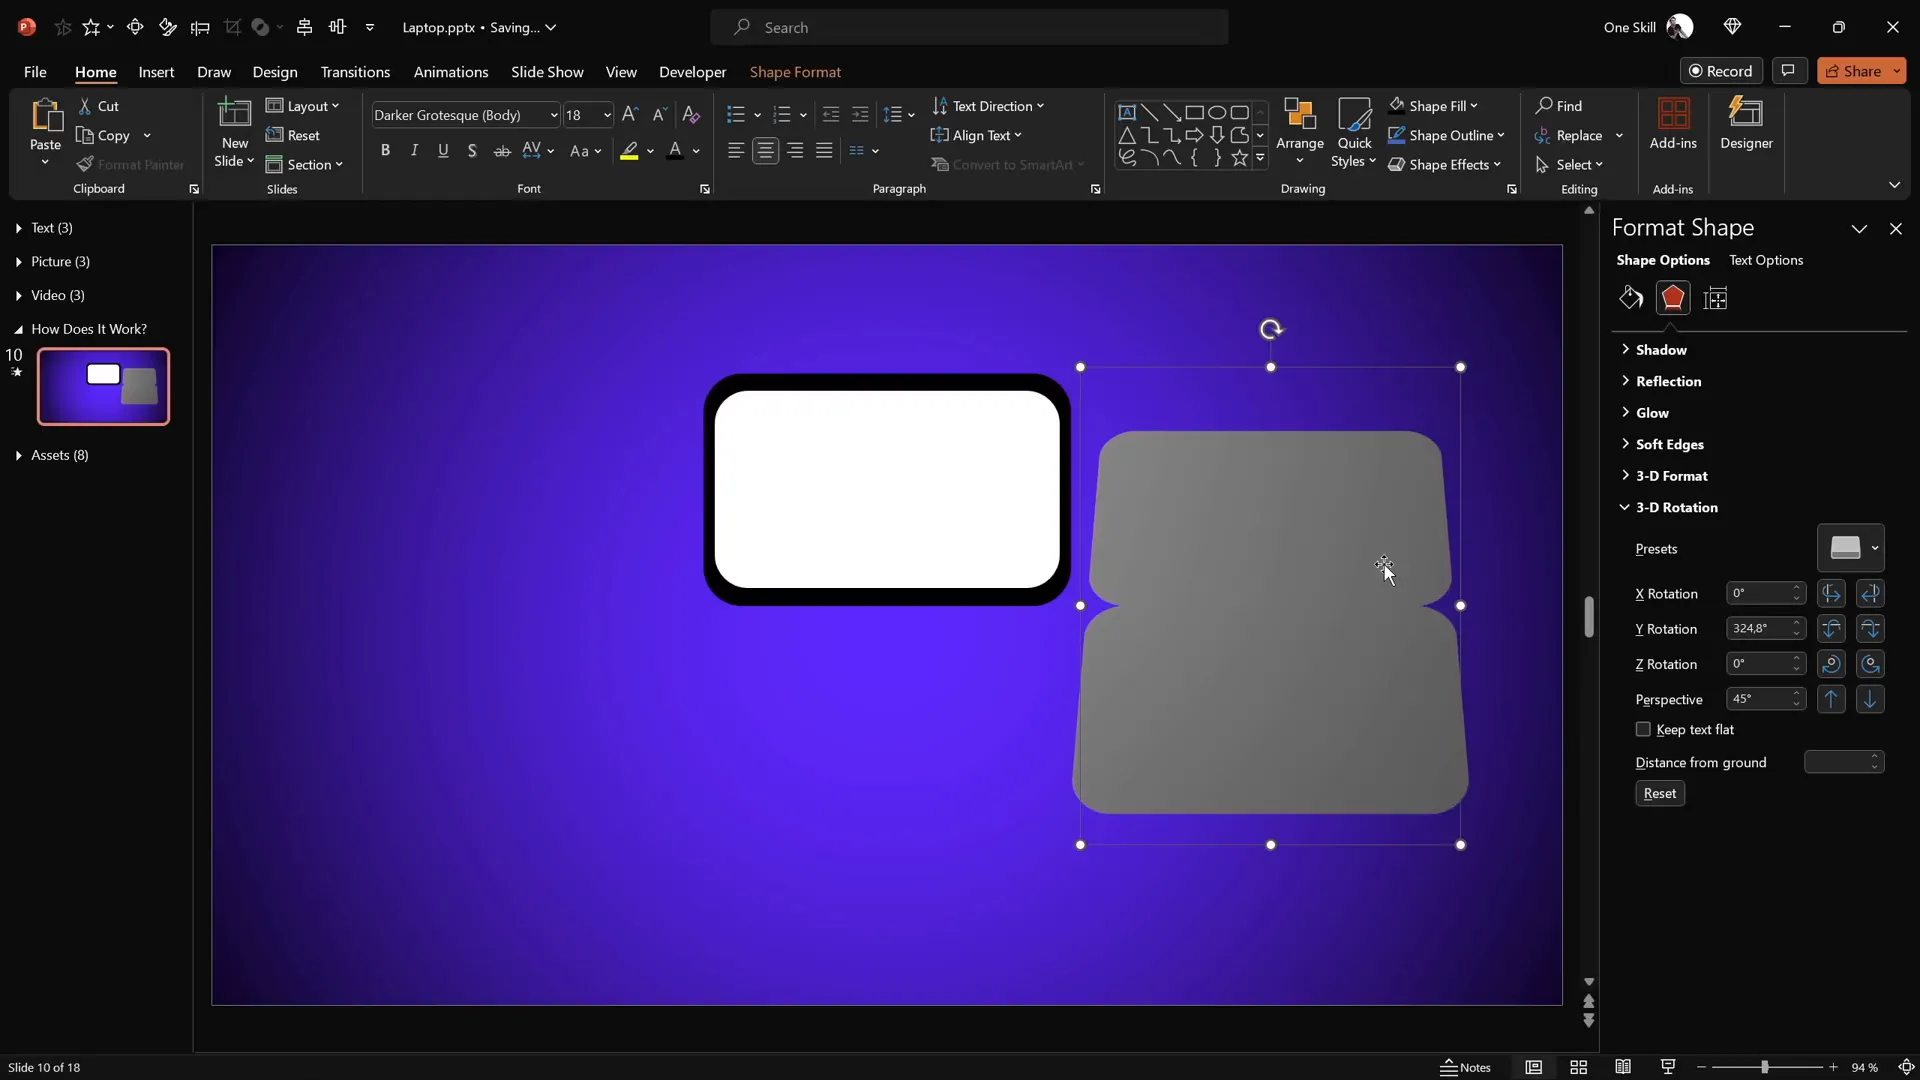
Enhancing 3D Depth and Rounded Edges
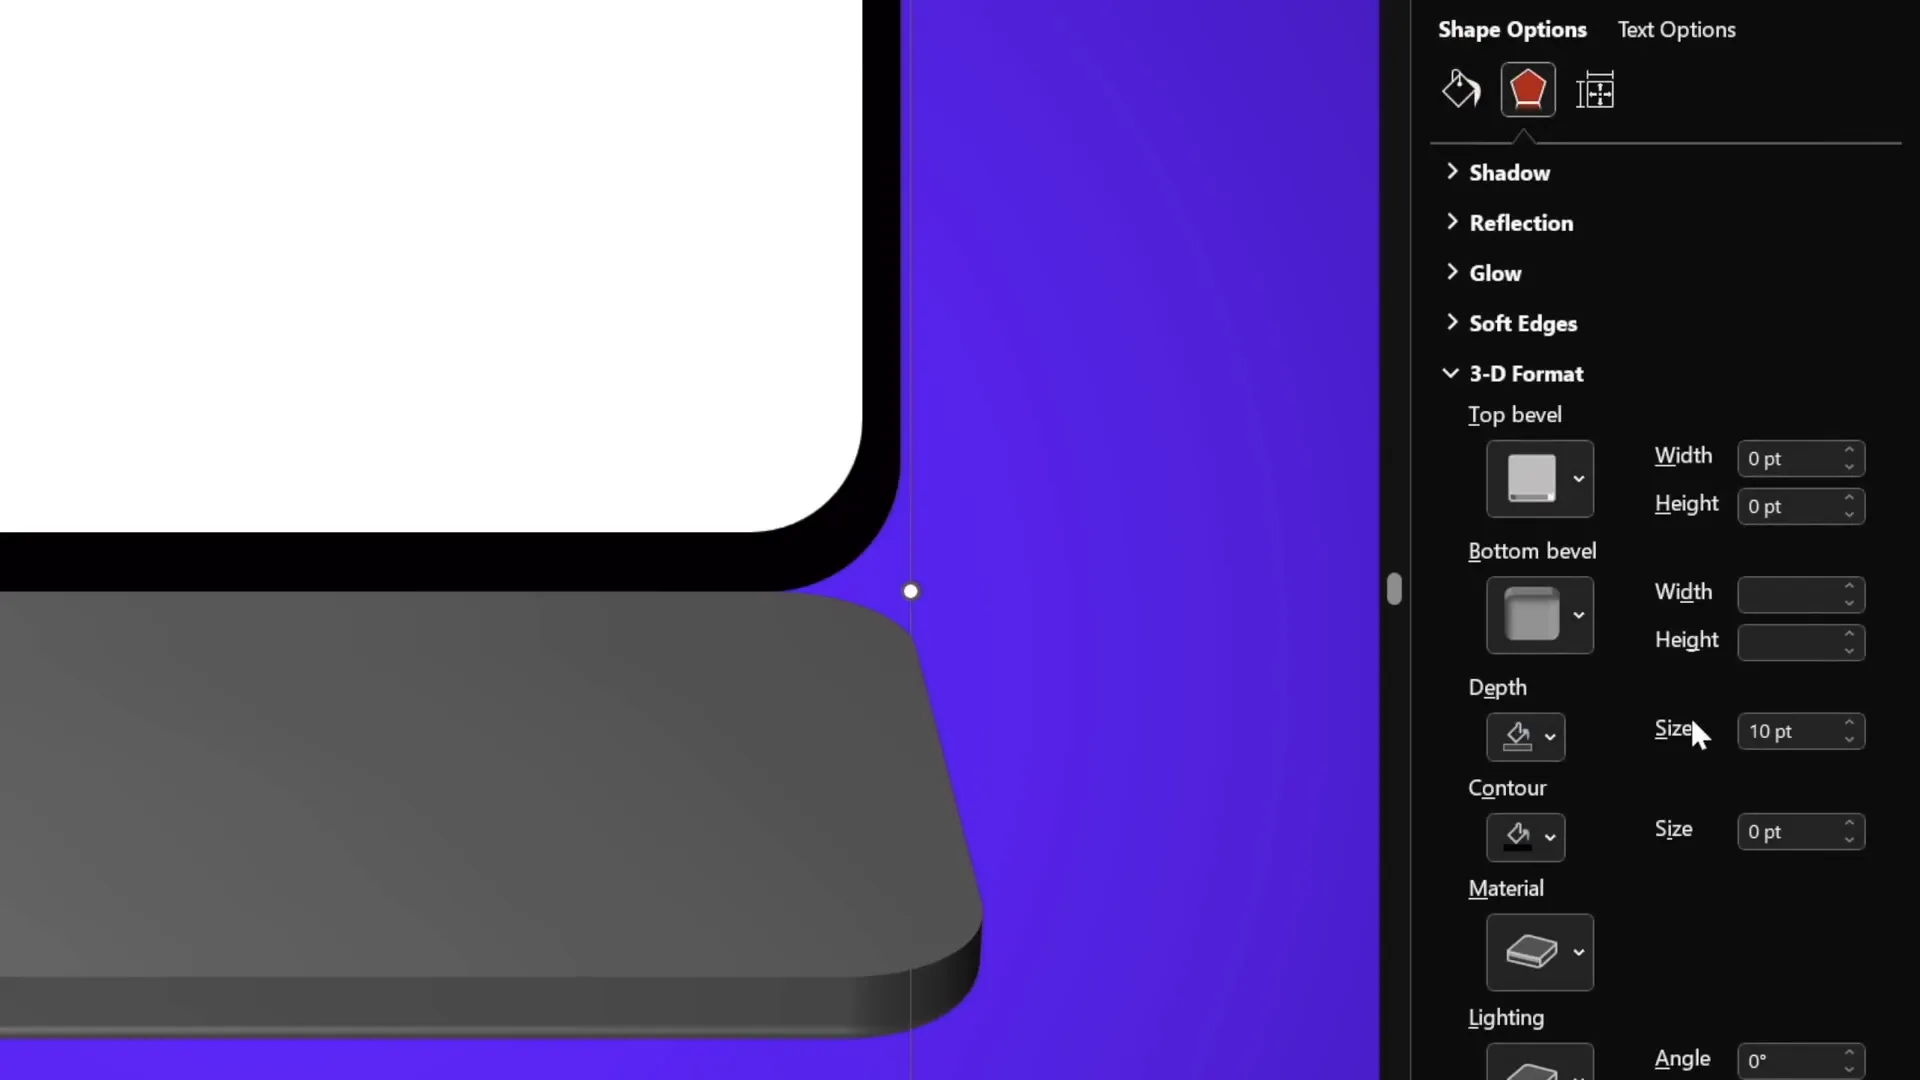
To make the laptop parts look more realistic, add 3D depth and rounded edges using PowerPoint’s 3D format options.
Adding Depth
- Select the keyboard shape.
- Go to Format Shape > 3D Format.
- Set the Depth to 10 points.
Rounding the Edges
- Within the 3D Format options, add a Bottom Bevel with width and height set to 5 points.
- This softens the edges, giving a rounded, polished look to the keyboard and screen.
Repeat the same steps for the screen shape to maintain a consistent appearance.
Aligning Components and Closing the Laptop
With the keyboard and screen shapes ready and formatted, align them perfectly and set the laptop to a closed position.
- Turn on slide guides to help with alignment.
- Select the grouped screen and keyboard shapes and align both to the center of the slide.
- Set the screen’s Y rotation to 90 degrees to make it vertical (closed).
- Set the keyboard’s Y rotation to 270 degrees to position it flat (closed).
This positioning closes the laptop perfectly, ready for animation.
Animating with Morph Transition
PowerPoint’s Morph Transition provides a smooth animation effect by transitioning between two slides with similar objects that have different positions or rotations.
Steps to Animate the Laptop Opening
- Duplicate the slide with the closed laptop.
- Apply the Morph transition to the new slide with a duration of 2 seconds.
- Select the screen shape and set its Y rotation to 0 degrees (fully open).
- Select the keyboard shape and set its Y rotation to 290 degrees (slightly lowered keyboard).
- Preview the slide show to see the laptop smoothly open.
This technique leverages PowerPoint’s morphing capabilities to create a realistic laptop opening animation using only simple shapes.
Building a Realistic Laptop with Photos
For a more realistic look, use a photo of a laptop instead of simple shapes. This section guides you through cropping and preparing the laptop photo for animation.
Step 1: Insert Laptop Photo
- Insert a top-view photo of a laptop (thanks to freepik.com for free images).
- Paste it onto your slide and position it centrally.
Step 2: Cut Out the Keyboard
- Insert a rounded rectangle shape over the keyboard area.
- Select the photo, then hold Shift and select the shape.
- Go to Shape Format > Merge Shapes > Intersect to crop the keyboard portion.
If you need precision, prepare the shape in advance and use it for cropping.
Step 3: Set Rotation Center for Keyboard
- Create a rectangle matching the keyboard’s dimensions positioned at the hinge edge.
- Group the keyboard photo and this rectangle to shift the rotation axis to the hinge.
- Make the rectangle invisible by setting no fill and no outline.
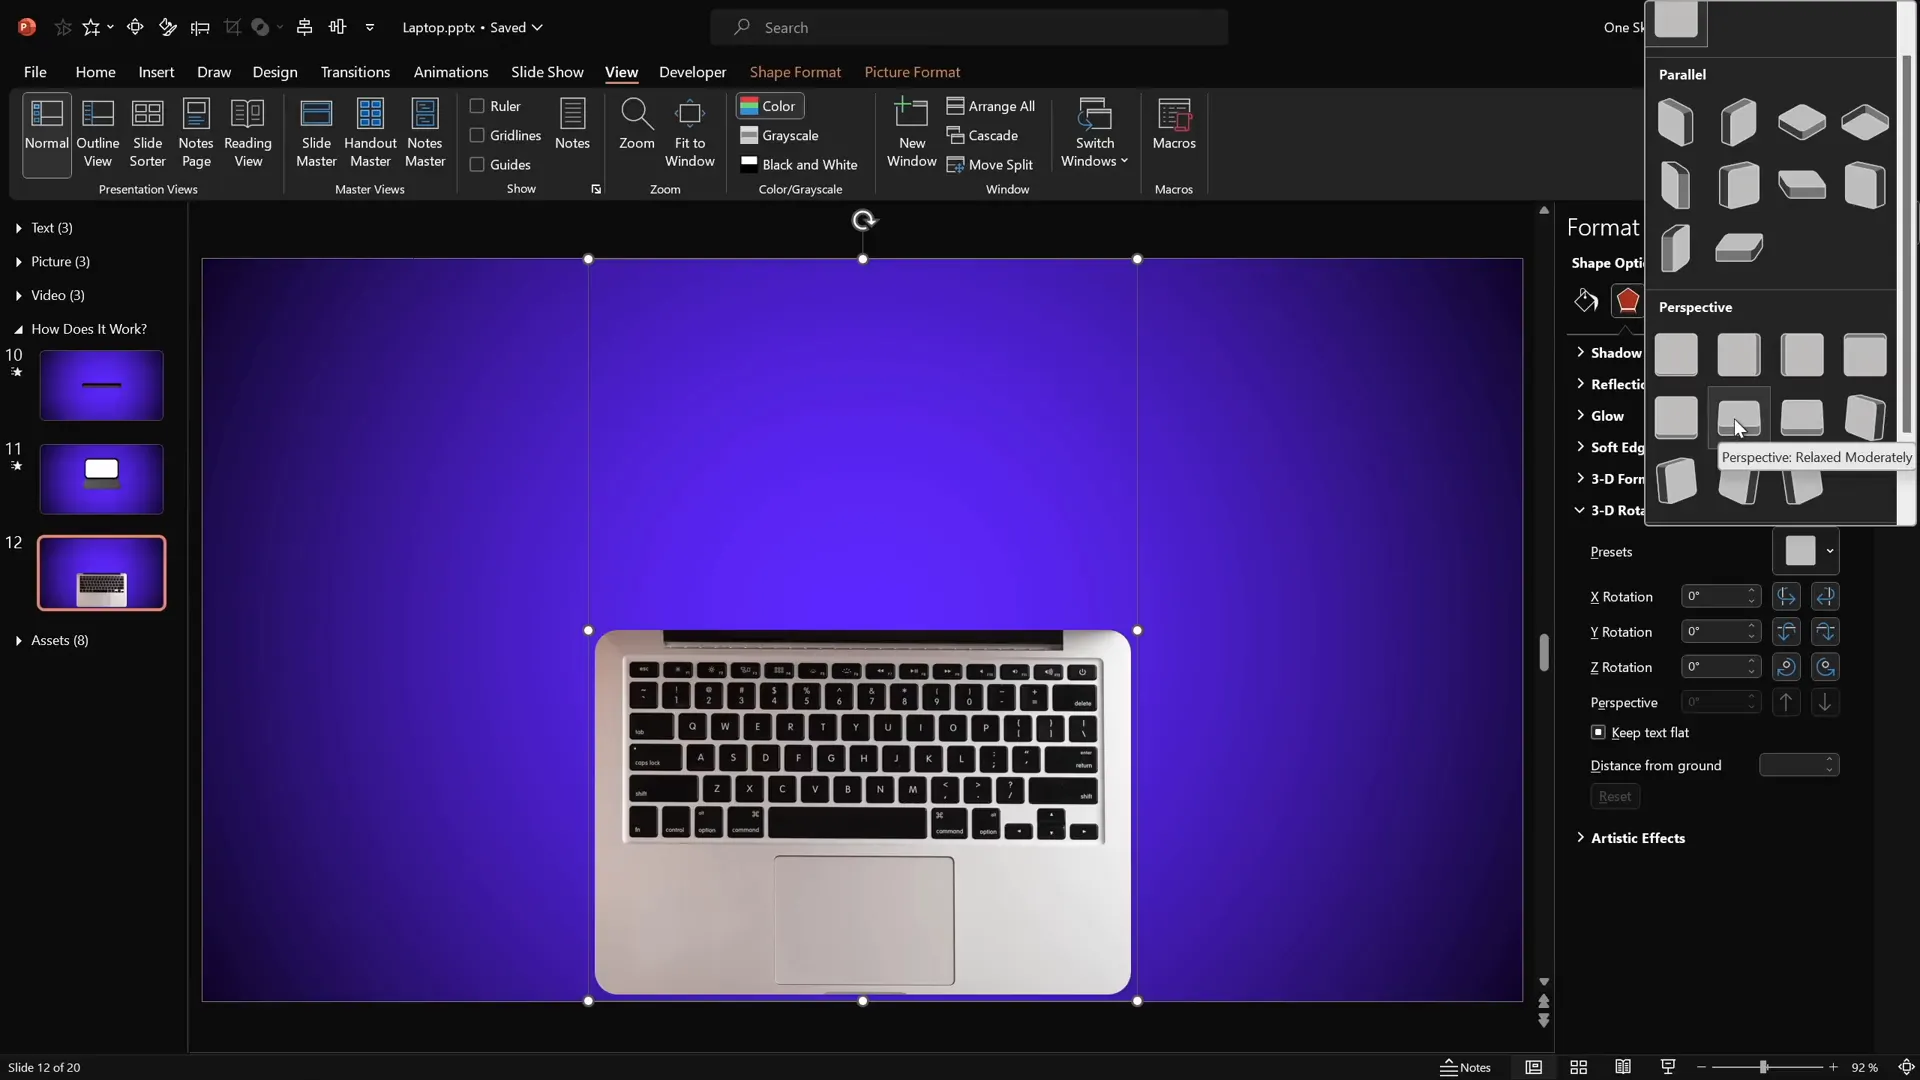
Step 4: Add 3D Rotation and Depth
- Apply perspective rotation presets and adjust Y rotation to simulate opening.
- Add 3 points of depth and 5 points bevel to soften edges.
Step 5: Prepare the Screen
- Create black and white rounded rectangles for the screen frame and display area.
- Ensure the black rectangle matches the keyboard’s cropped photo width for alignment.
- Group the two screen shapes and duplicate them to set a new rotation center.
- Make the duplicate shapes invisible as before.
- Apply the same 3D rotation and depth settings as the keyboard.
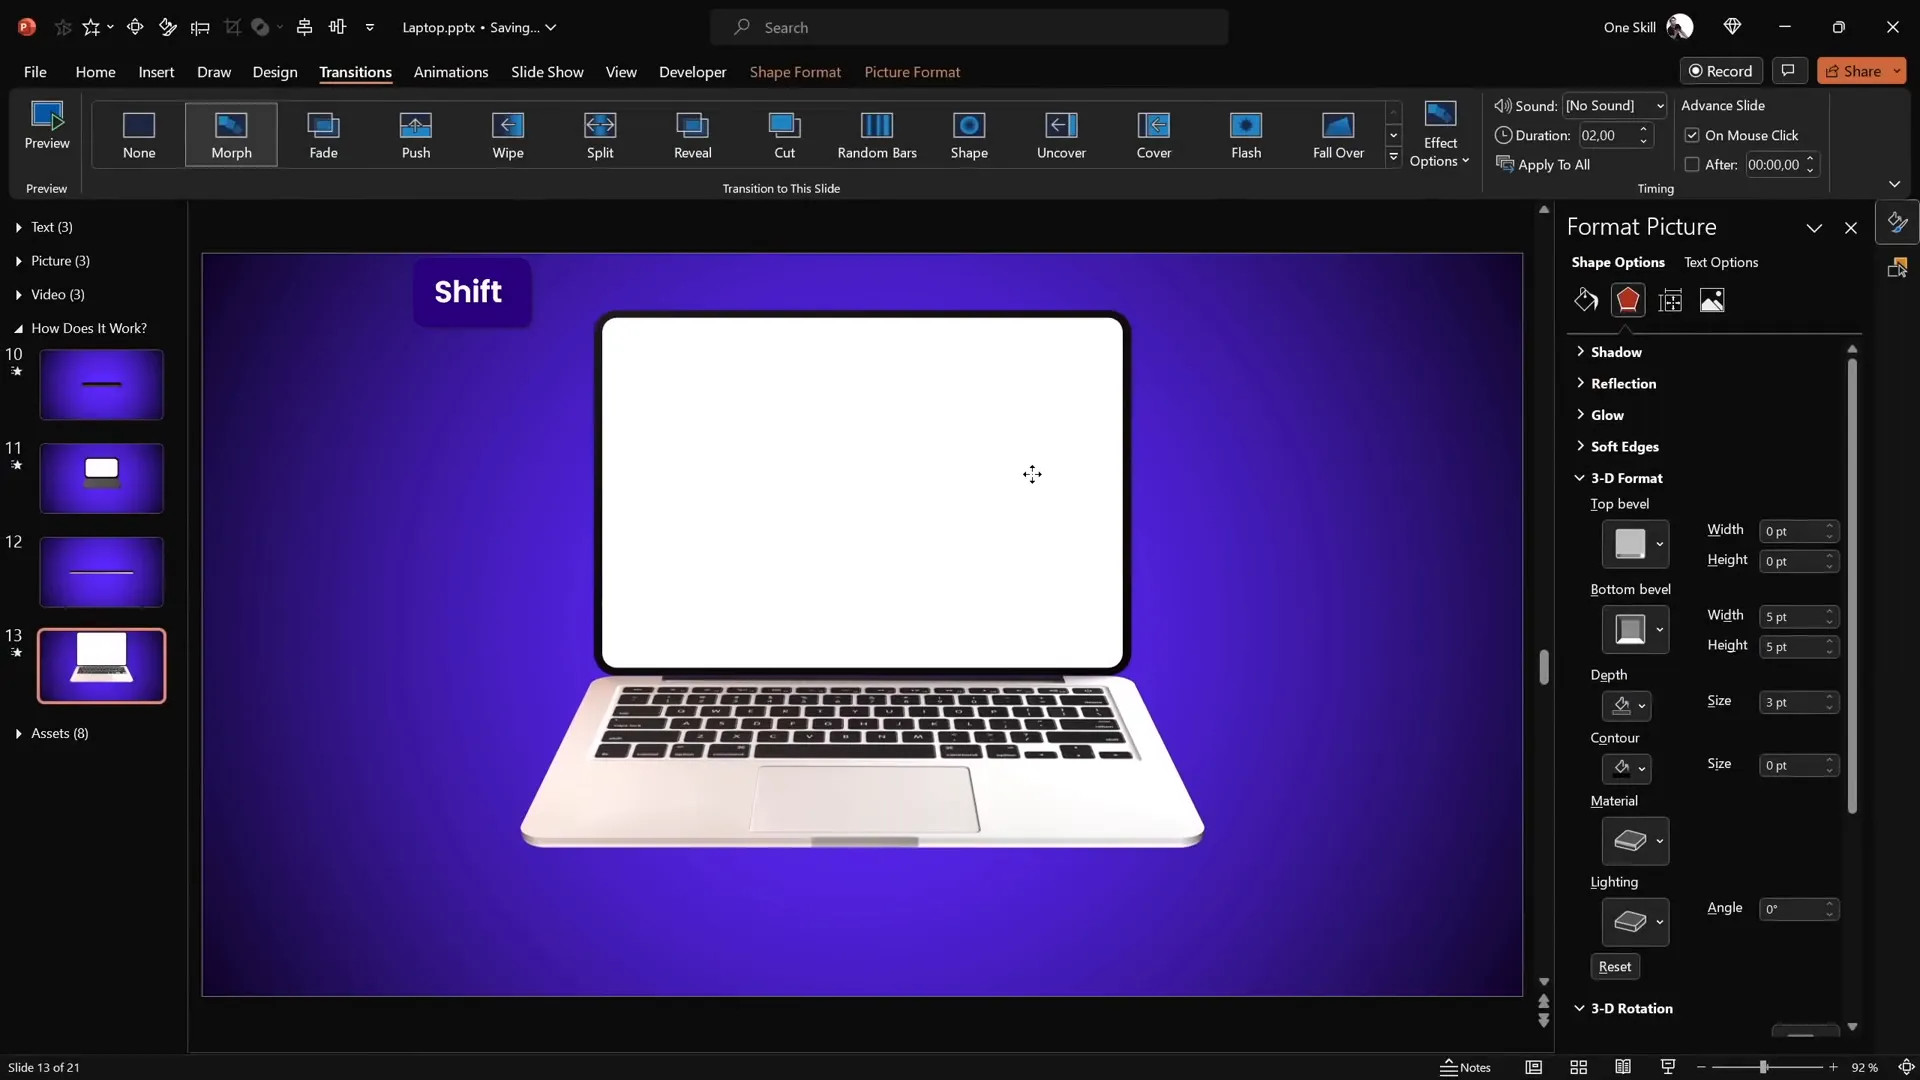
Step 6: Position and Animate
- Align the screen and keyboard groups centrally.
- Set the screen and keyboard to closed positions (90 and 270 degrees Y rotation, respectively).
- Duplicate the slide and apply the Morph transition.
- Change rotations on the duplicate slide to open positions (0 and 290 degrees).
Customizing the Laptop Screen with Text, Pictures, and Videos
One of the most exciting features of this animation is its full customizability. You can insert your own content inside the laptop screen — whether text, images, or even videos.

Adding Text
- Double-click the white screen shape to add text directly inside.
- Type your desired message or content.
- Copy the text box style (Ctrl + Shift + C) and paste it onto the corresponding screen shape on the other slide (Ctrl + Shift + V) to maintain consistency during animation.
Inserting Pictures
- Copy an image from your assets or online sources (e.g., freepik.com).
- Select the white screen shape.
- Go to Format Shape > Fill > Picture or Texture Fill and choose Clipboard to insert the copied picture inside the screen.
- Adjust font colors if you have text to ensure readability (e.g., white font on dark images).
- Copy and paste this style to the other slide’s screen shape to synchronize the animation content.

Embedding Videos
Embedding videos inside your animated laptop adds dynamic multimedia to your presentation.
- Insert a stock or custom video via Insert > Video > Stock Videos (available in PowerPoint 365).
- Crop the video to match the size and shape of the laptop screen:
- Copy the white screen shape.
- Paste it over the video.
- Align both objects centrally.
- Select both and use Merge Shapes > Intersect to crop.
- Copy the cropped video and paste it as a picture fill into the white screen shape for the closed laptop slide.
- Paste the video itself on the open laptop slide and align it precisely over the screen.
- Add animations to the video:
- Fade In (start with previous, duration 1 second).
- Play Automatically (start with previous).
This ensures the video fades in and plays as the laptop opens, creating a seamless multimedia experience.
Conclusion and Next Steps
Congratulations! You now have the skills to create a fully customizable 3D laptop open animation using just PowerPoint. This tutorial showed you how to:
- Build laptop parts using simple shapes and photos.
- Set custom rotation centers for realistic hinge animation.
- Add 3D depth and bevel effects for polished visuals.
- Use Morph transition to animate the laptop opening and closing.
- Insert and synchronize text, images, and videos inside the laptop screen.
By mastering these techniques, you will enhance your PowerPoint presentation skills and create engaging, professional presentations that stand out. Experiment with different content inside the laptop to suit your presentation needs — from showcasing product demos to highlighting key messages.
For those eager to deepen their PowerPoint animation expertise, structured courses like the Parpawn Animation Mastery Course can provide step-by-step guidance to become a PowerPoint animation pro.
The world of PowerPoint animations is vast and full of creative possibilities. Now it’s your turn to bring your ideas to life with these powerful tools. Let’s go!
Frequently Asked Questions
Can I use this laptop animation in older versions of PowerPoint?
This animation relies on the Morph transition and 3D rotation features, which are available in Microsoft 365 and PowerPoint 2019 or later. Older versions may not support these features fully.
Is it necessary to use the exact hex colors for the background?
No, the gradient background colors are optional and customizable. Use colors that fit your presentation’s theme or branding.
Can I insert other types of multimedia besides videos?
Yes! You can insert GIFs, sounds, or other multimedia files into the laptop screen area by using PowerPoint’s insert features and cropping them to fit inside the screen shape.
How can I ensure the text inside the laptop screen is readable?
Adjust the font color and size based on the background image or video. Using contrasting colors like white on dark backgrounds helps improve readability.
What if I want to use a different device instead of a laptop?
The same principles apply: create shapes or crop photos, set custom rotation centers, and use morph transitions to animate opening or flipping effects.
Where can I find free laptop photos and videos for this animation?
Free resources include websites like Freepik for images and PowerPoint’s stock videos available within the insert video menu.
How do I adjust the speed of the laptop opening animation?
Change the duration of the Morph transition between slides. A longer duration slows down the animation, while a shorter duration speeds it up.
Can I customize the rounded rectangle shape to better fit my laptop photo?
Absolutely! Adjust the corner radius and size of the rounded rectangle shapes to match your laptop photo’s keyboard and screen dimensions for a more realistic effect.
How do I troubleshoot if the morph transition animation looks choppy?
Ensure that all objects on both slides have matching names and groupings. Consistency between slides is key for smooth Morph animations.
Is it possible to export this animation as a video?
Yes, you can export your PowerPoint presentation as a video file through File > Export > Create a Video, which will preserve your animations.
Check out the full video: PowerPoint Presentation Skills: Creating 3D Laptop Animation ✨


