

If you’re aiming to elevate your PowerPoint presentation skills and create presentations that captivate and engage your audience, mastering the Slide Zoom feature is a game-changer. Slide Zooms empower you to break free from the traditional linear slide flow and introduce interactive, dynamic navigation within your presentation. Whether you want to zoom into specific slides or entire sections, this tool adds a new dimension to your storytelling and presentation delivery.
In this comprehensive guide, inspired by expert insights from One Skill PPT, we’ll dive deep into five essential tips that will help you unlock the full potential of PowerPoint Slide Zooms. Plus, stay tuned for a bonus tip that will take your skills to the next level with animation triggers.
Table of Contents
- How to Insert Slide Zooms: Two Simple Methods
- Tip 1: Using the Return to Zoom Feature
- Tip 2: Understanding Slide, Section, and Summary Zooms
- Tip 3: Making Slide Zoom Backgrounds Transparent for Stunning Effects
- Tip 4: Creating Custom Thumbnails for Slide Zooms
- Bonus Tip: Using Animation Triggers with Slide Zooms
- Frequently Asked Questions (FAQ)
- Conclusion: Become an Unstoppable Slide Zoom Creator
How to Insert Slide Zooms: Two Simple Methods
Getting started with Slide Zooms in PowerPoint is straightforward. There are two main ways to insert them into your presentation:
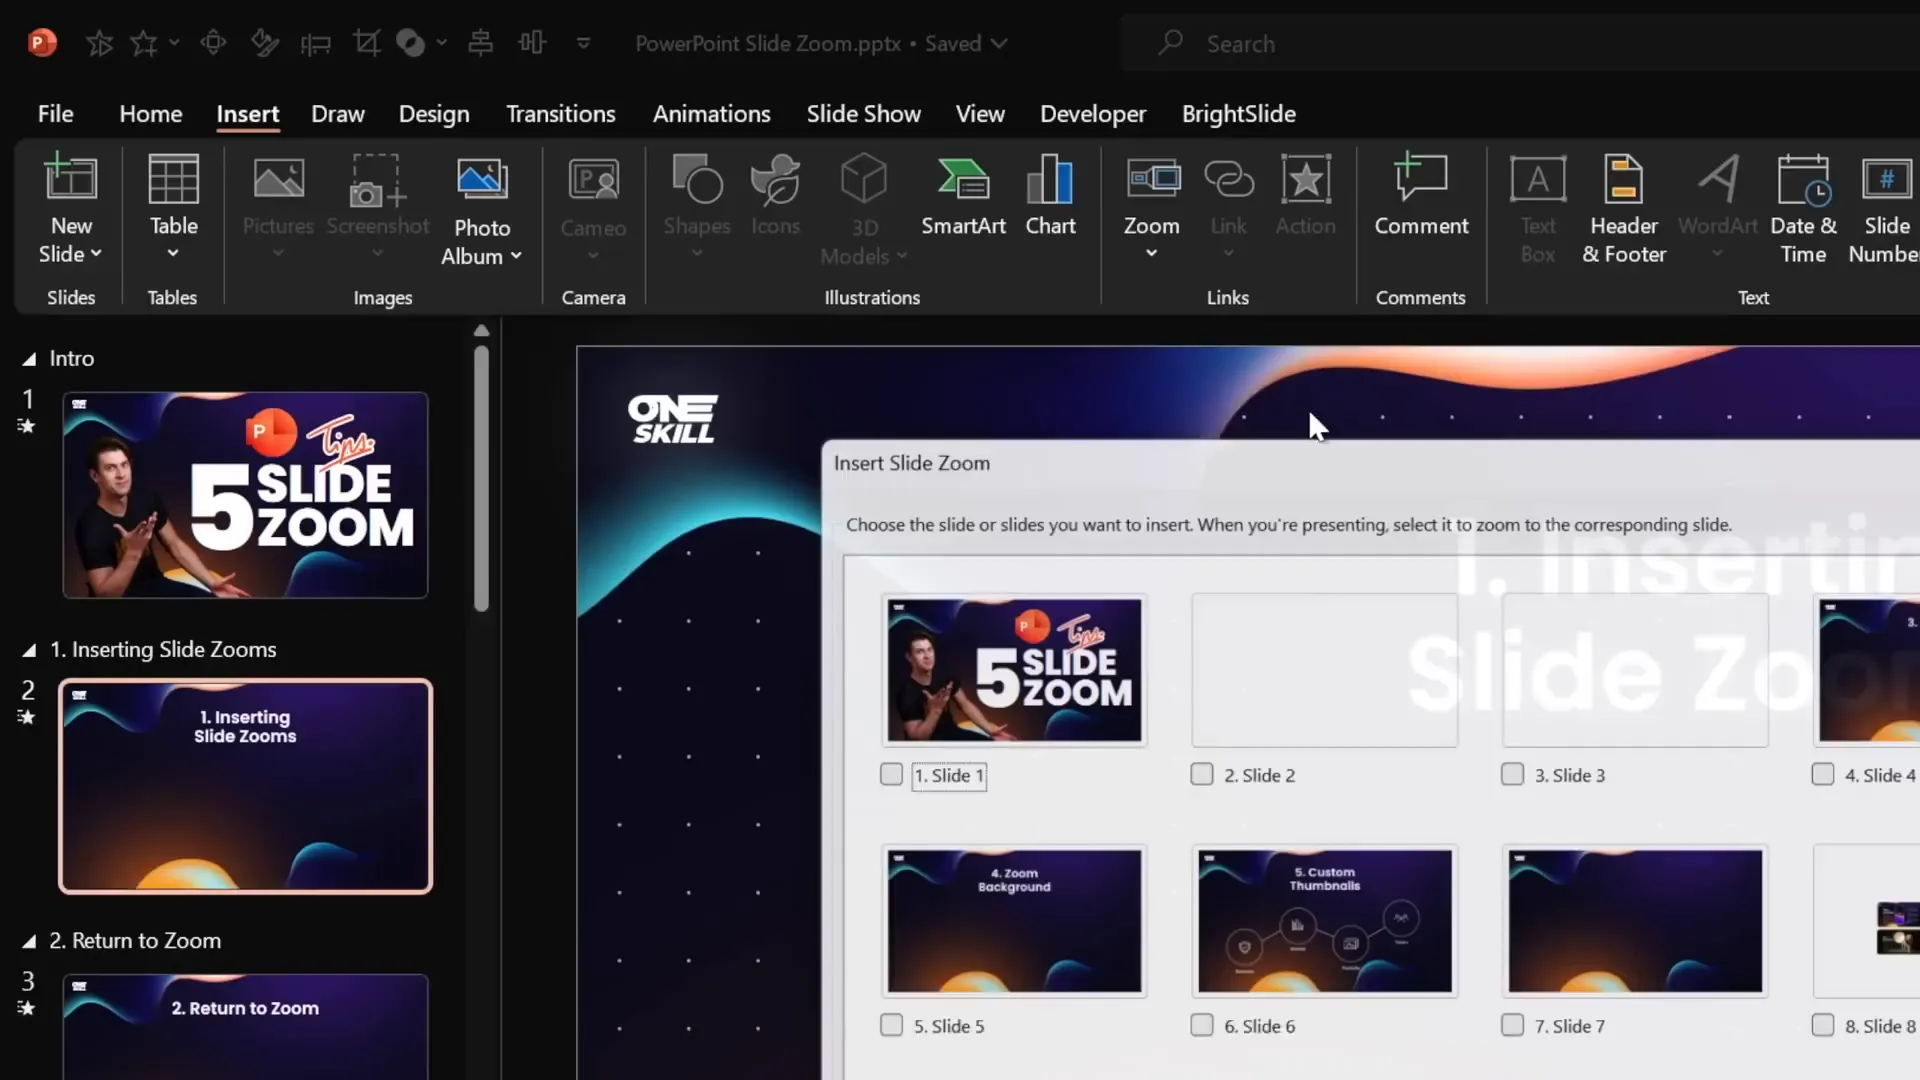
Method 1: Using the Insert Tab
- Go to the Insert tab on the PowerPoint ribbon.
- Click on the Zoom button, then select Slide Zoom.
- A window will pop up displaying thumbnails of all the slides in your presentation.
- Choose the slide you want to zoom into and click Insert.
- Voilà! Your first Slide Zoom is inserted.
Method 2: Drag and Drop from Slide Thumbnails
You can also create a Slide Zoom by dragging a slide thumbnail directly onto your current slide:
- Locate the slide you want in the slide thumbnail pane on the left.
- Click and drag that slide thumbnail onto your current slide.
- Drop it where you want the Slide Zoom to appear.
- PowerPoint automatically creates a Slide Zoom linked to that slide.

Pro Tips for Slide Zoom Appearance
- Remove Default Borders: By default, Slide Zooms have a thin outline. To remove it, select the Slide Zoom(s), go to the Zoom tab, click Zoom Border, and choose No Outline.
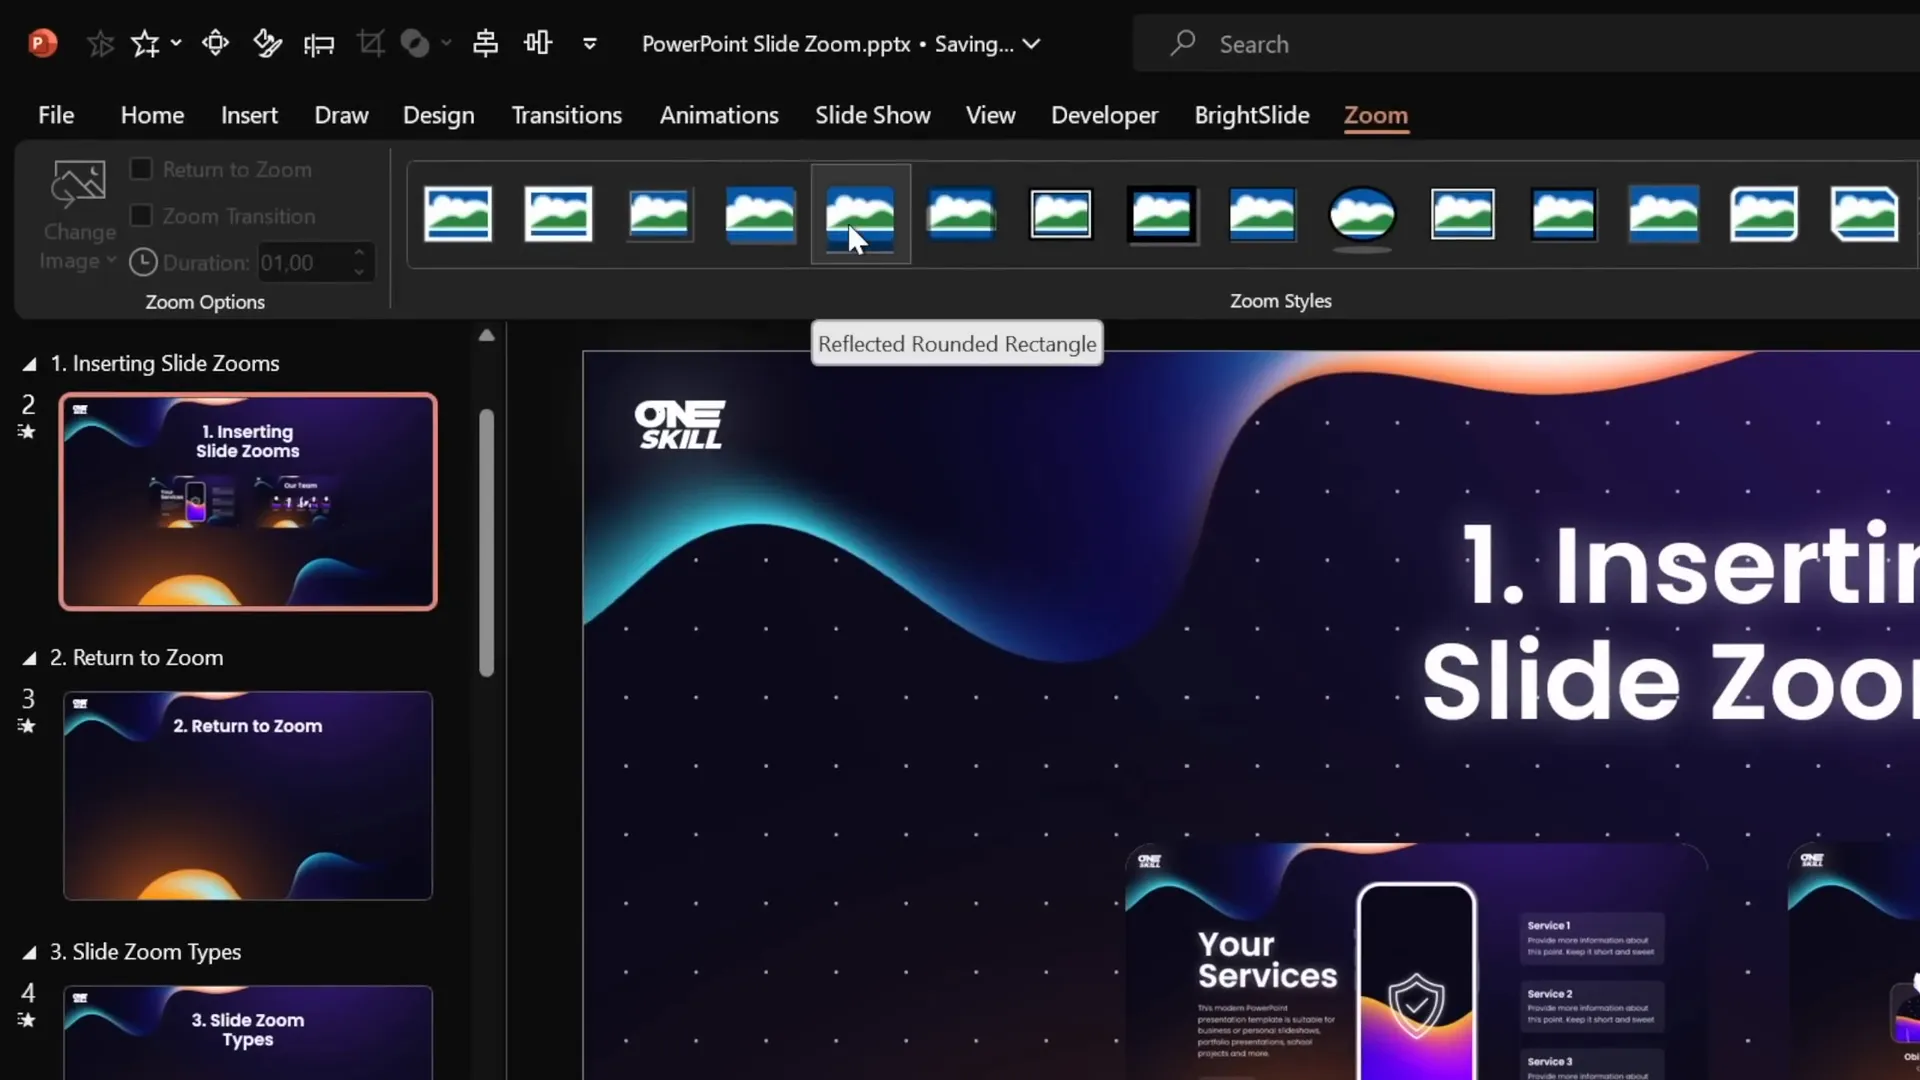
- Add Rounded Corners: For a polished look, select your Slide Zoom(s) and apply the Reflected Rounded Rectangle style.
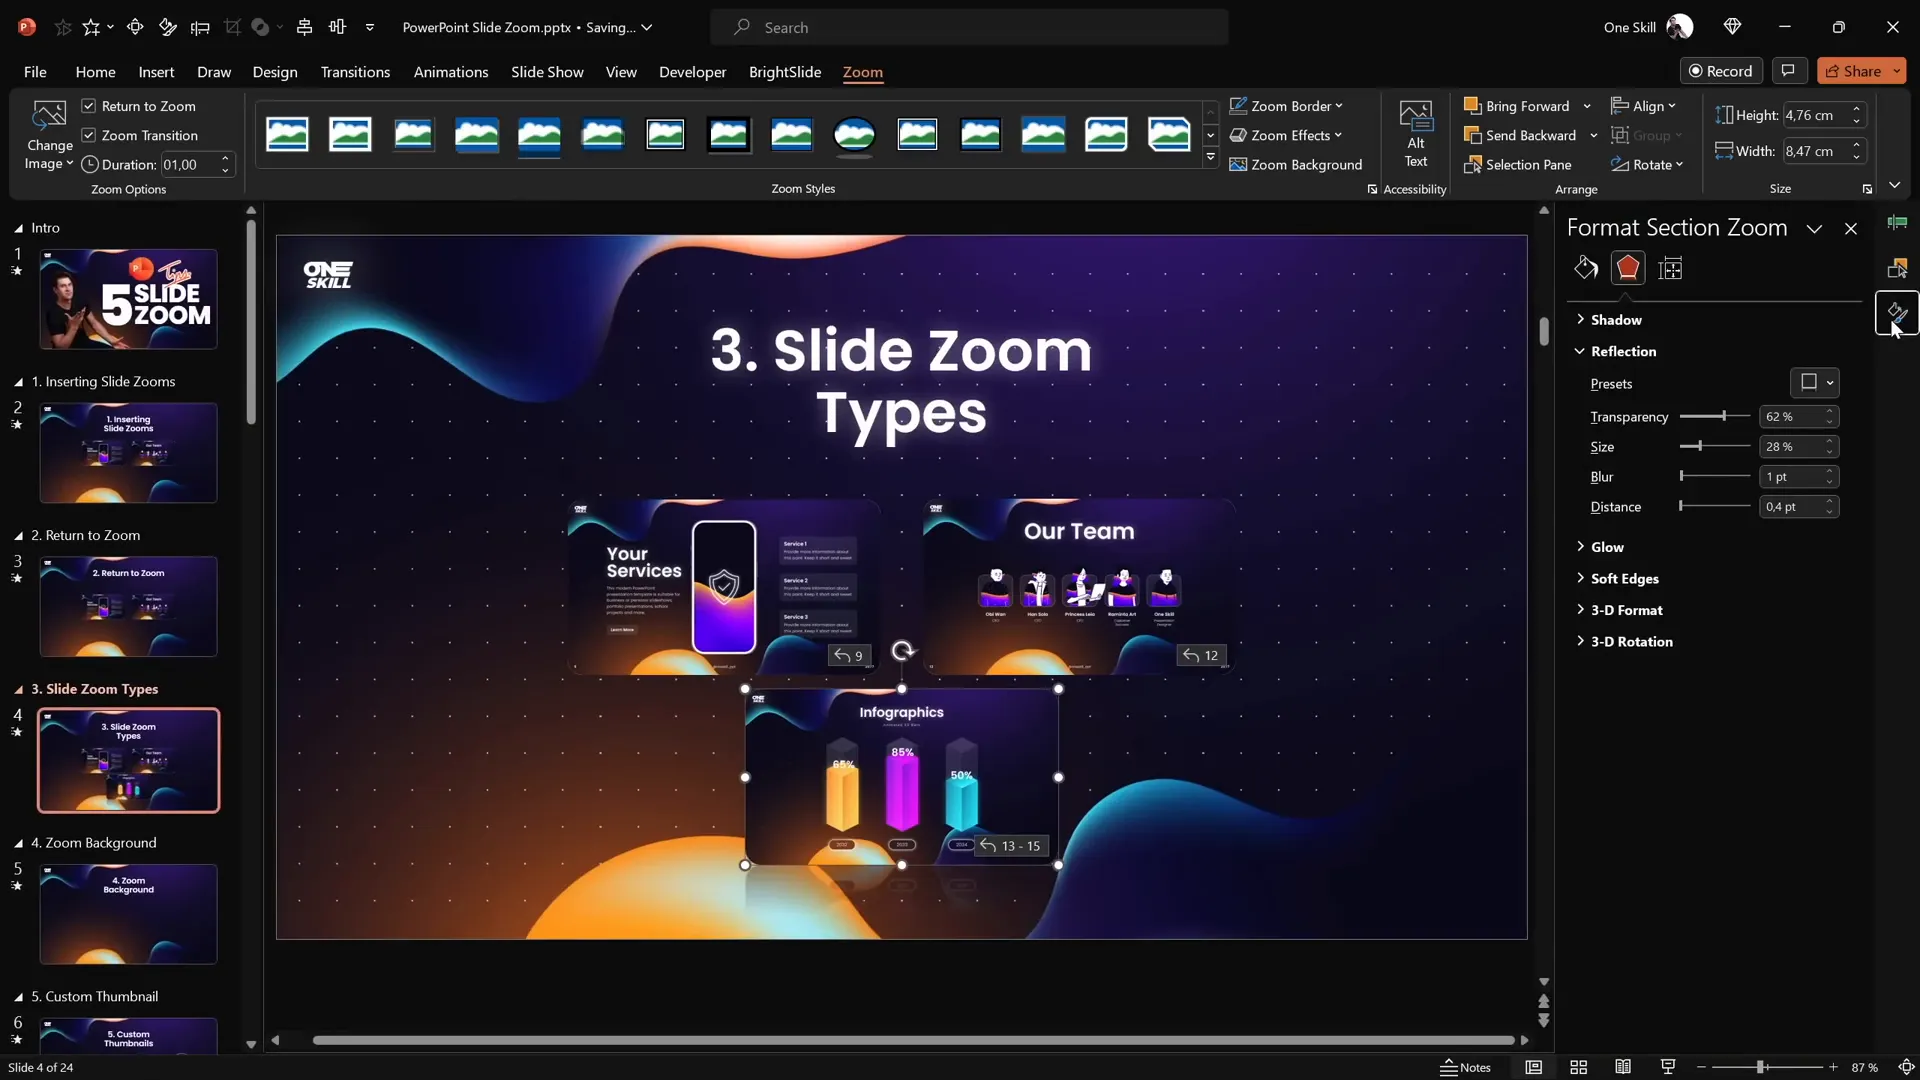
- Disable Reflections: If you prefer a cleaner look without reflections, open the Format Pane, navigate to Reflections, and select None.
Once your Slide Zooms are inserted and styled, you can test them by running your presentation and clicking on the zoom objects to jump into the linked slides.
Tip 1: Using the Return to Zoom Feature
By default, when you click a Slide Zoom during a presentation, PowerPoint zooms into the target slide but doesn’t automatically return to the original slide after viewing. To make your presentation navigation smooth and intuitive, you want to enable the Return to Zoom feature.
How to Enable Return to Zoom
- Select the Slide Zoom object.
- Navigate to the Zoom tab on the ribbon.
- Check the box labeled Return to Zoom.
- Repeat for all Slide Zooms where you want this behavior.
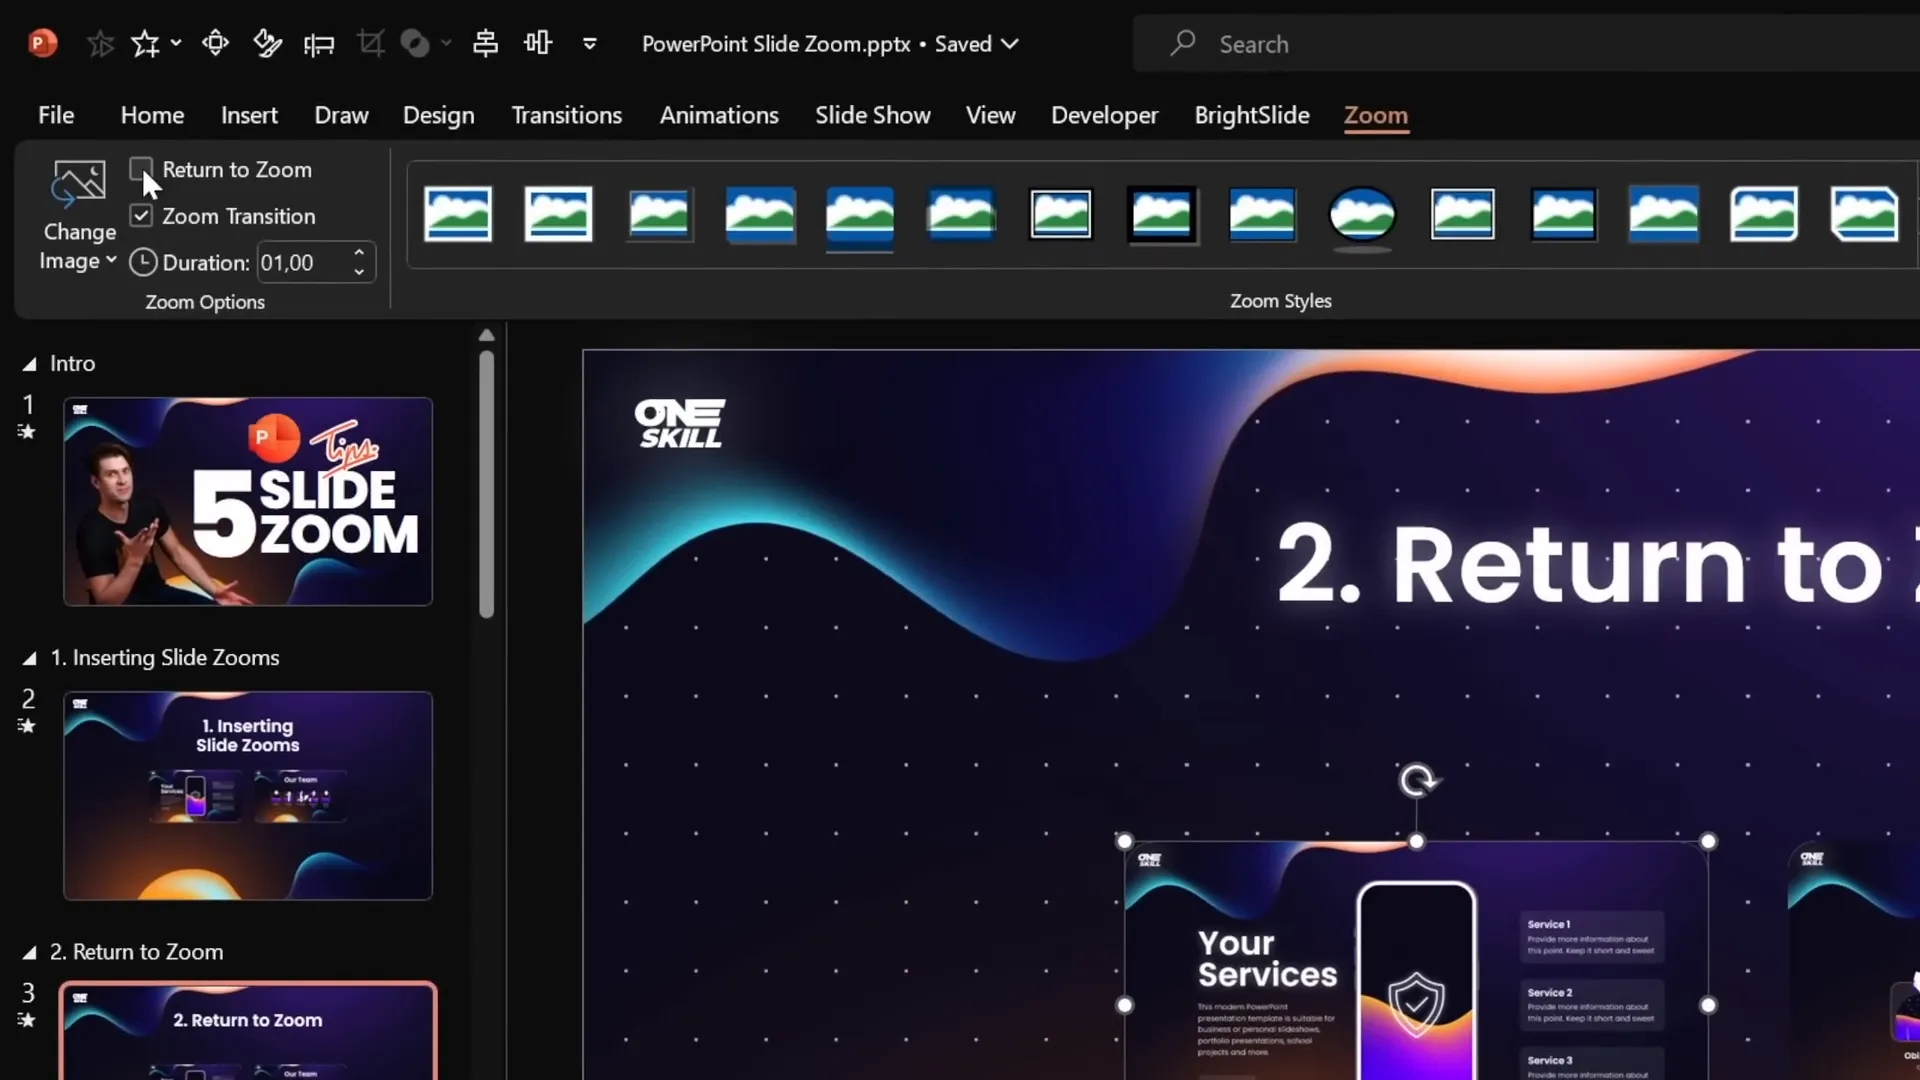
Now, when you run your presentation and click a Slide Zoom, you can zoom into the target slide, and when you click again, PowerPoint will zoom you back to the slide containing the Slide Zoom. This allows for a non-linear, interactive presentation flow that feels natural and engaging.
Tip 2: Understanding Slide, Section, and Summary Zooms
PowerPoint offers three types of zooms, each suited for different navigation needs:
| Zoom Type | Description | Use Case | Requirements |
|---|---|---|---|
| Slide Zoom | Zooms into a single slide and back. | When you want to highlight or jump to one specific slide. | None; works with any slide. |
| Section Zoom | Zooms into a section (group of slides), runs through them, then returns. | When you want to navigate through multiple related slides as a section. | You must have at least one section defined in your presentation. |
| Summary Zoom | Creates a navigational dashboard with zooms to all sections. | When you want an overview or “table of contents” slide for your presentation. | Requires multiple sections to create the summary. |
Creating Section Zooms
Before you can insert a Section Zoom, make sure your presentation is divided into sections:
- In the slide thumbnail pane, right-click between slides and choose Add Section.
- Name your sections meaningfully (e.g., “Infographics”, “Financials”).
Then, to insert a Section Zoom:
- Go to Insert > Zoom > Section Zoom.
- Select the section you want to zoom into and click Insert.
- Style it like Slide Zooms (remove border, add rounded corners, disable reflections).
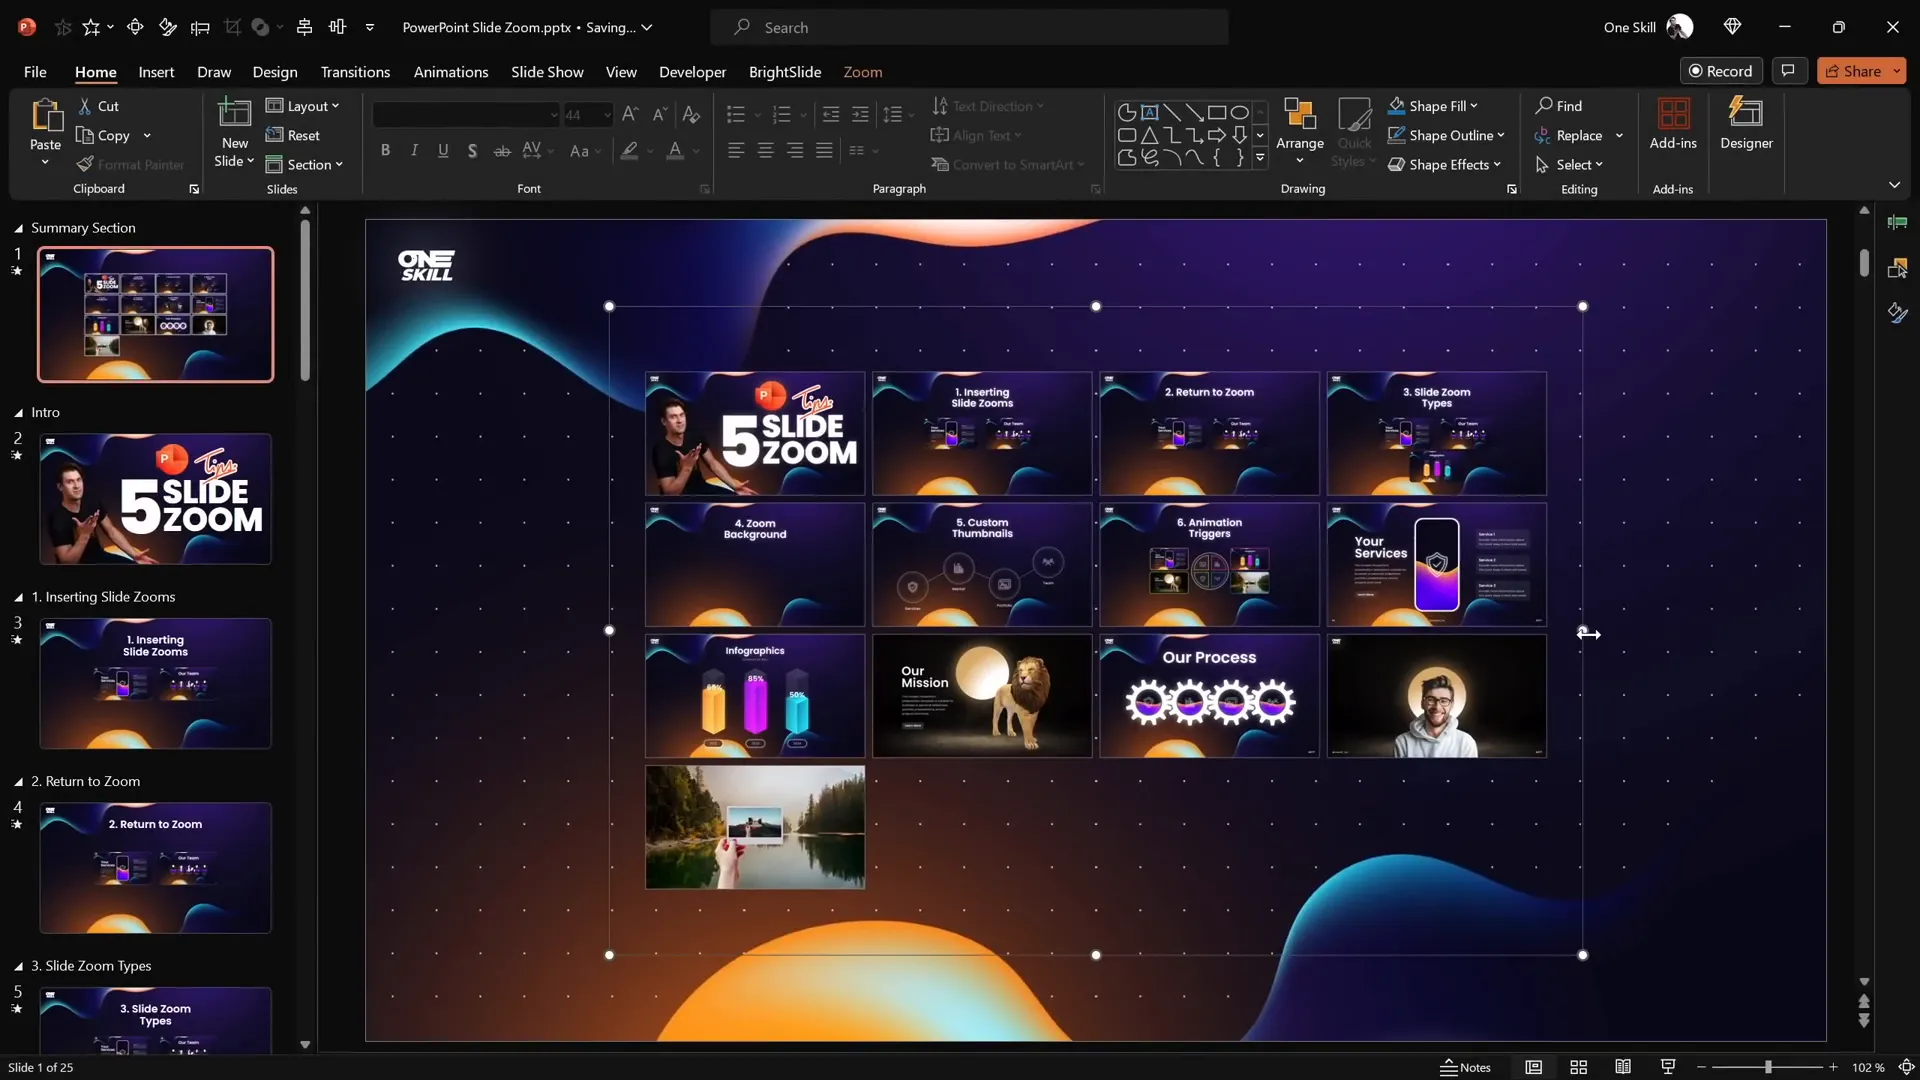
Creating Summary Zooms
Summary Zooms provide a bird’s eye view of your entire presentation’s sections:
- Go to Insert > Zoom > Summary Zoom.
- PowerPoint will automatically generate a new slide with thumbnails linking to all sections.
- Customize the layout by resizing the zoom thumbnails and aligning them to your preferred grid.
- Add a title like “Summary Zoom” and style the thumbnails for consistency.
When presenting, clicking any section thumbnail takes you through that section’s slides, then zooms back to the summary slide automatically. This is perfect for presentations where you want flexible navigation or to allow your audience to choose topics.
Tip 3: Making Slide Zoom Backgrounds Transparent for Stunning Effects
By default, Slide Zooms show the entire target slide including its background, which can sometimes clash with your current slide’s design or feel visually heavy.
PowerPoint lets you make Slide Zoom backgrounds transparent, creating a seamless depth effect where it feels like you’re zooming into content layered on the same canvas.
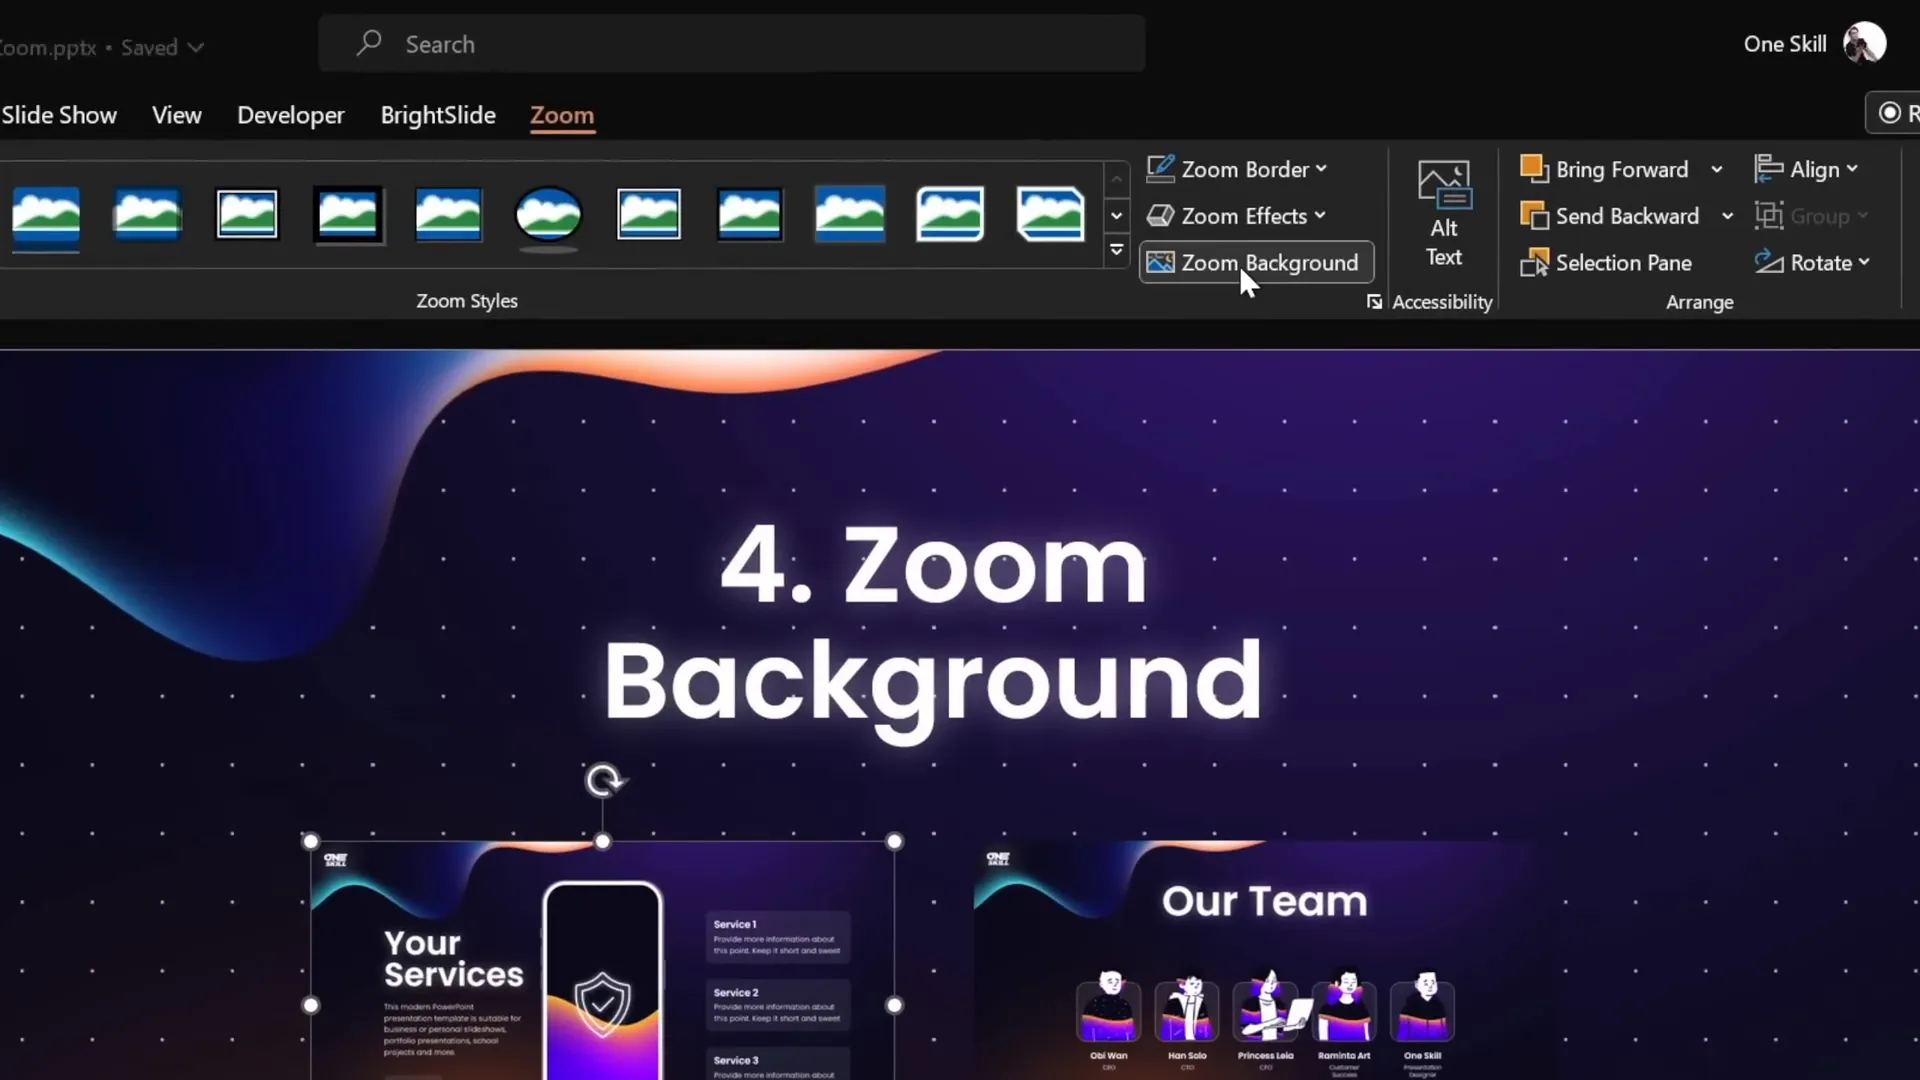
How to Activate Transparent Zoom Backgrounds
- Select your Slide Zoom object.
- Go to the Zoom tab.
- Click on Zoom Background to toggle transparency on.
Important: If your Slide Zoom background turns white instead of transparent, ensure the target slide uses a picture fill or a solid/gradient background fill. This ensures the transparency works correctly.
Using transparent backgrounds makes your presentations more visually cohesive and creates a sophisticated layering effect that adds depth without distraction.
Tip 4: Creating Custom Thumbnails for Slide Zooms
When you insert a Slide Zoom, it automatically displays the entire slide content as the thumbnail. This can sometimes reveal more information than you want upfront or clutter your slide design.
To control what your Slide Zoom looks like, you can set a custom image or thumbnail for it.
How to Add a Custom Thumbnail
- Select the Slide Zoom object.
- In the Zoom tab, click Change Image.
- Choose an image file (PNG, JPEG, etc.) to use as the thumbnail.
Creating Transparent Thumbnails
One clever trick is to create fully transparent thumbnails so your Slide Zooms don’t hide any underlying icons or designs on your main slide.
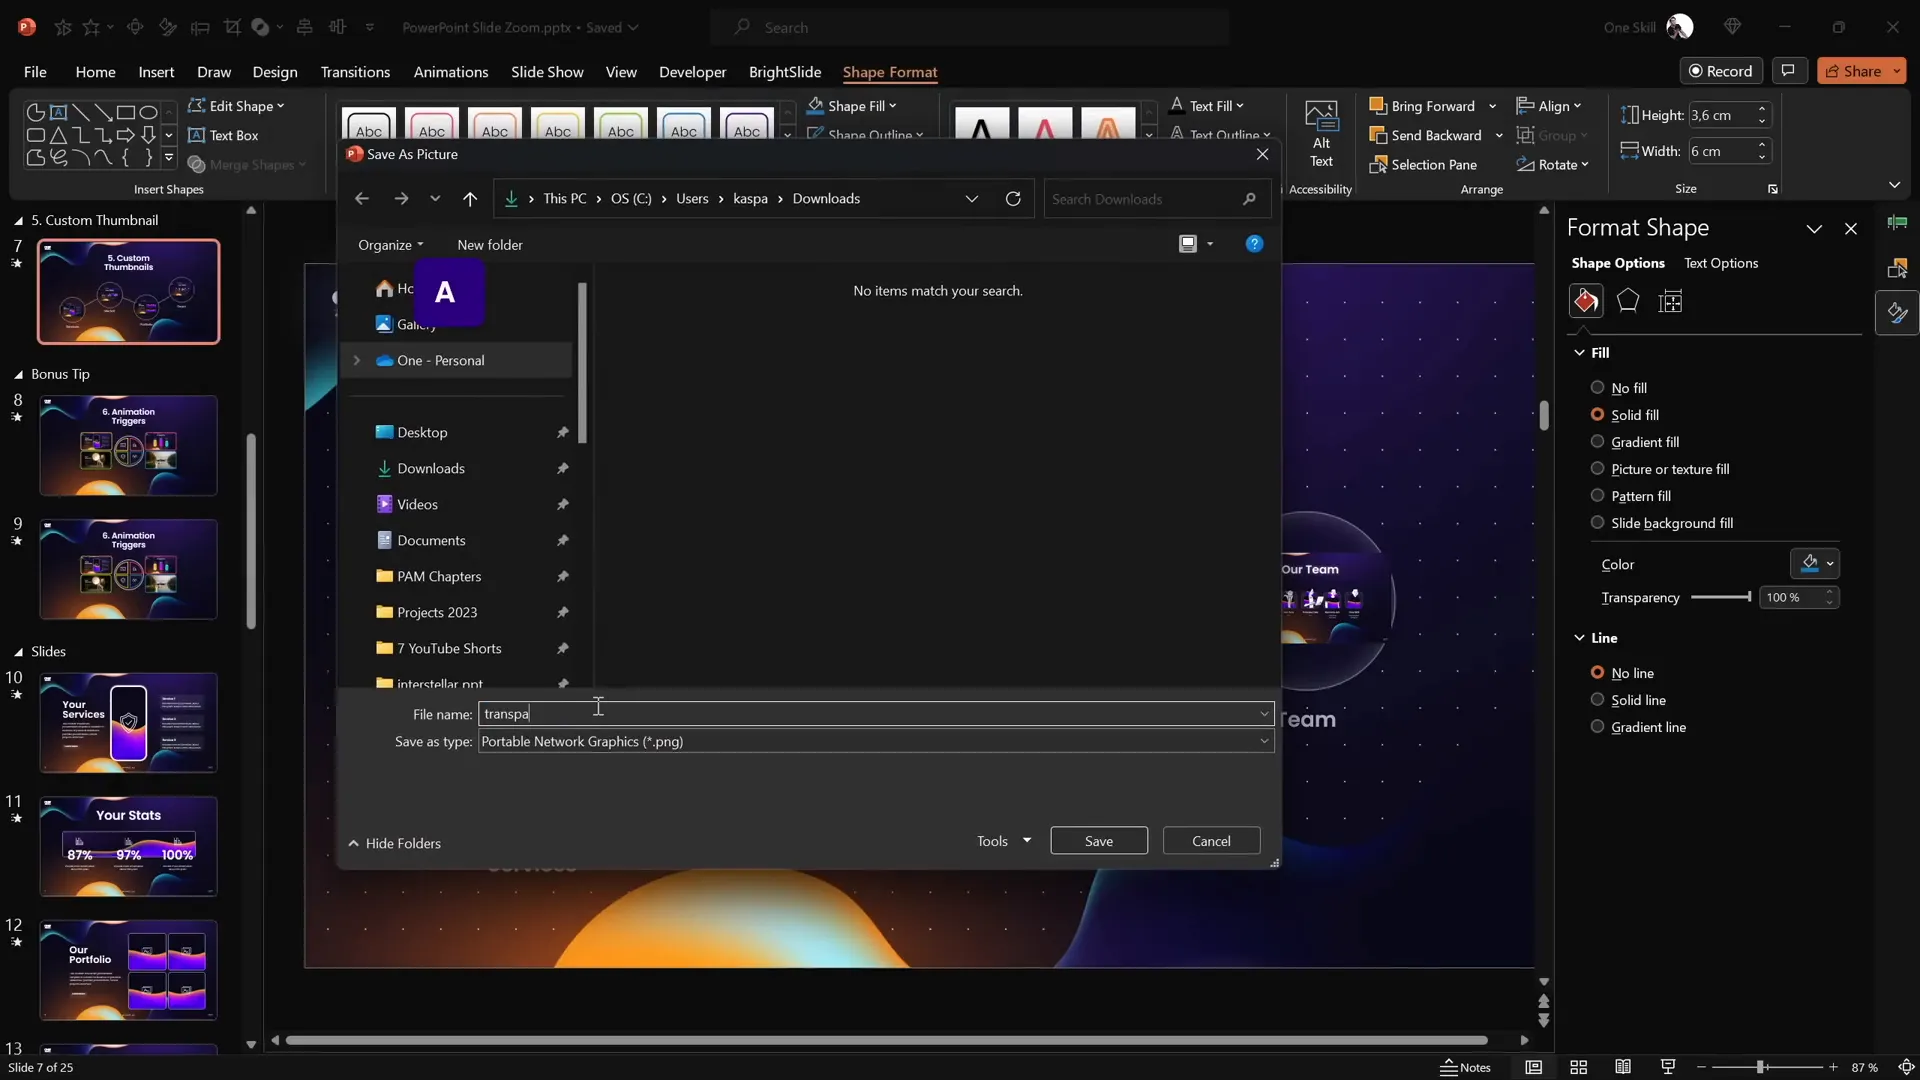
- Insert a rectangle shape on any slide.
- Fill it with a solid color and set its transparency to 100%.
- Right-click the rectangle and choose Save as Picture, saving it as a PNG file to preserve transparency.
- Delete the rectangle from the slide.
- Use this transparent PNG as the custom image for your Slide Zoom thumbnails.
This technique is especially useful when your slide contains icons or other visuals you want visible beneath the zoom objects, maintaining a clean and interactive design.
Bonus Tip: Using Animation Triggers with Slide Zooms
For those looking to add an extra layer of interactivity and polish to their presentations, combining Slide Zooms (especially Section Zooms) with animation triggers is a powerful approach.
Animation triggers let you control animations to start only when a specific object is clicked, allowing you to create clickable buttons that open and close zoom sections with smooth animations.
How to Set Up Animation Triggers with Section Zooms
- Insert your Section Zoom(s) on a slide and add clickable buttons (shapes or icons) that will control them.
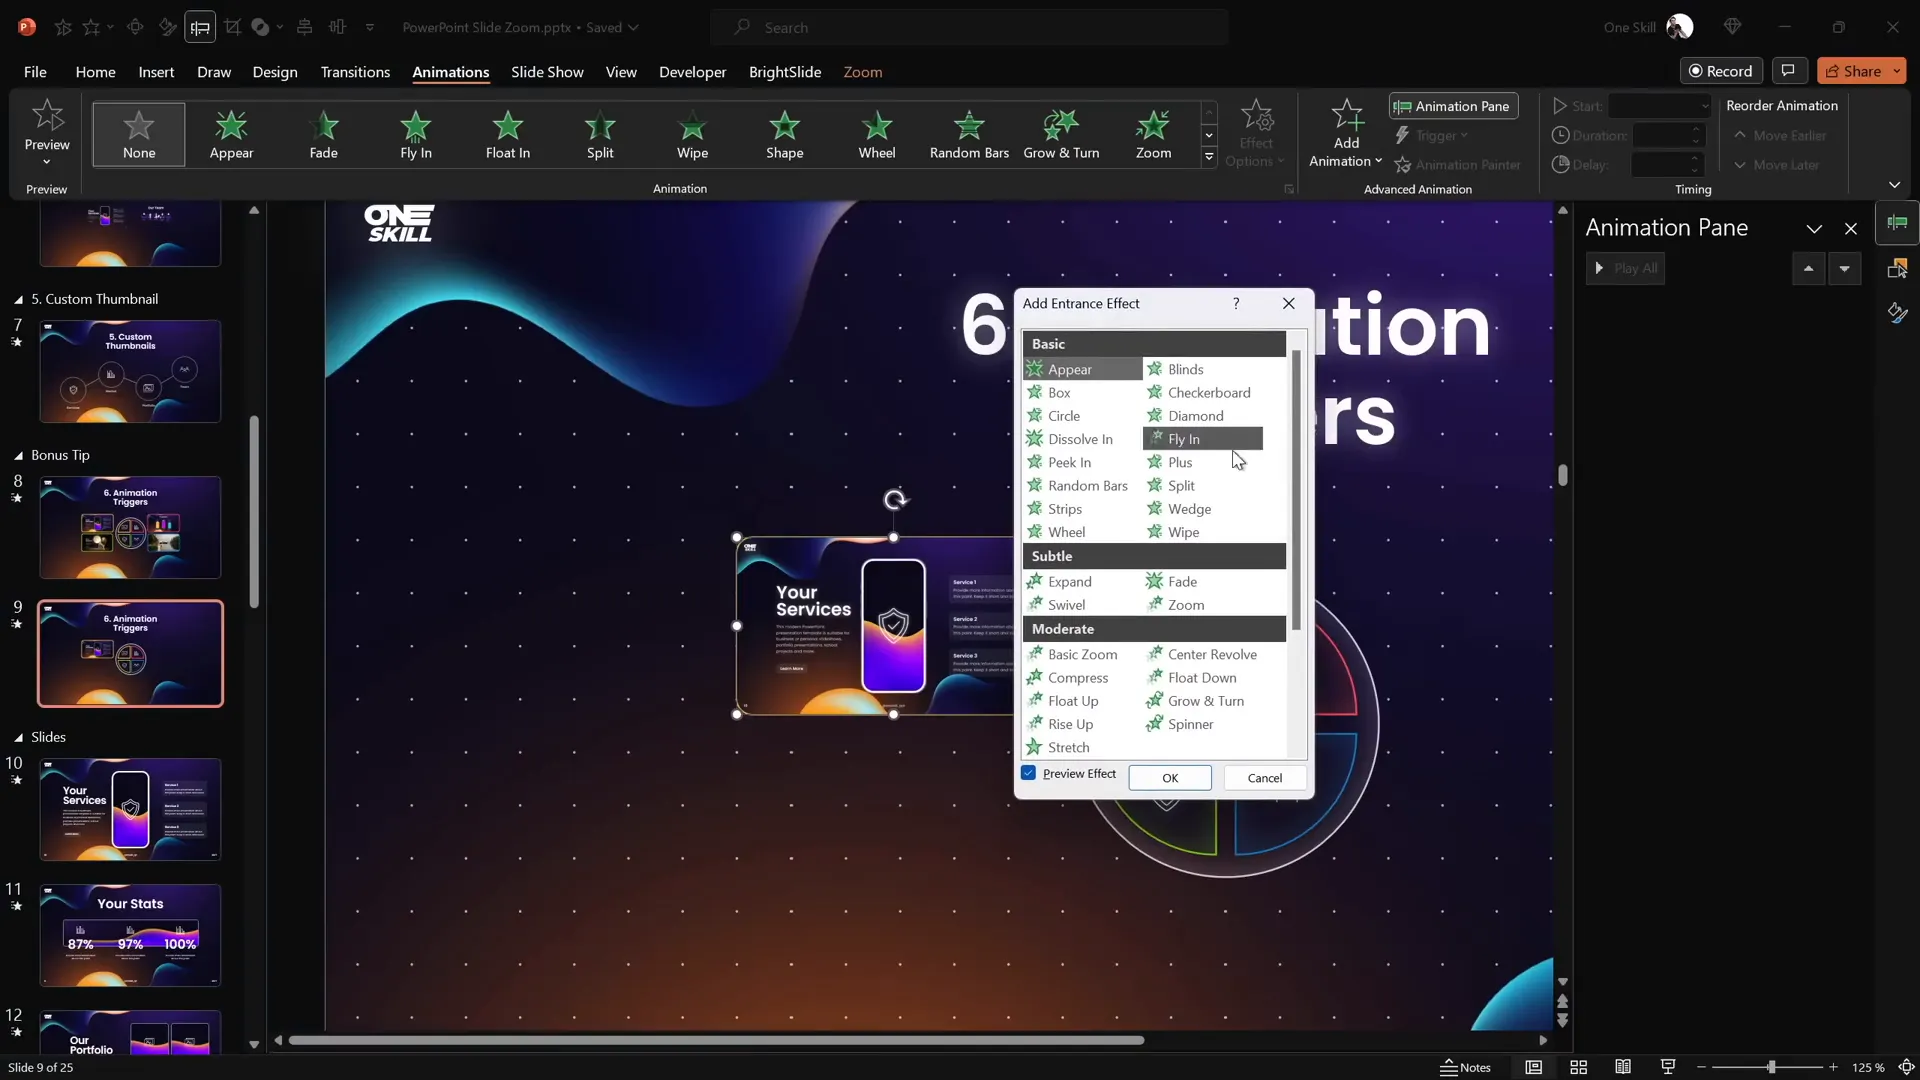
- Open the Animation Pane.
- Select the Section Zoom object and add an Entrance animation (e.g., Basic Zoom).
- Add a Motion Path animation to make the zoom appear as if it’s moving from the button’s position to its final place.
- Reverse the motion path so the animation starts at the button and ends at the zoom’s final location.
- Set both animations to be triggered by clicking the button (using the Trigger option in the Animation Pane).
- Add a Grow/Shrink animation to the button itself to create a pressed effect when clicked.
- To close the Section Zoom, add an Exit animation (Basic Zoom) triggered by the same button, along with a reverse motion path animation.
- Make sure all animations for opening and closing are grouped under the button’s trigger for smooth interaction.
This setup allows you to have buttons that toggle the visibility of sections smoothly, making your presentation highly interactive and professional.
Why Use Animation Triggers?
- They create a natural flow that feels controlled and intentional.
- Add polish and professionalism with custom animations.
- Enhance audience engagement with interactive navigation.
Pro Tip: If you find these animation concepts challenging, consider exploring courses like the PowerPoint Animation Mastery to build your skills step-by-step.
Frequently Asked Questions (FAQ)
What are Slide Zooms in PowerPoint?
Slide Zooms are interactive thumbnails in PowerPoint that let you zoom into specific slides or sections during your presentation, enabling non-linear navigation and dynamic storytelling.
How do Slide Zooms improve PowerPoint presentation skills?
They allow presenters to break free from the traditional slide-by-slide flow, creating engaging, interactive presentations that adapt to audience needs and emphasize key content dynamically.
What’s the difference between Slide Zoom, Section Zoom, and Summary Zoom?
- Slide Zoom: Zooms into a single slide.
- Section Zoom: Zooms into a section containing multiple slides.
- Summary Zoom: Acts as a dashboard with zooms to all sections for easy navigation.
Can I customize the appearance of Slide Zoom thumbnails?
Yes, you can change the default thumbnail to any image you want, including transparent images, to better fit your slide design and avoid revealing too much content prematurely.
How do I make Slide Zoom backgrounds transparent?
On the Zoom tab, select the Slide Zoom and click the Zoom Background button to make the background transparent. Ensure the target slide has a fill (solid, gradient, or picture) for this to work properly.
Can Slide Zooms be combined with animations?
Absolutely! Using animation triggers, you can create buttons that control the opening and closing of Slide or Section Zooms with smooth, custom animations for an interactive experience.
Conclusion: Become an Unstoppable Slide Zoom Creator
Mastering Slide Zooms is a powerful way to enhance your PowerPoint presentation skills and deliver presentations that are engaging, interactive, and professionally polished. By using the tips shared here—from inserting Slide Zooms and enabling Return to Zoom, to understanding the different zoom types, creating transparent backgrounds, customizing thumbnails, and leveraging animation triggers—you can create presentations that stand out and captivate your audience.
Remember, the key to great presentations lies not just in great content but also in how you deliver and navigate that content. Slide Zooms open up new possibilities for dynamic storytelling and audience interaction.
For those eager to dive deeper, One Skill PPT offers a PowerPoint Animation Mastery Course with free slides and detailed tutorials on advanced Slide Zoom animations like spinning gears, morph transitions, and infinite zooms. Use the coupon code oneskill100 to save $100 before the offer expires.
Now, go ahead and experiment with these Slide Zoom tips to become an unstoppable PowerPoint pro!
Happy presenting!


