If you’re looking to elevate your PowerPoint presentation skills and create slides that captivate your audience, you’ve come to the right place. In this detailed guide, we’ll explore how to add simple yet engaging animations to your slides, focusing on creating dynamic scrolling bars, pulsing buttons, and vibrant scribble effects. These techniques breathe life into your presentations, transforming static slides into visually compelling storytelling tools.
Whether you’re preparing a company pitch deck, a business report, or a proposal, mastering these animation skills will help you stand out. Plus, you’ll learn how to make your animations loop seamlessly, customize slide layouts, and apply professional touches that impress your audience.
Table of Contents
- Why Animation Matters in PowerPoint Presentations
- Overview of the Scrolling Bar Animation
- Setting Up Your Slide Layout and Customizing Footers
- Creating Semi-Transparent Rounded Rectangles
- Building a Horizontal Scrolling Bar
- Making the Scrolling Bar Loop Seamlessly
- Tilting the Scrolling Bar for a Dynamic Effect
- Creating a Scrolling Bar Moving in the Opposite Direction
- Adding Fade Animations to Scrolling Bars
- Animating Other Slide Elements: Photos, Titles, and Buttons
- Creating Pulsing Button Animations
- How to Create a Fun Scribble Animation
- Frequently Asked Questions
- Conclusion
Why Animation Matters in PowerPoint Presentations
Animations in PowerPoint are more than just flashy effects—they’re a powerful tool to engage your audience and emphasize key points. As demonstrated in the tutorial by One Skill PPT, animations can transform a dull, static slide into an interactive experience that holds attention and communicates your message more effectively.
Without animations, slides can look like static screenshots, which may fail to capture interest. Adding simple animations, such as scrolling bars or pulsing buttons, creates movement that guides the viewer’s eyes and adds a modern, professional touch to your presentation.
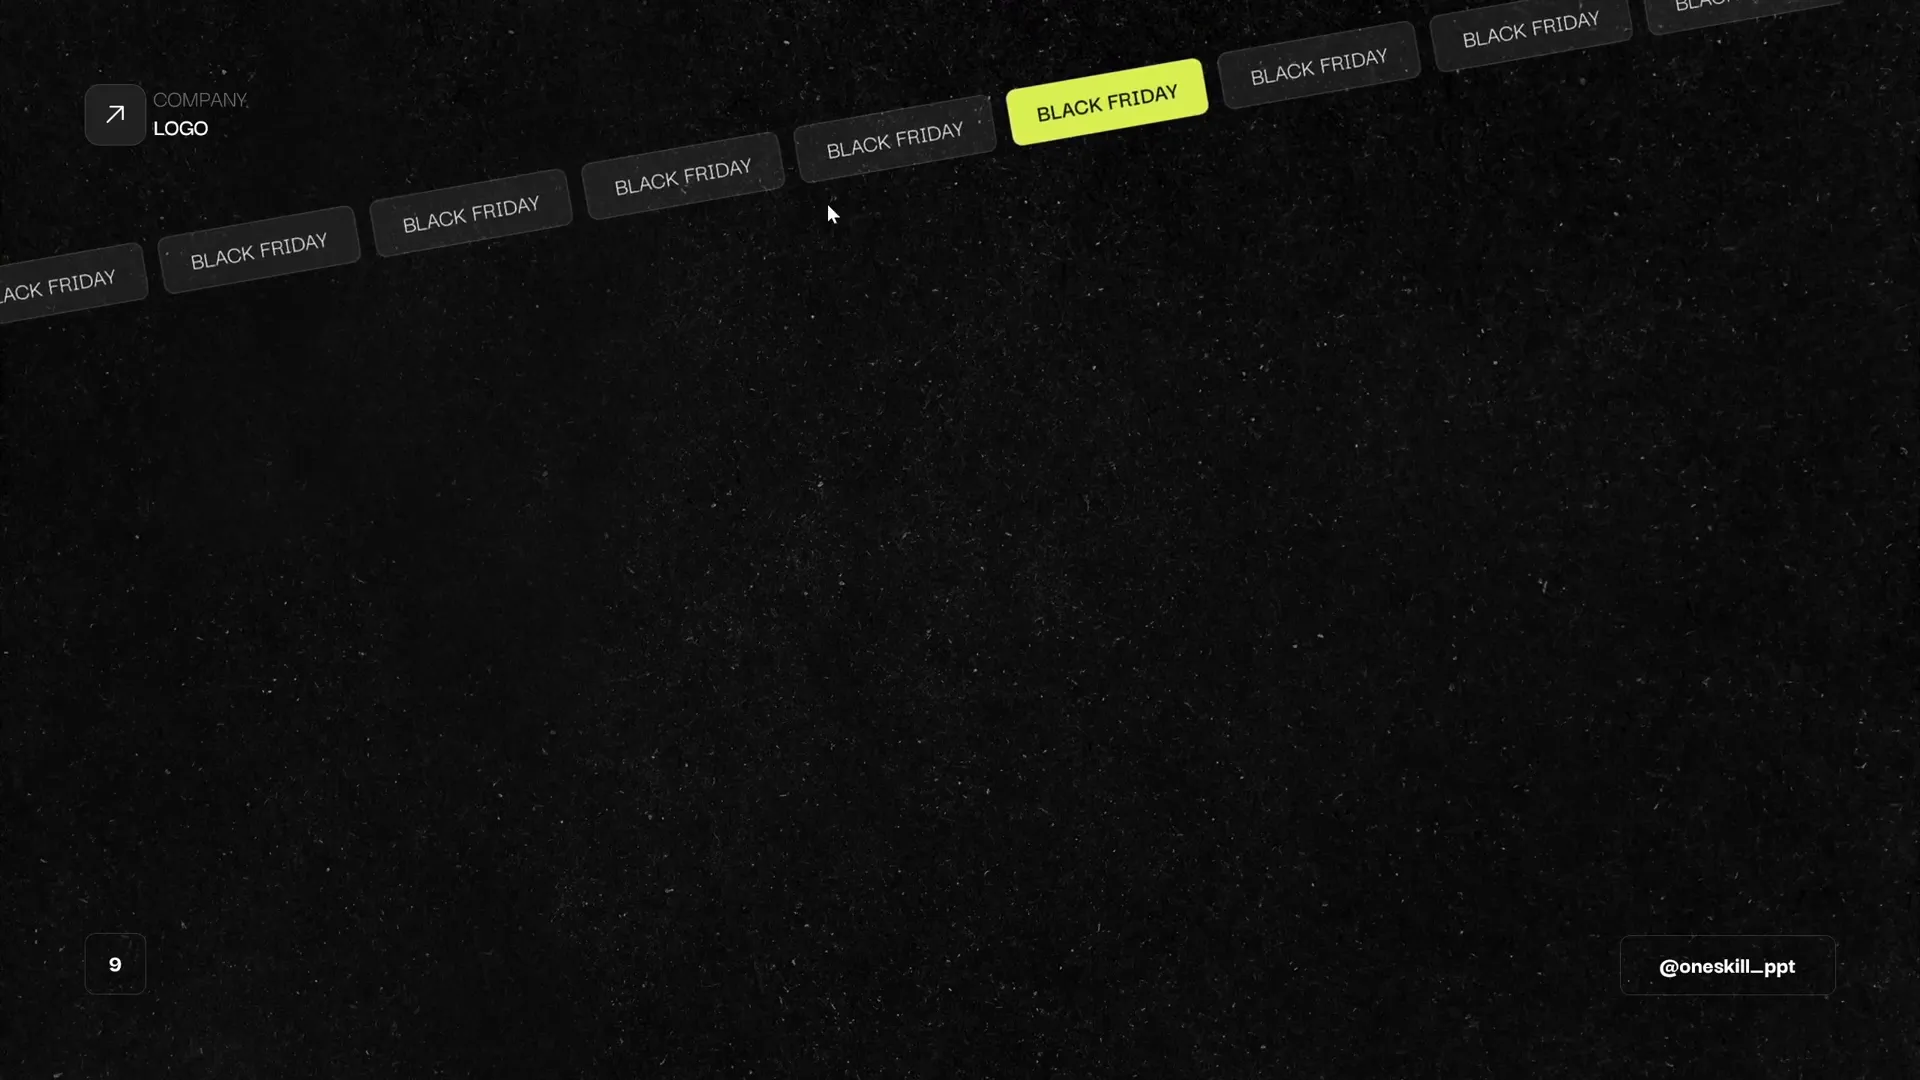
Overview of the Scrolling Bar Animation
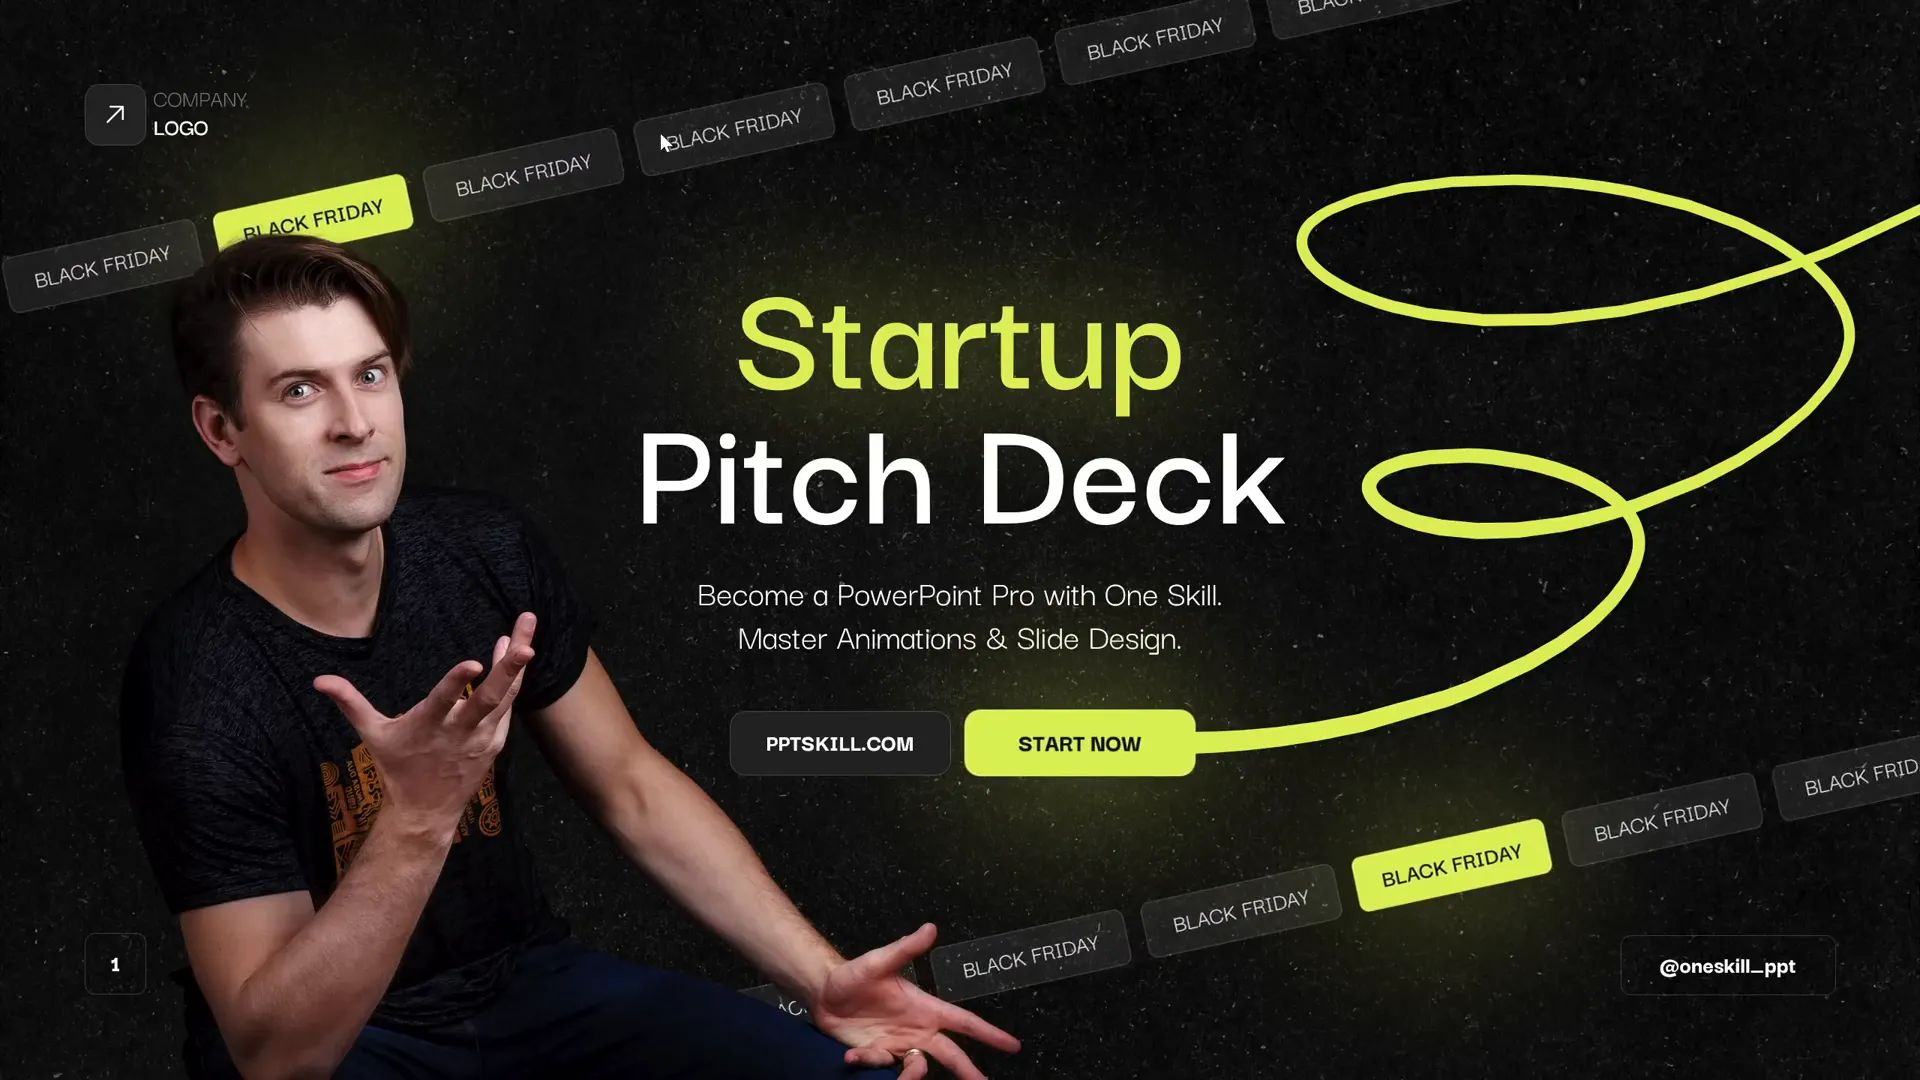
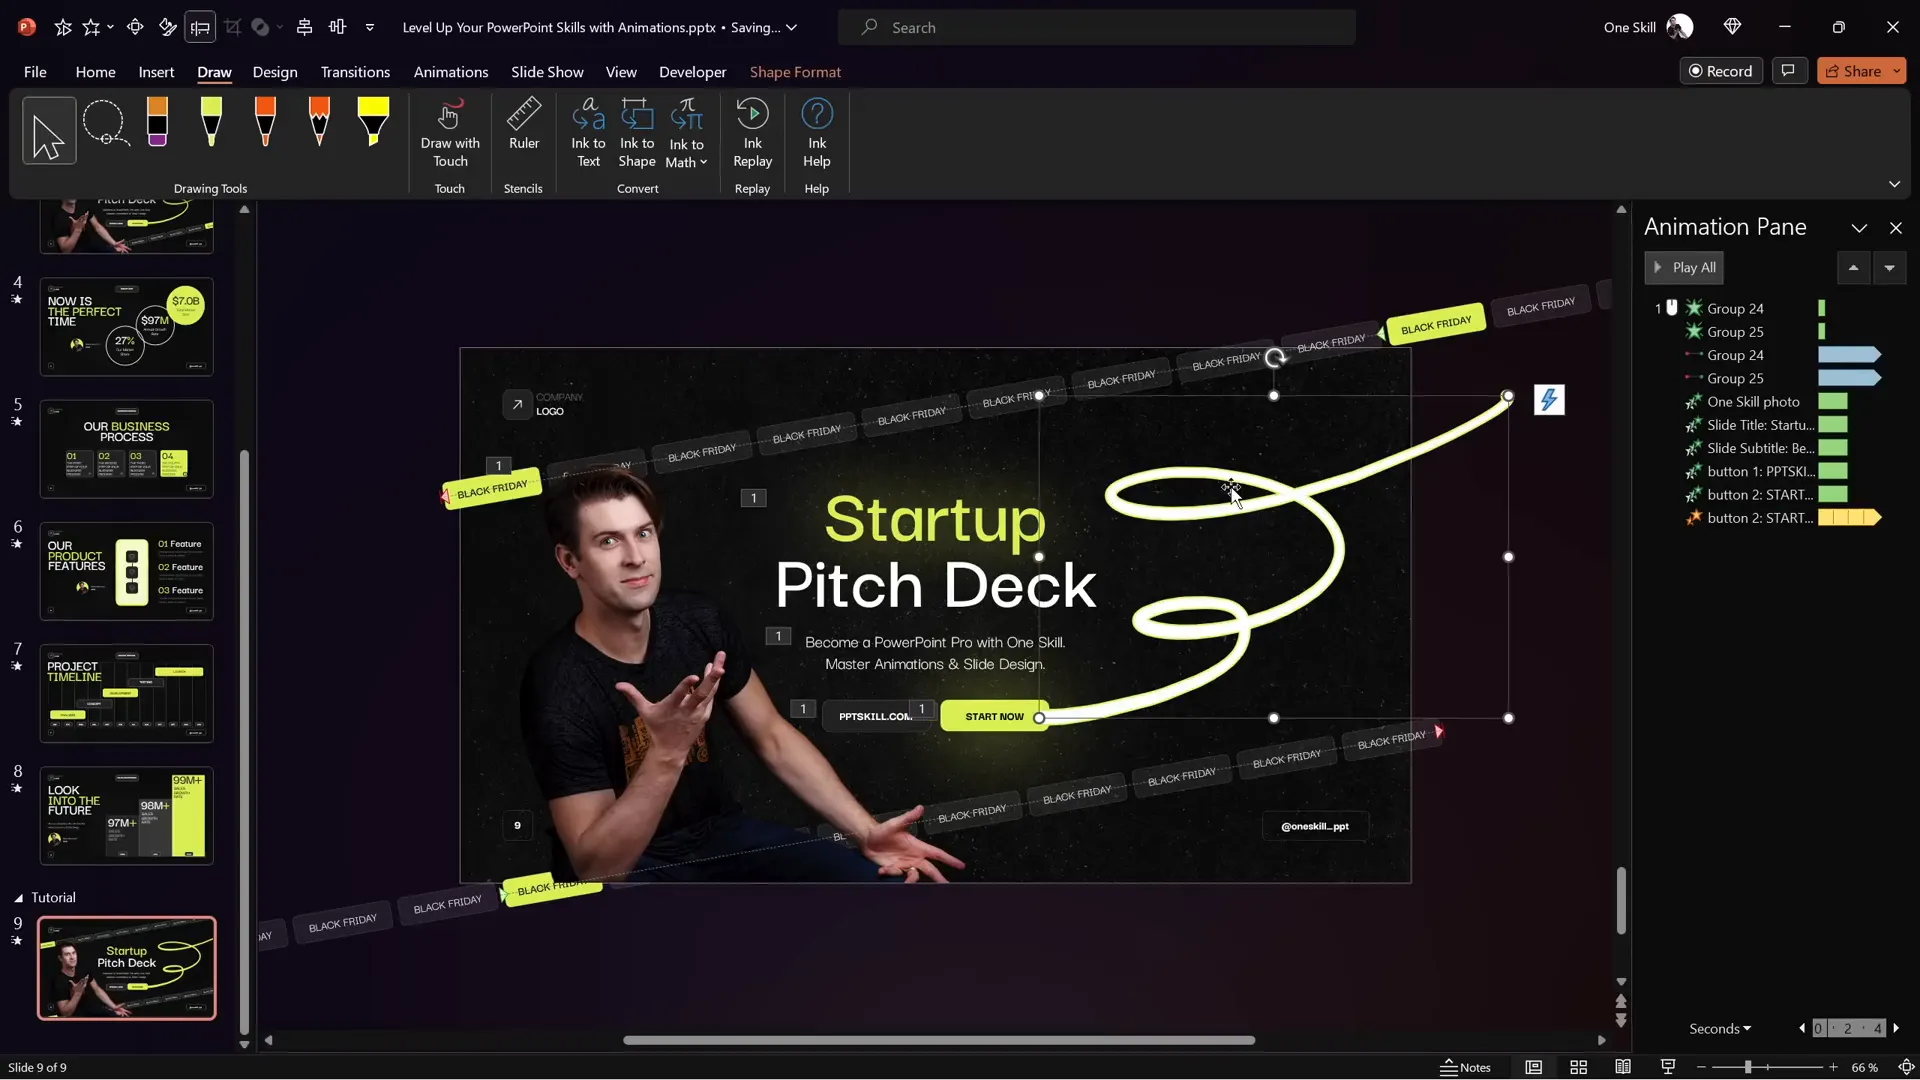
The key animation technique covered in the video is the creation of horizontal scrolling bars made up of multiple rounded rectangles. These bars can scroll in one or both directions, adding a dynamic feel to your slide. The tutorial showcases a slide with two scrolling bars: one at the top moving left, and one at the bottom moving right, along with a pulsing “Start Now” button and a vibrant scribble animation.
Here’s a quick summary of the main animated elements:
- Scrolling bars: Composed of semi-transparent rounded rectangles that scroll horizontally.
- Pulsing button: A “Start Now” button that gently grows and shrinks to attract attention.
- Scribble animation: A hand-drawn style line that animates to draw itself on screen.
These animations combine to create a lively and engaging slide perfect for business presentations.
Setting Up Your Slide Layout and Customizing Footers
Before diving into animations, it’s important to have a consistent and professional slide layout. The video tutorial highlights the use of Slide Master to create a custom slide template that includes:
- A dark textured background for a modern look.
- A footer area in the bottom-right corner for customizable text.
- Slide numbers on the bottom-left.
- A company logo placed in the top-left corner.
Using Slide Master ensures that all slides have a uniform appearance and that you only need to set these elements once.
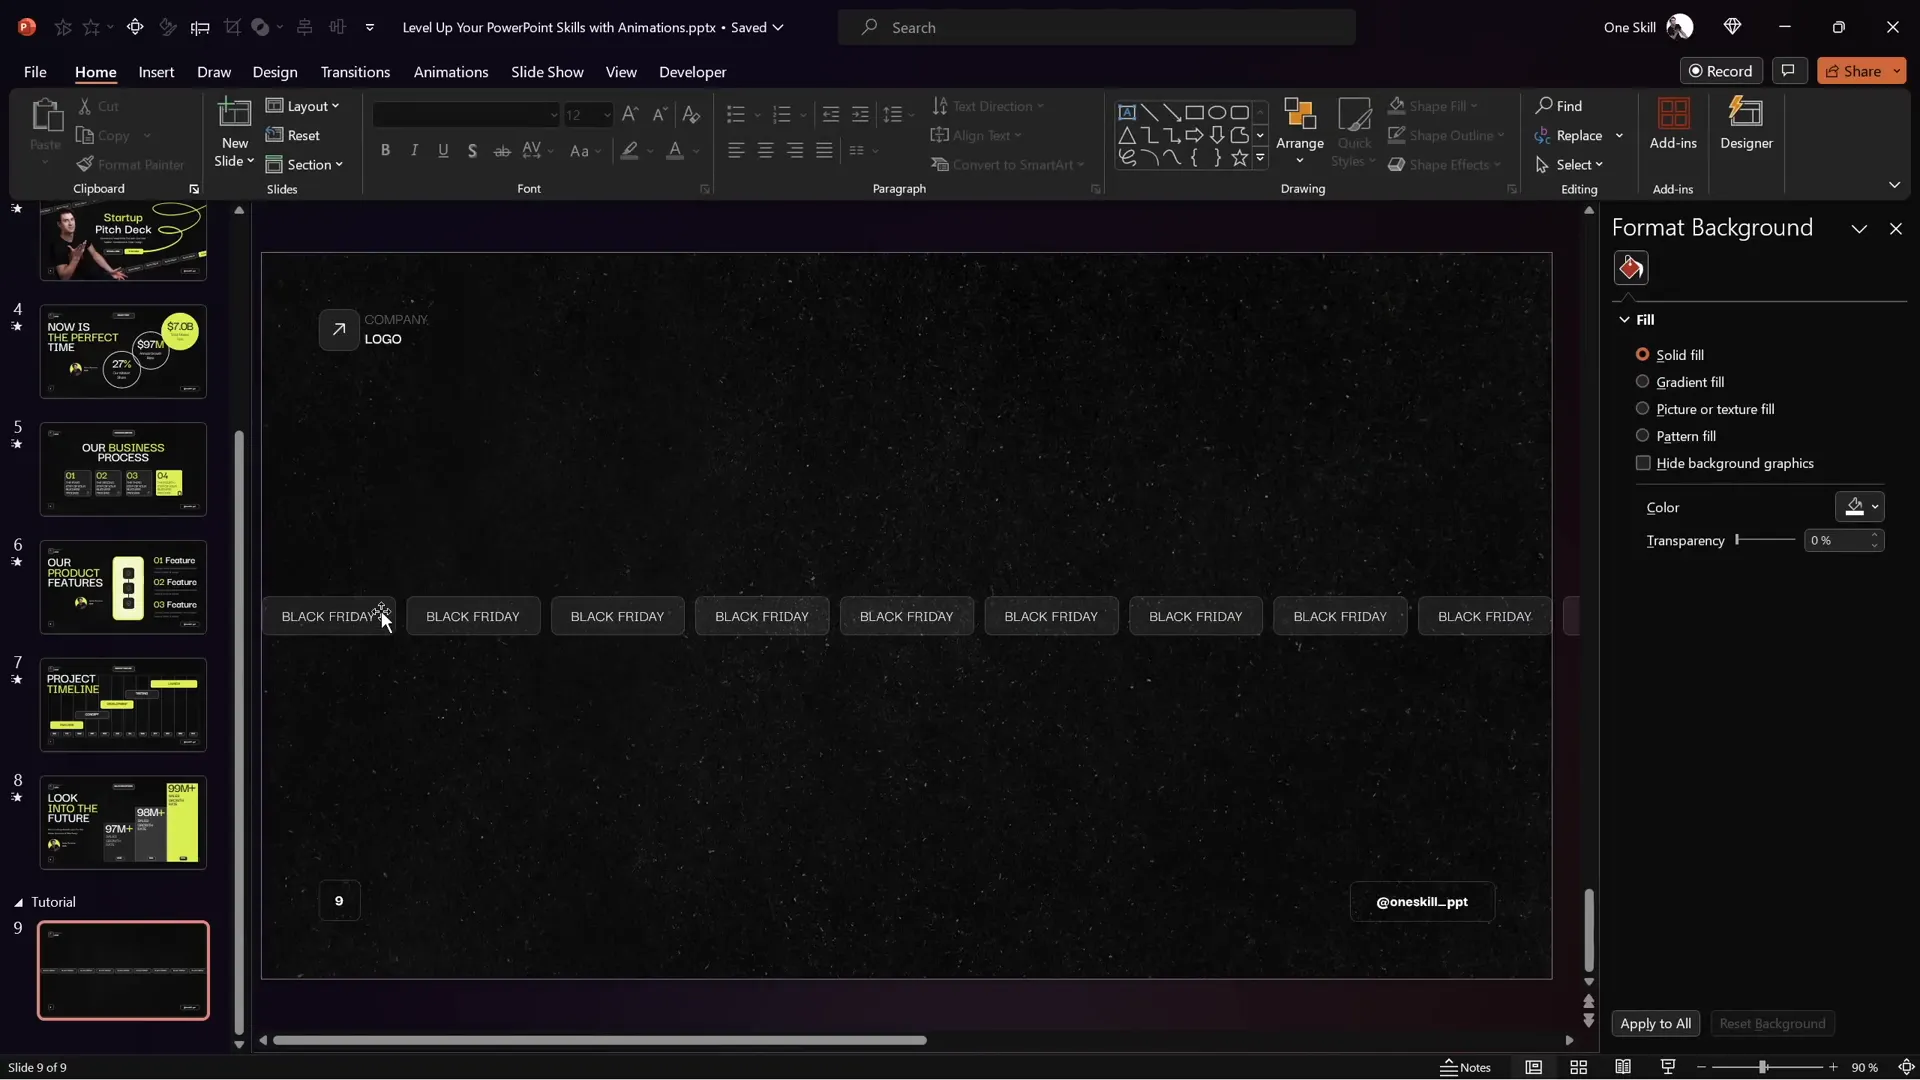
To customize footer text across all slides:
- Go to the Insert tab and select Header & Footer.
- Type your desired footer text in the footer field.
- Click Apply to All to update all slides.
This simple step helps maintain consistent branding and messaging.
Creating Semi-Transparent Rounded Rectangles
The scrolling bars are built from multiple rounded rectangles with a semi-transparent style. Here’s how to create one:
- Go to the Insert tab, select Shapes, and choose the Rounded Rectangle tool.
- Draw a rectangle roughly 3.5 cm wide and 1 cm tall.
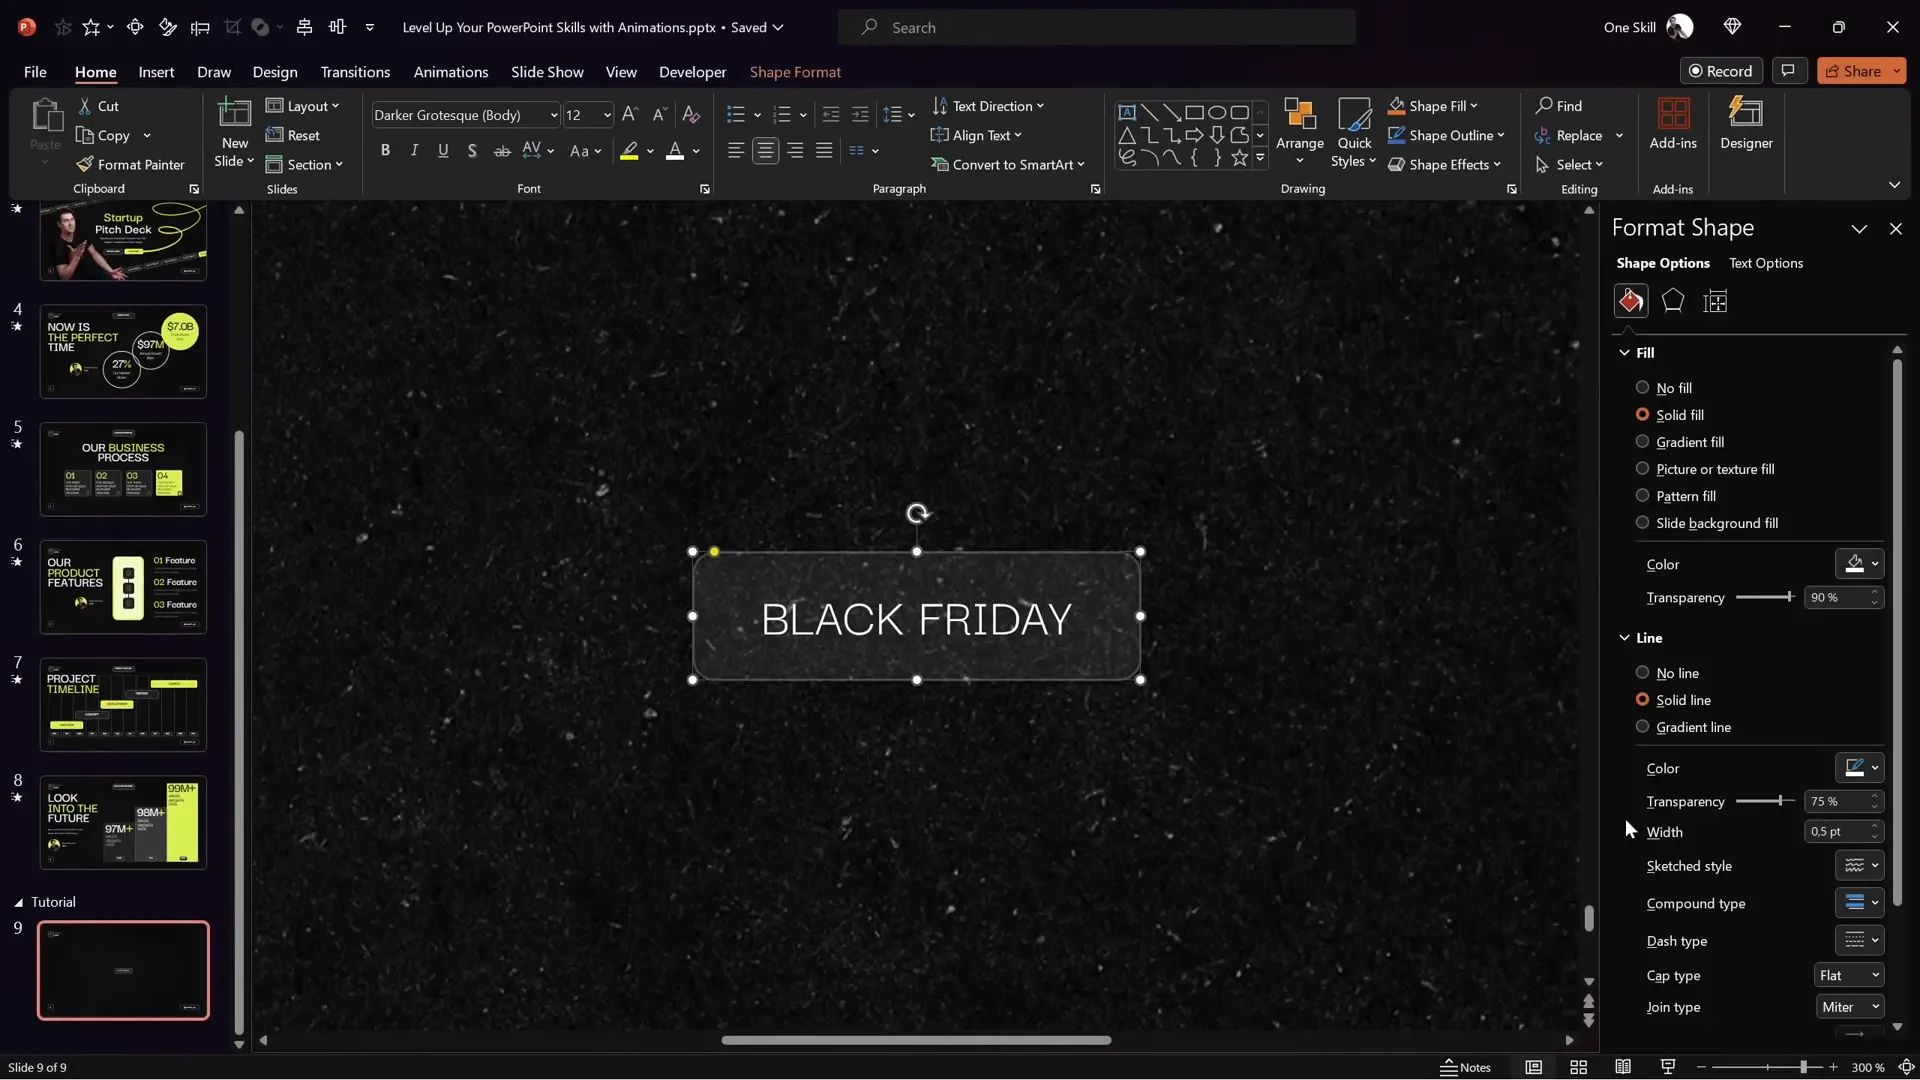
- Right-click the shape and select Format Shape to customize its appearance:
- Fill color: White with 90% transparency.
- Line color: White with 75% transparency and 0.5 pt thickness.
- Use the font Darker Grotesque, size 12, white color, and type your desired text inside the rectangle (e.g., “Black Friday”).
- Align the rectangle to the left side of the slide.
Once you have one styled rectangle, you can duplicate it multiple times to fill the width of your slide.
Building a Horizontal Scrolling Bar
To create a smooth scrolling bar:
- Duplicate the rounded rectangle multiple times (about nine) and arrange them side by side, evenly spaced.
- Group all the rectangles together using Ctrl + G.
- Duplicate this entire group and position the copy right next to the first group to cover the gap that will appear during scrolling.
- Change the leftmost rectangle in each group to a brighter style to serve as an alignment reference for the animation.
- Group both sets of rectangles into one large group.
This setup ensures that when the group moves, the rectangles will scroll seamlessly without gaps.
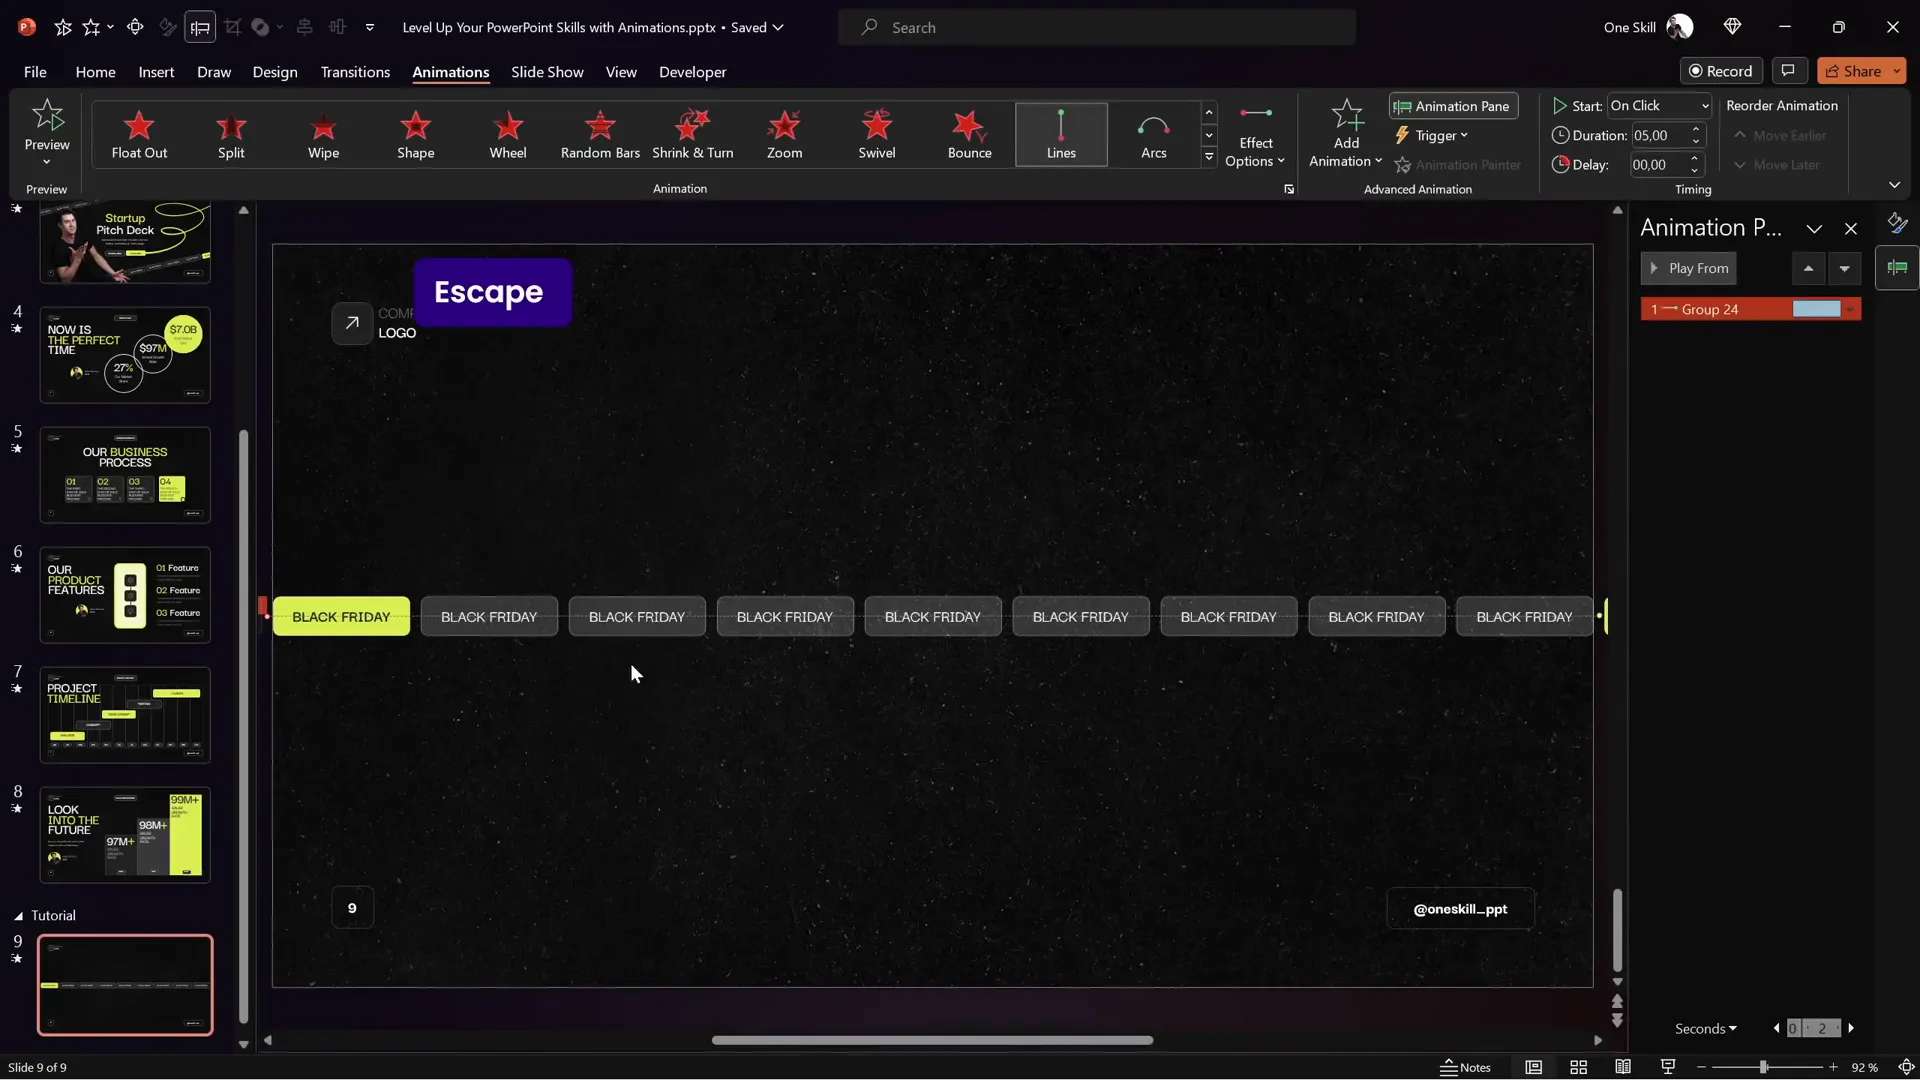
Making the Scrolling Bar Loop Seamlessly
After grouping the rectangles, you add a Motion Path Line animation to the group:
- Choose the Motion Path Line animation.
- Change the direction to Left (default is down).
- Adjust the animation’s end position (red bubble) so that the second bright rectangle perfectly overlaps the first bright rectangle’s starting position.
- Set the animation duration to 5 seconds (or longer for slower movement).
- Remove Smooth Start and Smooth End for consistent speed.
- In the animation timing options, set the animation to repeat Until End of Slide to create a continuous loop.
This careful alignment of bright rectangles ensures the scrolling motion resets seamlessly, creating an infinite loop effect.
Tilting the Scrolling Bar for a Dynamic Effect
To add visual interest, you can tilt the scrolling bar:
- Select the entire grouped scrolling bar.
- Use the rotate handle to tilt the group to your desired angle.
- Ensure only the first group of rectangles is visible on the slide area to avoid showing duplicates during scrolling.
- Adjust the motion path animation’s end position again to ensure the bright rectangles overlap correctly at the new angle.
Turning off snapping (Smart Guides) can help with precise alignment.
You can also slow down the scrolling by increasing the animation duration (e.g., 10 seconds) for a more elegant effect.
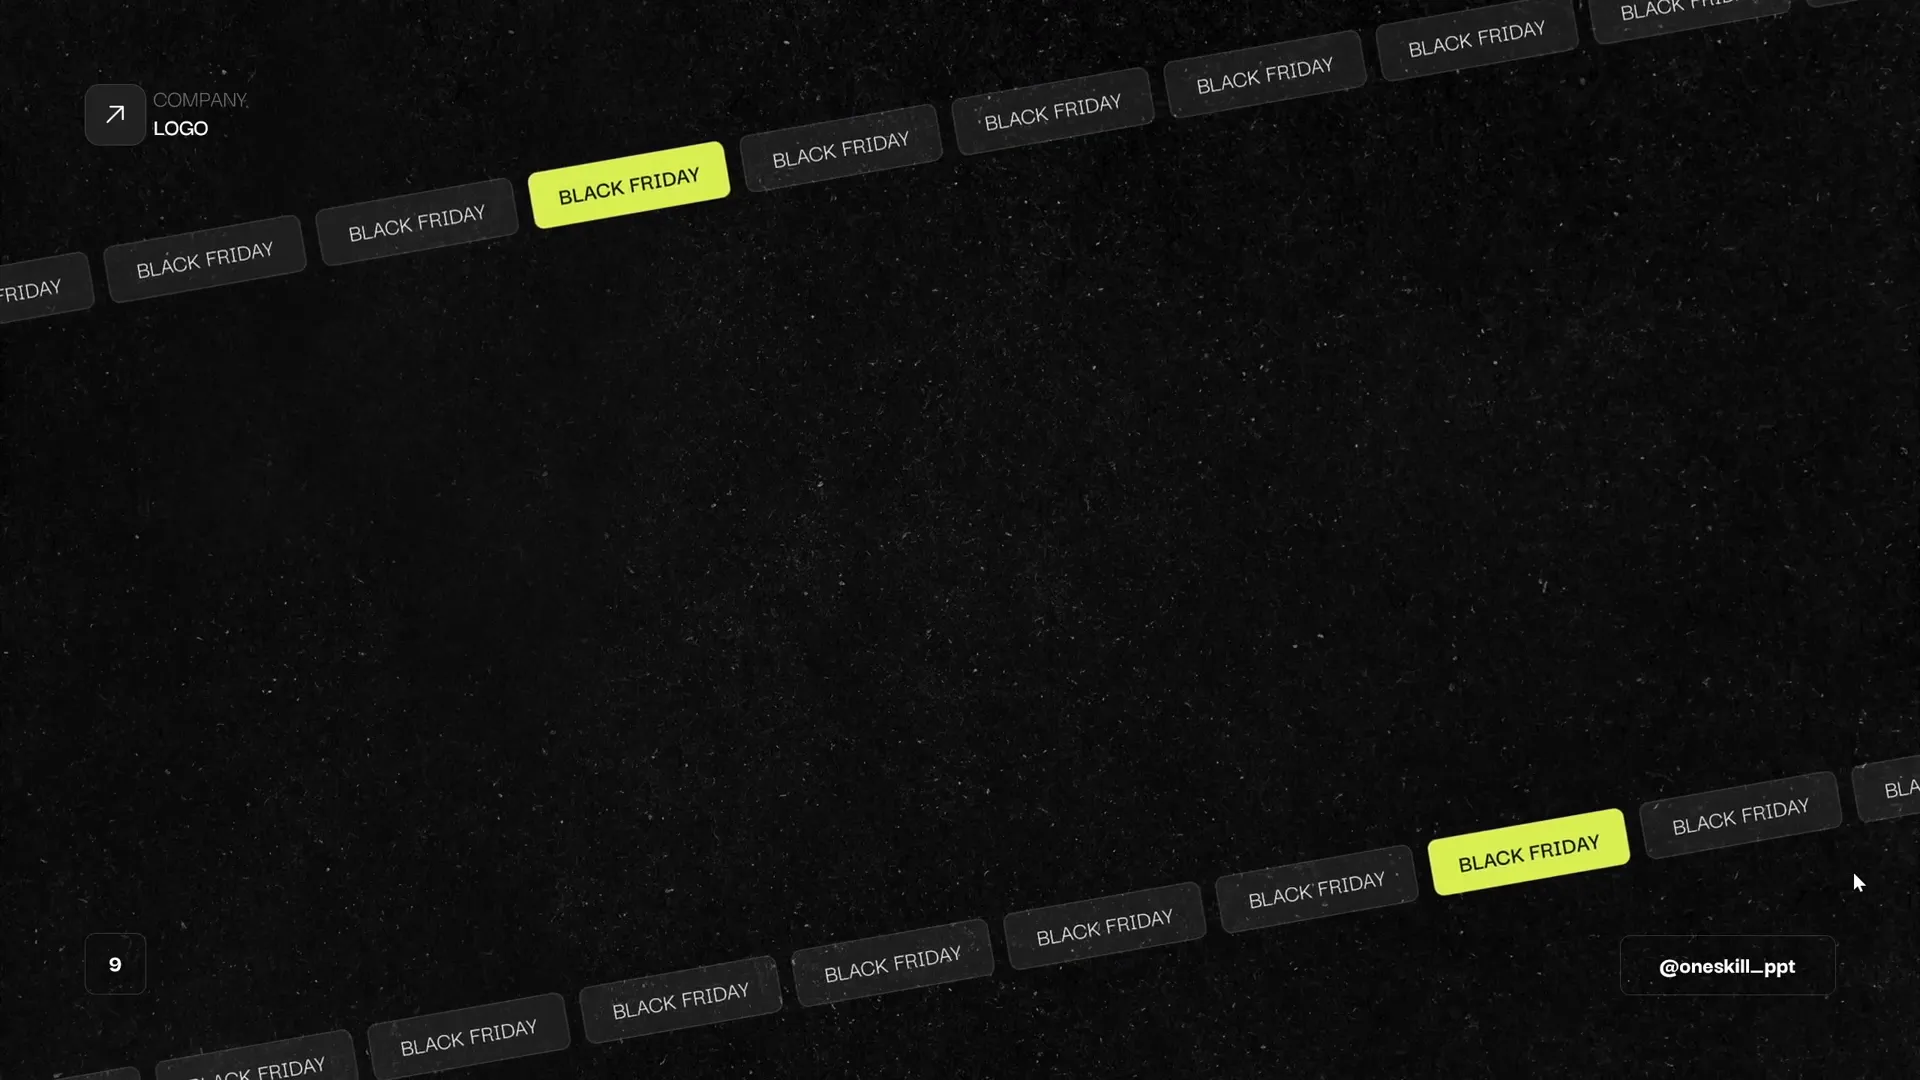
Creating a Scrolling Bar Moving in the Opposite Direction
To create a second scrolling bar moving in the opposite direction:
- Duplicate the existing scrolling bar group while holding Ctrl + Shift to drag a straight copy.
- Move the duplicated group slightly left to avoid gaps during scrolling.
- Make sure only the second group of rectangles inside the big group is visible.
- Change the motion path animation direction to Right for the new group.
- Align the bright rectangles as before to ensure seamless looping.
- Set the animation to start With Previous so both scrolling bars animate simultaneously on one click.
Adding Fade Animations to Scrolling Bars
To enhance the entrance of the scrolling bars, add a subtle fade-in animation to each:
- Select each scrolling bar group.
- Use the Add Animation button to add a Fade effect without removing the motion path animation.
- Set the fade animation to start With Previous to sync with the motion path.
This creates a smooth fade-in while the scrolling animation begins, making the slide entrance polished and professional.
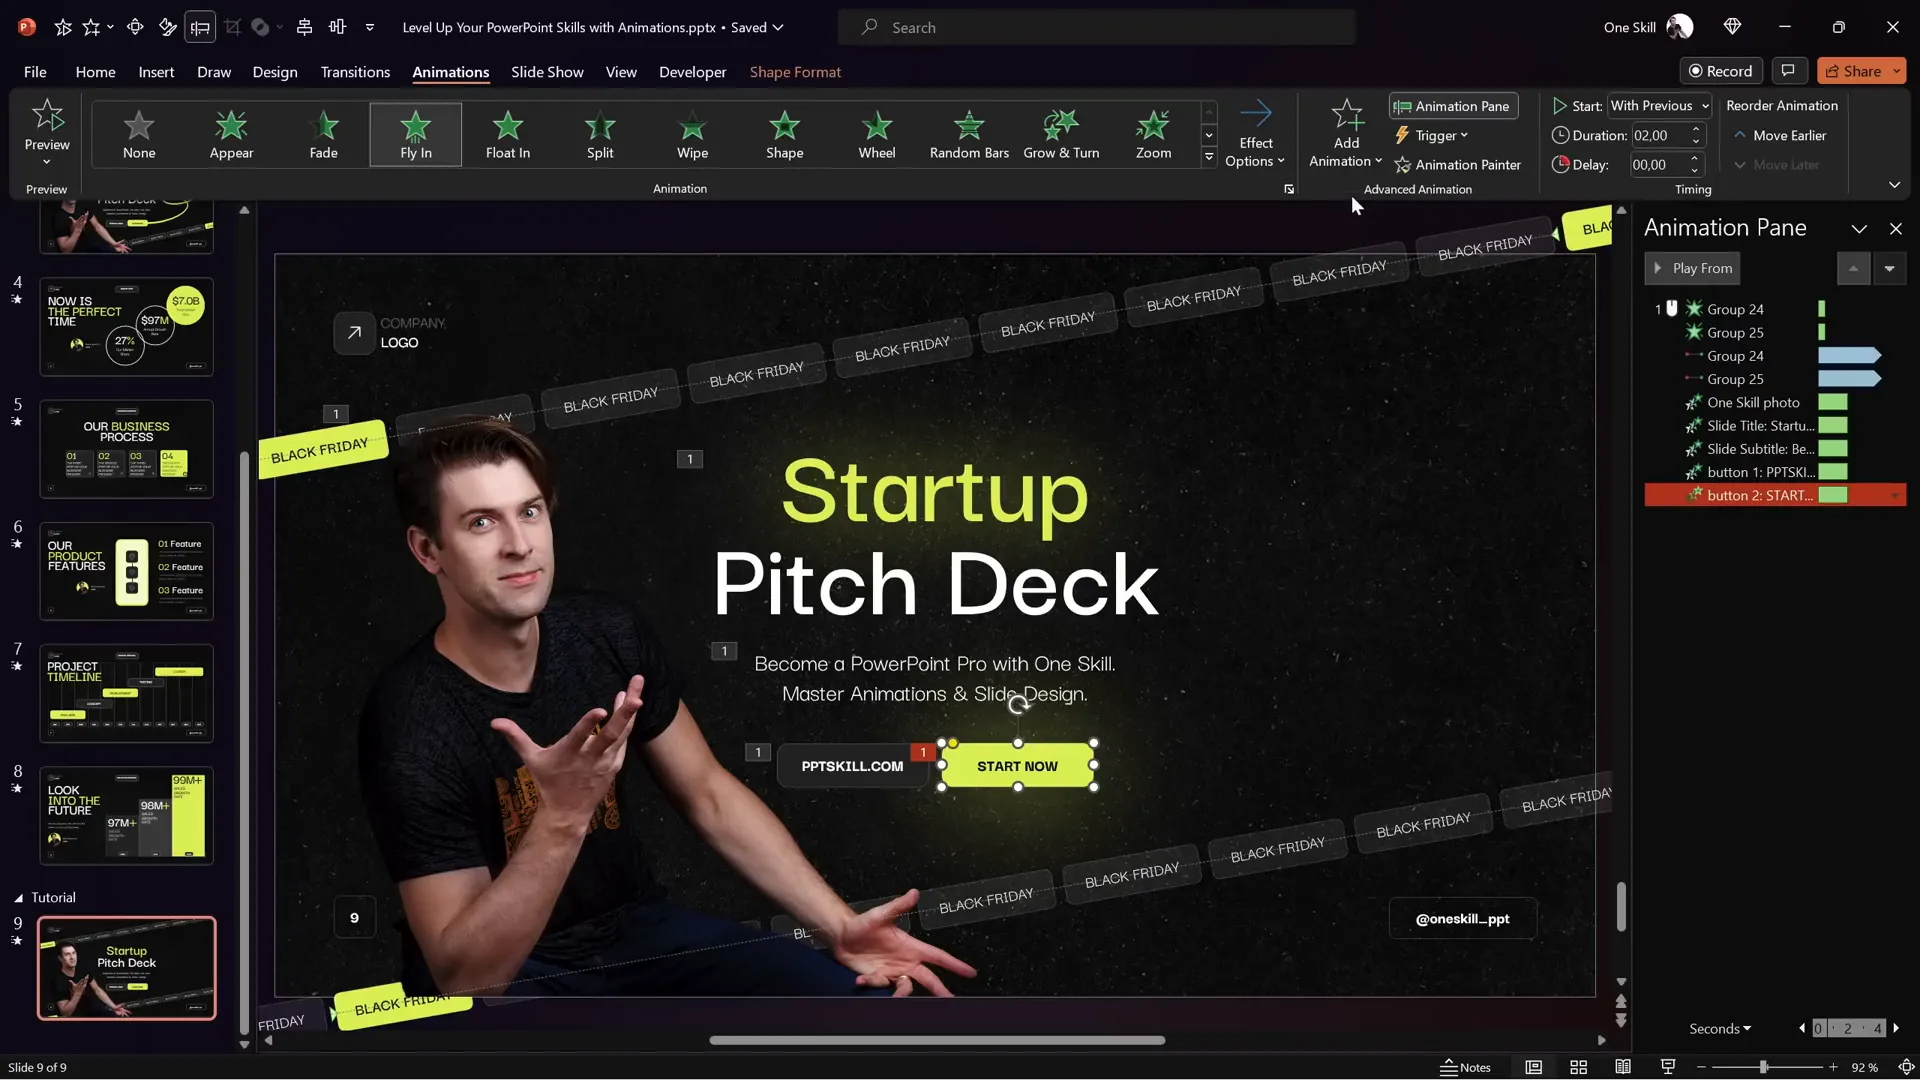
Animating Other Slide Elements: Photos, Titles, and Buttons
Beyond scrolling bars, animating other slide elements adds depth and cohesion. Here’s how to animate photos, titles, subtitles, and buttons for a lively presentation:
- Select the photo or object you want to animate.
- Add a Fly In animation from the left.
- Set the animation to start With Previous for seamless sequencing.
- Adjust the animation duration to 2 seconds.
- Enable a Bounce End effect with 1.5 seconds duration to add a playful finish.
- Use the Animation Painter tool to quickly copy this animation to other elements for consistent movement.
Creating Pulsing Button Animations
To make a call-to-action button stand out, a pulsing animation is effective:
- Select the button.
- Add a Grow/Shrink animation.
- Set it to start With Previous so it animates alongside other elements.
- Set the duration to 0.5 seconds.
- Adjust the growth size to about 105% for a subtle effect.
- Enable Auto Reverse so the button grows and shrinks continuously.
- Set the animation to repeat Until End of Slide.
- Add smooth start and smooth end timing of 0.25 seconds each for a softer pulse.
This gentle pulsing effect naturally draws the viewer’s eye to the button, encouraging interaction.
How to Create a Fun Scribble Animation
A scribble animation adds a personal, hand-drawn touch to your slide. Here’s the process:
- Go to the Draw tab and select a pen color (e.g., bright lime neon).
- Choose the thickest pen thickness for smooth lines.
- Draw a scribble shape on the slide. Don’t worry if it’s messy; you can undo (Ctrl + Z) and try again until you like the shape.
- Select the scribble shape.
- Go to the Animations tab and apply the Replay animation.
- Set the animation to start With Previous and adjust the duration to about 1.5 seconds.
- To sync the scribble animation with the “Start Now” button, add a delay equal to the button’s fly-in duration (e.g., 2 seconds) so the scribble animates right after the button appears.
This effect adds a dynamic flourish that can emphasize your messaging or branding.
Frequently Asked Questions
What are the benefits of adding scrolling bar animations to PowerPoint slides?
Scrolling bar animations create movement that attracts viewers’ attention and can highlight important information like promotions or announcements. They also add a modern, polished look that helps your presentation stand out.
How do I make animations loop seamlessly in PowerPoint?
To loop animations seamlessly, align the start and end points precisely (e.g., overlapping bright rectangles as visual anchors), remove smooth start and end effects, and set the animation to repeat until the end of the slide in the timing options.
Can I customize the speed of the scrolling animation?
Yes, you can adjust the animation duration to control the scrolling speed. A longer duration slows the movement, creating a more elegant effect, while a shorter duration speeds it up.
Is it possible to create animations like these without advanced PowerPoint skills?
Absolutely. The tutorial breaks down each step into manageable parts. Additionally, courses like the PowerPoint Animation Mastery Course provide structured lessons to help you build skills from beginner to pro.
What fonts and colors work best for animated slides?
Use clean, modern fonts like Darker Grotesque for readability and style. Choose colors that contrast well with your background and maintain brand consistency. Semi-transparent shapes with white or bright neon colors work well for contemporary business presentations.
How can I add a pulsing effect to buttons?
Add a Grow/Shrink animation with auto-reverse enabled and set it to repeat until the end of the slide. Adjust the growth percentage and smooth start/end settings to make the pulse subtle and engaging.
Conclusion
Mastering PowerPoint presentation skills means more than just creating slides; it’s about crafting an engaging experience for your audience. By incorporating simple animations like scrolling bars, pulsing buttons, and scribble effects, you can transform your presentations from static to dynamic.
Through careful grouping, motion path animations, and timing adjustments, you’ll create seamless loops and polished effects that impress. Don’t forget to customize your slide layouts using Slide Master for consistency and professionalism.
If some animation concepts feel complex, consider exploring dedicated courses such as the PowerPoint Animation Mastery Course, which offers step-by-step guidance and free resources to help you become a PowerPoint animation pro.
With these skills under your belt, you’ll be ready to create stunning, animated presentations that captivate and communicate effectively. Happy animating!


