
PowerPoint presentations are a crucial tool for communicating ideas clearly and effectively. Whether you’re pitching a business proposal, educating an audience, or sharing a project update, the design of your slides plays a pivotal role in how your message is received. In this comprehensive guide, you’ll learn how to create a visually appealing and interactive 4-option infographic slide in PowerPoint, perfectly suited for showcasing multiple choices or categories in a clean, professional layout.
This tutorial, inspired by expert techniques, walks you through the entire process—from setting up your slide background to adding interactive animations that bring your slide to life. With detailed instructions, handy tips, and illustrative screenshots, you’ll be equipped to elevate your PowerPoint slide design skills and create engaging infographic slides that captivate your audience.
Let’s dive into the essentials of crafting this powerful infographic slide and explore how you can customize it to fit your unique presentation needs.
Table of Contents
- Overview of the 4-Option Infographic Slide
- Slide Preparation and Background Setup
- Creating the Rounded Rectangle Shapes
- Fragmenting and Coloring Shapes for Visual Appeal
- Adding Icons and Text for Each Option
- Duplicating and Customizing Color Variations
- Grouping Objects for Easier Animation
- Applying Animations for Interactive Effects
- Additional Customization Tips
- Frequently Asked Questions (FAQ)
- Conclusion
Overview of the 4-Option Infographic Slide
This infographic slide design utilizes four square sections that serve as clickable options within a PowerPoint presentation. Each option, when clicked, reveals detailed information including a title, descriptive text, and a corresponding icon. The design also allows for additional details such as option numbers to be displayed prominently at the top, creating a clear and organized visual hierarchy.
The interactive nature of this slide makes it ideal for:
- Displaying product features or service benefits
- Breaking down steps in a process
- Comparing multiple options or categories
- Presenting segmented data in an engaging way
Such a slide not only boosts engagement during presentations but also enhances comprehension by allowing the audience to focus on one section at a time.
Slide Preparation and Background Setup
Before diving into creating shapes and animations, it’s essential to prepare your slide canvas properly. This ensures that your design elements align perfectly and your slide maintains a professional look.
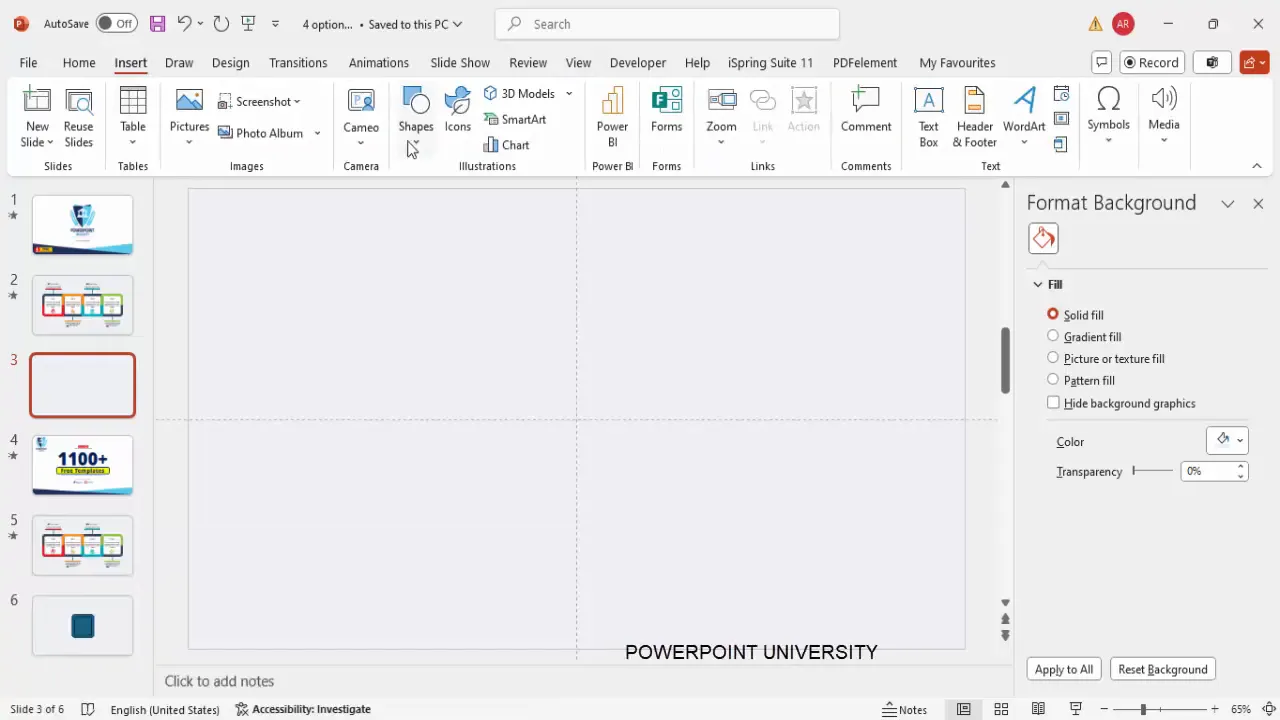
Step 1: Add a New Slide and Set Background Color
- Start by adding a new blank slide to your PowerPoint presentation.
- Change the slide background to a light blue color or any light shade that complements your presentation theme. This provides a soft, inviting backdrop for your infographic elements.
Step 2: Enable Guides for Precise Alignment
- Navigate to the View tab and enable Guides. These guides help you align shapes and text boxes precisely, ensuring consistency across the slide.
Creating the Rounded Rectangle Shapes
The core visual elements of the infographic are the rounded rectangles that form the clickable options. Here’s how to create and customize these shapes:
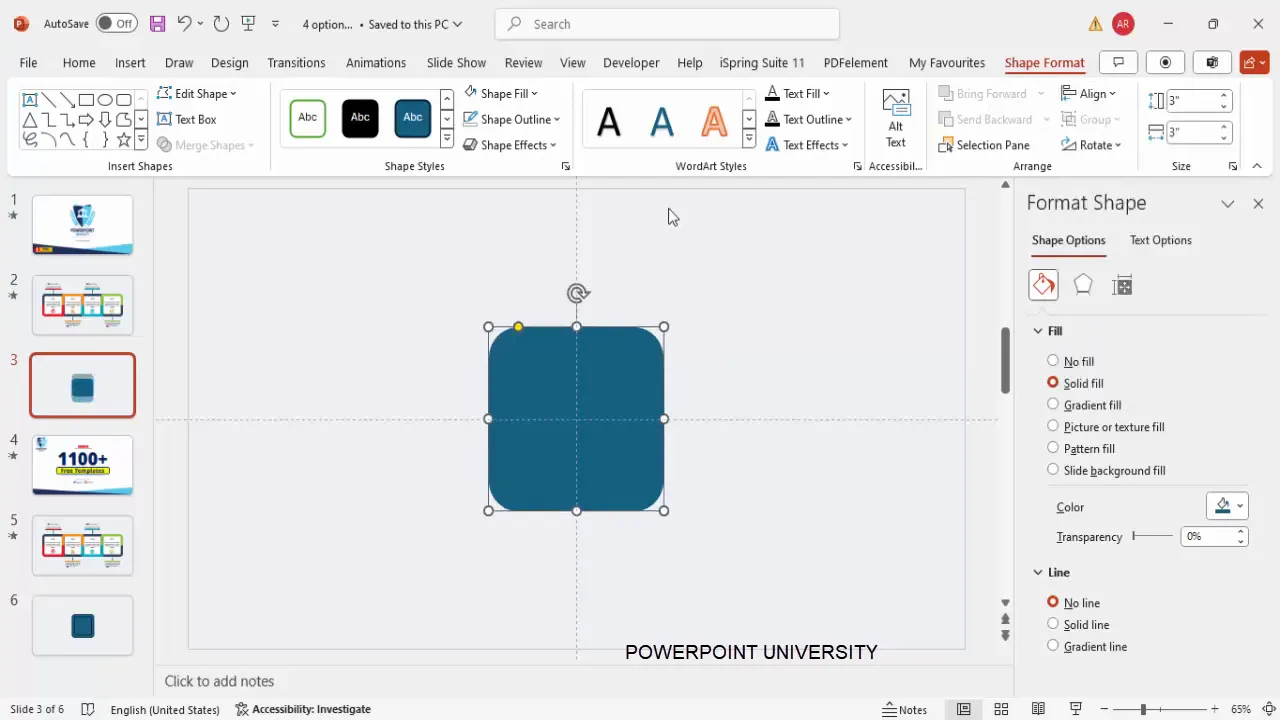
Step 1: Insert the Primary Rounded Rectangle
- Go to Insert > Shapes and select a rectangle with rounded corners.
- Click on the slide to insert the shape.
- Under Shape Format, set the height and width to 3 inches each for a balanced square shape.
- Remove the outline by selecting No Outline.
- Align the shape to the center both horizontally and vertically using Align Center and Align Middle.
- Adjust the small orange corner radius handle by dragging it outward slightly to soften the corners.
Step 2: Duplicate and Resize the Secondary Rectangle
- Press Ctrl + D to duplicate the rounded rectangle.
- Set the duplicated shape’s height and width to 2.25 inches for a smaller inner rectangle.
- Remove the outline and fill it with a color of your choice.
- Align it again to center and middle.
- Adjust the corner radius handle to reduce curvature as needed.
Step 3: Save a Duplicate for Later Use
- Duplicate the smaller rectangle again and keep it aside for future modifications or layering.
Fragmenting and Coloring Shapes for Visual Appeal
To create more complex shapes and visual depth, the tutorial uses the Fragment tool. This feature breaks overlapping shapes into smaller pieces, allowing for more intricate designs.
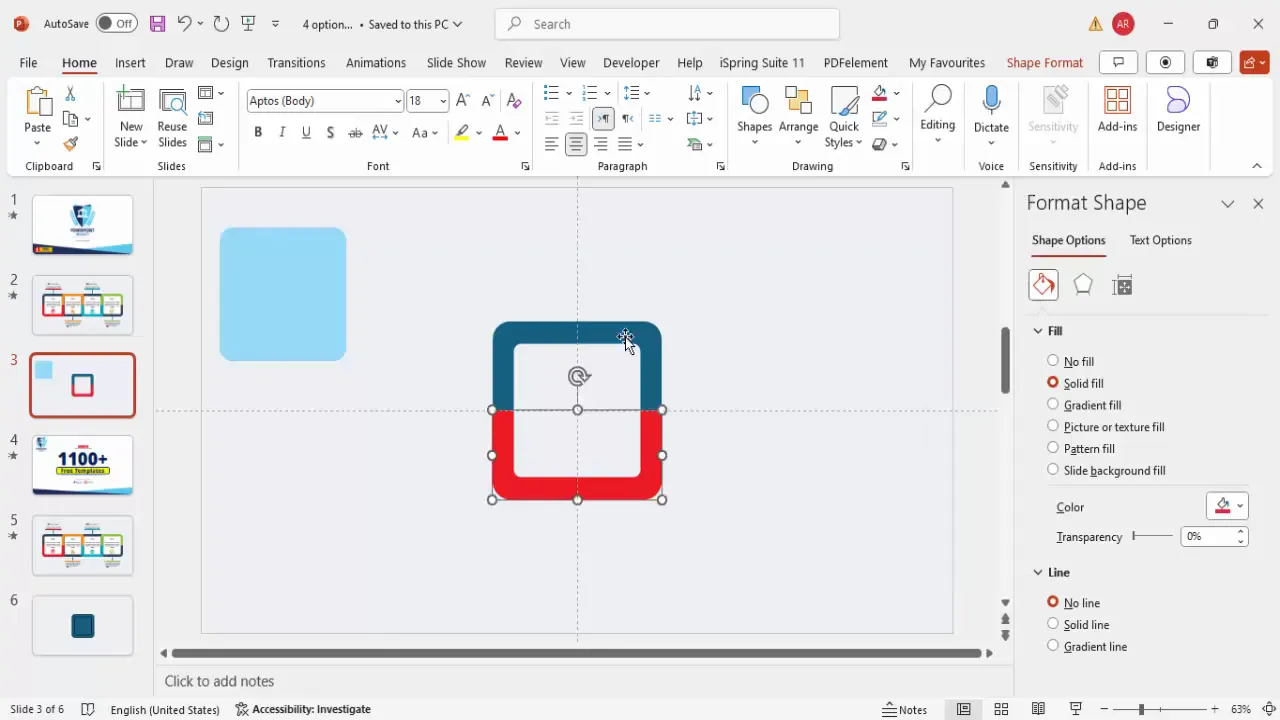
Step 1: Insert a Half Rectangle
- Insert a new rectangle that covers only half of one of the rounded rectangles.
- Position it carefully so it overlaps with the existing rounded rectangles.
Step 2: Fragment the Shapes
- Select all three shapes by holding Shift and clicking each shape.
- Go to Shape Format > Merge Shapes > Fragment.
- This divides the shapes into smaller segments based on the overlapping areas.
- Delete any unwanted fragments to clean up the design, leaving two distinct shapes.
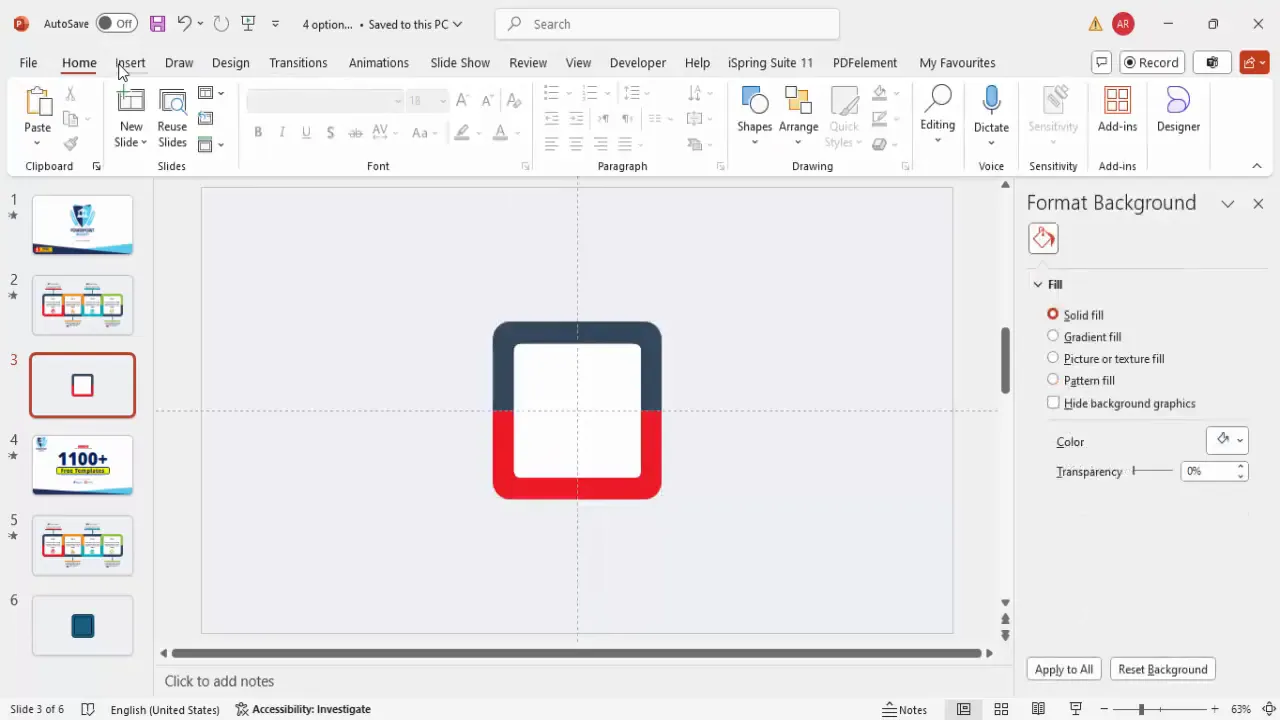
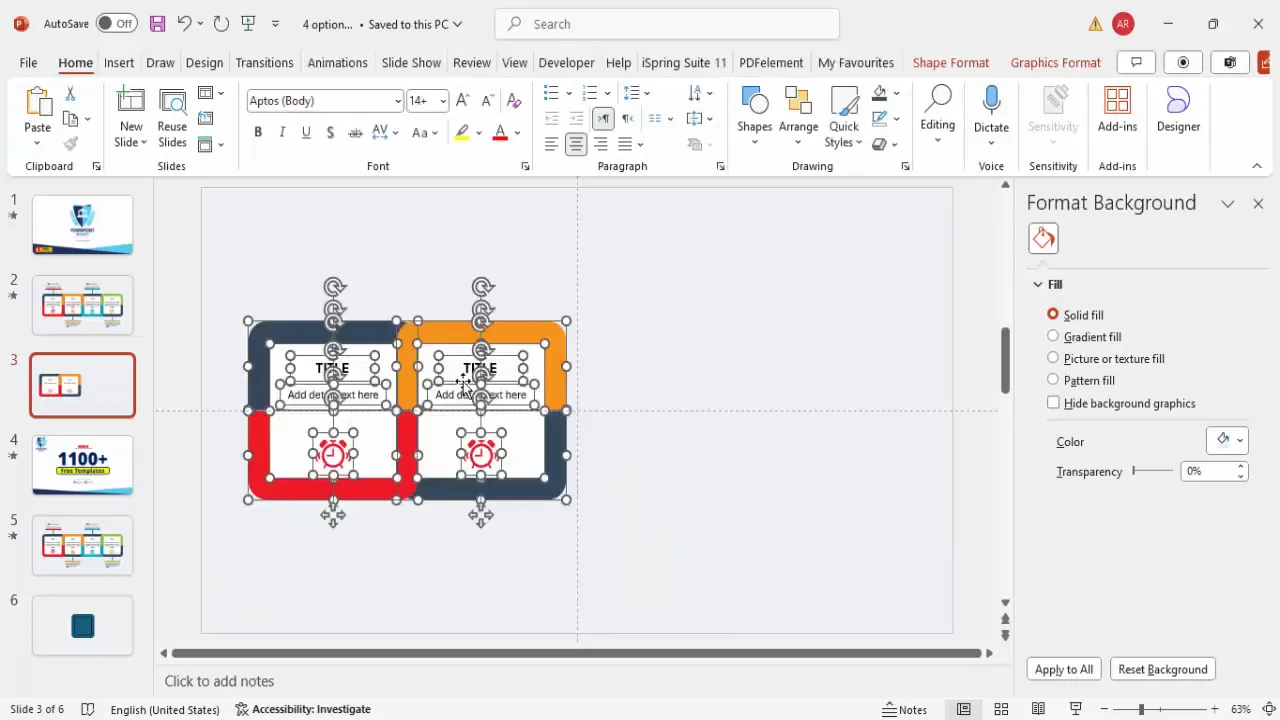
Step 3: Apply Colors
- Fill one shape with a reddish color and the other with a bluish-gray tone for contrast.
- Bring the smaller shape to the front and fill it with white.
- Ensure all shapes have no outlines for a sleek look.
- Align all shapes to center and middle for consistency.
Adding Icons and Text for Each Option
Icons and text are essential to communicate the purpose of each option clearly. Here’s how to add and format these elements:
Step 1: Insert Icons
- Go to Insert > Icons to open the icon library.
- Choose icons relevant to your presentation topic. For demonstration, an alarm clock icon is used.
- Insert the icon and resize it to 0.7 inches in height and width.
- Color the icon to match the smaller rounded rectangle’s fill color for a cohesive look.
- Position the icon centrally within the smaller rectangle.
Step 2: Add Titles and Descriptions
- Insert a text box above or below the icon for the option title.
- Center-align the text and make it bold for emphasis.
- Insert another text box for detailed descriptive text.
- Center-align this text and reduce the font size to 12-14 pt for readability without overwhelming the slide.
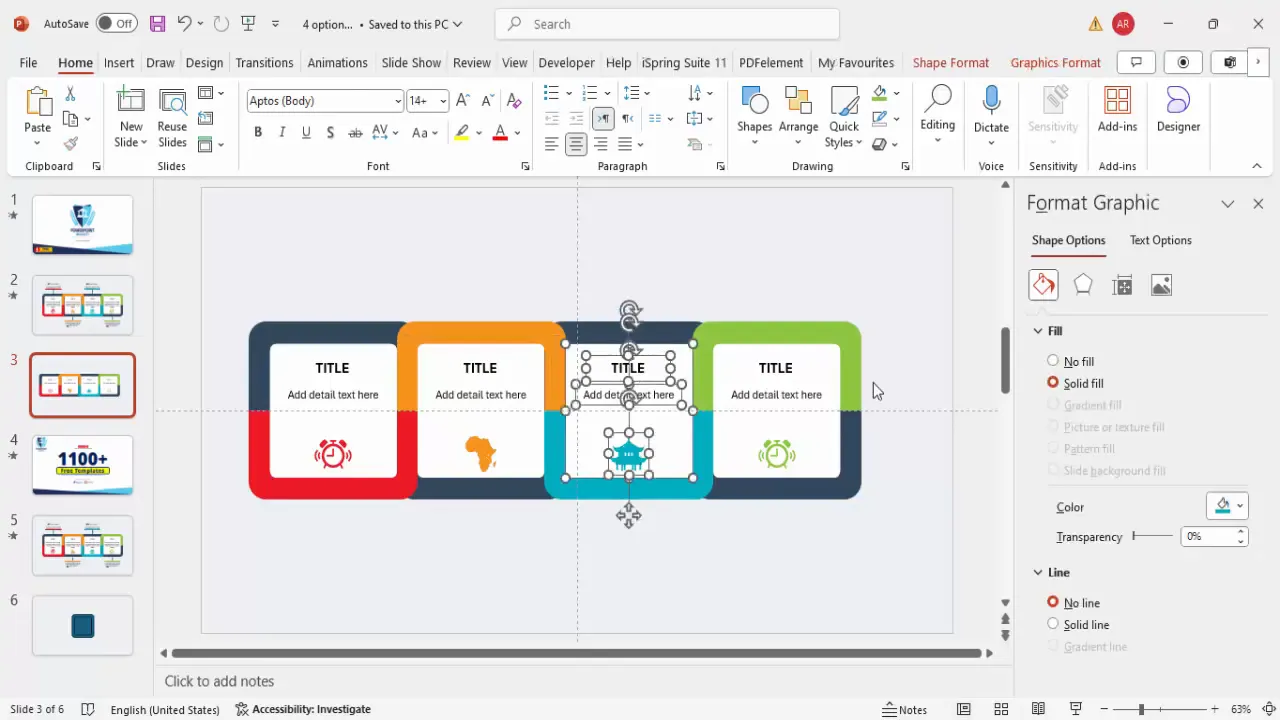
Duplicating and Customizing Color Variations
To create four distinct options, you’ll duplicate the designed option and customize colors and icons for each variation.
Step 1: Duplicate the Group of Shapes and Text
- Select all objects of one option (shapes, icon, title, and description).
- Hold Ctrl + Shift and drag to duplicate the entire group.
- Position the duplicate directly over the original to maintain alignment.
Step 2: Change Colors for Differentiation
- Change the fill color of the larger rectangle to an orange shade.
- Keep the blue-gray color consistent for the smaller rectangle.
- Send the larger rectangle to the back to layer correctly.
- Repeat duplications two more times to create four total options.
- For the third and fourth options, select different color combinations such as blue and light green for variety and visual interest.
Step 3: Update Icons for Each Option
- Select the icon in each option group.
- Go to Graphic Format > Change Graphic to replace the icon with new ones relevant to your content (e.g., African map, Japanese house).
- Adjust the icon colors to match the option’s color scheme.
Grouping Objects for Easier Animation
Grouping the elements of each option into a single unit simplifies the animation process and ensures consistent movement.
Step 1: Select the Elements to Group
- Click each shape, icon, and text box within one option while holding Shift.
- Once all relevant elements are selected, press Ctrl + G to group them.
Step 2: Repeat for All Options
- Group the remaining three options in the same way.
- This allows you to animate each option as a single entity rather than animating individual components.
Grouping not only streamlines animation but also helps maintain alignment and positioning when moving or duplicating options.
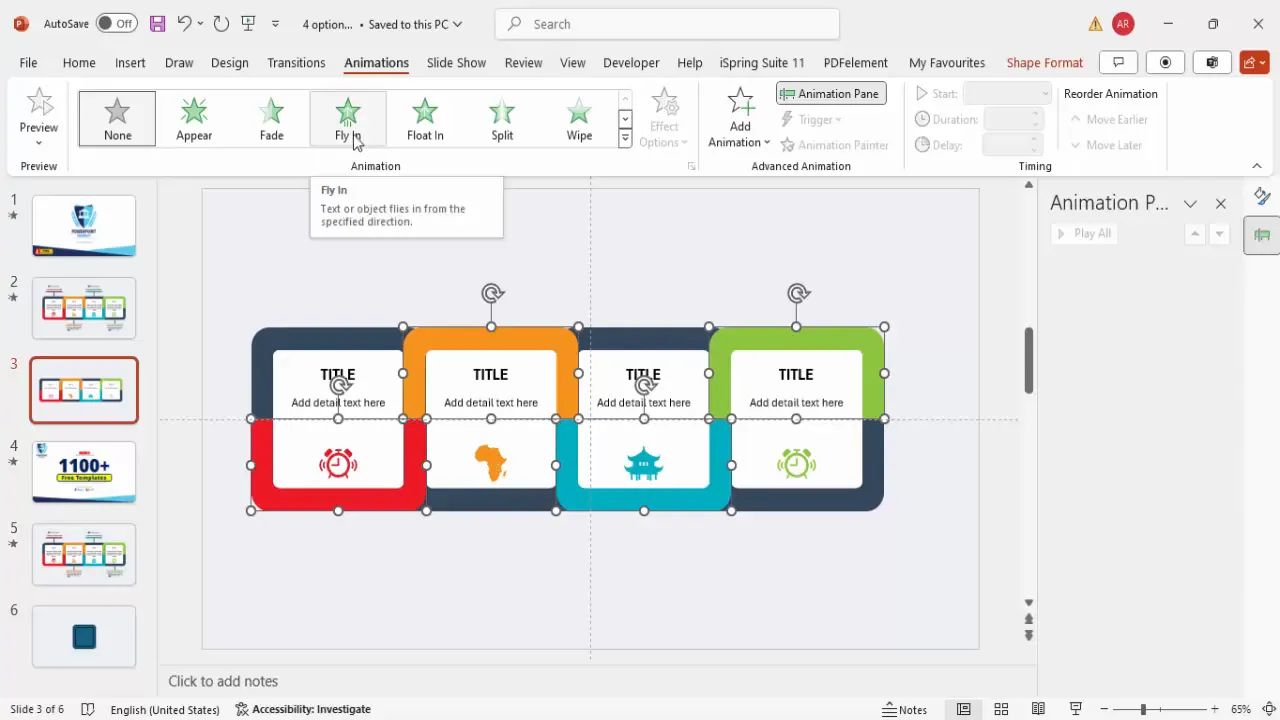
Applying Animations for Interactive Effects
Animations enhance your infographic slide’s interactivity, making it more engaging and easier to follow.

Step 1: Enable Animation Pane
- Go to the Animations tab and open the Animation Pane for better control.
Step 2: Animate the First Two Options
- Select the first two grouped options using Shift click.
- Apply the Fly In animation effect.
- Set the direction for these to From Top so they appear to drop in.
Step 3: Animate the Remaining Options
- Select the third and fourth options and apply the same Fly In effect with the direction From Top.
- Set these animations to start After Previous for a seamless sequence.
Step 4: Add Zoom Effect for Detail Reveal
- Select each option group individually and add the Basic Zoom animation from the More Intense Effects menu.
- Set the zoom effect to From Out for a smooth zoom-in appearance.
- You can configure these animations to trigger On Click to control when details appear during your presentation.
Additional Customization Tips
To further enhance your infographic slide, consider these customization ideas:
- Option Numbering: Add option numbers at the top of each square using small text boxes. This helps guide your audience through the options logically.
- Consistent Font Choices: Use bold and center-aligned titles with a clean font to ensure readability.
- Color Harmony: Choose a consistent color palette that reflects your brand or presentation theme to maintain a professional look.
- Icon Relevance: Select icons that clearly represent the content of each option to strengthen visual communication.
- Spacing and Alignment: Use PowerPoint’s alignment tools and guides to maintain equal spacing between options and within each option’s elements.
- Interactive Navigation: Consider adding hyperlinks or triggers within each option to navigate to detailed slides or external resources.
These enhancements will increase the overall impact and usability of your infographic slide.
Frequently Asked Questions (FAQ)
Q1: Can I use this 4-option infographic slide for any presentation topic?
Absolutely! This design is versatile and customizable, making it suitable for a wide range of topics including business, education, marketing, and more.
Q2: How do I change the icons to better fit my content?
Simply select the icon, go to the Graphic Format tab, and click Change Graphic. You can choose from PowerPoint’s built-in icon library or insert your own images.
Q3: Is it possible to add more than four options?
While this tutorial focuses on four options for clarity and balance, you can duplicate and adjust the layout to accommodate more options. Just keep in mind that too many options may clutter the slide.
Q4: How can I ensure the animations work smoothly during my presentation?
Before presenting, use the Slide Show mode to preview your animations. Adjust timing and triggers in the Animation Pane to ensure seamless transitions.
Q5: Can I download a ready-made template of this infographic slide?
Yes, you can find free PowerPoint templates with similar infographic designs available online to save time. Customizing these templates to fit your content is straightforward.
Conclusion
Mastering PowerPoint slide design is essential for creating presentations that are both visually appealing and effective at conveying your message. The 4-option infographic slide is a powerful tool that organizes complex information into digestible, interactive segments.
By following this step-by-step guide, you’ve learned how to:
- Prepare your slide background and layout
- Create rounded rectangle shapes and utilize fragment tools for creative designs
- Add meaningful icons and descriptive text
- Duplicate and customize color schemes for multiple options
- Group objects for efficient animation
- Apply engaging animations to enhance interactivity
- Customize the slide further for clarity and professional polish
With these skills, you can now create impressive infographic slides that make your presentations stand out. Remember, a well-designed slide not only grabs attention but also helps your audience retain information better.
Explore different color schemes, icons, and animations to tailor this template to your specific needs. Practice using the animation pane to control the flow and timing, ensuring your presentation is smooth and captivating.
Happy designing!
Check out the full video: Create 4 Option Infographic Slide in PowerPoint


