
Are you ready to elevate your presentation game with visually captivating PowerPoint slide designs? Whether you’re a seasoned presenter or just starting out, mastering the art of PowerPoint slide design can transform your slides from dull to dazzling. In this comprehensive tutorial, inspired by One Skill PPT’s expert walkthrough, you’ll learn how to create impressive, animated slides featuring beautiful rounded hexagons and seamless background fills. This step-by-step guide will walk you through designing, customizing, and animating your slides to leave a lasting impression on your audience.
By the end of this article, you’ll not only understand the design process but also how to add smooth animations that enhance your storytelling. Let’s dive into the creative world of PowerPoint slide design and unlock your potential as an unstoppable PowerPoint creator.
Table of Contents
- Getting Started: Setting Up Your Slide Background
- Creating a Semi-Transparent Overlay
- Using Slide Background Fill for Shapes
- How to Create Rounded Hexagons Using Figma
- Importing and Editing SVG Hexagons in PowerPoint
- Arranging Hexagons and Building Patterns
- Applying Slide Background Fill to Hexagons
- Grouping Hexagons for Easy Animation
- Adding Smooth Animations to Your Hexagons
- Finalizing Slide Design with Text and Logo
- Quickly Changing Background Photos for New Looks
- Frequently Asked Questions (FAQ)
- Conclusion
Getting Started: Setting Up Your Slide Background
Every great PowerPoint slide design begins with a compelling background. In this tutorial, the first step is to fill a blank slide with a beautiful, high-quality photo that sets the tone for the entire presentation.
- Find the perfect photo: Download images from Unsplash.com, a treasure trove of free, professional photos. The video description provides direct links to some stunning photos used in this tutorial.
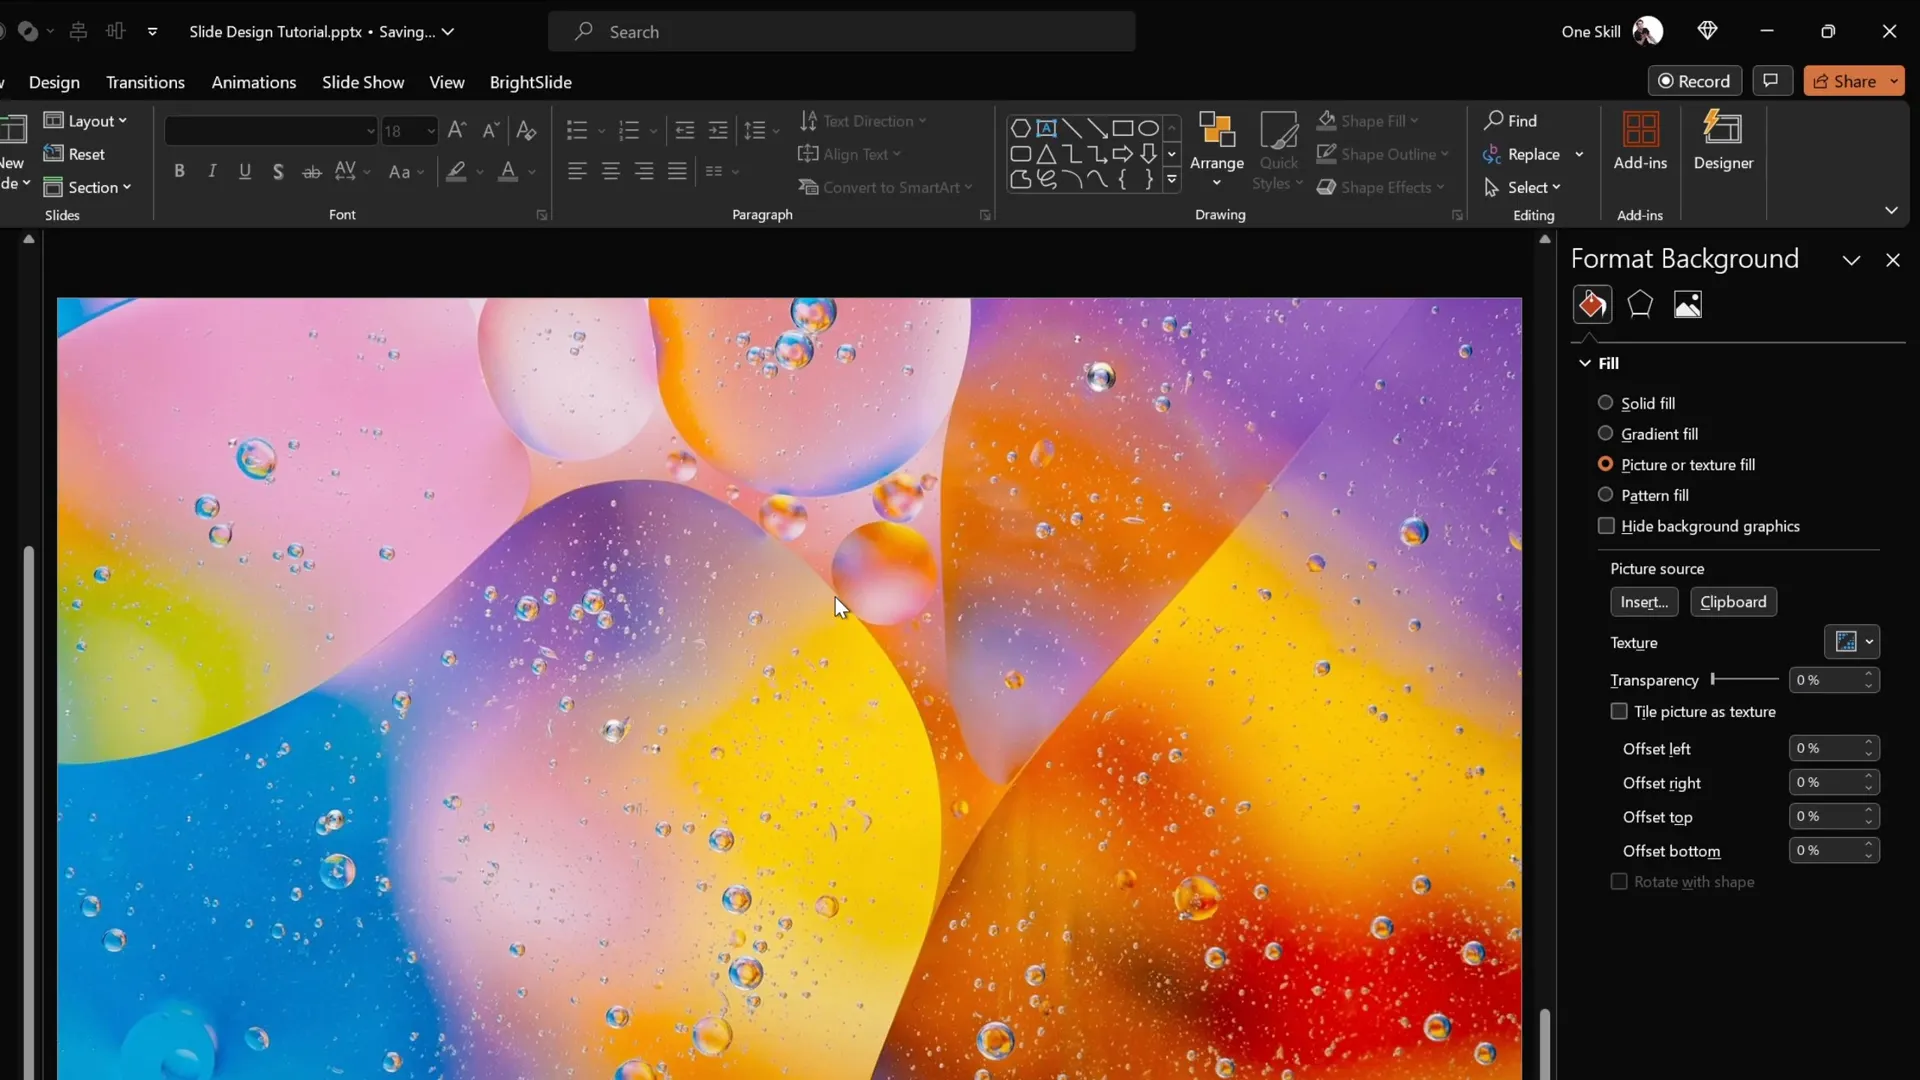
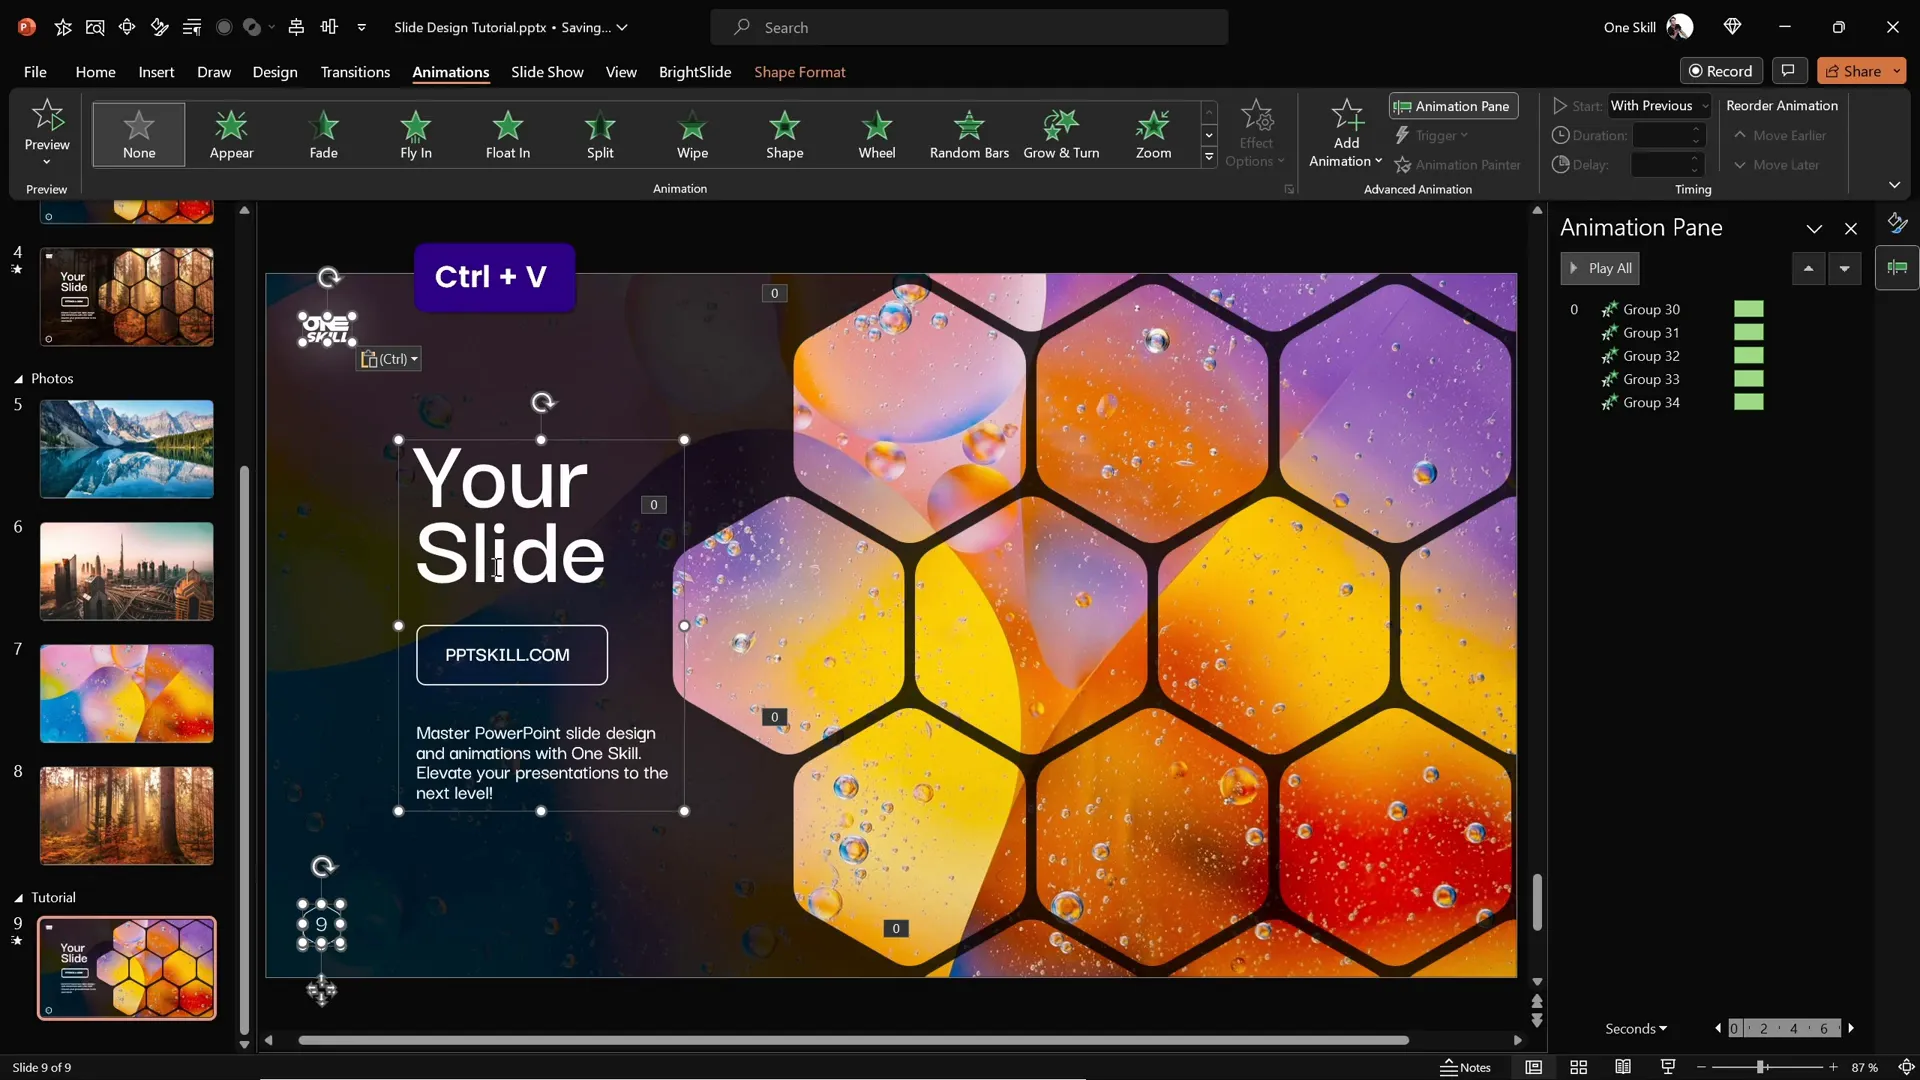
- Set the photo as the slide background: Copy your chosen image (Ctrl + C), then return to your blank PowerPoint slide. Right-click anywhere on the slide and select Format Background.
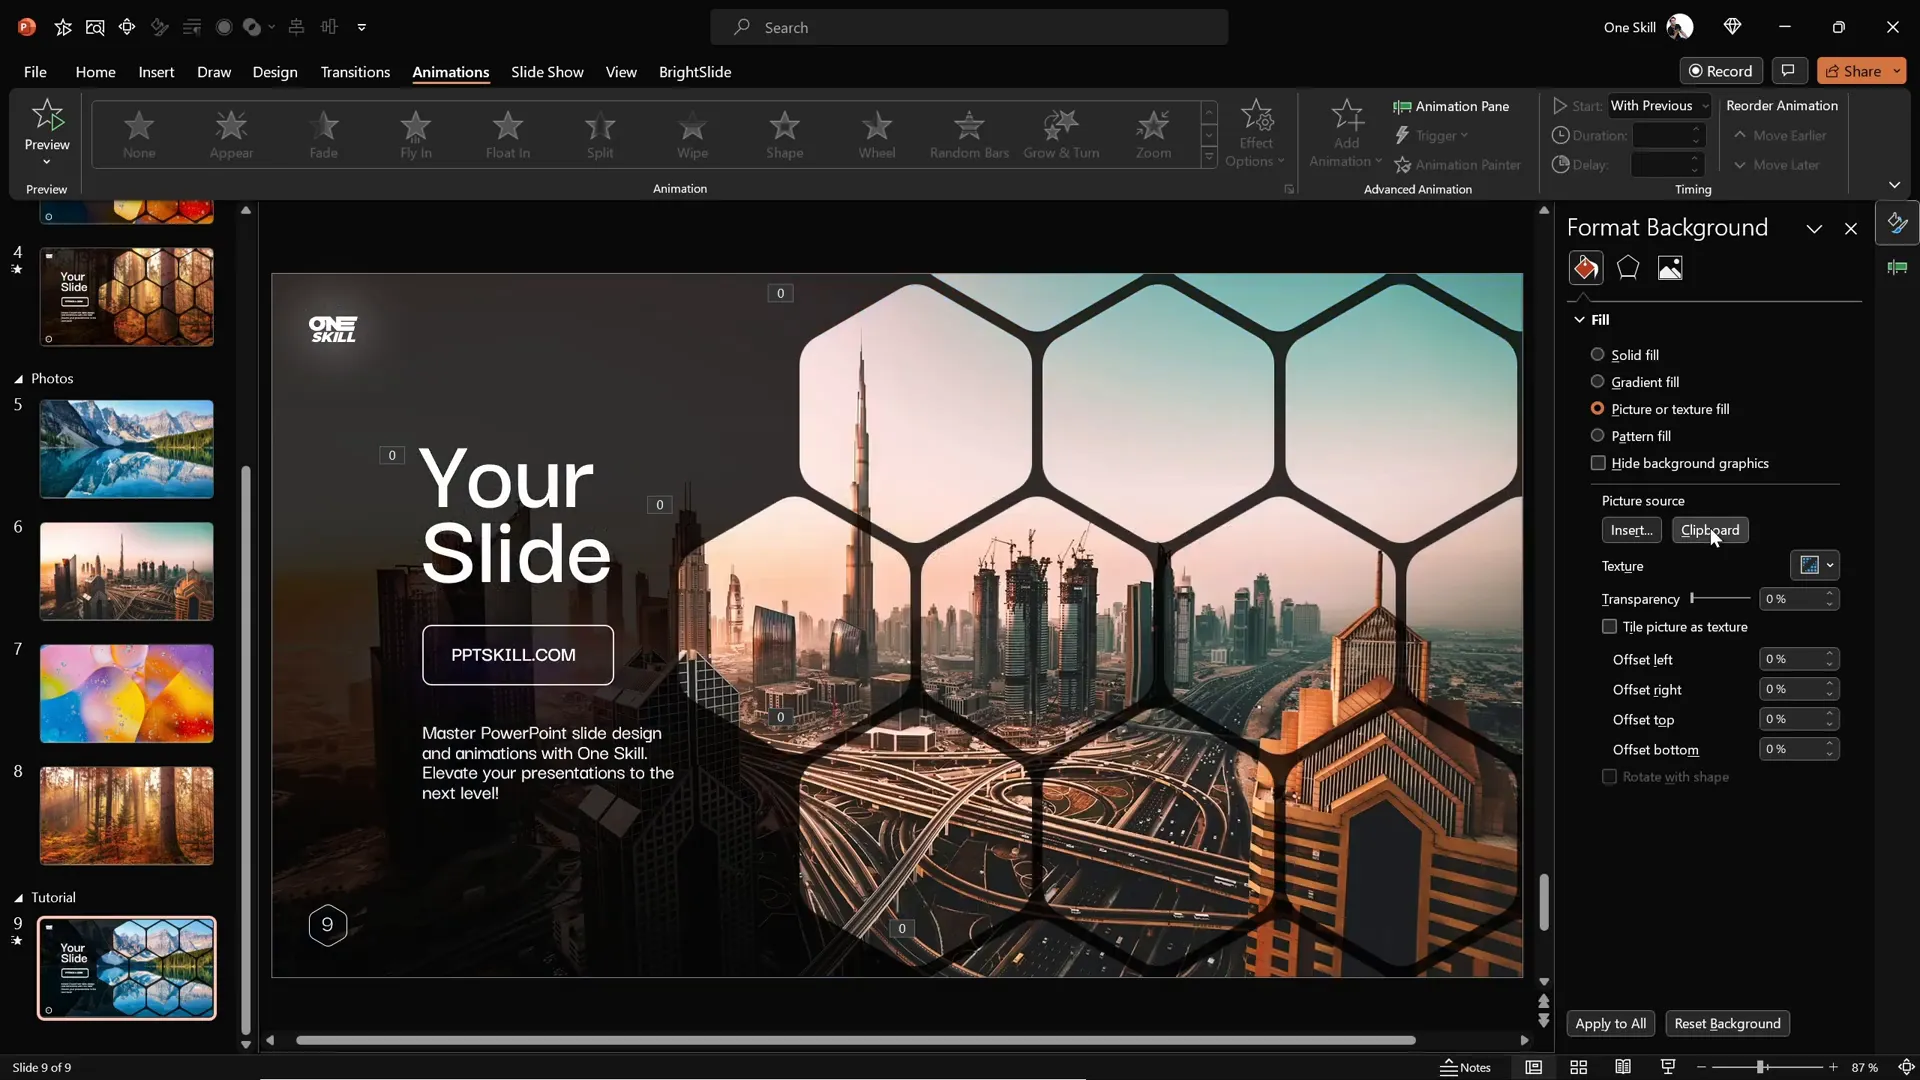
- Paste the photo: In the Format Background pane, choose Picture or texture fill, then click Clipboard to paste the copied photo as the slide background.
- Note: The photo is now locked as the background and cannot be selected or moved, which is ideal for clean slide design.
Creating a Semi-Transparent Overlay
To make the slide content more readable and add a stylish effect, the next step is to insert a semi-transparent dark rectangle over the background photo.
- Go to the Insert tab and select Shapes, then choose the Rectangle tool.
- Draw a rectangle aligned to the top-left corner of the slide, then drag it to cover the entire slide area.
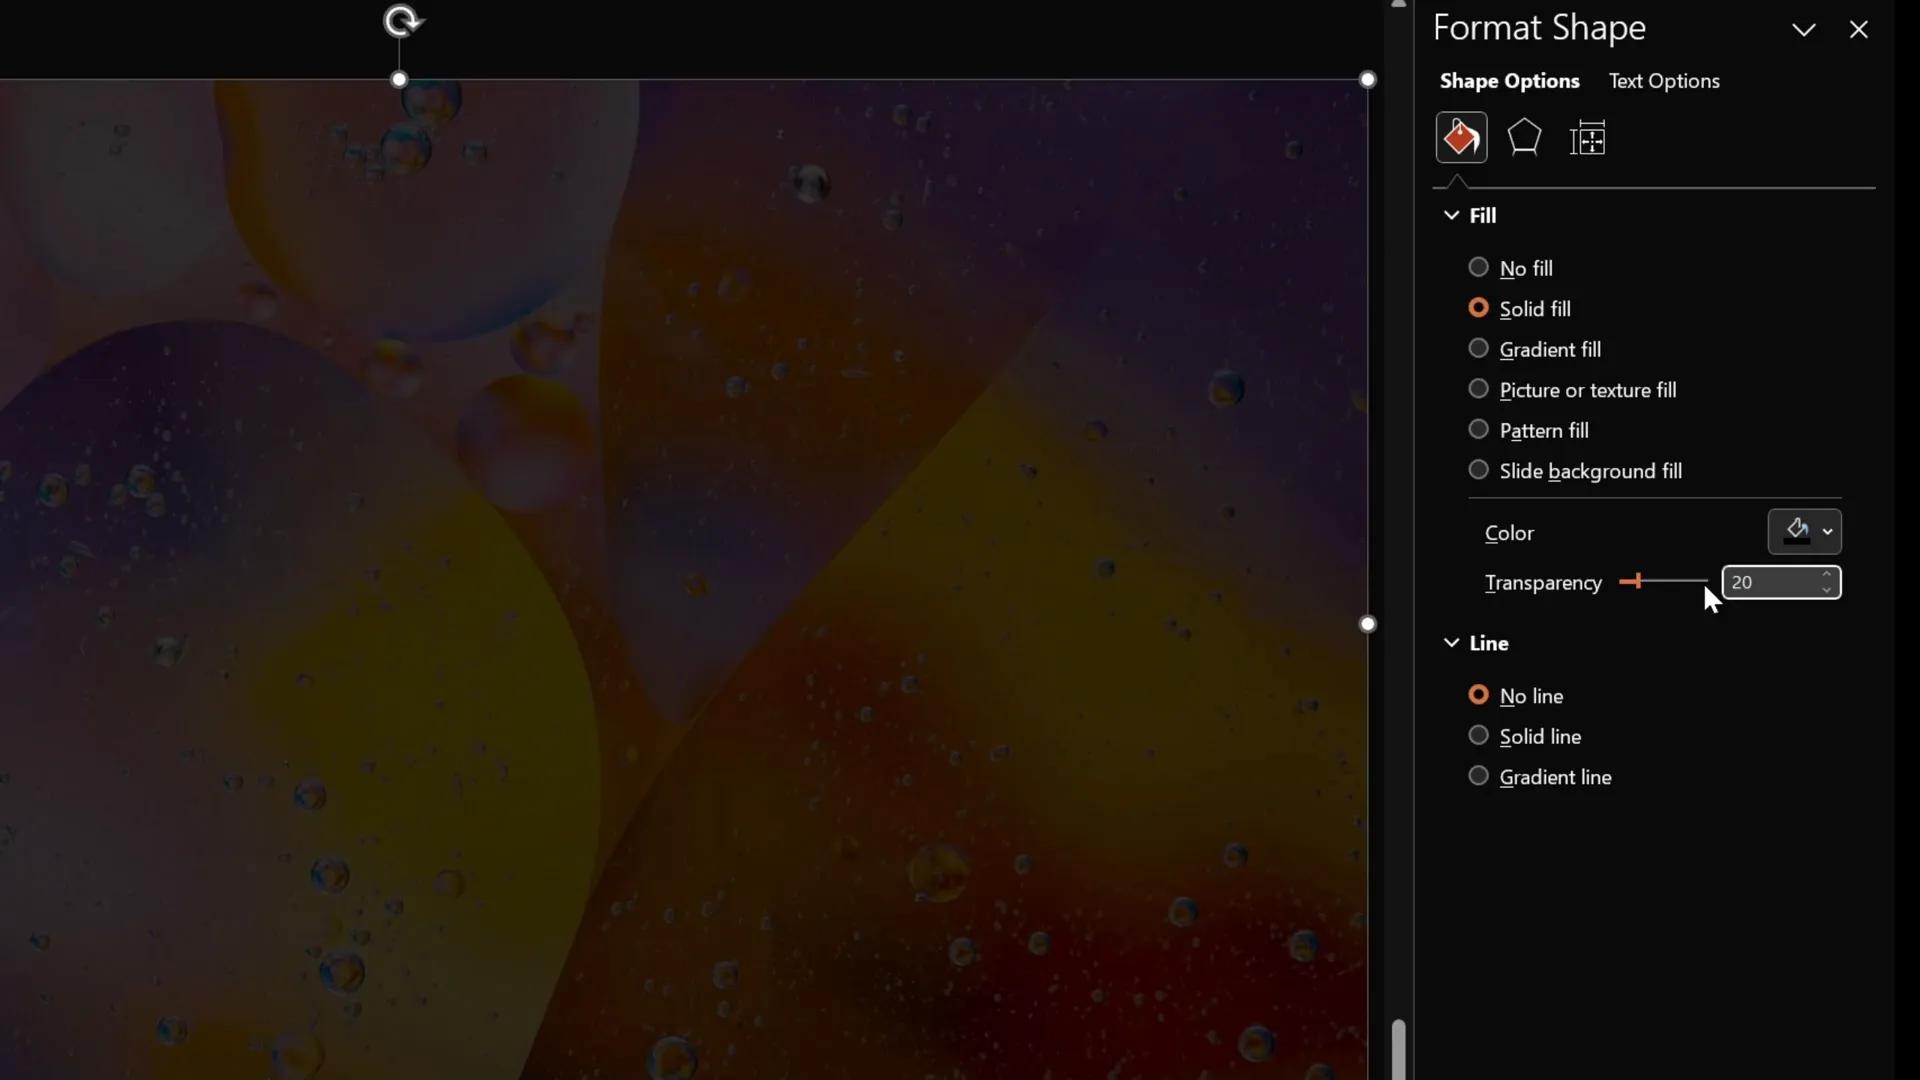
- Fill the rectangle with black color and adjust the transparency to 20%. This allows the background photo to subtly show through while darkening the slide for better contrast.
This overlay adds depth and professionalism to your slide, creating a perfect backdrop for your content.
Using Slide Background Fill for Shapes
One of the most magical features in PowerPoint slide design is the ability to fill shapes with the slide background itself. This technique creates a seamless, integrated look that ties your design elements to the background image.
- Insert any shape on the slide, such as a circle or rectangle, using the Insert > Shapes menu.
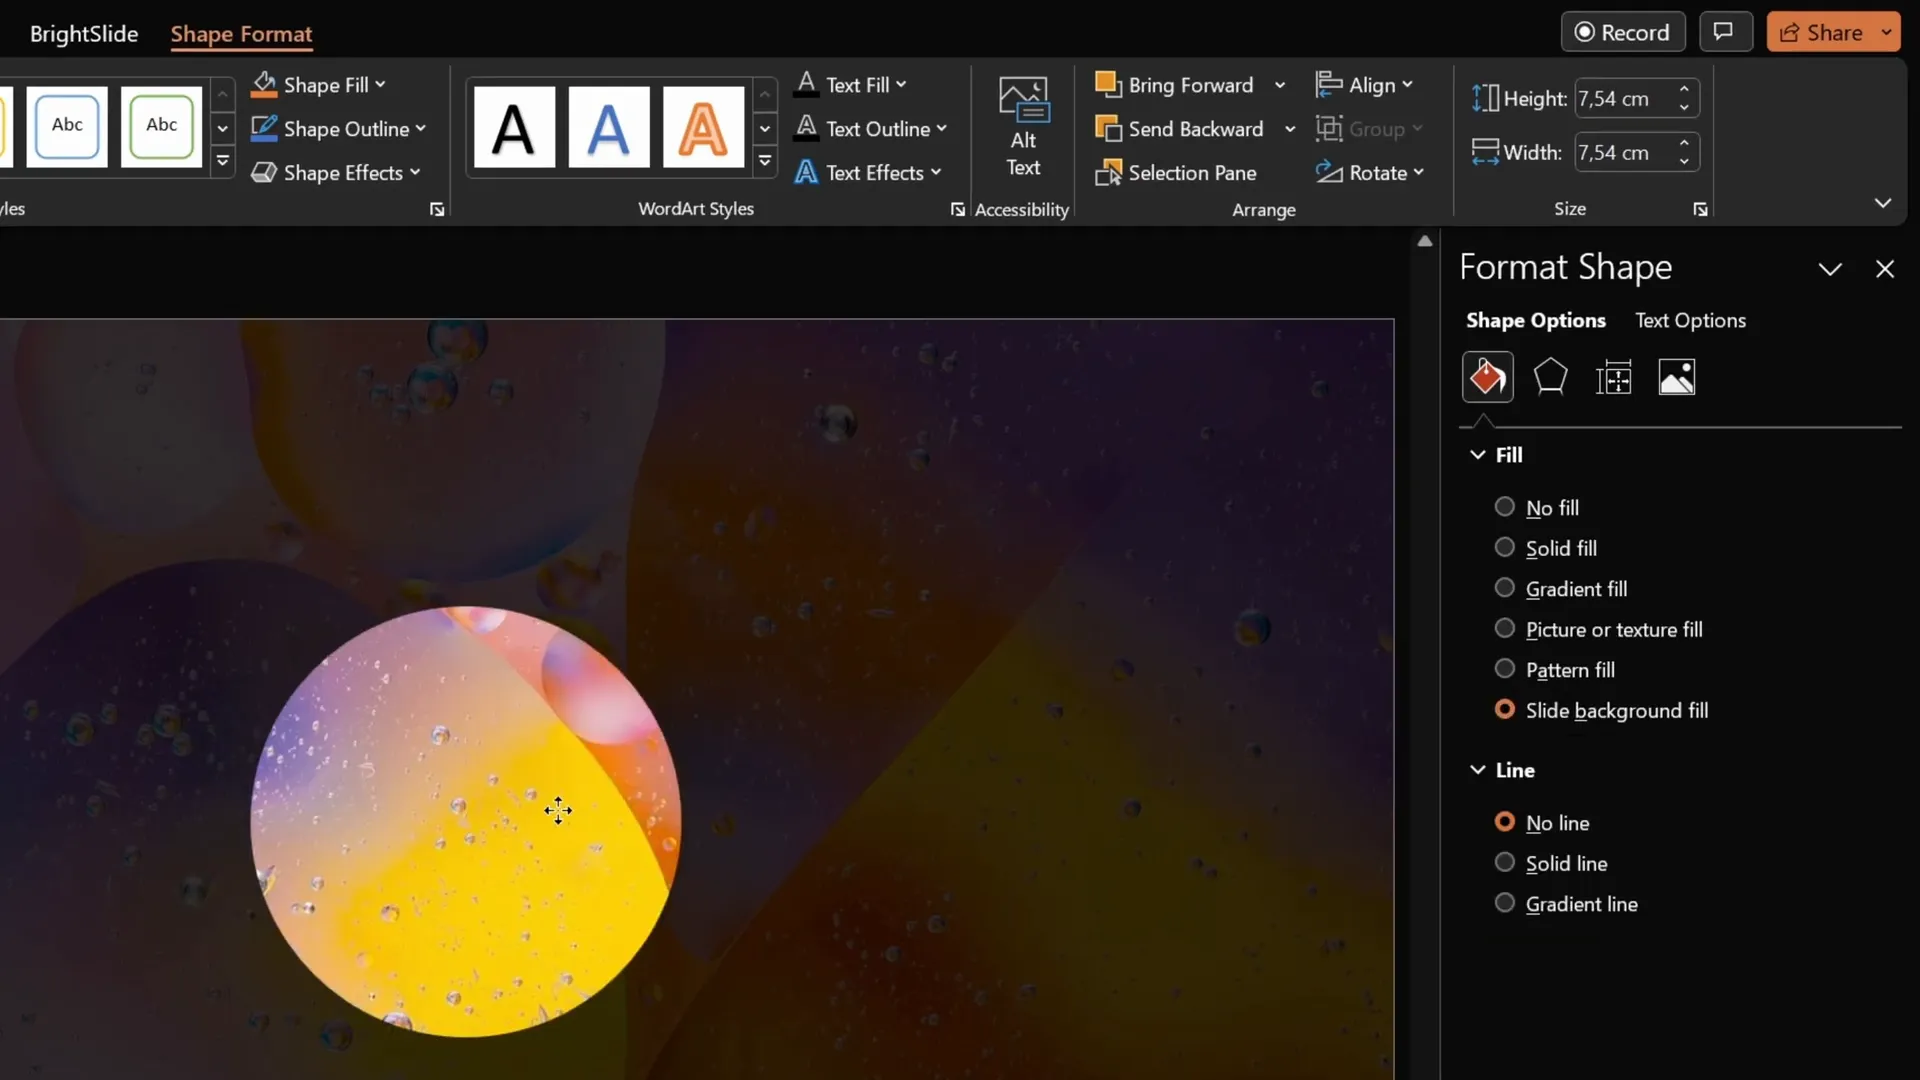
- Select the shape, then go to the Format Shape pane.
- Under Fill options, choose Slide background fill. The shape will now appear as a window to the background photo, perfectly matching the image behind it.
This feature is the foundation for creating stunning slide designs with dynamic shapes that blend beautifully with your background.
How to Create Rounded Hexagons Using Figma
In the tutorial’s introduction, you might have noticed the use of elegant rounded hexagons. Unfortunately, PowerPoint does not include rounded hexagons by default—it only offers sharp-edged hexagons. To overcome this limitation, we’ll use a free online design tool called Figma.
Figma is widely known for web and app design, but it’s also excellent for creating custom shapes like rounded hexagons.
- Visit figma.com and sign up for a free account using your Gmail or any email.
- Click on the New Design File button to start a new project.
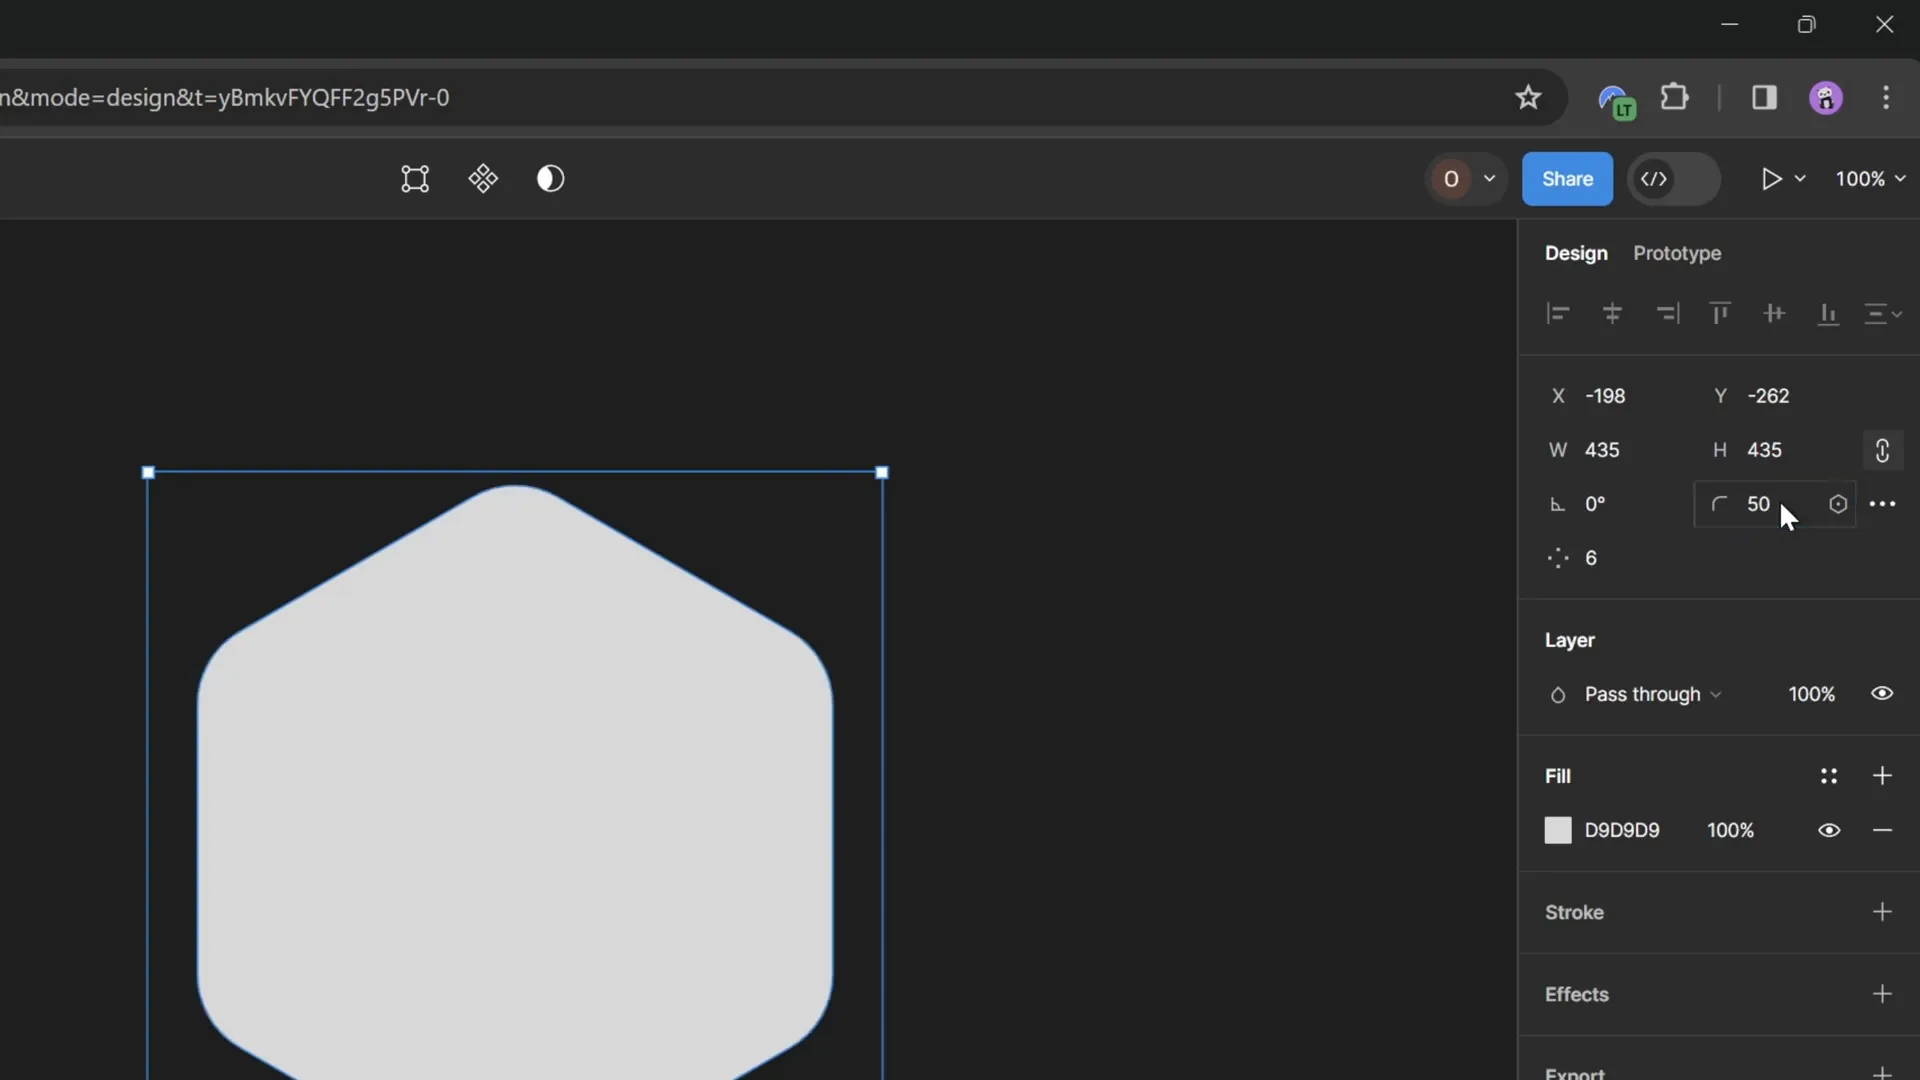
- Use the Polygon Tool (found by expanding the rectangle tool menu) to draw a polygon.
- Hold the Shift key while dragging to keep the polygon regular.
- Change the number of sides from the default triangle to six to create a hexagon.
- Adjust the corner radius slider to round the edges. A value of 50% usually gives a smooth rounded look.
- Once satisfied, select the hexagon, click Export, and choose the SVG file format.
This SVG file will now be ready to import into PowerPoint for further use.
Importing and Editing SVG Hexagons in PowerPoint
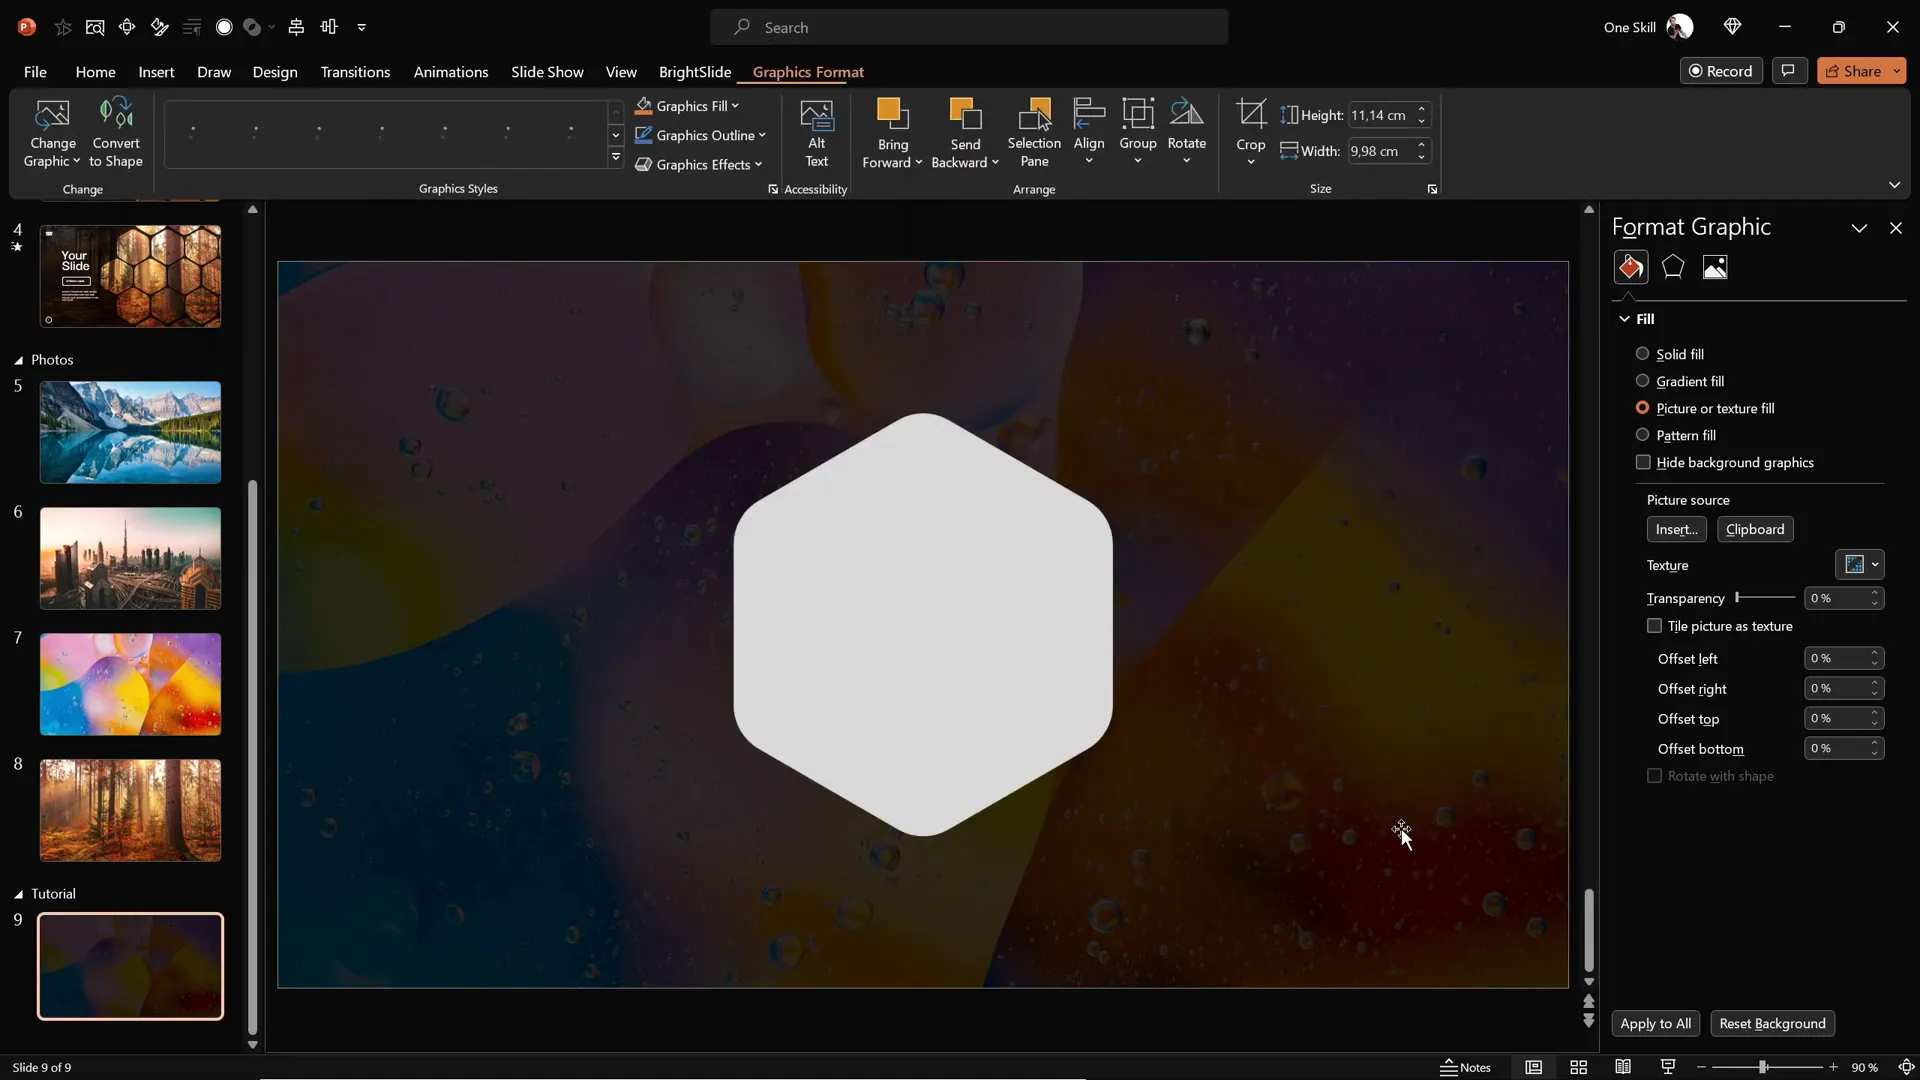
After exporting your rounded hexagon from Figma, the next step is to bring it into PowerPoint and make it fully editable.
- In PowerPoint, go to Insert > Pictures > This Device and select your exported SVG hexagon file.
- Once inserted, you may notice some fill options are grayed out. To fix this, select the shape and click Graphics Format > Convert to Shape.
- Now, your rounded hexagon is fully editable, and you can apply all fill options, including the Slide background fill.
- Resize the hexagon by locking the aspect ratio and adjusting the height to your desired size (e.g., 7 cm).
- Position the hexagon centrally on your slide to prepare for duplication and pattern creation.
This process allows you to integrate custom shapes into your PowerPoint slide designs seamlessly.
Arranging Hexagons and Building Patterns
With your rounded hexagon ready, it’s time to create an eye-catching pattern by duplicating and arranging multiple hexagons.
- Hold down the Ctrl + Shift keys to drag and make precise copies of the hexagon in a straight line.
- Adjust the spacing between hexagons to your liking; a narrow gap often looks sleek and modern.
- Create a row of three hexagons, then add space for a fourth, and copy it over.
- Select all hexagons in the row and move them slightly to the right so that half of the rightmost hexagon extends beyond the slide edge—this adds an artistic touch.
- Group this row to make it easier to handle.
- Duplicate the entire group to create additional rows, aligning them carefully for consistent gaps.
- Drag copies downward to form a honeycomb-like pattern.
- Add extra hexagons at the top and bottom edges to complete the design.
- Ungroup all hexagons and delete any that extend too far outside the visible slide area.
Experiment with the arrangement to suit your creative vision. The hexagon pattern forms the backbone of your slide’s unique design.
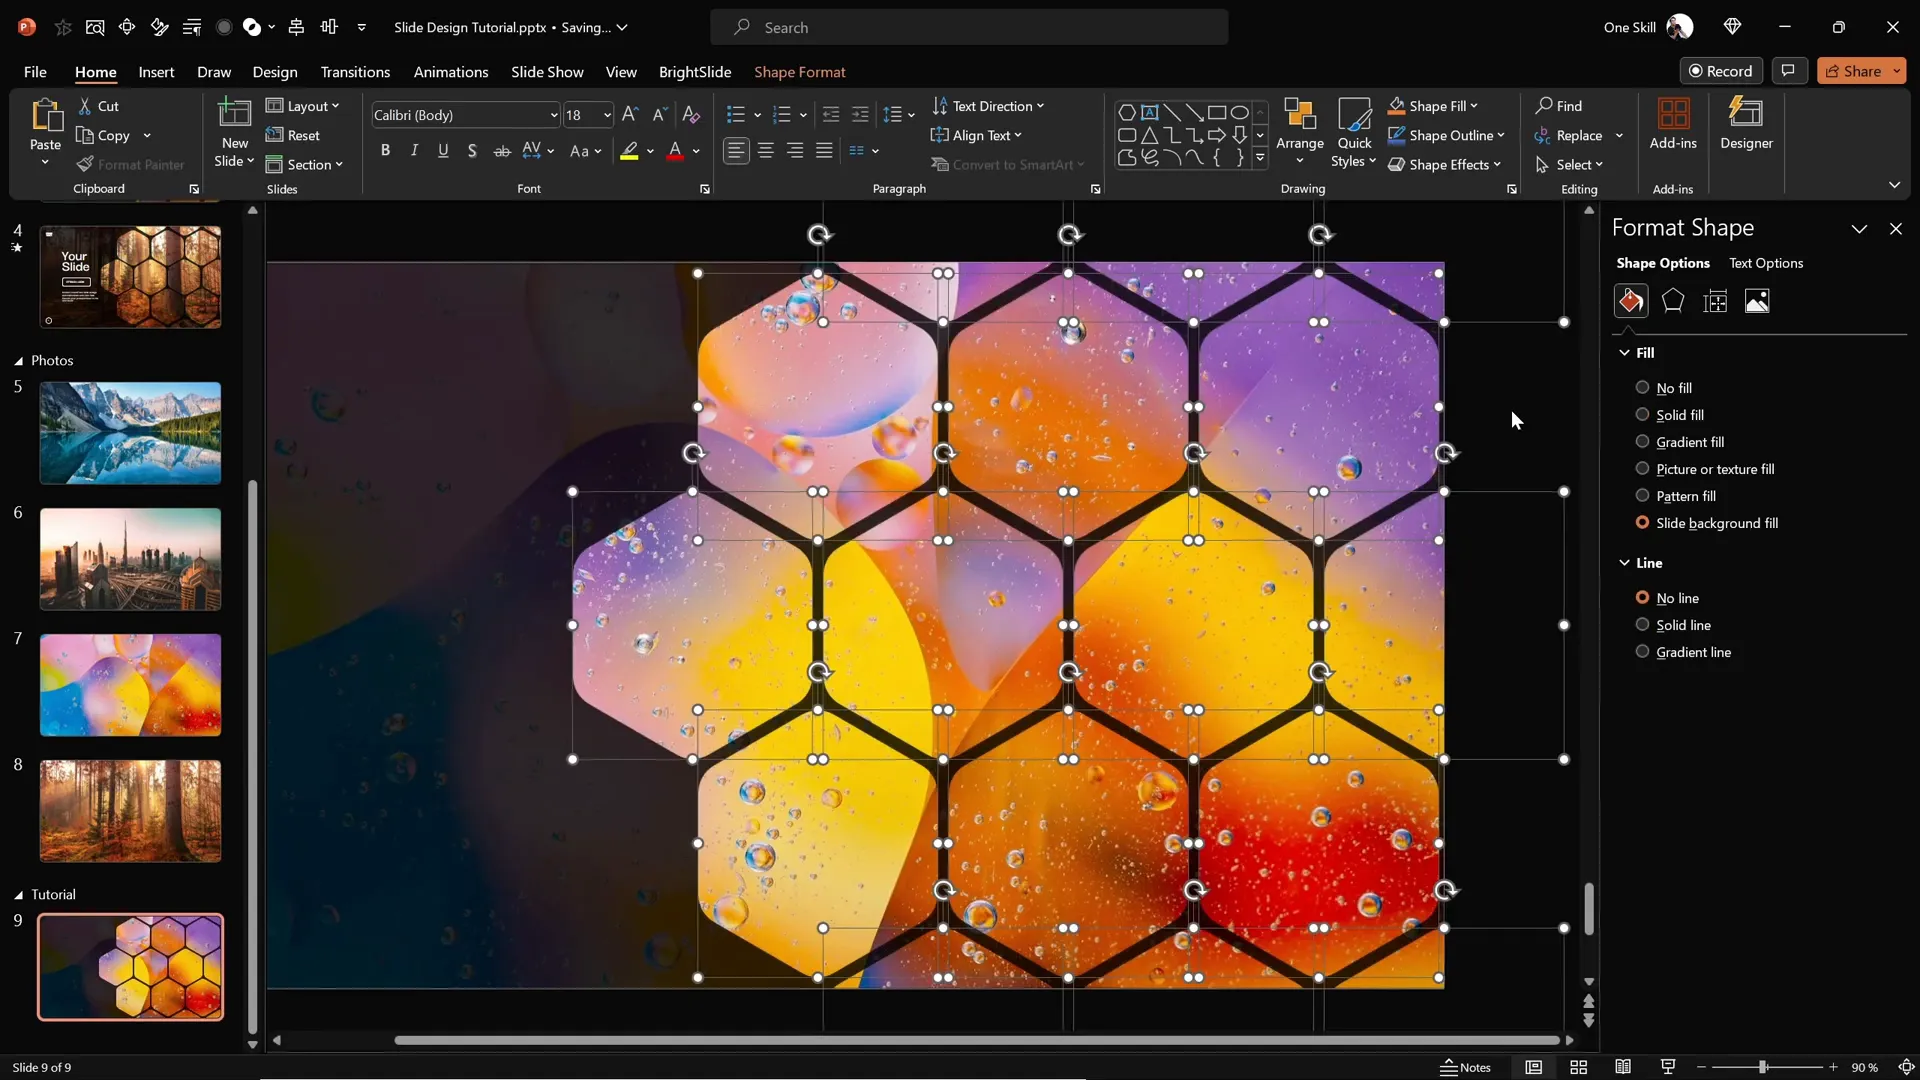
Applying Slide Background Fill to Hexagons
To maintain visual harmony, apply the slide background fill to the hexagons, making them mirror the background photo beneath.
- Select all hexagons that remain on the slide.
- Go to the Format Shape pane and select Slide background fill.
- Watch as the hexagons fill with the exact portion of the background photo, creating a cohesive and immersive look.
This technique ties your shapes and background together, giving your slide a professional and polished finish.
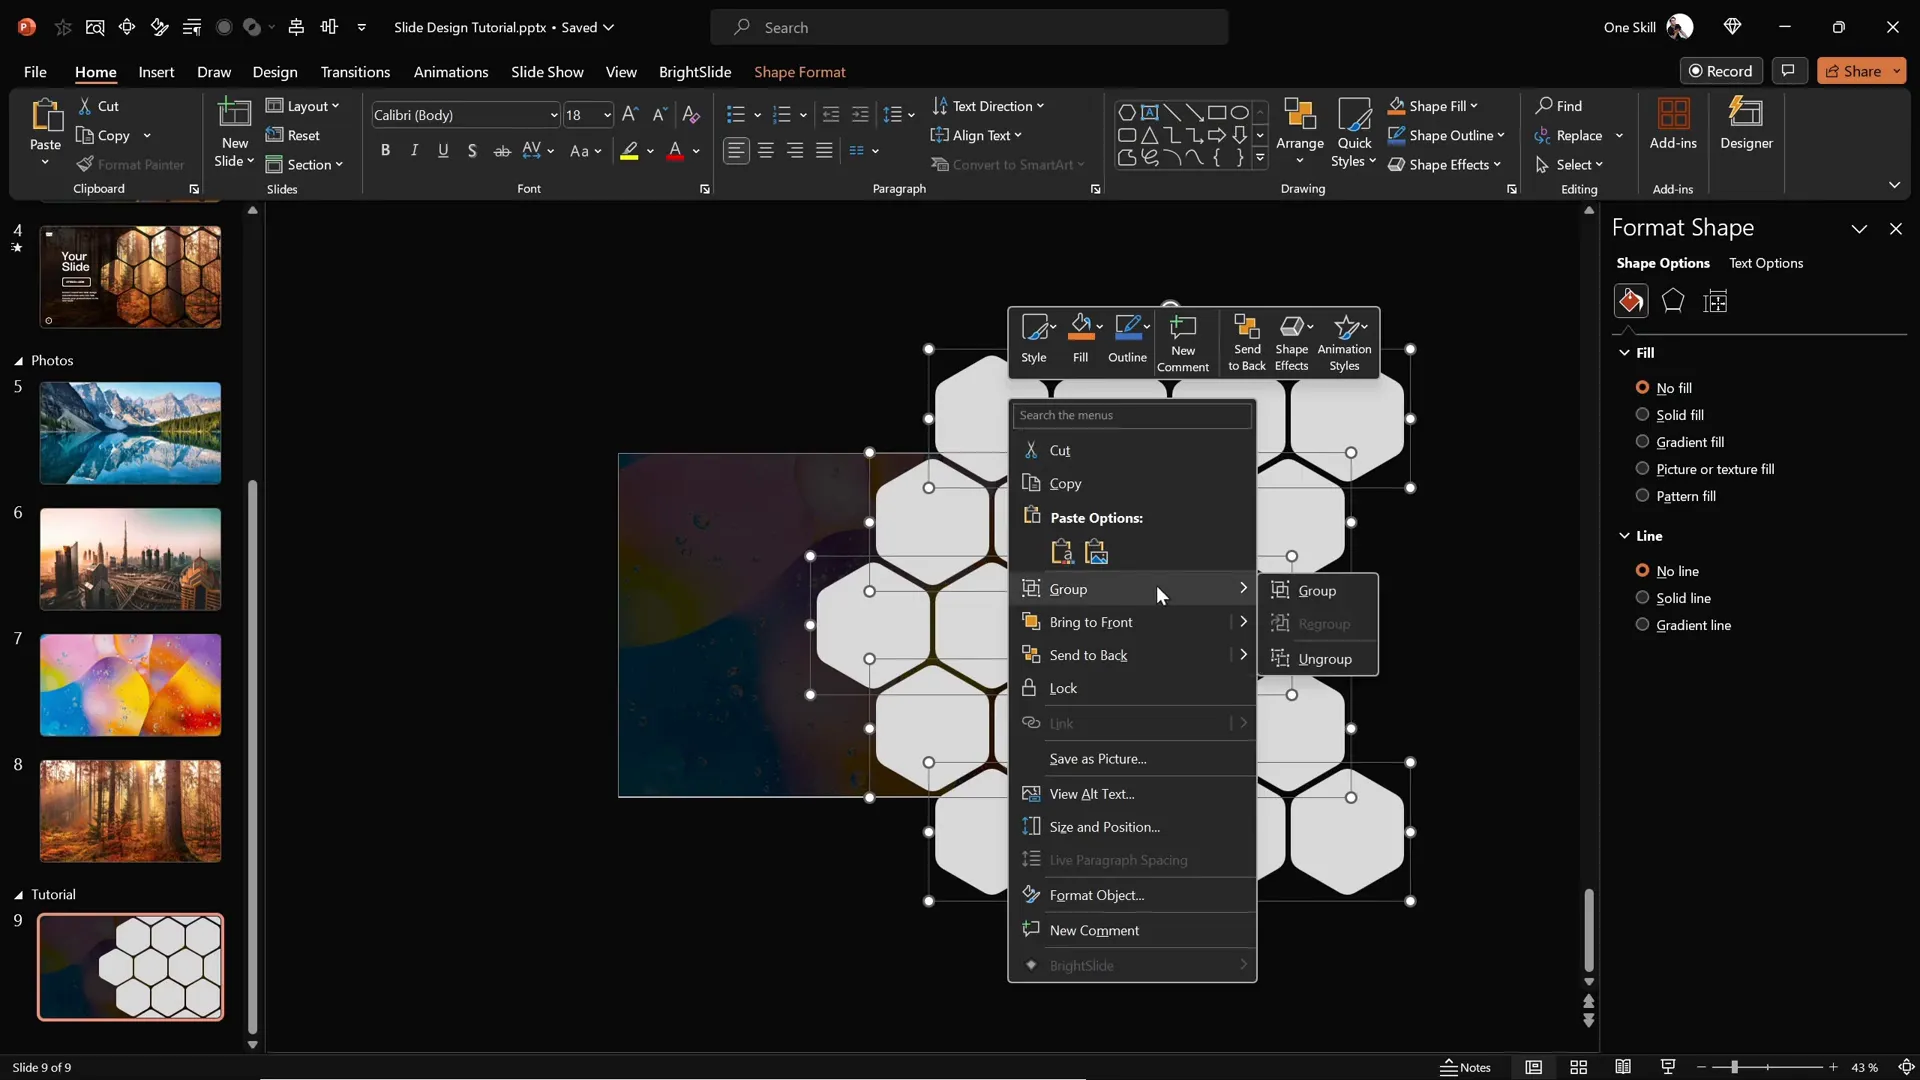
Grouping Hexagons for Easy Animation
Before adding animations, group your hexagons logically to control their movement smoothly.
- Group the middle row of hexagons into one group.
- Group the top hexagons into another group.
- Group the bottom hexagons into a third group.
- Optionally, create additional groups for other hexagon clusters if your design is more complex.
Grouping simplifies the animation process by allowing you to animate several hexagons together rather than individually.

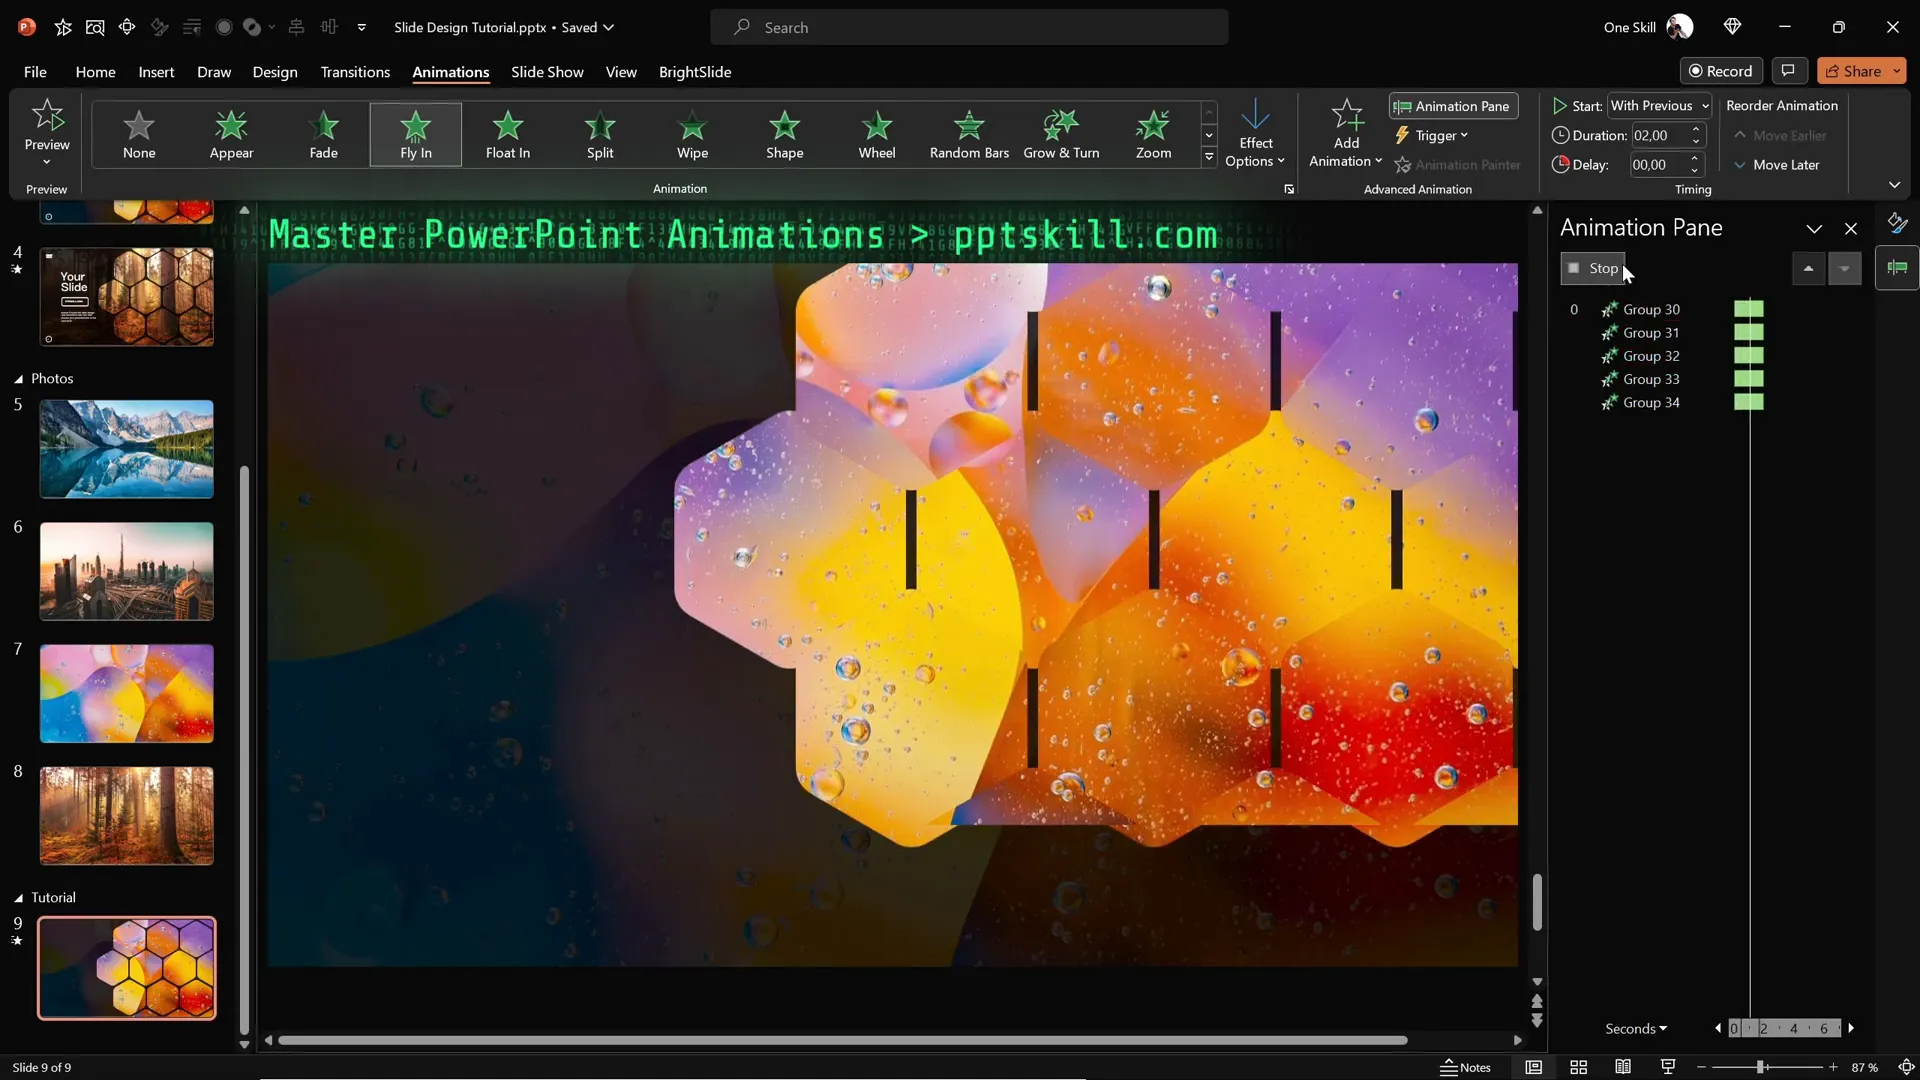
Adding Smooth Animations to Your Hexagons
Animations breathe life into your PowerPoint slides. Here’s how to add graceful flying animations to your hexagon groups:
- Open the Animations Pane to monitor your applied animations.
- Select all hexagon groups simultaneously.
- Choose the Fly In animation effect.
- Set the animation direction to From Top for the upper groups.
- For the bottom two groups, change the direction to From Bottom to create balanced movement.
- Set all animations to start With Previous for a seamless flow.
- Adjust the duration of each animation to 2 seconds.
- In the animation options, select Maximum Smooth End for a soft landing effect.
- Ensure the middle hexagon group stays in front by adjusting the layering (Bring to Front), and send the top and bottom groups to the back.
- Send the semi-transparent rectangle overlay to the back so it doesn’t obscure animated hexagons.
- Preview your animations to confirm smooth and professional transitions.
This approach creates a dynamic and engaging visual effect that enhances your slide’s appeal.
Finalizing Slide Design with Text and Logo
To complete your slide design, add textual elements such as logos, titles, and slide numbers:
- Copy existing text boxes and logos from other slides to maintain consistent branding.
- Paste them onto your current slide and position them appropriately.
- Group all text elements together for easier animation control.
- Add a Flame animation effect to the text group, with direction set to From Left.
- Set the text animation to start With Previous, matching the hexagon animations.
- Adjust the duration to 2 seconds and apply a bounce effect with a 1.5-second duration for added flair.
The combination of flying hexagons and bouncing text creates a polished, professional slide that grabs attention without overwhelming the viewer.
Quickly Changing Background Photos for New Looks
One of the greatest advantages of this slide design is its flexibility. You can easily change the background image, and the hexagons will update automatically thanks to the Slide background fill feature.
- Copy a new photo from your source (e.g., Unsplash).
- Return to your slide and select the background fill option for any shape or hexagon.
- Click Clipboard to paste the new photo as the slide background fill.
- Watch the entire slide transform instantly with the new image reflected in your hexagons and background.
- Repeat this process as often as needed to create multiple slide themes with minimal effort.
This method saves time and keeps your presentation fresh and visually engaging.
Frequently Asked Questions (FAQ)
Q1: Can I create rounded hexagons directly in PowerPoint?
PowerPoint does not offer rounded hexagons by default. However, you can create them easily using free design tools like Figma, export them as SVG files, and import them into PowerPoint.
Q2: What is the benefit of using slide background fill for shapes?
Slide background fill allows shapes to inherit the background image’s look, creating seamless and integrated designs. This technique makes your slide elements appear as windows to the background, enhancing visual cohesion.
Q3: How can I make animations smoother and more professional?
Use the Maximum Smooth End option in animation settings to create soft, natural landing effects. Also, coordinate animation directions and durations to avoid abrupt or overlapping movements.
Q4: Can I reuse this slide design with different images?
Absolutely! One of the strengths of this design is easy customization. Simply replace the background photo and update slide background fills, and your slide will refresh with a new look instantly.
Q5: What if I don’t have time to create custom slides?
When time is limited, consider using high-quality PowerPoint templates. These professionally designed templates save you time and ensure polished results. Check out the recommended templates from One Skill PPT for inspiration.
Conclusion
Mastering PowerPoint slide design is a powerful skill that can transform your presentations into compelling visual stories. This tutorial has guided you through creating stunning animated hexagon slides by leveraging advanced features like slide background fills, custom SVG shapes, and smooth animations.
By combining creative design with practical PowerPoint techniques, you can captivate your audience, communicate your message effectively, and stand out as a confident presenter. Remember, the ability to quickly customize your slides with new backgrounds and animations means you’ll always be ready for any presentation challenge.
If you’re pressed for time or want to explore more design possibilities, high-quality PowerPoint templates are a great resource. They offer professional layouts and animations that can be tailored to your needs.
Now it’s your turn to experiment, create, and inspire with your next PowerPoint presentation!
Credits: This tutorial is based on the expert guidance from One Skill PPT, whose YouTube channel offers many valuable PowerPoint design and animation tips.


