

Welcome to your ultimate guide on PowerPoint slide design, where creativity meets functionality! If you’ve ever wanted to create visually impressive slides that captivate your audience, you’re in the right place. This tutorial will walk you through a step-by-step process to design beautiful, modern slides featuring rounded hexagons filled with vibrant background images. Plus, you’ll learn how to add smooth animations that bring your slides to life.
Whether you’re a seasoned presenter or just starting out, mastering these techniques will elevate your presentations and help you become an unstoppable PowerPoint creator. Let’s dive in!
Table of Contents
- Getting Started: Preparing Your Slide Background
- Creating a Semi-Transparent Dark Overlay
- Using Slide Background Fill for Shapes
- Designing Rounded Hexagons with Figma
- Importing and Editing SVG Shapes in PowerPoint
- Arranging Hexagons to Create Your Slide Layout
- Applying Slide Background Fill to Hexagons
- Grouping Hexagons for Easier Animation
- Animating Your Hexagon Slide Design
- Adding Animated Text Elements
- Customizing Your Slide Background Quickly
- Conclusion and Frequently Asked Questions
Getting Started: Preparing Your Slide Background
Every great slide begins with a strong foundation—a captivating background image. To start, open PowerPoint and create a fresh, blank slide where you will build your design from scratch.
For this tutorial, I recommend using high-quality photos from Unsplash, a fantastic resource offering free, professional images. I’ve provided links to some beautiful photos in my resource list, but feel free to choose pictures that suit your presentation’s theme.
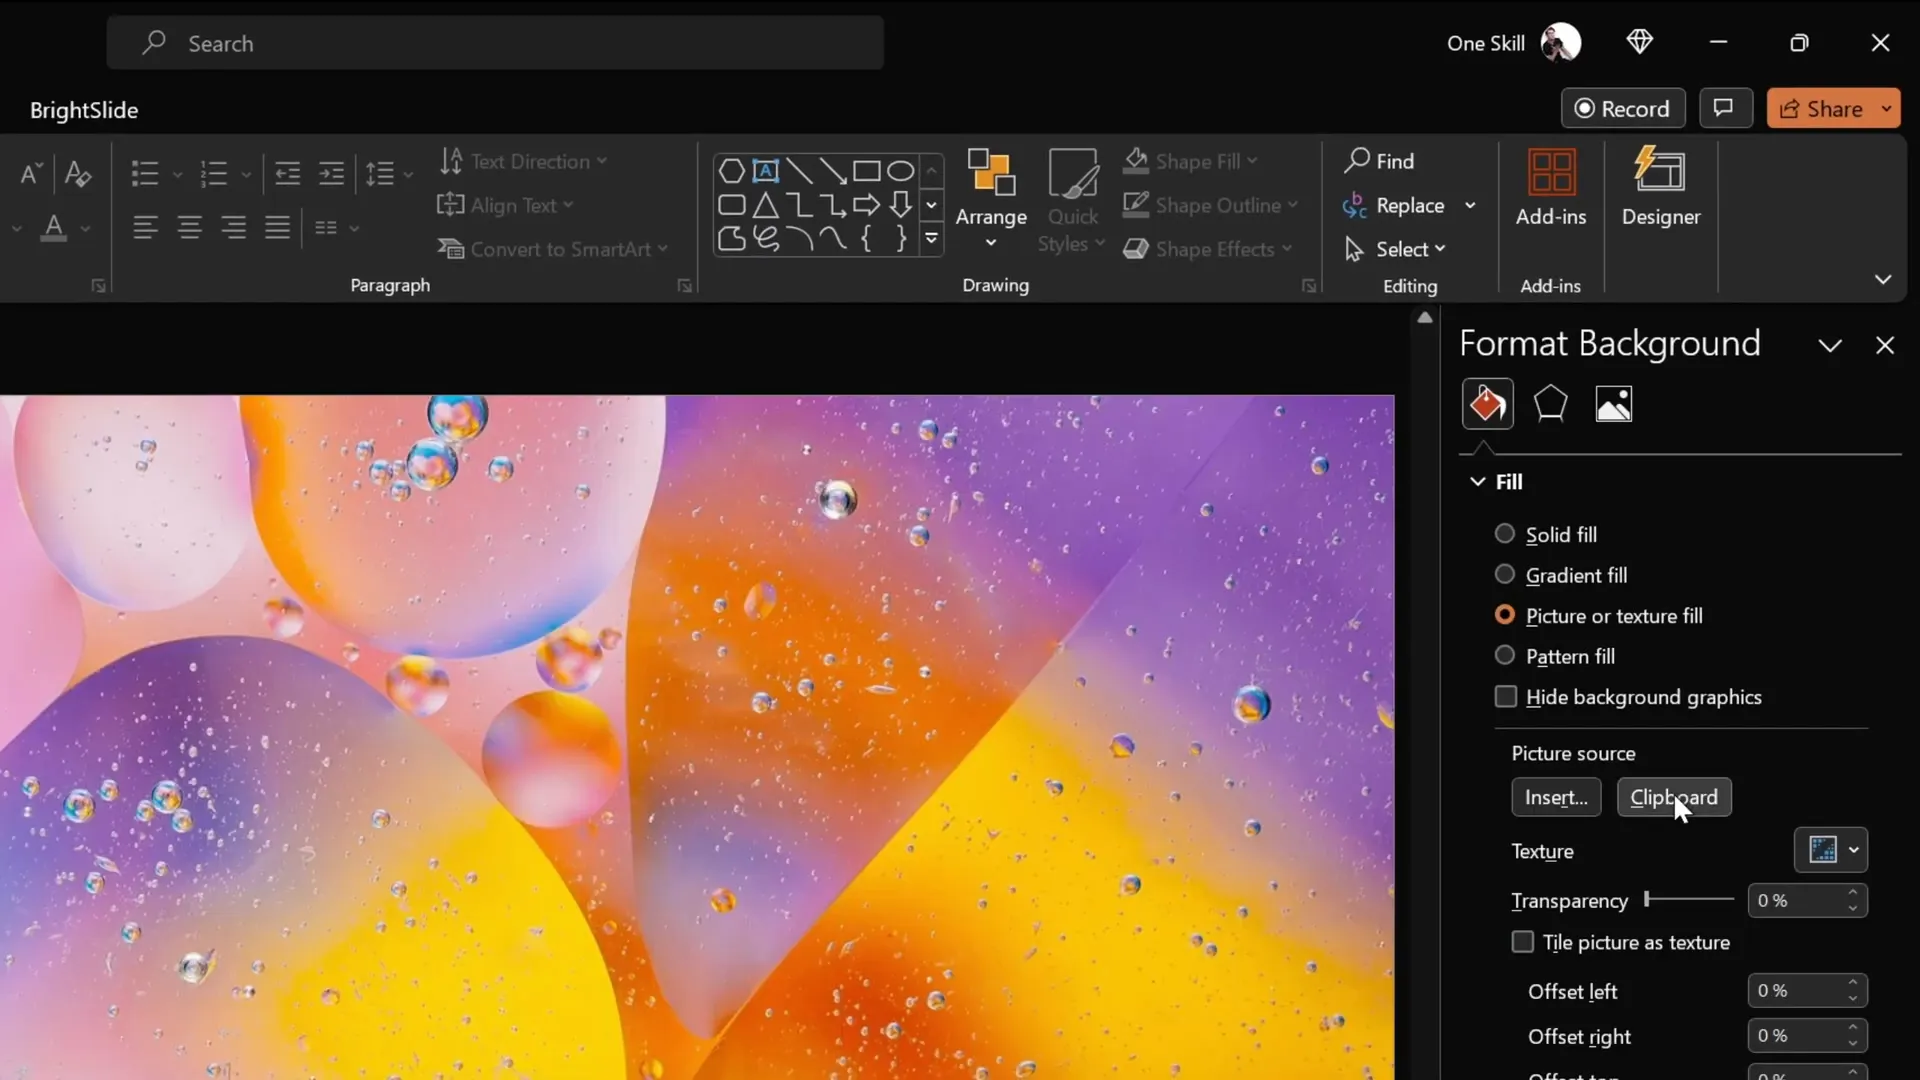
Once you have your chosen photo, copy it to your clipboard (Ctrl + C). Then, go back to your blank slide, right-click anywhere on the slide, and select Format Background. In the format background pane, choose Picture or texture fill and select the Clipboard option to paste your photo as the slide background. This method ensures the image is locked as the background and cannot be accidentally moved or resized.
By setting the background this way, you create a stunning canvas for your slide design.
Creating a Semi-Transparent Dark Overlay
Next, to make your slide content stand out against the vibrant background, add a semi-transparent dark rectangle overlay. This overlay helps improve text readability and adds a sleek, professional look.
Here’s how to do it:
- Go to the Insert tab and click Shapes.
- Select the Rectangle tool.
- Draw a rectangle starting from the top-left corner, dragging it to cover the entire slide.
- Fill the rectangle with black color.
- Adjust the transparency to about 20% so the background image subtly shows through.
This transparent black overlay balances your slide, providing contrast without overpowering the background image.
Using Slide Background Fill for Shapes
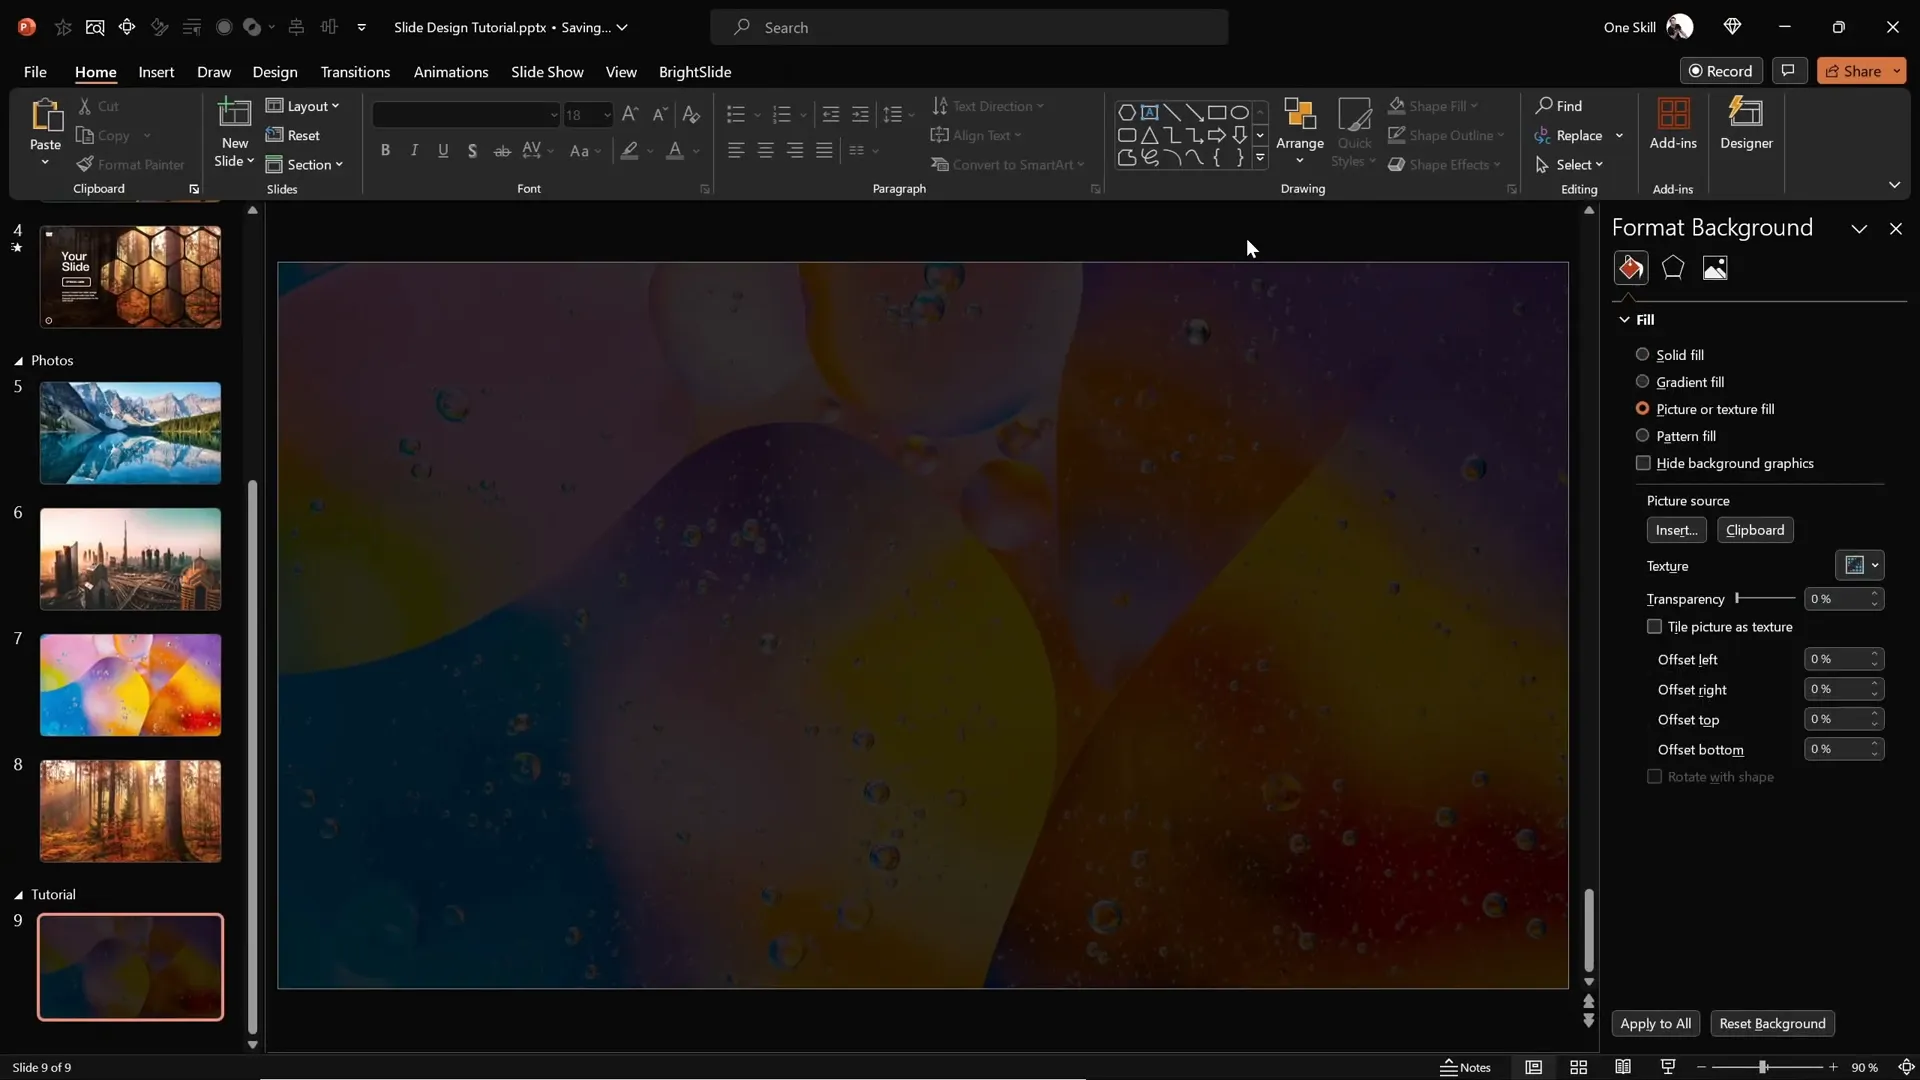
Now comes the magical part: creating shapes that reflect the slide background image. PowerPoint has a powerful feature called Slide Background Fill that allows any shape to take on the background image as its fill, producing a cool cut-out effect.
Try this simple example:
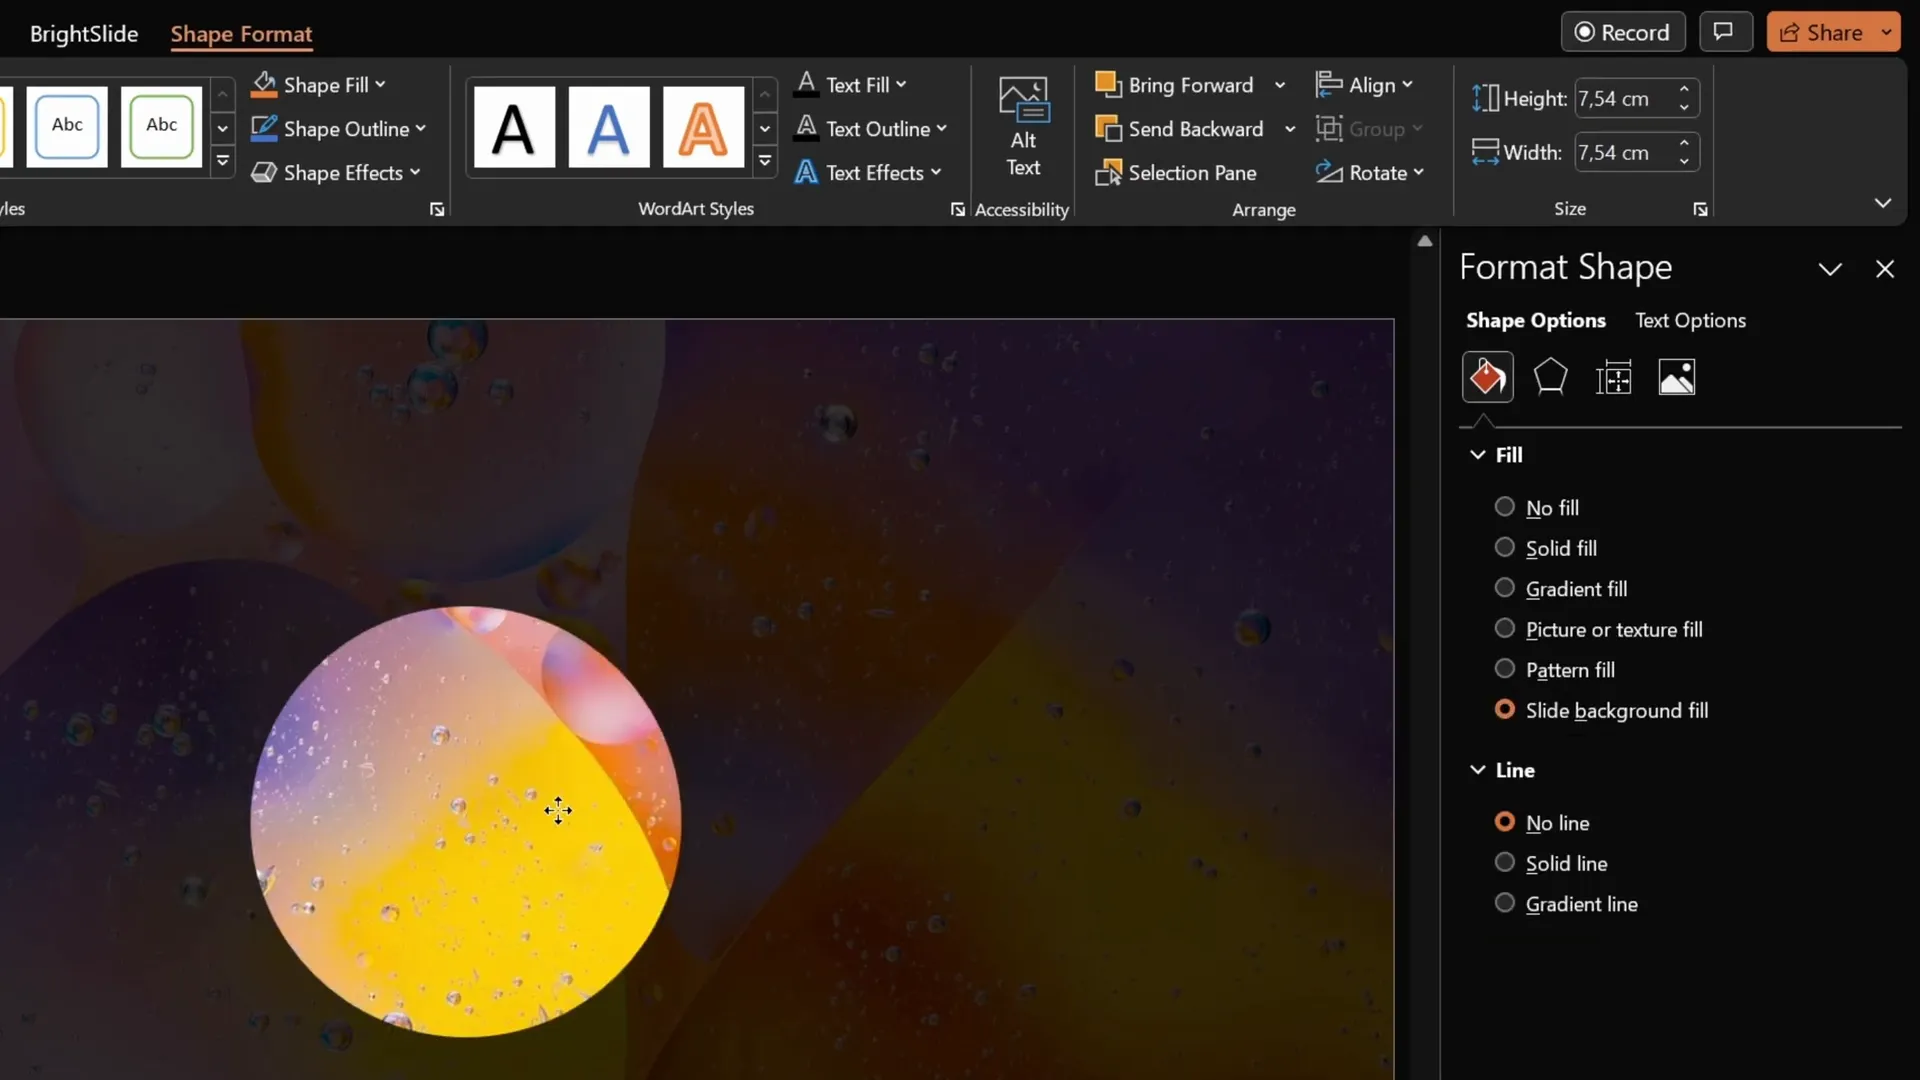
- Insert a shape—say, a circle—anywhere on your slide.
- With the shape selected, open the Format Shape pane.
- Under Fill, select Slide Background Fill.
Instantly, the shape adopts the image behind it as its fill, creating a seamless and eye-catching design element. This technique opens up many creative possibilities for integrating shapes with your background.
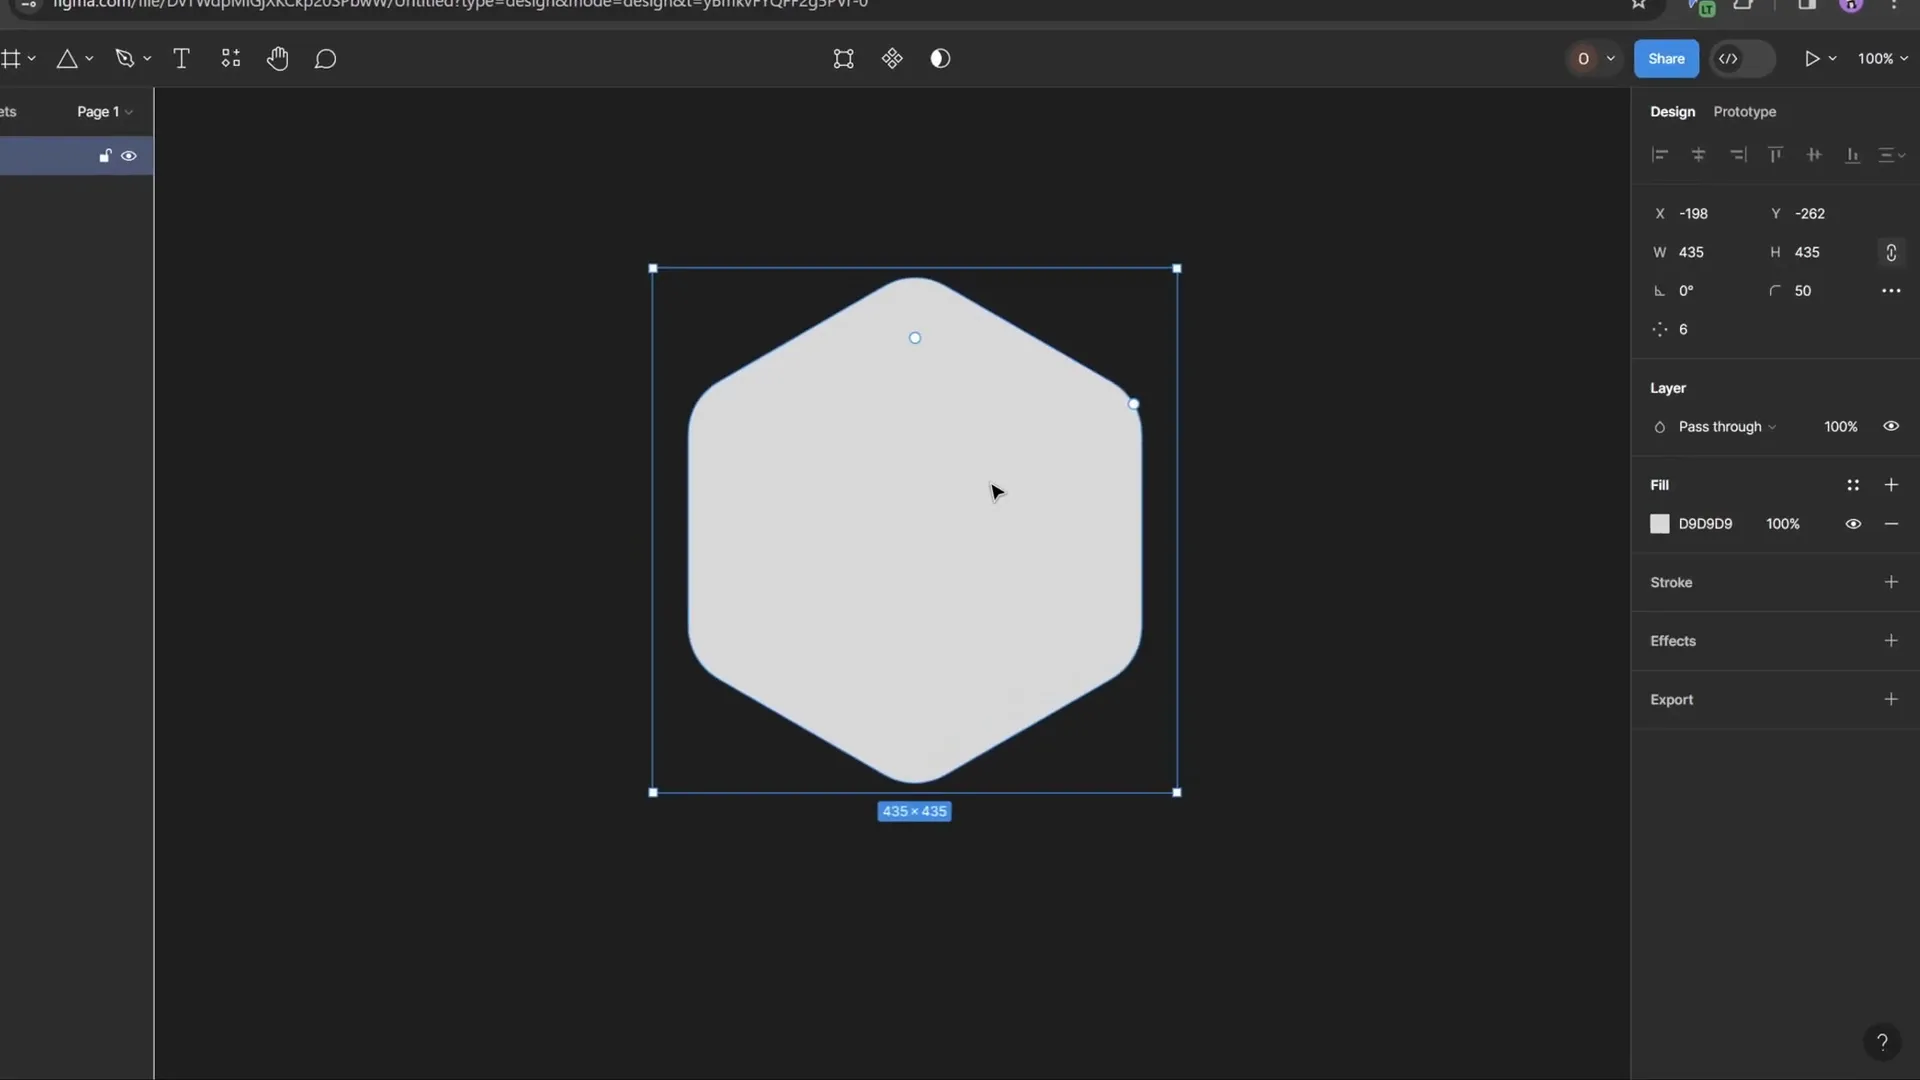
Designing Rounded Hexagons with Figma
While PowerPoint offers many shapes, it does not include rounded hexagons by default. The closest built-in shape is a hexagon with sharp corners, but for a modern, polished look, rounded corners are preferable.
To create rounded hexagons, we’ll use Figma, a free online design tool widely used for UI and graphic design. Here’s a quick guide to creating your rounded hexagon:
- Sign up or log in to Figma using your Gmail account.
- Click New Design File to open a blank canvas.
- From the shape tools dropdown, select the Polygon tool.
- Hold down the Shift key and draw a polygon.
- In the polygon properties, change the number of sides to 6 to form a hexagon.
- Adjust the corner radius slider to around 50 to round the corners.
- Export the shape as an SVG file.
And just like that, you have a perfectly rounded hexagon ready to import into PowerPoint!
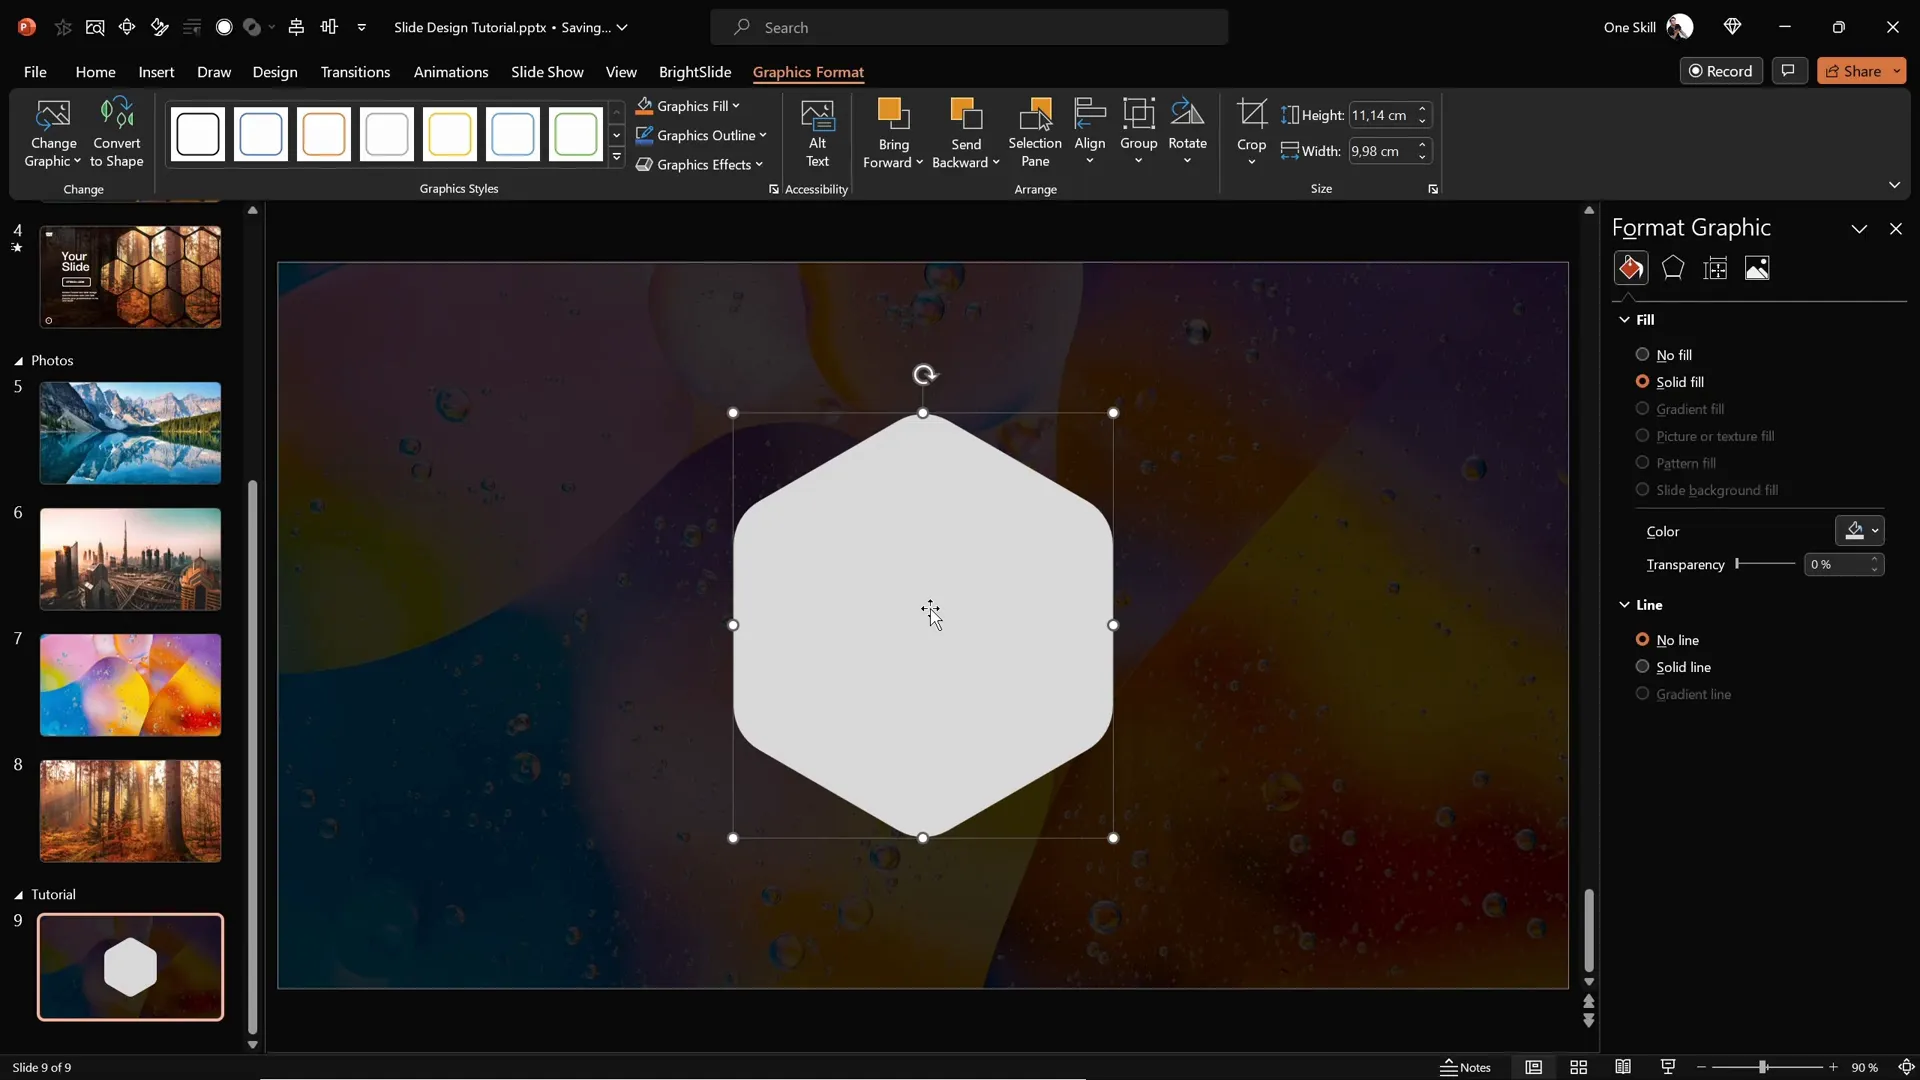
Importing and Editing SVG Shapes in PowerPoint
Now, bring your customized rounded hexagon into PowerPoint:
- Go to Insert > Pictures > This Device.
- Locate and insert your exported rounded hexagon SVG file.
- The hexagon will appear on your slide but may not be fully editable initially.
- Select the shape, then click Graphics Format > Convert to Shape to unlock all editing features.
- Now you can apply Slide Background Fill or solid fills freely.
- Resize the hexagon by locking the aspect ratio and adjusting the height to about 7 cm for a balanced size.
This process unlocks the full potential of your custom shape in PowerPoint, enabling creative design possibilities.
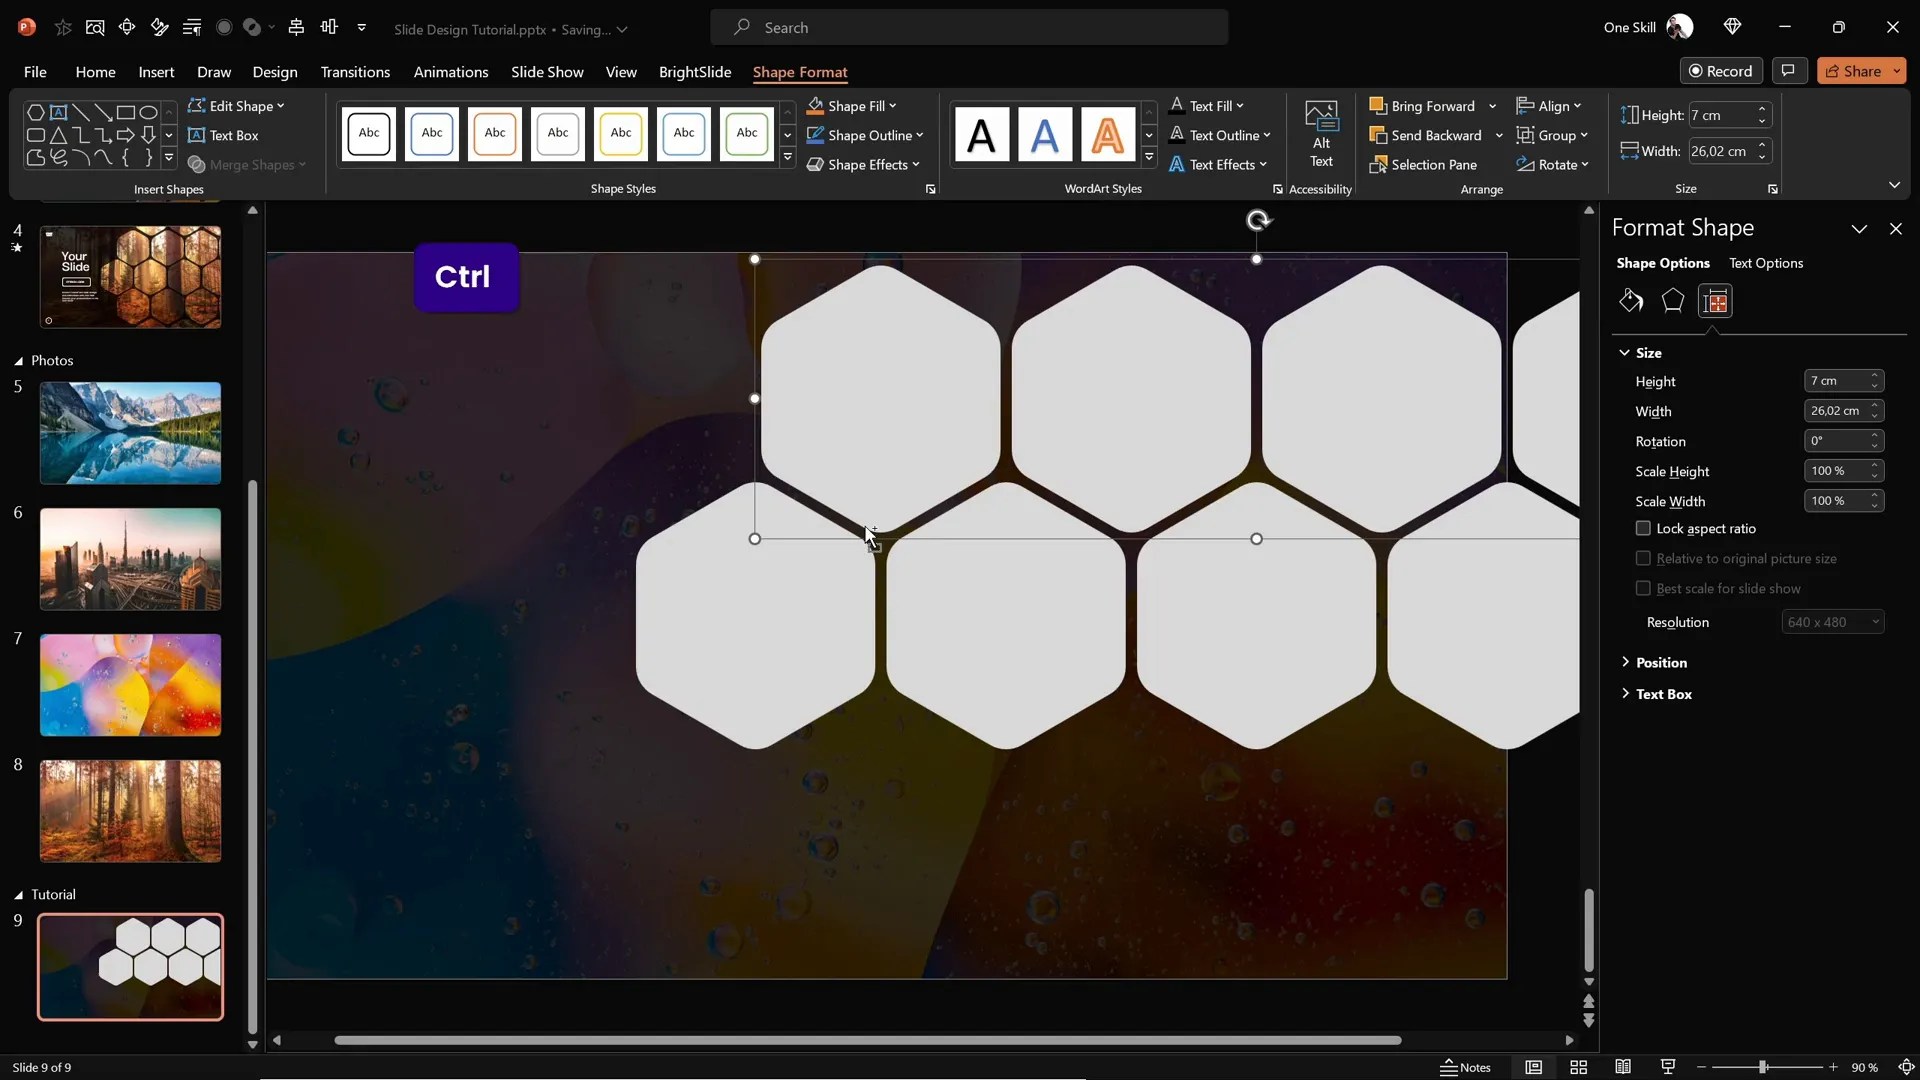
Arranging Hexagons to Create Your Slide Layout
With your first rounded hexagon ready, let’s create the layout by duplicating and arranging multiple hexagons:
- Hold Ctrl + Shift and drag the hexagon sideways to create copies aligned in a straight line.
- Adjust the spacing between hexagons to your preference—a narrow gap looks sleek and modern.
- Create four hexagons in a row, then group them (Ctrl + G) for easier handling.
- Duplicate this group to form a second row, aligning the hexagons precisely to maintain consistent gaps.
- Copy the group vertically to add more rows, building a honeycomb pattern.
- Add a few extra hexagons at the top and bottom edges of the slide for a balanced design.
Once your hexagon grid fills the slide area nicely, ungroup the shapes so you can delete any hexagons that extend beyond the slide edges, keeping only the ones that sit within the visible area.
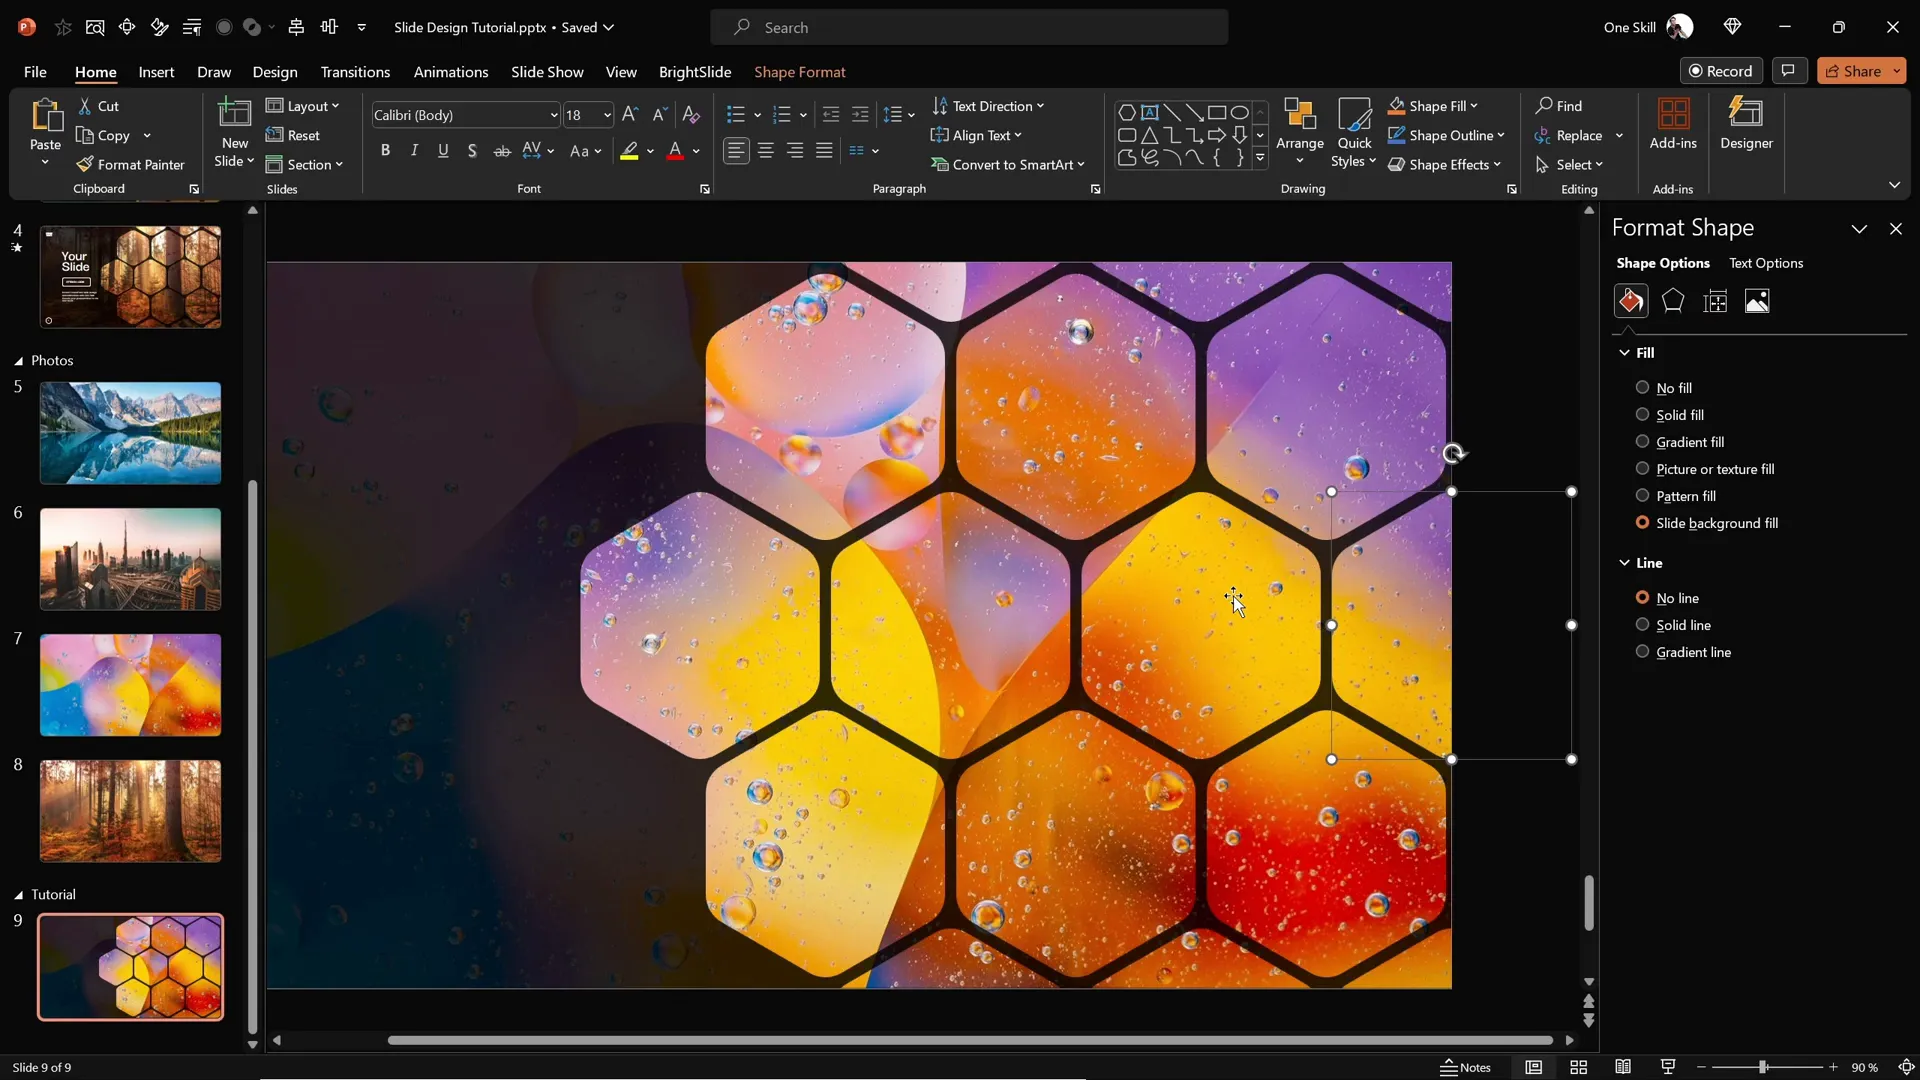
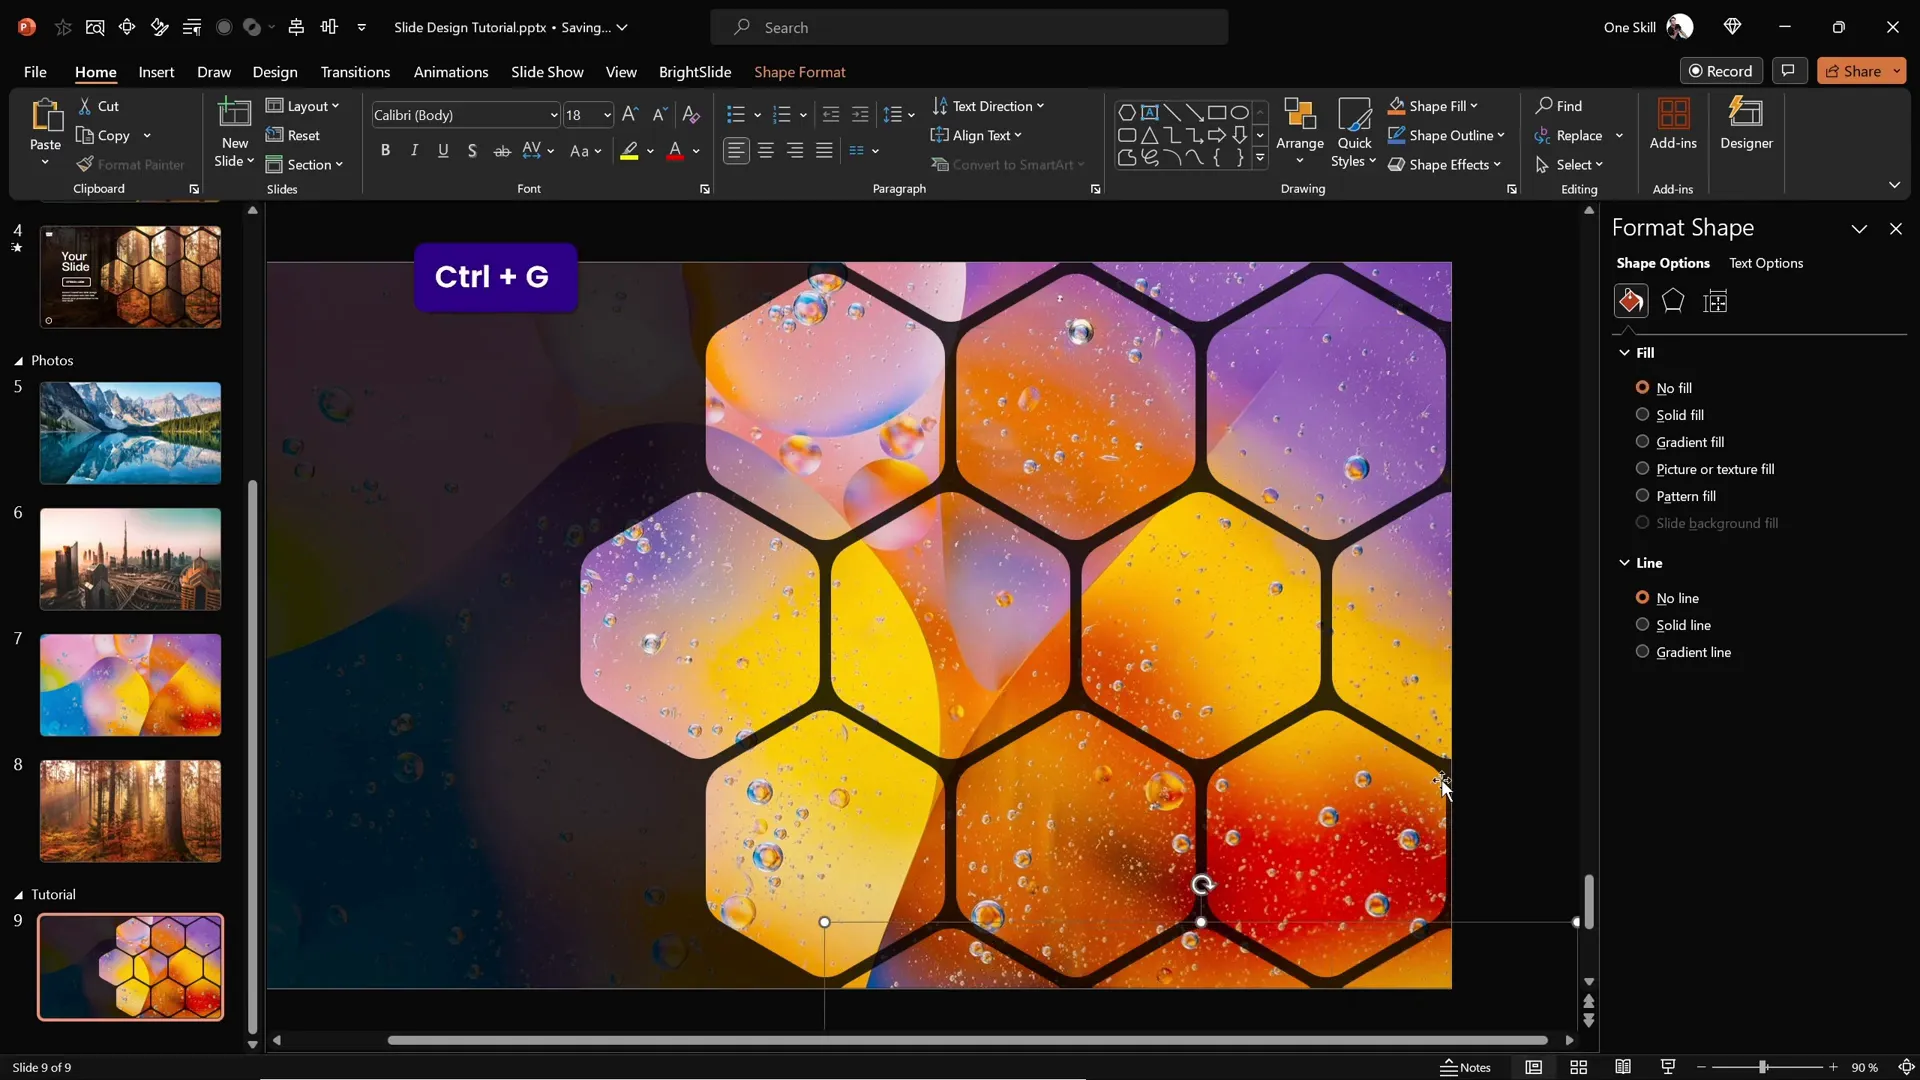
Applying Slide Background Fill to Hexagons
Now, apply the magic slide background fill to your hexagons. Select all the remaining hexagons and change their fill to Slide Background Fill. This will make each hexagon reflect the part of the background image behind it, creating a stunning visual effect.
This technique not only integrates your shapes with the background image but also adds depth and texture to your slide design.
Grouping Hexagons for Easier Animation
To prepare for animation, group hexagons based on their row or section. For example, you can create groups for the middle row, the top row, the bottom row, and any additional clusters you’ve created.
Grouping simplifies the animation process, allowing you to animate sections together rather than each hexagon individually.

To group:
- Select multiple hexagons by holding the Shift key and clicking them.
- Press Ctrl + G to group.
Repeat this for all desired groups, so you have about five groups ready for animation.
Animating Your Hexagon Slide Design
Animations add energy and professionalism to your presentations. Here’s how to animate your grouped hexagons smoothly:
- Open the Animation Pane from the Animations tab to track your animations.
- Select all hexagon groups.
- Apply the Fly In animation.
- Set the animation direction to From Top for the top groups.
- For the two bottom groups, change the direction to From Bottom for visual balance.
- Set the start option to With Previous so animations run automatically in sequence.
- Adjust the duration to 2 seconds for a smooth effect.
- In Effect Options, select Maximum Smooth End for gentle animation stops.
- Arrange the layering so the middle row stays in front, and send the top and bottom rows behind.
- Send the semi-transparent dark rectangle to the back so hexagons remain visible.
Preview your animation to see hexagons fly in softly from different directions, overlapping elegantly for a dynamic, polished slide.
Adding Animated Text Elements
Complete your slide design by adding text elements like logos, titles, and slide numbers. Here’s how to animate these elements for a cohesive look:
- Copy your text boxes and logo from another slide or create new ones.
- Group all text elements together for ease of animation.
- Add the Flame animation effect.
- Set the direction to From Left.
- Configure the animation to start With Previous, matching the hexagon animations.
- Set the duration to 2 seconds.
- Use the Bounce effect slider and set it to 1.5 seconds for a fun, lively entrance.
This subtle bounce combined with the flame effect adds personality and polish to your slide.
Customizing Your Slide Background Quickly
One of the best features of this slide design is how easy it is to customize. You can change the entire look of your slide by simply swapping the background image, and the hexagons will automatically update with the new image thanks to the slide background fill.
Here’s how to do it:
- Select the new photo and copy it (Ctrl + C).
- Go to your slide with the hexagons.
- Open the fill options for the hexagons or shapes using slide background fill.
- Click Clipboard to paste the new image as the fill.
Within seconds, your entire slide transforms with a fresh new look without rebuilding anything.
Try this with different photos to see how versatile and dynamic your slide can be.
Conclusion and Frequently Asked Questions
Congratulations! You now have the skills to create stunning, animated PowerPoint slides featuring rounded hexagons filled with vibrant background images. By combining custom shapes, slide background fills, and smooth animations, you can design presentations that truly stand out.
Remember, these techniques can be adapted for various presentation styles and topics, making your PowerPoint slide design both creative and professional.
Frequently Asked Questions (FAQ)
1. Can I create rounded hexagons directly in PowerPoint without using Figma?
PowerPoint does not have a built-in rounded hexagon shape. Using Figma or similar vector graphic tools to create custom SVG shapes is the best way to get perfectly rounded hexagons. Once imported, you can fully edit and animate them in PowerPoint.
2. What is the benefit of using slide background fill for shapes?
Slide background fill allows shapes to mirror the background image, creating a seamless and integrated design. This effect adds depth and visual interest, making your slides look more professional and cohesive.
3. How can I ensure my animations look smooth and professional?
Use the Maximum Smooth End effect option for animations, set durations to around 2 seconds, and stagger animation directions (e.g., top rows fly in from top, bottom rows from bottom). Also, group elements to animate them together for consistency.
4. Can I use these techniques with other shapes besides hexagons?
Absolutely! The slide background fill effect works with any shape. Experiment with circles, rectangles, or custom shapes to create unique slide designs tailored to your content.
5. Are there shortcuts to speed up slide design when I’m short on time?
Yes! You can use high-quality PowerPoint templates that feature these design elements pre-built. This way, you only need to add your content and customize colors or images. Check out premium template libraries or use free templates as a starting point.
6. Can I edit the hexagon shapes after importing them as SVGs?
Yes. After importing, click the Convert to Shape button to unlock full editing capabilities. This lets you change fills, effects, and sizes freely.
7. How do I maintain consistent spacing and alignment for multiple shapes?
Use PowerPoint’s alignment tools under the Format tab. Select multiple shapes and use Align Left/Right/Center, Distribute Horizontally/Vertically, and Group features to keep everything neat and evenly spaced.
Summary Table: Key Steps for Creating Animated Hexagon Slides
| Step | Action | Tools/Features Used |
|---|---|---|
| 1 | Set high-quality image as slide background | Format Background > Picture Fill |
| 2 | Add semi-transparent black rectangle overlay | Insert > Shapes > Rectangle + Transparency |
| 3 | Create rounded hexagon in Figma | Figma Polygon Tool + Corner Radius + Export SVG |
| 4 | Import and convert SVG to editable shape | Insert > Pictures > Convert to Shape |
| 5 | Duplicate and arrange hexagons in honeycomb pattern | Ctrl + Shift + Drag + Grouping |
| 6 | Apply Slide Background Fill to hexagons | Format Shape > Fill > Slide Background Fill |
| 7 | Group hexagons for animation | Ctrl + G Grouping |
| 8 | Add Fly In animations with smooth effects | Animations Pane + Fly In + Maximum Smooth End |
| 9 | Add animated text with bounce effect | Flame Animation + Bounce Effect Slider |
| 10 | Customize slide background image quickly | Copy new image + Paste in Slide Background Fill |
With these steps and tips, you can create dynamic, polished PowerPoint slides that make your presentations visually compelling and memorable. Keep practicing these techniques and experimenting with your own images and shapes to find your unique style.
Happy designing, and may your next presentation be your best yet!
Check out the full video: CREATIVE PowerPoint Slide Design Tutorial! 2024 ✨


