
If you’re looking to elevate your PowerPoint presentations with creative and visually striking slides, you’re in the right place. This comprehensive guide will walk you through crafting impressive PowerPoint slide designs featuring rounded hexagons, complete with animations that bring your slides to life. Whether you’re a beginner or an experienced PowerPoint user, this tutorial will help you unlock advanced design techniques that make your presentations stand out.
We’ll explore everything from setting a beautiful background image to creating unique rounded hexagon shapes using free design tools, and finally, adding smooth, professional animations to your slides. Along the way, you’ll discover how to quickly customize your slide’s look by swapping background images and grouping elements for easier editing and animation.
This article is inspired by the expertise of One Skill PPT, a leading PowerPoint creator known for empowering users to build unstoppable presentations. Let’s dive in and master the art of PowerPoint slide design in 2024!
Table of Contents
- Setting Up a Beautiful Slide Background
- Adding a Semi-Transparent Overlay for Contrast
- Using Slide Background Fill for Shapes
- Creating Rounded Hexagons in Figma
- Importing and Editing Rounded Hexagons in PowerPoint
- Arranging Multiple Hexagons for Patterns
- Applying Slide Background Fill to Hexagons
- Grouping Hexagons for Easier Animation
- Adding Smooth Animations to Your Slide
- Customizing Your Slide with Text and Logos
- Quickly Changing Slide Backgrounds for Variety
- Frequently Asked Questions (FAQ)
- Conclusion
Setting Up a Beautiful Slide Background
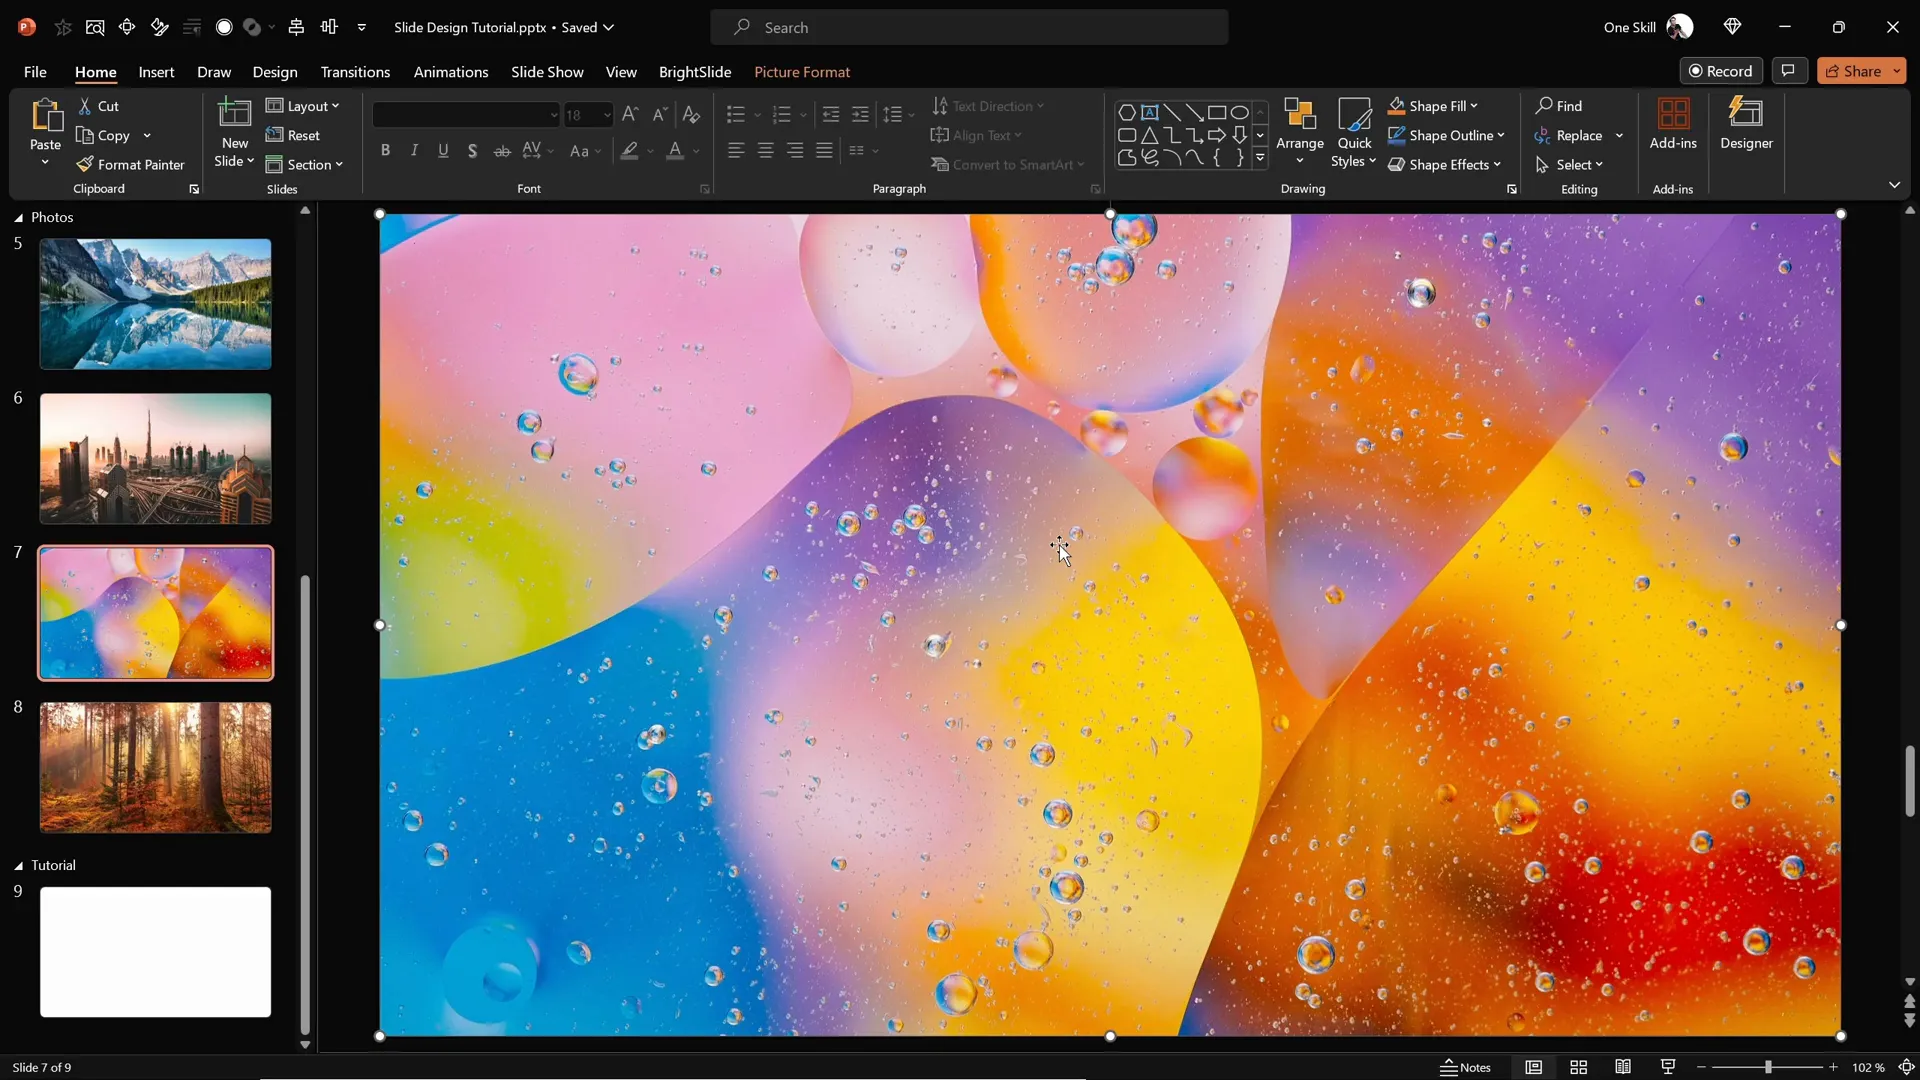
The foundation of a visually captivating PowerPoint slide design starts with an eye-catching background image. High-quality photos can set the mood and tone for your entire presentation. To begin, find a blank slide in your PowerPoint presentation where you can start fresh.
For this tutorial, you can download stunning photos from Unsplash, a fantastic resource for free, high-resolution images. Once you have your photo ready, copy it to your clipboard (Ctrl + C).
Next, go back to your blank slide and right-click anywhere on the slide background. Select Format Background from the context menu. In the formatting pane, choose the fill option, then select Picture or texture fill. Finally, click Clipboard to paste your copied photo as the slide background.
This method embeds the image as the background itself, meaning you won’t be able to select or move it, which is exactly what you want for a stable base. Your slide now has a beautiful, full-slide photo that sets the stage for the design elements you’ll add next.
Adding a Semi-Transparent Overlay for Contrast
To ensure that any shapes or text you add later stand out clearly against your background image, it’s a good idea to add a semi-transparent dark overlay. This technique helps improve readability and adds a professional touch to your slide.
Follow these steps:
- Go to the Insert tab and select Shapes.
- Choose the Rectangle tool.
- Draw a rectangle that covers the entire slide by aligning it from the top-left corner and dragging it to cover the slide fully.
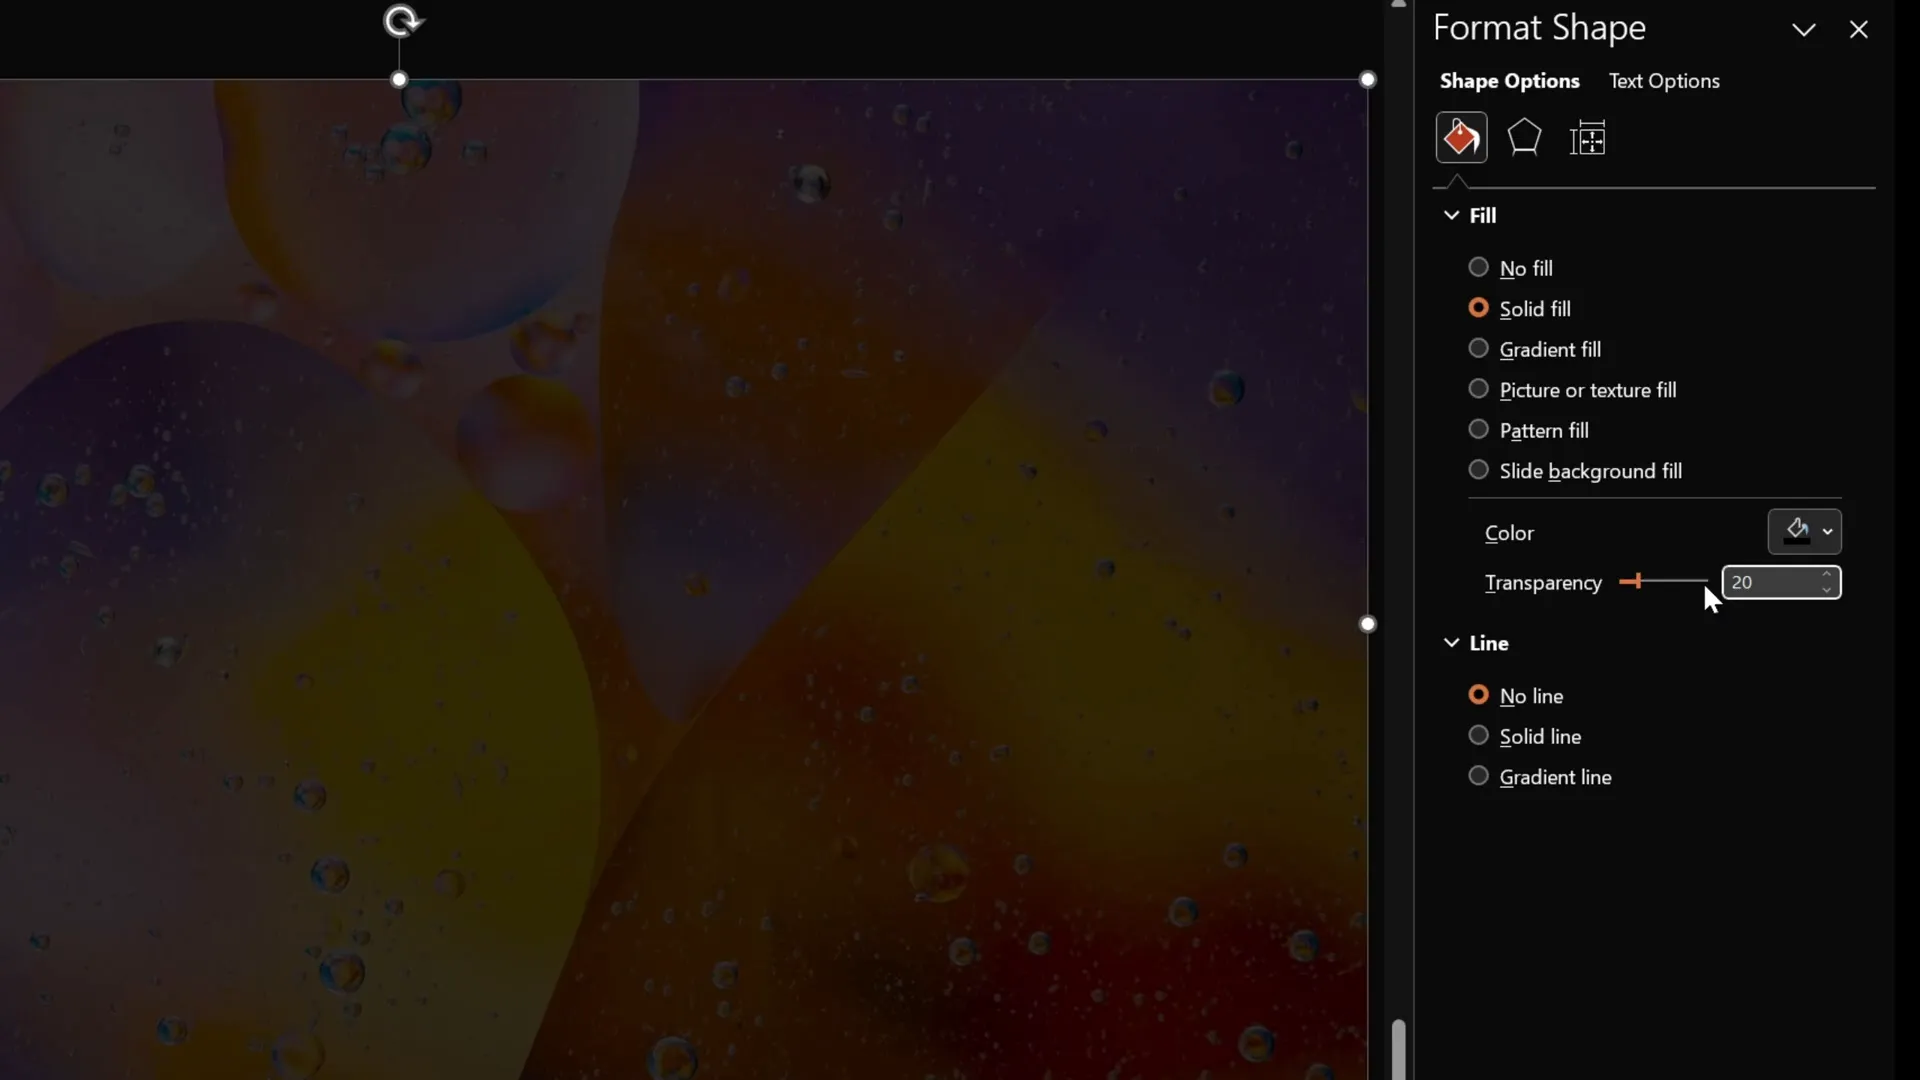
- Right-click the rectangle and open the Format Shape pane.
- Set the fill color to black.
- Adjust the transparency slider to around 20% so the background photo is still visible beneath the overlay.
This subtle dark layer creates a nice contrast, making your slide elements pop without obscuring the beautiful background.
Using Slide Background Fill for Shapes
Now comes the magical part: using the slide background as a fill for any shape you insert on top of the slide. This technique allows you to create shapes that appear to cut out or mirror the background image, resulting in an impressive visual effect.
For example, insert a simple shape like a circle:
- Go to Insert > Shapes and select the Oval tool.
- Draw the circle anywhere on the slide.
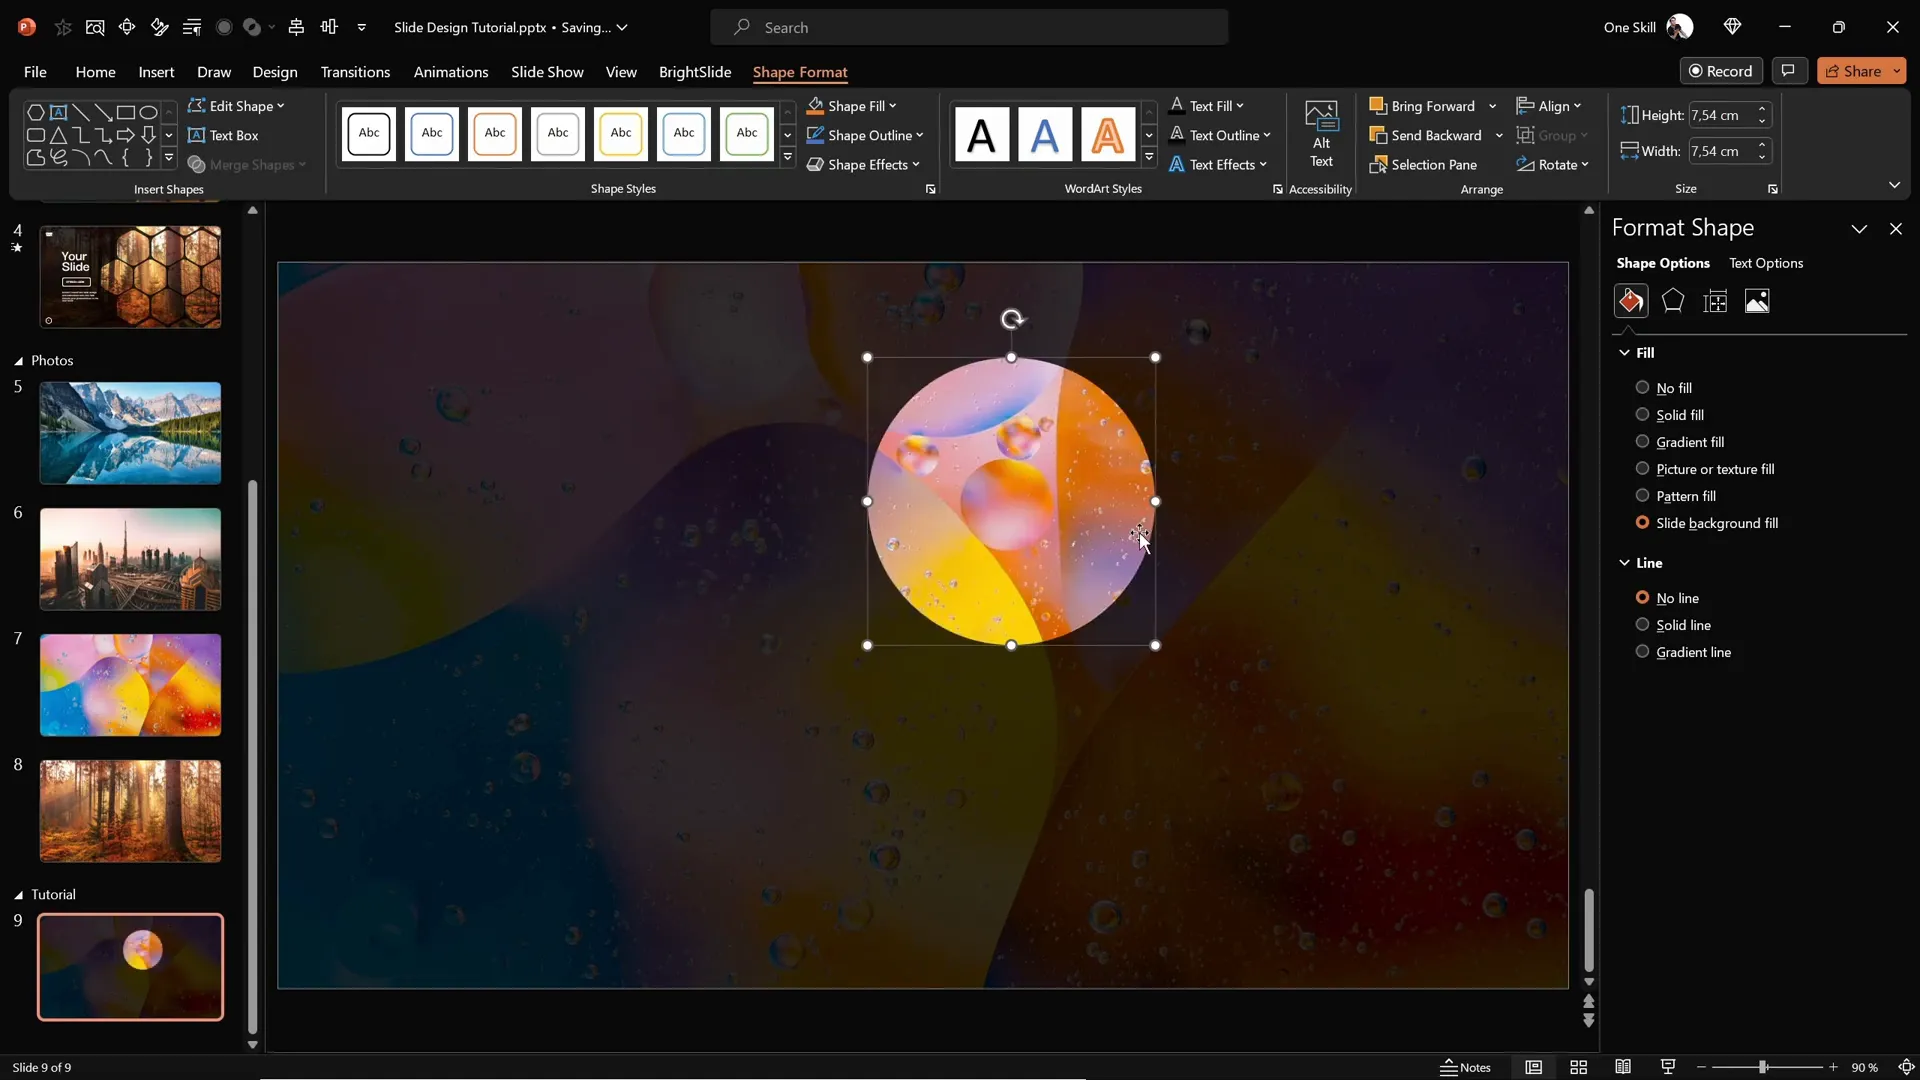
- Right-click the shape and choose Format Shape.
- Under Fill options, select Slide Background Fill.
Suddenly, the circle takes on the exact portion of the background photo behind it, creating a seamless and dynamic design element. This feature is a powerful way to integrate shapes with your slide’s background imagery.
Creating Rounded Hexagons in Figma
While PowerPoint offers various shapes, it doesn’t have a built-in option for rounded hexagons — those beautiful, softly curved six-sided shapes that add a modern touch to your slides.
To overcome this limitation, you can use Figma, a free, web-based design tool primarily used for UI/UX design but perfect for creating custom shapes for PowerPoint.
Here’s how to create a rounded hexagon in Figma:
- Sign up or log in to Figma using your Gmail account.
- Click on New Design File to start a blank canvas.
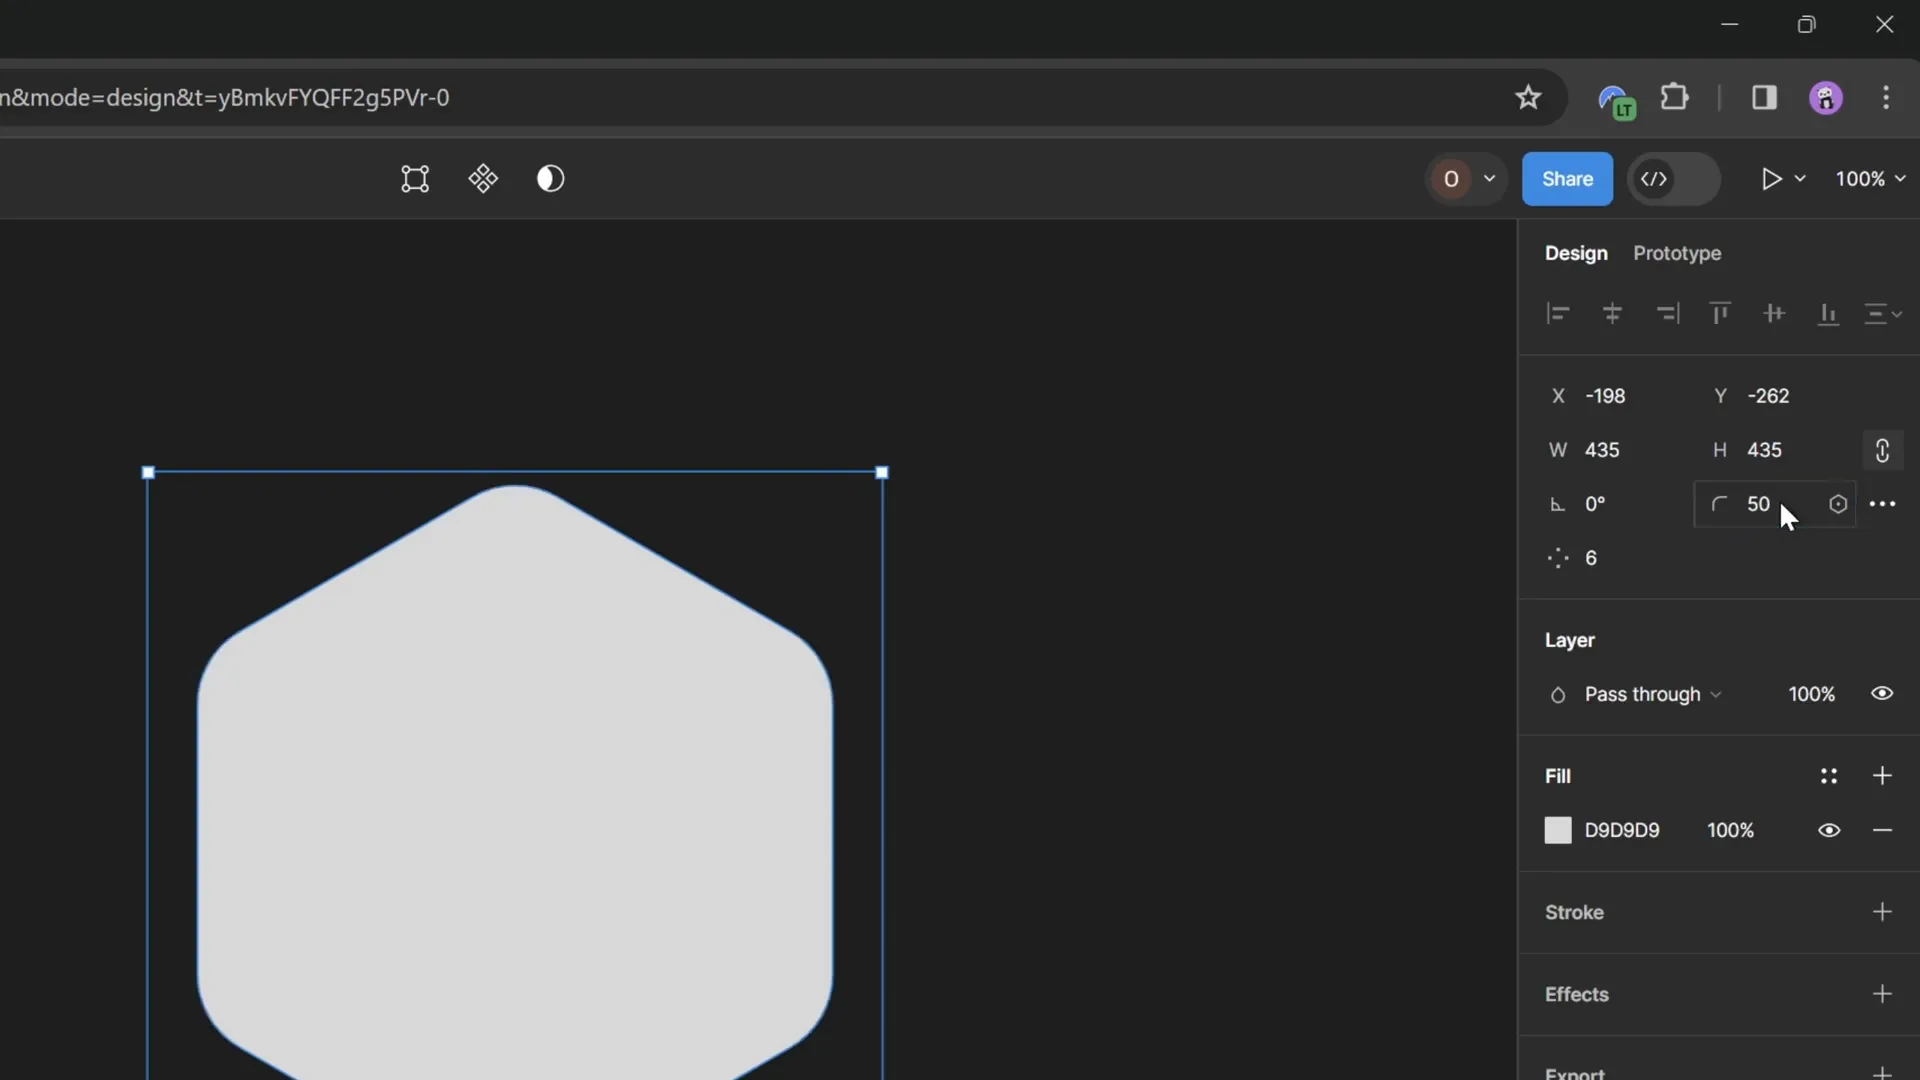
- Select the Polygon Tool from the shape menu (it looks like a triangle).
- Hold down the Shift key and draw a polygon on the canvas.
- In the polygon’s properties panel, change the number of sides from 3 (triangle) to 6 for a hexagon.
- Adjust the corner radius slider or input a value (e.g., 50) to round the hexagon’s corners.
- Once you’re happy with the shape, select it and click Export.
- Choose the SVG format and save the file to your device.
This process gives you a perfectly rounded hexagon SVG file that you can use directly in PowerPoint.
Importing and Editing Rounded Hexagons in PowerPoint
Back in PowerPoint, import your newly created rounded hexagon SVG file:
- Go to Insert > Pictures > This Device.
- Locate and select your rounded hexagon SVG.
- Insert it onto your slide.
At first, you might notice that some fill options are grayed out, meaning the shape isn’t fully editable yet. To fix this:
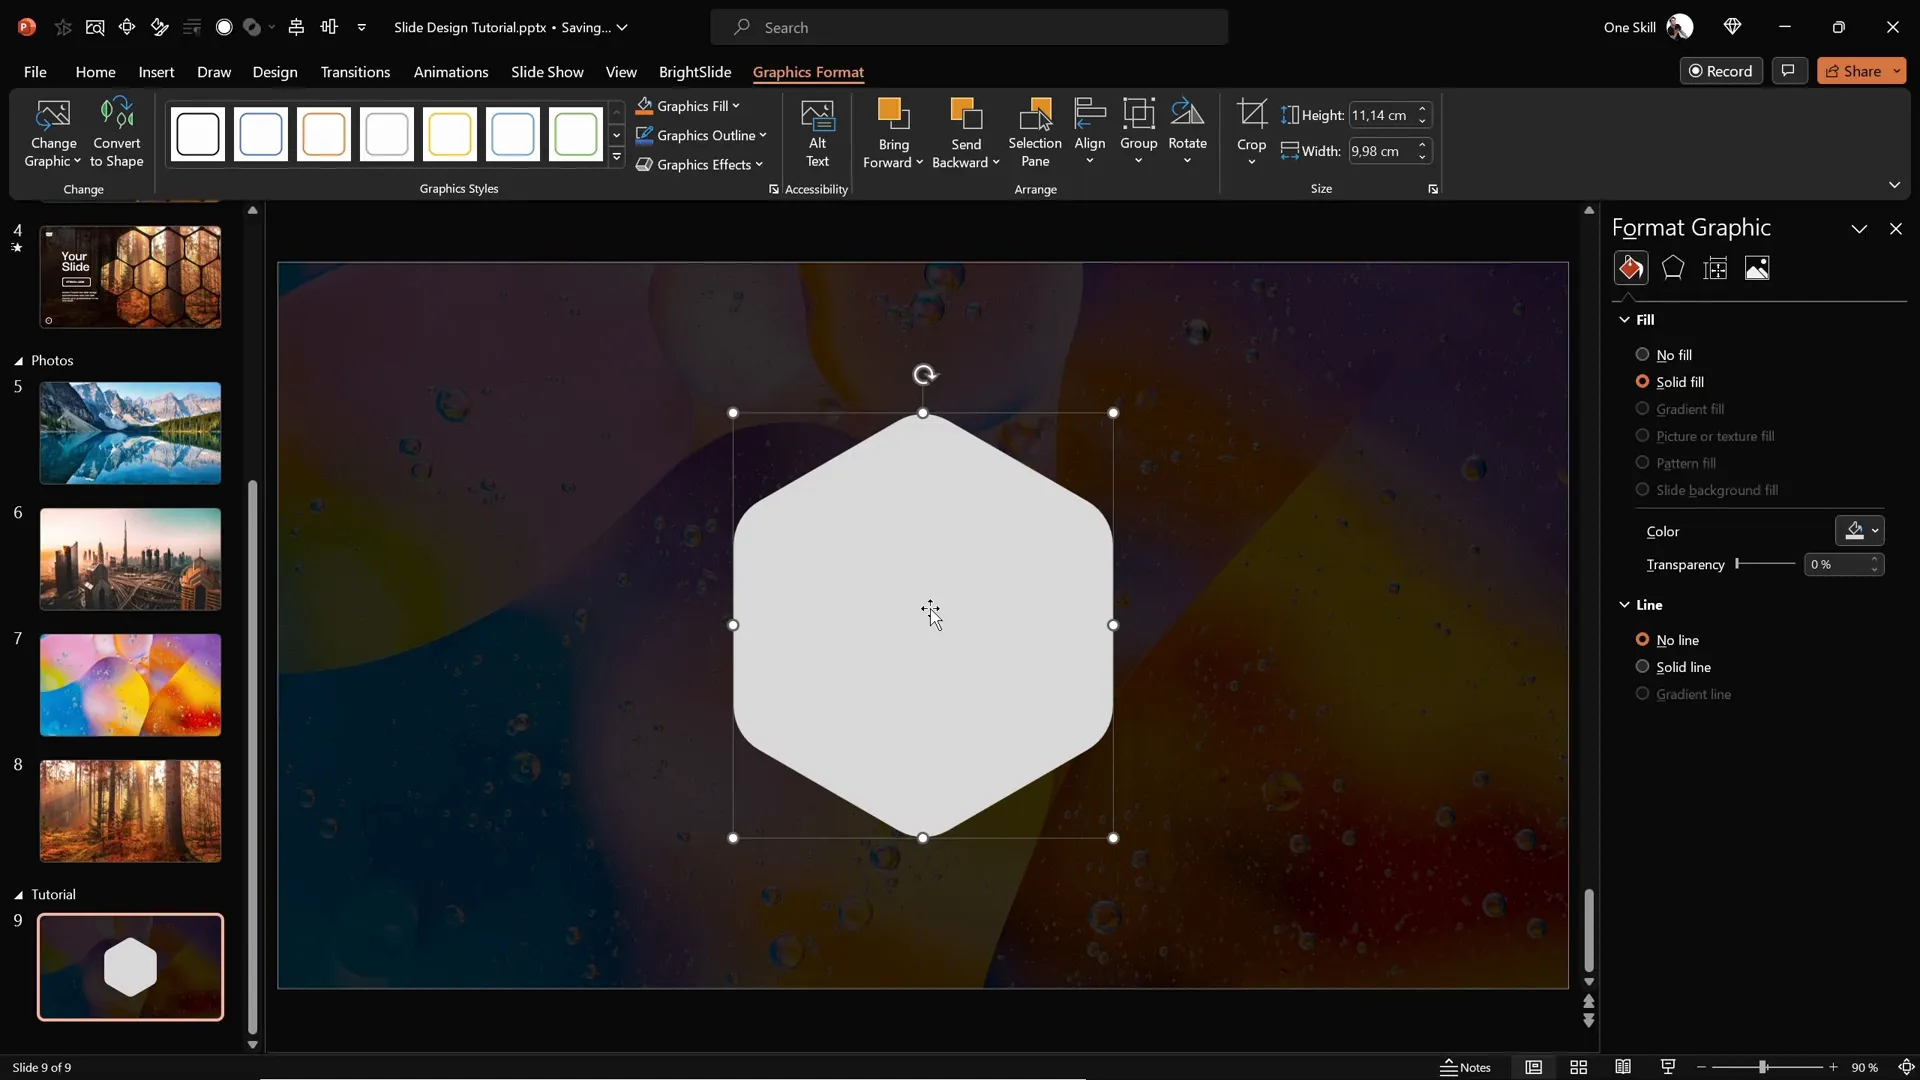
- Select the hexagon, then under the Graphics Format tab, click Convert to Shape.
- Now the hexagon is fully editable like any native PowerPoint shape.
- You can apply the Slide Background Fill to this shape to make it blend perfectly with your slide background.
Resize the hexagon by locking its aspect ratio and setting a suitable height (e.g., 7 cm) for a balanced look. Position it centrally on your slide as your base shape for building patterns.
Arranging Multiple Hexagons for Patterns
To create a visually interesting slide, arrange several hexagons in a pattern. Here’s how you can do it:
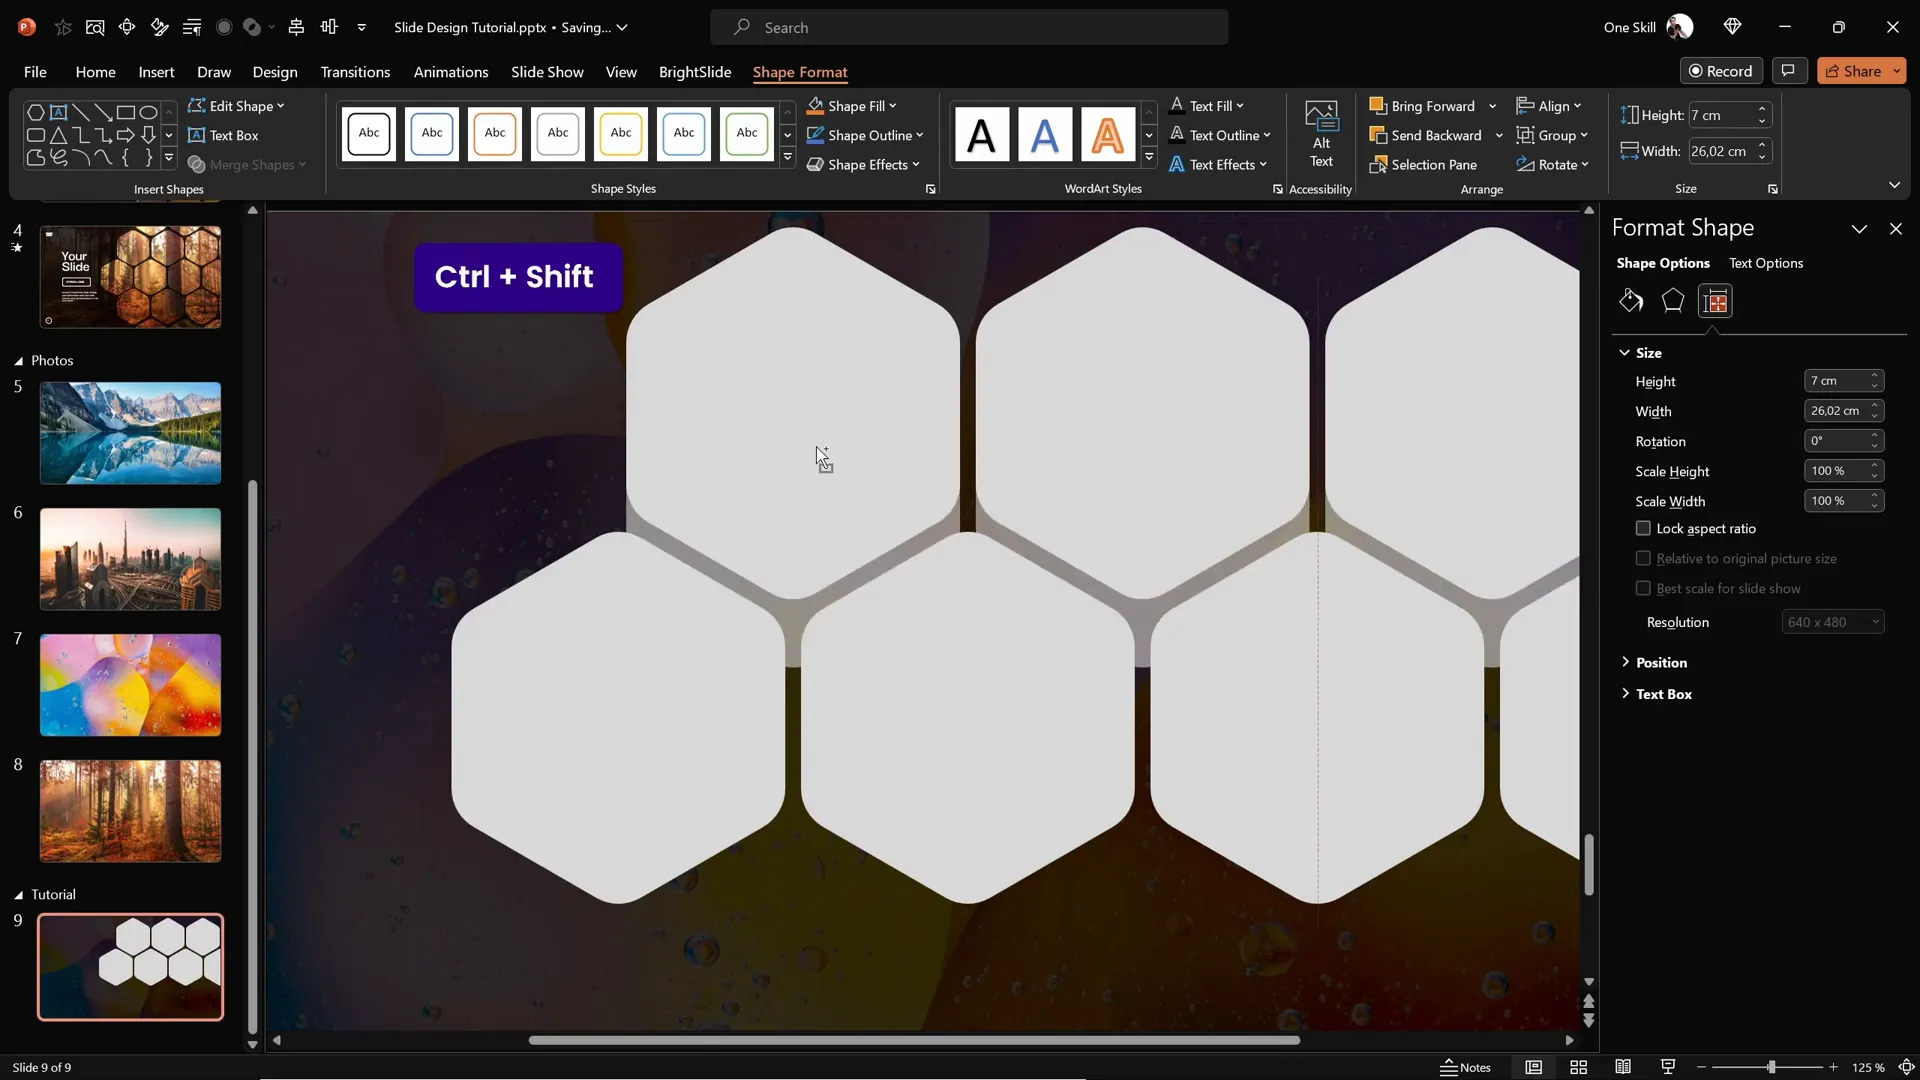
- Select the hexagon, then hold Ctrl + Shift and drag it to create a copy aligned horizontally.
- Decide the gap width between hexagons; a narrow gap works well for a tight pattern.
- Repeat to create a row of three hexagons.
- Drag the entire row slightly to the right so the last hexagon partially extends off the slide for a creative edge.
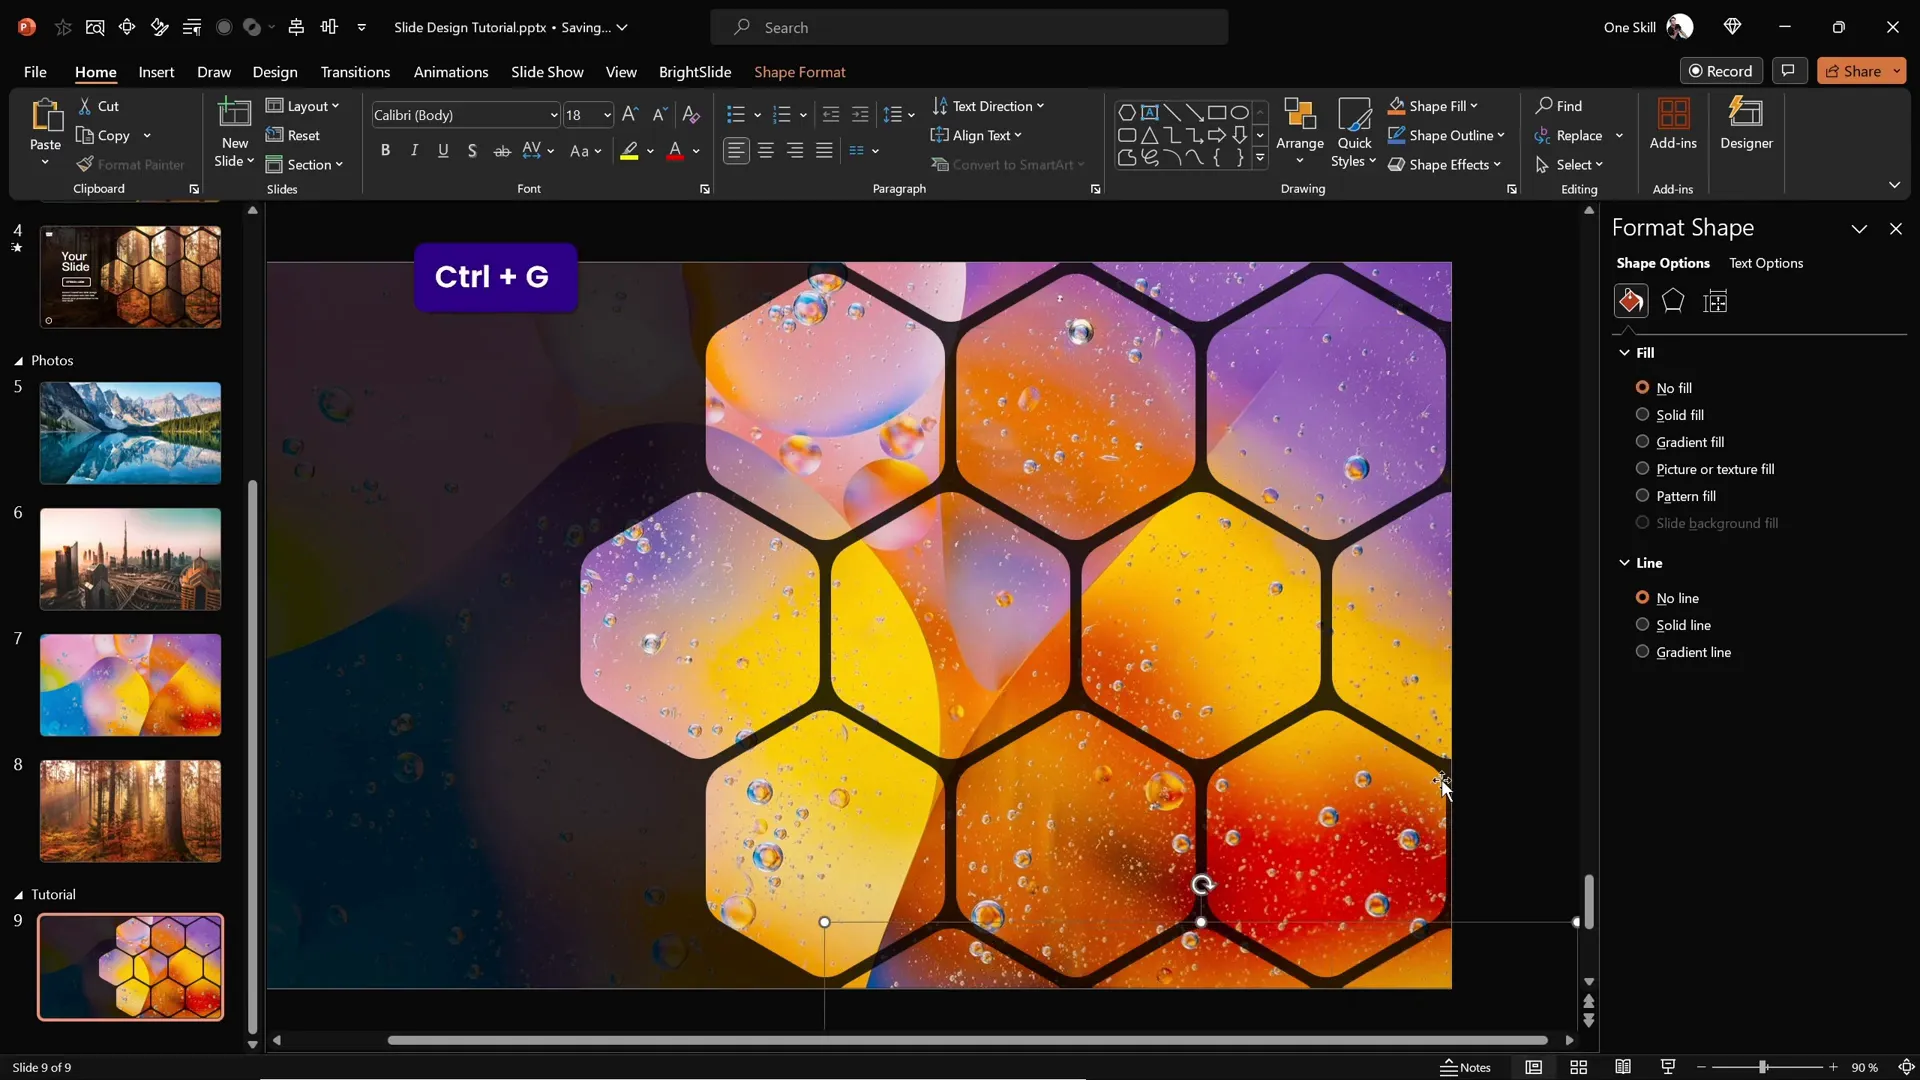
- Group these hexagons together (Ctrl + G) for easier handling.
- Make a copy of this group to create more rows.
- Align these rows vertically, maintaining consistent gaps for a clean pattern.
- Add additional hexagons at the top and bottom edges to fill the slide area as desired.
This arrangement forms a beautiful honeycomb pattern that adds a modern geometric flair to your slide design.
Applying Slide Background Fill to Hexagons
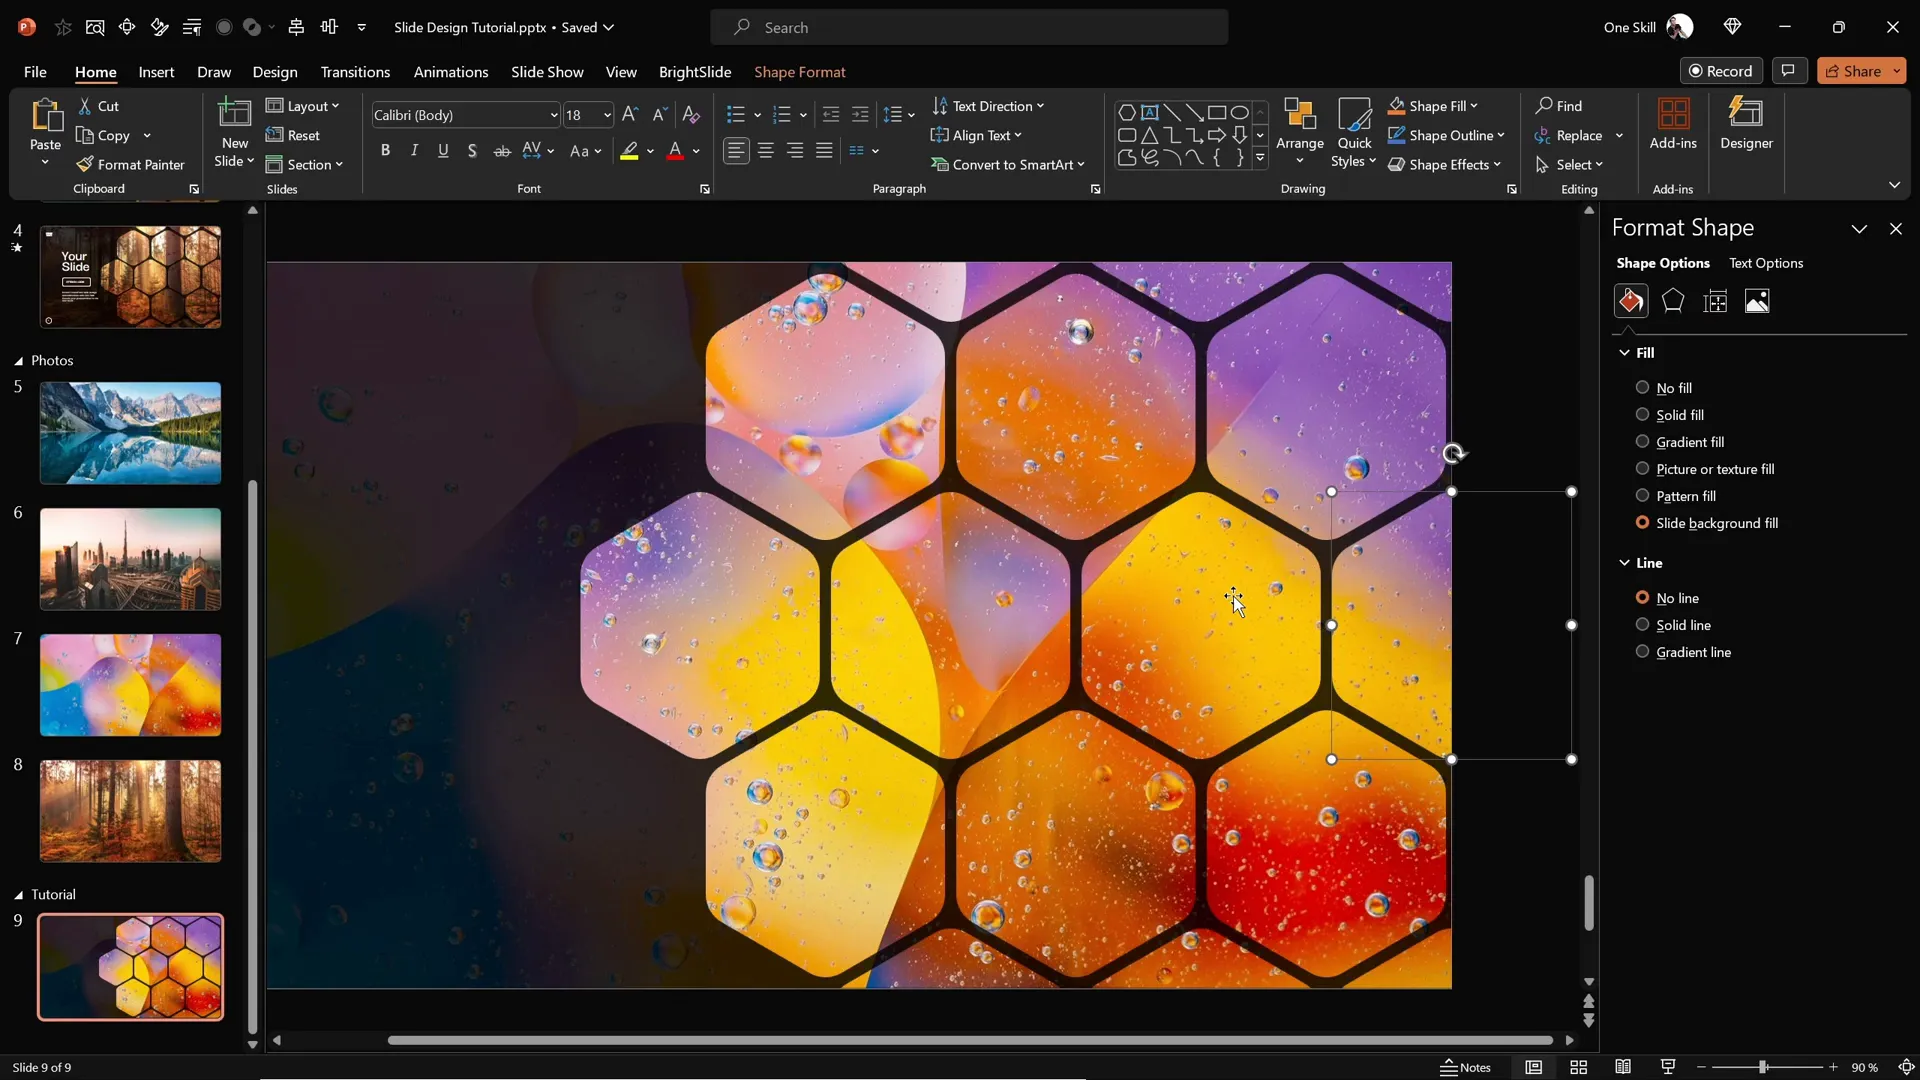
Once your hexagon pattern is laid out, apply the Slide Background Fill to each hexagon so they visually merge with the background image, creating a seamless effect:

- Select all hexagons.
- Choose Format Shape > Fill > Slide Background Fill.
This step ensures each hexagon reflects the exact section of the background beneath it, enhancing the overall design coherence.
Delete any hexagons that extend too far outside the visible slide area to keep the design clean and focused.
Grouping Hexagons for Easier Animation
To animate your slide efficiently, group hexagons into logical clusters. For example, group:
- The middle row of hexagons.
- The top row.
- The bottom row.
- Any additional clusters you want to animate separately.
Grouping helps you apply animations to multiple shapes simultaneously and manage timing more easily.
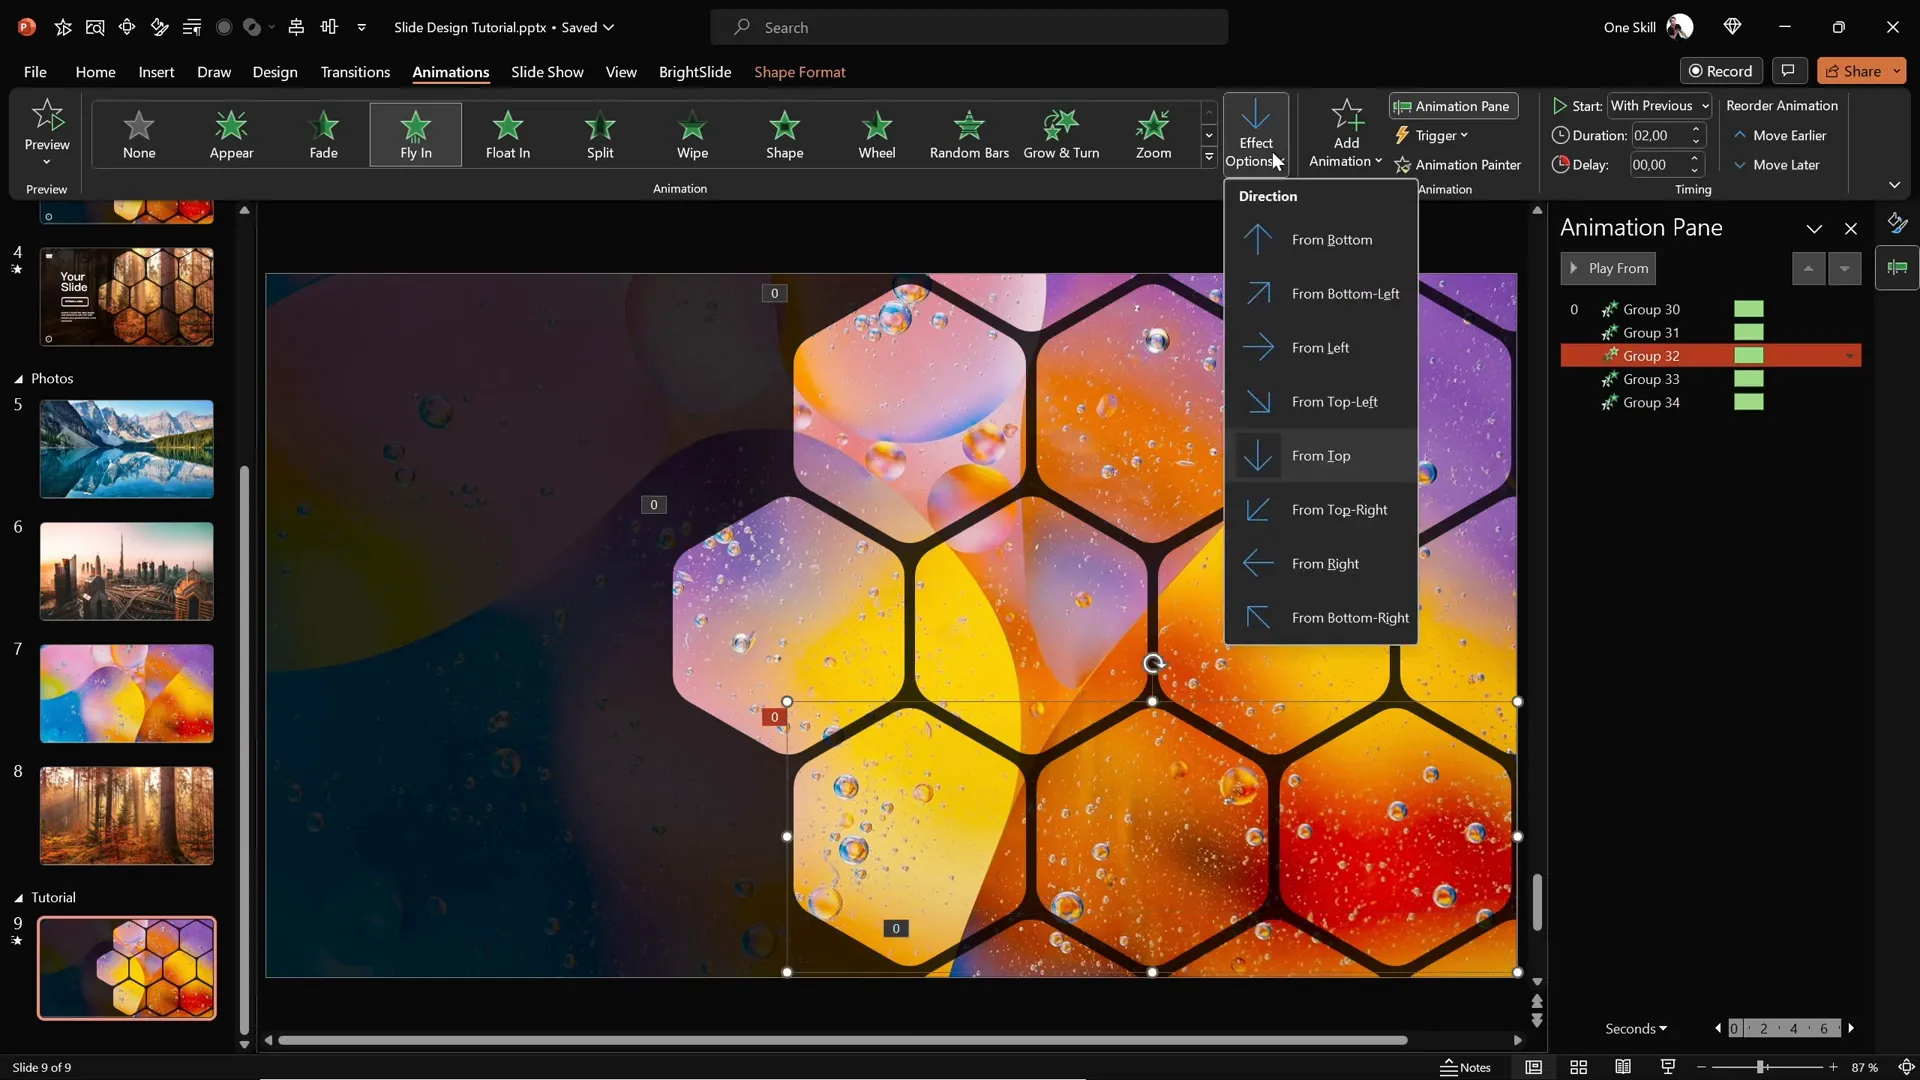
Adding Smooth Animations to Your Slide
Animations breathe life into your slide design. Here’s how to add smooth flying animations to your grouped hexagons:
- Open the Animations pane.
- Select all hexagon groups.
- Apply the Fly In animation effect.
- Set the direction to From Top for the top rows and middle groups.
- For the bottom groups, change the direction to From Bottom to create a balanced animation flow.
- Set all animations to start With Previous for simultaneous action.
- Adjust the duration to around 2 seconds for a smooth effect.
- In the animation options, set the easing to Maximum Smooth End for a soft landing of the hexagons.
To handle overlapping visuals, send the top and bottom rows to the back, keeping the middle row in front. Also, send the semi-transparent rectangle overlay to the back so the hexagons remain visible.
Preview your slide to ensure the animations are fluid and harmonious.
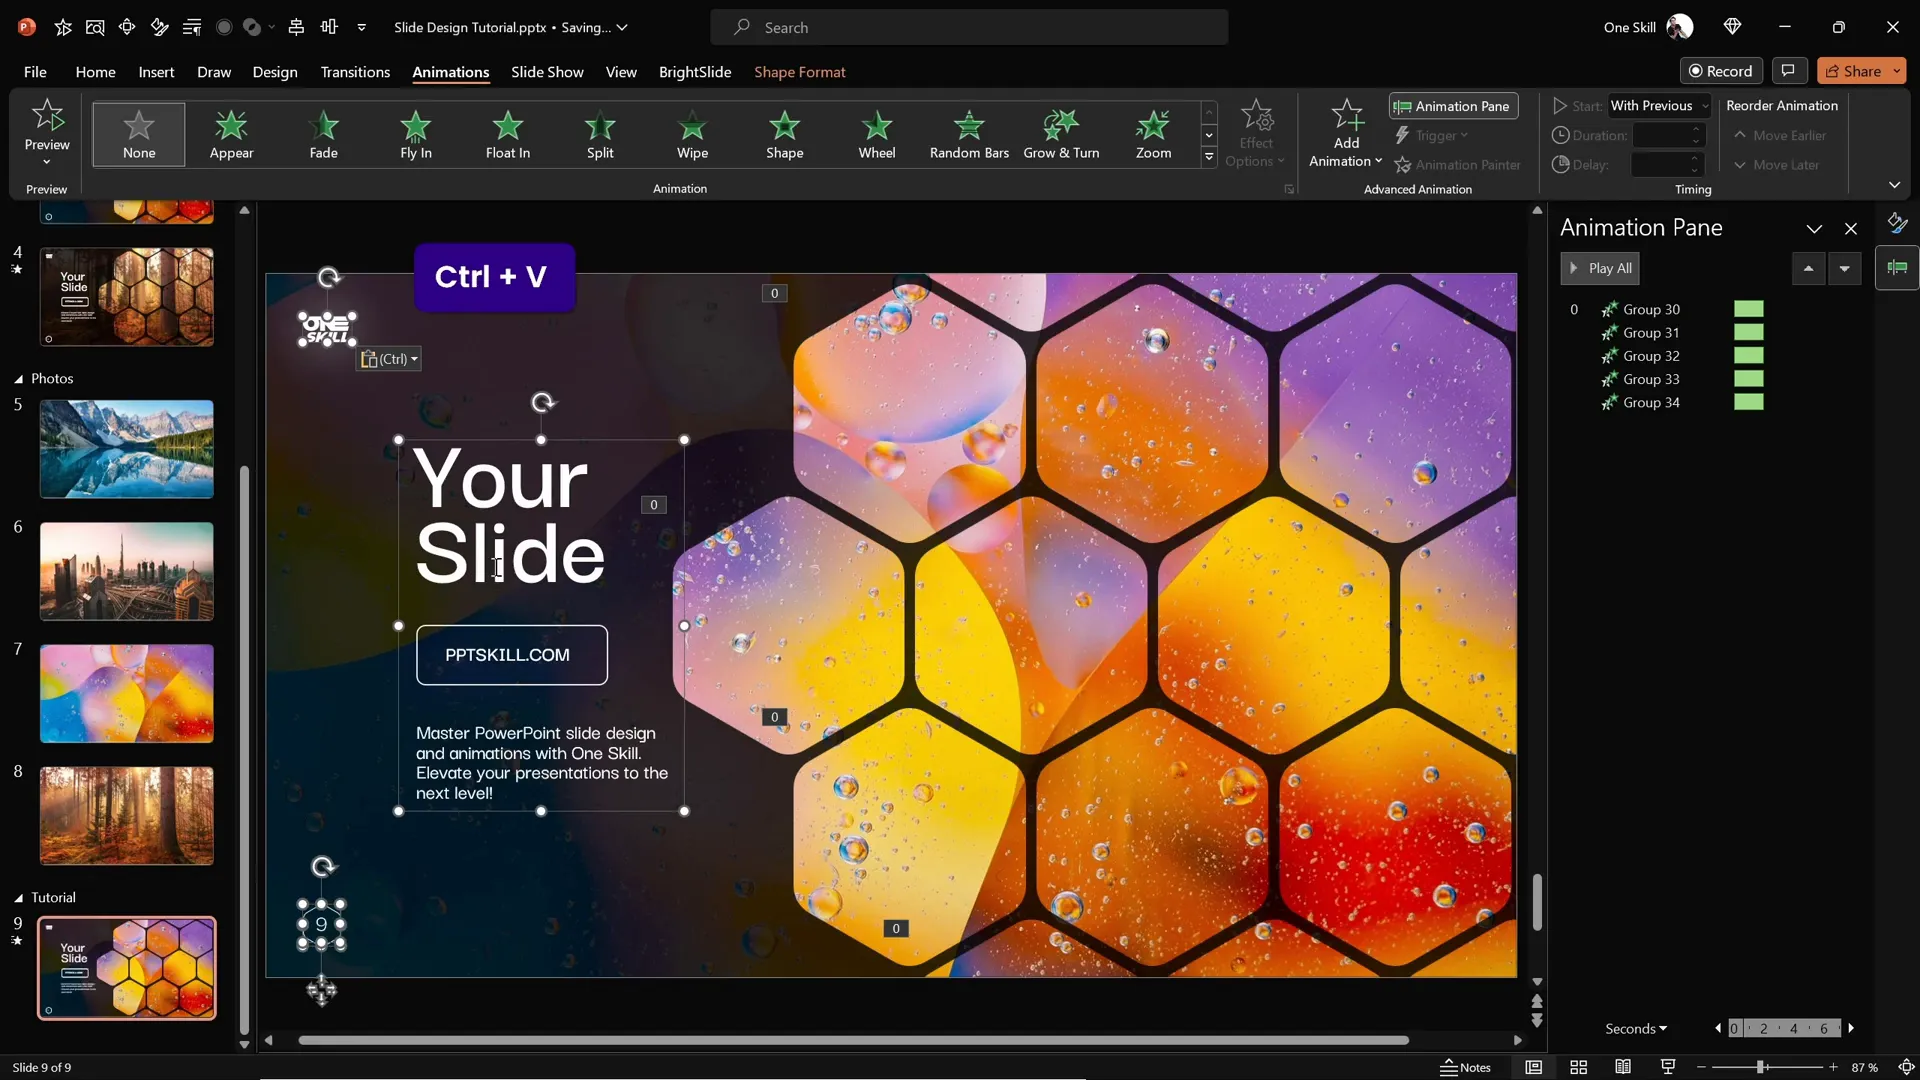
Customizing Your Slide with Text and Logos
To complete your slide, add text elements like titles, subtitles, logos, or slide numbers:
- Copy these elements from a previous slide or create new ones.
- Group all text boxes and logos together for easy animation.
- Apply a Flame animation with direction From Left.
- Set this animation to start With Previous and give it a duration of 2 seconds.
- Use the Bounce effect with a duration of 1.5 seconds to add a playful entrance.
This coordinated animation complements the flying hexagons, making your slide dynamic yet professional.
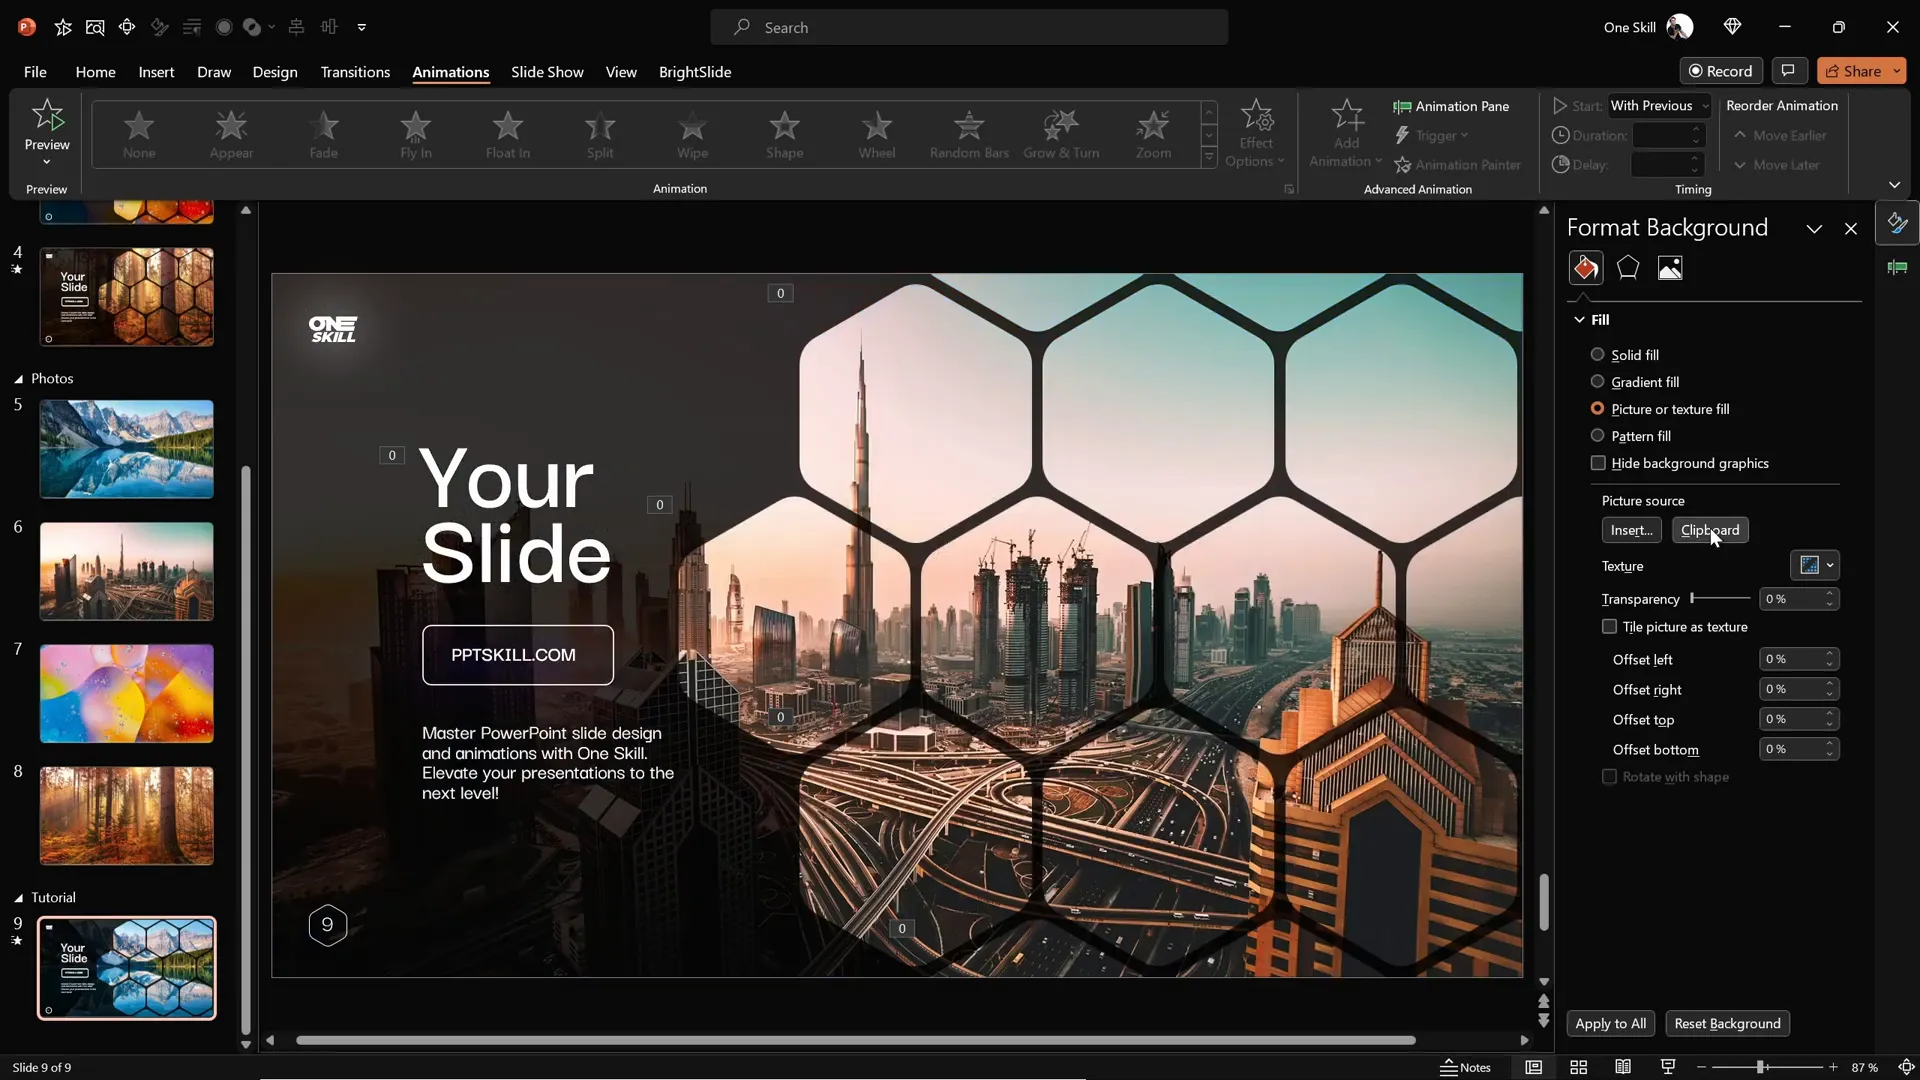
Quickly Changing Slide Backgrounds for Variety
One of the best features of this slide design is its flexibility. You can quickly change the entire look by swapping out the background image and updating the slide background fills on the shapes:
- Copy a new photo to your clipboard.
- In the slide background fill options for your hexagons and shapes, select Clipboard to apply the new image.
- Watch as your slide instantly refreshes with a fresh background and matching hexagon fills.
This method lets you create multiple versions of your slide with different themes or moods, all while maintaining the core design elements and animations.
Frequently Asked Questions (FAQ)
What is slide background fill in PowerPoint?
Slide background fill is a feature that fills a shape with the exact portion of the slide’s background image that lies beneath it. This creates a seamless blend between the shape and the background, which is ideal for creative slide designs.
How do I create rounded hexagons if PowerPoint doesn’t have them?
You can create rounded hexagons using a free online design tool like Figma. Draw a polygon with six sides and adjust the corner radius to round the edges. Export it as an SVG and import it into PowerPoint for further editing.
Can I animate multiple shapes at once in PowerPoint?
Yes! Group your shapes together and apply animations to the group. This way, all grouped shapes animate simultaneously, allowing for coordinated and smooth visual effects.
How can I make my slide elements more readable over a photo background?
Adding a semi-transparent dark rectangle overlay on top of the photo background improves contrast, helping text and shapes stand out without hiding the image.
Is it possible to quickly change the look of my slide design?
Absolutely! By replacing the background image and updating the slide background fills on your shapes, you can instantly refresh the entire slide’s appearance while preserving your layout and animations.
Conclusion
Mastering PowerPoint slide design in 2024 means embracing creativity, precision, and smart use of tools. By following this step-by-step guide, you’ve learned how to create stunning animated slides featuring rounded hexagons that seamlessly integrate with a beautiful photo background.
From setting up your slide background and adding a subtle overlay, to crafting custom rounded hexagons with Figma, importing and editing them in PowerPoint, arranging them into engaging patterns, and applying smooth animations — each step builds toward a professional and captivating presentation.
What’s more, the flexibility to quickly swap background images and update fills means your slides can adapt to any theme or mood with minimal effort. This approach not only saves time but also ensures your presentations remain fresh and visually compelling.
Remember, the key to great PowerPoint slide design is blending aesthetics with functionality — making sure your visuals enhance your message and engage your audience. Now that you have these skills, you’re well on your way to becoming an unstoppable PowerPoint creator.
Happy designing!
Check out the full video: CREATIVE PowerPoint Slide Design Tutorial! 2024 ✨


