
Creating visually appealing and informative slides is a crucial skill for anyone who frequently presents ideas using PowerPoint. Whether you are preparing a business presentation, an educational lecture, or a creative pitch, having well-designed slides can make all the difference in capturing your audience’s attention and conveying your message effectively.
In this comprehensive guide, we will explore how to create a striking wooden blocks infographic slide in PowerPoint. This design technique not only adds a professional and textured look to your presentation but also helps break down complex information into clear, digestible steps. Inspired by expert tips from POWERPOINT UNIVERSITY, this tutorial will walk you through the entire process—from crafting the wooden blocks to animating your slide for maximum impact.
By the end of this article, you’ll have all the tools and knowledge you need to master this PowerPoint slide design, making your presentations stand out with creative flair and clarity.
Table of Contents
- Why Choose Wooden Blocks for Your Infographic Slide?
- Getting Started: Setting Up Your PowerPoint Slide
- Creating Wooden Blocks with Texture and Depth
- Designing the Platform for Your Blocks
- Building the Step Structure
- Adding Text and Labels to Your Wooden Blocks
- Inserting and Customizing Icons
- Grouping and Aligning Elements for Consistency
- Applying Animations for Interactive Presentation
- Final Tips for PowerPoint Slide Design
- Frequently Asked Questions (FAQ)
Why Choose Wooden Blocks for Your Infographic Slide?
When designing an infographic slide, the goal is to present information in a way that is visually engaging and easy to follow. Wooden blocks are an excellent choice for several reasons:
- Natural Texture: The wood grain texture adds a tactile, realistic feel that makes the slide visually interesting and less sterile than plain shapes.
- Clear Structure: Blocks naturally imply building or stepwise progression, which is ideal for showing stages, processes, or hierarchical information.
- Customizable Depth and Shadows: Using PowerPoint’s 3D effects, you can add depth to the blocks, giving a three-dimensional look that enhances focus and professionalism.
- Versatility: Wooden blocks can be used in business, education, or creative presentations, adapting well to various themes and audiences.
In this tutorial, we’ll focus on creating a slide with three wooden blocks representing steps one, two, and three. Each block will be animated with corresponding icons and text to guide your audience through the information smoothly.
Getting Started: Setting Up Your PowerPoint Slide
Before diving into the design, it’s essential to set up your PowerPoint slide correctly. Follow these initial steps to prepare your workspace:
- Add a New Slide: Open your PowerPoint presentation and insert a new blank slide to work on.
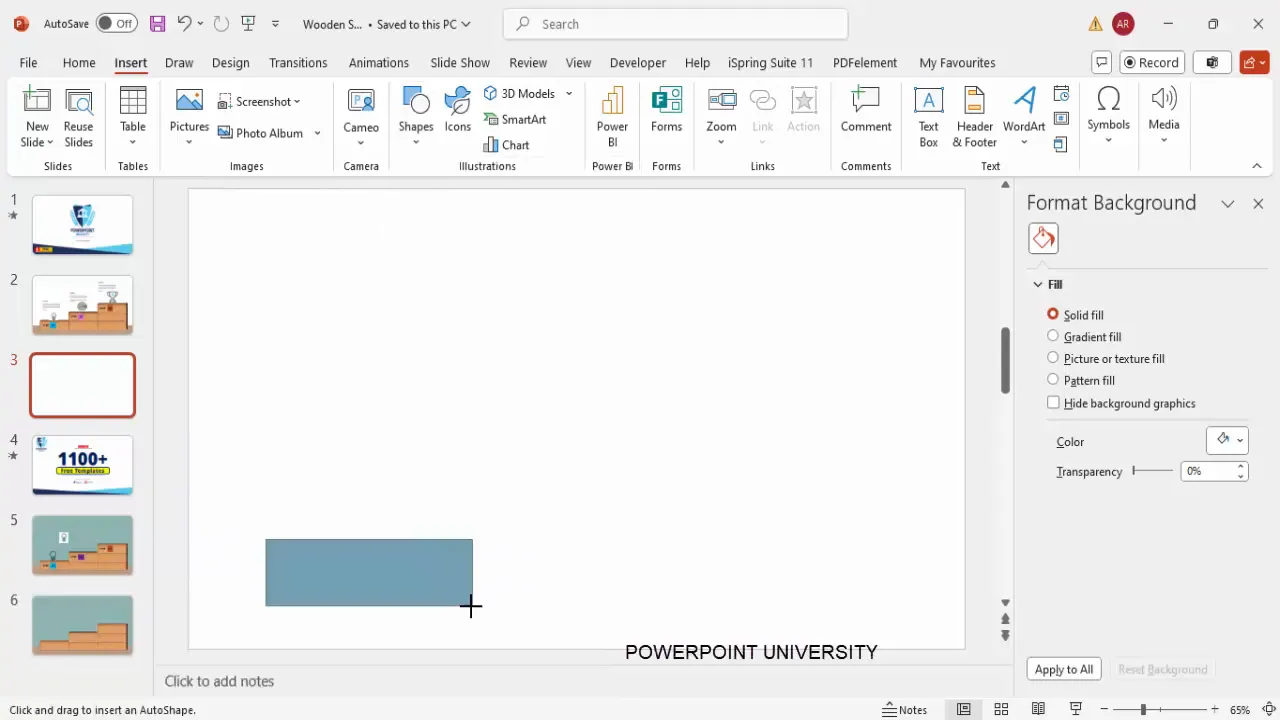
- Insert a Rectangle Shape: Go to the Insert tab, select Shapes, and choose the rectangle tool. Draw a rectangle on your slide to the size you want for your wooden block.
- Adjust Size Later: Don’t worry if the rectangle isn’t perfect in size initially—you can resize it as needed throughout the process.
Creating Wooden Blocks with Texture and Depth
Now comes the fun part—transforming a simple rectangle into a realistic wooden block. Here’s how to add texture and 3D effects:
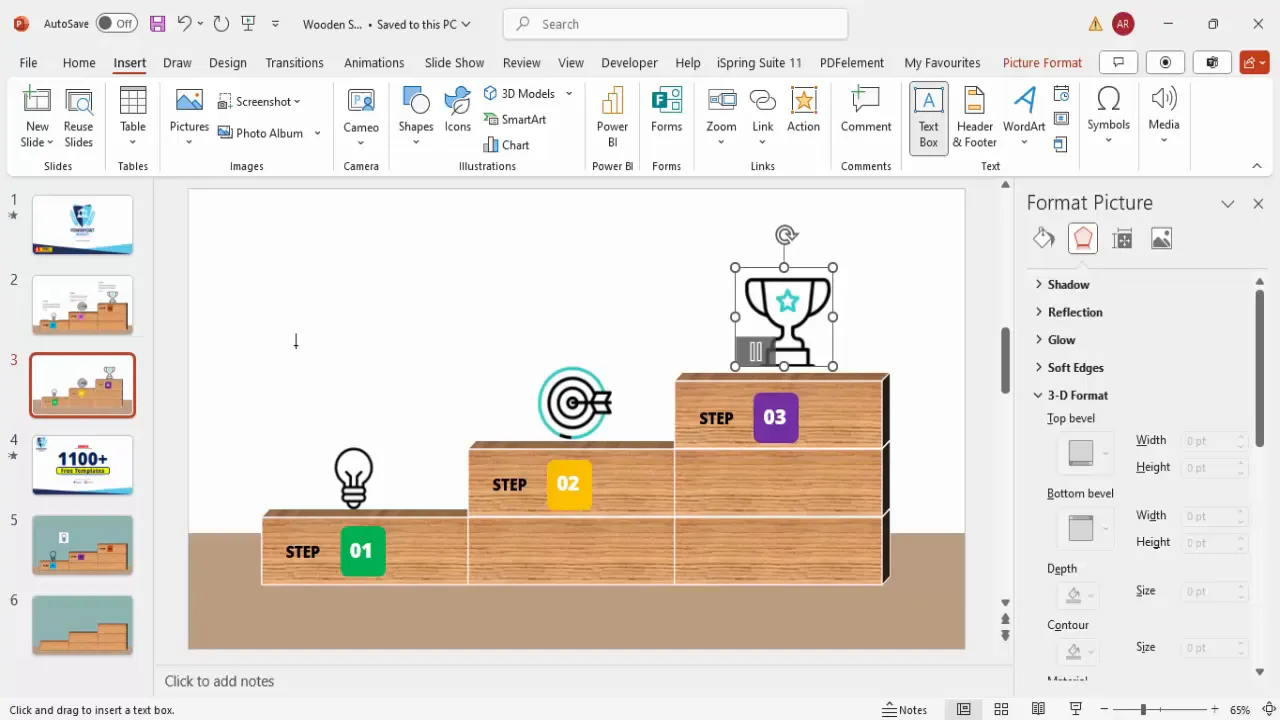
- Apply Texture Fill: With the rectangle selected, open the Format Shape pane. Under Fill, choose Picture or Texture Fill.
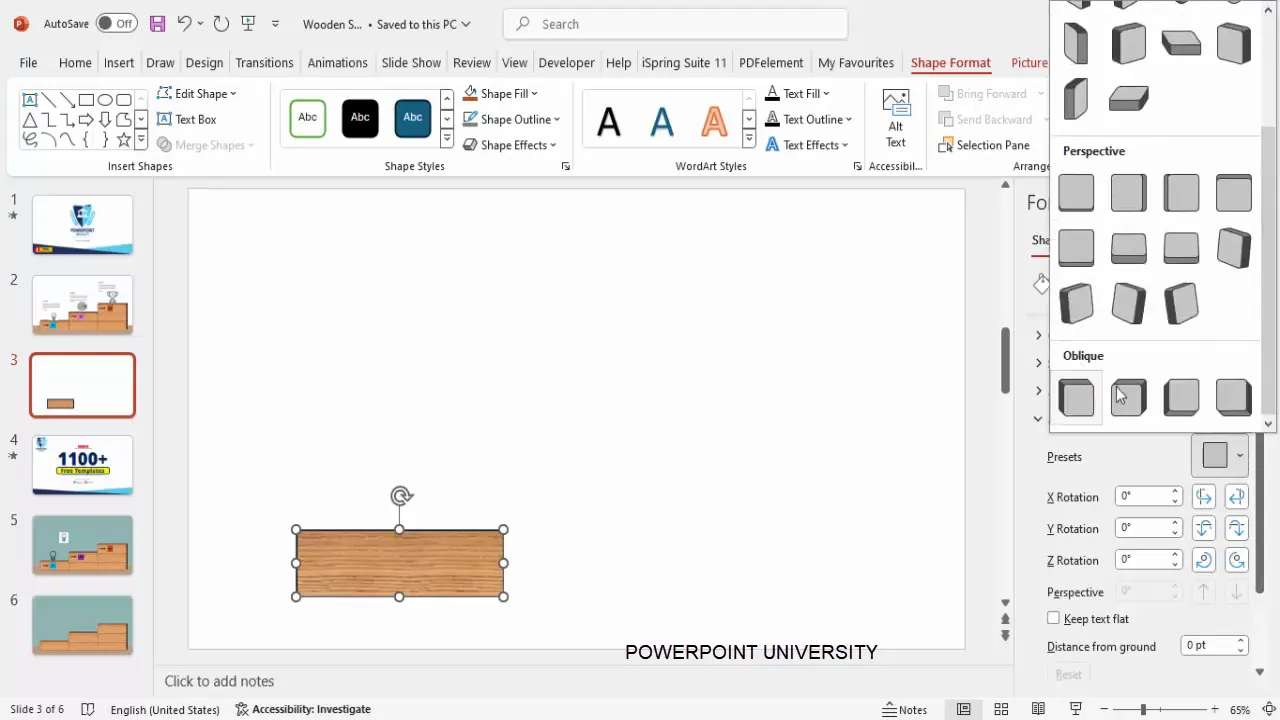
- Select an Oak Texture: Among the texture options, select the oak texture to give your block a natural wooden appearance.
- Add 3D Rotation: Navigate to Effects > 3D Rotation presets. Scroll down and select the Oblique Top Right preset to give your block a slight 3D angle.
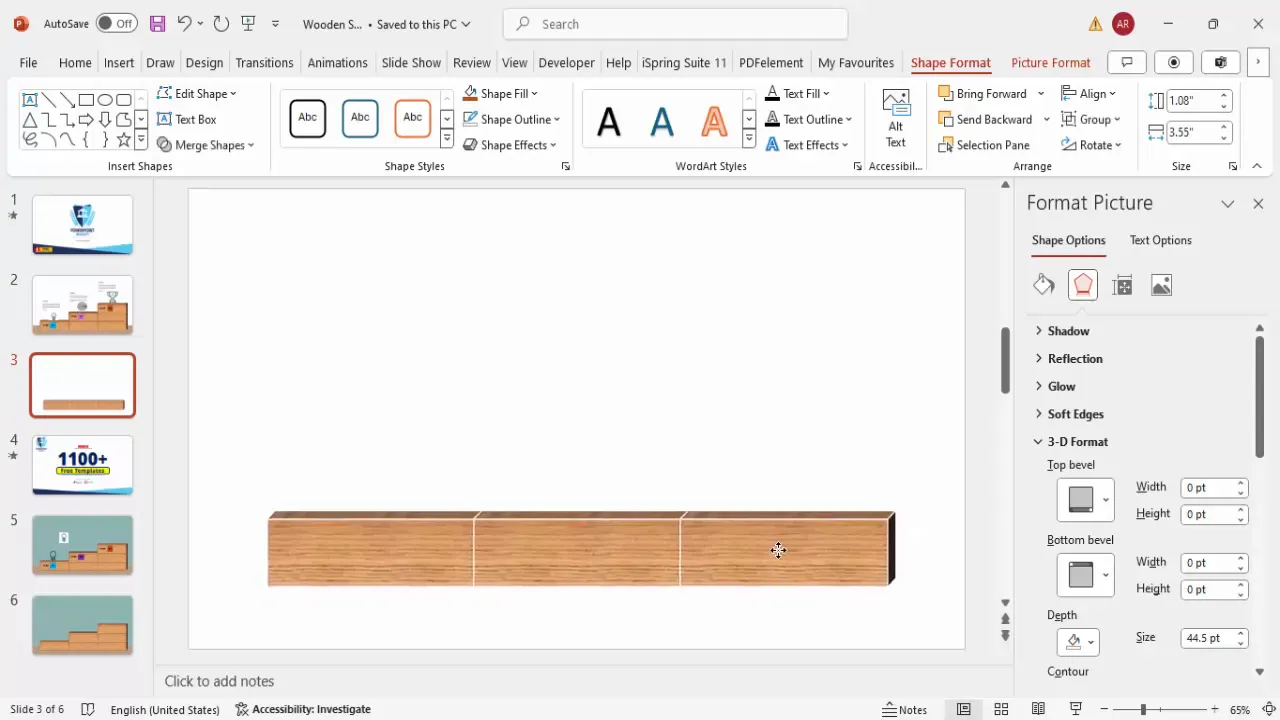
- Increase Depth: Still under 3D Format, increase the depth value to around 45 points to add thickness to the block.
- Remove Shape Outline: Set the shape outline to No Outline for a cleaner look.
- Add Contour (Optional): If you want an outline effect, use the Contour option. Choose a color like white and adjust the size for subtle emphasis.
Adjust these settings according to your preference and presentation theme. The goal is to create visually appealing wooden blocks that look three-dimensional and natural.
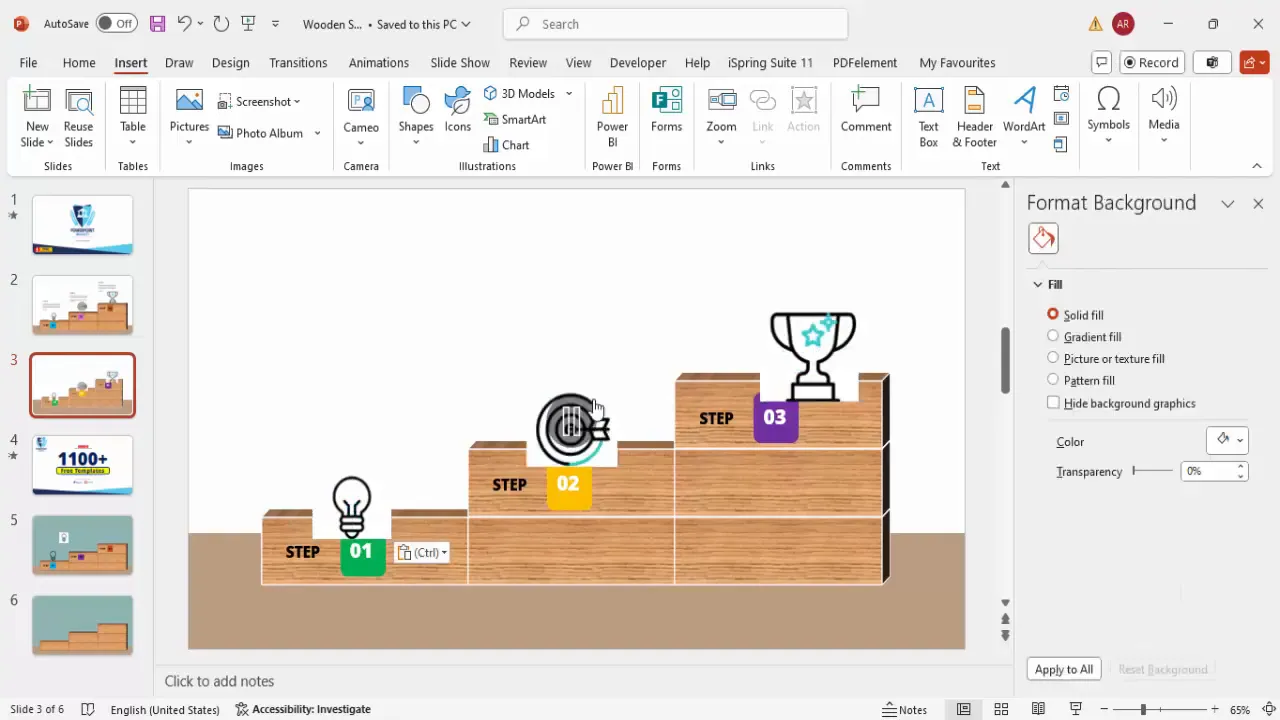
Designing the Platform for Your Blocks
To anchor your wooden blocks visually, it helps to create a platform or base where they sit. This adds context and balance to the slide design.
- Insert a New Rectangle: Draw another rectangle beneath your wooden blocks to serve as the platform.
- Color and Outline: Fill this rectangle with a tan or neutral color to complement the wooden texture.
- Remove Outline: Set the shape outline to No Outline for a seamless look.
- Send to Back: Right-click and select Send to Back so the platform sits behind your wooden blocks.
This platform visually grounds your blocks and adds a cohesive base for the step progression.
Building the Step Structure
The wooden blocks will represent sequential steps in your infographic. Here’s how to arrange and group them for clarity:
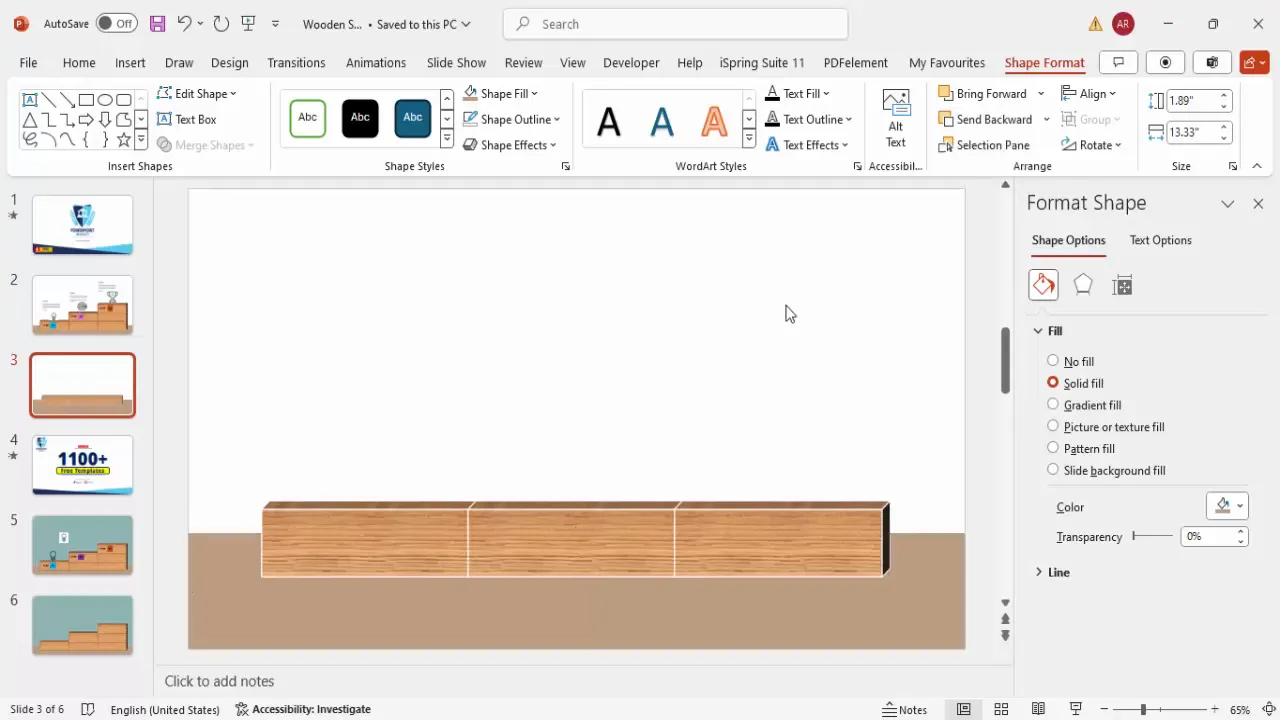
- Duplicate Blocks: Select your first wooden block and press Ctrl + D twice to create two more copies.
- Arrange Horizontally: Place the three blocks side by side, spaced evenly to represent steps one, two, and three.
- Create Step Layers: For a dynamic effect, select the first two blocks, hold Ctrl + Shift, and bring them to the front to create a layered appearance.
- Adjust Positions: Move the third block slightly to the right and back to complete the step progression look.
This layout visually communicates a process or timeline, guiding viewers through the content step-by-step.
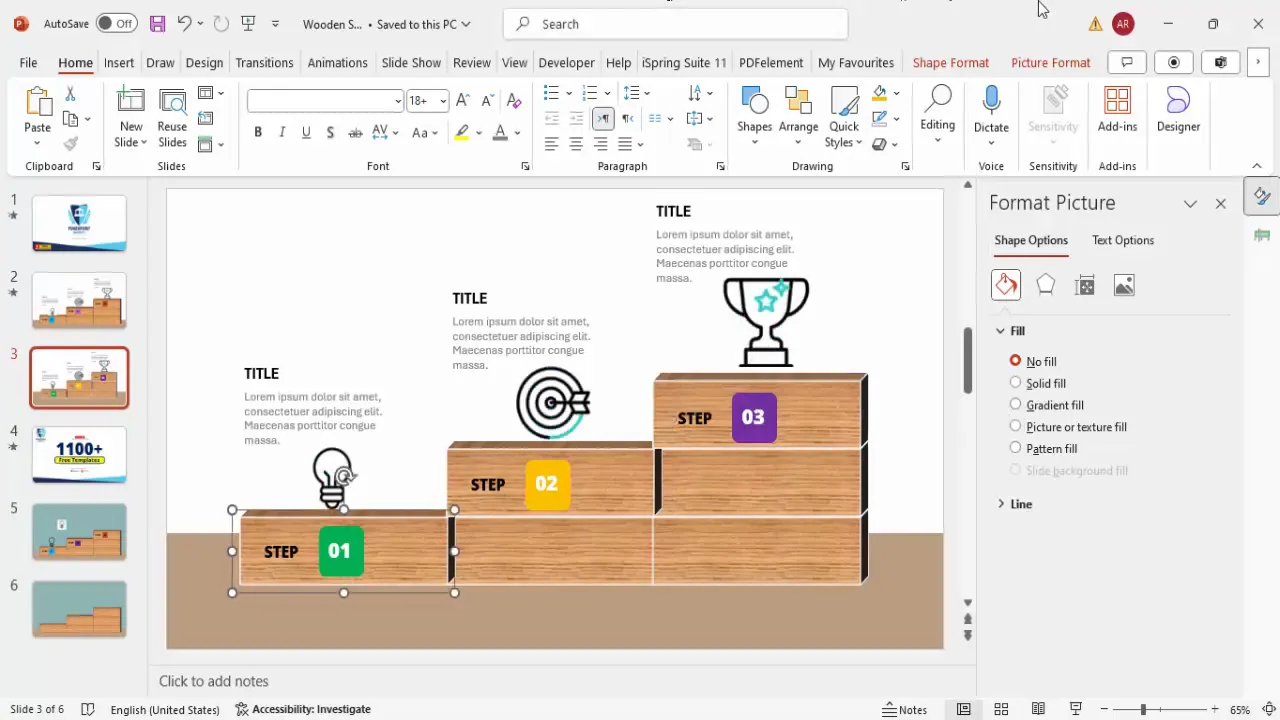
Adding Text and Labels to Your Wooden Blocks
Clear labeling is crucial for guiding your audience through the steps. Here’s how to add titles and detailed text to each block:
- Insert Text Boxes: Go to Insert > Text Box and click near your first block to type “Step.”
- Format Text: Use a bold font like Open Sans Extra Bold. Set the font size to around 24 points and center-align the text.
- Create Number Labels: Duplicate the “Step” text box, change the text to “01,” and place it below or beside the label.
- Add a Rounded Rectangle Background: Insert a small rounded corner rectangle behind the number label, fill it with a color (e.g., green for step one), and remove the outline.
- Set Text Color: Change the number text color to white for contrast against the colored background.
- Group Elements: Select the number label and its background shape, then press Ctrl + G to group them.
- Duplicate for Other Steps: Copy the grouped label and change the step numbers and colors for step two and step three (e.g., purple and orange).
- Add Detailed Text: Insert additional text boxes under each block for descriptive content. Use a smaller font size (around 14 points) and gray color for readability.
- Align Text: Ensure all text is left-aligned for consistency and easy scanning.
This method creates clear, visually distinct step labels that complement the wooden blocks, enhancing clarity and engagement.
Inserting and Customizing Icons
Icons provide visual cues that reinforce your message and make your slide more engaging. Here’s how to add and customize icons for each step:
- Download Animated Icons: Use resources like FlatIcons.com to find animated GIF icons that suit your steps.
- Copy and Paste Icons: Download your chosen icons and paste them onto your slide near the corresponding wooden blocks.
- Match Background: Make sure the icon background matches your slide background (e.g., white) to blend seamlessly.
- Alternative Option – PowerPoint Icons: If you prefer, go to Insert > Icons in PowerPoint and select from built-in icons for a simpler style.
- Resize and Position: Adjust the size of icons and place them centrally on or above the wooden blocks to maintain balance.
Icons serve as visual anchors that help your audience quickly grasp the topic of each step.
Grouping and Aligning Elements for Consistency
Maintaining alignment and grouping related elements ensures your slide looks polished and professional. Here’s how to do it:

- Group Step Elements: Select each wooden block, its icon, and text labels, then press Ctrl + G to group them. This makes it easier to move and animate the entire step as one unit.
- Align Groups: Use PowerPoint’s Align tools to distribute the groups evenly across the slide horizontally.
- Consistent Spacing: Maintain even spacing between blocks and ensure text boxes are aligned for a tidy layout.
- Send Layers: Send background elements like the platform to the back to keep the focus on the blocks and text.
Proper grouping and alignment enhance readability and visual flow, helping your audience follow the presentation effortlessly.
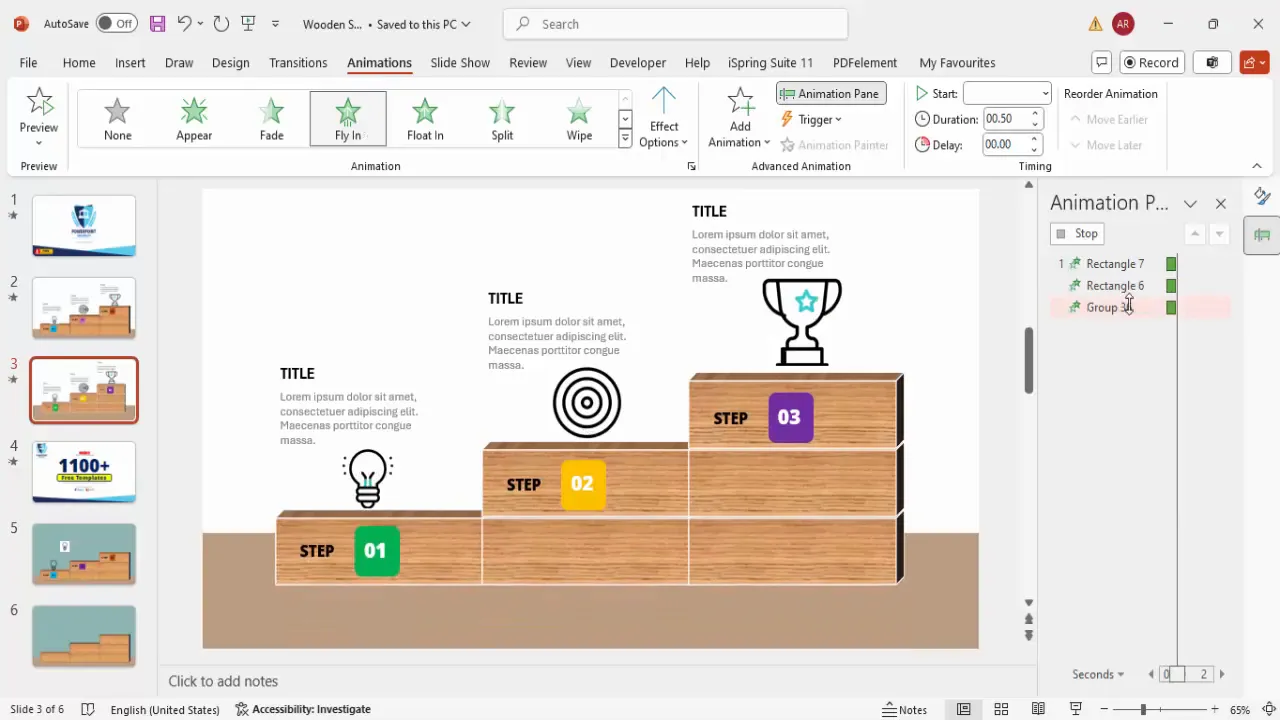
Applying Animations for Interactive Presentation
Animations can bring your slide to life by controlling the flow of information and keeping your audience engaged. Here’s a step-by-step guide to animating your wooden blocks infographic:
- Open Animation Pane: Go to the Animations tab and enable the Animation Pane for better control.
- Animate Blocks and Labels: Select the first grouped block and apply a Fly In animation from the left or bottom. Set the second and third blocks to animate After Previous for smooth sequencing.
- Add Icon Animations: Select the icons and apply a Zoom animation with After Previous timing to emphasize them after the blocks appear.
- Animate Text: Apply a Stretch animation from the bottom to the detailed text boxes, also set to trigger After Previous.
- Use Animation Painter: To save time, use the Animation Painter tool to copy animation settings from one step to the others for consistency.
- Preview Animations: Use the Preview button or run the slideshow to test the flow and timing of your animations.
Animating your slide in this way helps guide your audience’s attention step-by-step, making your presentation more dynamic and memorable.
Final Tips for PowerPoint Slide Design
To wrap up, here are some additional tips to elevate your PowerPoint slide design with wooden blocks or any infographic elements:
- Consistency Is Key: Use consistent colors, fonts, and styles throughout your presentation to maintain a professional look.
- Use High-Quality Textures: When adding texture fills, ensure they are high resolution to avoid pixelation on large screens.
- Balance Visual and Text Content: Avoid overcrowding your slide with too much text or too many visuals. Aim for clarity and simplicity.
- Test Animations: Always preview your animations on the actual presentation device to ensure smooth playback.
- Leverage Templates: Consider downloading free PowerPoint templates that include wooden block designs to save time and get inspired.
- Engage with Icons: Use icons that are relevant and support your message—avoid decorative icons that confuse the content.
By following these practices, your PowerPoint presentations will not only look great but also communicate your ideas effectively.
Frequently Asked Questions (FAQ)
1. Can I use other textures besides wood for the blocks?
Absolutely! PowerPoint offers various texture fills such as marble, fabric, or metal. Choose a texture that aligns with your presentation theme and audience.
2. Are animated GIF icons better than static icons?
Animated GIF icons can add visual interest and draw attention, but use them sparingly to avoid distraction. Static icons are simpler and may be more suitable for formal presentations.
3. How do I ensure my animations work on different computers?
Test your presentation on different devices before delivering it. Use standard PowerPoint animations and avoid third-party add-ins that may not be supported everywhere.
4. Can I customize the colors of the wooden blocks?
Yes, you can adjust the fill color or apply different textures to customize the blocks. However, keep the colors harmonious with your overall slide design.
5. Is it possible to add more than three steps using this design?
Definitely. You can duplicate the blocks and adjust the layout to accommodate more steps, but make sure to maintain readability and balance on the slide.
6. Where can I find free PowerPoint templates with wooden blocks?
Many websites offer free templates, including POWERPOINT UNIVERSITY, which provides over a thousand free templates. You can also find resources on sites like Slidesgo, SlideModel, and PresentationGO.
7. How do I group objects in PowerPoint?
Select multiple objects by holding Shift and clicking each one, then right-click and choose Group, or simply press Ctrl + G. This allows you to move or format them as a single unit.
8. What font sizes work best for slide labels and text?
For labels like “Step 1,” use larger fonts around 24 points or more. For detailed descriptions, smaller fonts around 14 points work well. Always ensure your text is legible from a distance.
Conclusion
Mastering PowerPoint slide design can transform the way you present your ideas. The wooden blocks infographic slide is a powerful tool to visually communicate stepwise information in a professional and engaging manner. By using textures, 3D effects, clear labeling, relevant icons, and smooth animations, you can create slides that captivate and inform your audience effectively.
Remember to keep your design consistent, your content clear, and your animations purposeful. With practice and attention to detail, you’ll be able to craft compelling presentations that leave a lasting impression. Happy designing!
Check out the full video: Step 1 2 3 on Wooden Blocks PowerPoint Slide


