
PowerPoint presentations are a staple in professional and creative environments, but making them truly engaging requires some design skill and clever animation techniques. If you want to elevate your slides and create a dynamic, interactive experience for your audience, learning to build clickable and scrollable animated slide designs is a game-changer. This article will guide you step-by-step through creating such a design using Microsoft PowerPoint 365, inspired by the expert tutorial from One Skill PPT.
We’ll cover everything from setting up a gradient background, inserting and cropping photos, adding text, cutting out objects for animation, to applying hyperlinks and morph transitions to produce beautiful animations. By the end of this guide, you’ll have a fully functional, interactive slide design that captivates your viewers and demonstrates your PowerPoint slide design skills.
Keyphrase focus: PowerPoint slide design
Table of Contents
- Creating a Gradient Background
- Inserting and Cropping Photos
- Adding Text to Your Slide
- Cutting Out Objects from the Photo
- Matching Photo Cutouts
- Creating Clickable Elements with Hyperlinks
- Applying Morph Transition for Animation
- Final Slide Design Tips and Adjustments
- Frequently Asked Questions (FAQ)
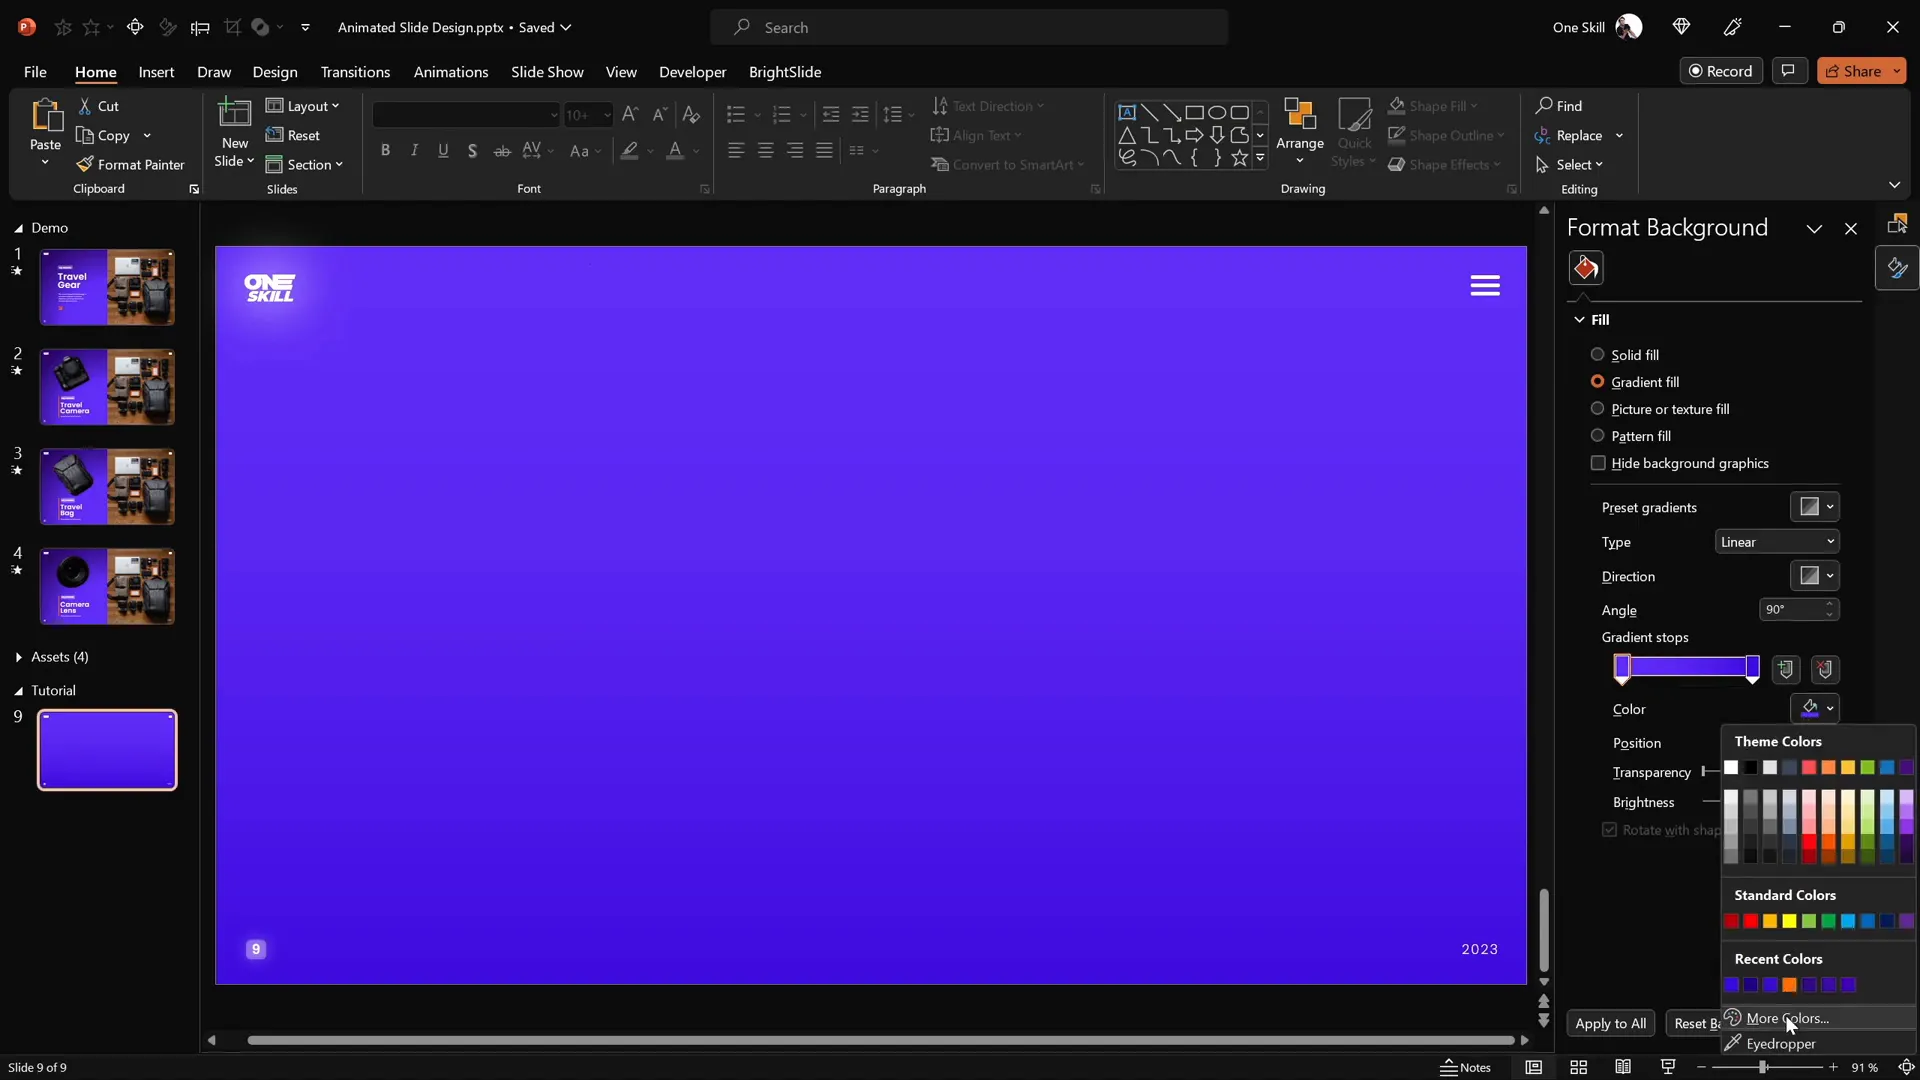
Creating a Gradient Background
Start with a clean, visually appealing background to set the tone for your slide design. A gradient fill adds depth and professionalism without distracting from your content.
Follow these steps:
- Open Microsoft PowerPoint 365 and create a new blank slide.
- Select the slide background and apply a linear gradient fill. Use two color stops to create a smooth transition.
- Use the following hex color codes for a beautiful gradient:
- First color stop:
#1A1F36(a dark, muted blue) - Second color stop:
#3E4A78(a soft blue tone)
- First color stop:
- Hide the format pane to maximize your workspace.
- Activate slide guides to identify the slide center for precise alignment.
This sets up a sophisticated base for your PowerPoint slide design and ensures your content will stand out clearly.
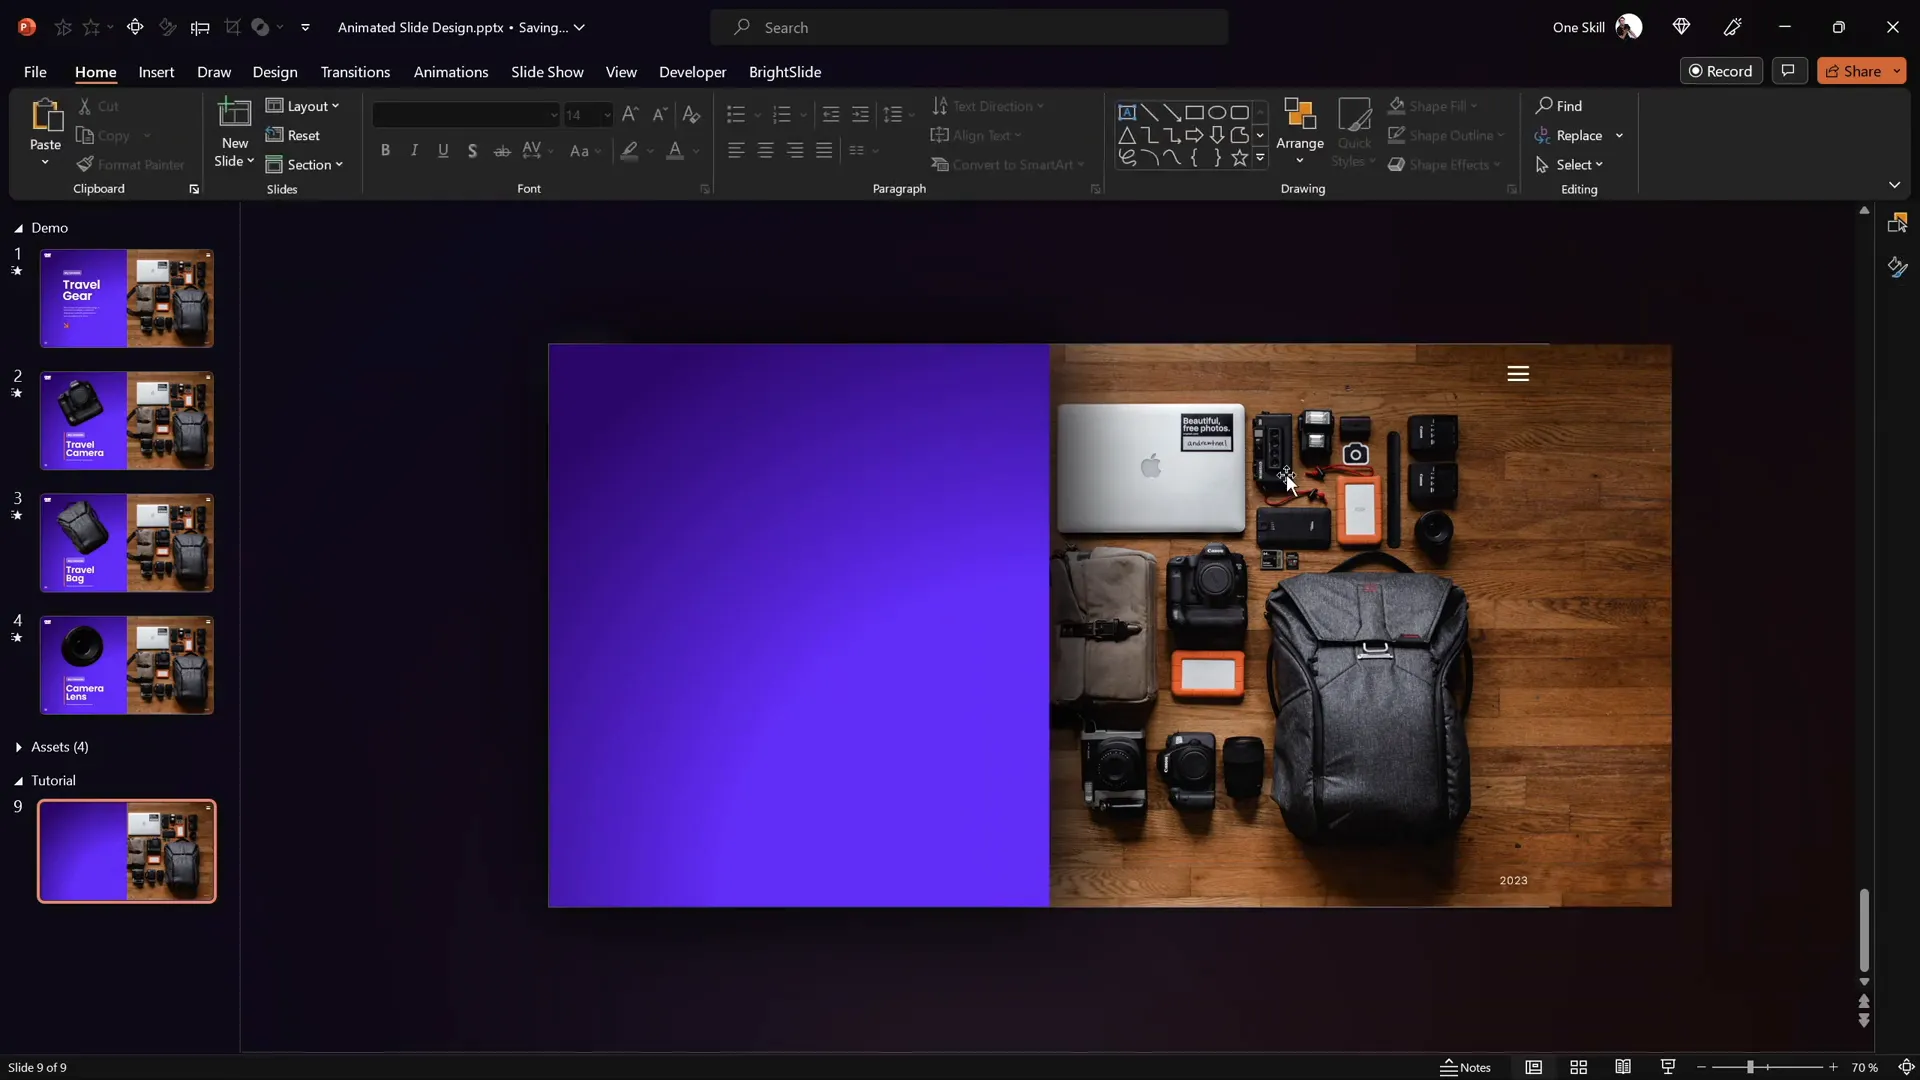
Inserting and Cropping Photos
Next, add a compelling image to your slide. For this tutorial, a beautiful photo is used from Unsplash, but you can choose any photo that fits your theme.
Steps to insert and crop your photo:
- Go to Insert > Pictures and select your photo.
- Position the photo on the right side of the slide.
- Send the photo to the back layer so that other elements like shapes and text boxes remain visible on top.
- Crop the right side of the photo to prevent it from sticking out beyond the slide boundaries. Adjust the crop area as needed to fit the slide cleanly.
- Send the photo and the background rectangle to the back layer again to ensure logos and slide numbers are visible.
This photo will serve as the base for your clickable items.
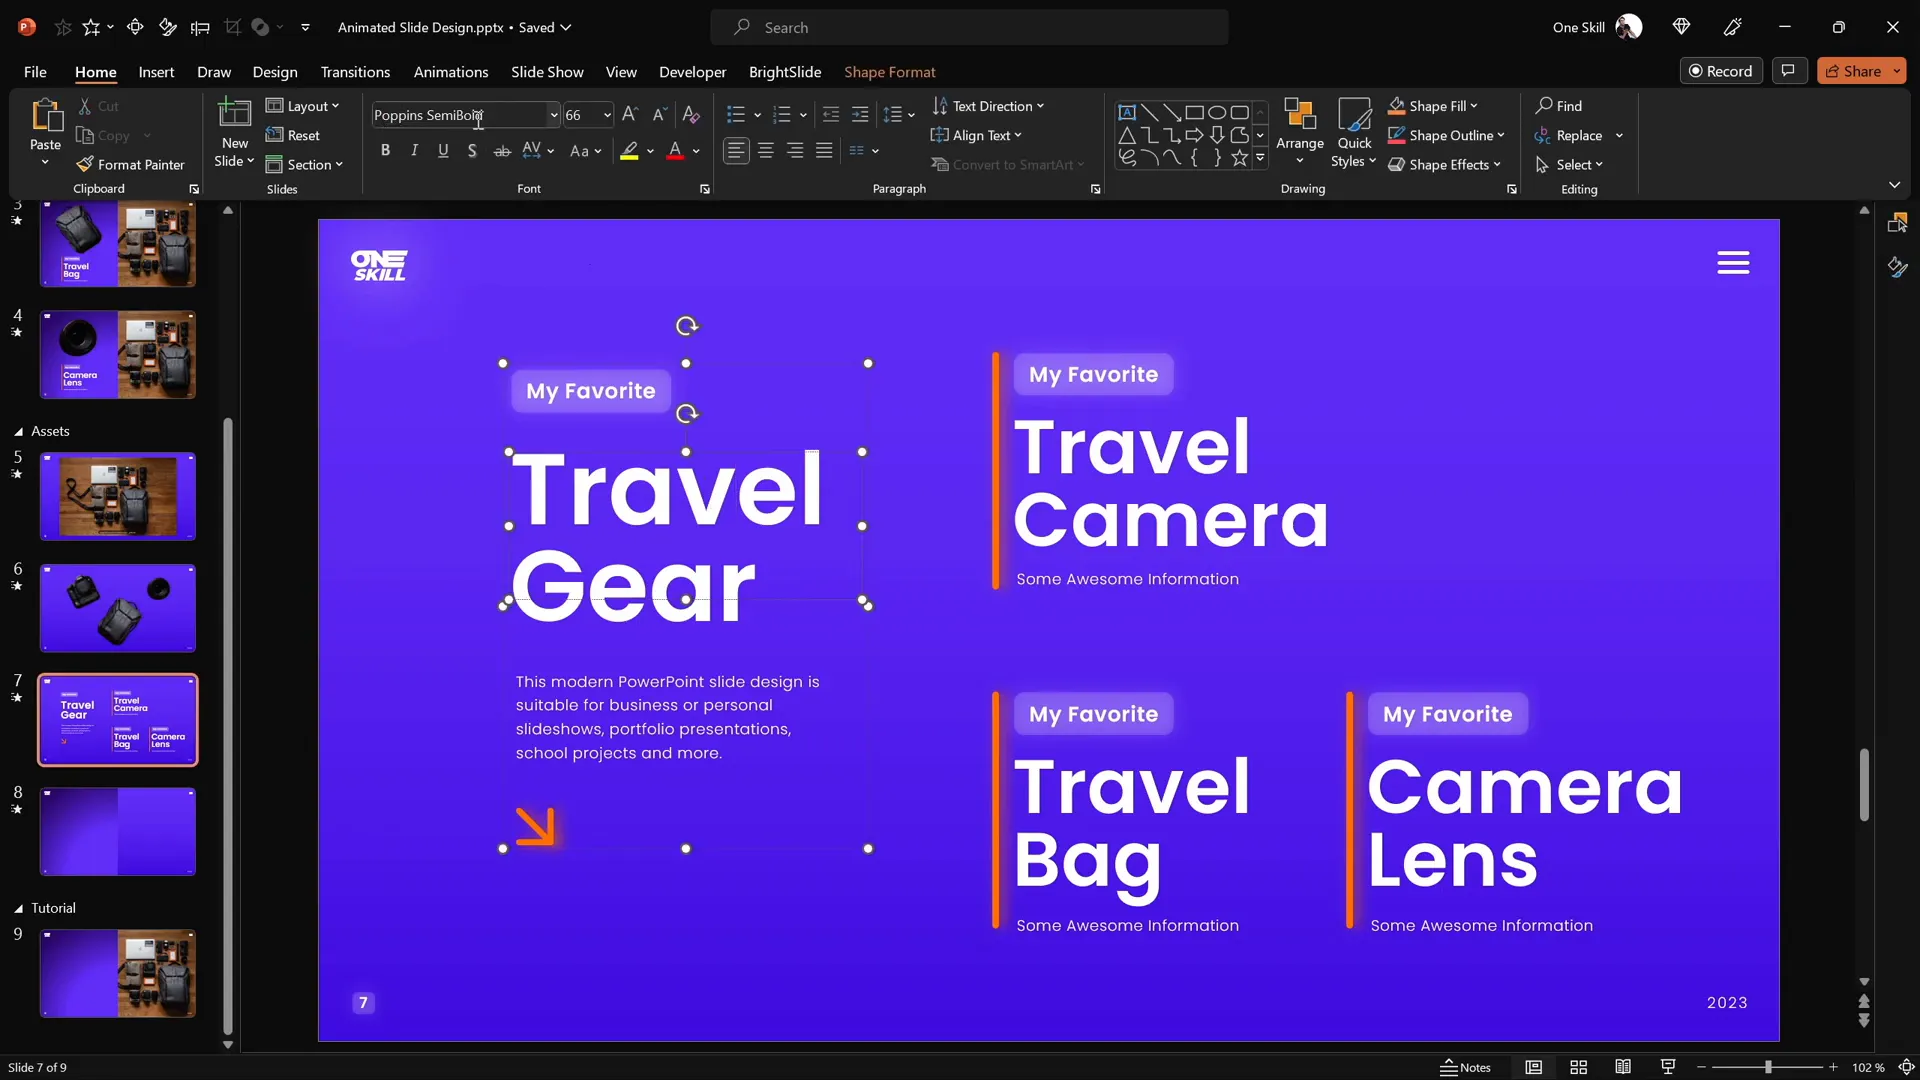
Adding Text to Your Slide
Text elements provide context and descriptions for your clickable items. To maintain consistency and professionalism, use clean, modern fonts like Poppins Semi Bold for headings and Poppins Light for body text.
Here’s how to add and align text:
- Prepare text boxes for each clickable item (e.g., Travel Camera, Travel Bag, Camera Lens).
- Group related text boxes for easier handling.
- Copy and paste these groups onto your slide.
- Align the text groups inside the background rectangle using alignment tools:
- If you have the Brightslide add-in, use its alignment shortcuts for speed.
- Otherwise, select the rectangle and text, then use Shape Format > Align > Align Center and Align Middle.
- Add additional text boxes at the bottom of the slide, aligned neatly with equal vertical spacing.
Having dedicated text boxes for each item prepares your slide for interactivity and animation.
Cutting Out Objects from the Photo
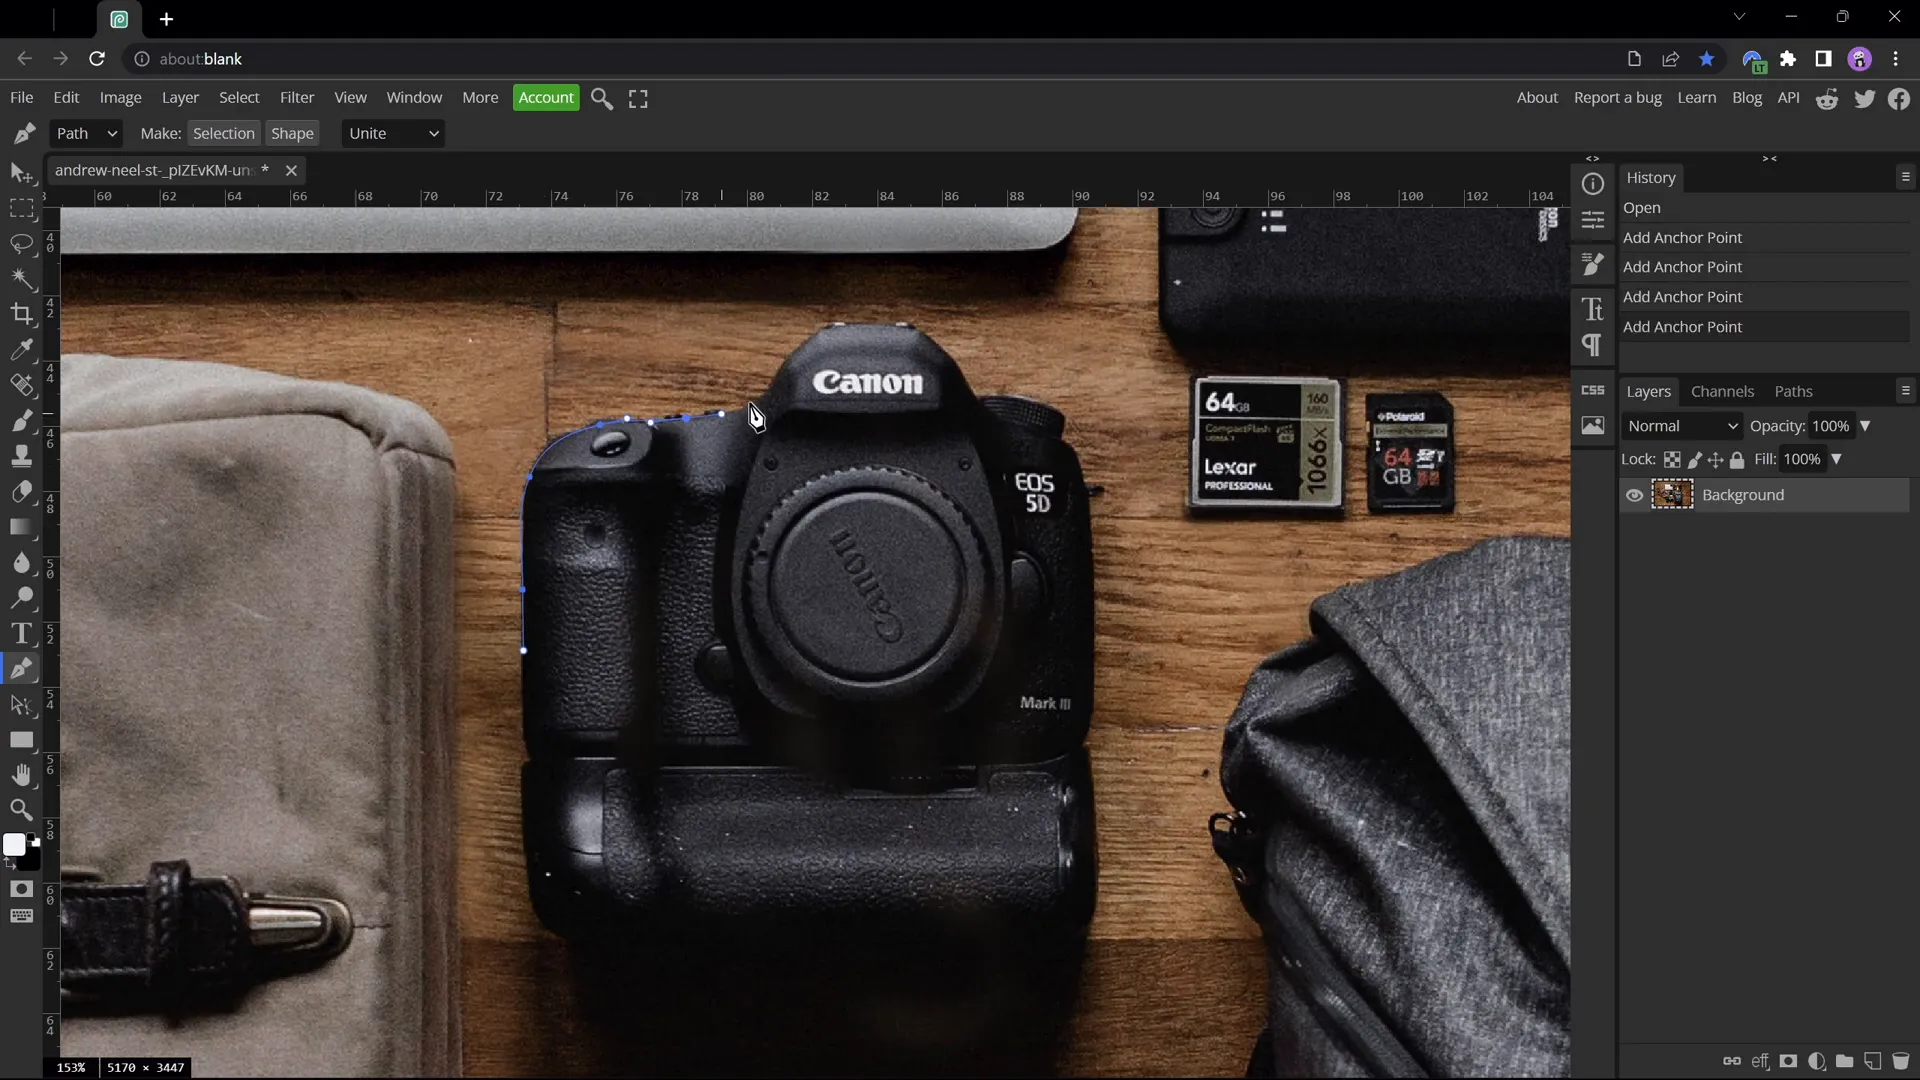
To create clickable, animated elements, you need to isolate individual objects from your photo. While PowerPoint has basic cropping tools, for precise cutouts, use the free online photo editor Photopea.
Steps to cut out objects using Photopea:
- Open your photo in Photopea.
- Zoom in by holding the Alt key and scrolling to closely trace the object edges.
- Select the Pen Tool and make sure Path Mode is active.
- Click points around the object’s edges to create a path. Adjust points by holding the spacebar or Alt key for sharp turns.
- Complete the path by connecting near the starting point.
- Click Create Selection and confirm the selection popup.
- Click the Mask button to isolate the object.
- Trim empty space via Image > Trim.
- Export the isolated object as a PNG file with transparency.
Repeat for each object you want to animate.
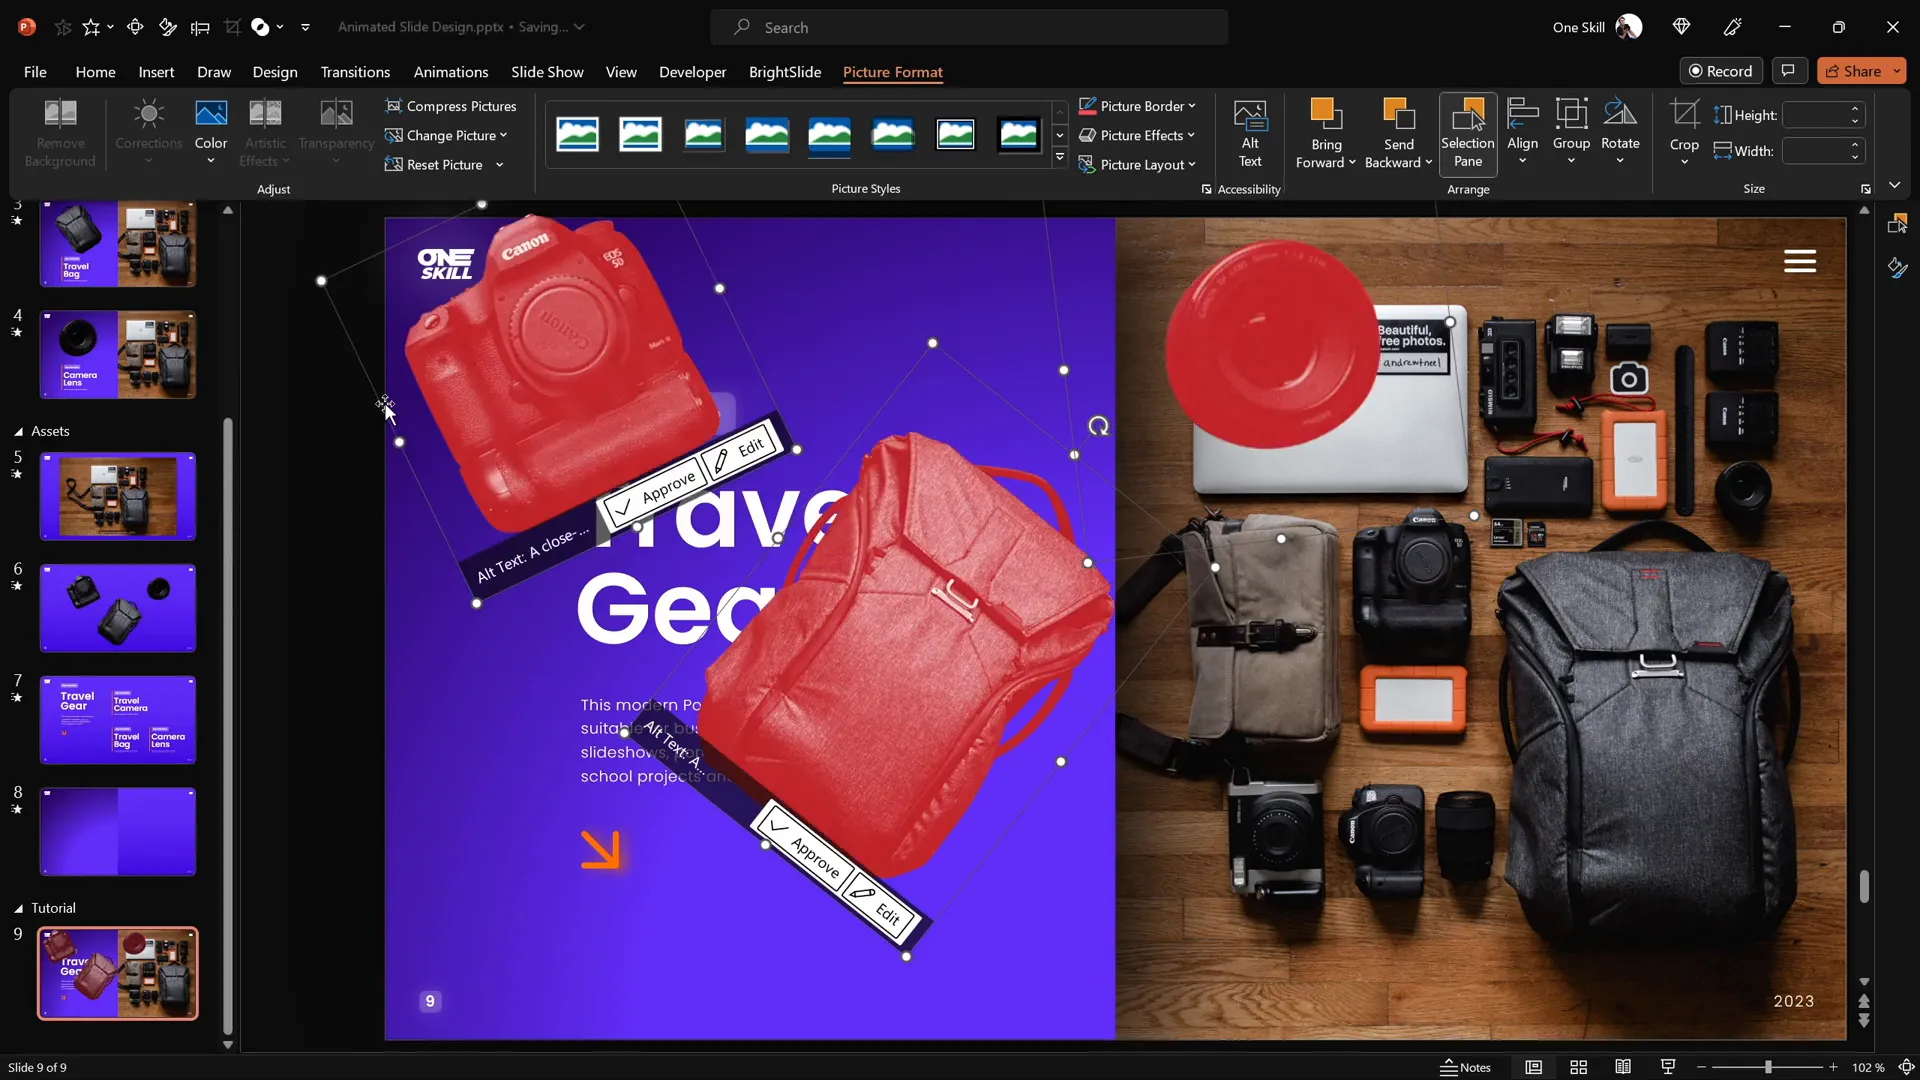
For this design, three objects were cut out: a camera, a travel bag, and a camera lens.
Matching Photo Cutouts
Once you have your cutout PNG images, place them precisely over the original photo in PowerPoint to maintain visual consistency.
Here’s how to match the cutouts:
- Copy and paste all cutouts onto your slide.
- Select all cutouts and temporarily recolor them red via Picture Format > Color to see the outlines clearly against the original photo.
- Individually adjust size, rotation, and position of each cutout to align perfectly with the corresponding object in the background photo.
- Use arrow keys for fine positioning.
- Once aligned, select all cutouts and reset their color to the original by clicking Reset Picture.
This step is crucial for creating seamless morph animations later.
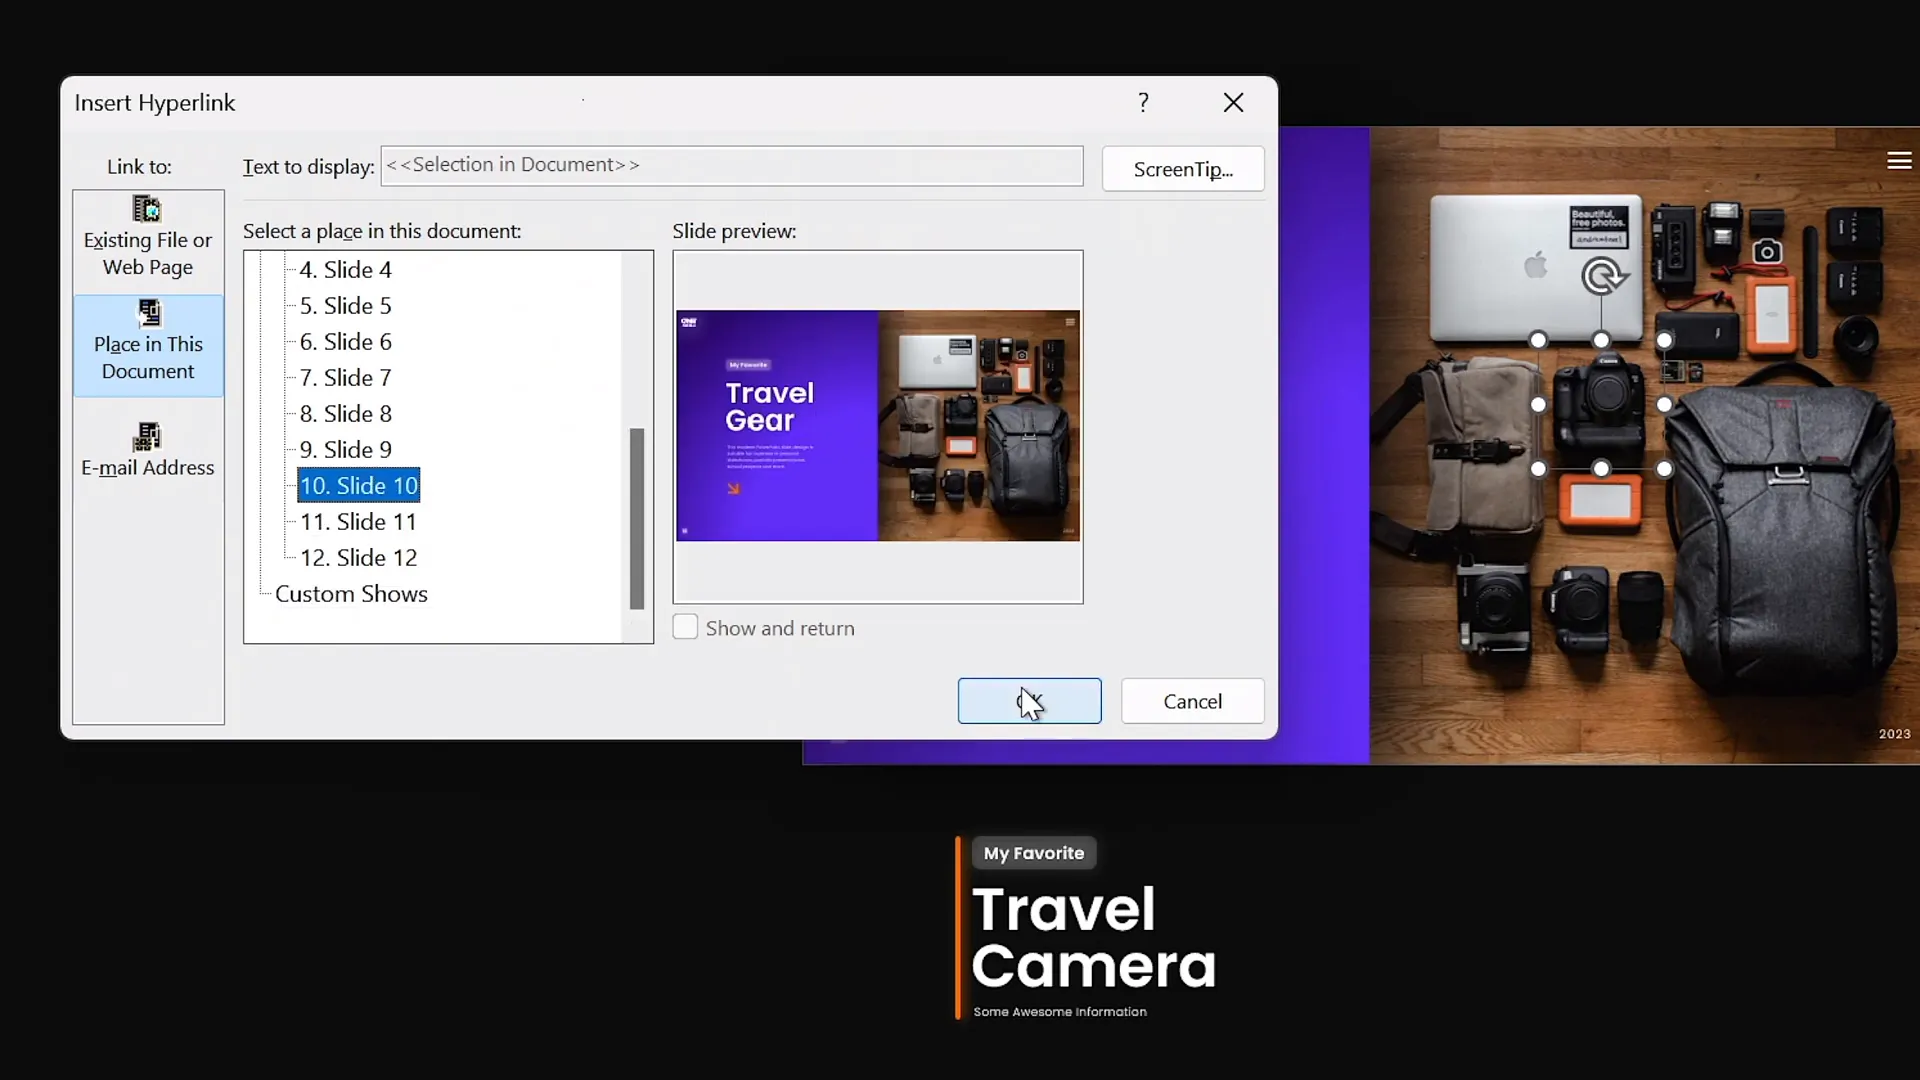
Creating Clickable Elements with Hyperlinks
To make your slide interactive, the cutout objects need to be clickable and linked to other slides where the animation will happen.

Follow these steps:
- Duplicate your current slide three times, so you have four slides in total:
- Slide 1: Introduction slide with all clickable objects
- Slide 2: Camera-focused slide
- Slide 3: Travel bag-focused slide
- Slide 4: Camera lens-focused slide
- On the introduction slide, select each cutout and press Ctrl + K to insert a hyperlink.
- Link each cutout to its corresponding slide:
- Camera → Slide 2
- Travel Bag → Slide 3
- Camera Lens → Slide 4
- Copy the cutouts with hyperlinks and paste them into each of the other slides, replacing the old cutouts without links.
Now, when you click on any object in presentation mode, you will jump to the slide dedicated to that object.
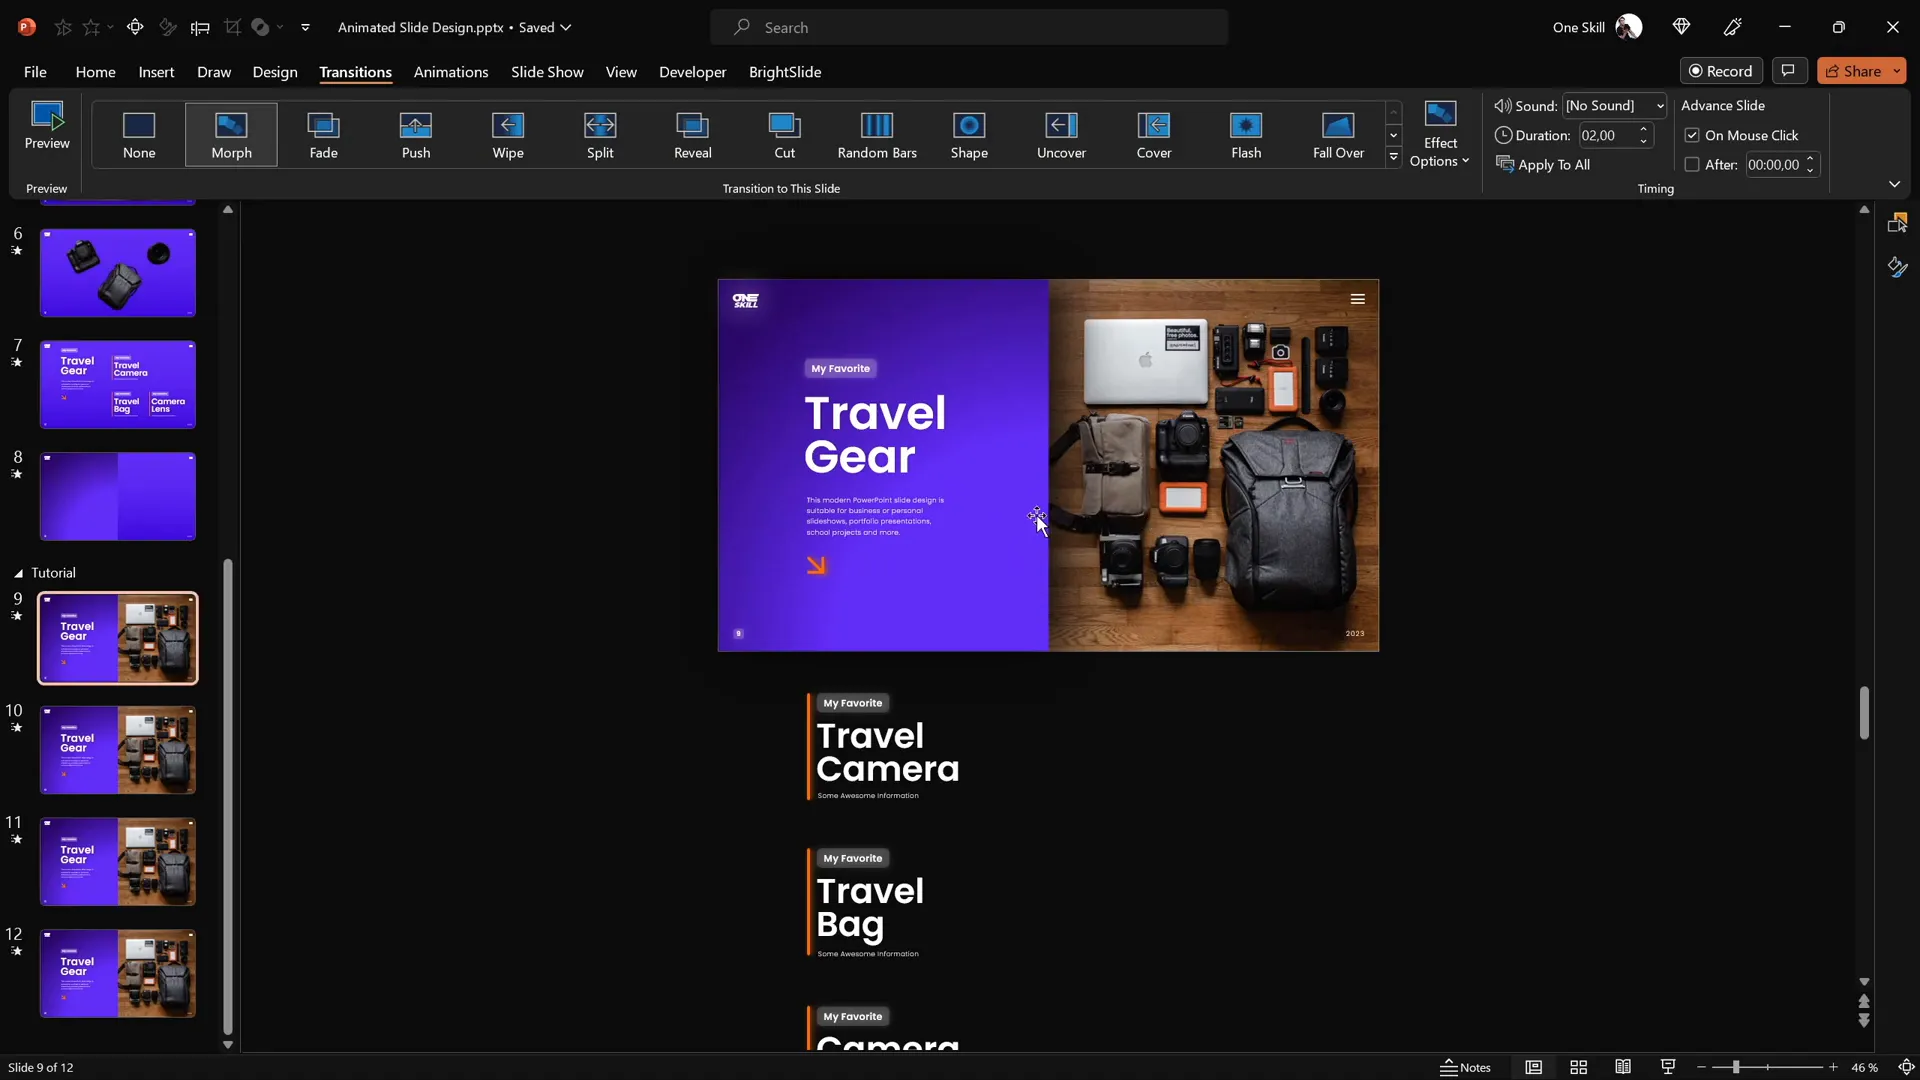
Applying Morph Transition for Animation
The magic of smooth animations between slides is achieved by using PowerPoint’s Morph transition. This powerful feature animates the transformation of objects from one slide to another.
How to apply Morph transitions:
- Select all four slides.
- Go to the Transitions tab and choose Morph as the transition effect.
- Adjust the objects on each slide to create the desired animation effect. For example:
- On the camera slide, enlarge and reposition the camera cutout.
- On the travel bag slide, focus on the bag and hide other text groups.
- On the camera lens slide, do the same for the lens.
- Test the slide show by clicking on the objects and watching the smooth transitions.
Fixing Morph Transition Issues: Sometimes Morph can confuse similar objects, causing odd animations. To fix this, rename the objects in the Selection Pane by adding double exclamation marks (!!) before the name (e.g., !!Lens). Use consistent names across all slides to help Morph identify the objects correctly.
Final Slide Design Tips and Adjustments
With your interactive slides and Morph transitions in place, finalize your design by:
- Ensuring text boxes are aligned and spaced evenly.
- Hiding irrelevant text groups on each focus slide to avoid clutter.
- Adjusting object sizes and rotations for the best visual impact.
- Testing the full presentation in Slide Show mode to confirm all animations and hyperlinks work smoothly.
Once complete, you have created a professional, clickable, and scrollable PowerPoint slide design that impresses your audience and demonstrates advanced PowerPoint skills.

Frequently Asked Questions (FAQ)
What is the Morph transition in PowerPoint?
Morph is a transition effect that animates smooth movement, resizing, and transformation of objects between slides. It helps create professional animations without complex timing or custom paths.
Can I create clickable elements in PowerPoint without hyperlinks?
Clickable elements require hyperlinks or action buttons to navigate between slides or trigger actions. Without hyperlinks, objects are static and cannot respond to clicks.
Is Photopea free to use for cutting out objects?
Yes, Photopea is a free online photo editor that works similarly to Adobe Photoshop. It’s perfect for precise object cutouts with tools like the Pen Tool and masking.
What fonts work best for PowerPoint slide design?
Modern, clean fonts like Poppins Semi Bold for headings and Poppins Light for body text create a professional look. Avoid default fonts like Calibri or Cambria for a fresher design.
How do I fix Morph transition issues with similar objects?
Rename objects in the Selection Pane with distinct names, such as adding double exclamation marks (!!) before the object’s name. Use consistent naming across all slides to help Morph differentiate and animate correctly.
Can I use any photo for this clickable slide design?
Absolutely! You can use any photo, but choosing a high-quality image with clearly distinguishable objects will make cutting out and animating elements easier.
Conclusion
Mastering a clickable and scrollable animated PowerPoint slide design transforms static presentations into engaging, interactive experiences. By combining gradient backgrounds, precise photo cutouts, well-aligned text, hyperlinks, and Morph transitions, you can create slides that not only look stunning but also invite interaction and storytelling.
Practice these techniques to enhance your PowerPoint slide design skills and impress your audience with professional animations and seamless navigation. Whether for business, education, or creative projects, these skills will set your presentations apart.
Remember, the key to success is attention to detail in alignment, color choice, and animation flow, alongside using tools like Brightslide and Photopea to streamline your workflow.
Stay creative and keep designing!
Check out the full video: ANIMATED PowerPoint Slide Design ✨FREE✨


