
PowerPoint is an incredibly versatile tool, capable of much more than just static slides. Today, we’ll explore how to create a dynamic, clickable, and scrollable animated slide design that captivates your audience and enhances your presentations. This design technique allows viewers to interact with different elements on a single slide, triggering smooth animations and transitions that bring your content to life.
Whether you’re a seasoned PowerPoint user or just starting out, this guide will walk you through each step of building an interactive slide design from scratch, using Microsoft PowerPoint 365. We’ll cover everything from background creation to precise object cutting, hyperlinking, and applying the powerful Morph transition for seamless animations.
By the end, you’ll have the skills to create a professional, visually stunning PowerPoint slide design that impresses your audience and elevates your storytelling.

Table of Contents
- Creating a Gradient Background
- Inserting and Cropping Photos
- Adding Text Elements
- Cutting Out Objects from the Photo
- Matching Photo Cutouts
- Making Elements Clickable with Hyperlinks
- Applying Morph Transitions
- Designing the Clickable Slides
- Fixing Morph Transition Issues
- Final Result and Testing
- Frequently Asked Questions
Creating a Gradient Background
Starting with a visually appealing background sets the tone for your slide design. Instead of a plain solid color, using a subtle gradient adds depth and sophistication.
Follow these steps to create a beautiful gradient background:
- Open Microsoft PowerPoint 365 and start with a blank slide.
- Apply a linear gradient fill to the slide background.
- Use two color stops for the gradient:
- First color stop:
#3a1a40(a deep purple shade) - Second color stop:
#4e338a(a lighter purple shade) - Adjust the gradient angle to create a smooth transition from one color to the other.
- Hide the format pane to maximize your workspace.
This gradient creates a calm and elegant backdrop that enhances the foreground elements without overwhelming them.

Inserting and Cropping Photos
Next, insert the main photo that will serve as the interactive canvas for your clickable items. For this tutorial, we use a stunning photo sourced from Unsplash, a free stock photo platform.
Steps to insert and crop the photo:
- Go to Insert > Pictures and select your chosen photo.
- Position the photo on the right side of the slide.
- Send the photo to the back layer so it doesn’t cover other elements.
- Crop the right edge of the photo to ensure it fits perfectly within the slide boundaries and doesn’t overflow.
- Adjust the photo position inside the crop area for the best composition.
By cropping and positioning the photo carefully, you ensure a clean, professional look that fits seamlessly within your slide layout.

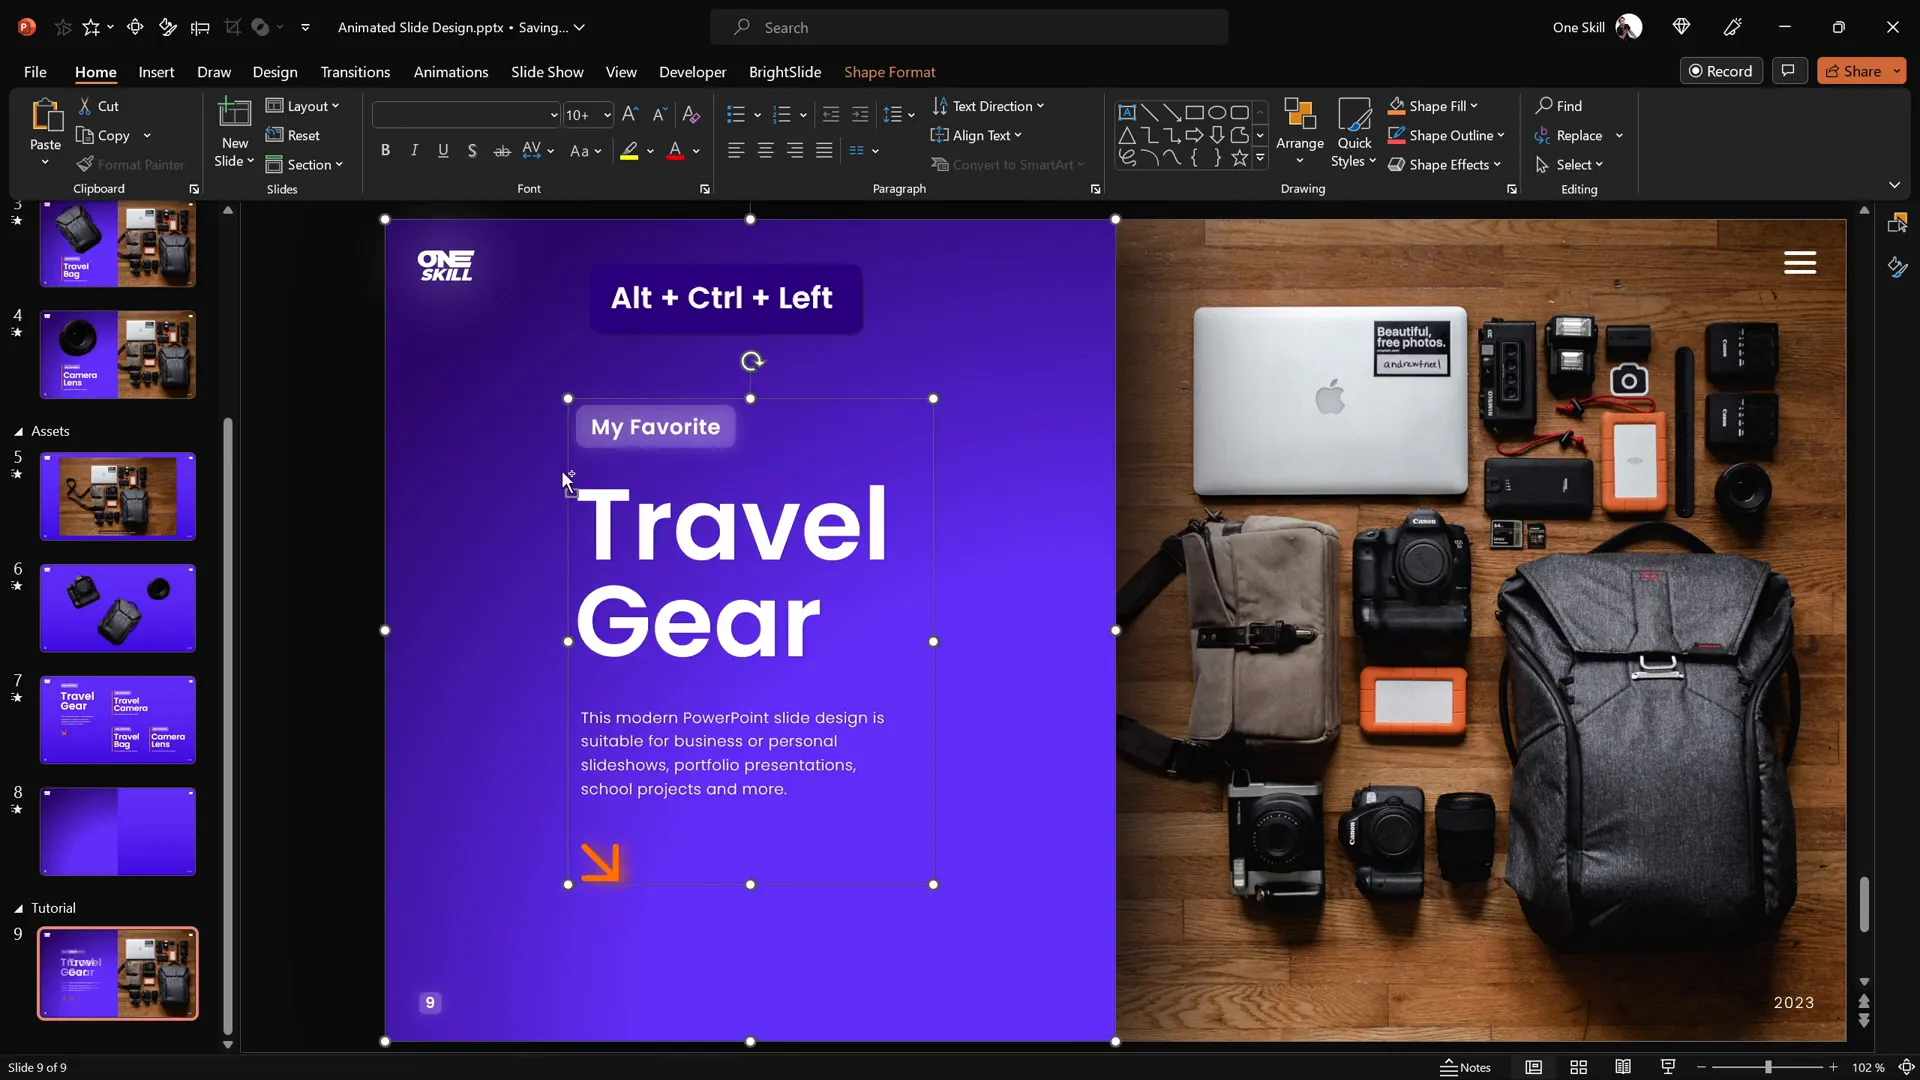
Adding Text Elements
Text boxes provide context and description for each clickable item on your photo. To keep the design consistent and visually appealing, use clean, modern fonts like Poppins Semi Bold for headings and Poppins Light for body text.
Here’s how to add and align text elements:
- Create text boxes for each clickable item (e.g., Travel Camera, Travel Bag, Camera Lens).
- Group related text boxes together for easy manipulation.
- Align the text groups neatly inside the left-side rectangle area of the slide.
- Use alignment tools to center text vertically and horizontally within the rectangle.
- If you have the BrightSlide add-in, use its handy alignment shortcuts for faster workflow.
Organizing your text in groups makes editing and positioning much easier, especially when you’re creating multiple slides with similar layouts.
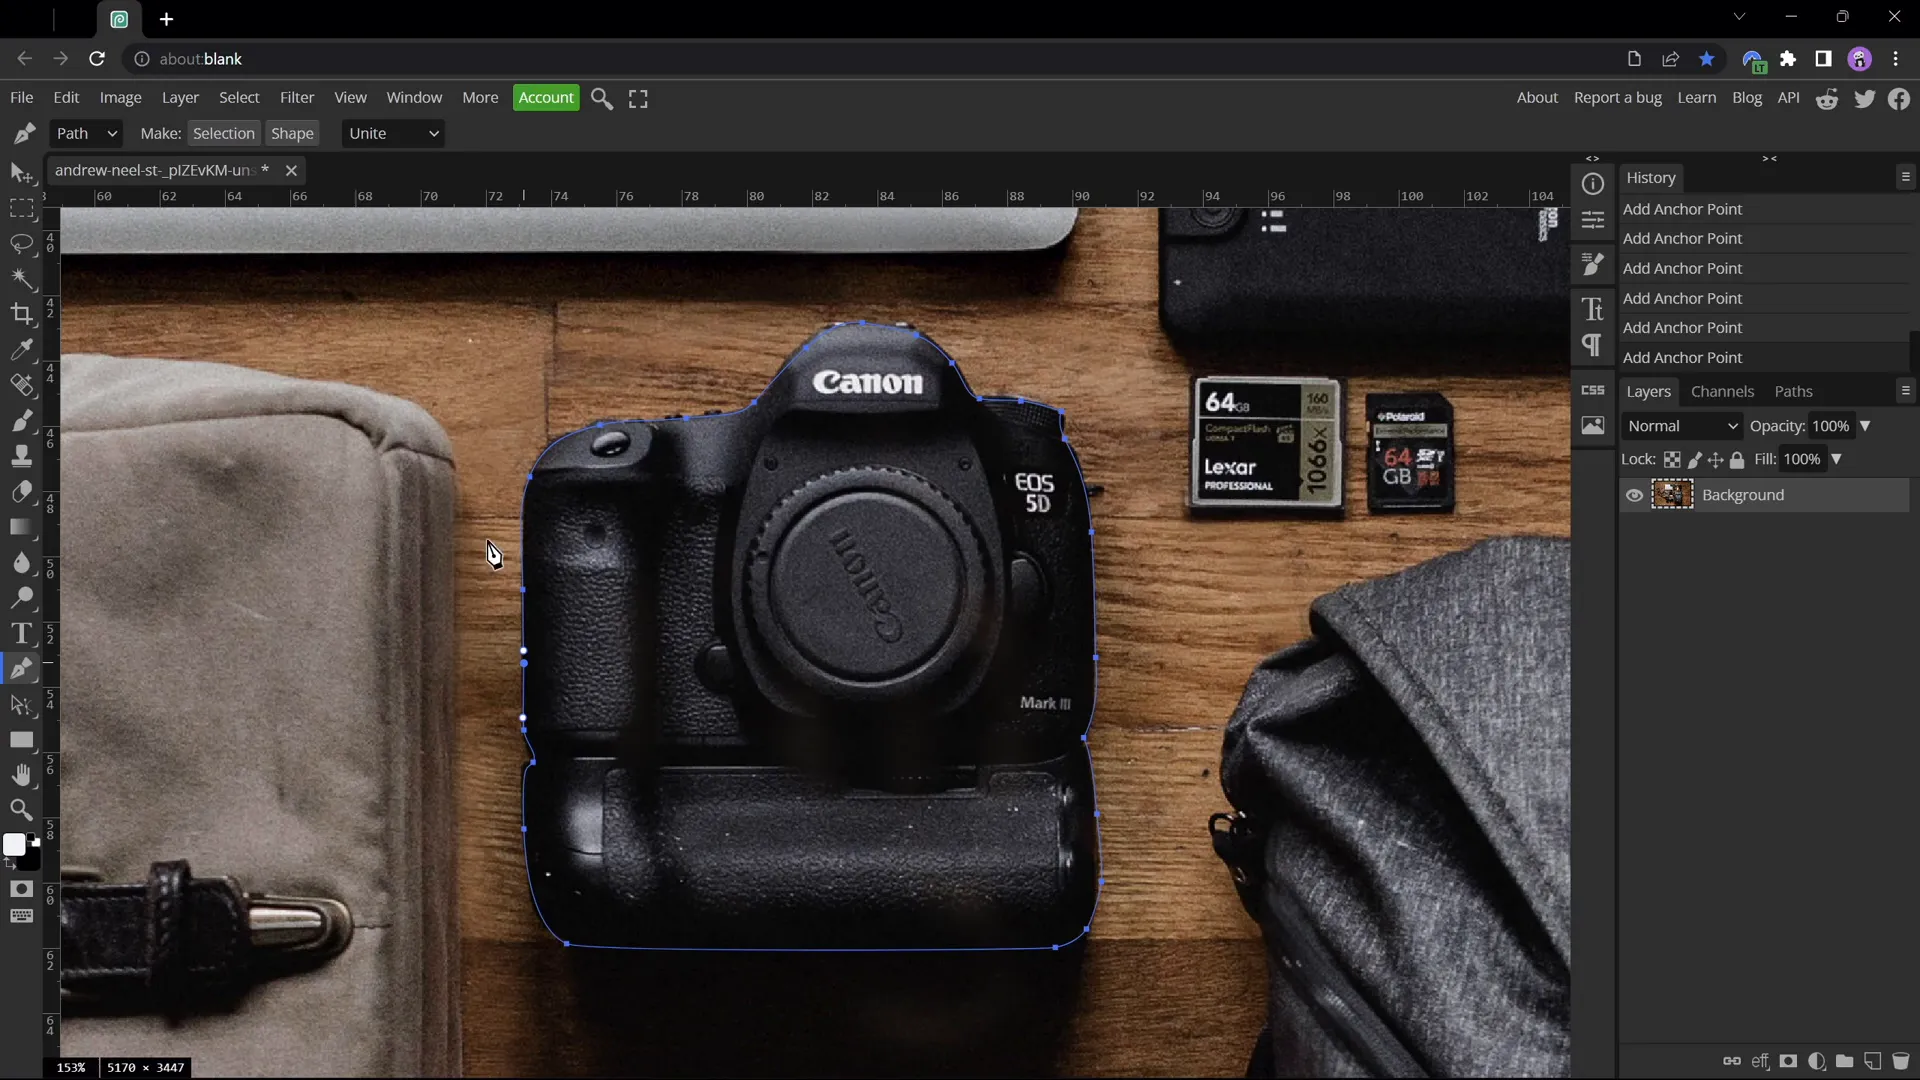
Cutting Out Objects from the Photo
To create clickable, animated elements, you need to isolate items from the photo as separate layers. This allows you to animate and interact with each item independently.
While PowerPoint has basic cropping tools, for precision cutting, use the free online editor Photopea, which functions similarly to Photoshop.
Steps for cutting out objects:
- Open the photo in Photopea.
- Use the Pen Tool set to path mode to trace around the object (e.g., camera).
- Click points around the edges, using
Altto create sharp corners andSpacebarto adjust points. - Close the path near the starting point.
- Convert the path to a selection and create a mask to isolate the object.
- Trim the image to remove excess transparent space.
- Export the cutout as a PNG file with transparency.
Repeat for each object you want to animate separately, such as the camera, travel bag, and camera lens.
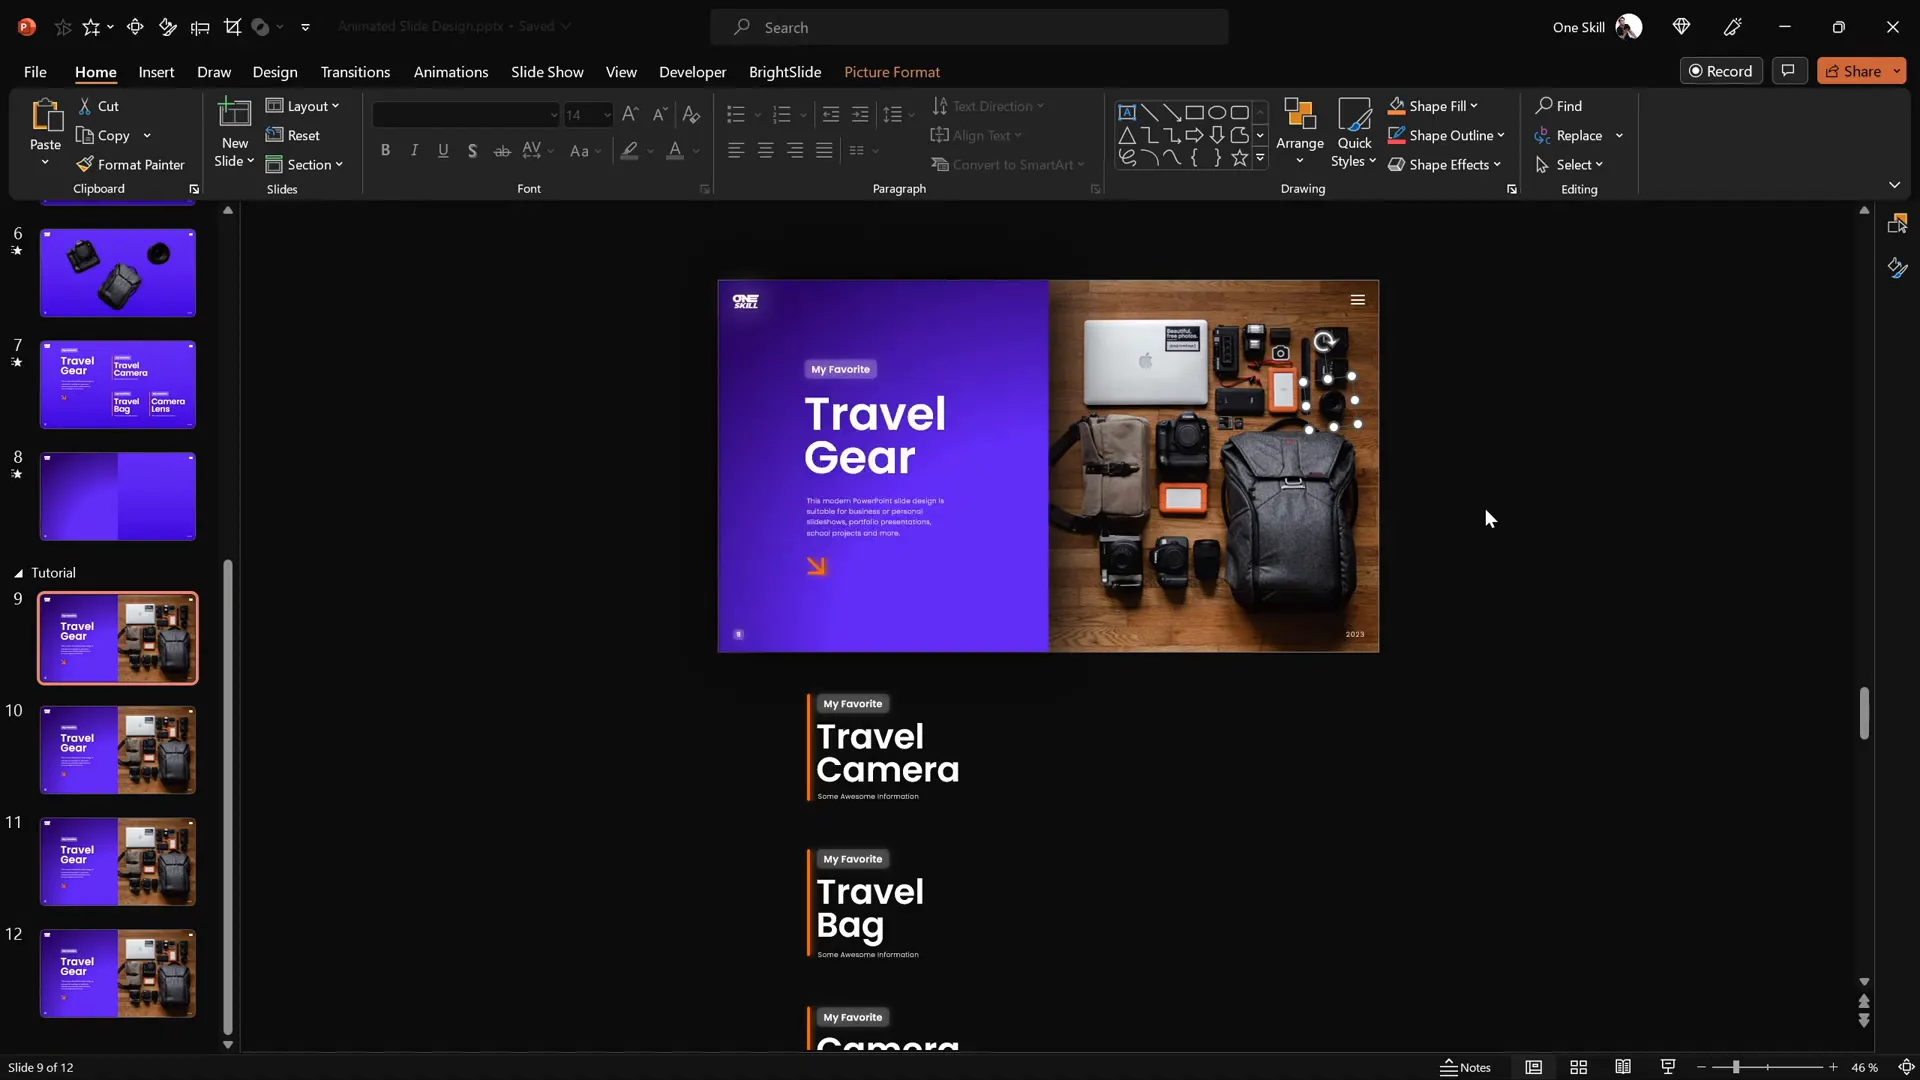
Matching Photo Cutouts
Once you have your cutout PNGs ready, insert them back into your PowerPoint slide and position them exactly on top of the original photo.
To ensure perfect alignment:
- Select all cutouts and temporarily recolor them with a bright red shade to make positioning easier.
- Move each cutout over its counterpart in the original photo.
- Adjust size, rotation, and position using arrow keys and transform controls for pixel-perfect alignment.
- After positioning, reset the picture color to remove the red tint.
This technique helps you visually confirm that your cutouts match the photo perfectly before proceeding with animation and interactivity.

Making Elements Clickable with Hyperlinks
To add interactivity, you need to make each cutout clickable, linking it to a dedicated slide that will display an animated version of that object.
Follow these steps:
- Duplicate your main slide three times, so you have four slides total: one introduction slide and three detail slides (camera, travel bag, camera lens).
- On the introduction slide, select each cutout and press
Ctrl+Kto insert a hyperlink. - Link each cutout to its corresponding slide (e.g., camera cutout links to the camera detail slide).
- Copy and paste the cutouts with hyperlinks to the other slides, replacing the original cutouts.
- Delete old cutouts without hyperlinks to avoid confusion.
This setup allows users to click on objects and seamlessly navigate to detailed views, enhancing the interactive experience.
Applying Morph Transitions
The Morph transition in PowerPoint is a powerful feature that creates smooth animations between slides by transforming objects’ size, position, and rotation.
To apply Morph transitions:

- Select all four slides.
- Go to the Transitions tab and choose Morph.
- This will animate changes in object placement and size between slides automatically.
Morph handles the animation magic, making objects appear to pop out or move smoothly when clicking between slides.
Designing the Clickable Slides
Each detail slide focuses on one clickable item, highlighting it with animations and repositioned text.
Here’s how to design each slide:
Camera Slide
- Move the “Travel Gear” text box upward to make space.
- Show only the “Travel Camera” text group.
- Resize, rotate, and reposition the camera cutout to emphasize it.
Travel Bag Slide
- Bring text groups closer together and move them upwards so only the “Travel Bag” text group is visible.
- Resize and rotate the travel bag cutout for prominence.
Camera Lens Slide
- Adjust text and cutout similarly to focus on the camera lens.
- Make sure only the lens text group is visible and the object is highlighted.
These adjustments ensure that when users click an object, the slide zooms in on it with relevant text, creating an engaging user experience.
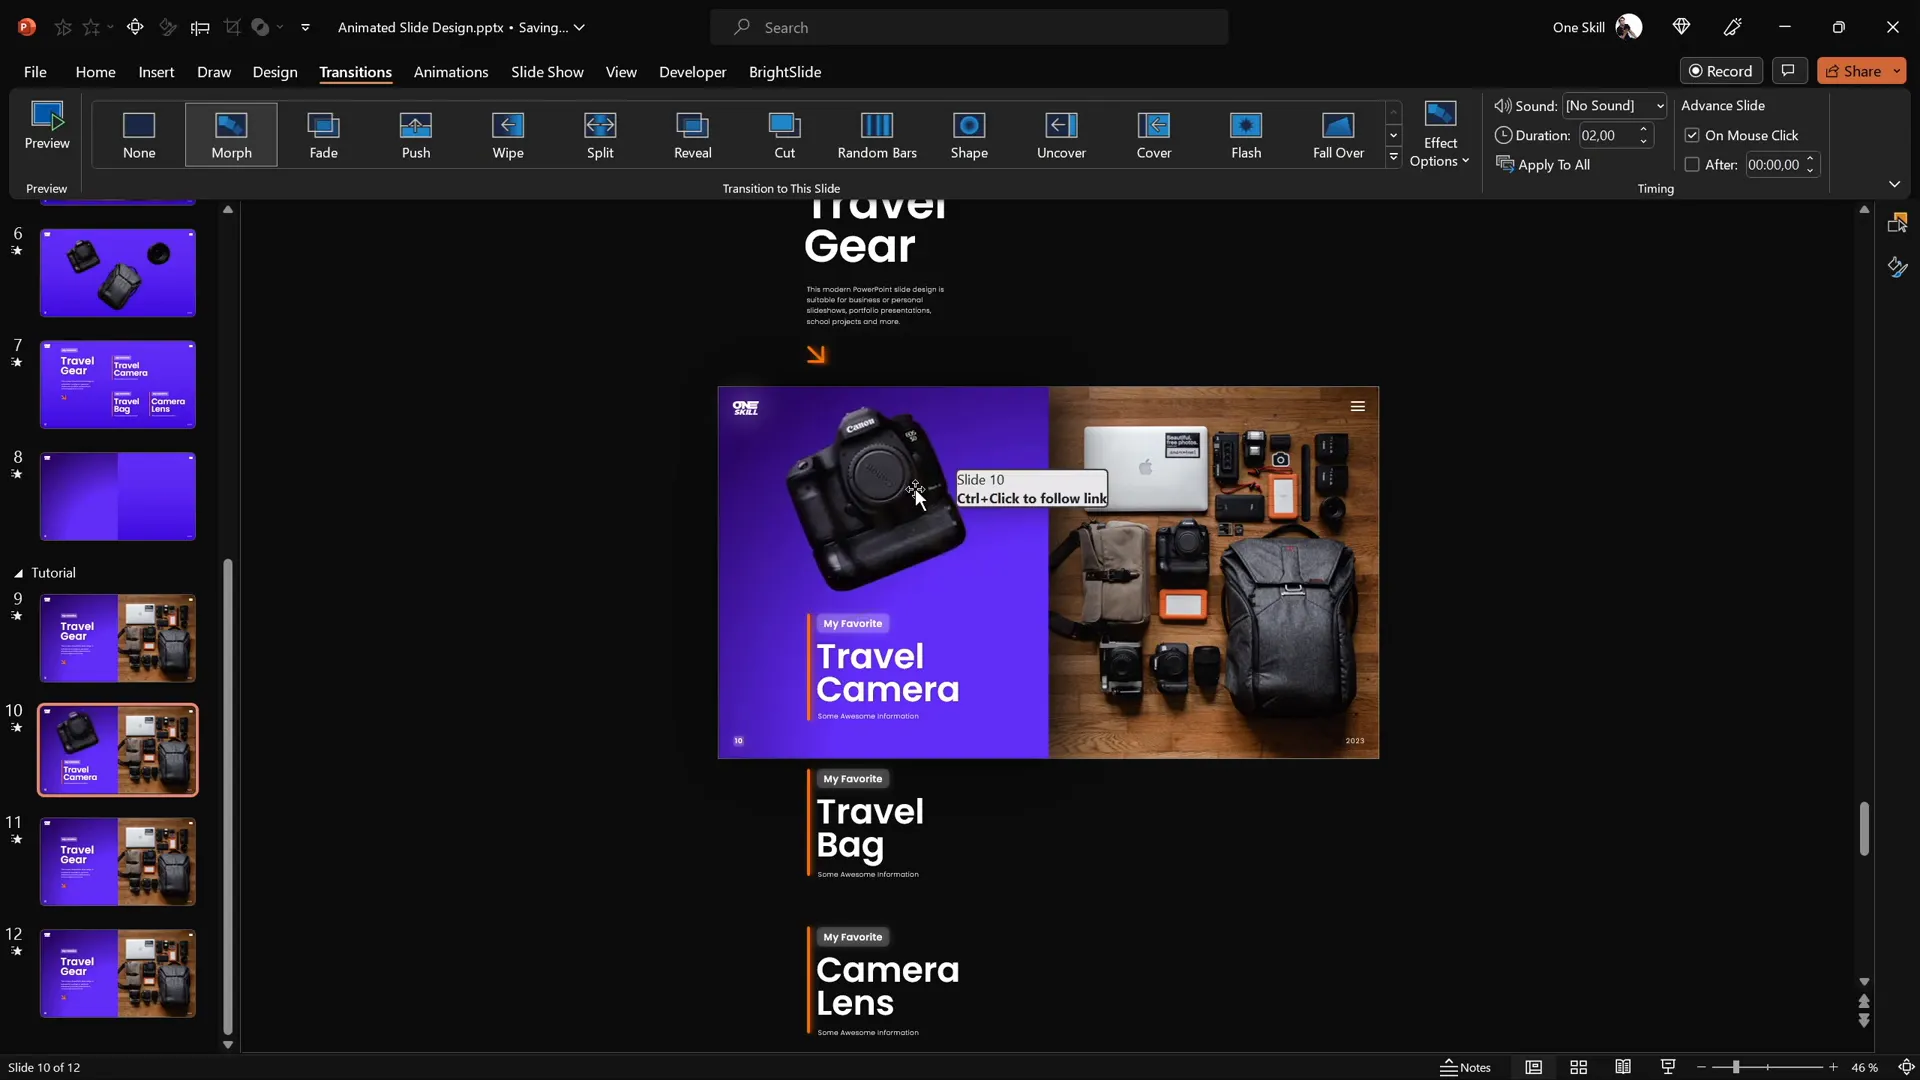
Fixing Morph Transition Issues
Sometimes, Morph can struggle animating objects that look very similar across slides, causing unexpected animations.
To fix this:
- Use the Selection Pane (Home > Select > Selection Pane) to rename objects uniquely.
- Prefix object names with double exclamation marks (e.g., !!Lens) to force Morph to treat them as distinct.
- Ensure all instances of the object across slides have the same unique name.
This naming trick helps Morph differentiate objects and perform smooth, accurate animations.

Final Result and Testing
With everything set up, it’s time to test your clickable and scrollable animated slide design.
Steps to test:
- Enter full-screen presentation mode.
- Click each clickable object (camera, travel bag, camera lens) on the introduction slide.
- Observe the smooth Morph animation transitioning to the detail slide.
- Verify that the animation looks natural and the correct text is displayed.
If everything works perfectly, congratulations! You have created a highly interactive PowerPoint slide design that enhances user engagement and presentation quality.

Summary Table: Key Steps for Creating Clickable Animated PowerPoint Slide Design
| Step | Action | Tools/Features | Tips |
|---|---|---|---|
| 1 | Create gradient background | Slide background fill | Use two complementary colors with linear gradient |
| 2 | Insert and crop photo | Insert > Pictures, Crop tool | Crop photo to fit slide boundaries |
| 3 | Add and align text boxes | Text boxes, BrightSlide add-in (optional) | Group text boxes and align consistently |
| 4 | Cut out objects from photo | Photopea online editor (free) | Use Pen Tool for precision cutting, export PNG |
| 5 | Match cutouts on slide | Picture formatting tools | Temporarily recolor cutouts to red for alignment |
| 6 | Make cutouts clickable with hyperlinks | Hyperlink feature (Ctrl+K) | Link each object to dedicated detail slide |
| 7 | Apply Morph transition | Transitions > Morph | Apply to all slides for smooth animation |
| 8 | Design detail slides | Slide layout, text positioning | Highlight one object per slide with adjusted text |
| 9 | Fix Morph issues | Selection Pane object renaming | Use unique names with double exclamation marks |
| 10 | Test presentation | Presentation mode | Check clickable objects and smooth animations |
Frequently Asked Questions (FAQ)
What version of PowerPoint is needed to create this animated slide design?
You should use Microsoft PowerPoint 365 or any version that supports the Morph transition feature and allows inserting hyperlinks on objects. Older versions may lack these advanced animation features.
Can I use any photo for this clickable slide design?
Yes, you can use any photo you like. However, photos with clearly distinguishable objects work best for cutting out and creating interactive elements.
Is it necessary to use an external tool like Photopea to cut out objects?
While PowerPoint has basic cropping tools, Photopea or similar tools provide much greater precision and control for cutting out objects with clean edges, which improves the quality of your animations.
How do hyperlinks work in this interactive slide design?
Each cutout on the main slide is linked via a hyperlink to its corresponding detail slide. Clicking the object jumps to that slide, triggering the Morph transition for animation.
What if the Morph transition animation looks strange or glitches?
This can happen if Morph confuses similar objects across slides. To fix it, rename objects uniquely in the Selection Pane, using prefixes like double exclamation marks to differentiate them.
Can I add more clickable objects to this slide design?
Absolutely! Just repeat the process of cutting out objects, inserting them as separate layers, adding hyperlinks to dedicated slides, and applying Morph transitions.
Are there any recommended fonts for this design?
Using clean and modern fonts like Poppins Semi Bold and Poppins Light helps maintain a professional look and readability.
Can I use this technique for other presentation topics?
Yes, this clickable and animated slide design technique is versatile and can be adapted for product showcases, educational content, portfolios, and more.
Conclusion
Creating an interactive PowerPoint slide design with clickable, scrollable, and animated elements is an excellent way to engage your audience and present your content dynamically. By combining a thoughtfully designed gradient background, precision-cut photo objects, well-aligned text, hyperlinks, and the Morph transition, you can craft a professional and visually captivating presentation.
Remember, the key to success lies in attention to detail—accurate object cutting, precise alignment, and consistent object naming for smooth animations. With practice, you can easily apply these techniques to a variety of presentation styles and topics.
Embrace the power of interactivity and animation in PowerPoint to create presentations that not only inform but also delight your viewers.
Stay creative and happy presenting!
Check out the full video: ANIMATED PowerPoint Slide Design ✨FREE✨


