
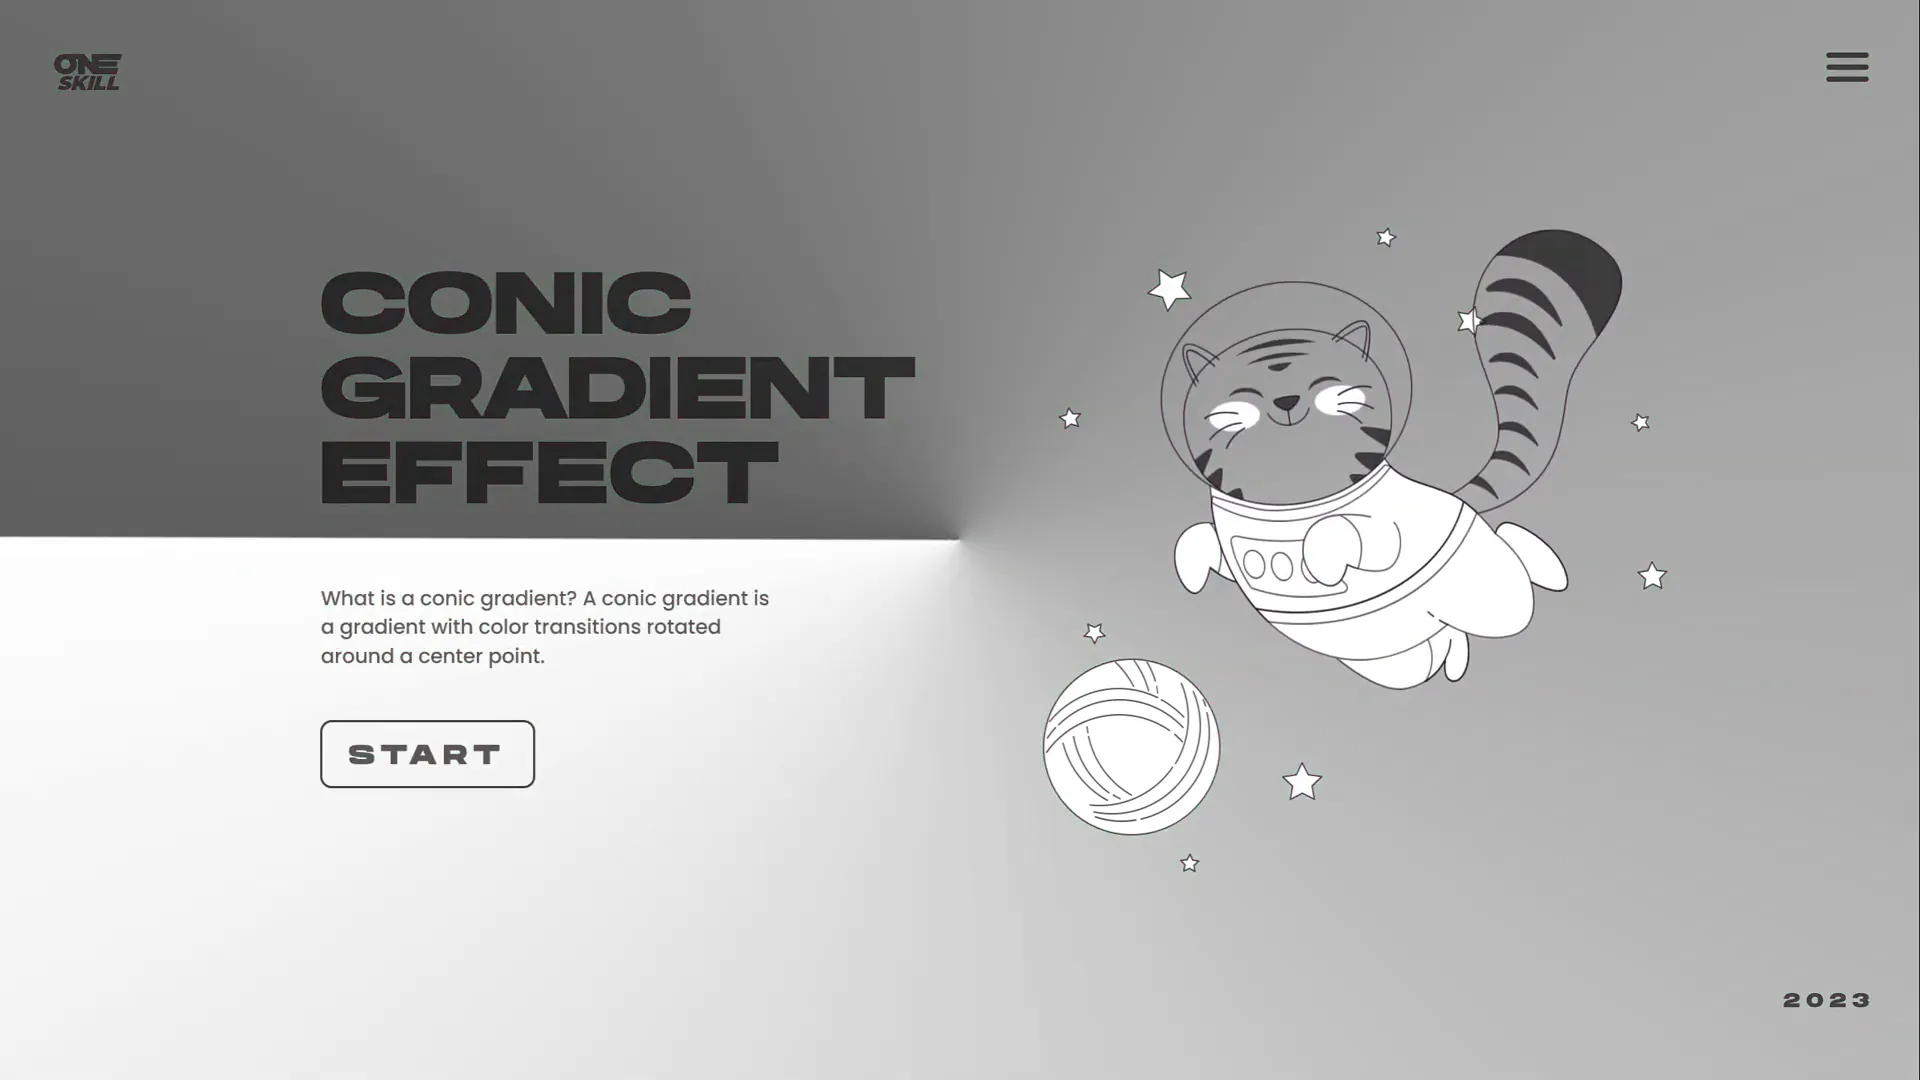
If you’re looking to elevate your PowerPoint presentations with a fresh, eye-catching design, this tutorial is just for you. In this comprehensive guide, I’ll walk you through how to create an impressive animated conic gradient effect in PowerPoint—a unique, spinning gradient that wraps around a central point to add dynamic color and motion to your slides.
This PowerPoint slide design idea is perfect for anyone who wants to add a modern, stylish look to their presentations without relying on complex software. While I’m using Office 365 for this tutorial, the techniques shared here are compatible with most versions of PowerPoint. Plus, I’ll share tips on customizing the effect to fit your brand colors and style, and even how to add fun animated elements like flying cats to make your slides stand out.
Inspired by the incredible work of UI Adrian, a talented designer who created a similar effect using Figma, I’ll show you how to harness the power of free tools combined with PowerPoint’s animation features to bring this design to life. Whether you’re a business professional, educator, or creative, this animated conic gradient effect is a fantastic PowerPoint slide design idea to keep in your toolkit.

Table of Contents
- What Is a Conic Gradient?
- Creating the Conic Gradient in Figma
- Importing and Preparing the Gradient in PowerPoint
- Cropping the Gradient to a Circle Shape
- Adding the Spin Animation
- Customizing Background and Gradient Colors
- Turning the Gradient Dark
- Adding Content and Animated Elements
- FAQ
- Conclusion
What Is a Conic Gradient?
Before diving into the creation process, it’s important to understand what a conic gradient is and why it’s such a captivating design element.
A conic gradient (sometimes called an angular gradient) is a color gradient that radiates around a central point, creating a circular, pie-slice effect. Instead of colors blending linearly or radially, the colors sweep around in a circle, transitioning smoothly as they rotate around the center.
This effect is visually captivating because it introduces movement and color variation in a way that feels dynamic and alive. It’s perfect for backgrounds, overlays, or animated effects that need to draw the viewer’s attention without overwhelming the content.
Creating the Conic Gradient in Figma
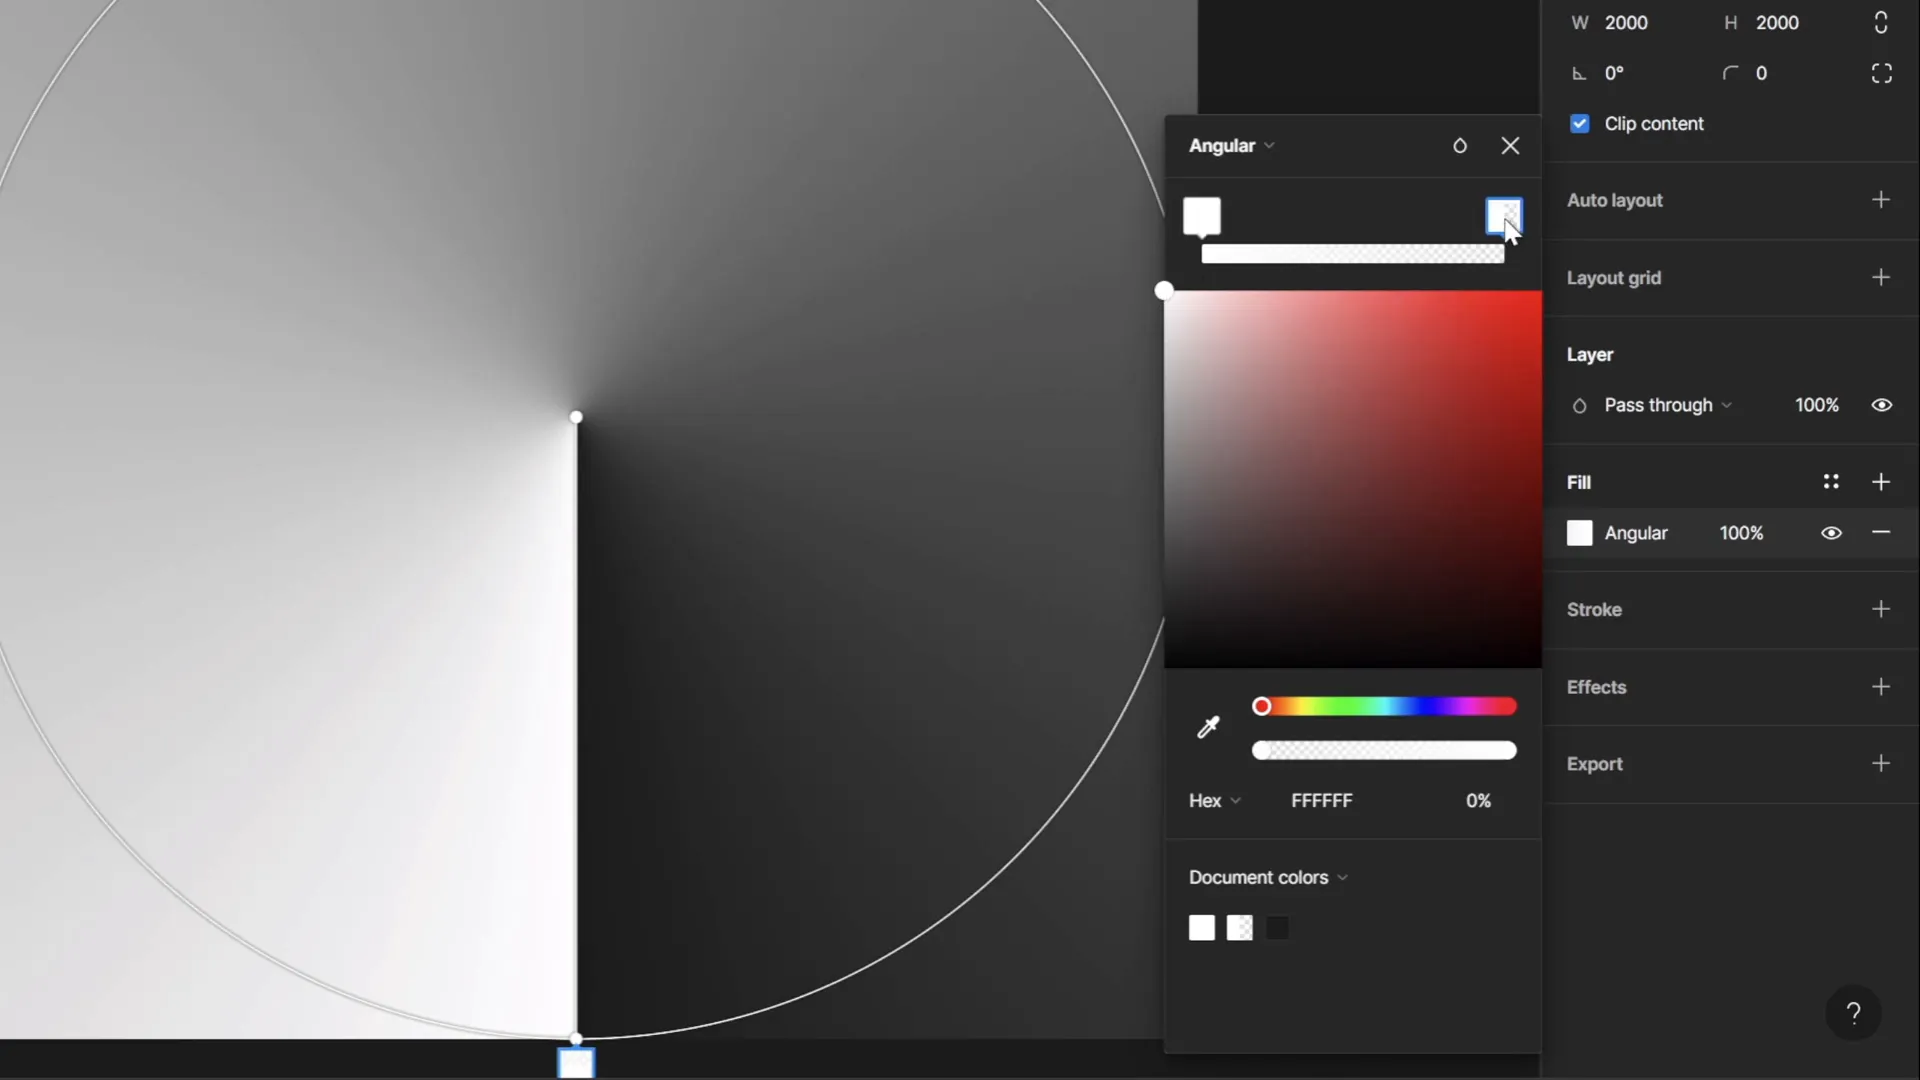
PowerPoint’s native gradient options—linear, radial, rectangular, and path—do not support conic gradients. To overcome this limitation, I recommend using Figma, a free and powerful web-based design tool that supports conic (angular) gradients.
Here’s how to create your conic gradient in Figma:
- Sign up or log in: Use your Google account for quick access to Figma’s platform.
- Create a new design file: Once logged in, click on “New design file” to open a blank canvas.
- Insert a frame: Click the frame tool and select the “Slide” preset from the right-side dimensions panel. This preset matches typical presentation slide dimensions.
- Resize the frame: For easier editing and exporting, adjust the frame size to 2000 pixels by 2000 pixels to create a large square canvas.
- Apply the angular gradient: Select the frame, click on the “Fill” option on the right panel, and choose “Angular gradient.” This is the conic gradient effect.
- Adjust colors and transparency: By default, Figma sets one color stop to white and the other to transparent white. Keep this setting for maximum flexibility. You can later change the slide background color in PowerPoint to modify the look of the gradient.
- Rename and export: Rename the frame “Conic Gradient” for clarity, then export it as a PNG file for use in PowerPoint.
Why Use Transparent Whites in the Gradient?
Choosing white and transparent white for the gradient stops might seem limiting, but it’s a smart choice. This design allows the gradient to blend seamlessly with any slide background color in PowerPoint. Instead of hardcoding colors into the gradient image, you can change the slide’s background fill color to dynamically alter the gradient’s appearance and mood.
Importing and Preparing the Gradient in PowerPoint
Now that you have your conic gradient PNG ready, it’s time to bring it into PowerPoint.
- Start with a colored slide background: Change your slide background color from white to a soft color of your choice. This will make the gradient more visible and vibrant.
- Insert the gradient image: Go to Insert > Pictures and select your exported conic gradient PNG file.
- Resize the gradient: Click on the gradient image and drag the corner handles while holding
Ctrl + Shiftto maintain proportions and scale the gradient until it fully covers the slide. - Zoom out and adjust: Make sure the gradient covers the entire slide area for a professional look.
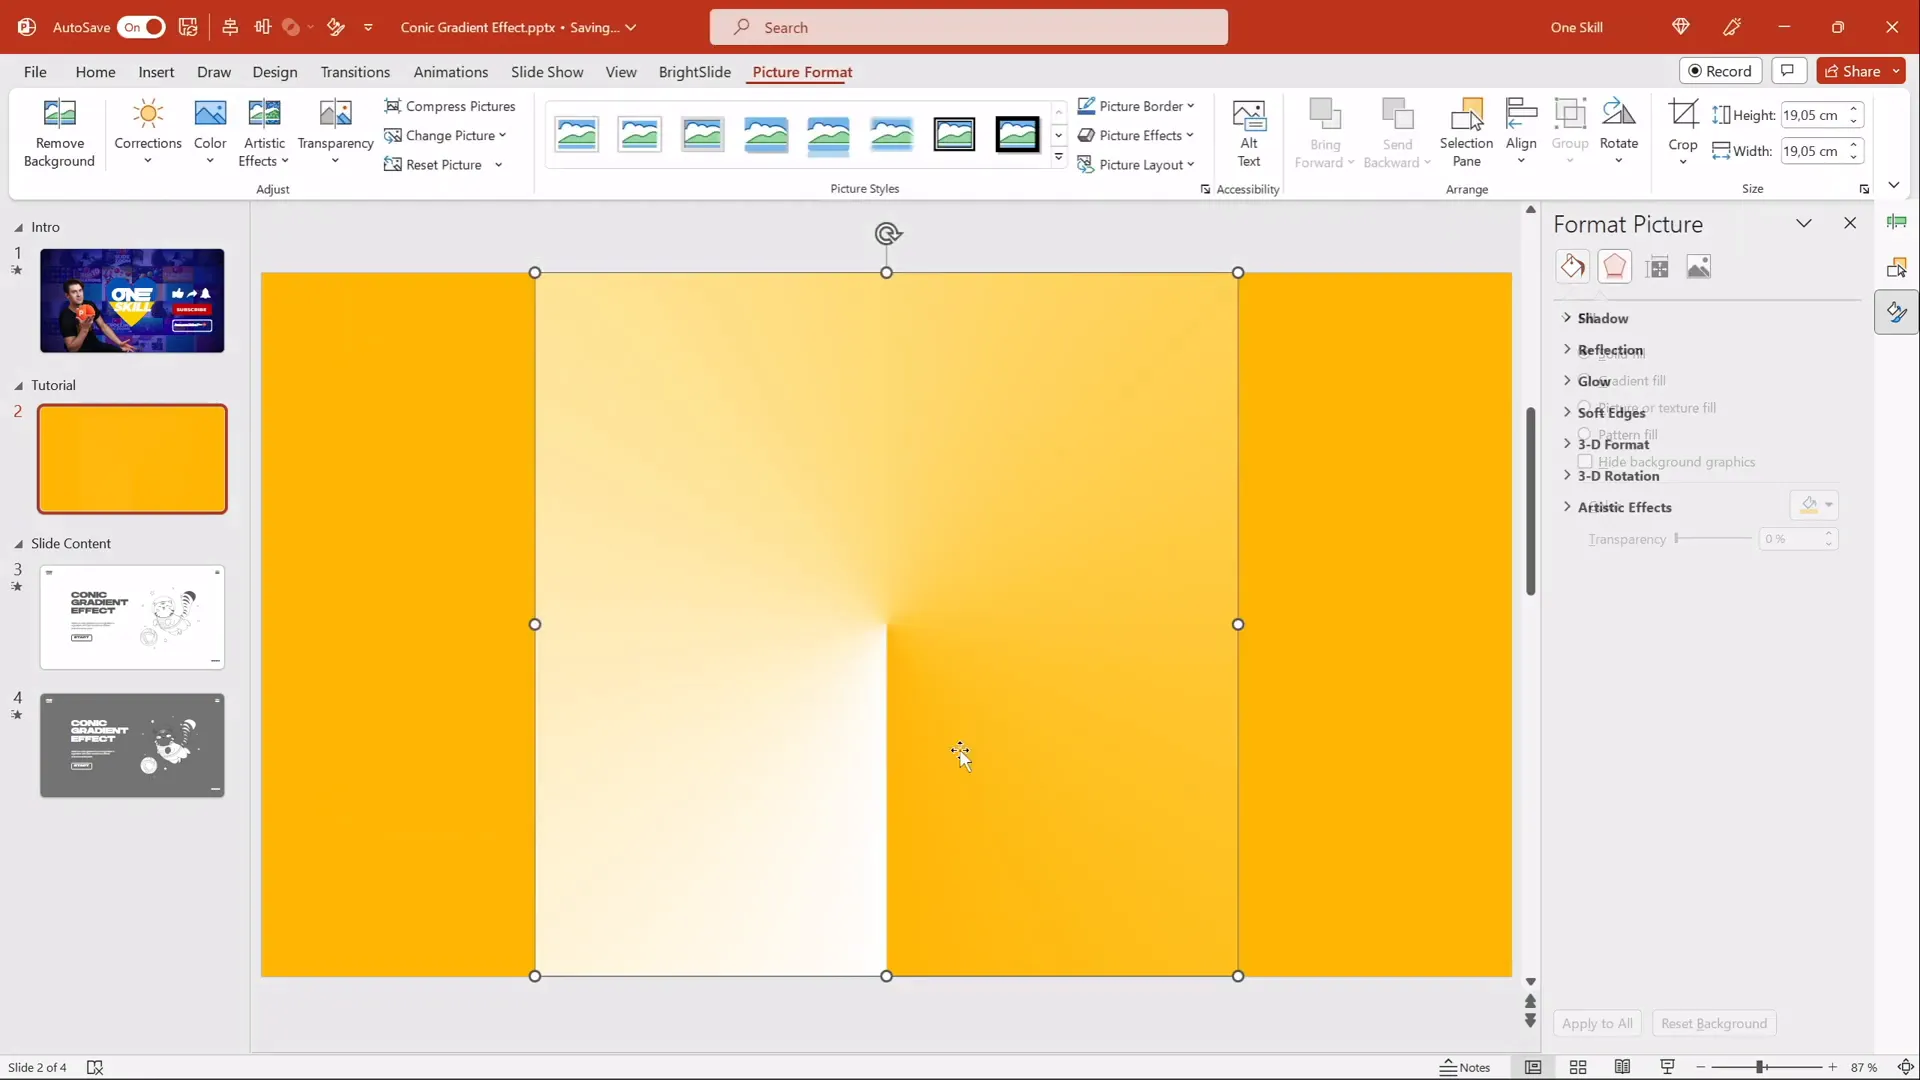
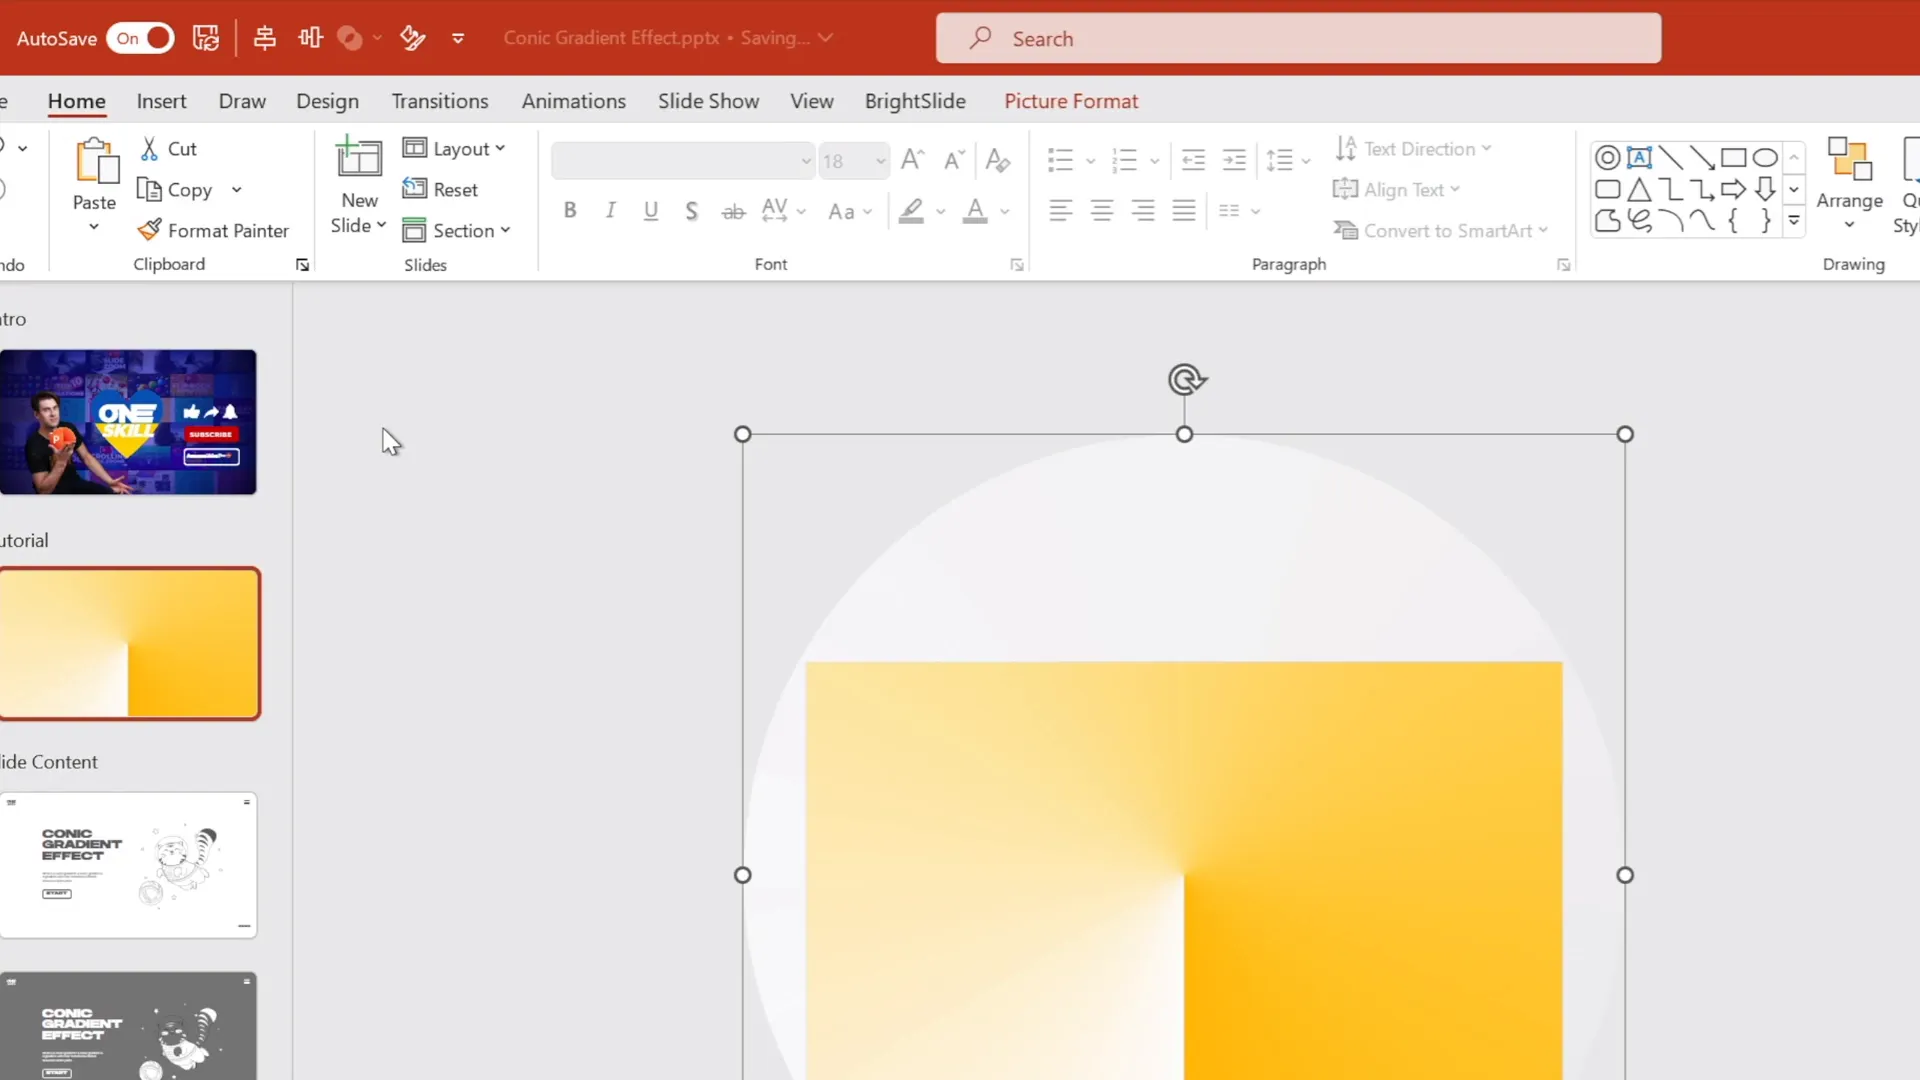
Cropping the Gradient to a Circle Shape
When you apply a spin animation to the gradient, you want the rotating image to fully cover the slide at all times. Simply scaling the gradient image might leave corners of the slide uncovered during rotation. To solve this, you’ll crop the gradient to a perfect circle slightly larger than the slide.
Follow these steps:
- Insert a circle shape: Hold the
Shiftkey while drawing a circle to create a perfect round shape. - Center the circle: Align the circle both vertically and horizontally to the center of the slide.
- Make the circle fill transparent: Set the circle’s fill color to fully transparent so you can see the gradient behind it.
- Resize the circle: Hold
Ctrl + Shiftand scale the circle until it is just a bit bigger than the slide. - Resize the gradient: Similarly, resize the gradient so it’s slightly larger than the circle.
- Select both shapes: Hold
Shiftand click the gradient image, then the circle. - Use the Merge Shapes feature: Go to the Shape Format tab, click Merge Shapes, and select Intersect. This crops the gradient image to the circle shape.
This step ensures that when the gradient spins, the entire slide remains covered without any gaps.
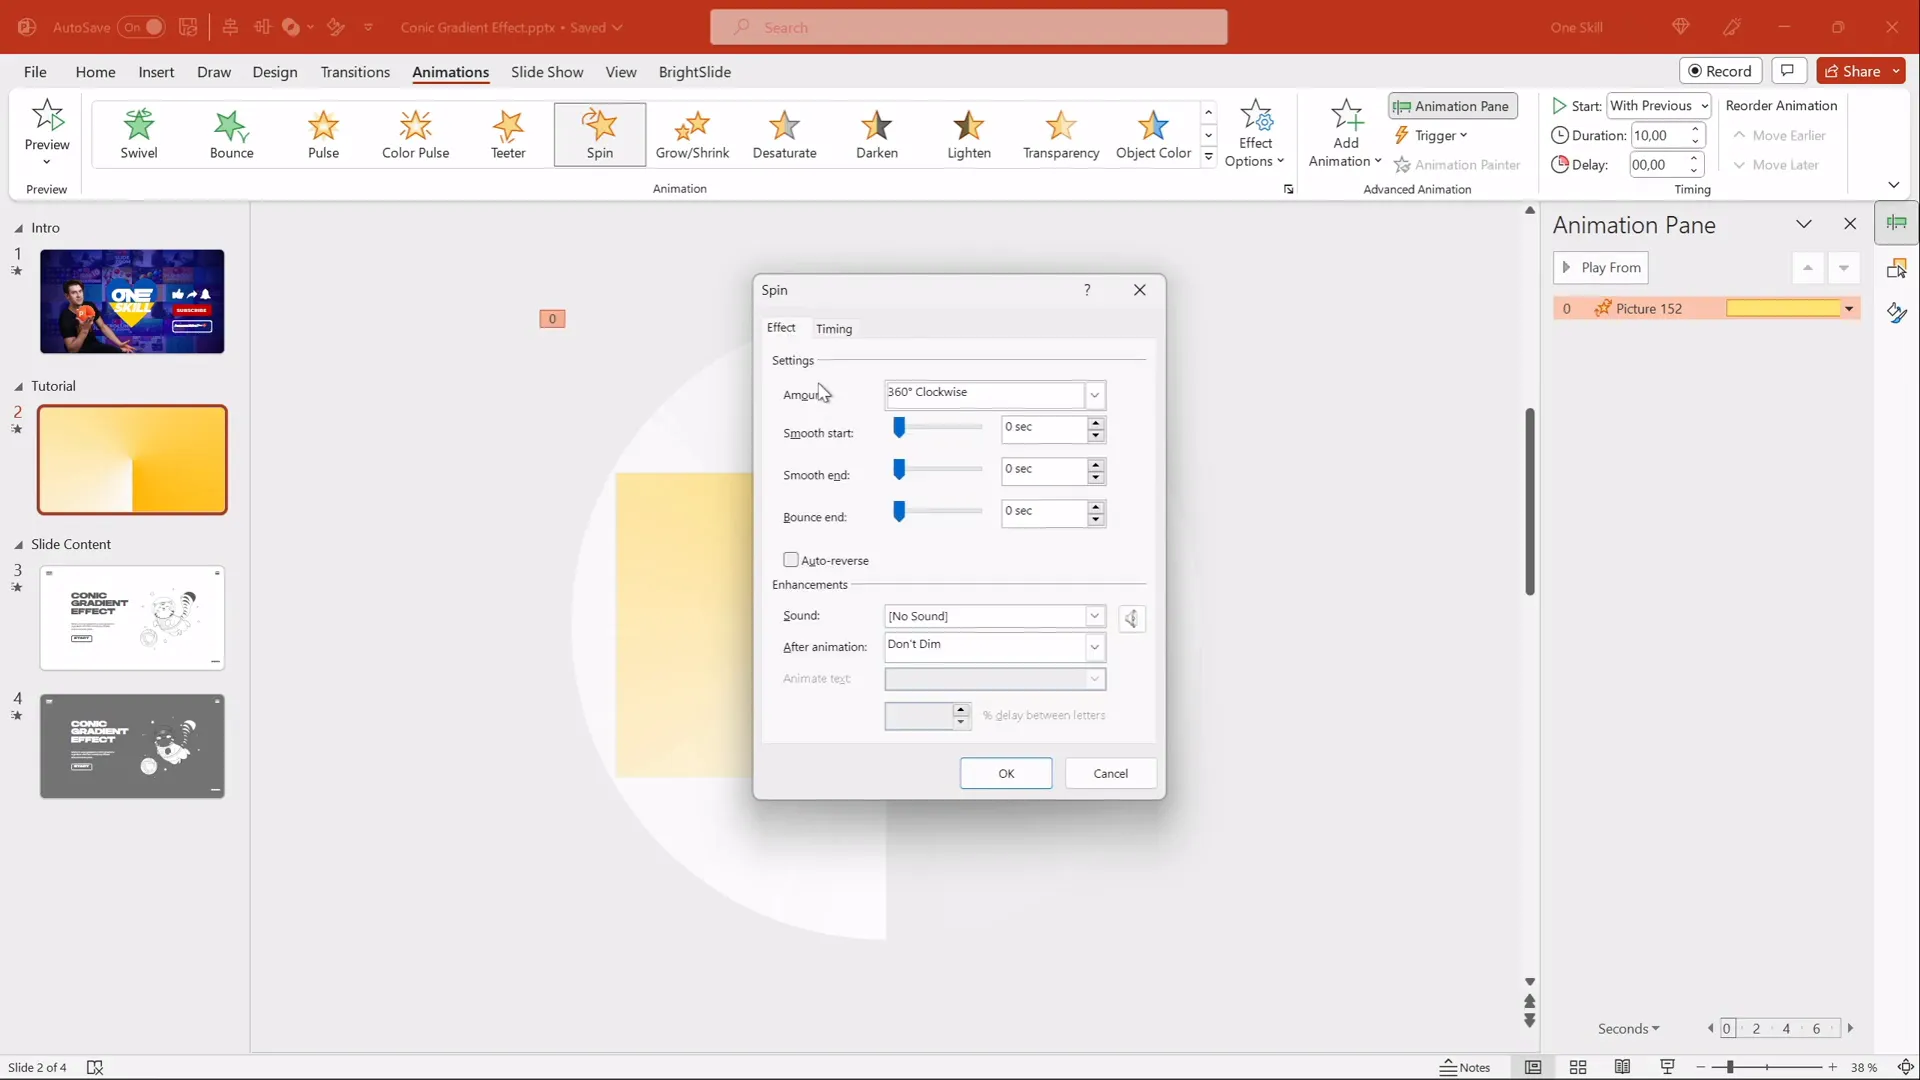
Adding the Spin Animation
With the gradient cropped perfectly to a circle, it’s time to bring it to life with animation.
- Select the gradient image: Click on the circular gradient shape.
- Add spin animation: Go to the Animations tab and select Spin from the animation gallery.
- Configure animation settings:
- Set the rotation direction to clockwise.
- Choose a full spin (360 degrees).
- Set the animation to start with previous so it begins automatically.
- Set the duration to 10 seconds for a smooth, slow rotation.
- Enable Repeat to loop the animation until the end of the slide.
- Disable Smooth Start and Smooth End to maintain consistent speed.
- Preview the animation: Click Preview to see the spinning conic gradient in action.
Congratulations! You’ve created a beautiful, rotating conic gradient effect that adds dynamic visual interest to your slide.
Adding Content and Animated Elements
To demonstrate how this effect works in a real presentation, I added some slide content, including text boxes and a playful animated cat illustration.
Here’s how you can do the same:
- Insert text boxes: Add your headings, subheadings, or body text using PowerPoint’s text box feature. I used a font called Hands On for a friendly, handwritten look.
- Add illustrations: For whimsical or thematic elements, I used a flying cat illustration from Storyset. Download SVG format for easy editing and animation in PowerPoint.
- Animate illustrations: PowerPoint supports various animations, so you can add motion to your elements to complement the spinning gradient background.
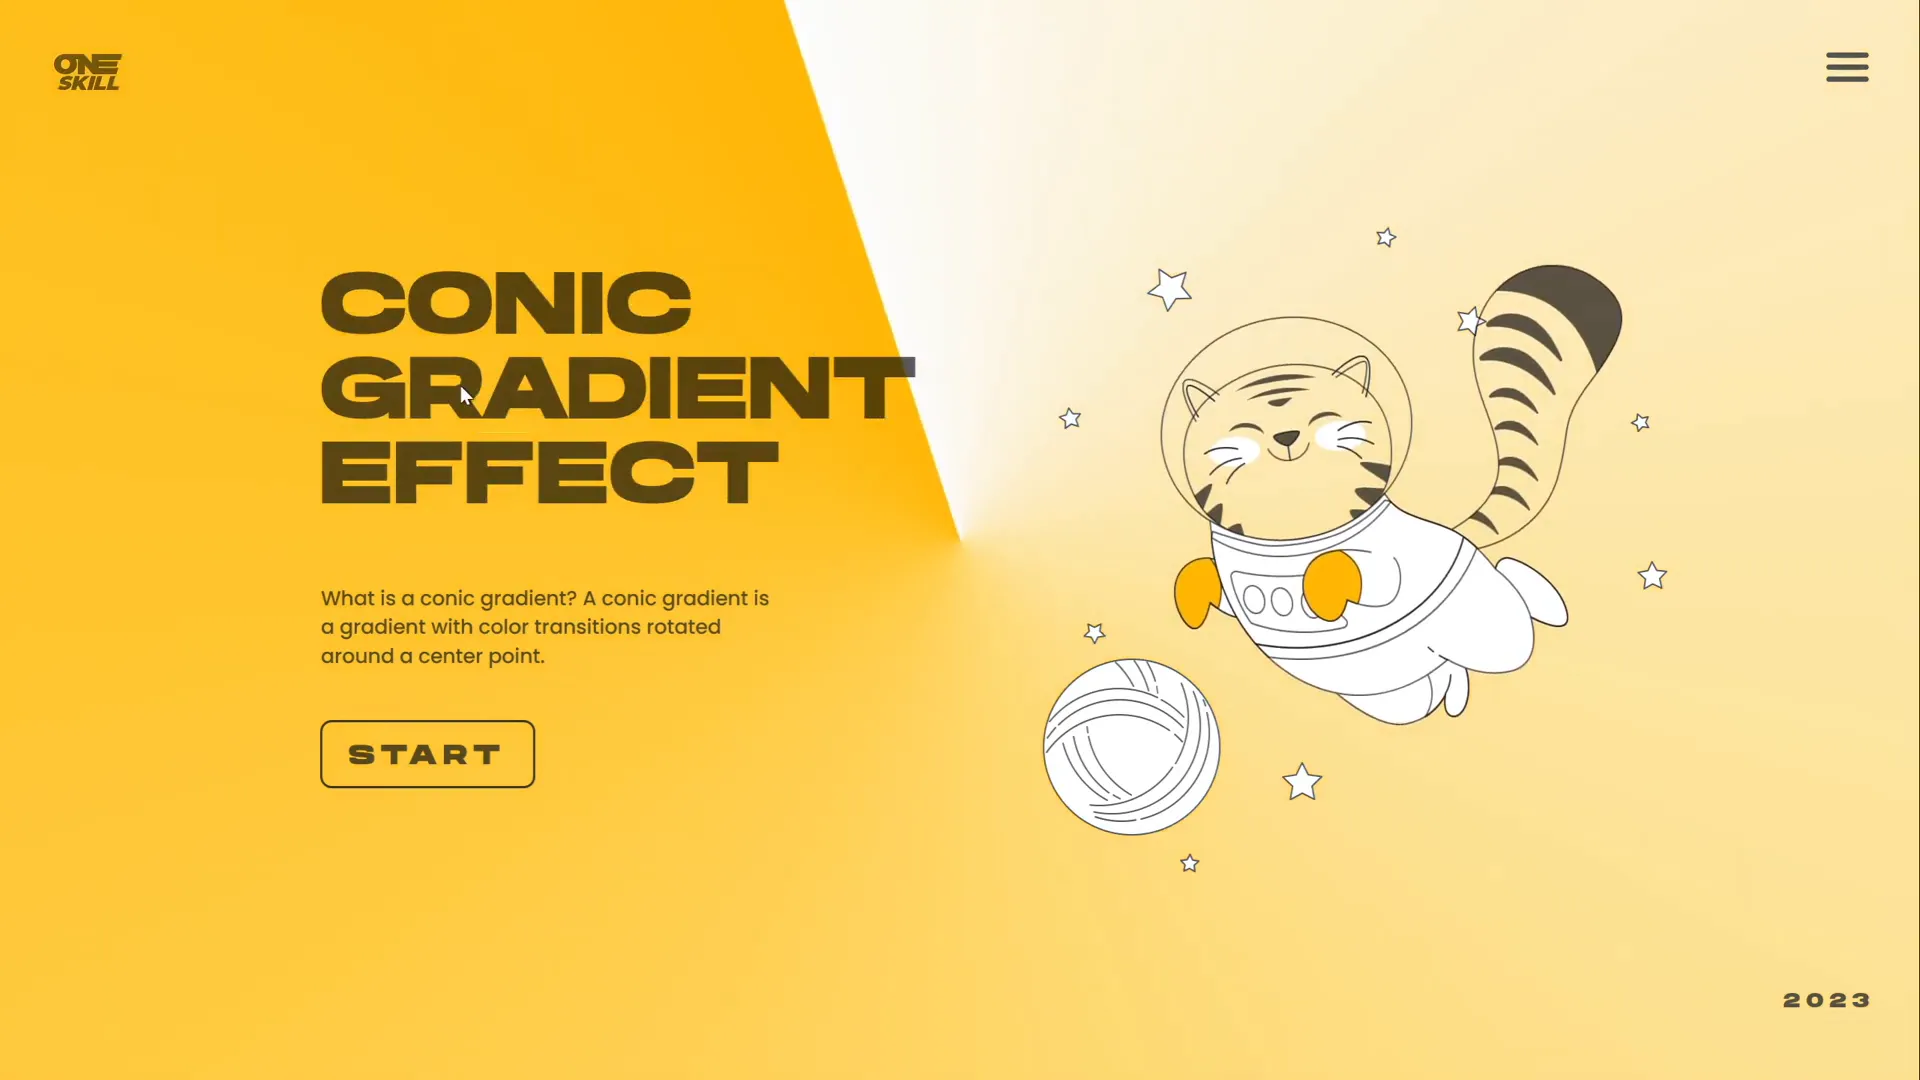
Adding content on top of the animated conic gradient background demonstrates how this effect can be integrated into presentations for a fun yet professional look.
Customizing Background and Gradient Colors
One of the biggest advantages of creating the conic gradient with white and transparent white colors in Figma is the flexibility it offers for customization inside PowerPoint.

Here’s how to change the gradient’s color mood by adjusting the slide background:
- Duplicate your slide: Right-click your slide thumbnail and select Duplicate Slide to preserve your original work.
- Change slide background: Right-click on the slide background, select Format Background, and choose a new fill color. For example, a light purple or any other color you prefer.
- Observe the gradient change: Because the gradient has transparent white areas, it blends with the new background color, effectively changing the gradient’s hue.
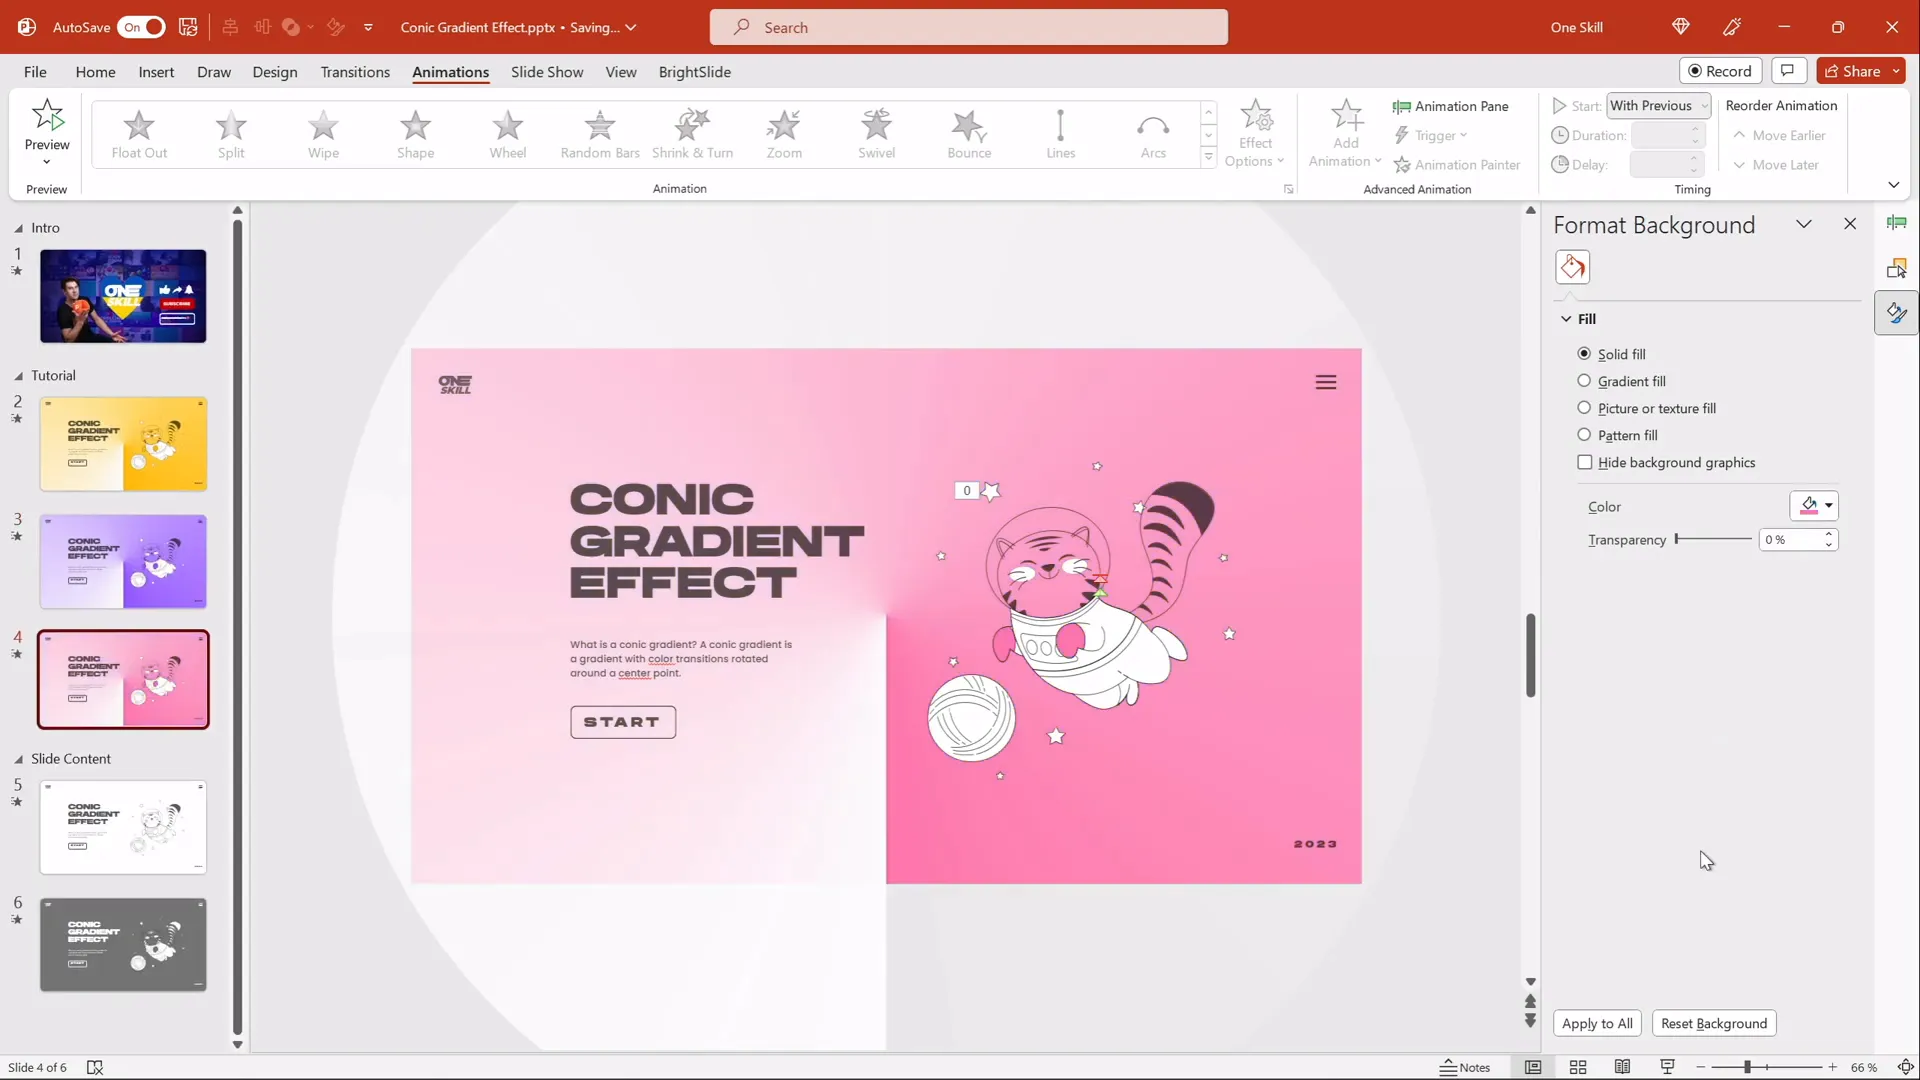
This simple trick lets you create numerous variations of the conic gradient effect by just changing your slide background color, without needing to recreate or edit the gradient image.
Turning the Gradient Dark
Want to switch from a light and airy gradient to a dark, moody effect? You can easily do this inside PowerPoint using picture correction settings.
Steps to make the gradient dark:
- Select the gradient image: Click on your conic gradient shape.
- Open picture correction options: Under Picture Format, choose Corrections.
- Adjust brightness: Slide the brightness control to the left to darken the image.
- Fine-tune transparency: If the dark effect is too strong, adjust the transparency slider to soften it.
- Change the slide background: Experiment with different background colors to find the best contrast and mood.
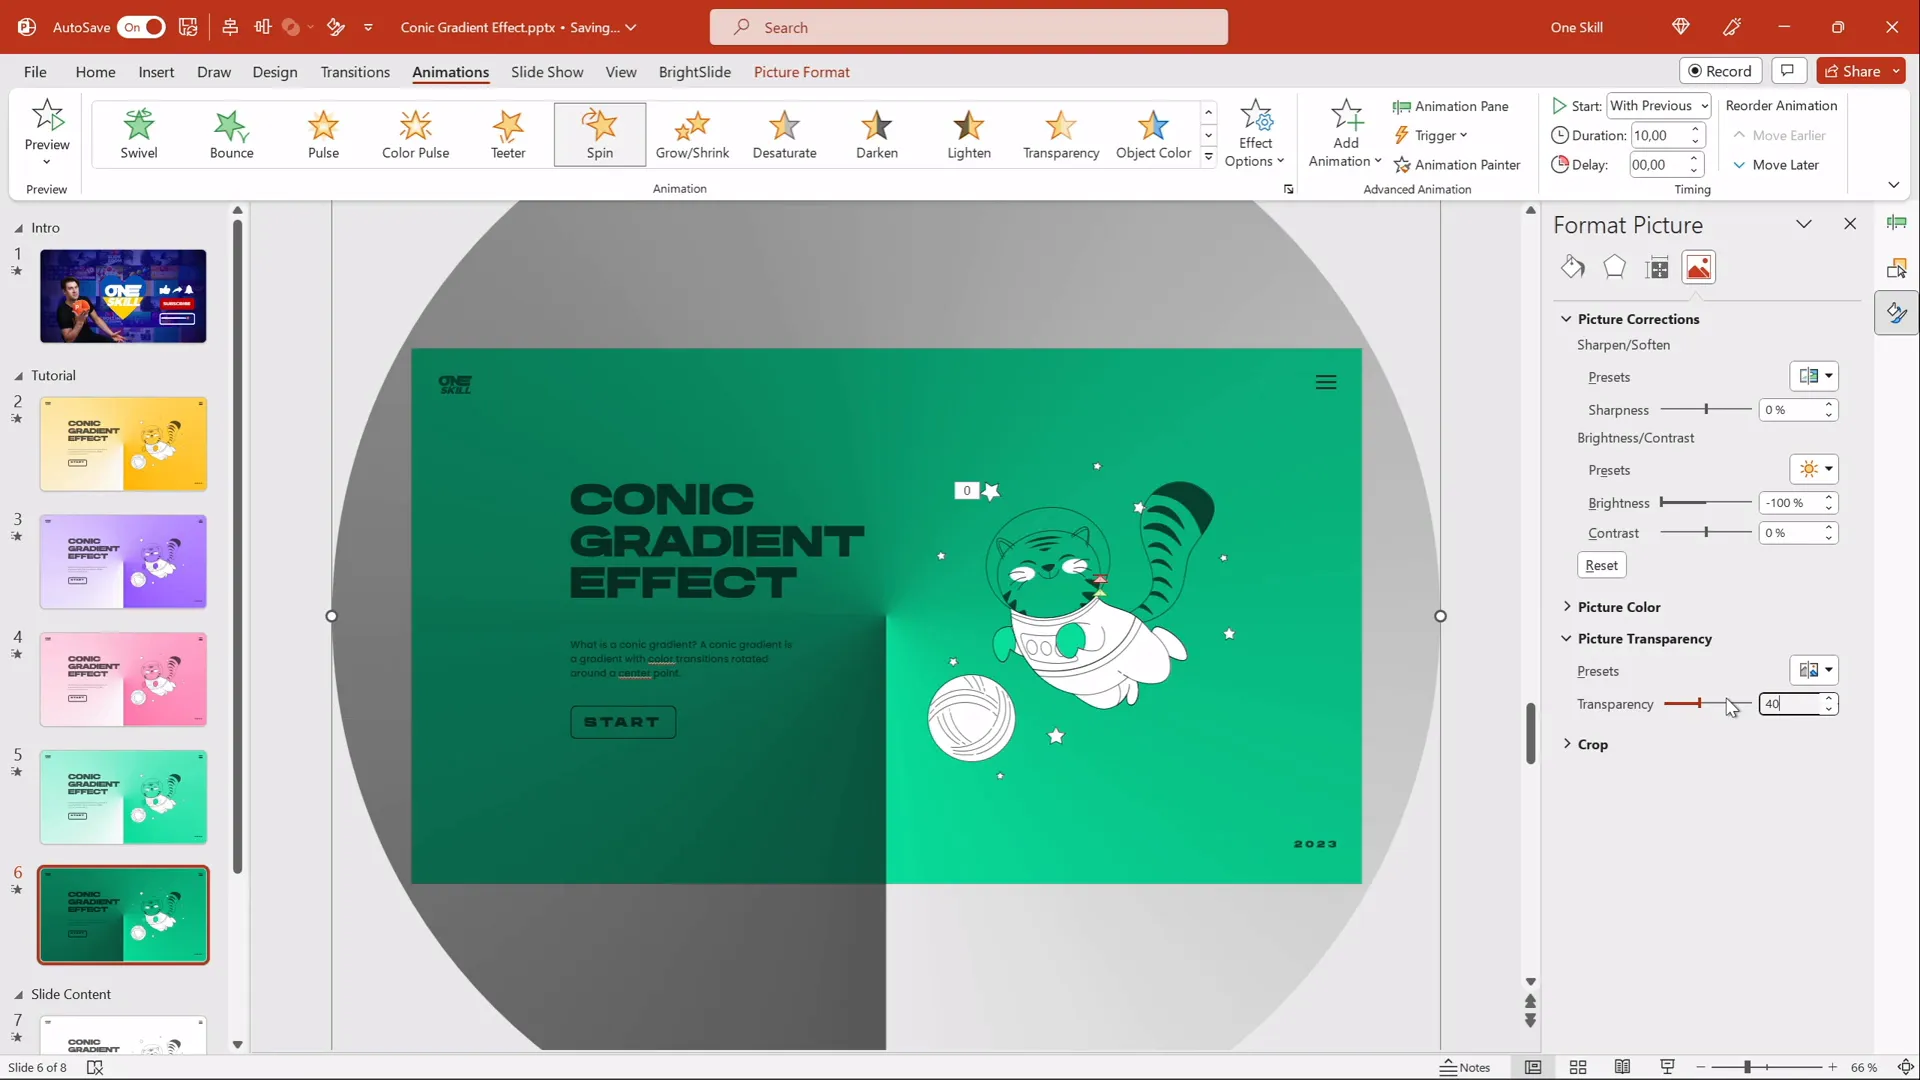
For dark backgrounds, remember to adjust your text color to white or a light shade for readability. This technique offers another layer of customization for your PowerPoint slide design idea.
FAQ
Can I create a conic gradient directly in PowerPoint?
No, PowerPoint’s native gradient options do not include conic (angular) gradients. However, you can create the effect easily in Figma or other design tools, export it as an image, and then import it into PowerPoint.
Is Figma free to use for this purpose?
Yes, Figma offers a free tier that allows you to create design files, including conic gradients, and export images without any cost.
Will this animated gradient work on all PowerPoint versions?
This tutorial was made using Office 365, but the technique should work in most modern PowerPoint versions that support image import and basic animations like spin.
Can I customize the colors of the gradient after importing?
Yes! By using white and transparent white in the gradient image and changing the slide background color, you can shift the overall gradient color dynamically inside PowerPoint.
How do I add animated illustrations like the flying cat?
You can download SVG illustrations from sites like Storyset, import them into PowerPoint, and apply PowerPoint’s animation effects to bring them to life.
Is it possible to control the speed of the spin animation?
Absolutely. Adjust the animation duration setting in PowerPoint’s animation pane. A higher duration means slower rotation, and vice versa.
Can I use this effect for professional business presentations?
Yes, as long as the animated gradient complements your content and doesn’t distract from your message. The spinning conic gradient can add a modern, polished look to your slides.
Conclusion
Adding animated backgrounds to your slides is a powerful way to capture your audience’s attention and elevate your presentation’s visual appeal. This PowerPoint slide design idea—a spinning conic gradient effect—combines modern design principles with accessible tools to create a stunning animated background that’s both flexible and easy to customize.
By leveraging Figma’s angular gradient tool and PowerPoint’s animation features, you can create dynamic, colorful slides that suit a wide range of presentation styles. Whether you want a light, airy look or a dark, dramatic mood, this technique adapts beautifully to your needs.
Plus, incorporating animated content like playful illustrations adds personality and engagement to your slides, making your message memorable and enjoyable.
Try this tutorial today and watch your presentations come to life with color and motion. Remember, the key to great slide design is not just what you show, but how you show it—so make your next presentation impressive with this creative PowerPoint slide design idea!
Happy presenting, my friends!
Check out the full video: IMPRESSIVE PowerPoint Design Idea 😍 Conic Gradient Effect


