
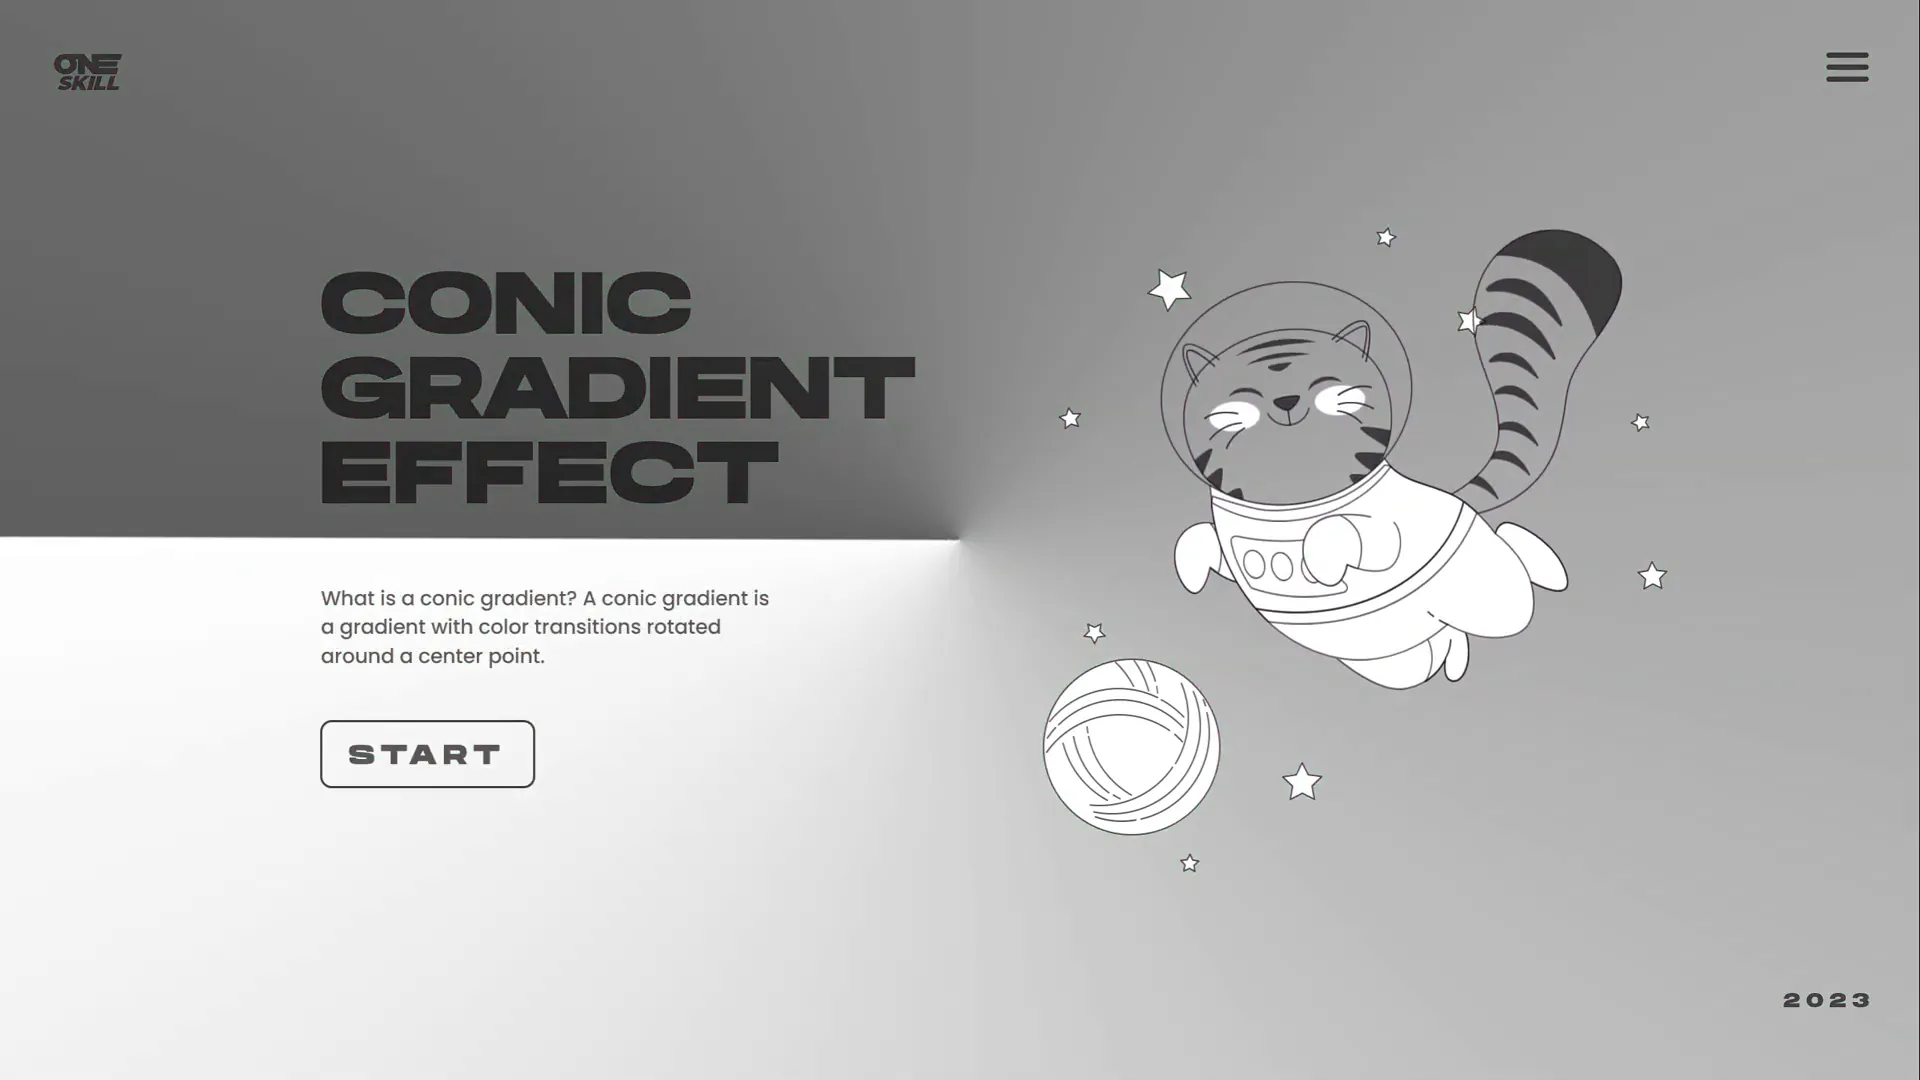
If you’re looking for a fresh and visually captivating PowerPoint slide design idea, you’re in the right place. This comprehensive guide will walk you through creating a stunning animated conic gradient effect in PowerPoint. Whether you’re using Office 365 or an earlier version, this tutorial will help you elevate your slide design with a dynamic gradient that spins around a center point, adding life and motion to your presentations.
This technique is inspired by UI Adrian’s work with conic gradients in Figma, a popular web design tool. We’ll replicate and enhance this effect right inside PowerPoint, complete with animation and playful elements like flying cats to make your slides both beautiful and fun. Plus, you’ll learn how to customize the gradient colors and background to fit any style or theme.

Table of Contents
- What Is a Conic Gradient?
- Creating a Conic Gradient Using Figma
- Importing and Preparing the Gradient in PowerPoint
- Animating the Gradient to Spin
- Adding Slide Content and Customizing Colors
- Advanced Tips: Dark Mode Gradient and Transparency
- Frequently Asked Questions
- Conclusion
What Is a Conic Gradient?
Before diving into the tutorial, let’s clarify what a conic gradient is and why it’s such a powerful effect for slide design. A conic gradient, also known as an angular gradient, is a type of gradient where colors radiate around a central point in a circular fashion. Unlike linear or radial gradients, which blend colors along a line or from a center outward in a circular shape, the conic gradient’s color transitions sweep around the center in a pie-slice or ring pattern.
This creates a dynamic, spinning visual effect when animated, which can add energy and interest to your slide backgrounds or design elements.
Creating a Conic Gradient Using Figma
PowerPoint does not natively support conic gradients. After experimenting with PowerPoint’s built-in gradient options—linear, radial, rectangular, and path gradients—it became clear that none could replicate the conic gradient effect. The solution? Use Figma, a free and versatile web design tool, to create the conic gradient and export it for use in PowerPoint.
Step-by-Step Guide to Creating the Gradient in Figma
- Sign up or log in: Use your Google account or create a Figma account at figma.com.
- Create a new design file: Click on New Design File to open a blank canvas.
- Add a frame (page): Click the frame tool or the frame button, and select a preset size. Choose a slide dimension for easier export to PowerPoint, but adjust the size to 2000×2000 pixels for better resolution and easier scaling.
- Apply an angular gradient: Select the frame, click the fill color option, and change the fill type to Angular Gradient. This is Figma’s term for a conic gradient.
- Customize colors: The default gradient has white on the left and transparent white on the right side. Keep this setting for maximum flexibility in PowerPoint, but you can adjust the colors if you want. Transparent white allows the background color in PowerPoint to show through, enabling easy color changes later.
- Export the gradient: Rename the frame to “Conic Gradient” for easy identification. Then export it as a PNG file.
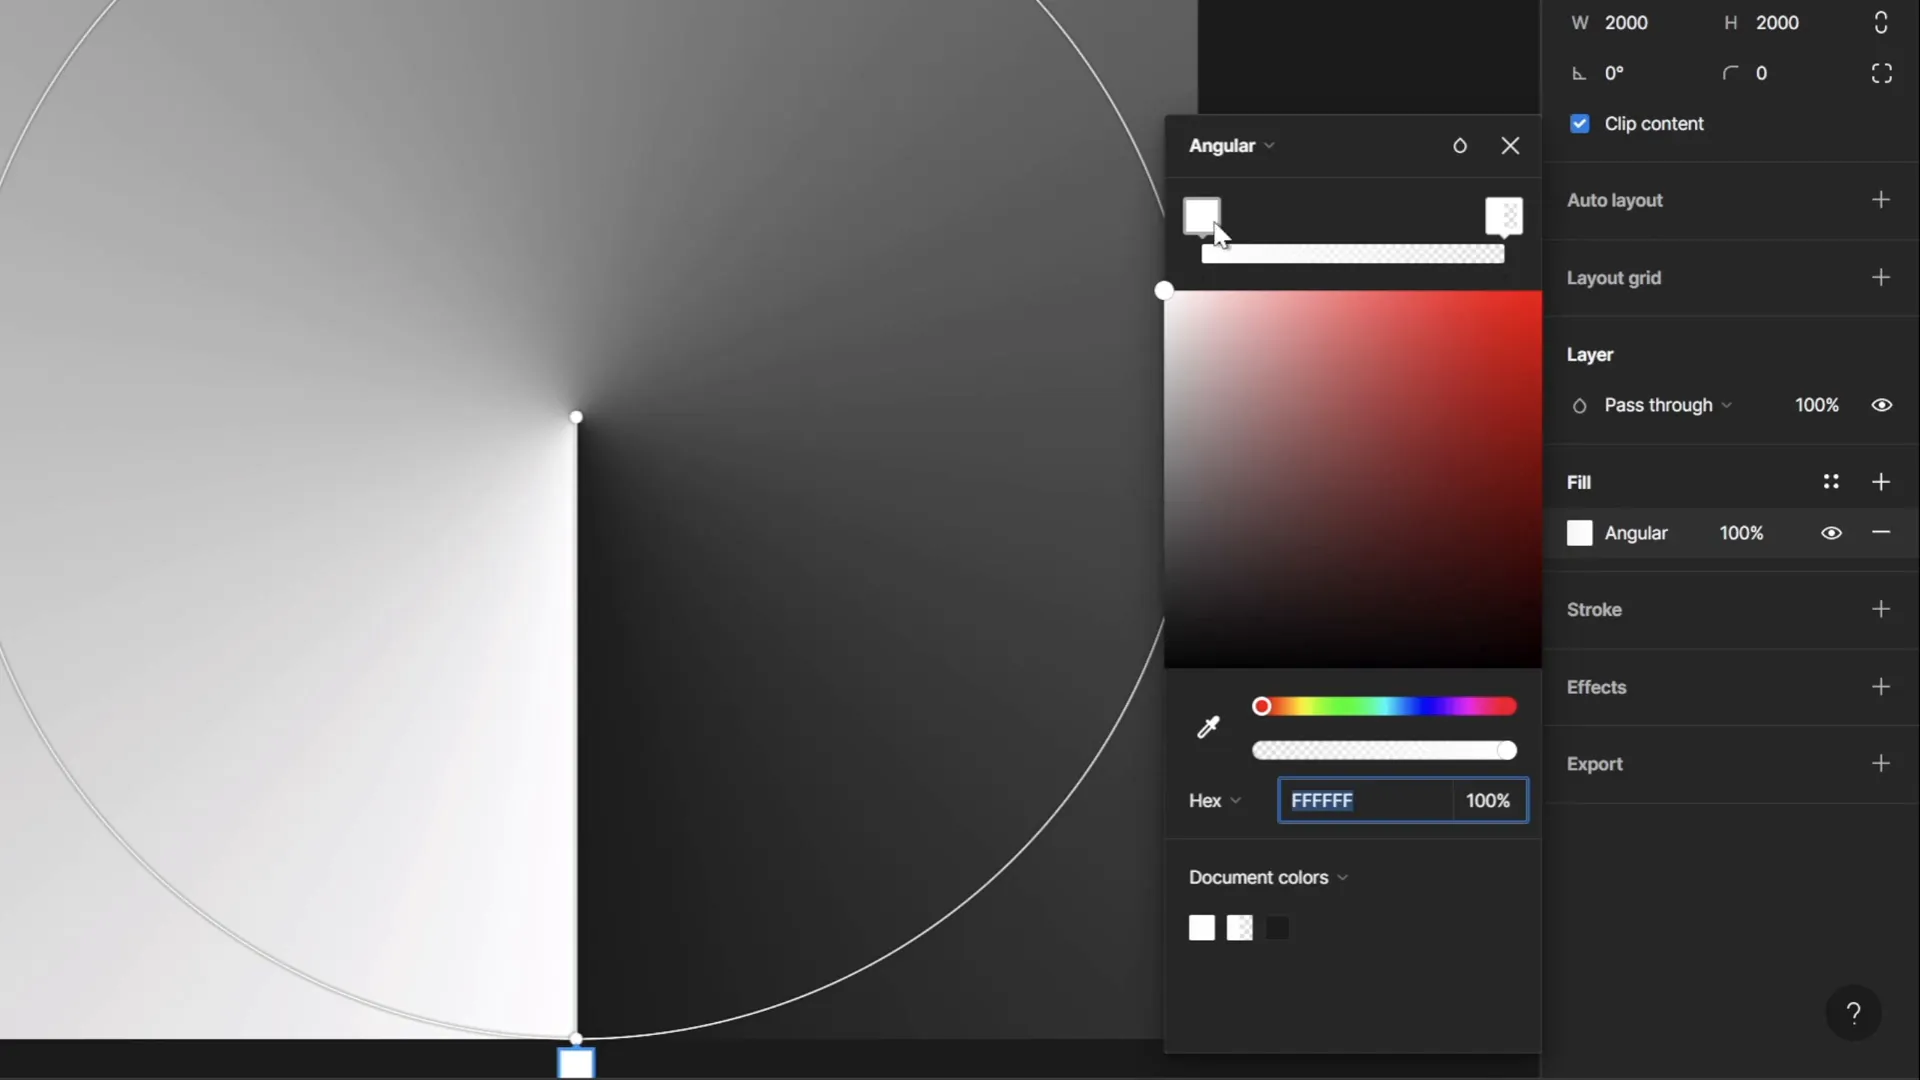
By using Figma, you get a high-quality conic gradient image that can be imported into PowerPoint, overcoming PowerPoint’s native limitations.
Importing and Preparing the Gradient in PowerPoint
Once you have your conic gradient PNG file, the next step is to bring it into PowerPoint and prepare it for animation and use as a slide background.
Steps to Import and Resize the Gradient
- Add a background color: Change your slide background color from white to a darker or colored fill. This helps the gradient stand out once applied.
- Insert the conic gradient image: Go to Insert > Pictures and select your exported PNG file.
- Resize the gradient: Hold down
Ctrl + Shiftwhile dragging a corner of the image to scale it proportionally until it covers the whole slide.
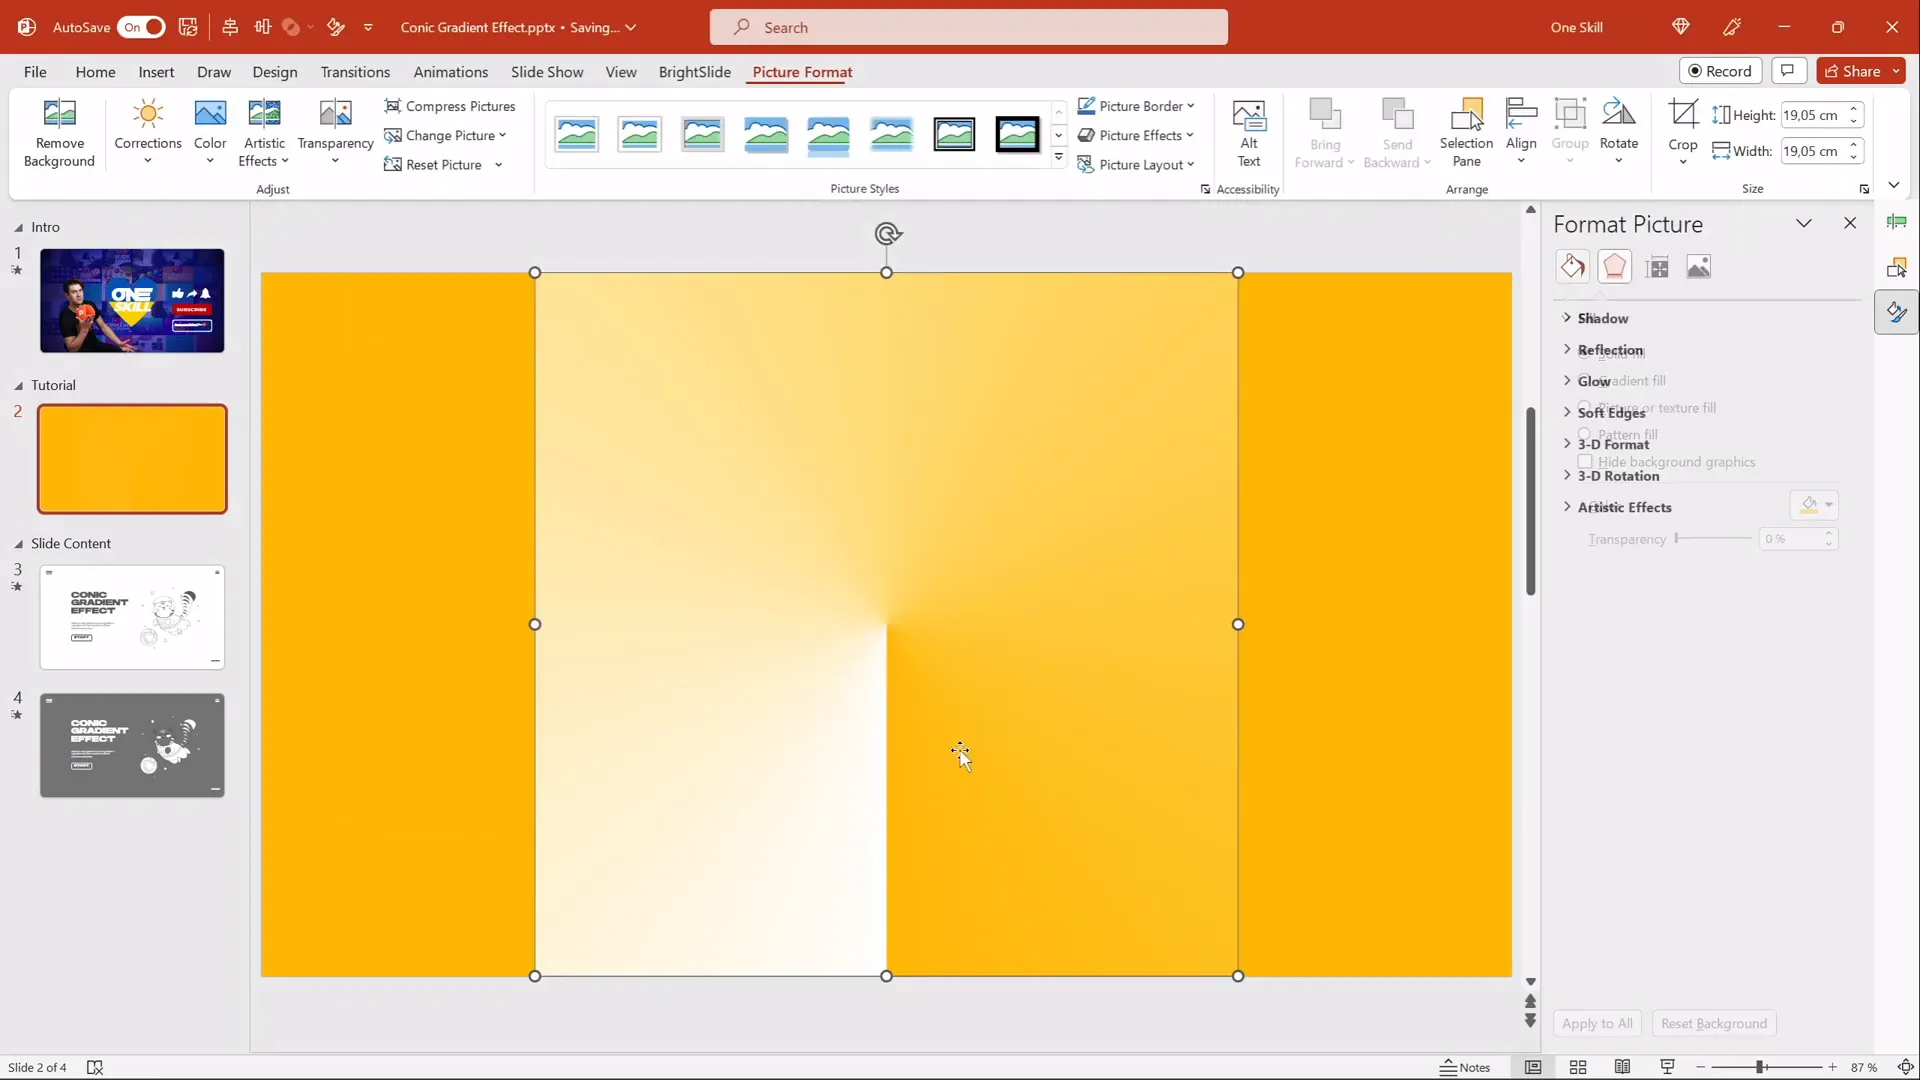
Fixing Edge Coverage with Shape Cropping
When you add a spinning animation, some corners of the slide might not be fully covered by the gradient, causing unwanted blank areas. To fix this, you can crop the gradient into a perfect circle slightly larger than the slide.
- Insert a circle: Use the Insert > Shapes > Oval tool. Hold the
Shiftkey to draw a perfect circle. - Center the circle: Align it both horizontally and vertically to the slide center.
- Make the circle transparent: Set the fill color to fully transparent so you can see your gradient behind it.
- Resize the circle: Hold
Ctrl + Shiftand scale the circle until it’s slightly bigger than the slide. - Resize the gradient: Similarly, resize the gradient image to be slightly larger than the circle.
- Crop the gradient: Select the gradient first, then hold
Shiftand select the circle. Go to Shape Format > Merge Shapes > Intersect. This crops the gradient to the circle shape, ensuring full coverage when spinning.
This cropping technique guarantees that the spinning gradient fully covers the slide without leaving empty corners visible.
Animating the Gradient to Spin
With the gradient properly cropped and sized, it’s time to add the spinning animation that brings the slide design to life.
How to Add the Spin Animation
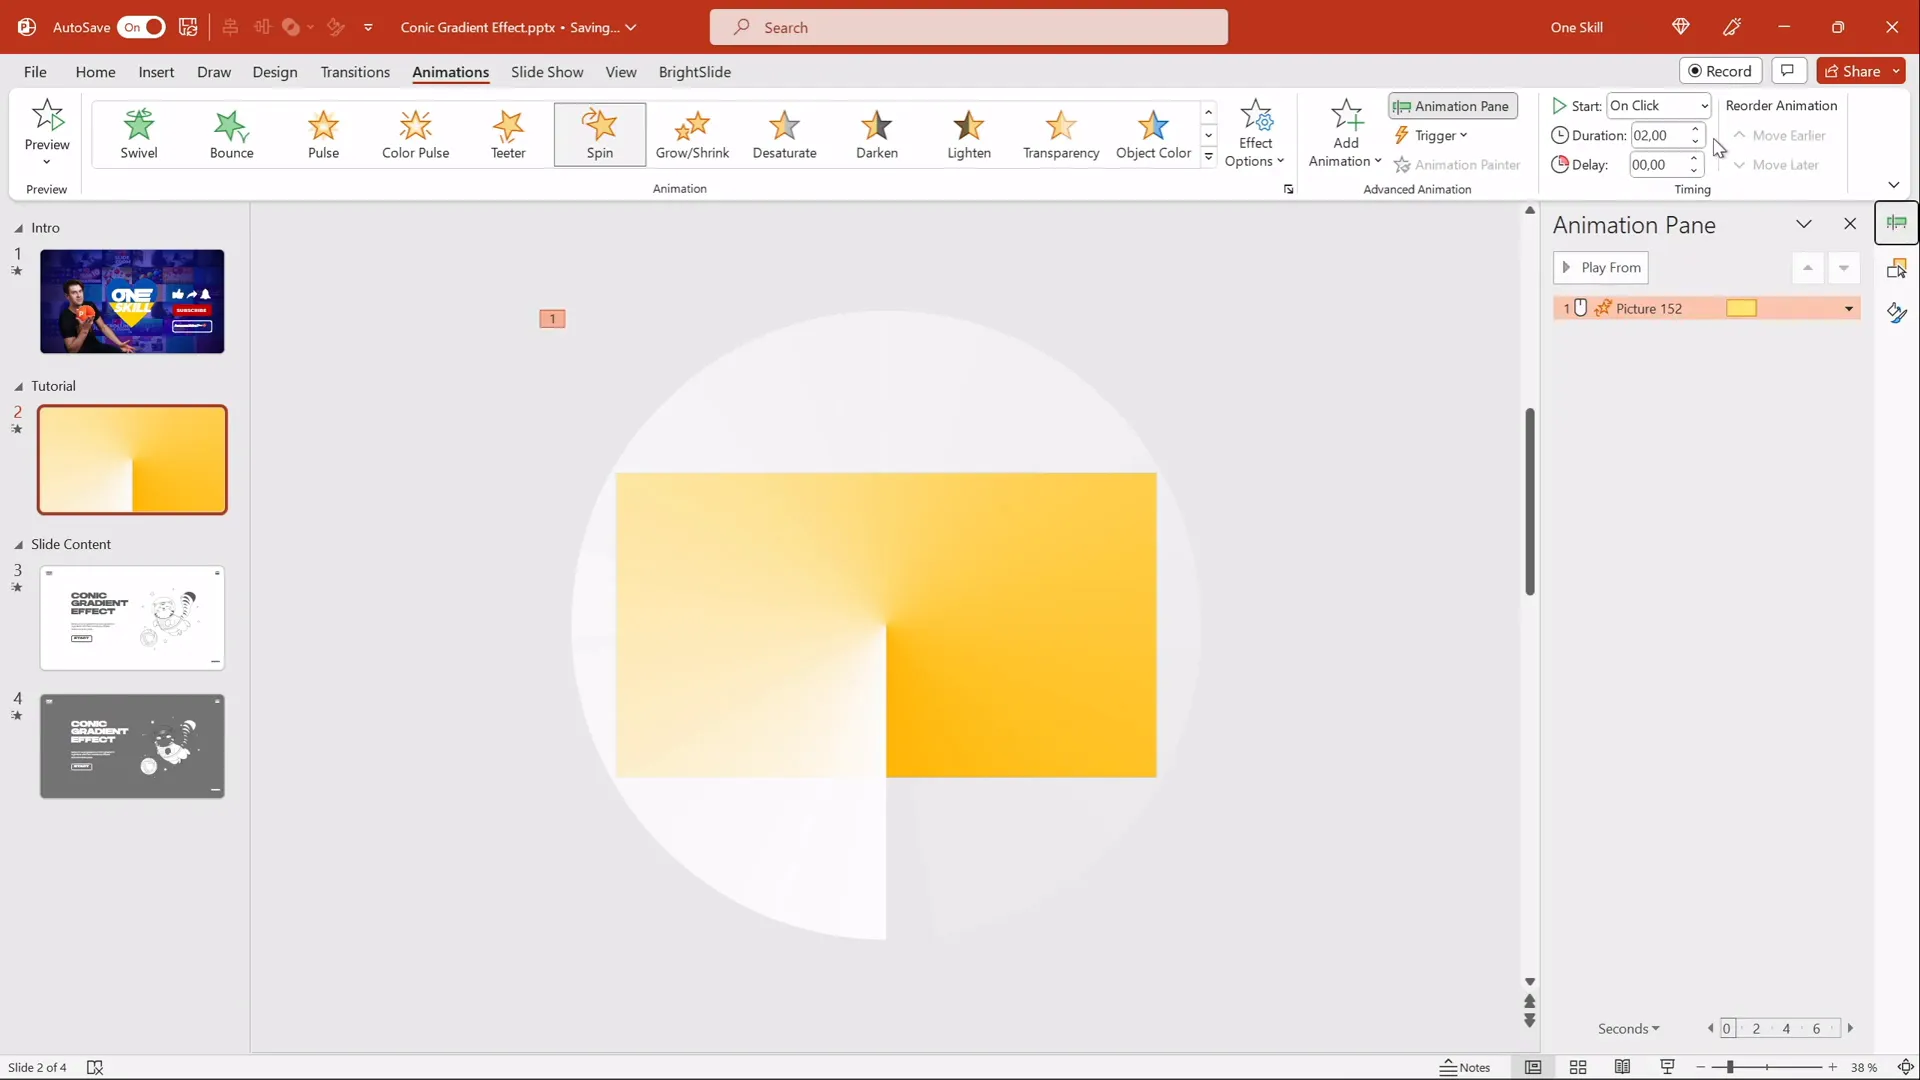
- Select the conic gradient image on your slide.
- Go to the Animations tab and choose the Spin animation.
- Open Effect Options and set the rotation direction to Clockwise.
- Set the amount of rotation to a Full Spin (360 degrees).
- Configure the animation to start With Previous so it begins automatically when the slide loads.
- Adjust the duration to about 10 seconds for a smooth, slow spin.
- In the animation pane, set the animation to repeat Until End of Slide for continuous spinning.
- Disable Smooth Start and Smooth End for consistent speed.
Preview your slide in slideshow mode to see the gradient smoothly rotating around the center point, creating a mesmerizing effect.
Adding Slide Content and Customizing Colors
Now that your animated conic gradient is set up, you can enhance your slide by adding content and customizing the overall color scheme.
Integrating Text and Illustrations
- Add text boxes with your desired content or messaging. For a stylish look, consider using a unique font such as “Hands On,” which pairs well with this effect. (You can find this font online.)
- Insert fun illustrations, like an animated flying cat, to add personality and visual interest. Websites like Storyset offer free SVG illustrations that are easy to manipulate in PowerPoint.
- Group your content and position it strategically around the spinning gradient to maintain balance and readability.

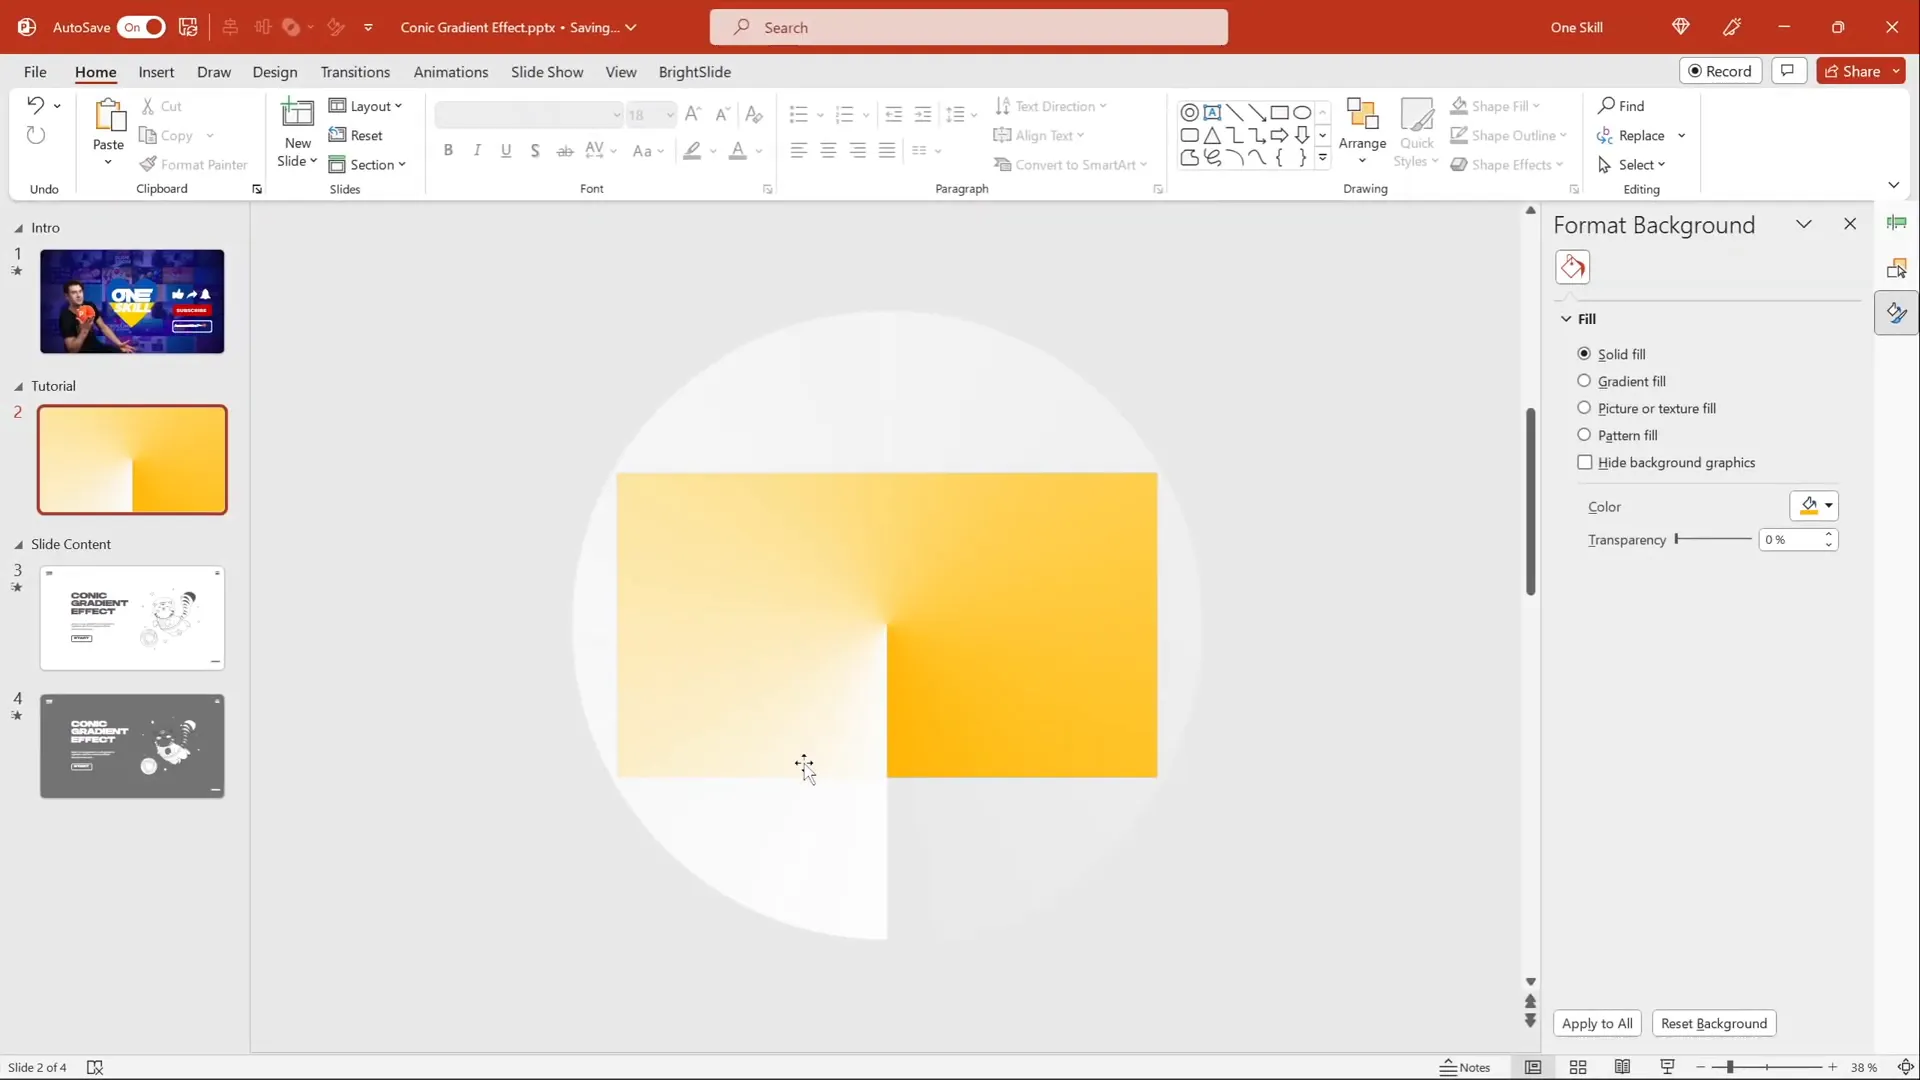
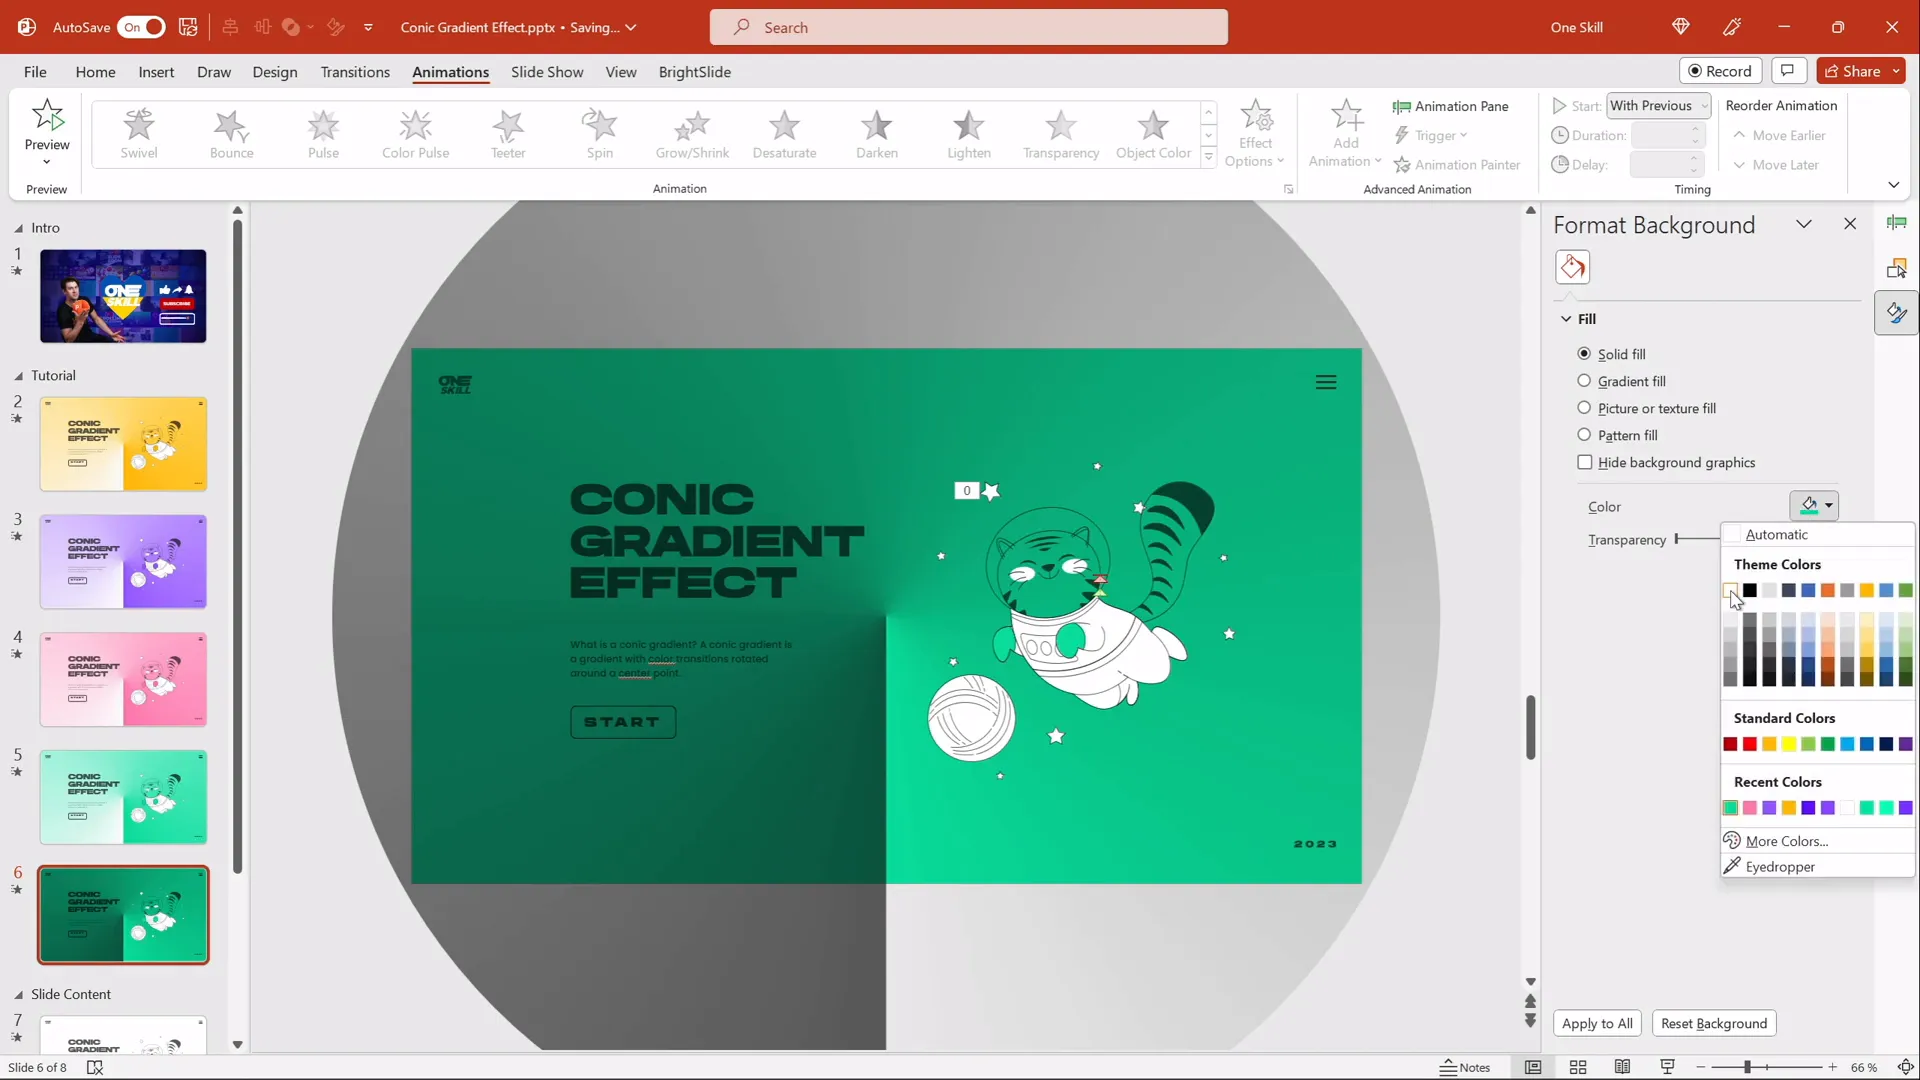
Changing the Slide Background Color to Modify Gradient Appearance
Because the gradient uses white and transparent white colors, the slide background color affects the gradient’s visible color. This means you can create many different looks simply by changing the slide background fill color.
- Duplicate your slide to preserve your original design.
- Right-click on the slide background and select Format Background.
- Choose a new solid fill color—try pastel purples, blues, or any brand colors.
- Apply the change, and watch how the gradient color shifts accordingly.

This technique allows you to quickly experiment with color schemes without recreating the gradient each time.

Advanced Tips: Dark Mode Gradient and Transparency
Want to create a darker mood or a night mode version of your gradient? PowerPoint’s picture correction tools make it easy to invert or adjust the brightness of your conic gradient.
Creating a Dark Gradient Look
- Select the conic gradient image.
- Go to Picture Format > Corrections.
- Adjust the Brightness slider downwards to darken the gradient.
- If the effect is too strong, use the Transparency slider to soften it.
- Combine with a black or dark background fill for a striking high-contrast effect.
Remember to adjust your text color accordingly—white or light-colored fonts work best on dark backgrounds for readability.
Summary of Customization Options
| Customization | How to Achieve It | Effect on Slide |
|---|---|---|
| Background Color | Change slide background fill color | Alters gradient color visibility and mood |
| Gradient Colors | Adjust colors in Figma before export | Sets base colors for gradient flexibility |
| Brightness & Transparency | Use PowerPoint picture corrections | Creates dark/light gradients and subtle effects |
| Animation Speed | Adjust spin animation duration | Controls how fast the gradient spins |
Frequently Asked Questions
Can I create conic gradients directly in PowerPoint?
Currently, PowerPoint does not support conic or angular gradients natively. The best workaround is to create the gradient in a tool like Figma and import it as an image into PowerPoint.
Is Figma free to use for this purpose?
Yes, Figma offers a free tier that allows you to create and export angular gradients, making it accessible for this tutorial without any cost.
Can I change the colors of the conic gradient after importing it into PowerPoint?
Because the gradient is a PNG image, you cannot change its colors directly. However, by using white and transparent white in the gradient and changing the slide background color, you can effectively alter the gradient’s appearance.
How do I ensure the spinning gradient covers the entire slide without gaps?
Use the intersect merge shape technique with a circle slightly larger than your slide, cropping the gradient into a circular shape to avoid any uncovered corners during the spin.
Can I use this effect with other illustrations or animations?
Absolutely! You can add text, images, and animations on top of the spinning gradient to create engaging, multi-layered slides. Ensure your content contrasts well with the background for readability.
Conclusion
This PowerPoint slide design idea — the animated conic gradient — is a fantastic way to add dynamic visual interest to your presentations. By leveraging Figma to create the gradient and PowerPoint’s animation and formatting tools, you can craft a unique spinning gradient effect that works across versions and themes.
Remember, the key steps are:
- Create the conic gradient in Figma using the angular gradient fill.
- Export it as a PNG file and import it into PowerPoint.
- Resize and crop the gradient with a circle shape to cover the slide fully.
- Add a spin animation with continuous rotation.
- Customize the slide background color to change the gradient appearance.
- Use picture corrections to create dark mode or subtle effects.
- Add text and illustrations to enhance your message.
This method opens up creative possibilities for your slide designs, helping you stand out and impress your audience. And the best part? You can download free tutorial slides to get started quickly and experiment on your own.
So go ahead — try this PowerPoint slide design idea today, and watch your presentations come to life with color, motion, and personality!
Check out the full video: IMPRESSIVE PowerPoint Design Idea 😍 Conic Gradient Effect


