
Creating engaging, visually appealing presentations is a skill that can set you apart in any professional or educational setting. One of the most exciting ways to enhance your PowerPoint slide design is by incorporating interactive elements like slide zooms. In this comprehensive guide, you’ll learn how to create a stunning hover zoom effect in PowerPoint that not only looks impressive but also adds an intuitive navigation experience for your audience.
This tutorial is inspired by a creative approach that reimagines the traditional slide zoom template into a modern, interactive hover zoom design. Whether you’re a beginner or an advanced PowerPoint user, this guide will walk you through every step to elevate your presentations using this dynamic technique.
Let’s dive into the world of PowerPoint slide design and discover how to make your slides come alive with hover zoom animations, glassmorphic effects, and seamless navigation.
Table of Contents
- Getting Started: Setting Up Your Slide
- Creating the Glassmorphic Effect in PowerPoint
- Designing the Hover Animation
- Structuring Your Presentation with Sections
- Adding Slide Zooms for Interactive Navigation
- Creating a Mask to Highlight Slide Zooms
- Enhancing Hover Effects with Shadows and Rounded Corners
- Using Section Zooms for Multi-Slide Presentations
- Frequently Asked Questions (FAQ)
- Conclusion
Getting Started: Setting Up Your Slide
Before jumping into animations and zooms, it’s essential to start with a clean, well-prepared slide. Here’s how you can begin:
- Start with a Blank Slide: Go to the Home tab, click on Layout, and select Blank to remove any preset placeholders. This gives you a clean canvas to work on.
- Insert a Background Image: Use the Insert tab to add a picture that will serve as your slide background. For high-quality free images, Unsplash is an excellent resource.
- Adjust the Image to Cover the Slide: If the image does not cover the entire slide, resize it using the corner handles while holding down the Ctrl and Shift keys to maintain proportions.
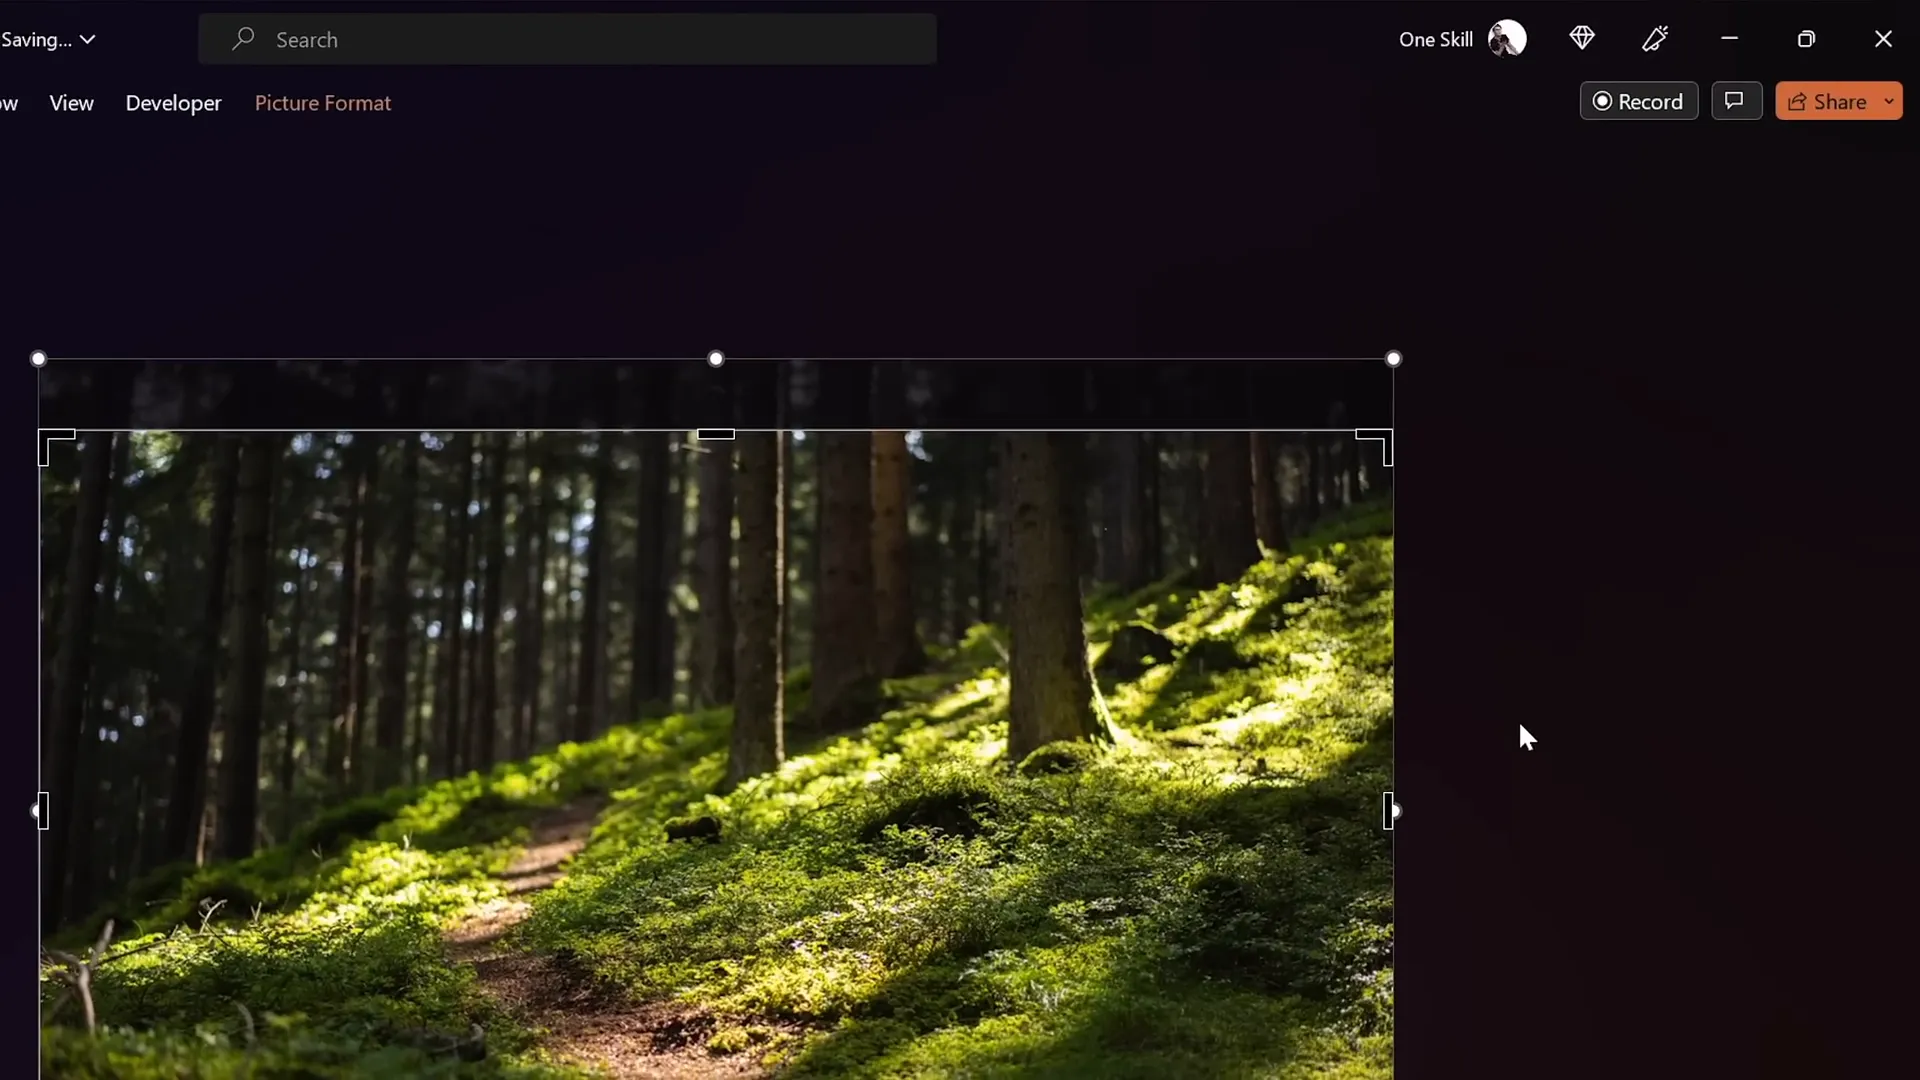
- Crop to 16:9 Aspect Ratio: With the image selected, click on Crop > Aspect Ratio and choose 16:9 to perfectly fit the standard slide size.
This setup ensures your slide is visually cohesive and ready for further enhancements.
Creating the Glassmorphic Effect in PowerPoint
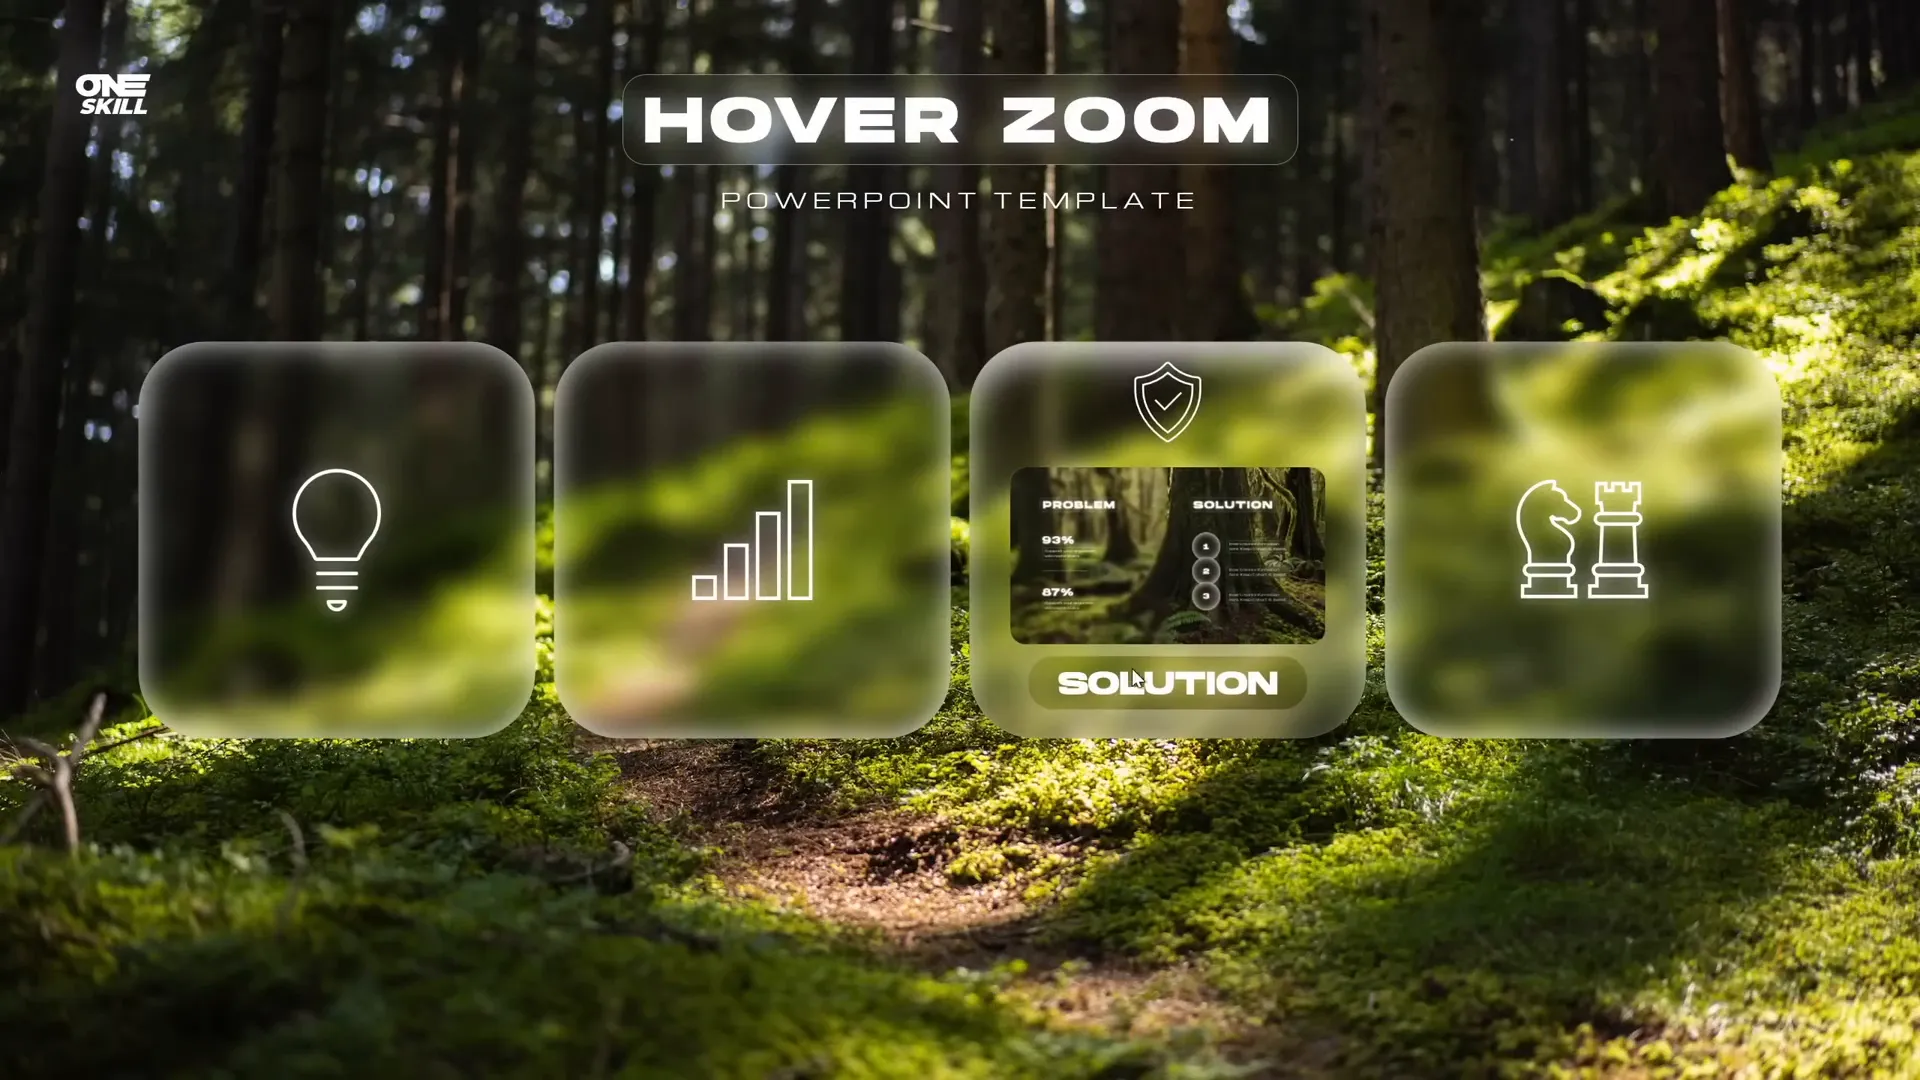
The glassmorphic effect adds a frosted glass look to your shapes, making your design modern and elegant. This effect consists of a blurred background with subtle white highlights around the edges. Here’s how to create it:
- Duplicate the Background Photo: Select your background image, hold down the Ctrl key, and drag to create a copy.
- Apply Blur Effect: Right-click the duplicated image, go to Artistic Effects, and select Blur. Adjust the blur amount to around 30 for a soft, frosted effect.
- Copy the Blurred Image: Right-click the blurred image and click Copy, then delete the blurred image from the slide.
- Set Slide Background Fill: Right-click the slide background, select Format Background, choose Picture or texture fill, and click Clipboard to paste the blurred image as the background fill.
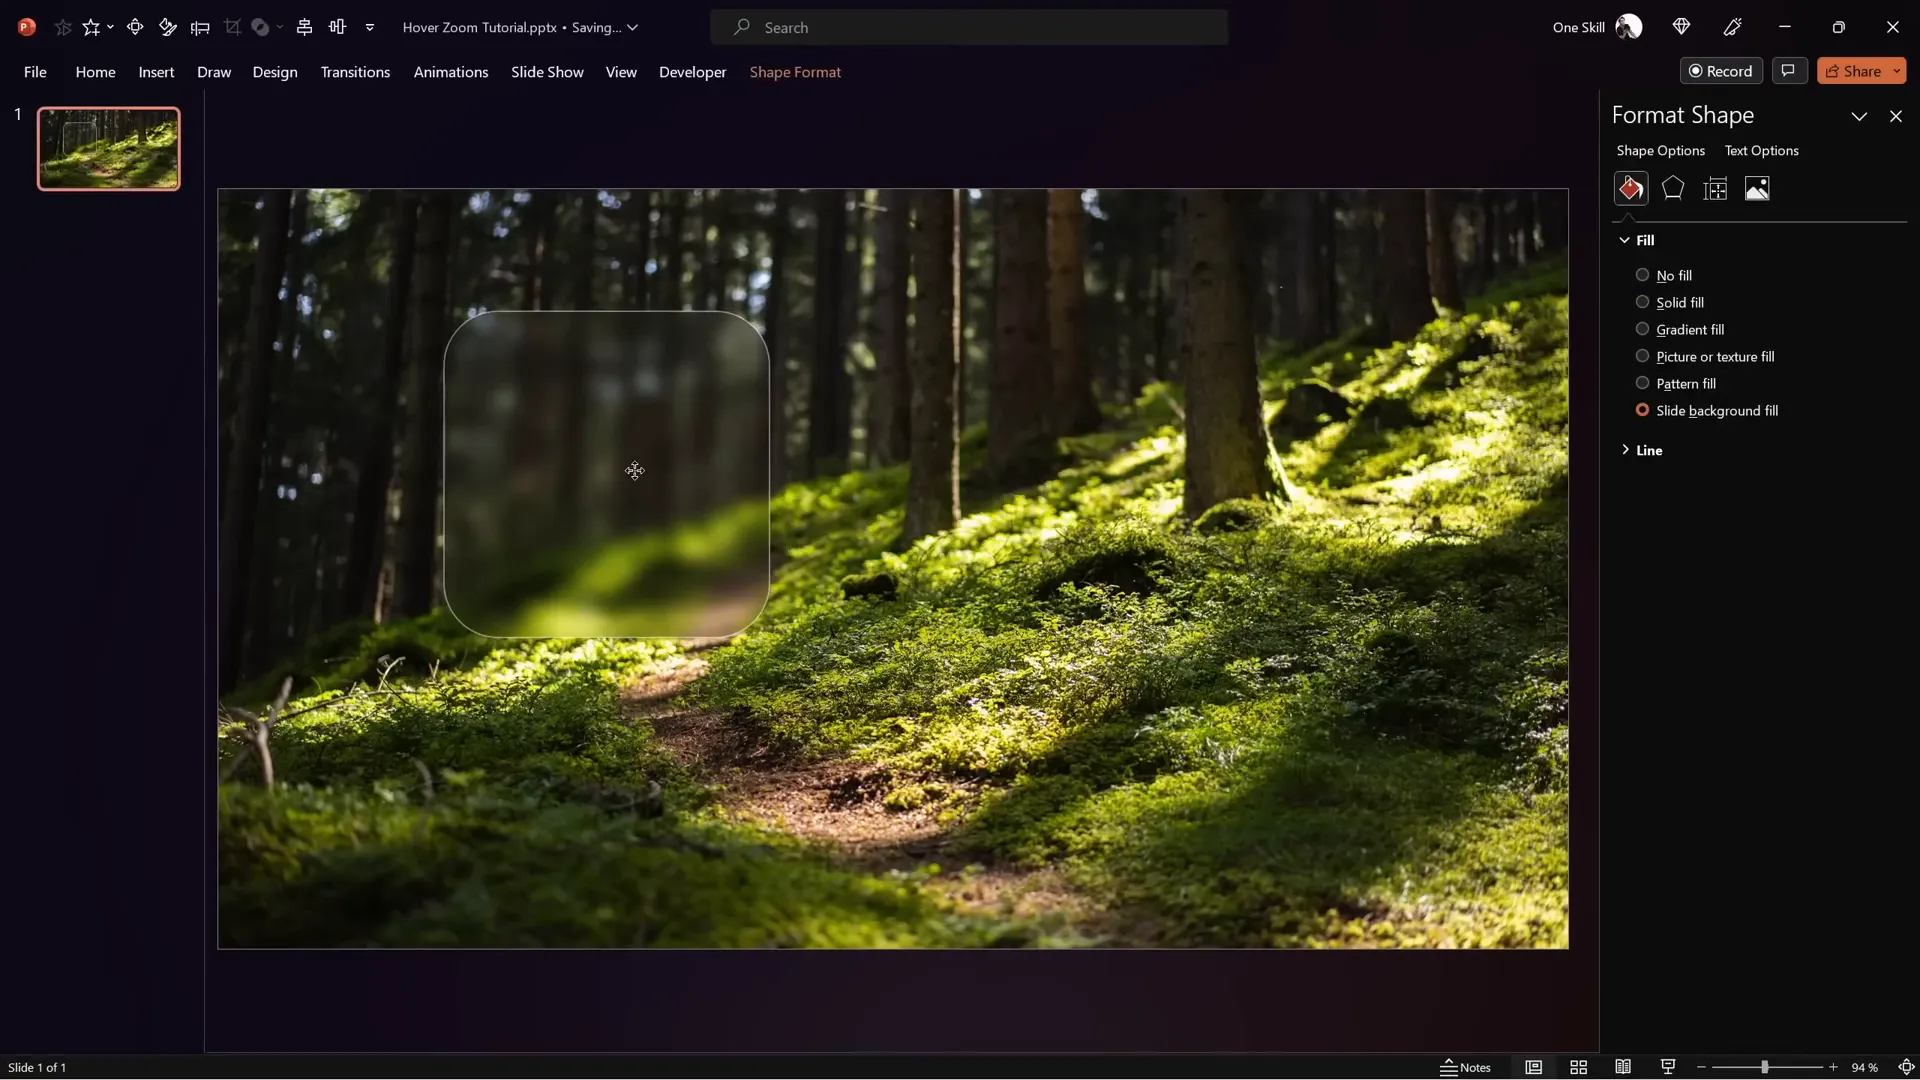
- Insert a Shape: Go to Insert > Shapes and select a rounded rectangle or any shape you prefer.
- Apply Slide Background Fill to the Shape: Right-click the shape, choose Format Shape > Fill > Slide Background Fill. The shape will now show the blurred background within it, creating a glassmorphic look.
- Add Frosty Edges: In the Format Shape pane, add an Inside Shadow with white color and set the blur to 20 points to simulate frosty edges.
- Resize and Center the Shape: Set the shape’s height and width to 7 cm and center it perfectly on the slide.
This method allows the shape to adapt dynamically as you move it around the slide, maintaining the glassmorphic effect consistently.
Designing the Hover Animation
Hover animations create an interactive experience where elements respond visually when the mouse cursor moves over them. To build a hover zoom effect, follow these steps:
- Prepare Elements: Copy your icon, logo, slide title, and subtitle from a previous slide or create new ones. Use stylish fonts like Hanson for the title and Michroma for the subtitle.
- Align Icon and Shape: Place the icon in the center of the glassmorphic rounded rectangle.
- Add a Text Box: Insert a text box below the icon with placeholder text like “Hover” to later change to your actual label (e.g., “Opportunity”).
- Duplicate the Slide: Create a copy of the slide for the hover state.
- Adjust Hover State: On the duplicate slide, reduce the icon size, move it upwards, and enlarge the text box font size for emphasis.
- Apply Morph Transition: Select both slides, go to Transitions, and apply the Morph transition with a short duration (around 0.135 seconds) for smooth animation.
- Set Up Mouse Over Actions: On the first slide, select the rounded rectangle, go to Insert > Action, choose the Mouse Over tab, and hyperlink to the next slide.
- Return Action: On the second slide, assign a mouse over action on the background photo to hyperlink back to the previous slide.
This setup creates a seamless hover animation where moving the mouse over the card triggers the zoom and label to appear, enhancing interactivity without clicking.
Structuring Your Presentation with Sections
Organizing your presentation into sections is a smart practice, especially when working with complex slide zooms and hover animations. This approach helps you manage content efficiently and maintain clarity in your slide deck.
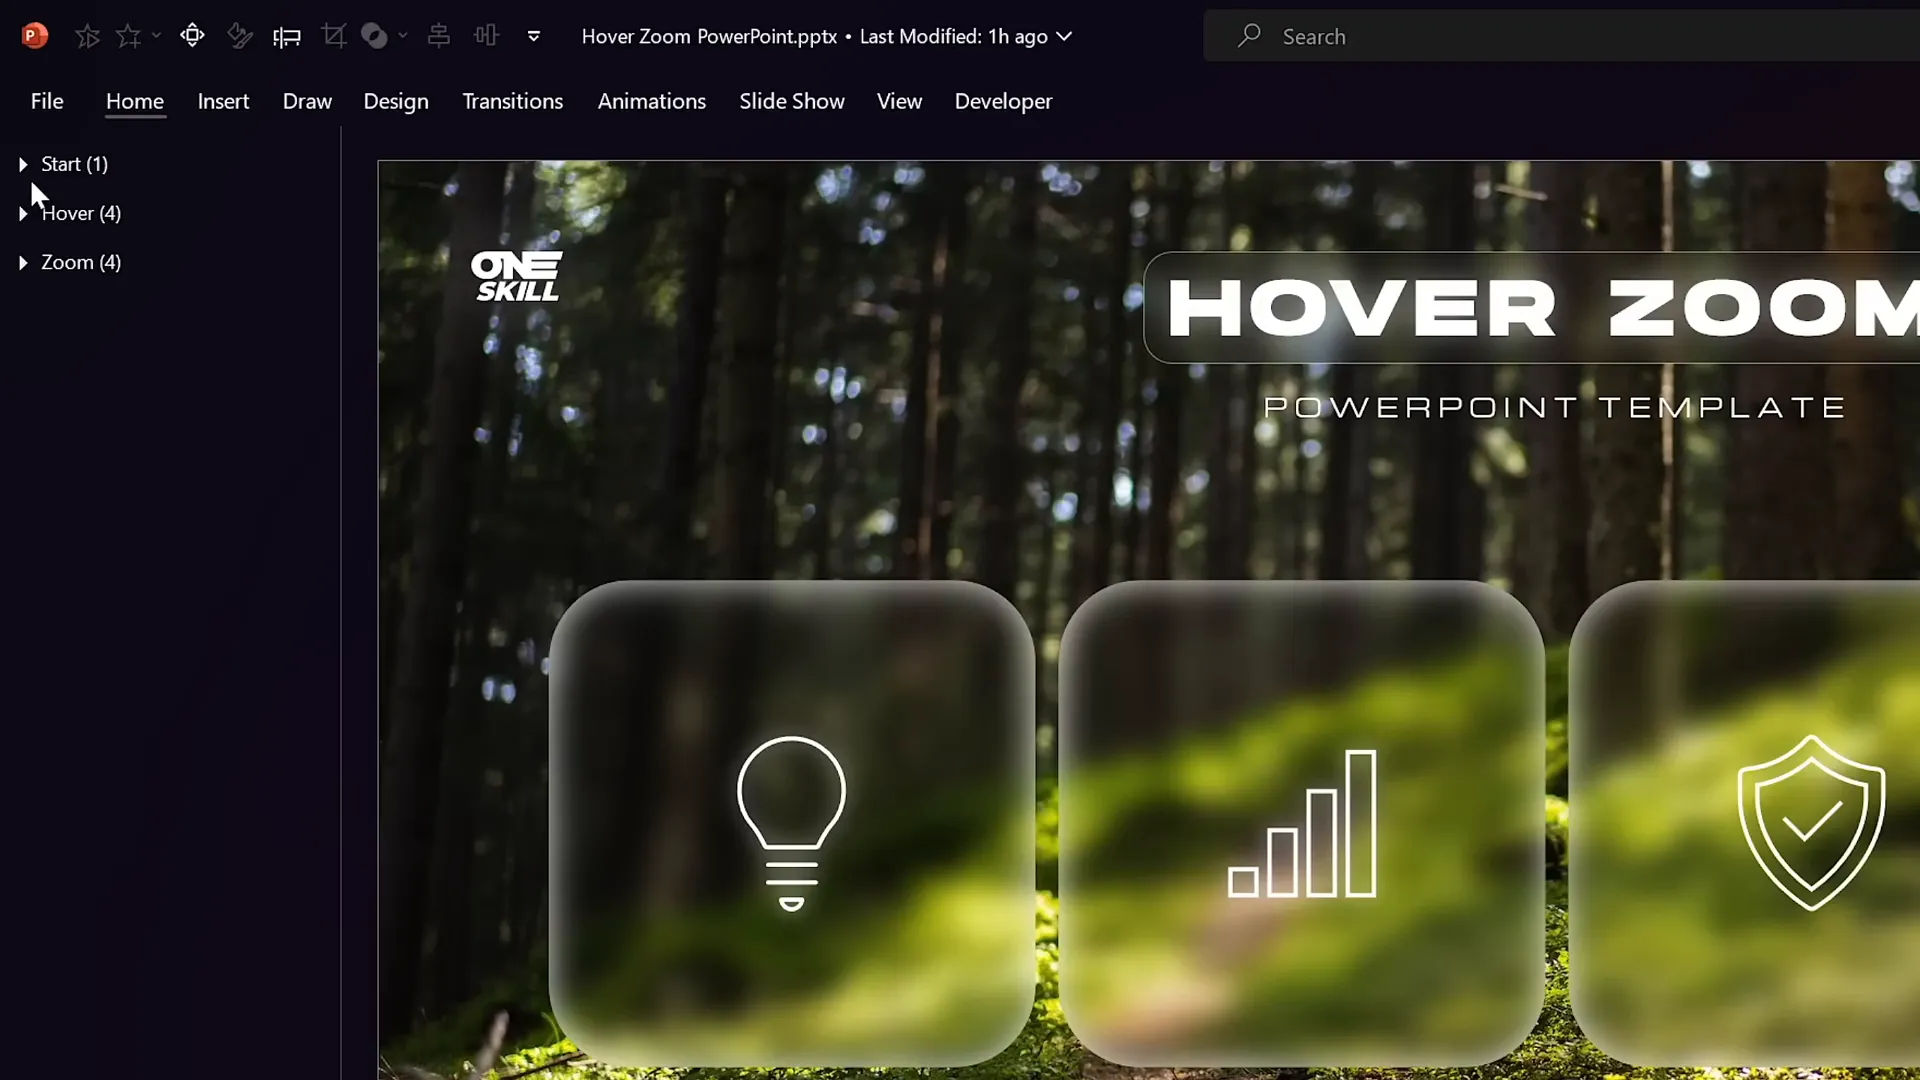
Typical sections for this hover zoom template include:
- Start Section: Contains the home or starting slide.
- Hover Section: Comprises multiple hover slides, each representing a different card with active hover effects.
- Zoom Section: Includes the slides you want to zoom into, providing detailed content.
Using sections allows you to visually separate areas of your presentation and apply zooms or transitions selectively, making the editing and navigation process more manageable.
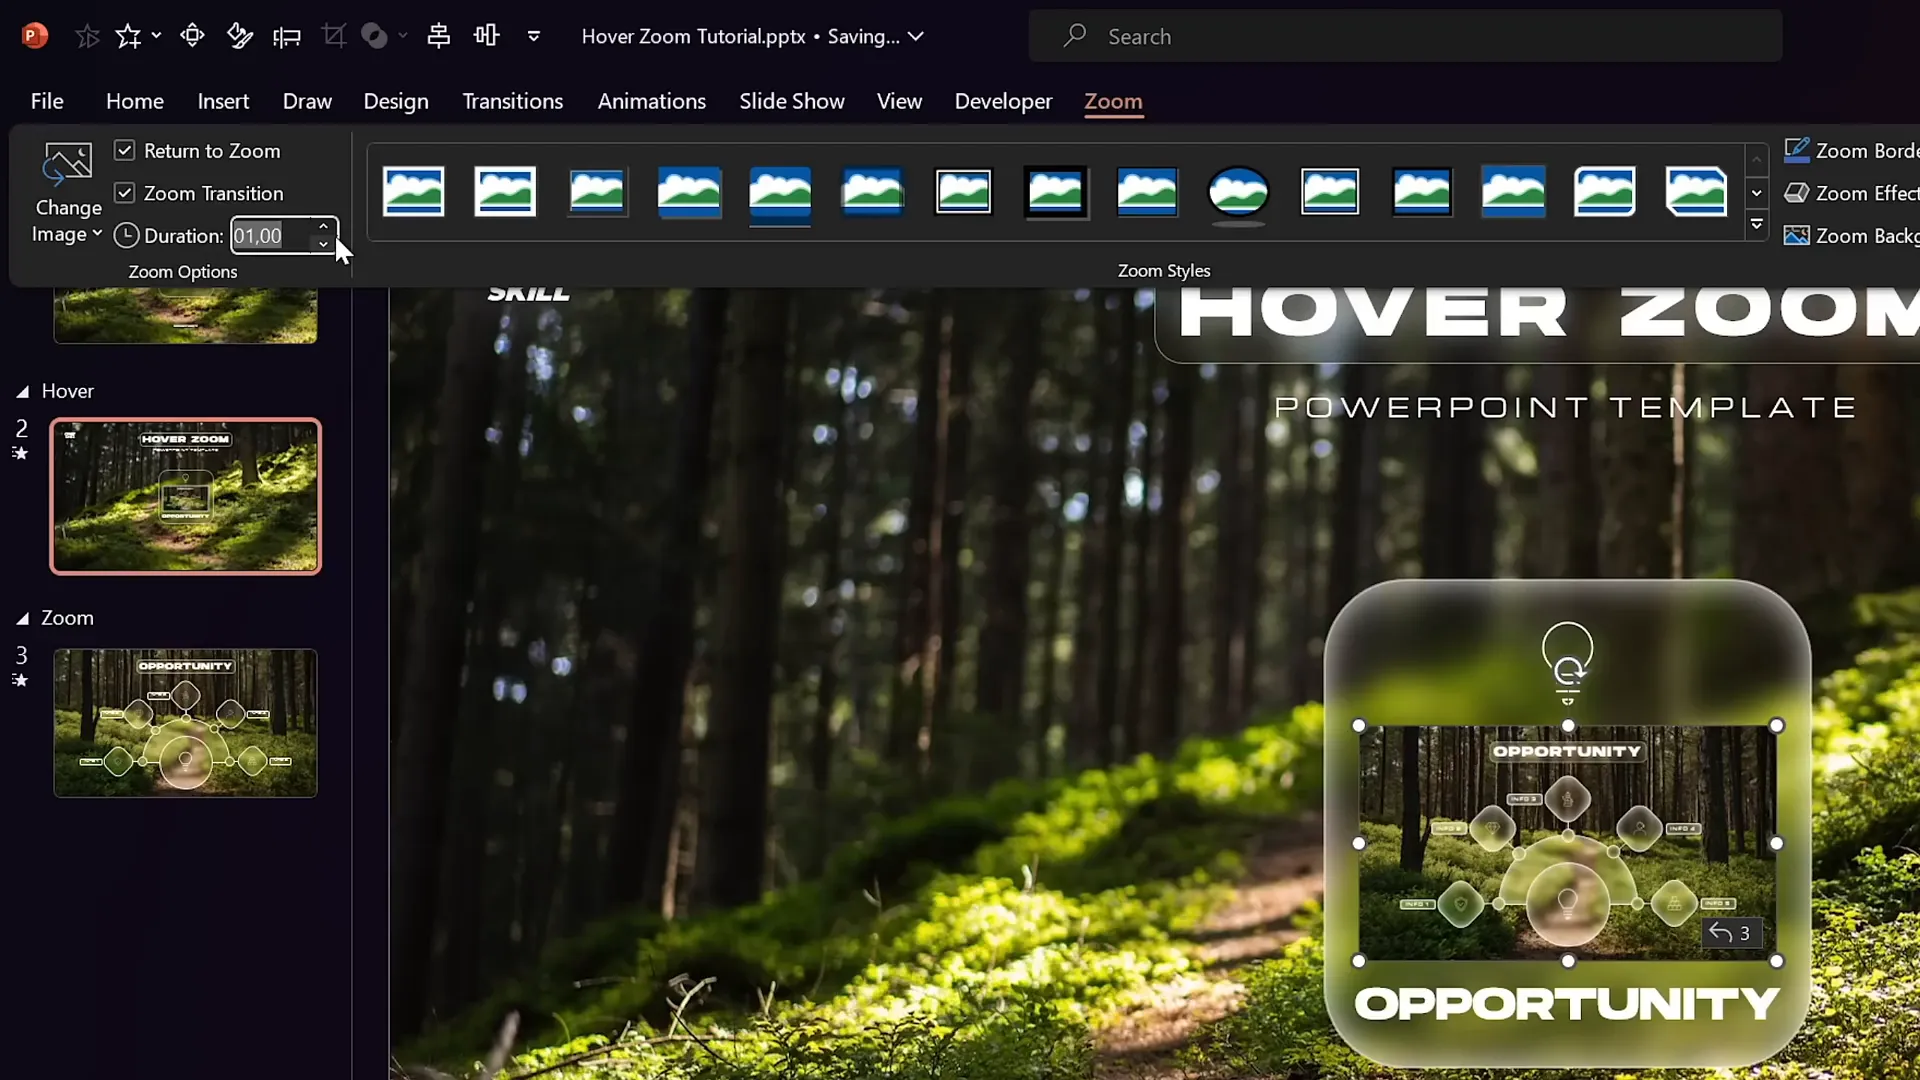
Adding Slide Zooms for Interactive Navigation
Slide zooms are powerful tools that allow you to jump into specific slides or sections dynamically. Here’s how to add and customize them within your hover zoom design:
- Insert Slide Zoom: Drag any slide thumbnail onto the target slide or go to Insert > Zoom > Slide Zoom and select the desired slide.
- Resize and Position: Fit the slide zoom neatly into your card or shape, ensuring it complements the overall design.
- Enable Return to Zoom: In the zoom options, activate Return to Zoom so users can navigate back after zooming in.
- Adjust Zoom Duration: Set a fast zoom duration (e.g., 0.5 seconds) for smooth transitions.
- Style the Slide Zoom: Apply styles like Reflected Rounded Rectangle for a polished look. You can disable reflection if preferred.
- Duplicate Slide Zoom: Copy the slide zoom and paste it onto your starting slide to keep consistency.
These steps integrate slide zooms into your hover cards, allowing viewers to explore detailed content interactively.
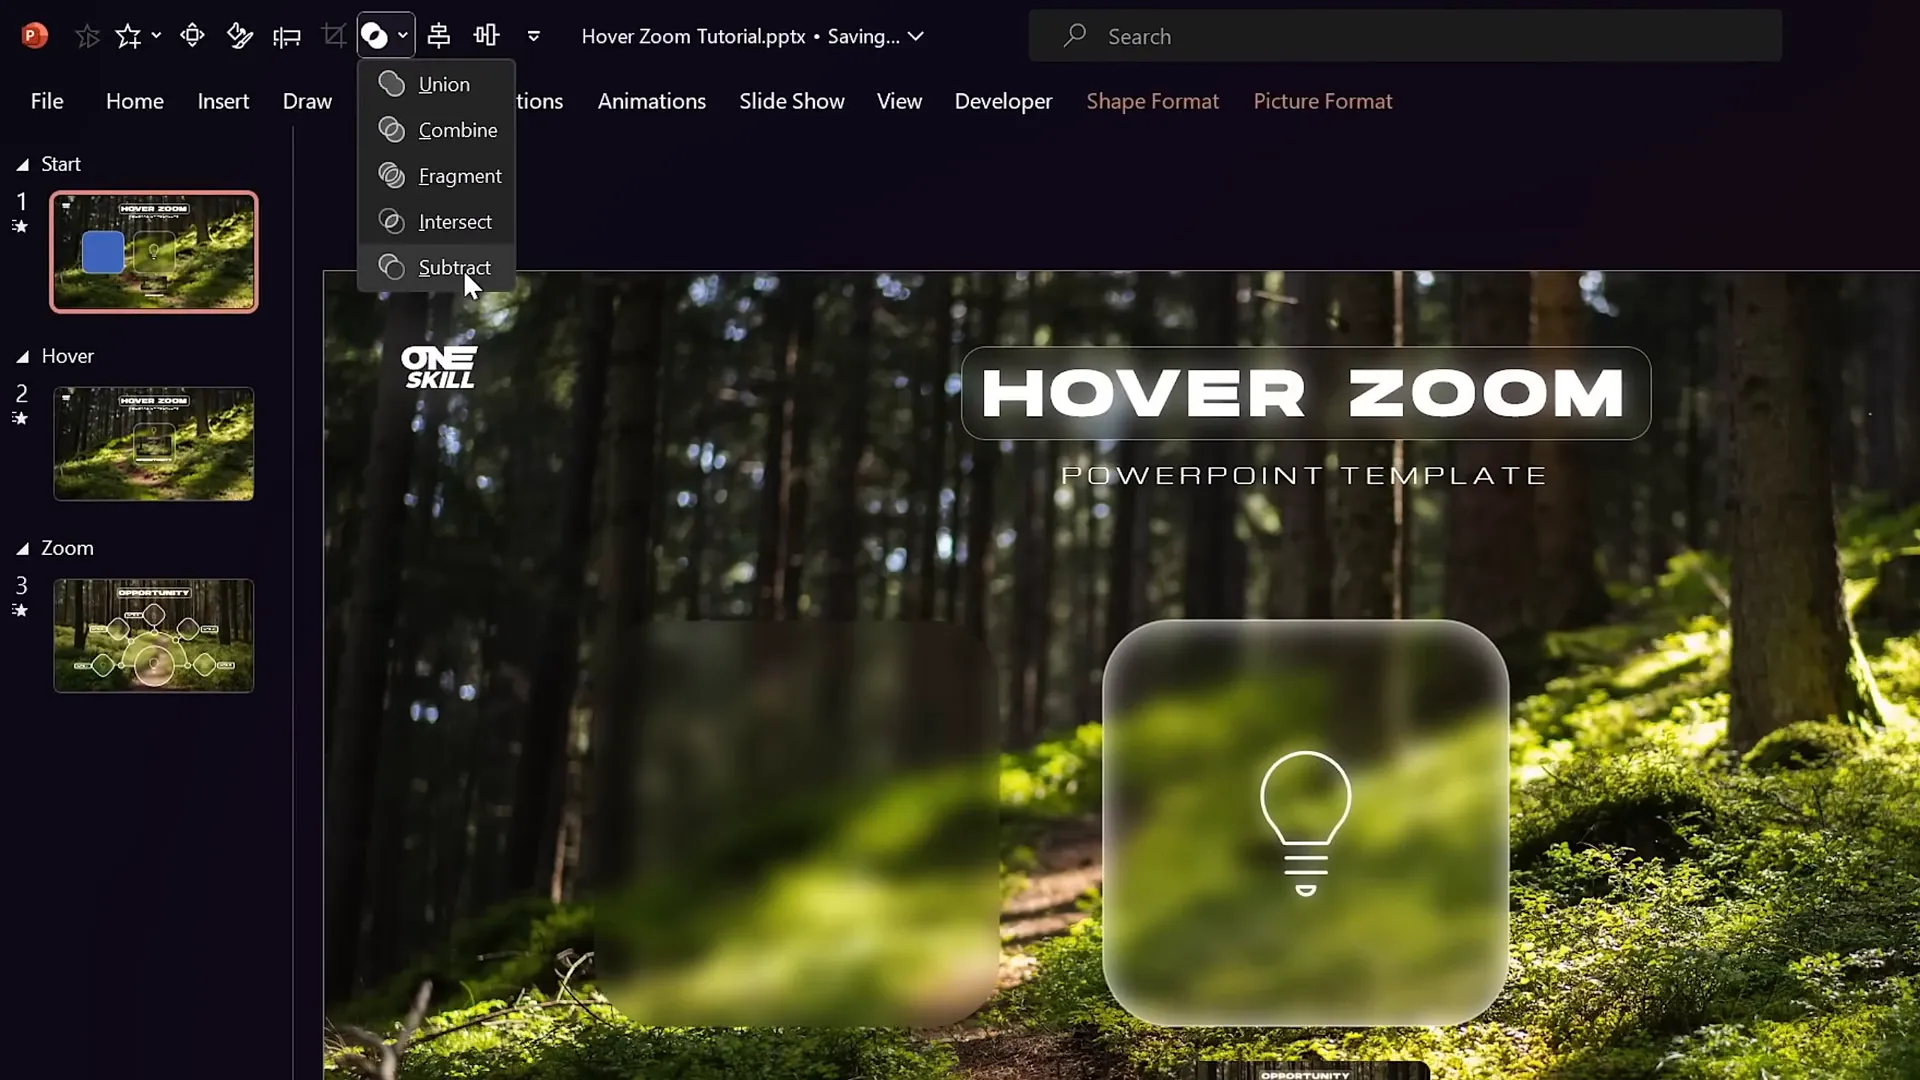
Creating a Mask to Highlight Slide Zooms
To focus attention on the slide zoom and prevent distraction from other slide elements, creating a mask effect is essential. This mask hides everything except the zoom card area, enhancing the hover experience.
Follow these steps to create the mask:
- Duplicate the Glassmorphic Shape: Copy the rounded rectangle and change its fill color to a visible color like blue for identification.
- Position the Shape: Center this shape exactly over the blurred card area.
- Select Background and Shape: Hold Shift and select the background photo and the blue rectangle.
- Merge Shapes – Subtract: Go to Shape Format > Merge Shapes and choose Subtract. This punches a hole in the background photo where the rectangle overlaps.
- Rename Mask: In the selection pane, rename the resulting shape to “Mask” and bring it to the top layer.
- Adjust Layer Order: Bring the slide title, subtitle, and logo above the mask to keep them visible.
- Copy Mask to Other Slides: Paste the mask onto related slides, replacing old backgrounds.
- Add Mouse Over Action: Assign a mouse over action on the mask to hyperlink back to the previous slide, enabling easy navigation.
This masking technique ensures that the slide zoom and relevant text stand out, creating a focused and polished user experience.

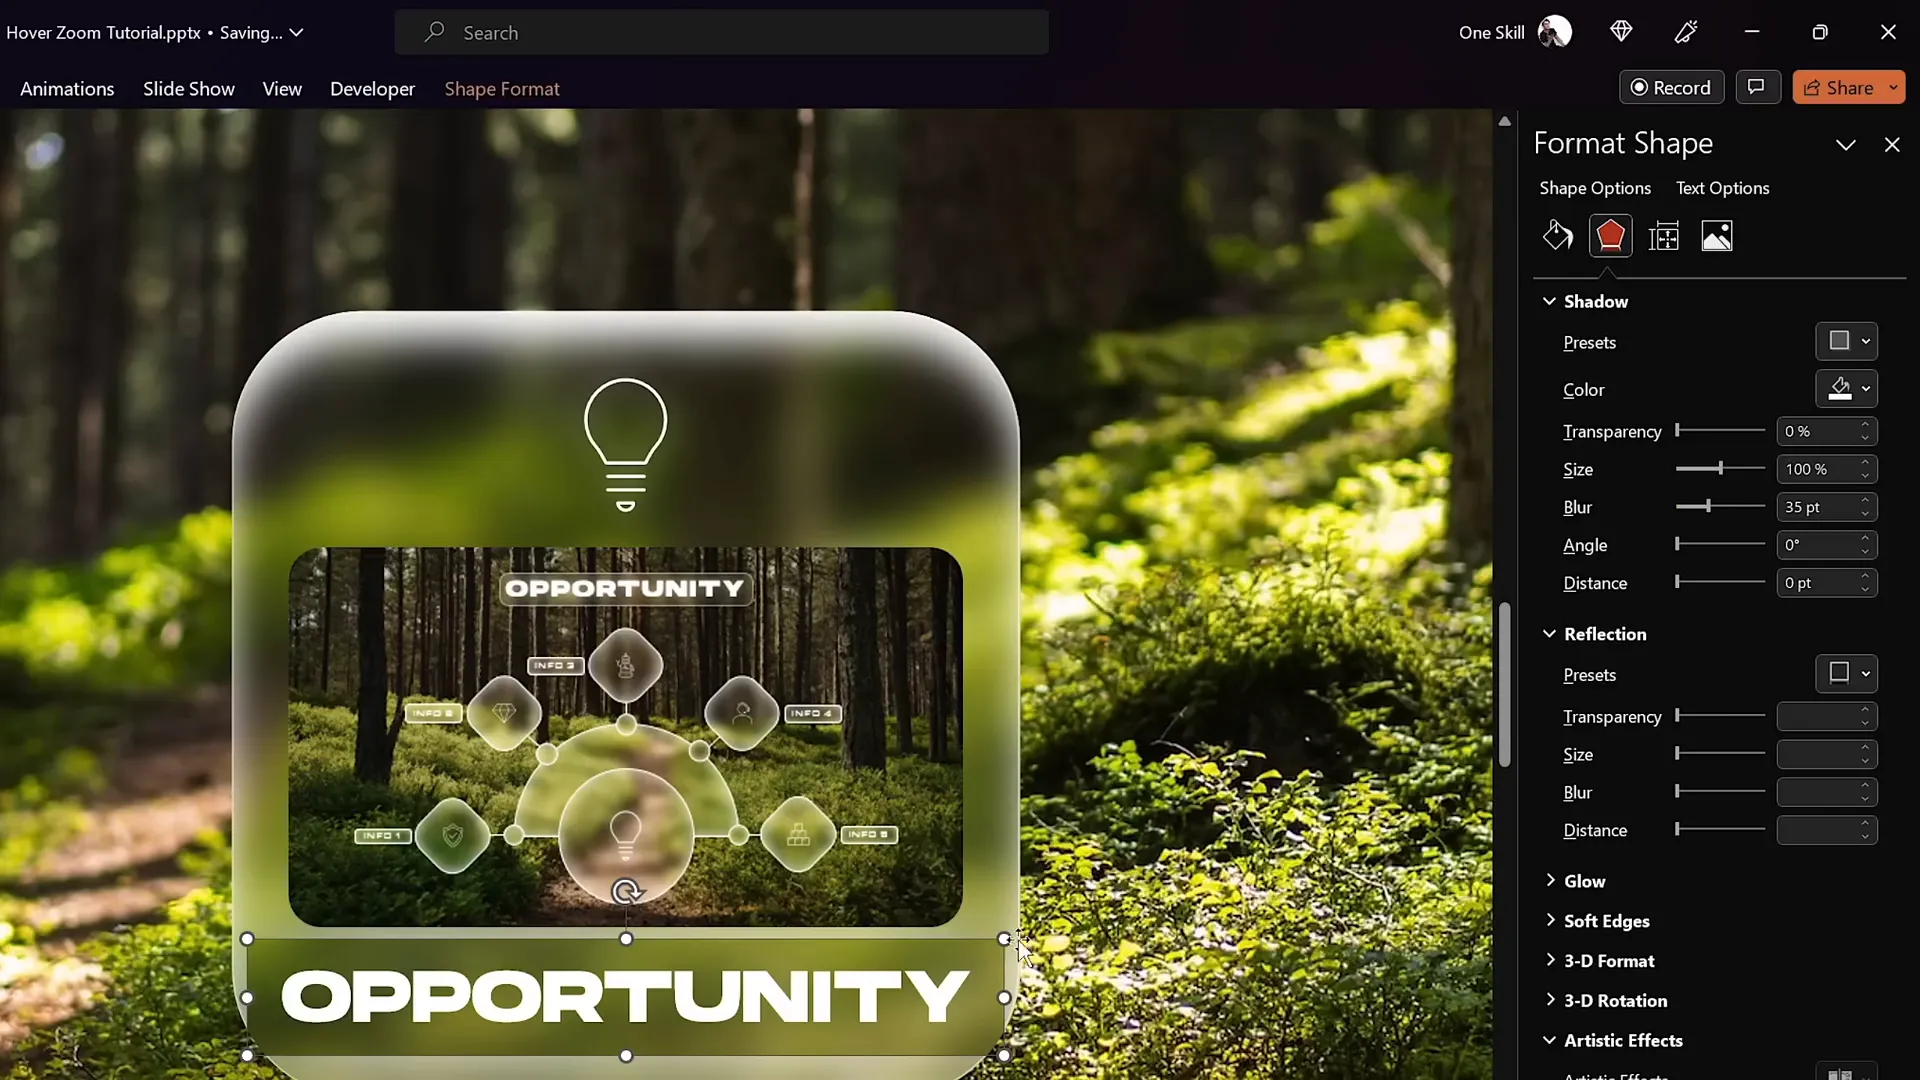
Enhancing Hover Effects with Shadows and Rounded Corners
To make your hover card visually pop when selected, adding shadow effects and rounded corners enhances the perception of interactivity. Here’s how to style these elements:
| Effect | Settings | Purpose |
|---|---|---|
| Inside Shadow | White color, no transparency, blur and distance adjusted for a frosty highlight | Creates the illusion of the card being selected or highlighted |
| Outside Shadow on Text Box | White color, zero transparency, size 100%, blur 35 points | Adds depth and emphasis to text labels |
| Rounded Rectangle Shape | Use the edit shape feature to convert text box into rounded rectangle, adjust corner roundness | Softens edges for a modern, friendly look |
Additionally, adjust text box margins and vertical alignment to ensure the text sits perfectly inside the shape. Copy these styled elements across your slides to maintain consistency and ensure smooth morph transitions.
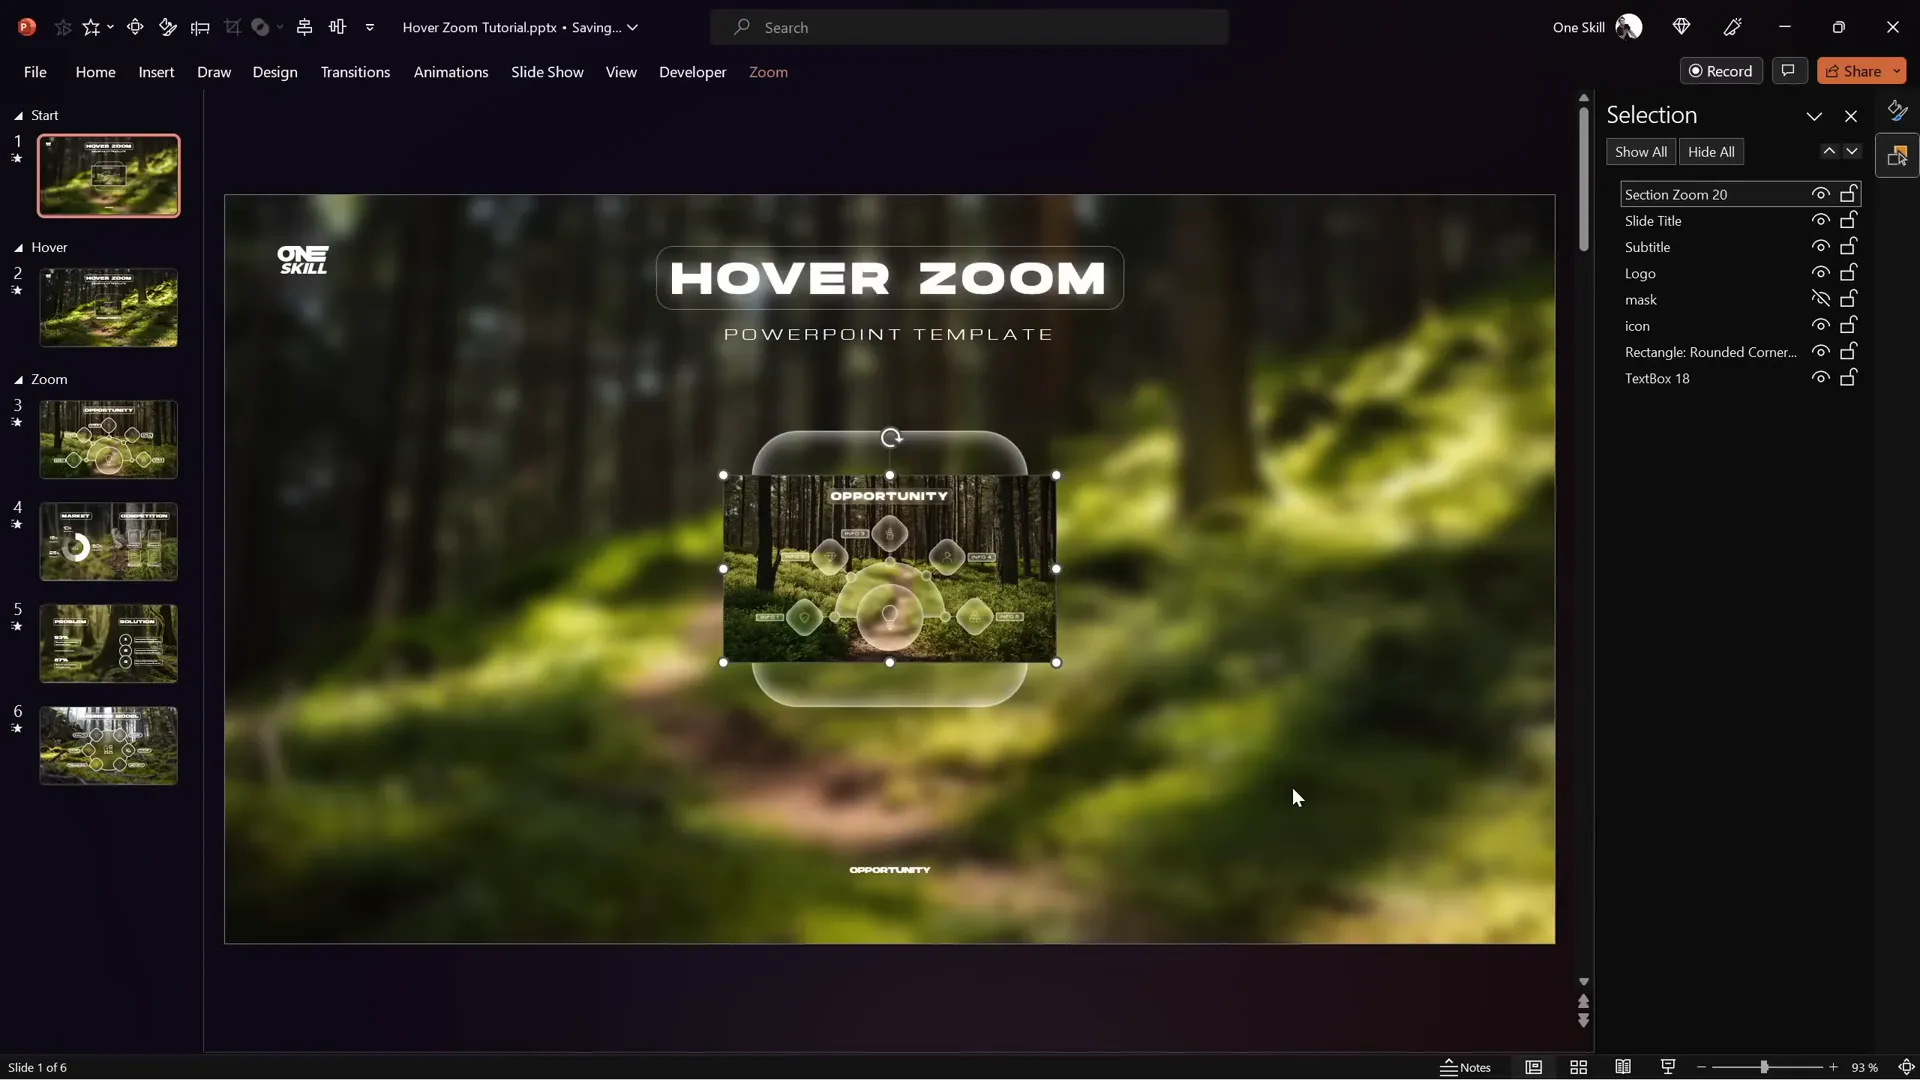
Using Section Zooms for Multi-Slide Presentations
Sometimes, you may want to zoom into multiple slides consecutively rather than a single slide, especially when presenting detailed content. Section zooms are perfect for this use case.
Here’s how to set up and use section zooms effectively:
- Add Slides to Zoom Section: Create a dedicated section in your presentation for zoom slides. Copy and paste all relevant slides here, preserving formatting.
- Insert Section Zoom: On your starting slide, go to Insert > Zoom > Section Zoom and select the zoom section containing your slides.
- Configure Zoom Options: Activate Return to Zoom and set the zoom duration to a fast speed (e.g., 0.5 seconds).
- Style the Section Zoom: Apply rounded corners and remove reflections for a clean appearance.
- Replace Slide Zooms: Remove old slide zooms from your hover slides and insert the new section zooms instead.
- Apply Slide Transitions: Select all slides in the zoom section and apply a transition such as Uncover from the right to create a smooth flow between slides.
- Adjust Layering: Ensure the section zoom is behind masks or other overlapping elements for smooth animations.
Section zooms allow you to present multiple slides in a coherent sequence, then return to your main slide seamlessly, making your presentation more dynamic and engaging.
Frequently Asked Questions (FAQ)
What is the difference between Slide Zoom and Section Zoom?
Slide Zoom zooms into a single slide, perfect for highlighting one piece of content. Section Zoom zooms into a group of slides organized into a section, allowing you to present multiple slides continuously before returning.
Can I use the hover zoom effect on any version of PowerPoint?
The hover zoom effect relies on the Morph transition and Zoom features, which are available in PowerPoint 365 and PowerPoint 2019. Older versions may not support these features fully.
How do I ensure smooth transitions between slides during hover animations?
Using the Morph transition with a short duration creates seamless animations. Also, ensure that elements like text boxes and shapes are duplicated and consistent between slides to avoid flickering.
Where can I find free images and fonts for my PowerPoint slide design?
High-quality free images can be found on Unsplash. Recommended fonts for this tutorial include Hanson and Michroma.
How can I create the glassmorphic effect on shapes?
Duplicate the background image, apply a blur effect, set it as the slide background fill, and then apply the slide background fill to your shape. Add an inside white shadow for frosty edges to complete the look.
Can I customize the hover text labels?
Yes! Replace the placeholder text (e.g., “Hover”) with your desired labels like “Opportunity” or any other relevant text. Adjust font size and styling to fit your design.
Conclusion
Mastering the hover zoom effect in PowerPoint opens up a world of possibilities for creating visually compelling and interactive presentations. By combining glassmorphic design, smooth morph transitions, slide and section zooms, and clever masking techniques, you can craft slides that captivate and engage your audience effortlessly.
Remember, the key to excellent PowerPoint slide design lies not only in aesthetics but also in usability and intuitive navigation. The hover zoom technique elegantly balances form and function, making your presentations stand out.
Start experimenting with these techniques today, and transform your PowerPoint slides into dynamic storytelling tools that leave a lasting impression.
Happy designing!
Check out the full video: PowerPoint HOVER ZOOM Tutorial ✨700K Special✨ ✅ Free Slides


