
PowerPoint slide design is an essential skill for anyone looking to create visually stunning and professional presentations. Whether you’re preparing for a business pitch, educational lecture, or creative showcase, the way your slides look and animate can make a huge difference in engaging your audience. In this comprehensive guide, you’ll learn how to create impressive PowerPoint slides featuring beautiful rounded hexagons filled with background images, enhanced with smooth animations — all designed to elevate your presentation game in 2024.
Throughout this tutorial, we’ll walk you through each step of designing these creative slides from scratch, including how to use external tools to overcome PowerPoint’s limitations, how to apply slide background fills to shapes, and how to add animations that bring your slides to life. By the end, you’ll be able to replicate this modern, sleek design style and customize it effortlessly for your own projects.
Let’s dive in and become unstoppable PowerPoint creators!
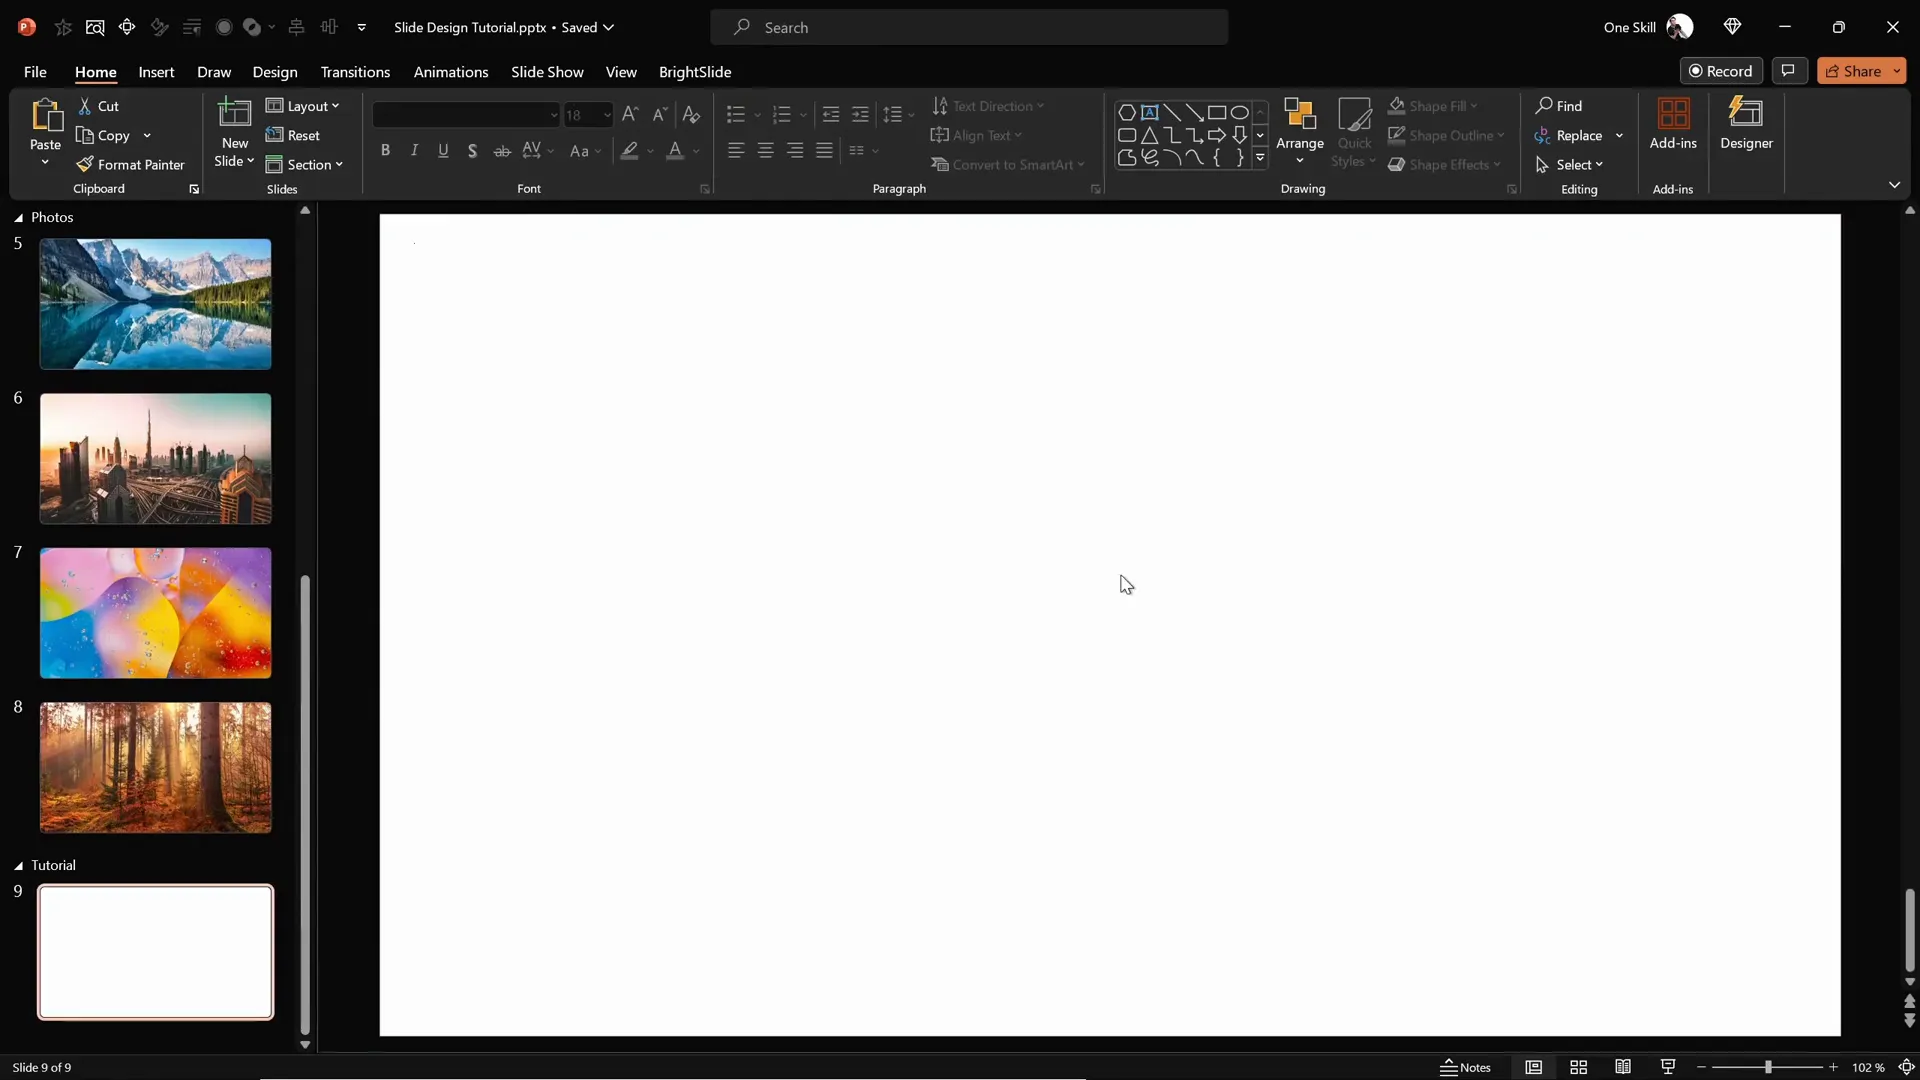
Table of Contents
- Preparing the Slide Background
- Adding a Semi-Transparent Overlay
- Using Slide Background Fill for Shapes
- Creating Rounded Hexagons with Figma
- Importing and Editing Rounded Hexagons in PowerPoint
- Arranging and Grouping Hexagons for Design
- Applying Animations to Hexagons
- Finalizing the Slide with Text and Logo
- Customizing Slide Appearance Easily
- Frequently Asked Questions
- Conclusion
Preparing the Slide Background
The first step to creating an eye-catching PowerPoint slide is setting a stunning background that sets the tone for your entire design. Instead of using solid colors or gradients, using a high-quality photograph can add depth and interest to your slide.
For this tutorial, you can download free, beautiful photos from Unsplash.com. These images are royalty-free and perfect for professional presentations.
Once you select your photo, here’s how to apply it as the slide background:
- Copy the photo (Ctrl + C) from your image viewer or browser.
- Open your blank PowerPoint slide.
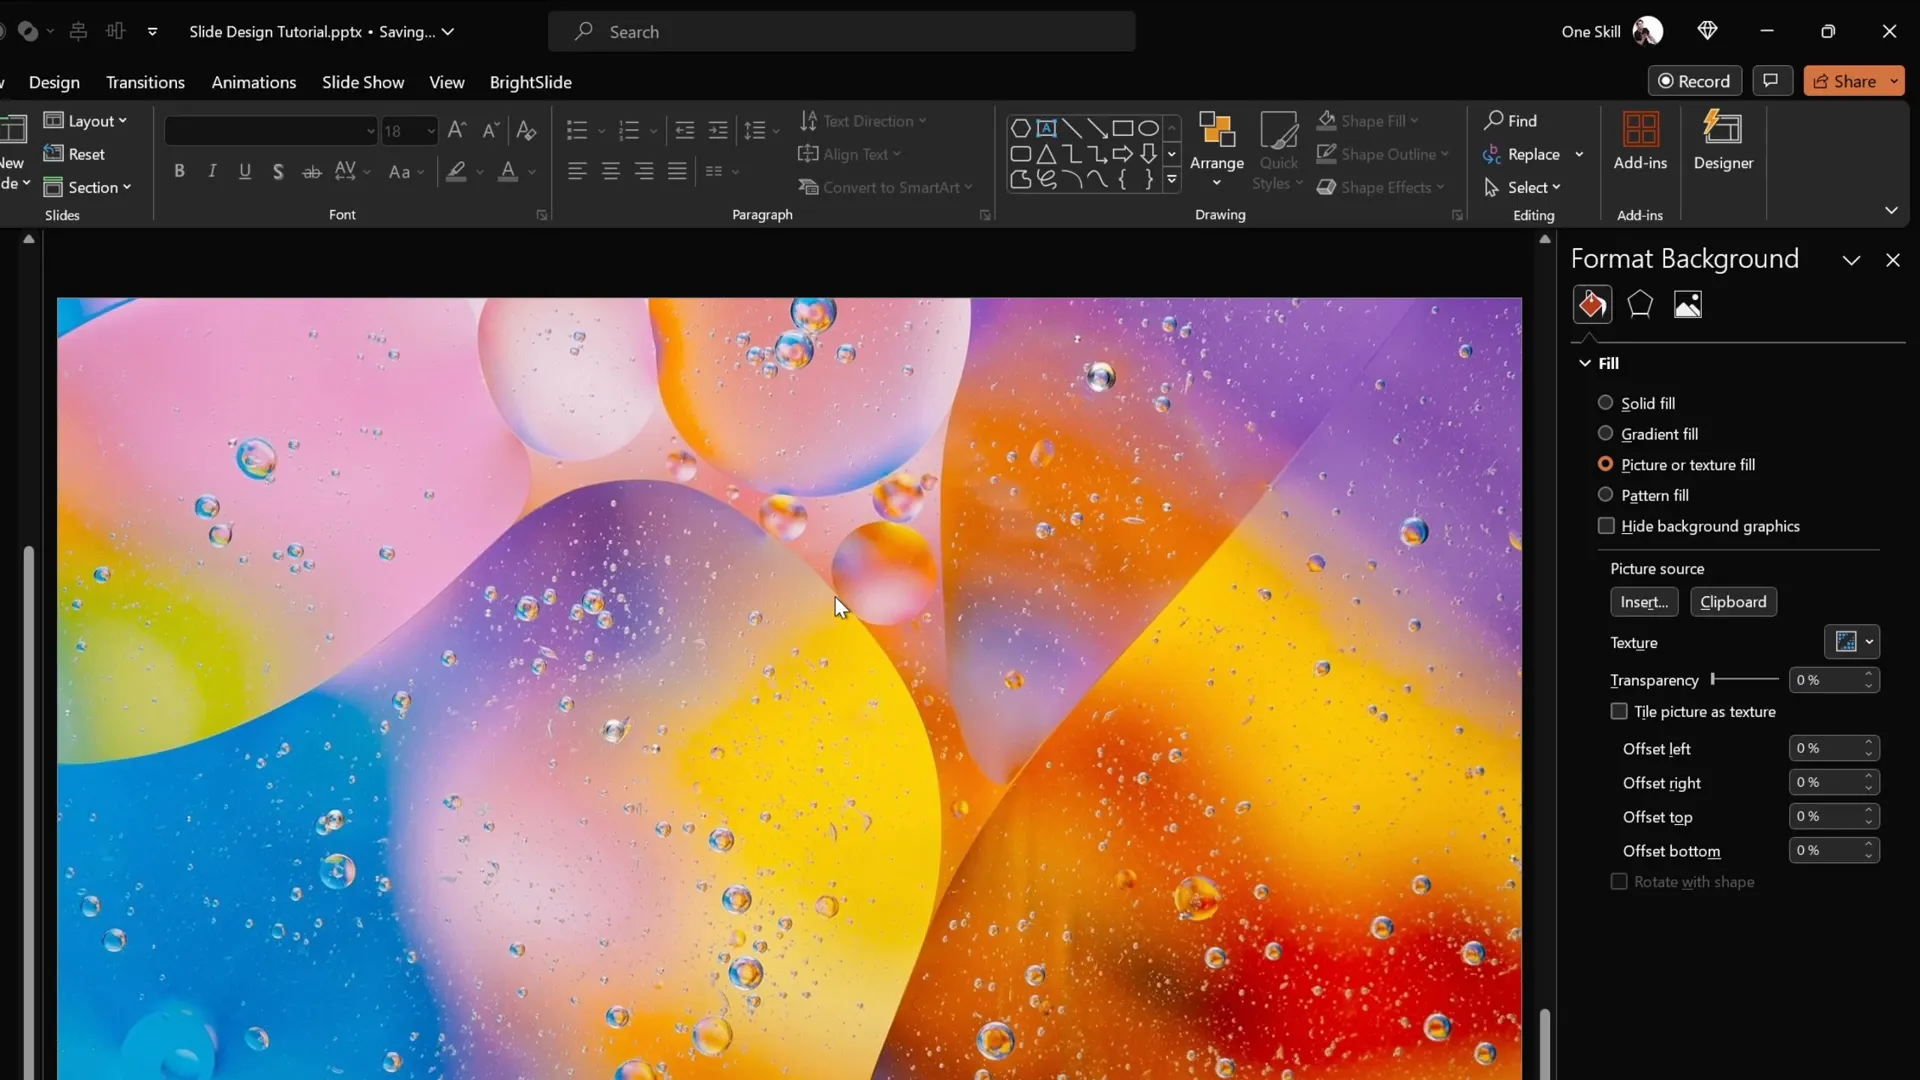
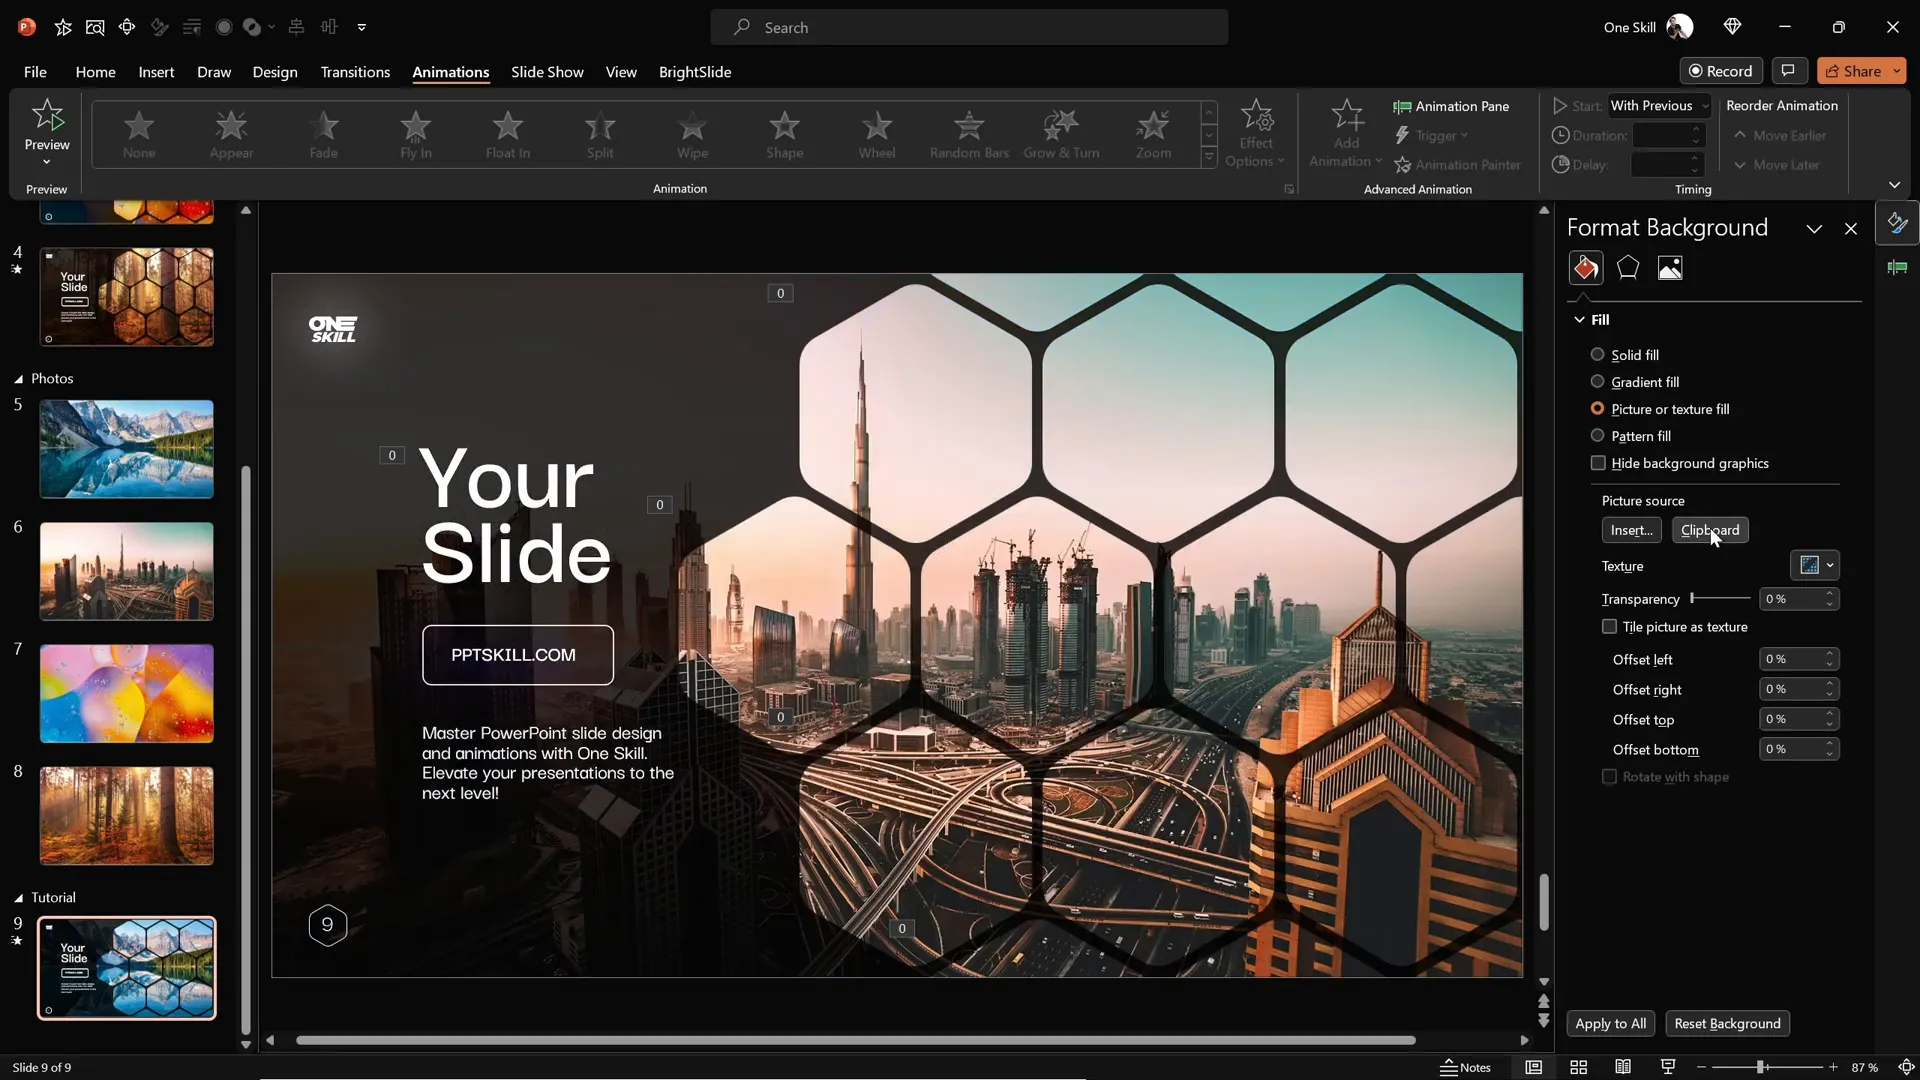
- Right-click anywhere on the slide and select Format Background.
- In the Format Background pane, choose Picture or texture fill.
- Click on Clipboard to paste the copied photo as the slide background.
Note that once the photo is set as the slide background, it cannot be selected or moved as a regular image. This is intentional, as it keeps your background fixed and prevents accidental changes.
Adding a Semi-Transparent Overlay
To improve readability and add a stylish effect over your background image, adding a semi-transparent dark overlay can be very effective. This layer will subtly darken the background photo, allowing foreground elements like text and shapes to stand out clearly.
Here’s how to add this overlay:
- Go to the Insert tab and select Shapes.
- Choose the Rectangle tool.
- Draw a rectangle that covers the entire slide, aligning it to the top-left corner.
- Fill the rectangle with black color.
- Adjust the transparency of the rectangle to around 20% so the background image is still visible through the overlay.
This overlay sets the perfect mood and contrast for your slide, making other design elements pop.

Using Slide Background Fill for Shapes
One of the standout techniques of this slide design is using shapes filled with the slide background image itself. This effect creates a seamless, integrated look where shapes appear as “windows” into the background photo.
To apply this effect:
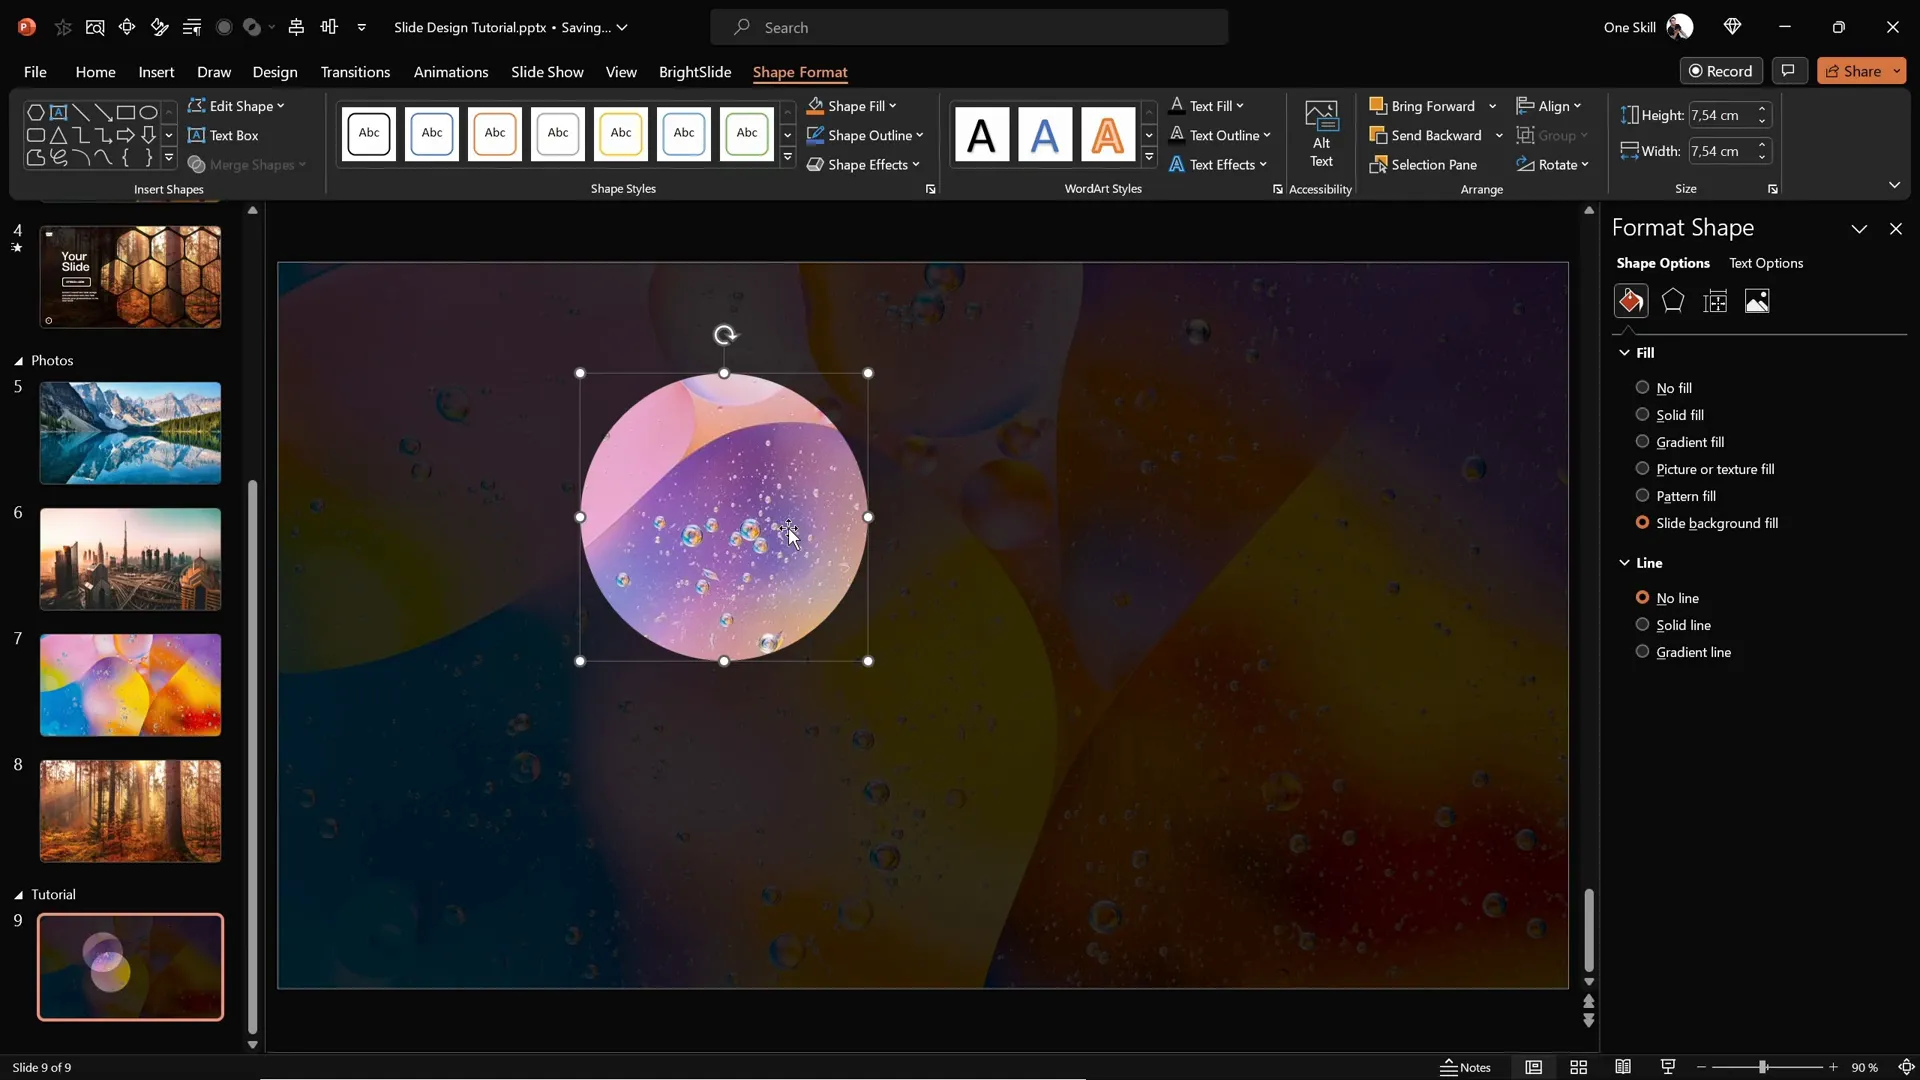
- Insert any shape you want, for example, a circle or hexagon, from the Insert > Shapes menu.
- Select the shape and open the Format Shape pane.
- Under Fill, select Slide Background Fill.
The shape will now display the exact part of the background photo that lies behind it, creating a dynamic and creative design element.
Creating Rounded Hexagons with Figma
PowerPoint does not natively support rounded hexagons — it only offers sharp-edged hexagons and rounded rectangles, but not a combination of both. To achieve the desired rounded hexagon shapes, we use a free external tool called Figma.
Figma is primarily a web-based design tool used for UI/UX design, but it’s perfect for creating custom shapes for PowerPoint.
Here’s a step-by-step guide to creating a rounded hexagon in Figma:
- Go to figma.com and sign up or log in using your Gmail account.
- Click the blue New Design File button.
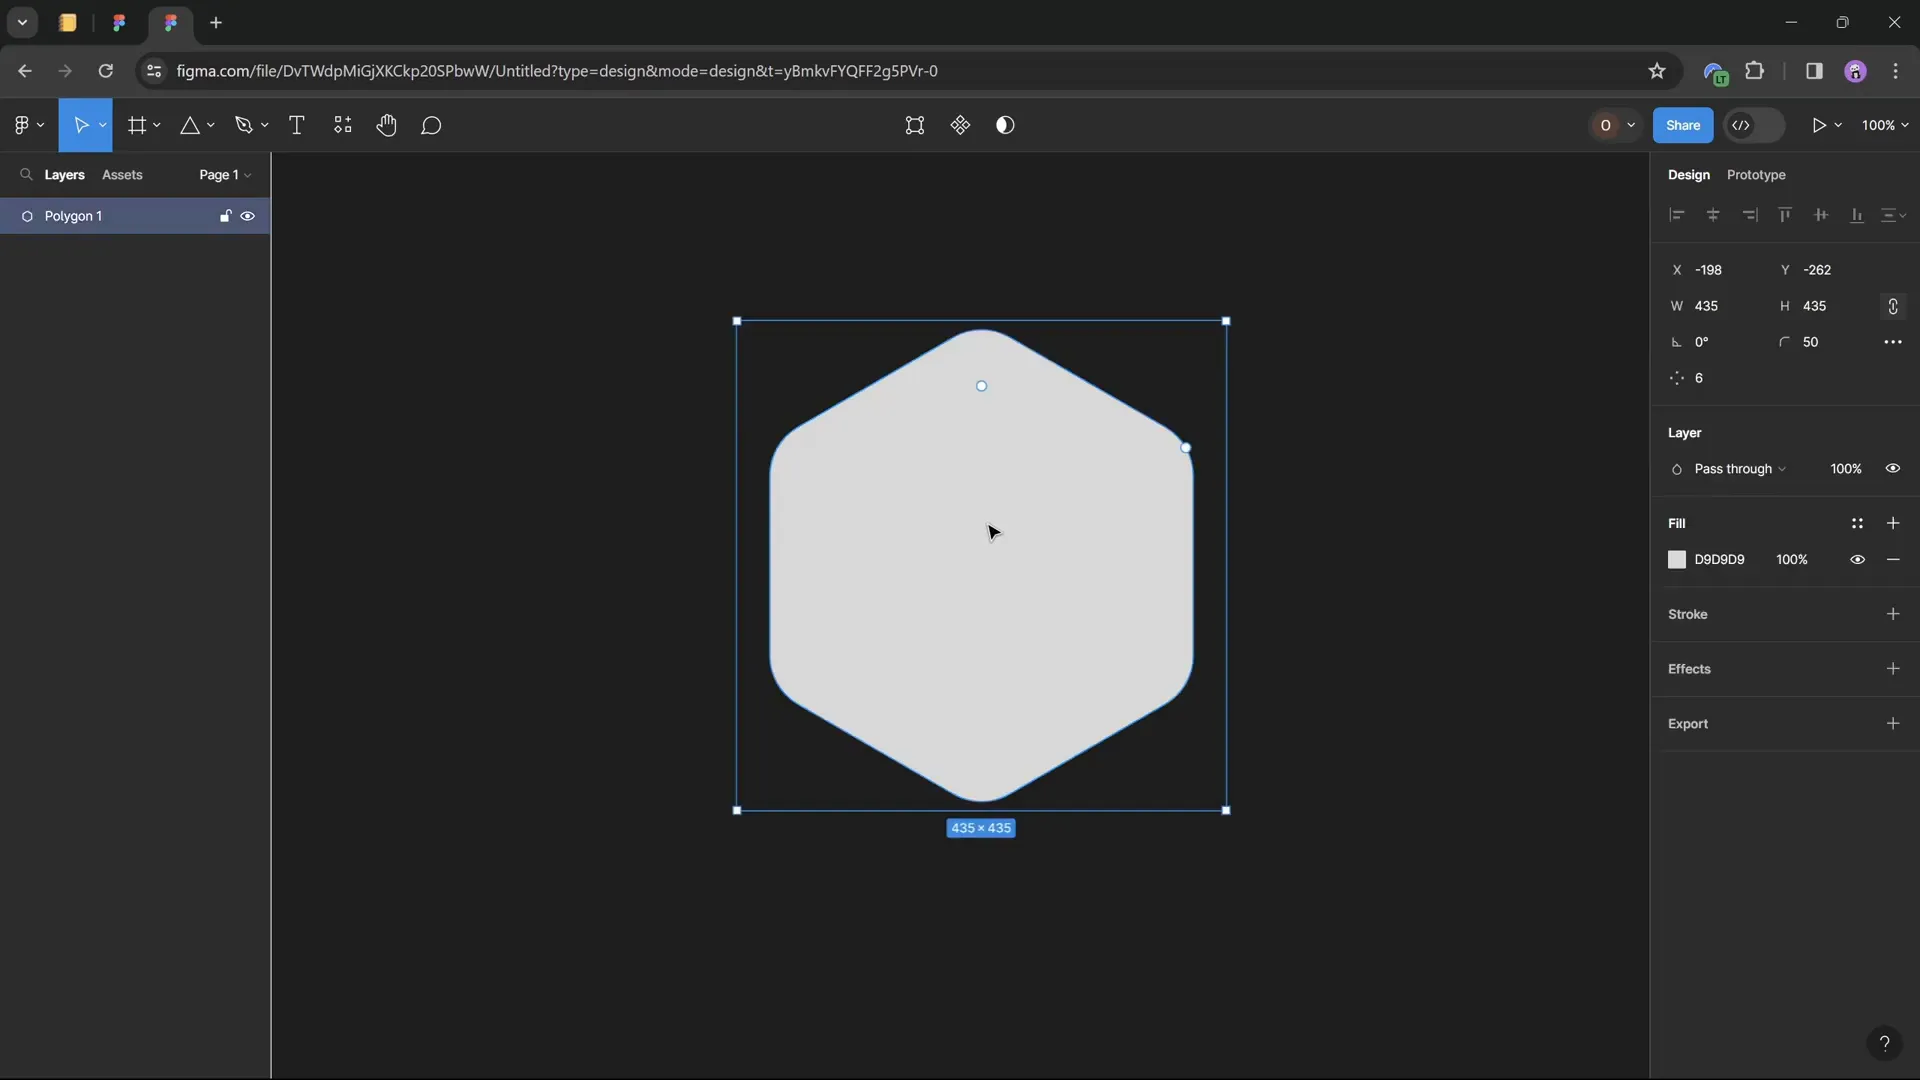
- In the toolbar, click on the Rectangle tool dropdown and select the Polygon tool (it looks like a triangle).
- Hold the Shift key and draw a polygon on the canvas.
- In the properties panel on the right, change the number of sides to 6 to create a hexagon.
- Adjust the corner radius slider to about 50 to round the hexagon’s corners.
- Select the hexagon, click Export at the bottom right, choose SVG format, and export the file.
This SVG file can now be imported into PowerPoint for use in your slide design.
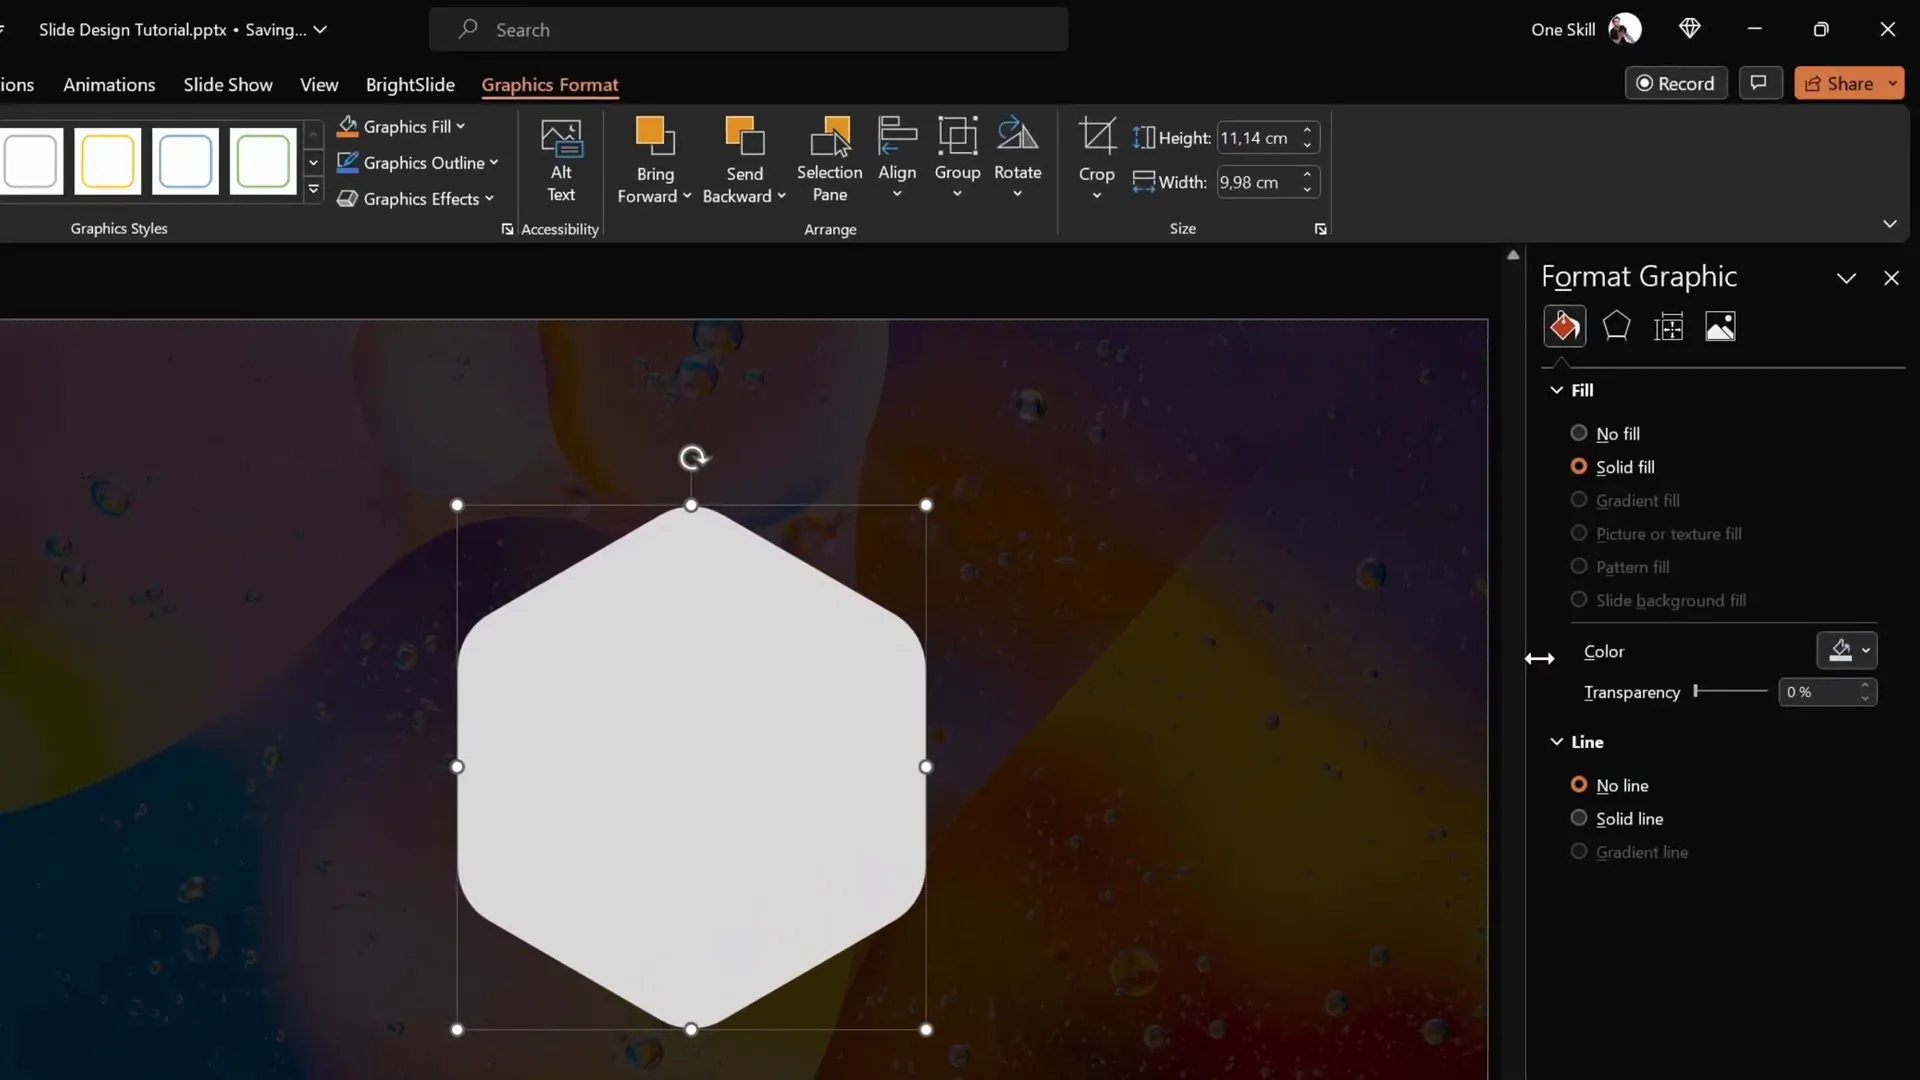
Importing and Editing Rounded Hexagons in PowerPoint
Once you have your rounded hexagon SVG, import it into PowerPoint:
- Go to Insert > Pictures > This Device and select your exported SVG hexagon.
- Click Insert to add it to your slide.
At first, you might notice some fill options are grayed out, restricting your ability to customize the shape. To fix this:
- With the SVG selected, go to the Graphics Format tab.
- Click Convert to Shape.
Now your rounded hexagon is fully editable, and you can apply the Slide Background Fill effect to it, just like other shapes.
Before resizing, lock the aspect ratio to maintain the shape’s proportions. For this tutorial, set the height to 7 cm, and the width will adjust automatically.
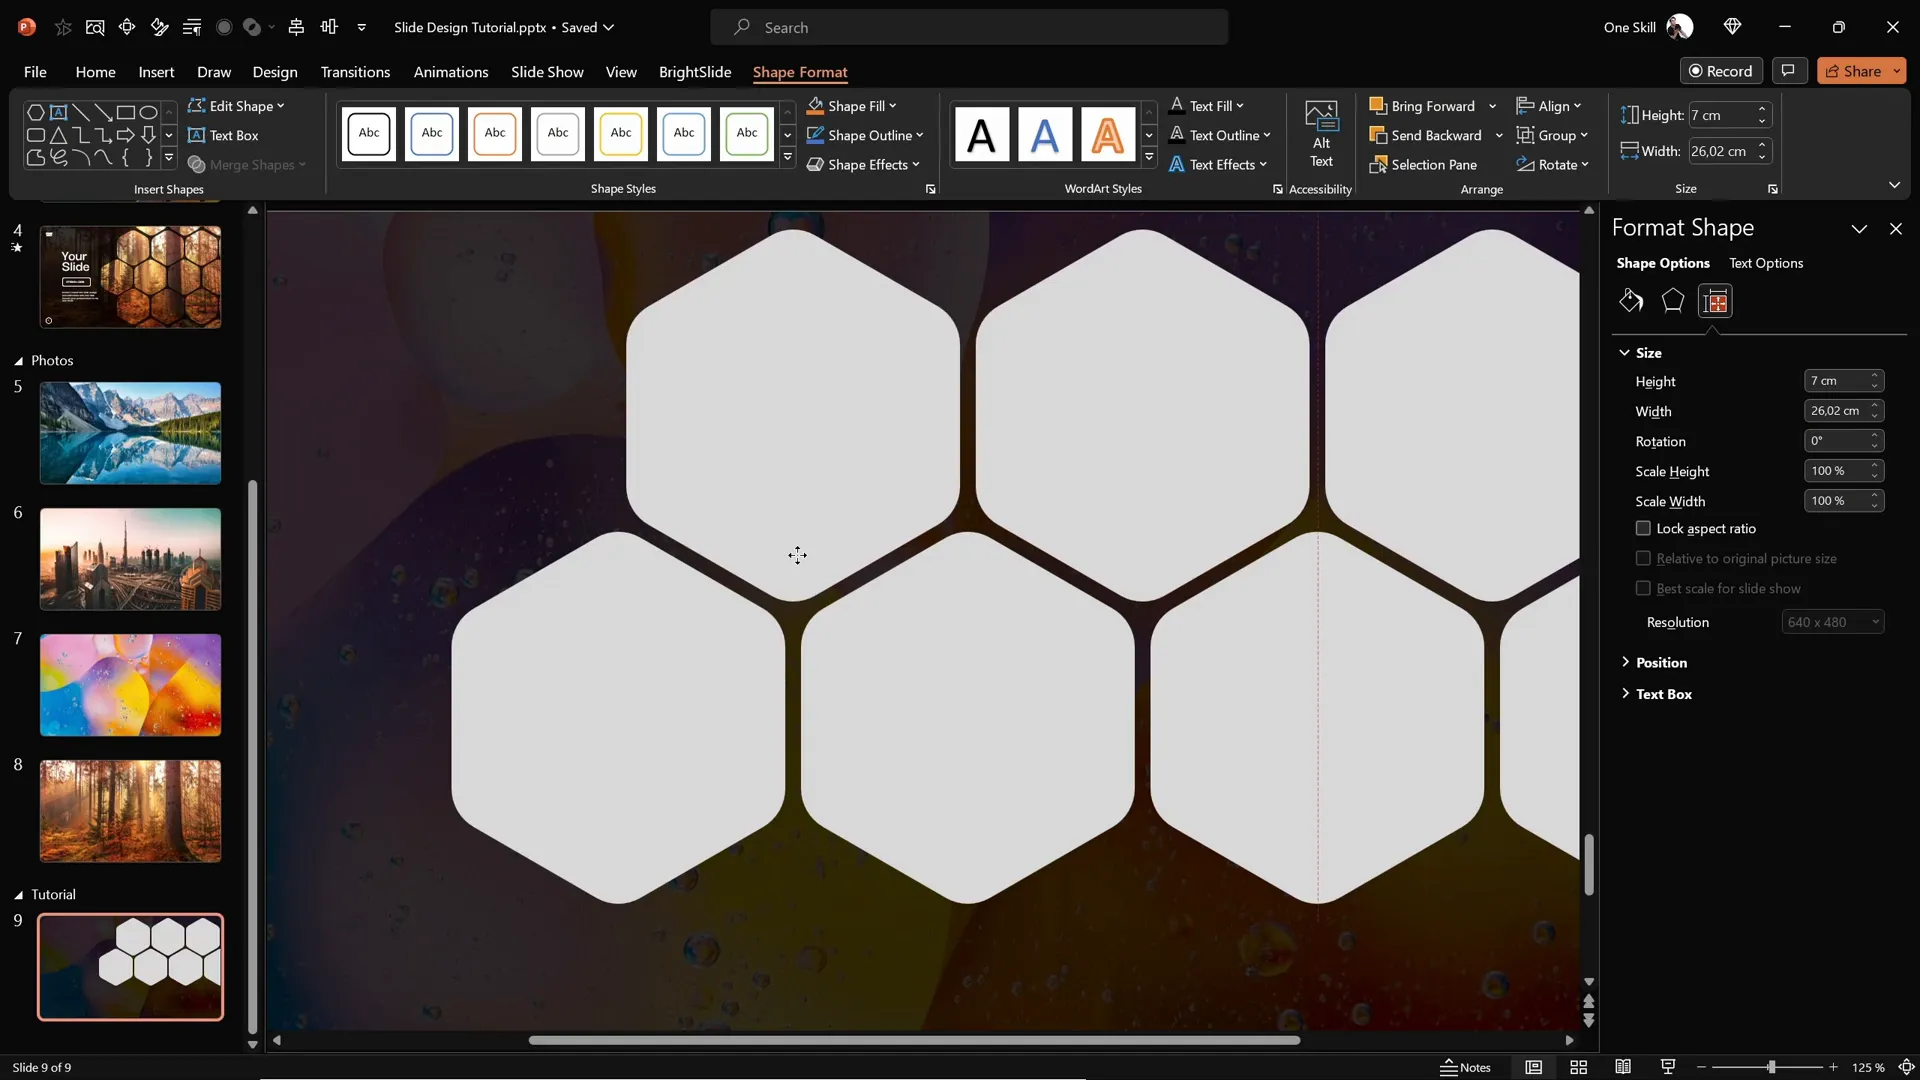
Arranging and Grouping Hexagons for Design
With your editable rounded hexagon ready, it’s time to create a visually appealing pattern on your slide.

Follow these steps to arrange multiple hexagons:
- Hold Ctrl + Shift and drag the hexagon to create duplicates aligned horizontally.
- Adjust the spacing between hexagons to your liking — a narrow gap works well for a compact look.
- Create at least four hexagons in a row. Slightly move the group so the rightmost hexagon is partially off the slide edge for a creative touch.
- Group these hexagons (Ctrl + G) for easier manipulation.
- Duplicate this group horizontally and vertically to form a grid of hexagons.
- Add additional hexagons at the top and bottom edges to create a balanced layout.
- Ungroup the entire grid to select individual hexagons and delete any that fall outside the visible slide area.
Once your hexagons are arranged, apply the Slide Background Fill to all of them to integrate the hexagons with your slide background photo beautifully.
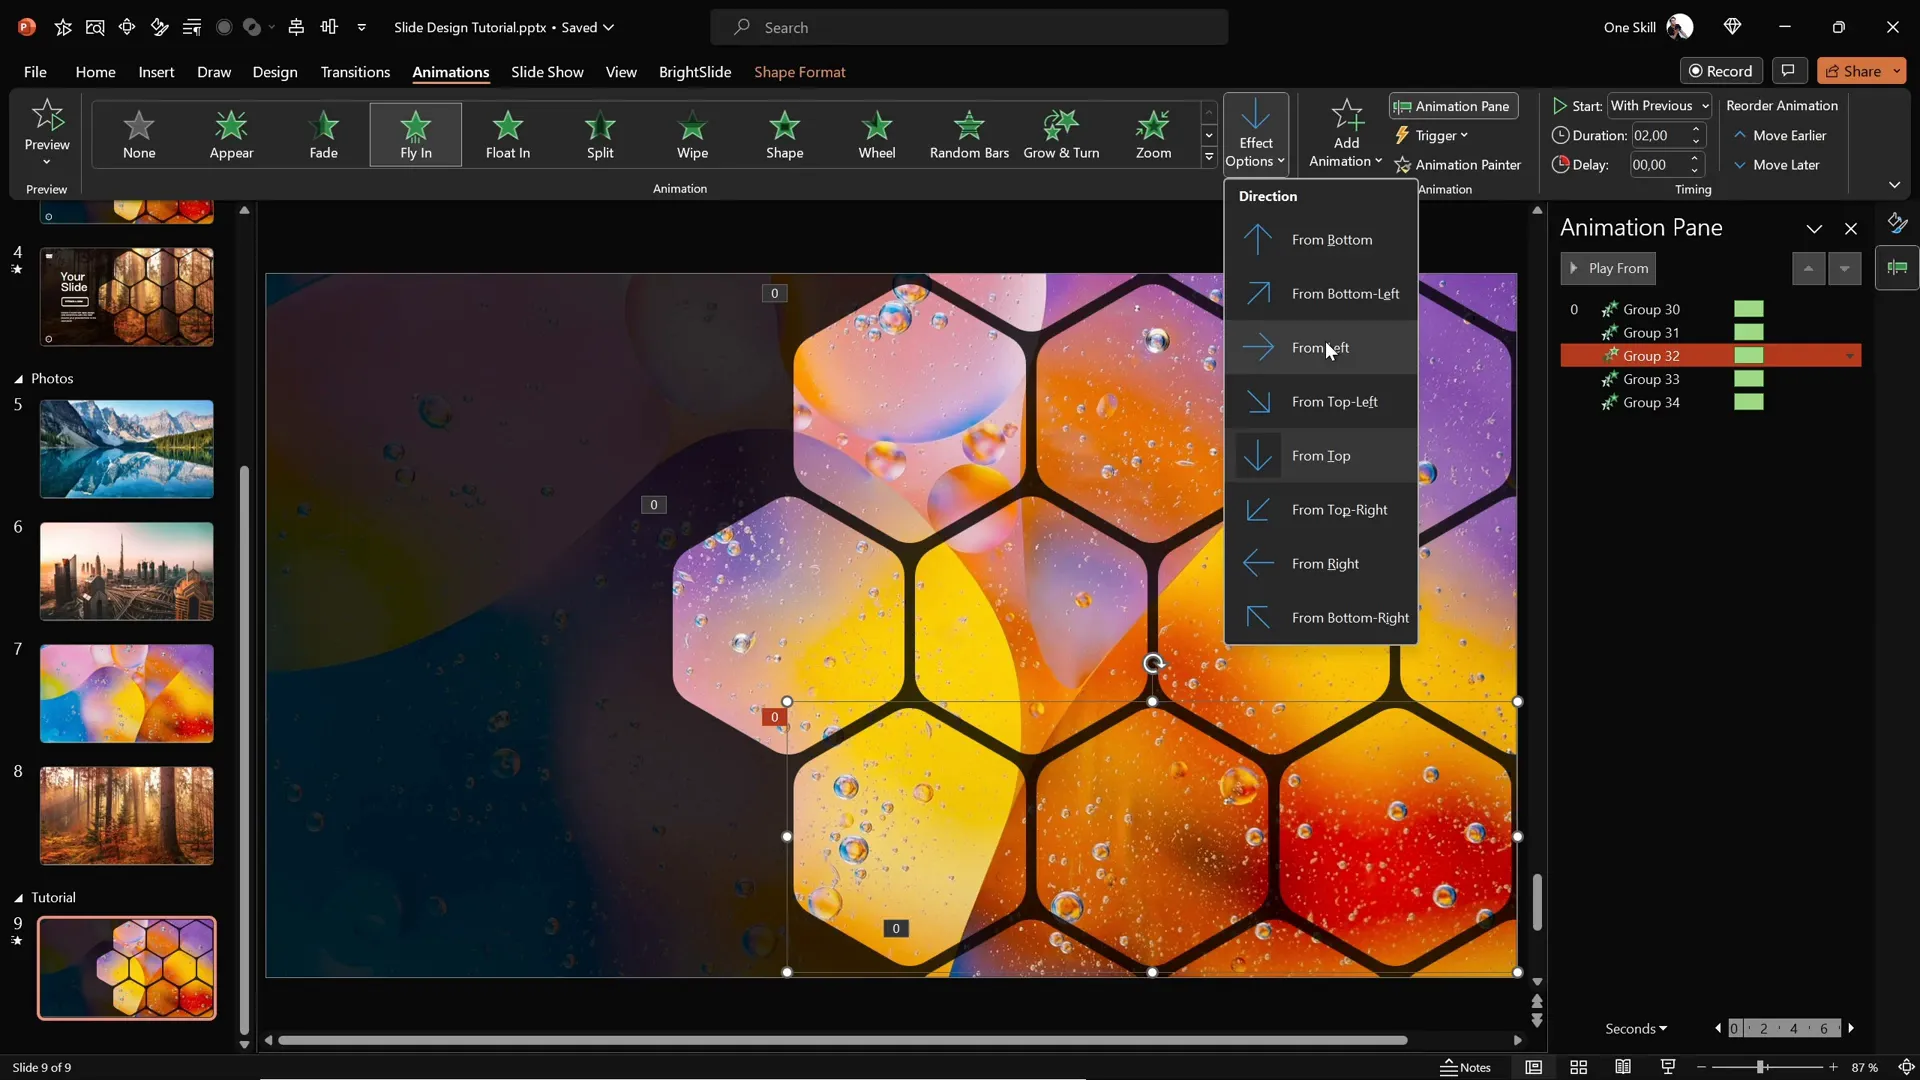
Applying Animations to Hexagons
Animations add dynamic flair and professional polish to your slides. Here’s how to animate your hexagon groups for maximum visual impact:
- Select all hexagon groups.
- Open the Animations pane in PowerPoint.
- Apply the Fly In animation effect to all groups.
- Set the animation direction to From Top for the top and middle hexagon rows.
- For the two bottom rows, change the animation direction to From Bottom to create a balanced entrance effect.
- Set the animations to start With Previous and adjust the duration to 2 seconds.
- In the animation options, select Maximum Smooth End to ensure a soft landing for the hexagons.
- Adjust the layering by sending the top and bottom hexagon rows backward behind the middle row, ensuring the middle row stays in front during animation overlaps.
- Also, send the semi-transparent rectangle overlay to the back so the hexagons remain visible.
This setup creates a smooth, coordinated animation sequence that enhances the slide’s visual appeal without overwhelming the viewer.
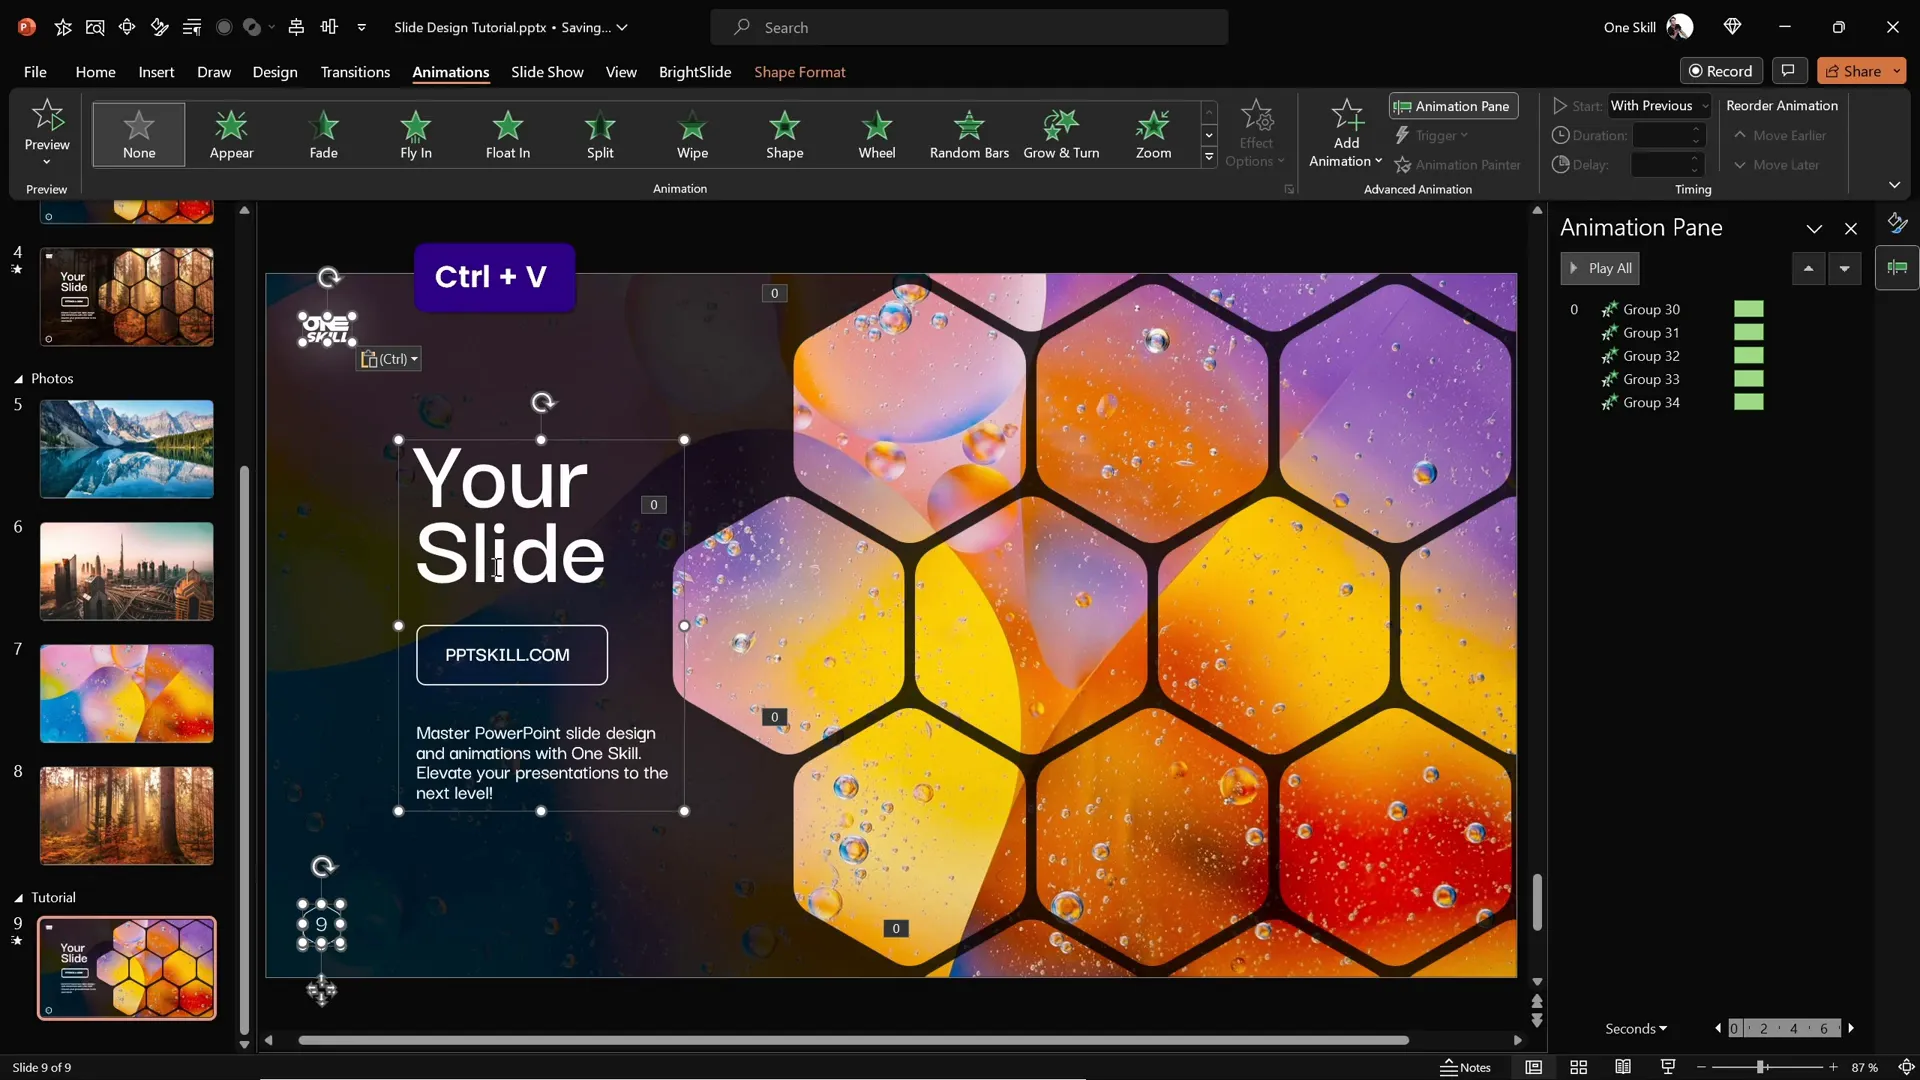
Finalizing the Slide with Text and Logo
To complete your slide, add essential elements like your logo, slide number, and any text you want to include. Here’s a quick way to do it:
- Copy these elements from a previous slide (Ctrl + C).
- Paste them onto your current slide (Ctrl + V).
- Group the text boxes and logo together for easier animation.
- Apply a Flame animation to the group, with the direction set to From Left.
- Set this animation to start With Previous to synchronize with the hexagon animations.
- Use a duration of 2 seconds and add a bounce effect with a duration of 1.5 seconds for a lively entrance.
The final effect is a professional, vibrant slide where hexagons fly in softly and text elements bounce in smoothly, creating an engaging visual experience.
Customizing Slide Appearance Easily
One of the best features of this slide design is how easily you can change the entire look by swapping out the background photo. Because the hexagons use the Slide Background Fill, updating the background image automatically updates the fills inside the hexagons.
To change the background and update the hexagon fills:
- Copy a new photo to your clipboard (Ctrl + C).
- Open the slide with your design.
- Right-click the slide background and select Format Background.
- Choose Picture or texture fill, then click Clipboard to paste the new photo.
- The slide background updates, and all hexagons using slide background fill will update instantly to reflect the new image.
This quick swap lets you create multiple visual themes without rebuilding your slide from scratch.
Frequently Asked Questions
Can I create rounded hexagons directly in PowerPoint?
No, PowerPoint currently does not offer rounded hexagons as a default shape. The closest default option is a sharp-cornered hexagon. To create rounded hexagons, you need to use an external tool like Figma to design and export the shape as an SVG, then import and convert it into an editable PowerPoint shape.
What is “Slide Background Fill” and why is it useful?
Slide Background Fill is a feature in PowerPoint that fills a shape with the exact portion of the slide’s background image that lies behind it. This creates a seamless, integrated look where shapes appear to be “cut out” of the background. It’s useful for creating creative designs with consistent visual flow.
How can I animate multiple objects smoothly in PowerPoint?
Group related objects to animate them together, and use the Animation Pane to fine-tune start times, durations, and effects. Using effects like Fly In with smooth start/end options and synchronized start times (With Previous) creates professional, fluid animations.
Can I easily update my slide’s look after designing it?
Yes! If you use slide background fills for shapes and set your background image as the slide background, updating the background photo automatically updates the fills inside your shapes. This allows for quick theme or style changes without redesigning the slide.
Is Figma free to use for creating shapes?
Yes, Figma offers a free tier that allows you to create and export custom shapes like rounded hexagons. You only need to sign up or log in with your Google account to get started.
Conclusion
Mastering creative PowerPoint slide design can transform your presentations from ordinary to extraordinary. This tutorial showed you how to build impressive slides using rounded hexagons filled with your slide background image, enhanced with smooth, professional animations.
By leveraging free tools like Figma to overcome PowerPoint’s shape limitations, using slide background fills to create seamless designs, and applying thoughtful animations, you can create slides that captivate and engage your audience.
Remember, the key to effective PowerPoint slide design is combining visual appeal with clarity and ease of customization. The techniques shared here not only help you build stunning slides but also enable you to quickly adapt your designs for different themes and projects.
If you ever find yourself short on time, consider exploring high-quality PowerPoint templates that incorporate these design principles to speed up your workflow while maintaining professional results.
Now, go ahead and create your own amazing slides that are sure to impress!
Check out the full video: CREATIVE PowerPoint Slide Design Tutorial! 2024 ✨


