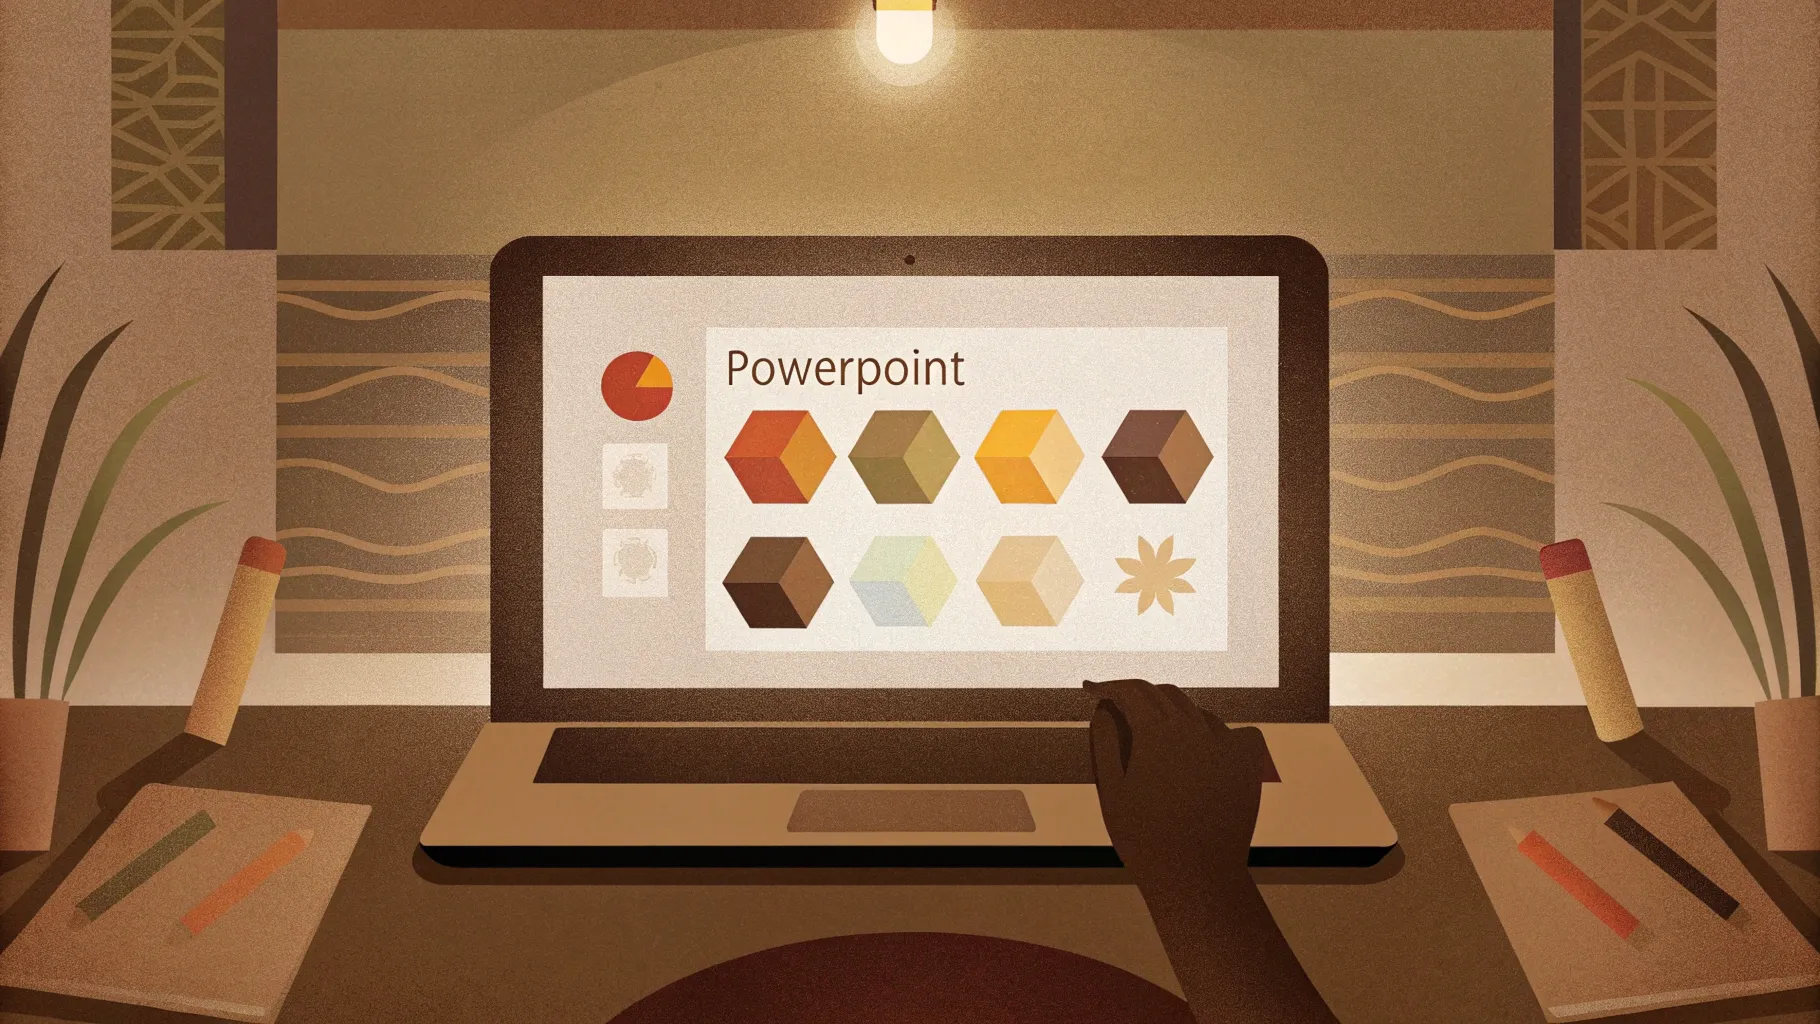
PowerPoint slide design is an art that combines creativity with technical skill to produce visually compelling presentations. In this comprehensive tutorial, we will explore how to create impressive and modern PowerPoint slides featuring rounded hexagons with beautiful animations. Whether you’re a beginner or an experienced PowerPoint user, this step-by-step guide will teach you to transform blank slides into engaging, professional designs that captivate your audience.
This tutorial is based on the expert guidance from One Skill PPT, a renowned PowerPoint creator, and covers everything from designing the slide background to adding smooth animations. By the end of this article, you’ll not only understand how to create these stunning slides but also how to customize and animate them for maximum impact. Let’s dive in!
Table of Contents
- Getting Started: Preparing Your Slide
- Setting Up a Beautiful Slide Background
- Creating Rounded Hexagons Using Figma
- Importing and Editing Rounded Hexagons in PowerPoint
- Arranging Hexagons to Create a Pattern
- Applying Slide Background Fill to Hexagons
- Animating Hexagon Groups for Dynamic Effects
- Adding Text Boxes and Logos with Animation
- Customizing Your Slide Design Quickly
- Frequently Asked Questions
- Conclusion and Next Steps
Getting Started: Preparing Your Slide
The first step in creating a beautiful PowerPoint slide is to start with a clean slate. Open PowerPoint and insert a fresh, blank slide where you will build your design from scratch. This approach allows you to have full control over every element and ensures your slide looks unique and tailored to your presentation.
Once your blank slide is ready, you can begin by adding a captivating background image that sets the tone for your slide design.
Setting Up a Beautiful Slide Background
A stunning background image can elevate your slide instantly. For this tutorial, we recommend using high-quality photos from Unsplash, a free resource for beautiful, royalty-free images. The video creator provides a selection of photos linked in the description, perfect for professional presentations.
Here’s how to set the background image:
- Copy your chosen photo from Unsplash or your local files by selecting the image and pressing Ctrl + C (or Command + C on Mac).
- Return to your blank PowerPoint slide.
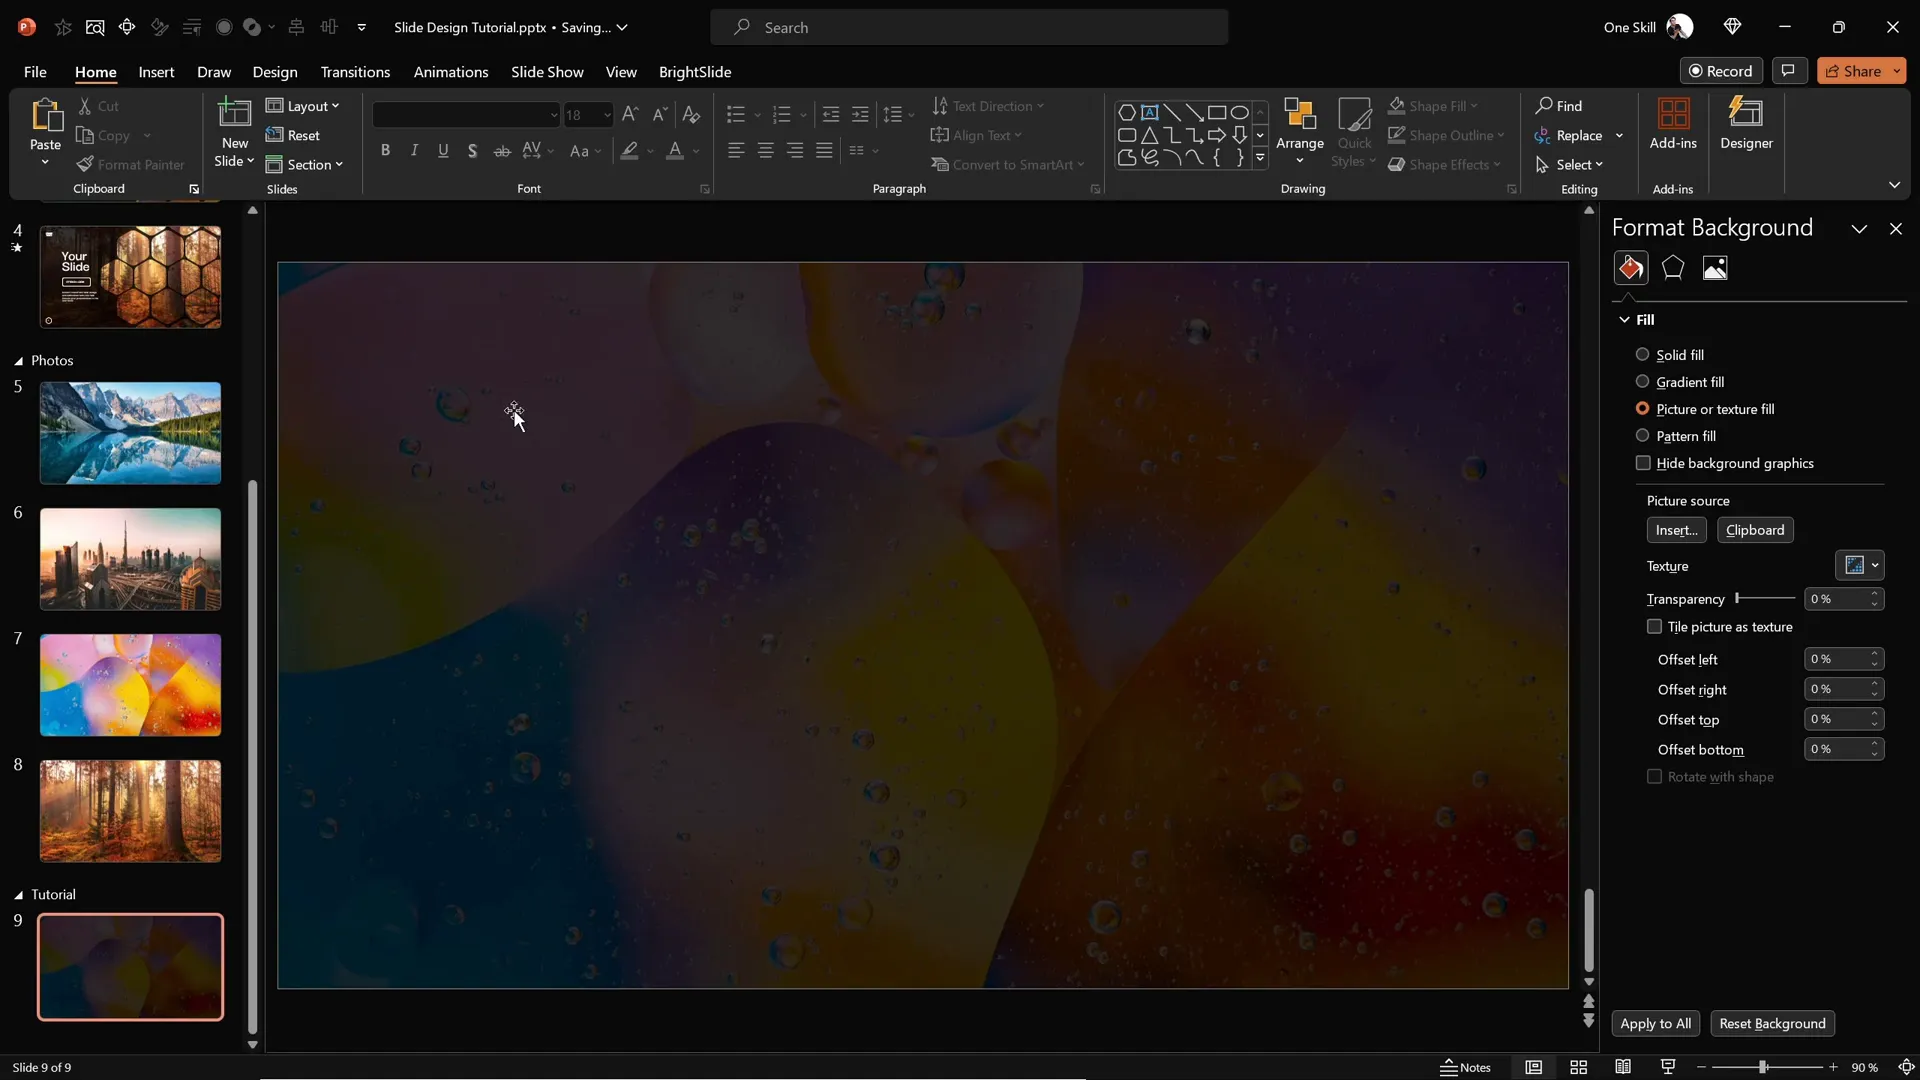
- Right-click on the slide background and select Format Background.
- In the Format Background pane, choose Picture or texture fill.
- Click on Clipboard to paste your copied photo as the slide background.
This method pastes the image as a background, meaning it can’t be accidentally moved or edited, keeping your design consistent.

Next, to enhance readability and add depth, insert a semi-transparent dark rectangle overlay:
- Go to the Insert tab and select Shapes.
- Choose the Rectangle tool and draw a rectangle covering the entire slide.
- Fill this rectangle with black color.
- Adjust the transparency to around 20% so the background image is visible through the overlay.
This darkened overlay ensures that text and shapes placed on top stand out clearly without losing the beauty of the background image.
Creating Rounded Hexagons Using Figma
One of the signature elements of this slide design is the use of rounded hexagons. Unfortunately, PowerPoint does not provide a default shape with rounded corners for hexagons. The closest is a sharp-edged hexagon, but the smooth, rounded look adds a modern and polished feel.
To overcome this limitation, we will use Figma, a free, web-based design tool primarily used for designing websites and apps. Figma allows us to create a custom rounded hexagon easily and export it as an SVG file which can be imported into PowerPoint.
Follow these steps to create a rounded hexagon in Figma:
- Visit figma.com and sign up or log in with your Google account.
- Click on New Design File or Drafts to create a new canvas.
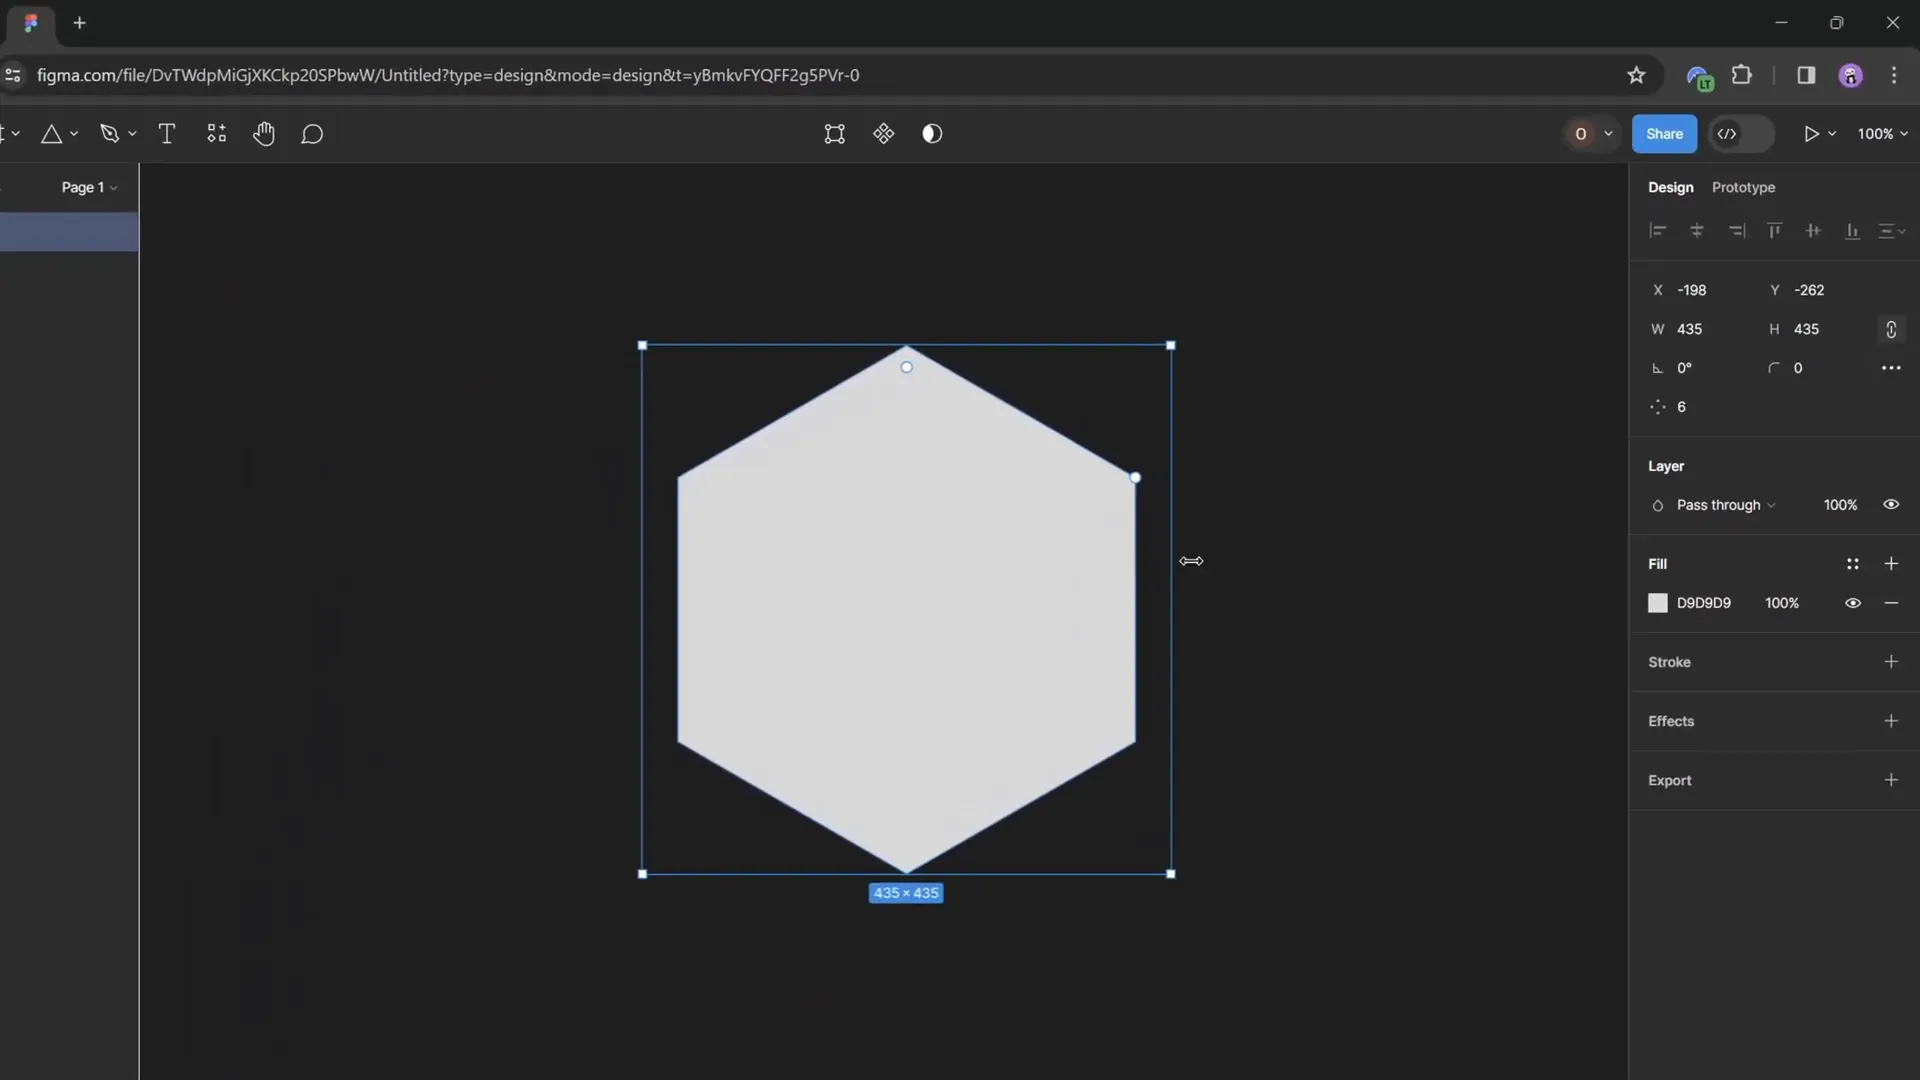
- In the left toolbar, click the Rectangle tool dropdown and select the Polygon tool (looks like a triangle).
- Hold down the Shift key and draw a polygon on the canvas.
- In the properties panel, change the number of sides to 6 to create a hexagon.
- Adjust the corner radius to around 50 to round the hexagon’s edges.
- Once satisfied, select the hexagon, click Export, and choose SVG format.
- Download the SVG file to your computer.
Importing and Editing Rounded Hexagons in PowerPoint
Now that you have your custom rounded hexagon SVG file, it’s time to bring it into PowerPoint and make it fully editable:
- In PowerPoint, go to the Insert tab and select Pictures > This Device.
- Locate and insert the saved rounded hexagon SVG file.
- The hexagon will appear on your slide but initially, some fill options will be grayed out.
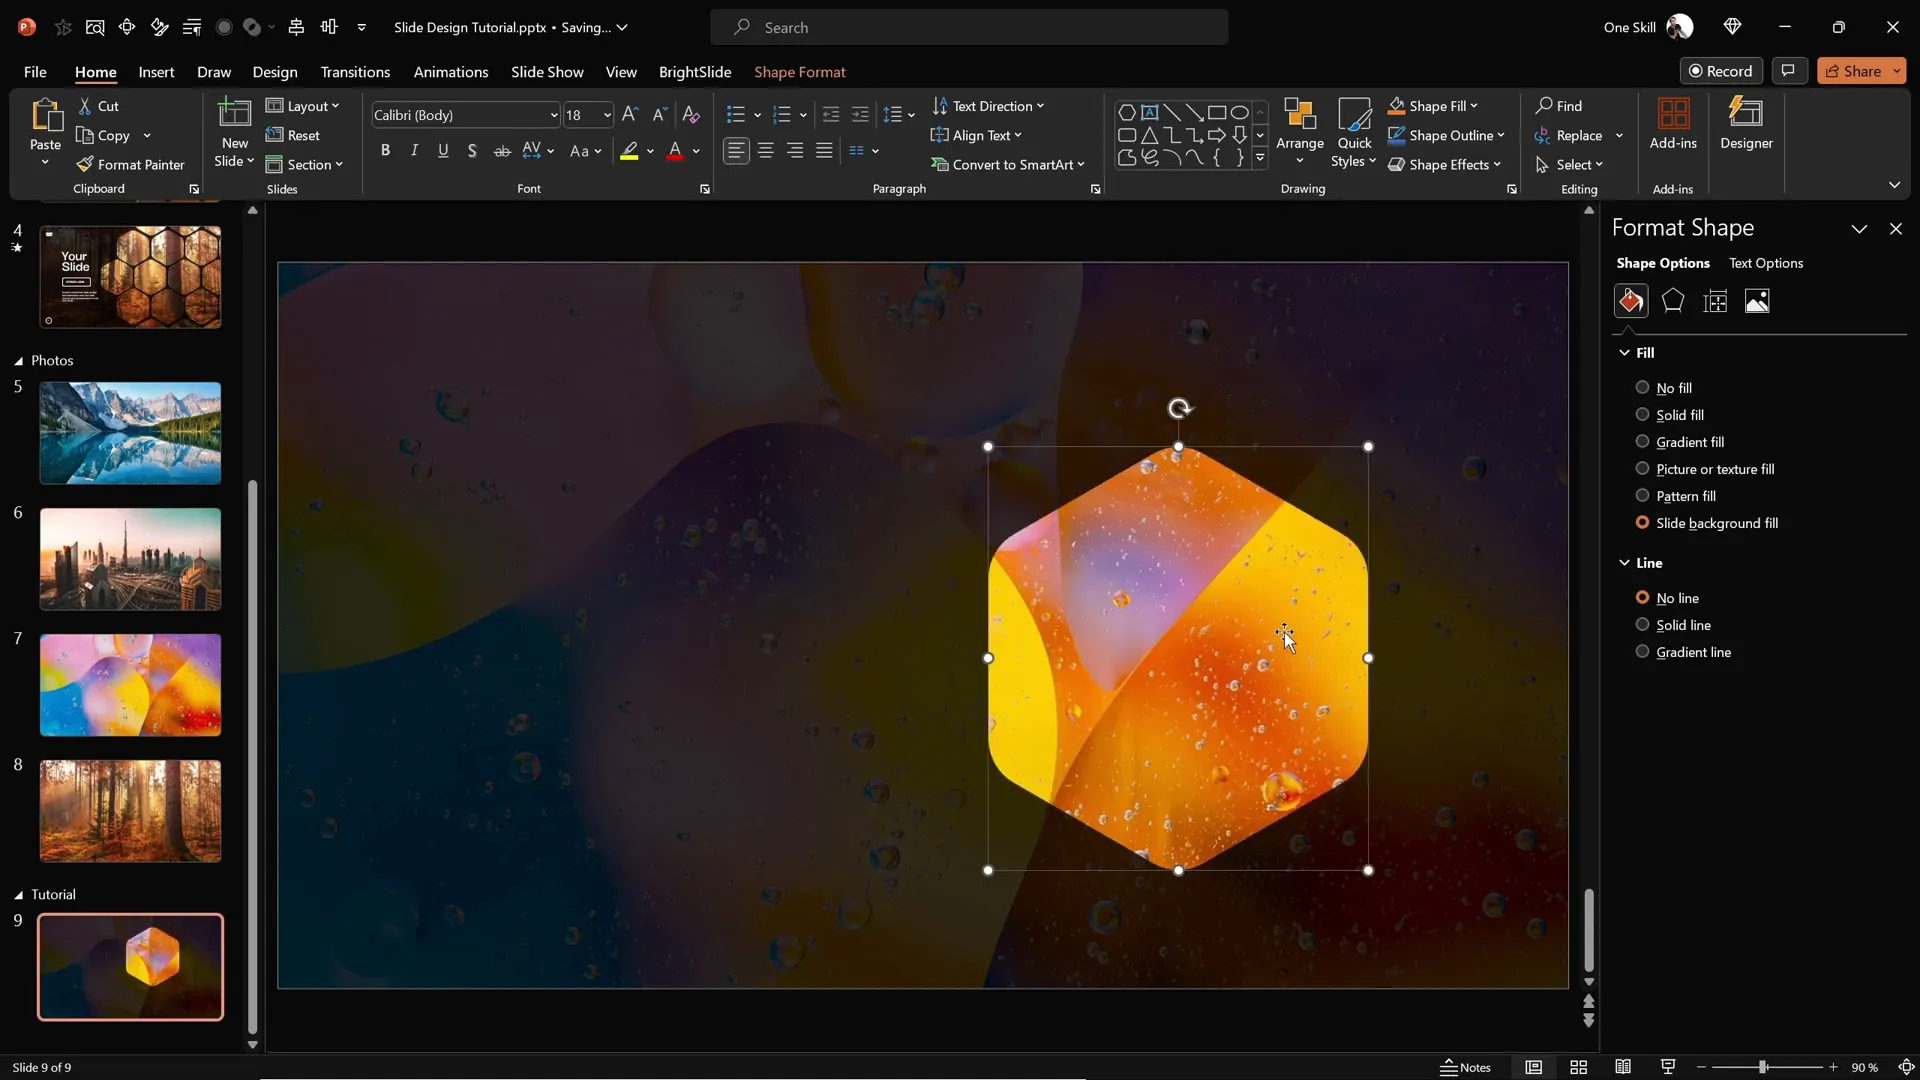
- To fix this, select the hexagon and click Convert to Shape in the Drawing Tools or Format tab.
- After conversion, you can fully customize the hexagon, including using the Slide Background Fill feature for unique visual effects.
- Resize your hexagon by locking the aspect ratio and adjusting the height (a good starting height is 7 centimeters).
With your rounded hexagon ready, you can now proceed to create multiple copies and arrange them to build your slide design.
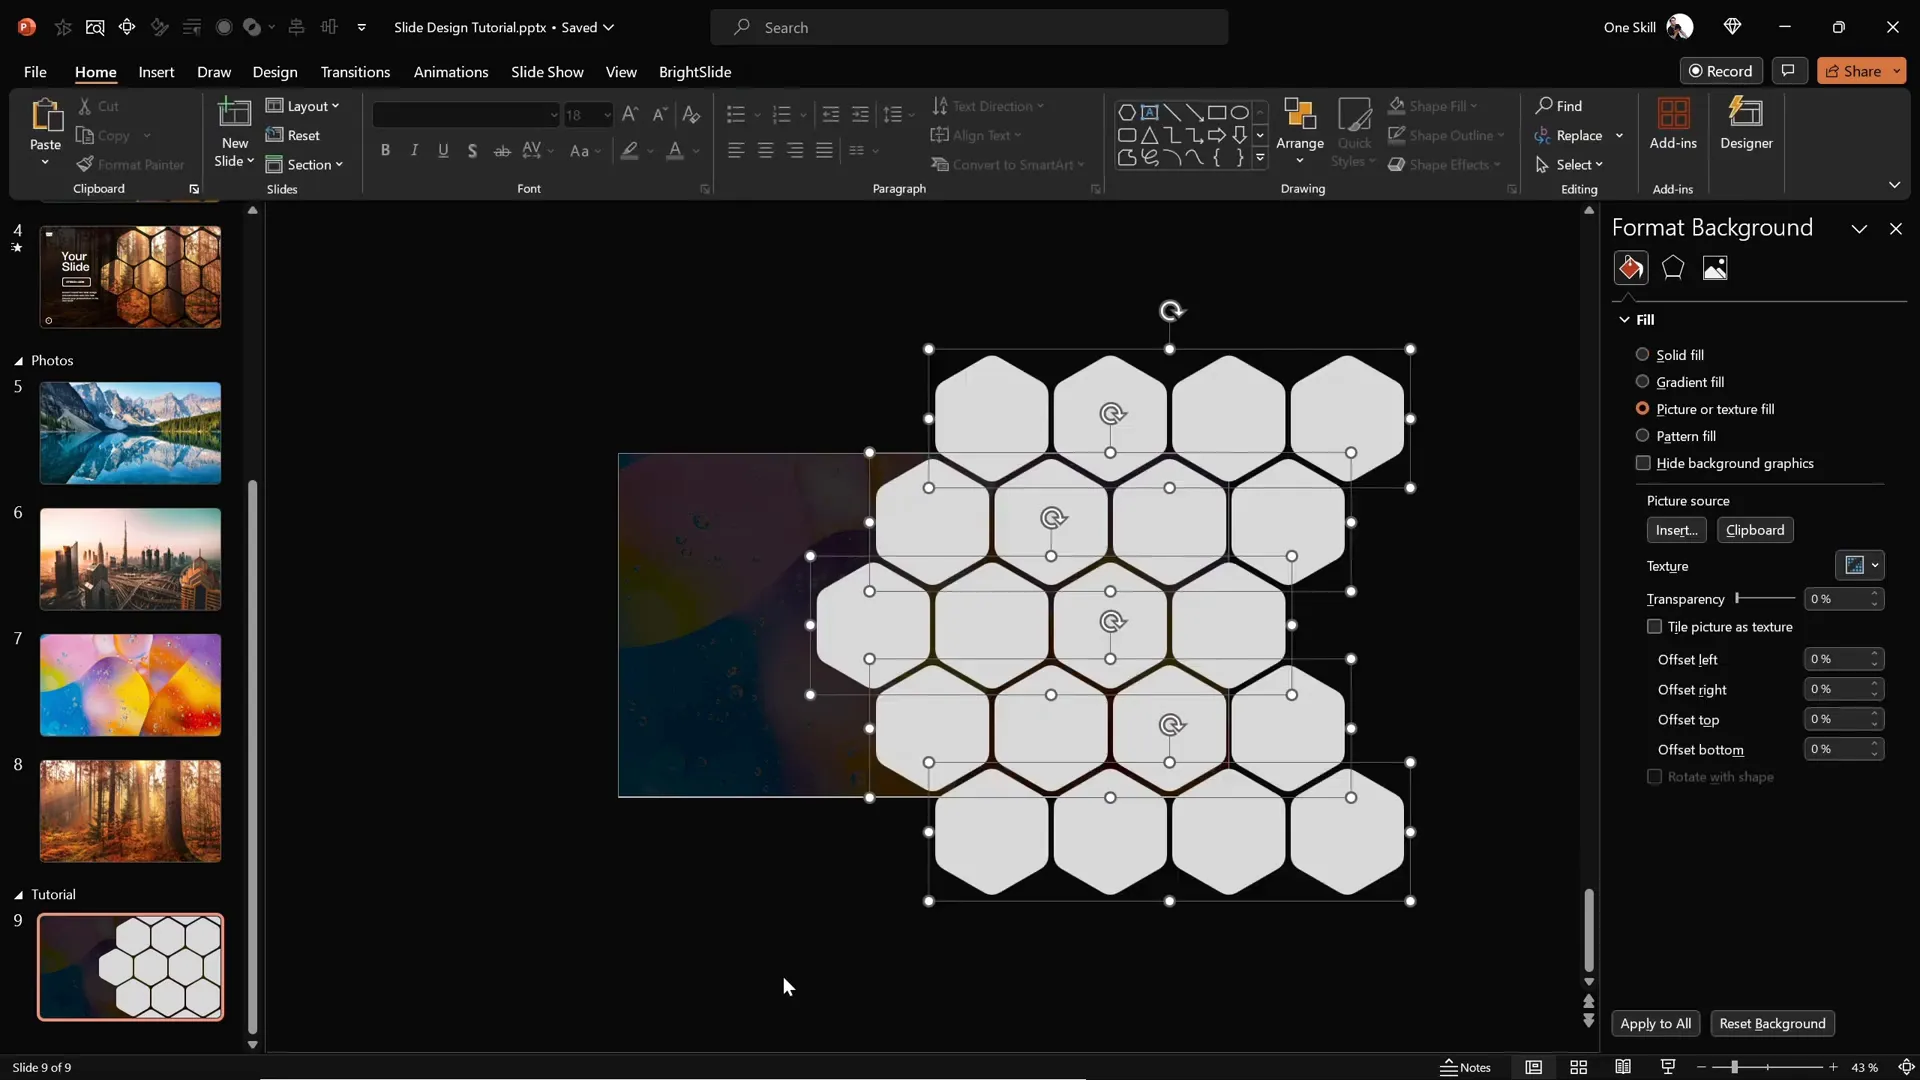
Arranging Hexagons to Create a Pattern
Creating an appealing pattern of hexagons involves precise alignment and spacing. Here’s how to arrange your hexagons:
- Select the hexagon and hold down Ctrl + Shift (Command + Shift on Mac), then drag to make copies in a perfectly straight horizontal line.
- Adjust the spacing between hexagons to your liking; a narrow gap often looks sleek and modern.
- Make at least four hexagons in a row and move the group so that the rightmost hexagon slightly protrudes beyond the slide edge for a creative effect.
- Group these hexagons together by selecting them and pressing Ctrl + G (Command + G on Mac).
- Duplicate the entire group and align it next to the first set to create a longer line of hexagons.
- Once the horizontal rows look good, duplicate them vertically by holding Ctrl + Shift and dragging downwards to create multiple rows.
- Add a few hexagons at the top and bottom edges of your slide to fill the space and create a balanced design.
- Ungroup all hexagons to delete any that fall outside the visible slide area for a clean look.
This process creates a dynamic hexagonal pattern that forms the core of your slide design.
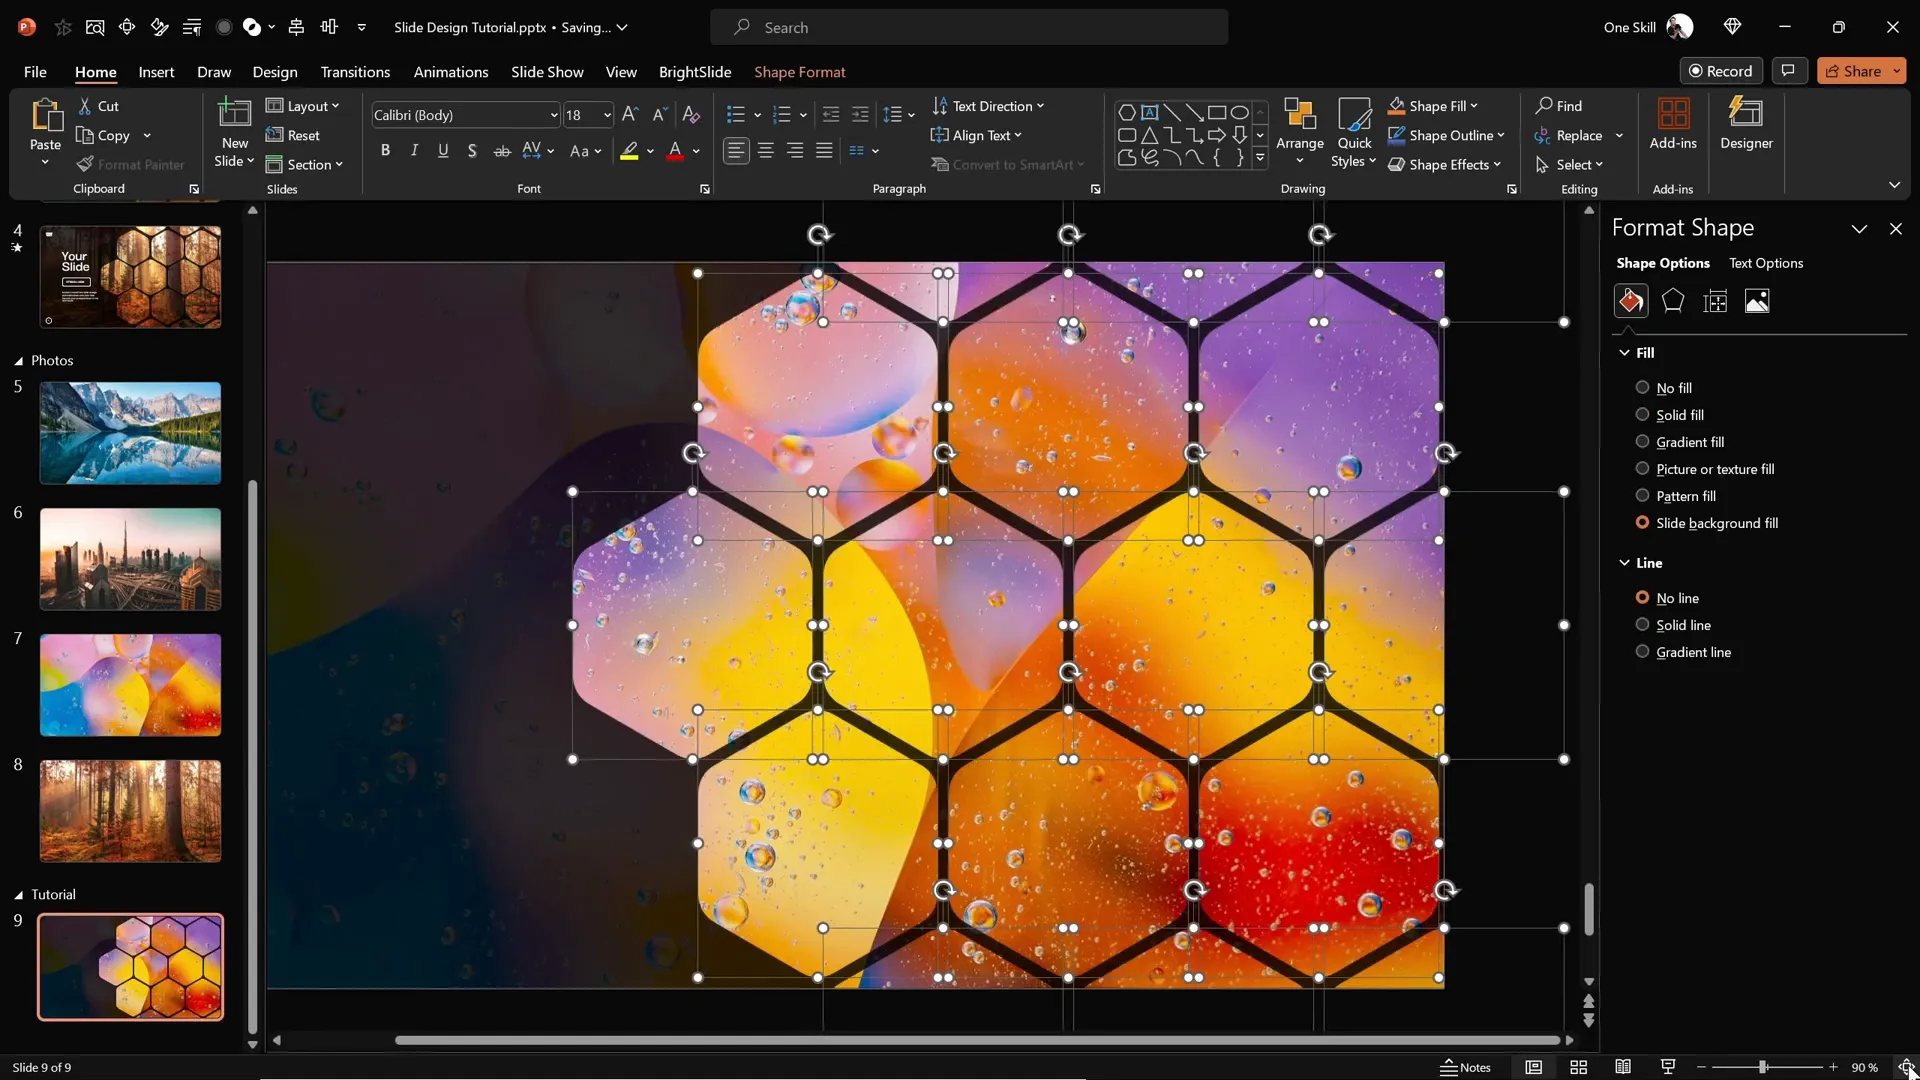
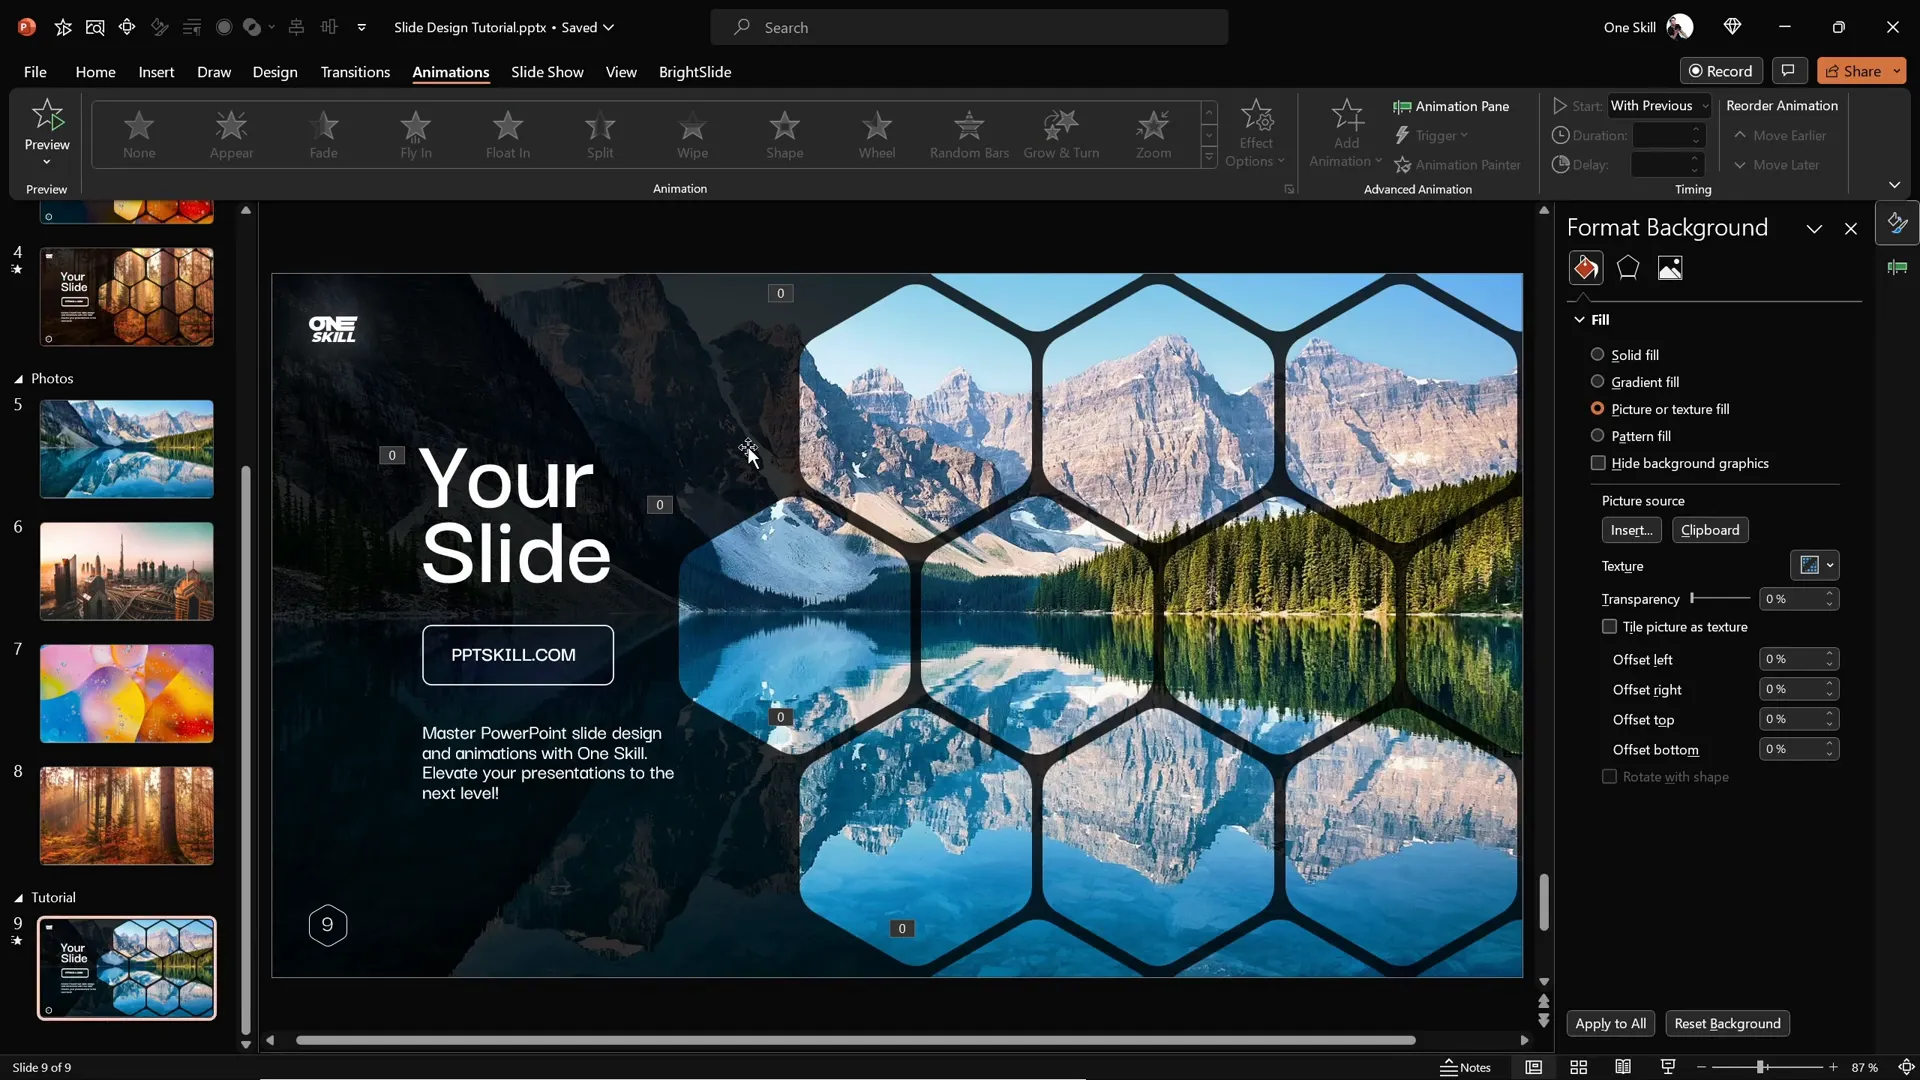
Applying Slide Background Fill to Hexagons
One of the most striking visual effects in this design is the use of the Slide Background Fill for the hexagons. This feature fills shapes with the underlying slide background image, creating a seamless and integrated look.
To apply this effect:
- Select all hexagons that you want to apply the background fill to.
- Open the Format Shape pane.
- Under Fill, select Slide Background Fill.
- Watch as each hexagon takes on the portion of the background image behind it, creating a stunning mosaic effect.
Grouping hexagons into logical sections (top, middle, bottom) will make the next step—animation—much easier to manage.
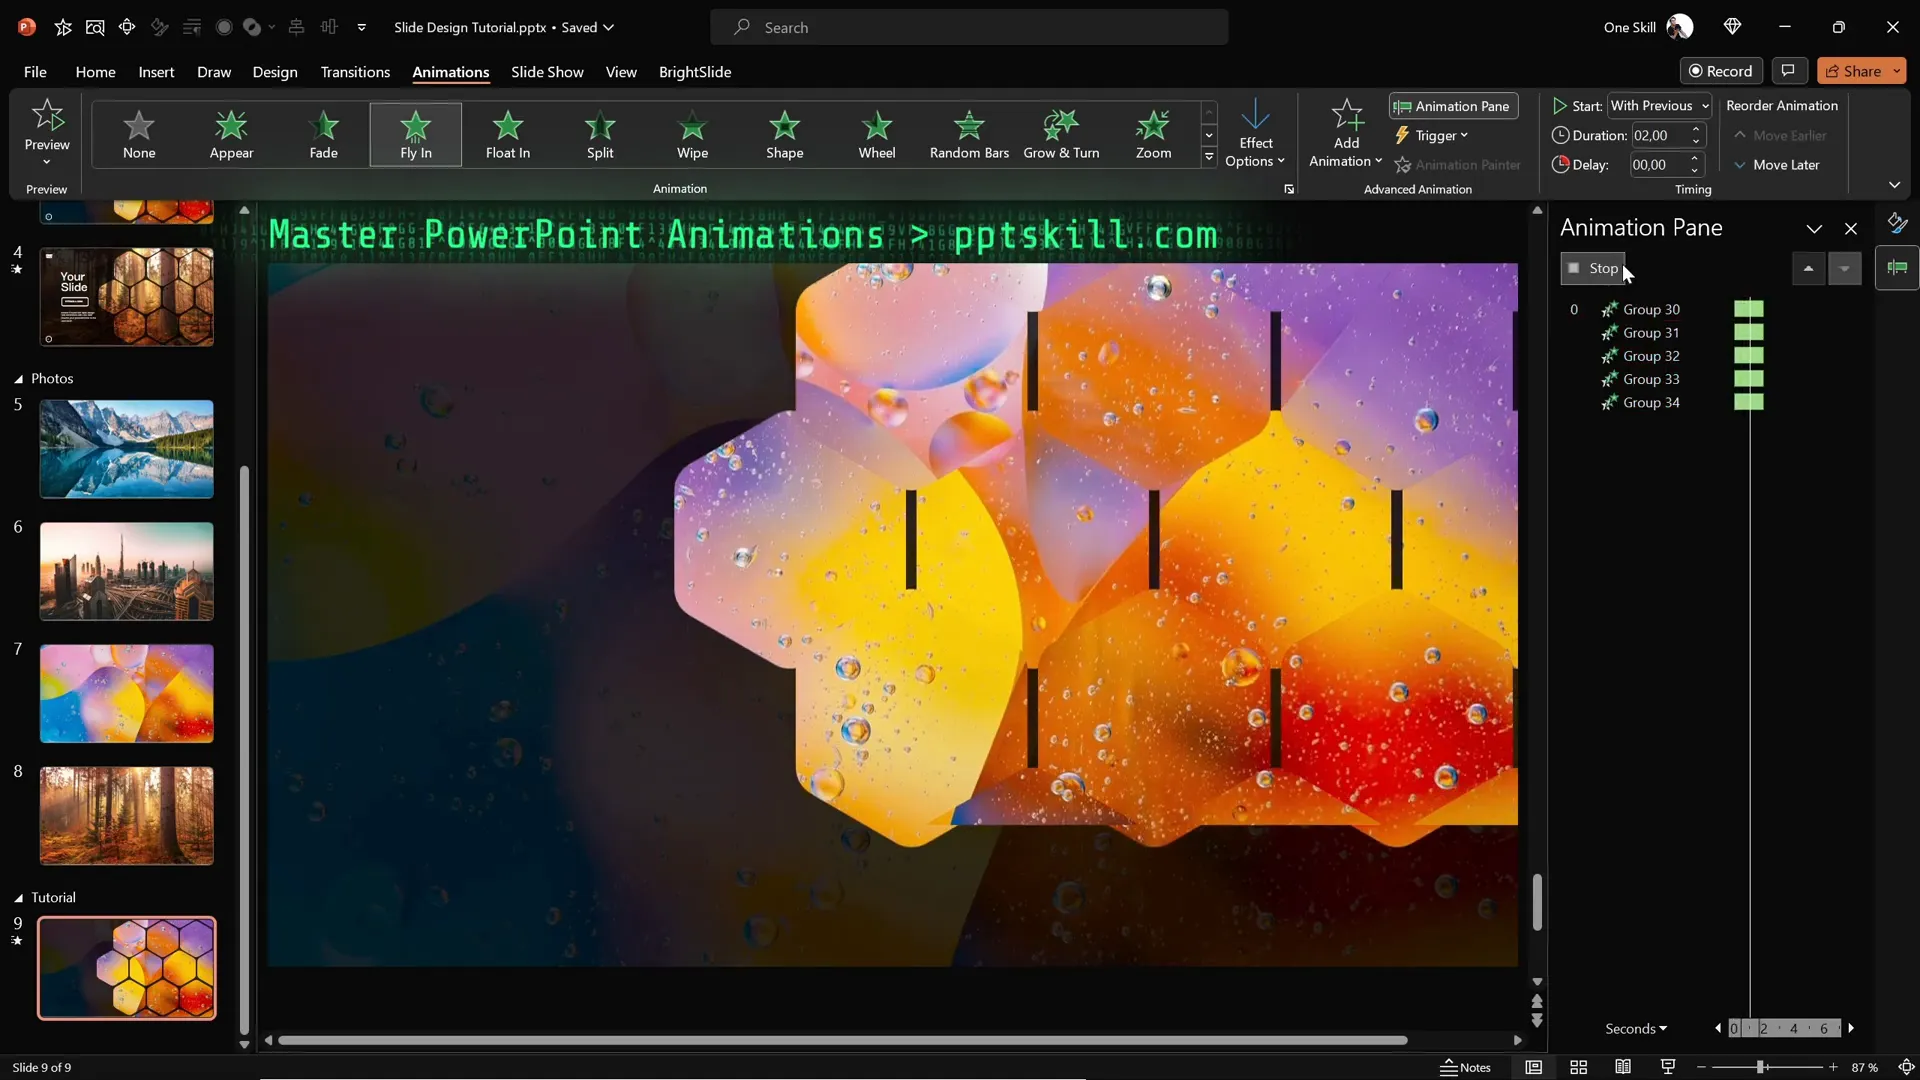
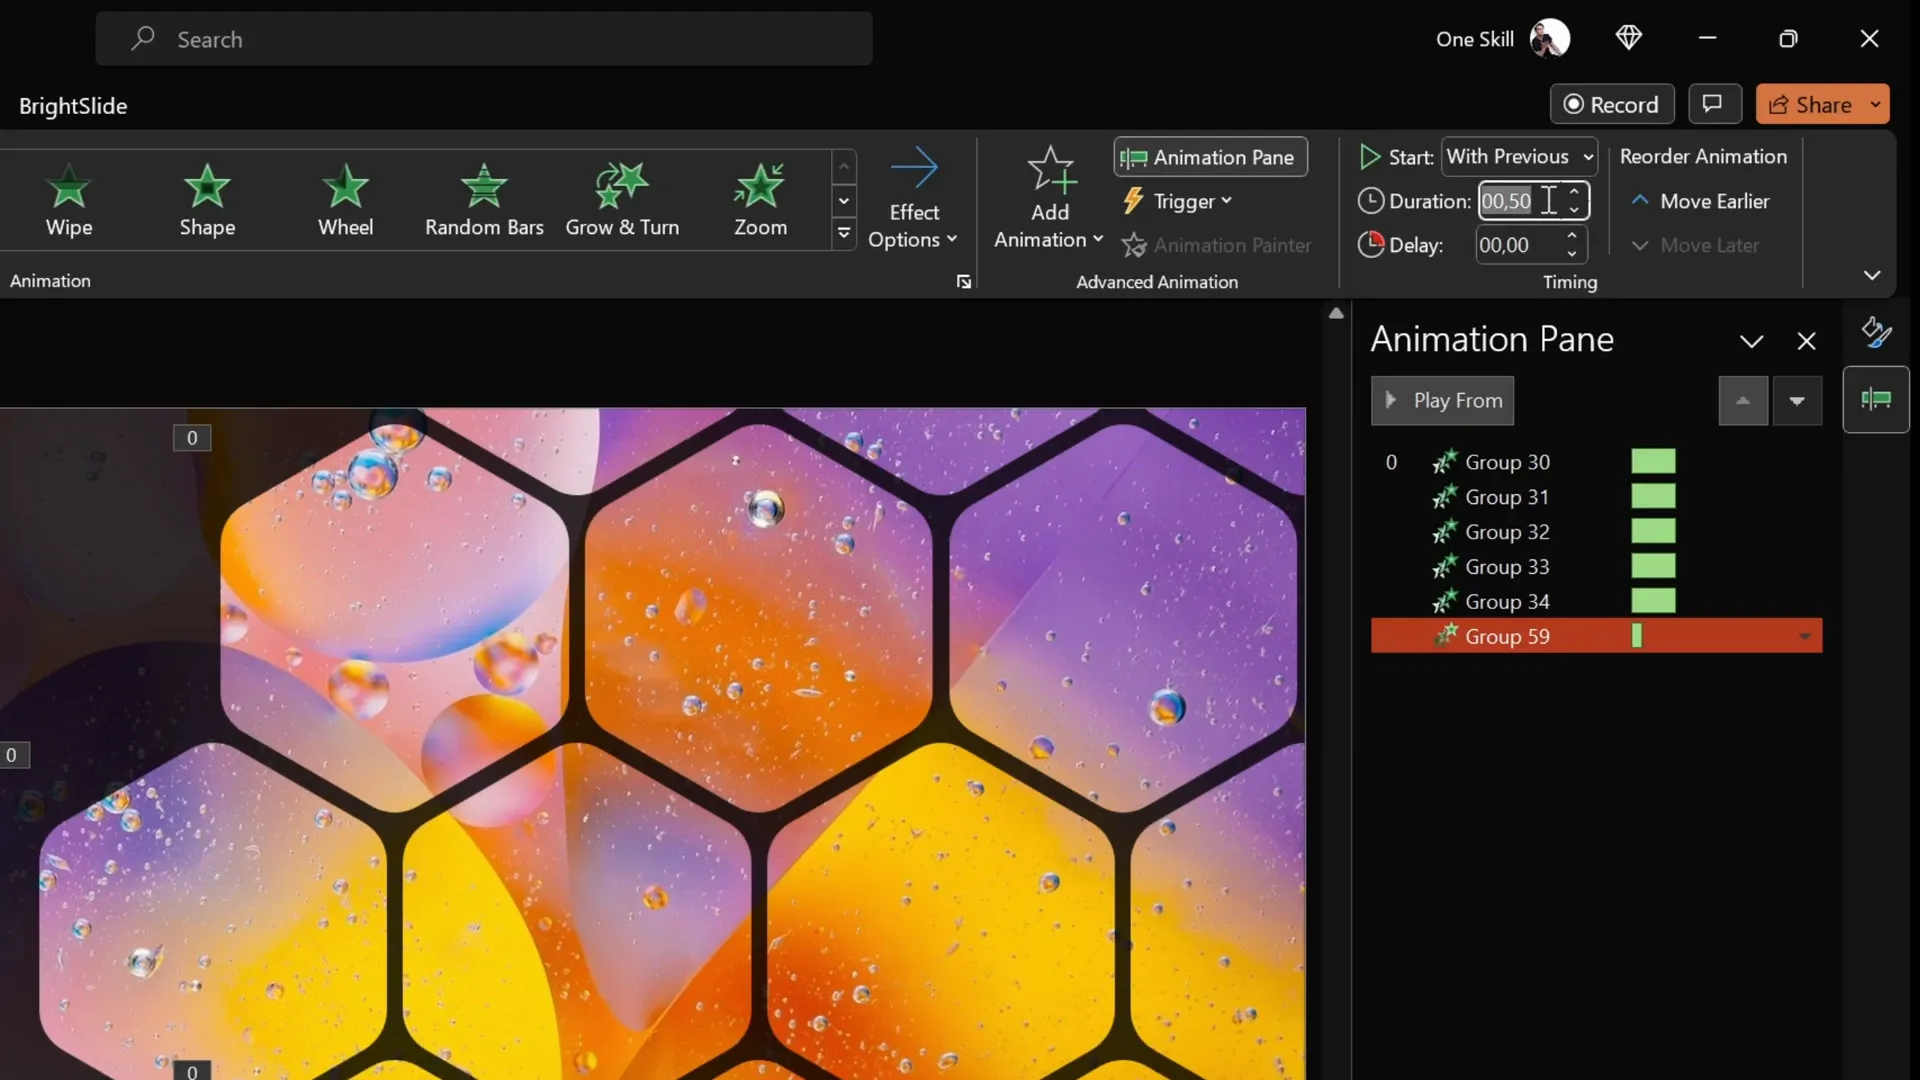
Animating Hexagon Groups for Dynamic Effects
Adding animation brings your slide to life and engages your audience. Here’s how to animate your hexagon groups:
- Open the Animation Pane from the Animations tab to monitor your animations.
- Select all hexagon groups you want to animate.
- Choose the Fly In animation effect.
- Set the direction of the animation to From Top for the top and middle rows.
- For the bottom rows, change the direction to From Bottom to create a balanced movement.
- Set the animation to Start With Previous for automatic sequencing.
- Adjust the duration to around 2 seconds for smoothness.
- In Effect Options, select Maximum Smooth End for a gentle landing effect.
- Adjust the layering order by sending top and bottom hexagon groups to back, keeping the middle group in front for better overlapping visuals.
This subtle animation effect enhances the visual appeal without overwhelming the audience.
Adding Text Boxes and Logos with Animation
With your hexagon pattern animated, it’s time to add essential slide elements such as text boxes, logos, and slide numbers.
Here’s a streamlined process:
- Copy existing text boxes, logos, and slide numbers from a previous slide to maintain consistency.
- Paste them onto your current slide and position them appropriately.
- Group these elements for easier management.
- Add a Flame animation effect to the grouped text elements.
- Set the animation direction to From Left and synchronize it to Start With Previous.
- Adjust the animation duration to 2 seconds and apply a bounce effect for 1.5 seconds to add playful movement.
The combination of flying hexagons and bouncing text creates a professional and engaging slide presentation.
Customizing Your Slide Design Quickly
One of the great advantages of this slide design method is its flexibility. You can quickly change the look of your slide by swapping out background photos and having the hexagons and other elements update automatically.
To change the slide background and update the hexagons:
- Copy the new photo you want to use as your background.
- Go to your slide with the hexagons.
- Select one of the hexagons filled with the slide background.
- Open the Format Shape pane and select Slide Background Fill.
- Click Clipboard to paste the new photo as the slide background fill.
- All hexagons using the slide background fill will update instantly to reflect the new image.
This technique allows you to experiment with different looks and adapt your presentation style quickly without rebuilding your slide design.
Frequently Asked Questions (FAQ)
Can I create rounded hexagons directly in PowerPoint?
PowerPoint does not have a built-in rounded hexagon shape. However, you can create one using external tools like Figma and import it as an SVG, which can then be converted to a fully editable shape in PowerPoint.
Is Figma free to use?
Yes, Figma offers a free plan that allows you to create and export shapes like the rounded hexagon needed for this tutorial.
What PowerPoint version is required for importing SVGs?
SVG import and editing features are supported in PowerPoint 2019, Office 365, and later versions. Older versions may not support SVG import.
How can I ensure my animations run smoothly during a presentation?
Use the Animation Pane to fine-tune timings and test your animations in Slide Show mode before presenting. Avoid overly complex animations that may distract your audience.
Can I use other shapes with the slide background fill effect?
Yes, the slide background fill can be applied to any shape in PowerPoint, allowing for creative and cohesive designs that integrate with your background imagery.
Is it possible to customize the hexagon size and spacing?
Absolutely. You can resize hexagons while maintaining the aspect ratio and adjust the spacing between them to suit your design preferences.
What if I don’t have time to create slides from scratch?
For quick projects, consider using high-quality PowerPoint templates available online. These templates often include professionally designed slides with animations and layouts ready to customize.
Conclusion and Next Steps
Mastering PowerPoint slide design is about combining creativity with practical techniques that make your slides both beautiful and functional. This tutorial has shown you how to create stunning slides featuring rounded hexagons filled with your slide background, enhanced by smooth fly-in animations and dynamic text effects.
Key takeaways include:
- Using high-quality background images with semi-transparent overlays for readability.
- Creating custom rounded hexagons via Figma and importing them into PowerPoint.
- Arranging hexagons into patterns and applying slide background fill for seamless integration.
- Animating hexagon groups and text elements to engage your audience.
- Quickly customizing your slide design by swapping background photos.
With these skills, you can elevate your presentation design and make your slides stand out in any professional context. If you’re pressed for time, consider exploring premium PowerPoint templates that offer similar aesthetics with less setup required.
For more tutorials and professional PowerPoint resources, be sure to visit One Skill PPT and explore their extensive collection of templates and custom presentation services.
Happy designing!


