
Welcome to this comprehensive guide on creating stunning slide zoom presentations in PowerPoint, inspired by the expert tutorial from One Skill PowerPoint. This article will walk you through the entire process of building a dynamic slide zoom template featuring clickable section zooms, smooth morph transitions, and captivating animations. Whether you’re a PowerPoint beginner or looking to enhance your presentation skills, this step-by-step tutorial will equip you with the techniques to impress your audience and deliver content with style.
Throughout this article, you’ll learn how to set up your presentation, add interactive zoom sections, and apply creative animations to shapes and icons. Plus, you’ll get tips on customizing backgrounds and syncing animations for a professional finish. Ready to transform your slides into an engaging visual journey? Let’s dive in!
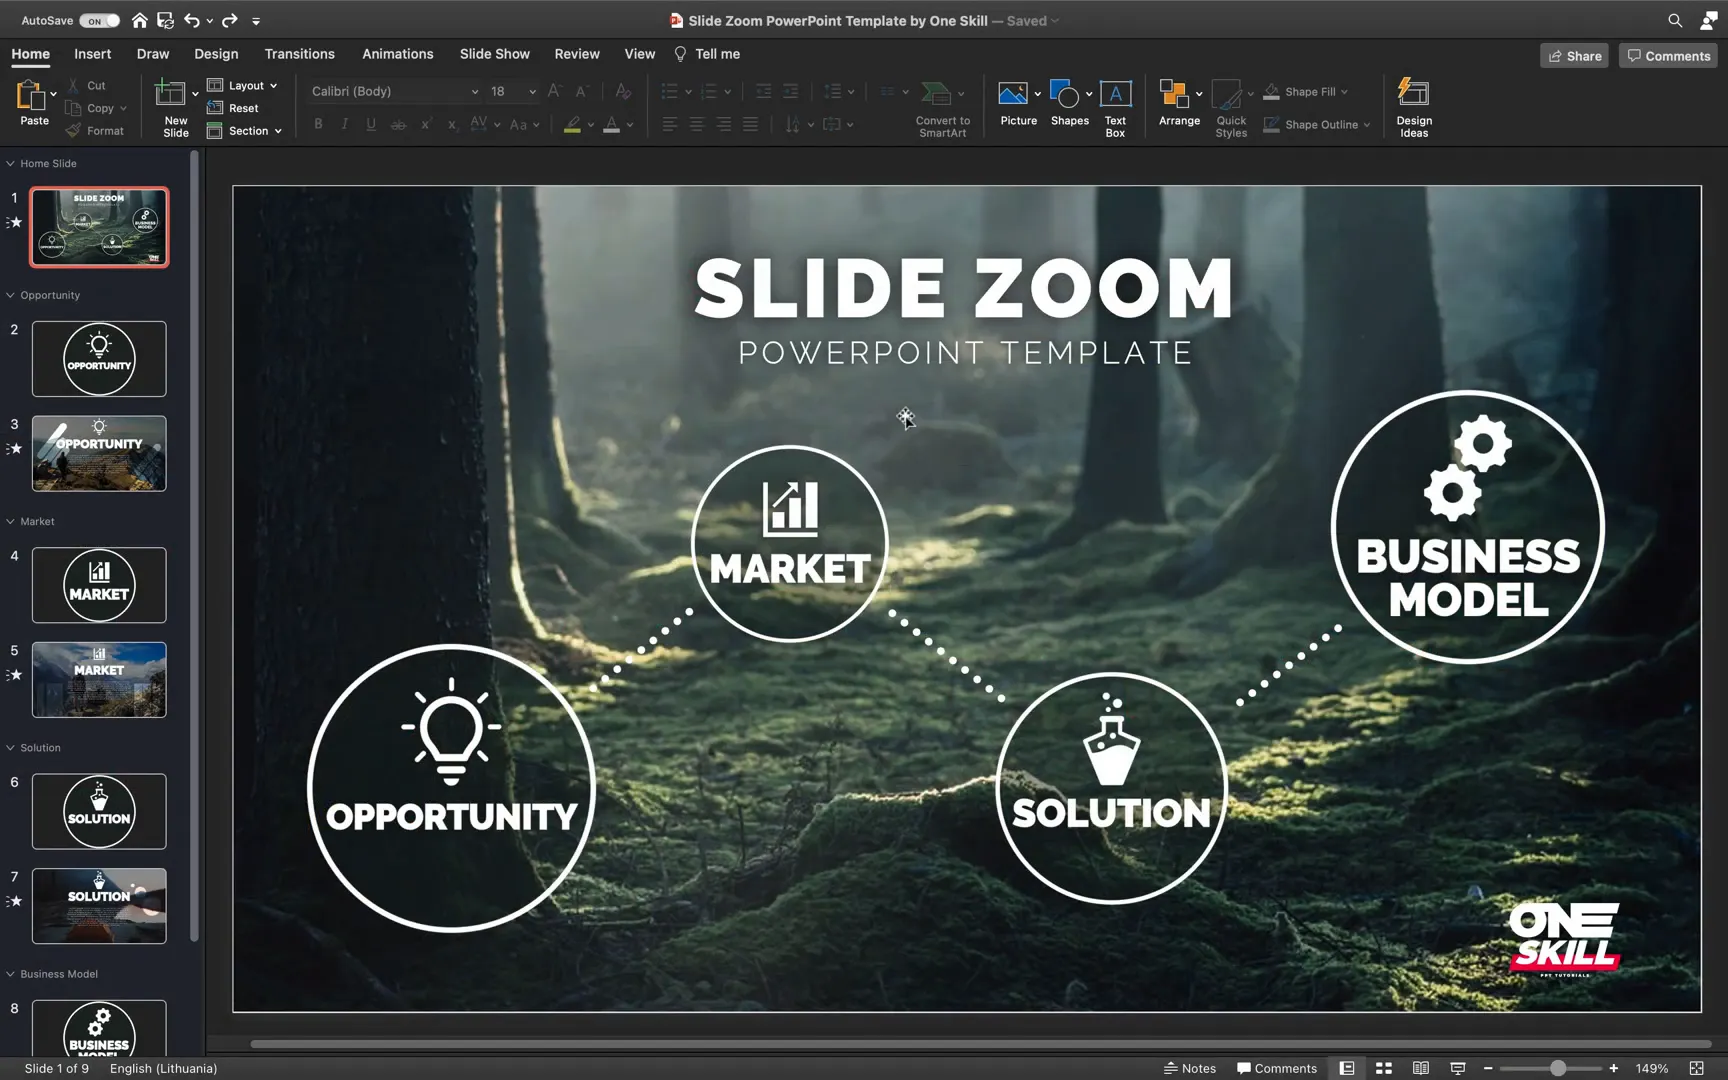
Table of Contents
- Getting Started: Setting Up Your Presentation with a Beautiful Background
- Organizing Your Presentation: Adding Sections and Slides
- Adding Text and Icons for Visual Impact
- Designing the Opportunity Slide with Background Effects and Shadows
- Adding Smooth Morph Transitions for Seamless Animations
- Animating Shapes: Creating Fun Rounded Rectangles
- Inserting Interactive Section Zooms for Navigation
- Building the Market Section with Animated Rectangles
- Enhancing the Home Slide with a Zoom-In Background Animation
- Creating Animated Bubbles for the Solution Section
- Crafting the Business Model Section with Spinning Gear Animation
- Final Touches: Adding Section Zooms and Connecting with Dashed Lines
- Summary: What You’ve Learned
- Frequently Asked Questions (FAQ)
- Resources and Links
Getting Started: Setting Up Your Presentation with a Beautiful Background
The first step in crafting an impactful slide zoom presentation is to start with a clean slate. Open a new PowerPoint presentation and set the slide layout to blank. This gives you a fresh canvas without any distracting placeholders, allowing you to fully customize your design.
Next, focus on your home slide, which will serve as the starting point for your zoom sections. Choose an eye-catching background image to set the tone. A great resource for high-quality, free images is Unsplash. For this tutorial, you can use the exact photo linked in the resources section below.
Paste your chosen photo onto the slide and drag it to cover the entire slide area. To maintain the image’s proportions while resizing, hold down the Shift key. Then, use the crop tool to fine-tune the image’s position and ensure it fits perfectly within the slide boundaries. This step helps you create a visually appealing home slide that sets the stage for your presentation.

Organizing Your Presentation: Adding Sections and Slides
With your home slide ready, it’s time to start organizing your presentation into sections. Sections help you group related slides and enable the powerful section zoom feature in PowerPoint.
Right-click in the slide sorter area and select Add Section. Name your first section, for example, Opportunity. This will contain the slides related to that topic.
Insert a blank slide within this section and set a dark background color. The dark background provides contrast, making it easier to work with white shapes and icons that we’ll add next.
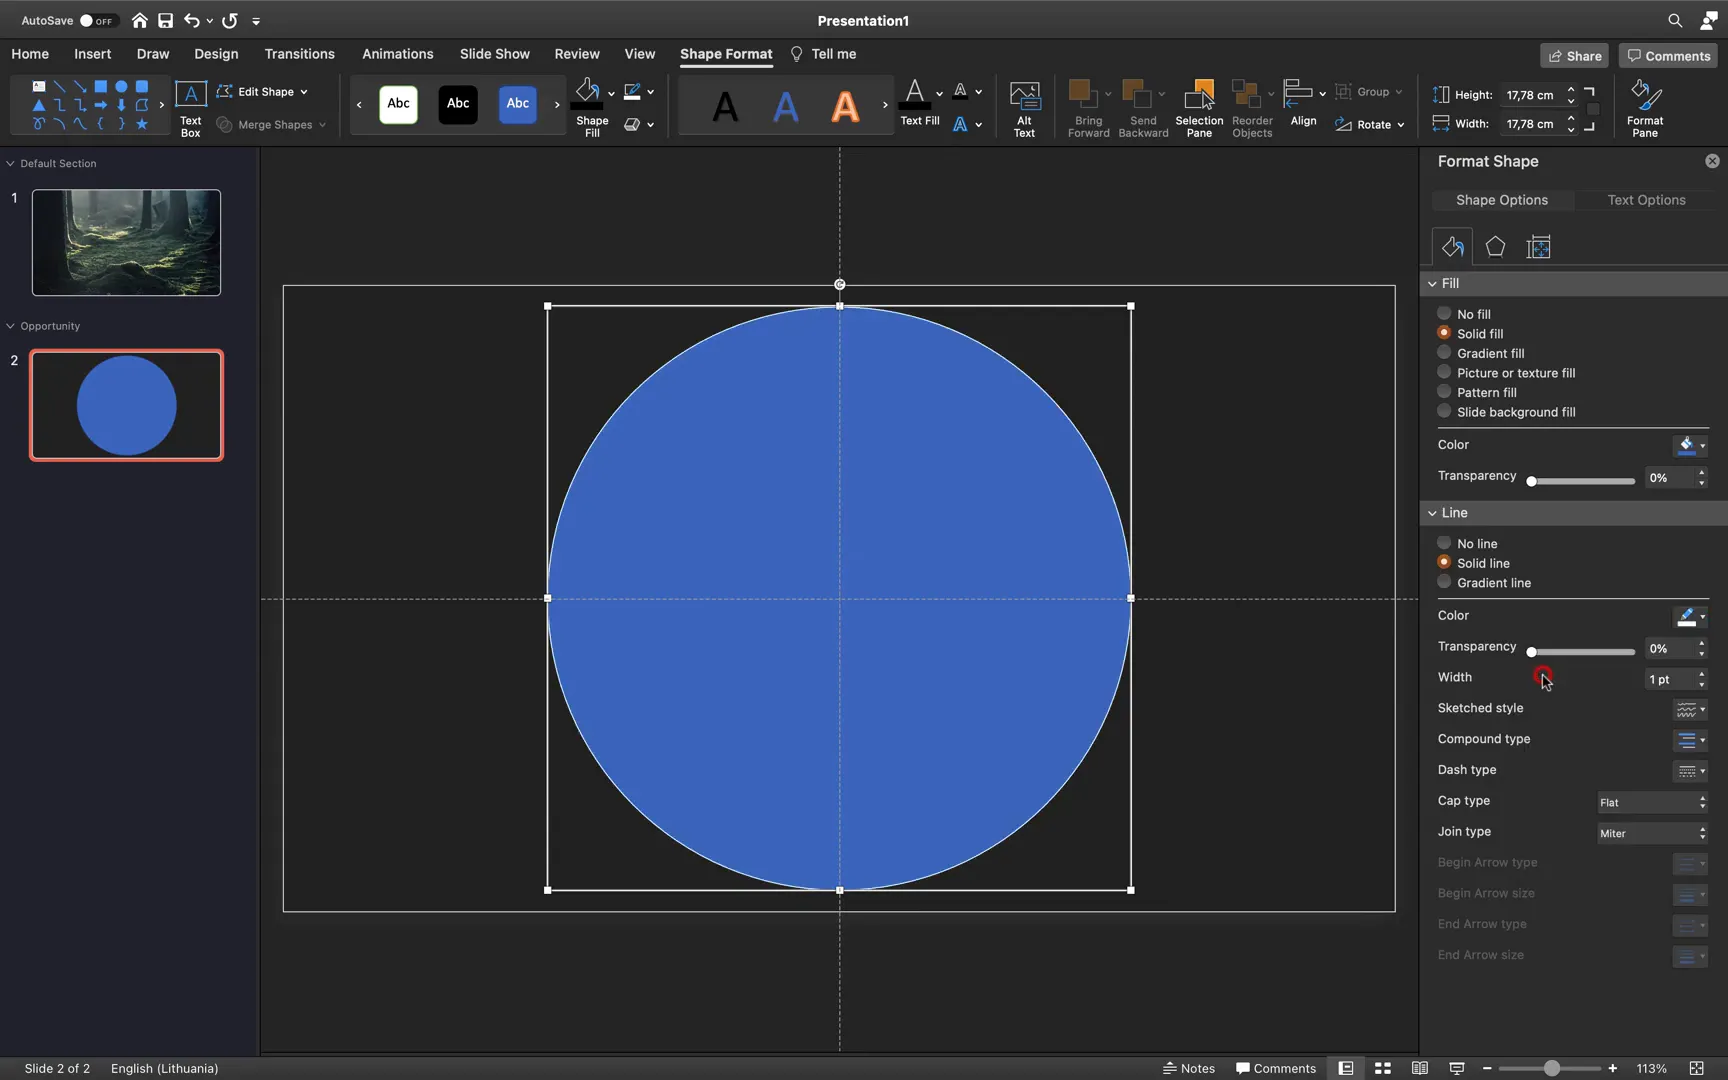
Now, insert a perfect circle shape by selecting the circle tool from the Insert Shapes menu. Hold down the Shift key to ensure the circle is perfectly round. Activate slide guides to help position your circle precisely in the center of the slide. Align it both vertically and horizontally, then apply a white outline with a thickness of 10 points.
Copy this circle and paste it back on the home slide. Use the eyedropper tool to pick a color from the background image—like a green shade from a tree—to fill the circle with a semi-transparent color that complements your design. Paste the circle back to the dark slide and adjust transparency as needed.
Adding Text and Icons for Visual Impact
The next step is to add descriptive text to your slide. Insert a text box and type the section title, such as Opportunity. Since the dark background makes black text invisible, change the font color to white for readability.
To save time and maintain consistency, copy the style of a text box from a previous presentation and paste it onto your new text box. This ensures font size, type, and effects like shadows remain uniform throughout your slides. Center the text box on the slide for a balanced layout.
Icons add visual cues and enhance the thematic appeal of your slides. If your PowerPoint version supports it, use the Insert Icons feature to add a light bulb icon (usually named “idea”). If not, websites like Flaticon offer free icon downloads. Insert the icon, color it white, and enlarge it for prominence.
Designing the Opportunity Slide with Background Effects and Shadows
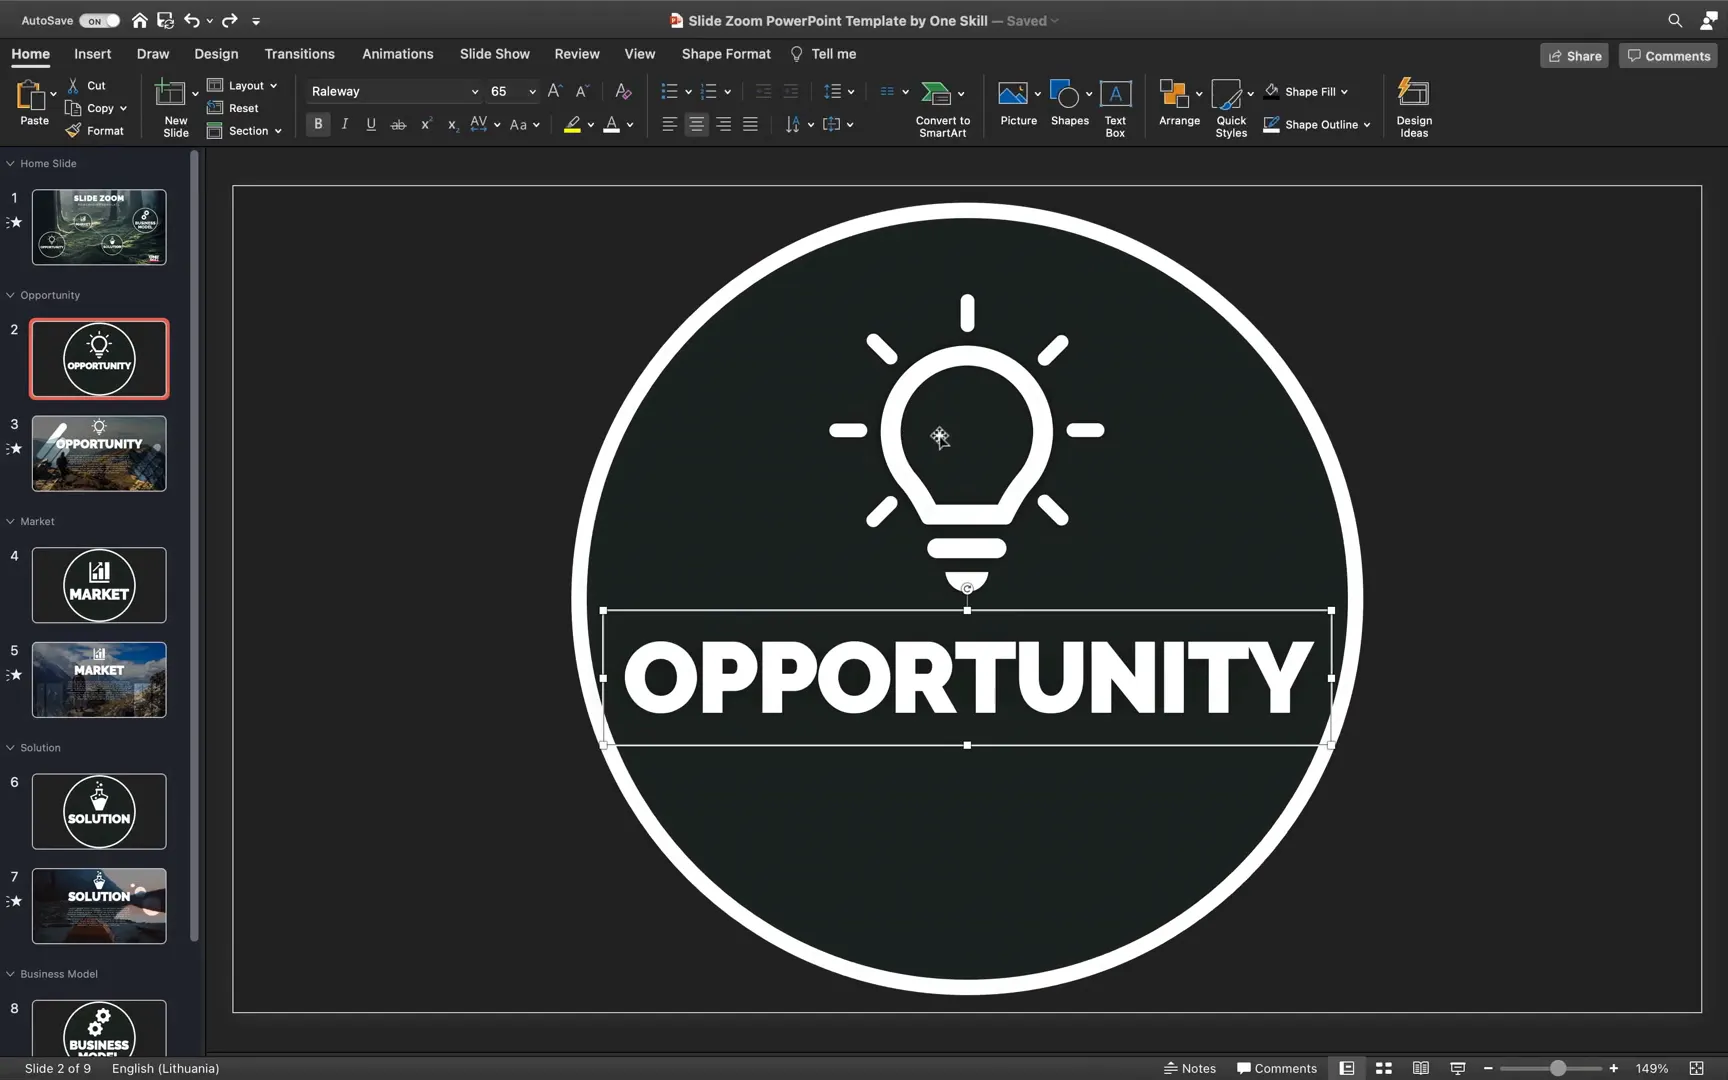
Create the actual Opportunity slide by duplicating the elements from the dark slide: the circle, text box, and icon. Paste them onto a new slide with a white background.
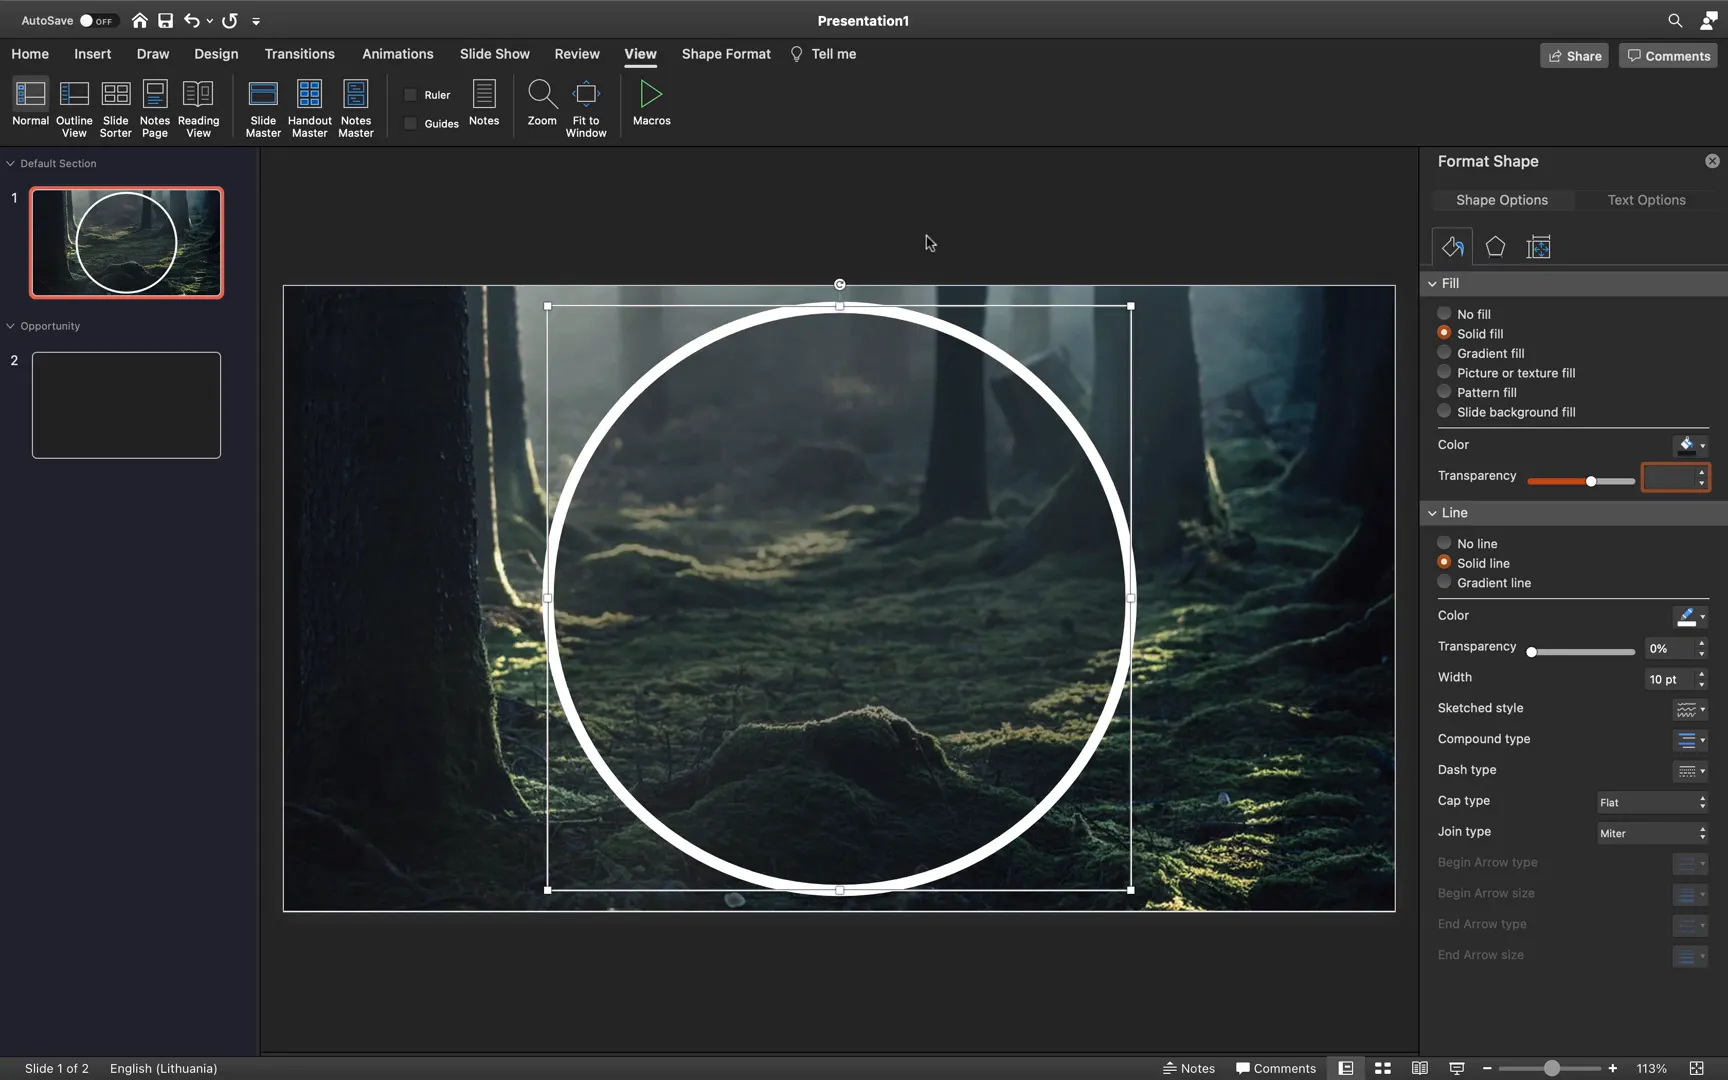
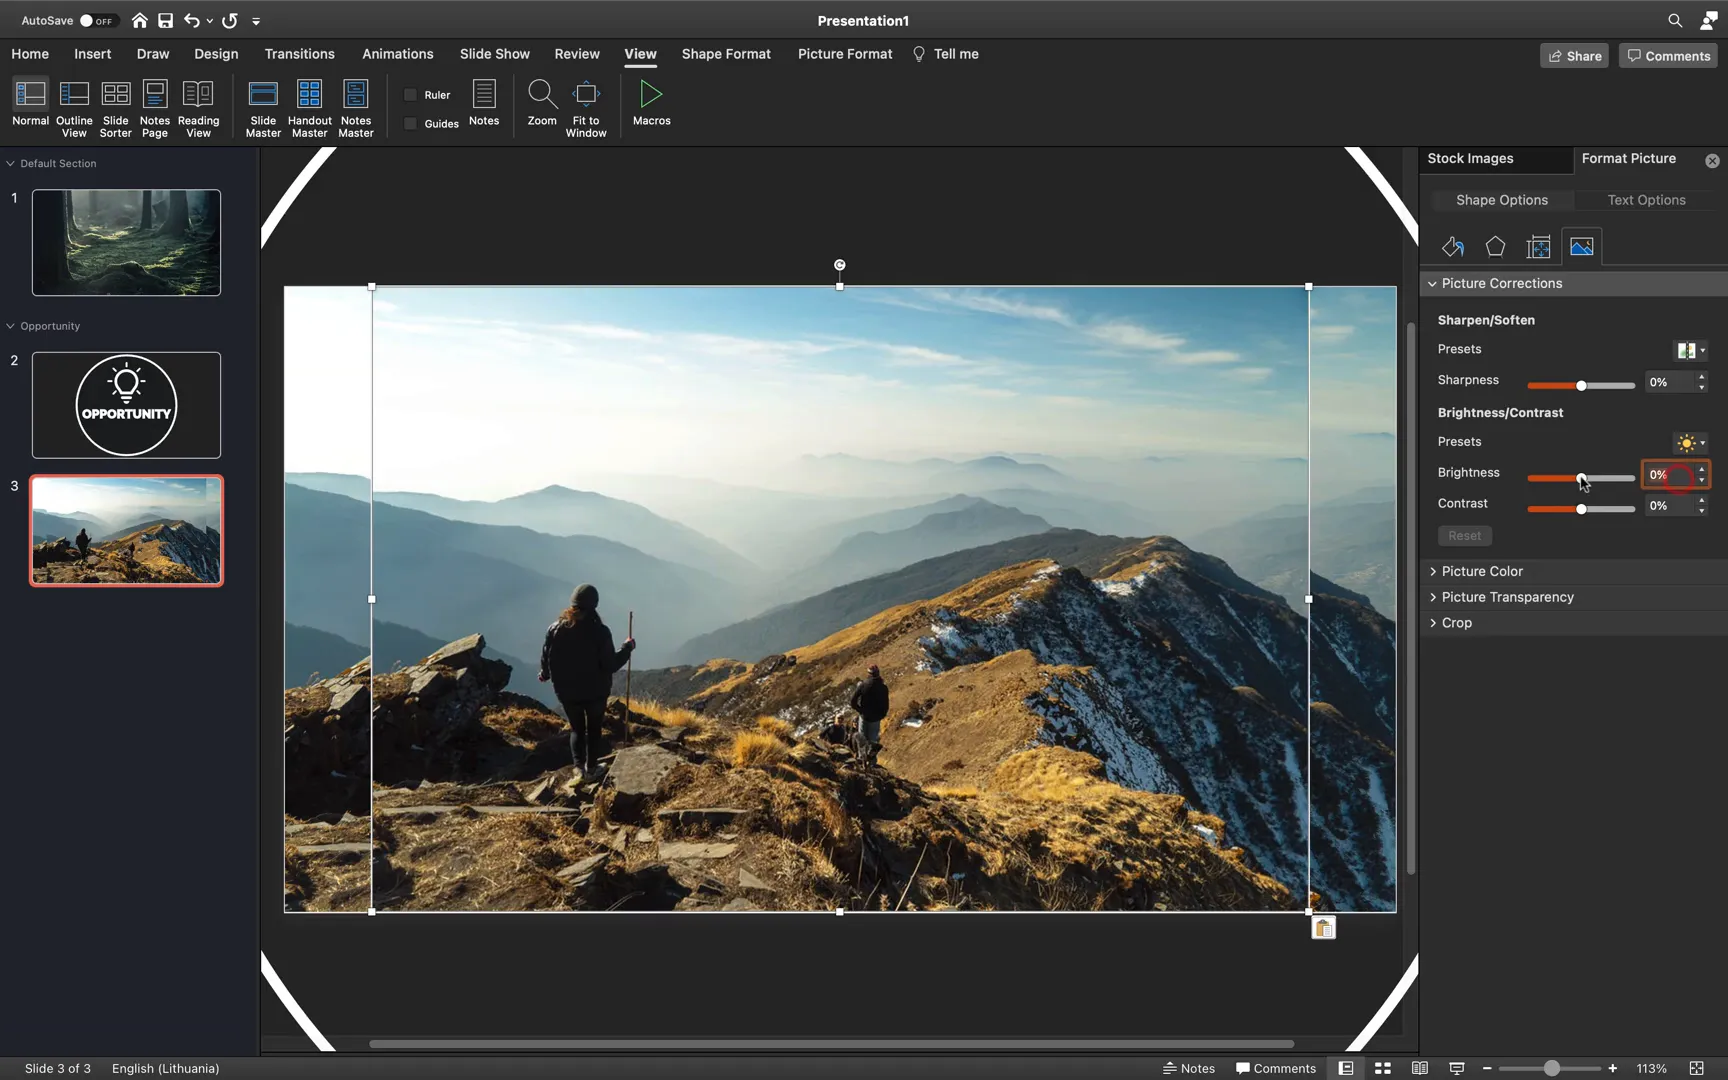
To add depth and a professional touch, choose a new background image from Unsplash and set it as the slide’s background via the Format Background menu. Enlarge the circle so that it extends beyond the slide edges, remove its fill, and keep the white outline. Duplicate the background image, paste it again on the slide, and reduce its brightness by 50%. Crop this darkened image to a 16:9 aspect ratio and ensure it covers the entire slide. This layering technique creates a subtle vignette effect that draws attention to the slide’s content.
Resize the light bulb icon smaller and increase the font size of the Opportunity text box to around 88 points for emphasis. Apply shadows to both the icon and text box to give them a floating effect. Adjust shadow transparency, blur, and size until you achieve the desired look.
Finally, add descriptive text copied from previous presentations to complete the slide content.
Adding Smooth Morph Transitions for Seamless Animations
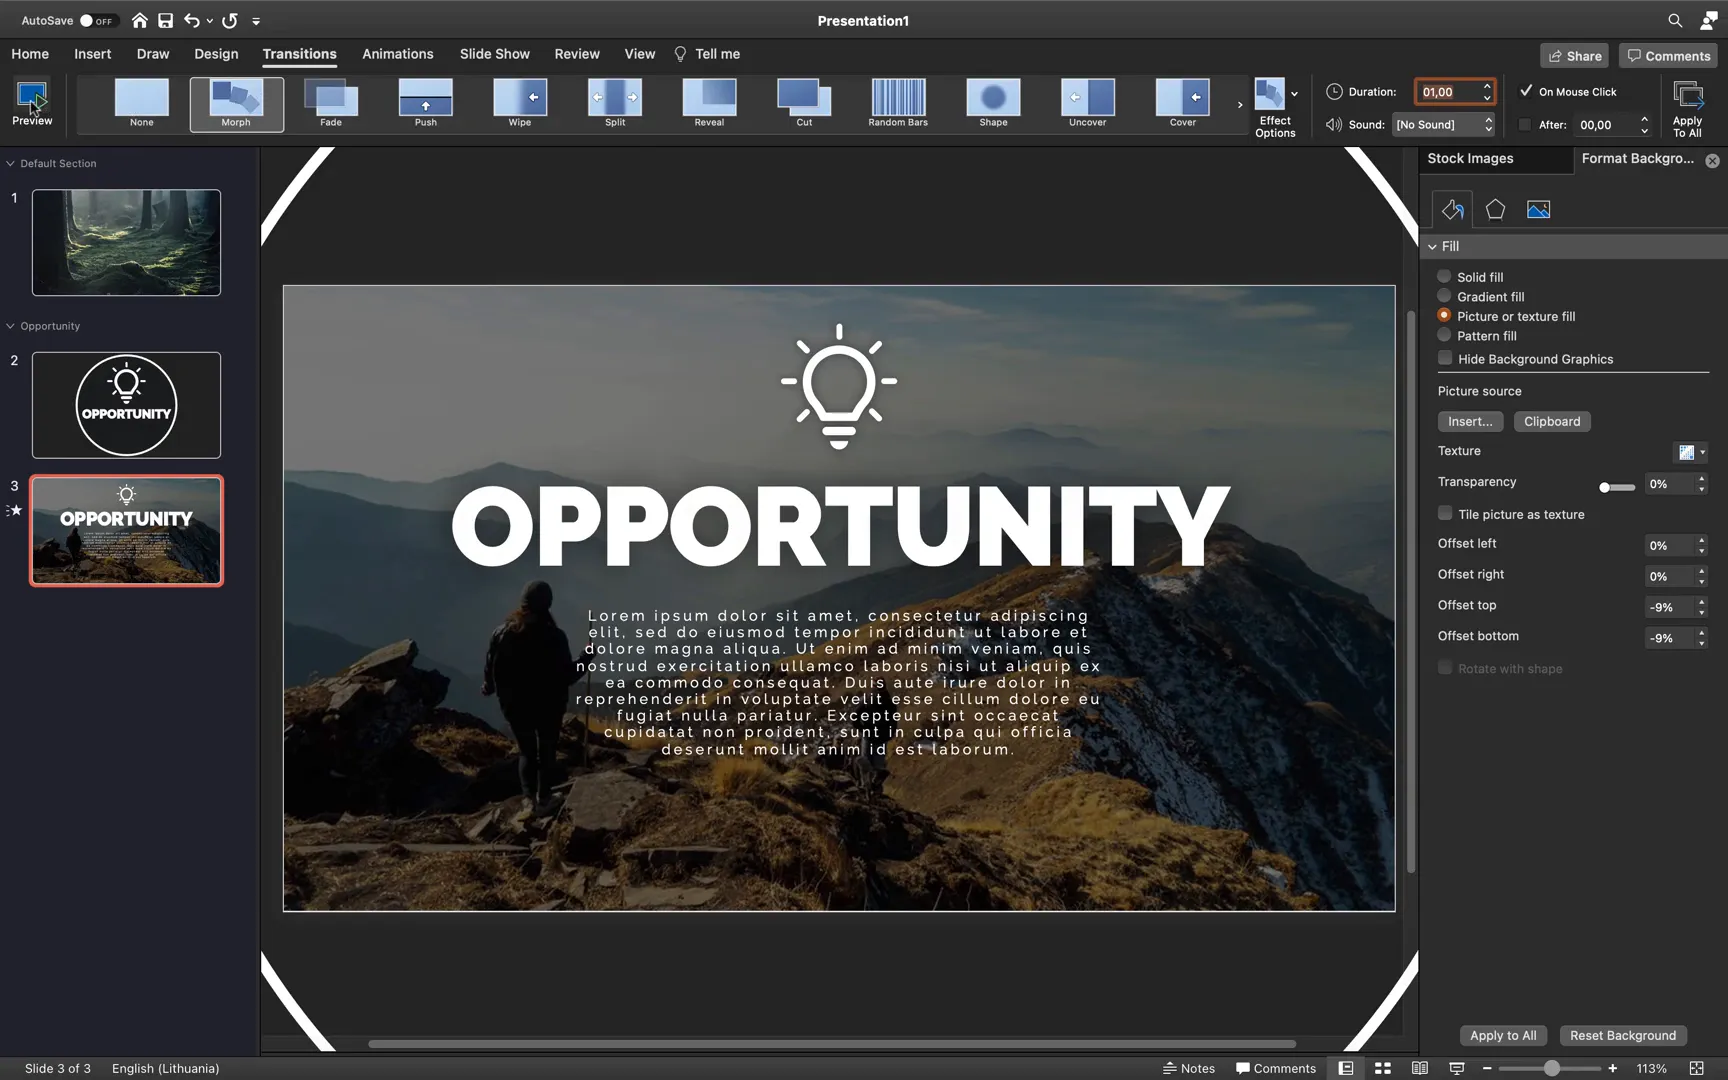
A key feature that makes the slide zoom presentation visually appealing is the Morph transition. Set the transition for the Opportunity slide (the one with the white background) to Morph. This transition animates the changes between slides smoothly, such as resizing shapes or moving objects.
For the dark slide preceding it, set the transition to automatically advance after zero seconds. This setup creates a fluid animation effect when moving from the dark slide to the bright Opportunity slide.
Animating Shapes: Creating Fun Rounded Rectangles
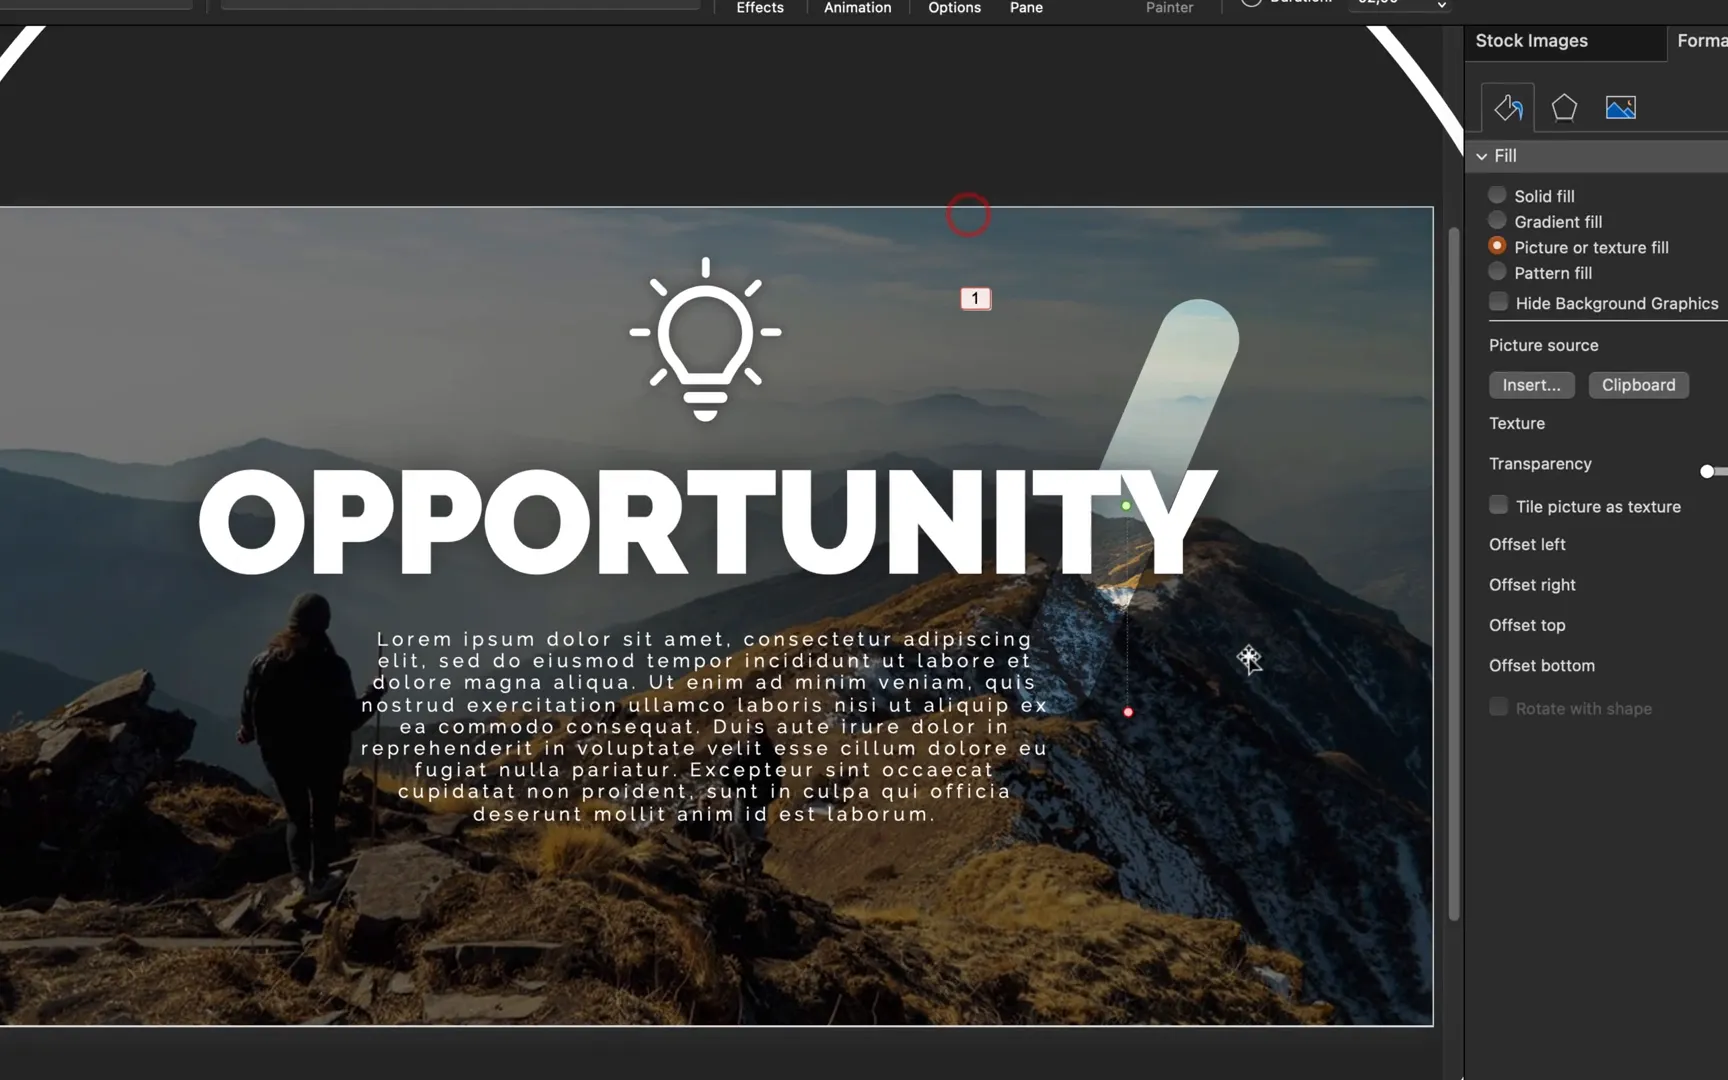
To add dynamic elements, insert rounded rectangles with no outlines and fill them using the slide background fill option. This technique allows the rectangles to blend beautifully with your slide’s background image, creating a unique effect that looks like transparent shapes revealing the background.
Rotate and place these rounded rectangles creatively around your slide to add visual interest. Make sure that text boxes stay on top to maintain readability.
Apply a Line animation path to each rounded rectangle, making them move upwards. Set the animation options to start with the previous animation, auto-reverse, and repeat until the end of the slide. Adjust the animation duration to around two seconds for a smooth effect.
Create copies of the animated rectangles and stagger their start times by adding delays (e.g., 0.4 seconds, 0.8 seconds, 1.2 seconds) to produce a flowing, lively pattern.
Inserting Interactive Section Zooms for Navigation
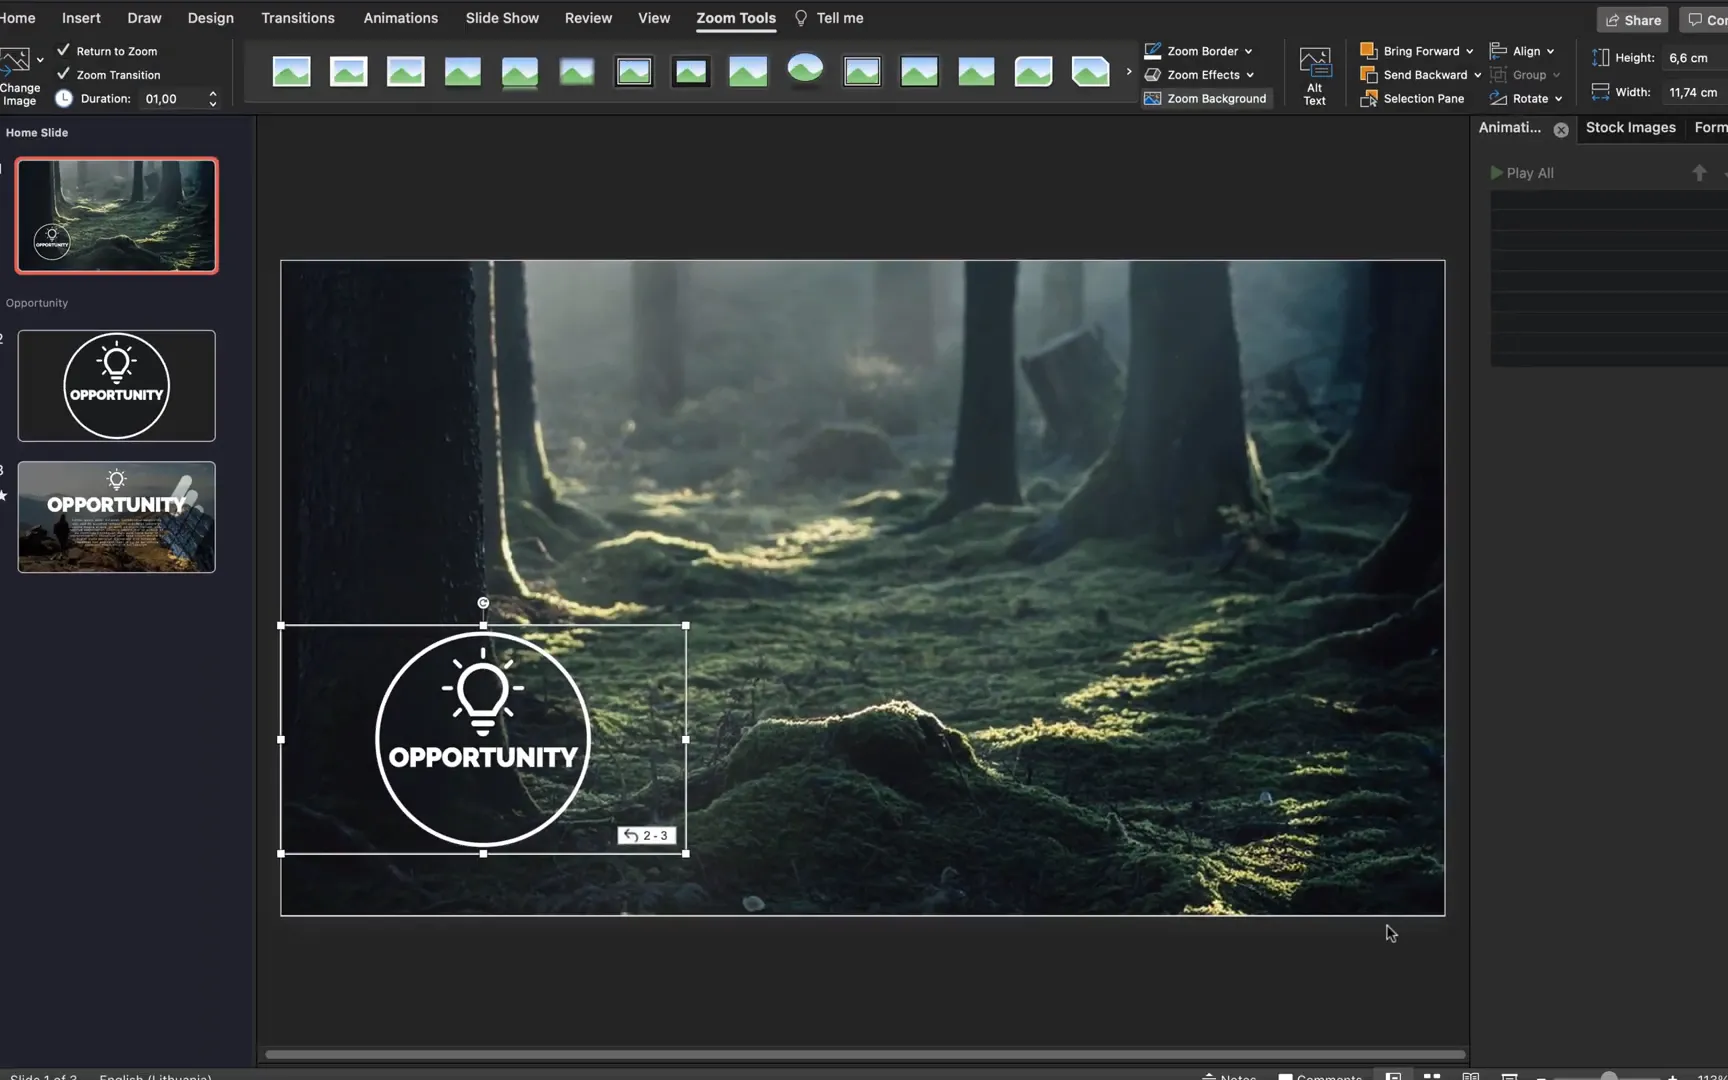
Rename your first section to Home Slide to keep your presentation organized. Then, insert a Section Zoom by going to Insert > Zoom > Section Zoom and choosing the Opportunity section.
Right-click on the inserted section zoom and select Zoom Background to make its background transparent, allowing it to blend seamlessly with your home slide.
Position the section zoom button anywhere you prefer on the home slide. When presenting, clicking this zoom will smoothly transition to the Opportunity slides, and clicking again will zoom back to the home slide. This interactive navigation adds a Prezi-style feel to your PowerPoint presentation.
Building the Market Section with Animated Rectangles
Next, create a new section named Market. To save time, copy the slides from the Opportunity section and paste them into the Market section, keeping the source formatting intact.
Update the text boxes, change icons, and select a new background image that fits the Market theme.
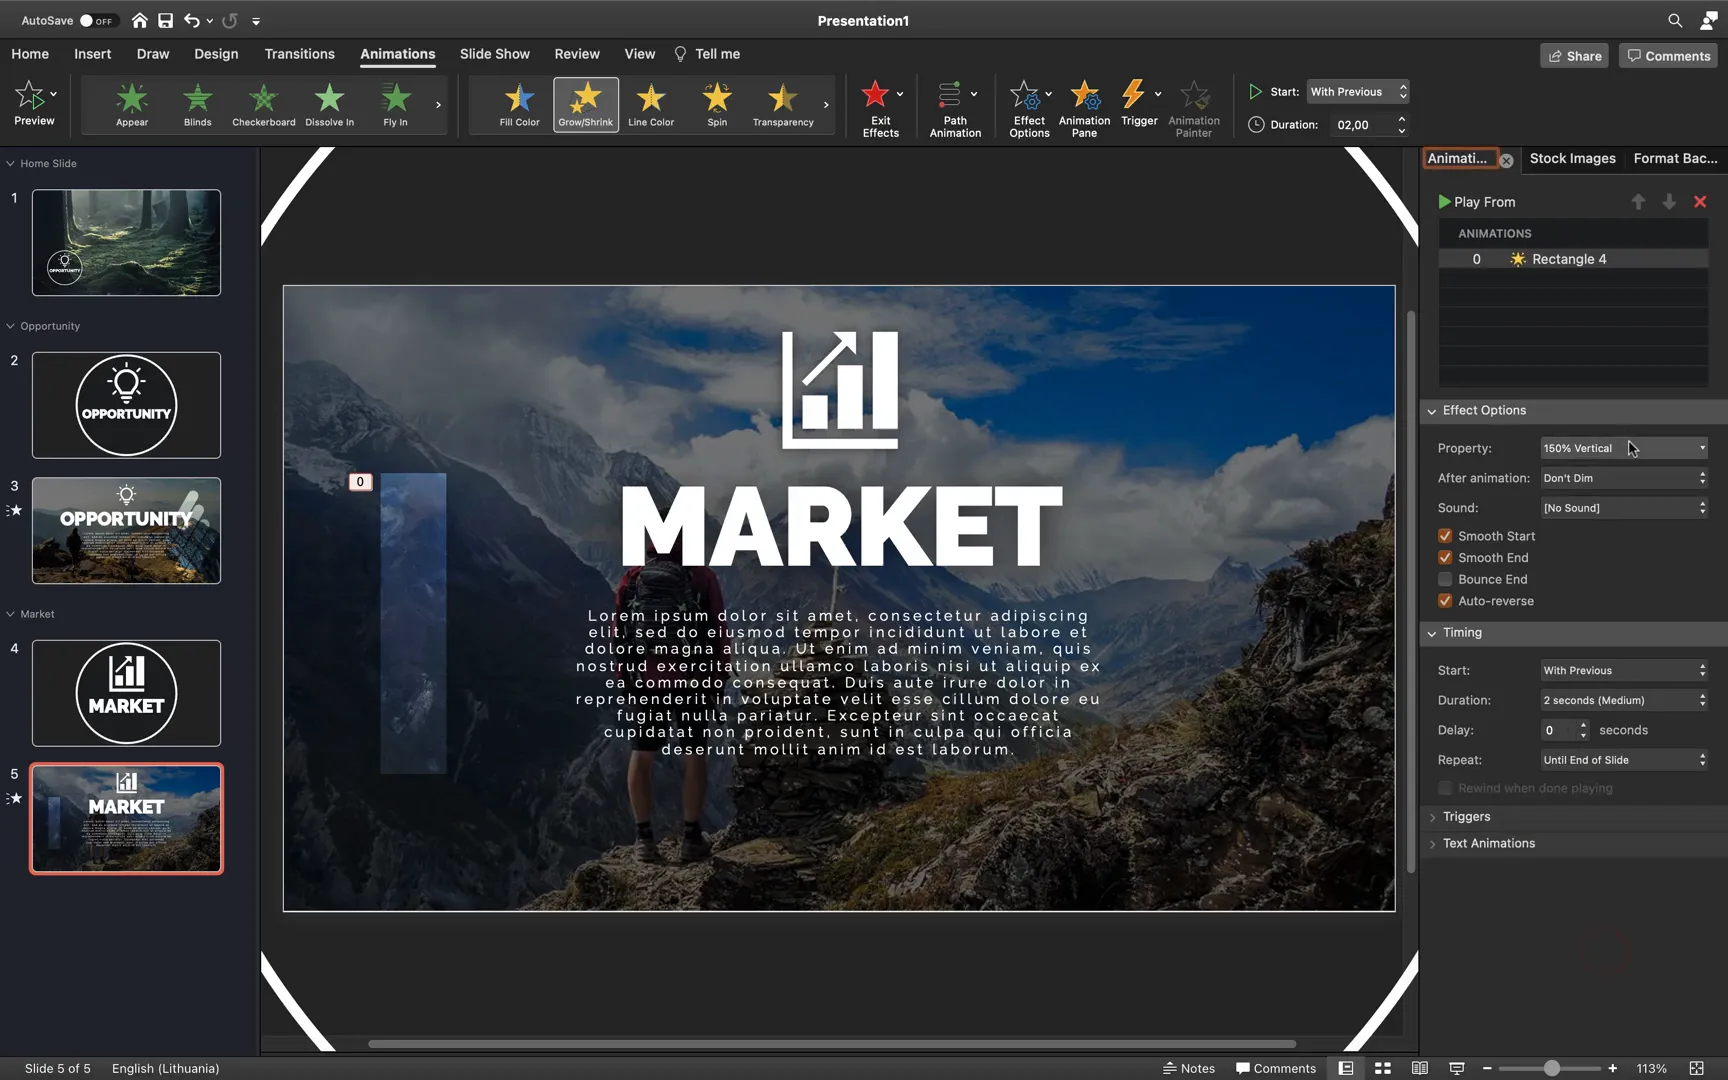
To create the animated vertical rectangles seen on the Market slide, insert simple rectangles filled with the slide background fill and no outlines. Place them at the bottom of the slide.

Apply a Grow/Shrink animation set to grow vertically by 125%. Enable smooth start and end, auto-reverse, and repeat until the end of the slide. This makes the rectangles expand and contract continuously.
To ensure the rectangles grow only upwards, add a secondary Line animation with a short upward motion path. Sync both animations to start with previous, have the same smooth settings, auto-reverse, and repeat.
Duplicate the animated rectangles horizontally and distribute them evenly across the slide, staggering the animation delays to create a rhythmic, wave-like effect. You can also duplicate the group to the right side of the slide for added visual density.
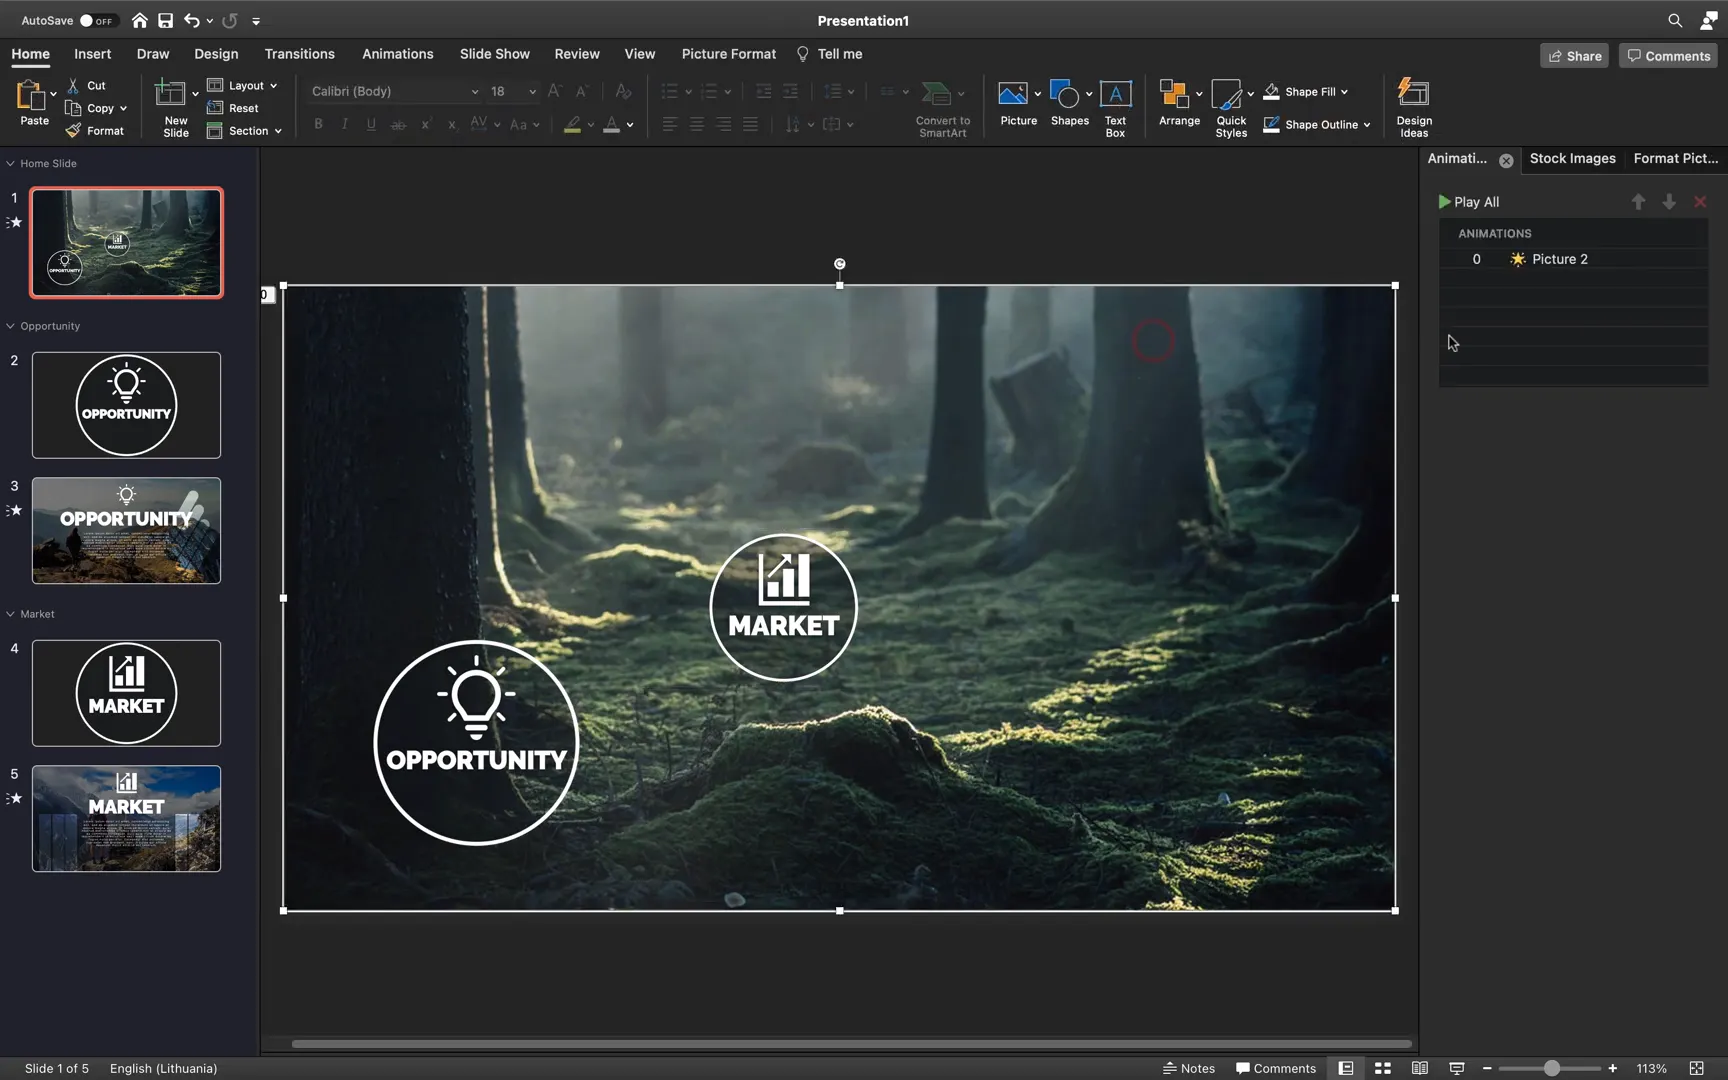
Enhancing the Home Slide with a Zoom-In Background Animation
To add subtle motion to your home slide background, apply a Grow/Shrink animation scaling the image by 110%. Set the animation to start with previous, enable smooth start and end, auto-reverse, and repeat indefinitely. This creates a gentle zoom-in-and-out effect that keeps the slide visually engaging without being distracting.
Use the animation painter tool to copy this animation and paste it onto the home slide background image for consistency.
Creating Animated Bubbles for the Solution Section
Add a new section called Solution and copy slides from previous sections to maintain consistency. Update the text, icons, and background image accordingly.
To create the animated bubbles effect, insert circles filled with the slide background fill and no outline. Apply a Line animation moving the bubbles upwards. Set the animation to start with previous, with no smooth start or end, and repeat indefinitely.
Add a Fade animation to the same bubbles, also starting with previous and repeating until the end of the slide. This combination creates bubbles that rise and fade out, mimicking a natural bubble movement.
Copy and resize these bubbles multiple times, adding staggered delays (e.g., 0.4 seconds and 0.8 seconds) to produce a lively, floating bubble effect on the slide.

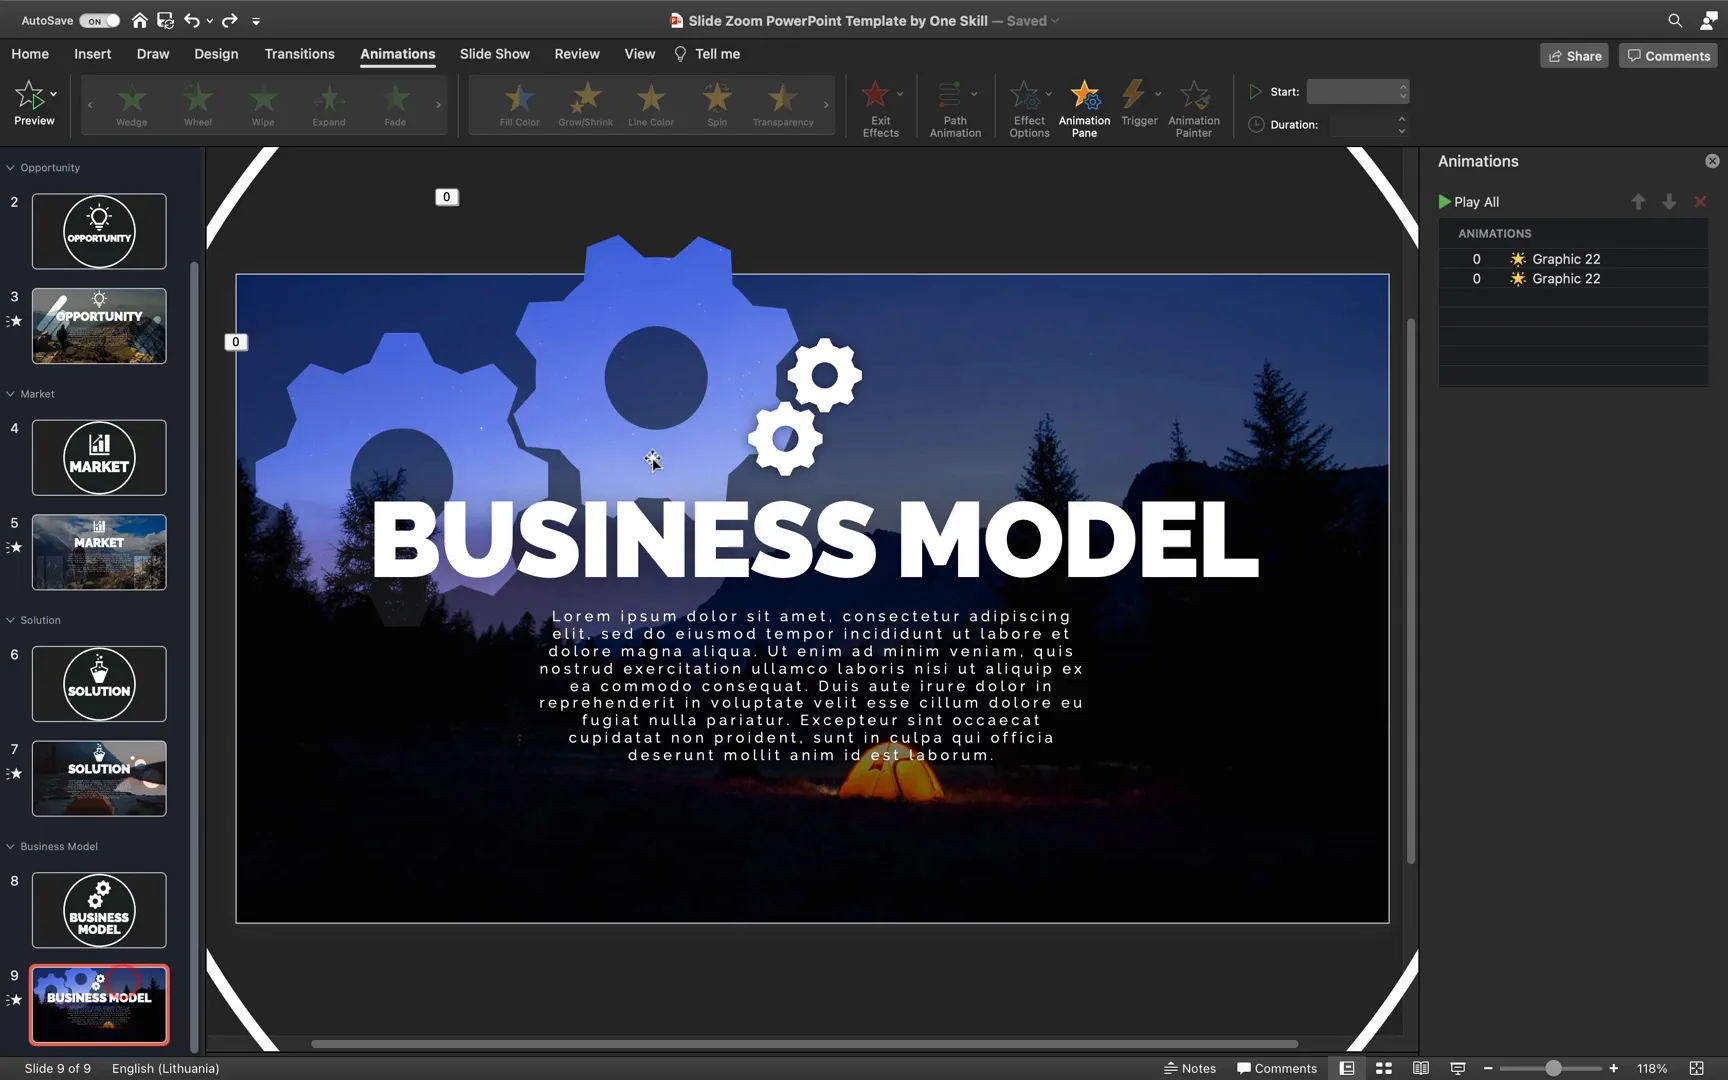
Crafting the Business Model Section with Spinning Gear Animation
For the final section, Business Model, copy slides from previous sections and update the text, icons, and background image.
The highlight of this section is the spinning gears animation. Here’s how to create it:
- Insert gear icons and set their fill to slide background fill for a sophisticated look.
- To customize the gears, convert the icon to shapes and use vector editing tools like Inkscape to subtract parts of the gear shapes. This process involves tracing the bitmap to create vector paths and using the difference operation to modify shapes.
- Export the edited gear as an SVG file and import it back into PowerPoint as an editable shape.
- Adjust the size and position of the gears so they mesh together visually.
- Apply a Spin animation to each gear: one clockwise and the other counterclockwise, both set to repeat indefinitely with a duration of about seven seconds.
This creates a realistic and engaging spinning gear effect that adds mechanical sophistication to your presentation.
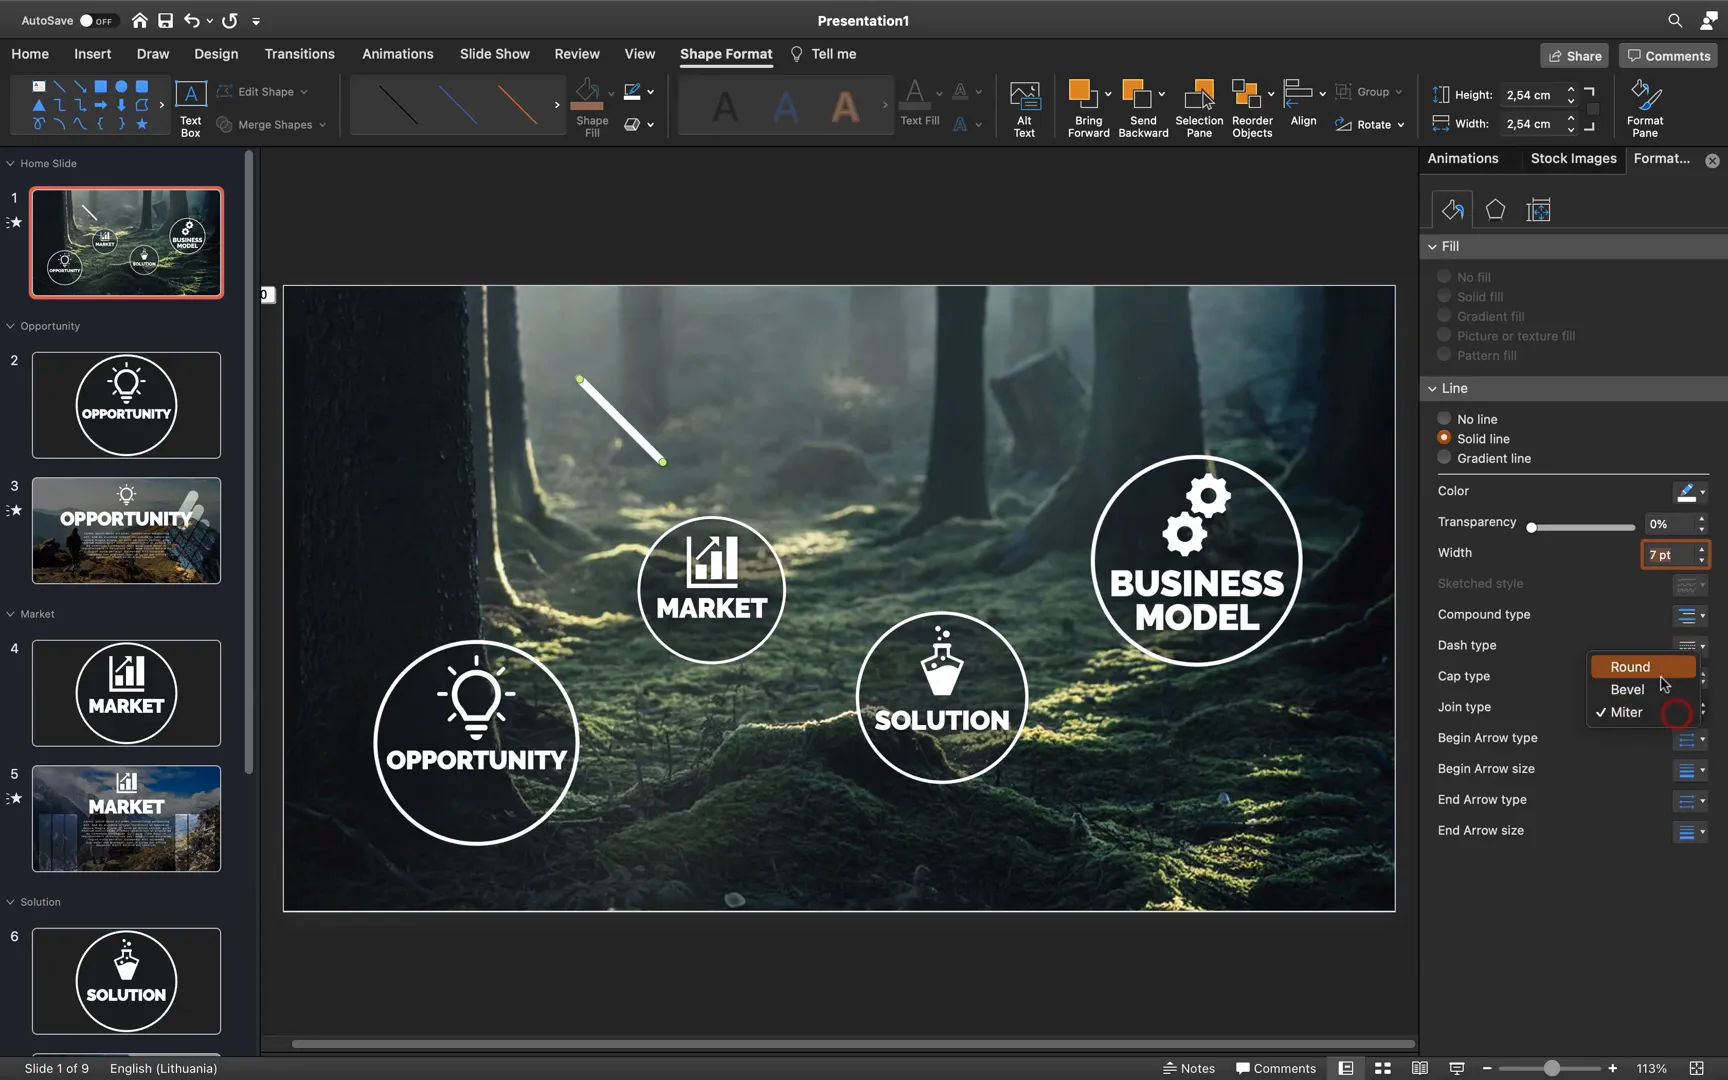
Final Touches: Adding Section Zooms and Connecting with Dashed Lines
Insert a section zoom for the Business Model section onto your home slide. Make sure to set a transparent background for a clean look.
Arrange all your section zooms neatly on the home slide, adjusting their size and position until you achieve a balanced layout.
To visually connect the section zooms, insert lines with rounded caps and joins. Set the line color to white or any color that contrasts well with your background. Adjust the width to about 7 points for visibility.
Enable dashed line styles for a modern, tech-inspired look. Copy and position the lines to connect all section zooms, creating a network-like structure that visually guides your audience through the presentation flow.
Finally, bring all section zooms to the front to ensure they remain clickable and visible. Add your presentation title, subtitle, and logo for branding.
Summary: What You’ve Learned
- How to set up a blank PowerPoint presentation and use high-quality background images effectively.
- Organizing slides into sections and leveraging PowerPoint’s section zoom feature for interactive navigation.
- Creating visually appealing shapes like circles and rounded rectangles, and using slide background fills for unique effects.
- Applying Morph transitions to create smooth animation between slides.
- Designing animated elements such as moving rounded rectangles, growing rectangles, floating bubbles, and spinning gears.
- Using external tools like Inkscape to customize vector shapes and importing them into PowerPoint.
- Enhancing the home slide with zoom animations and connecting section zooms with stylish dashed lines.
By following these steps, you can create a polished, interactive PowerPoint presentation that captivates your audience and elevates your storytelling. The techniques shared here blend creativity with technical know-how, giving you the tools to design presentations that stand out.
Frequently Asked Questions (FAQ)
What is a Section Zoom in PowerPoint and how does it work?
A Section Zoom is an interactive navigation feature in PowerPoint that allows you to jump between sections of your presentation with smooth zooming animations. It helps create non-linear presentations where you can click on a section zoom to dive into that part of the deck and then zoom back to the home slide.
How do Morph transitions enhance slide animations?
Morph transitions animate the smooth movement and resizing of objects between slides. When you duplicate objects and change their size, position, or formatting, Morph creates a fluid animation that visually connects the slides, enhancing storytelling and engagement.
Can I use free images and icons in my presentations?
Yes! Websites like Unsplash offer free high-quality images, and sites like Flaticon provide free icons. Always check the license terms and provide attribution if required.
What tools can I use to edit vector shapes for PowerPoint?
Inkscape is a free, open-source vector graphics editor that allows you to trace bitmap images, modify shapes using path operations, and export SVG files compatible with PowerPoint. This is useful for customizing icons and creating unique shapes.
How can I add animations that repeat indefinitely in PowerPoint?
When adding animations, set the timing options to Repeat Until End of Slide and enable Auto Reverse if needed. This ensures animations loop continuously while the slide is displayed.
Is this slide zoom template available for free?
Yes! You can download the free slide zoom template from the One Skill PowerPoint website by entering your email. This template includes all the features demonstrated here, ready for you to customize.
Resources and Links
- One Skill PowerPoint Website – Free tutorials and templates
- Background Image 1
- Background Image 2
- Background Image 3
- Free Icons from Flaticon
- Inkscape Vector Editor
By mastering these techniques, you’ll be able to create presentations that are not only visually stunning but also highly interactive and engaging. Remember to experiment with animations, timings, and layouts to find the style that best suits your content and audience.
Happy presenting!
Check out the full video: PowerPoint Slide Zoom Tutorial 🔥Free Template🔥


