

Welcome to this comprehensive guide on creating an eye-catching and dynamic PowerPoint presentation using slide zooms, morph transitions, and engaging animations. This tutorial is designed to walk you through the entire process of building a Prezi-style slide zoom template from scratch, complete with clickable section zooms and beautiful animated elements. Whether you’re a beginner or an intermediate PowerPoint user, you will find practical tips and techniques to elevate your presentations to the next level.
Throughout this article, I will share step-by-step instructions, creative animation ideas, and design insights that will help you craft a professional and interactive PowerPoint template. By the end of this tutorial, you’ll have a fully functional slide zoom presentation that impresses your audience and keeps them engaged.
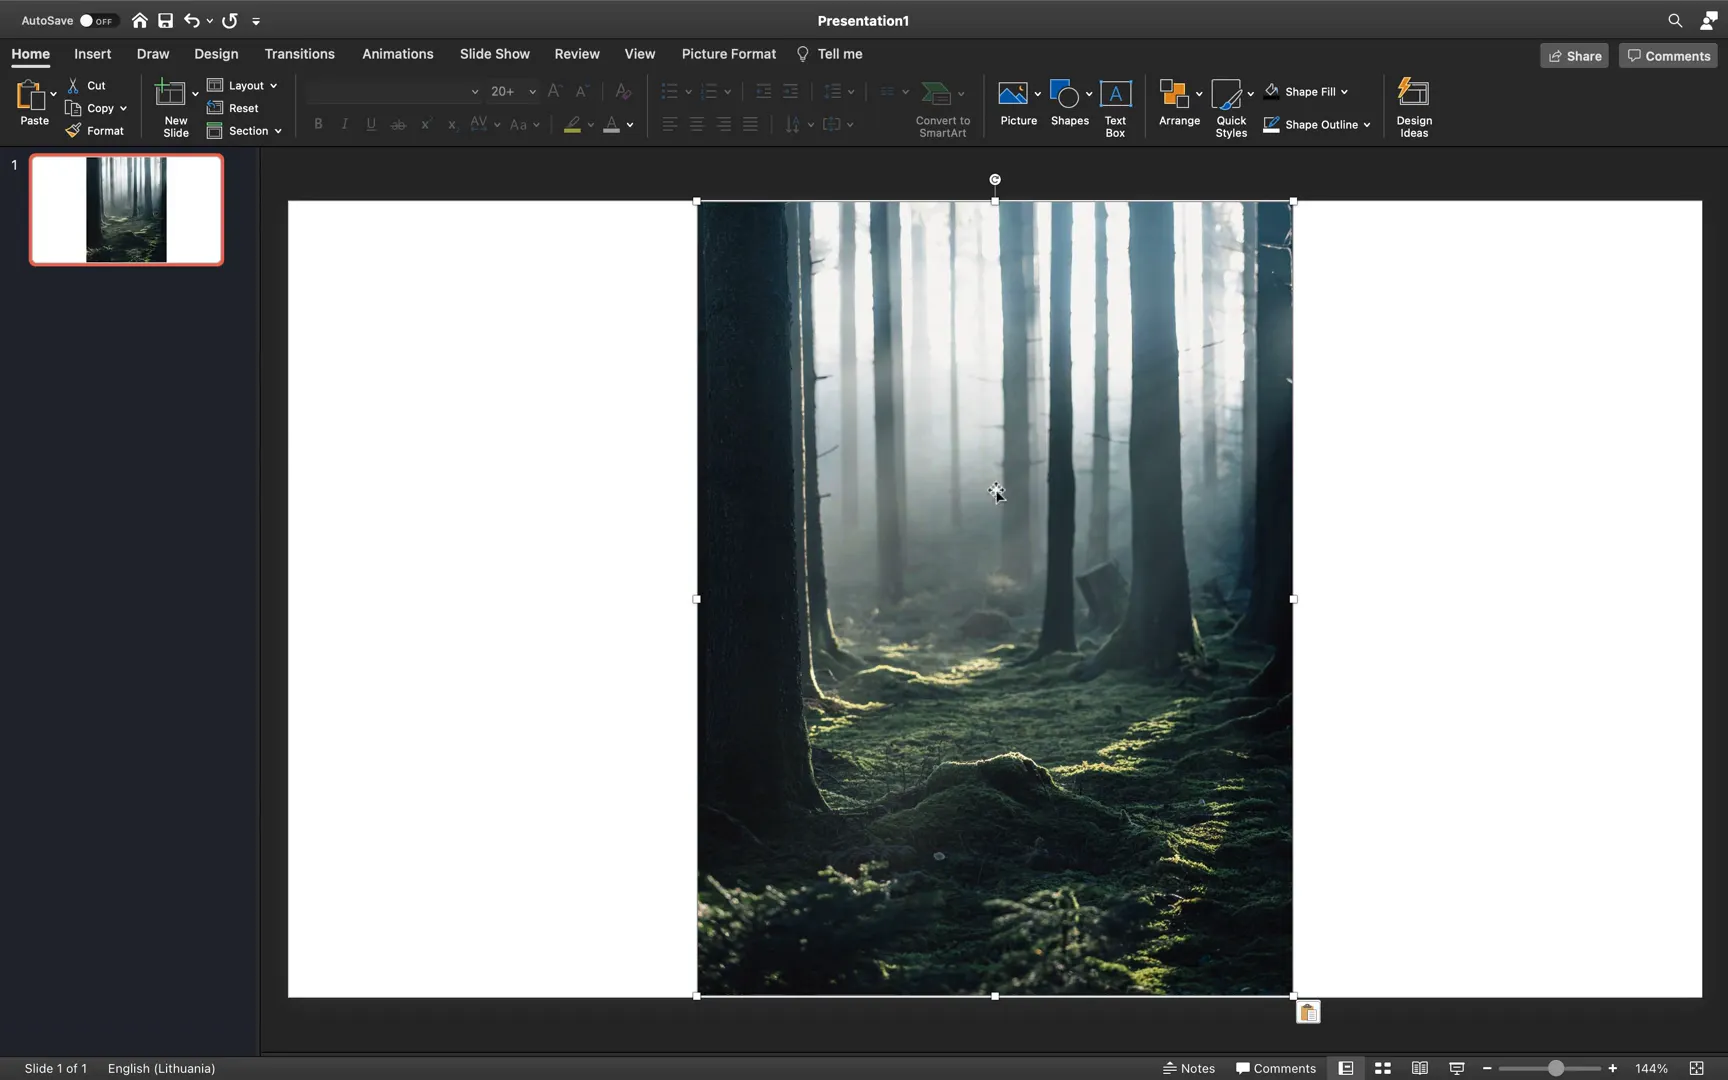
Table of Contents
- Getting Started: Setting Up Your Home Slide
- Organizing Your Presentation: Adding Sections and Slides
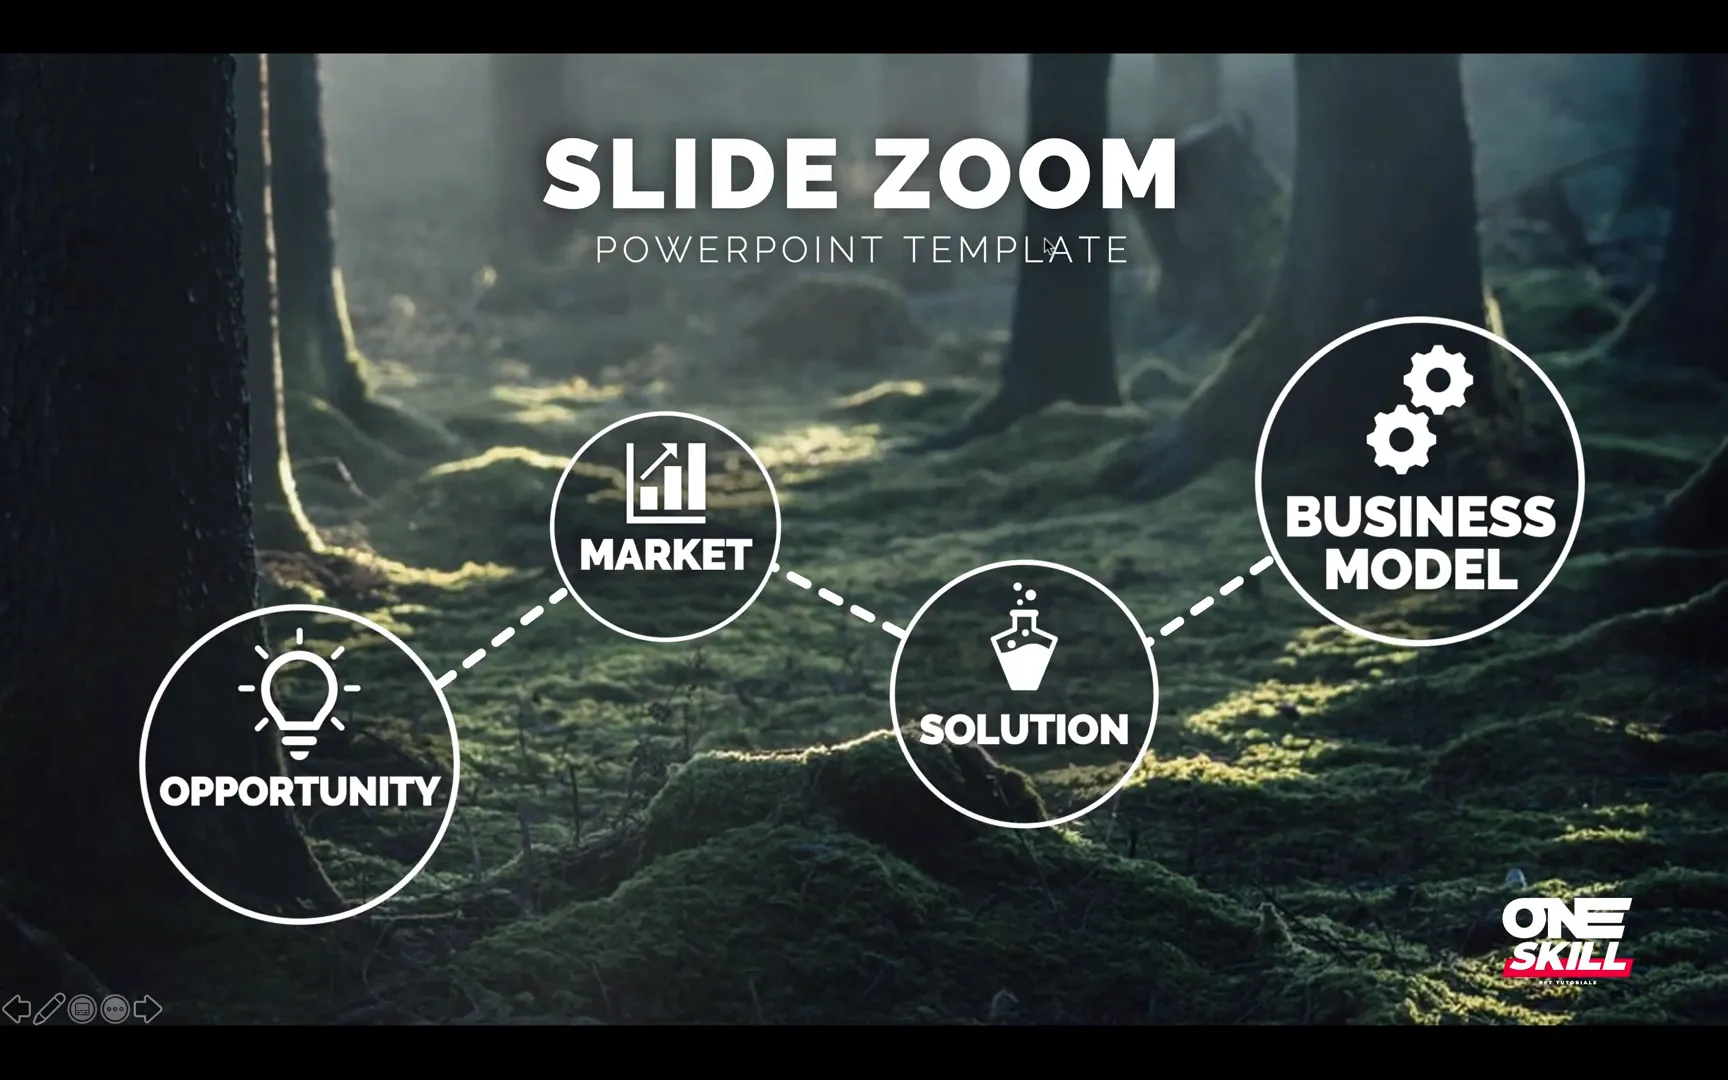
- Designing the Opportunity Slide
- Animating Rounded Rectangles for Visual Interest
- Inserting Section Zooms for Interactive Navigation
- Creating the Market Section with Animated Rectangles
- Enhancing the Home Slide with Background Zoom Animation
- Animating Bubbles for the Solution Section
- Designing the Business Model Section with Spinning Gears
- Connecting Section Zooms with Dashed Lines
- Final Touches: Title, Subtitle, and Logo
- Frequently Asked Questions (FAQ)
- Conclusion
Getting Started: Setting Up Your Home Slide
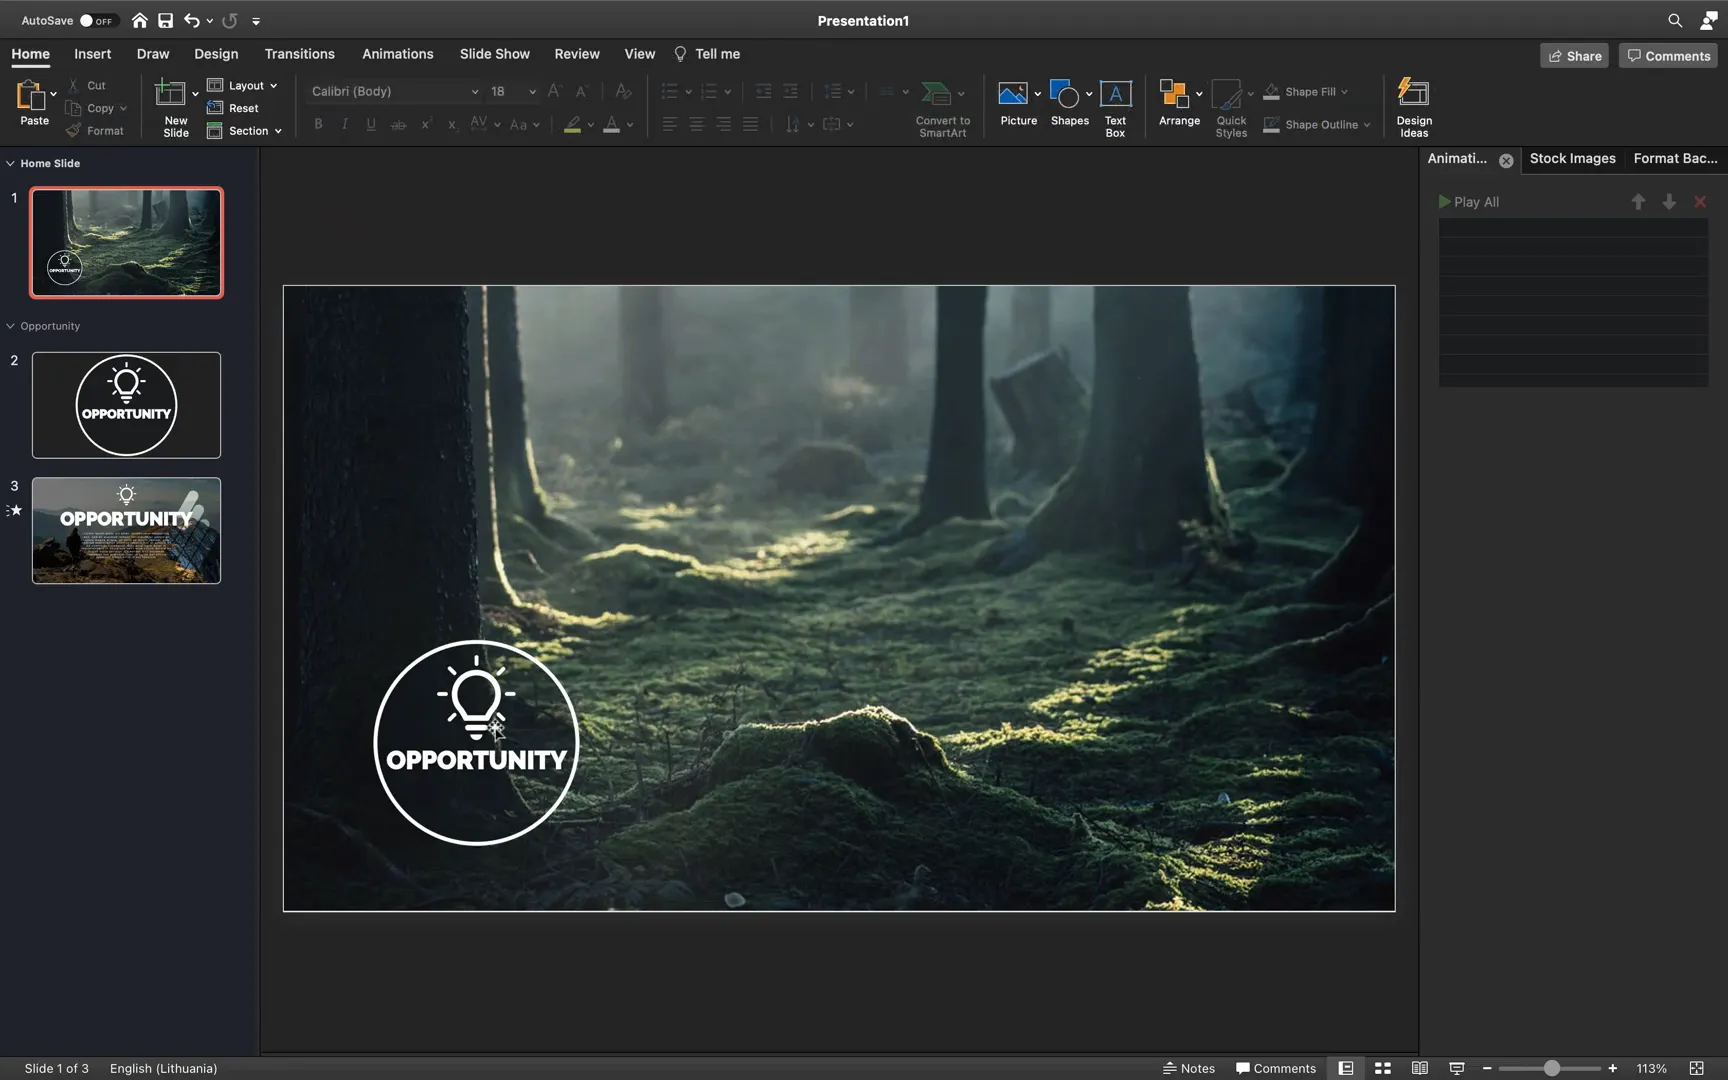
The foundation of any great presentation is a striking home slide that sets the tone for the entire deck. To begin, open a new PowerPoint presentation and set the slide layout to blank. This ensures a clean canvas without any default placeholders that might interfere with your design.
Next, you need a beautiful background image to give your home slide visual appeal. I recommend using high-quality photos from Unsplash, a fantastic source for free, professional photos. For this tutorial, I’ve chosen a stunning nature photo that complements the theme of opportunity and growth.
Simply copy the image from Unsplash and paste it onto your first slide. Resize the photo to cover the entire slide by dragging its corners while holding the Shift key to maintain proportions. Use the crop tool to fine-tune the image size and positioning, ensuring it perfectly fits within the slide boundaries.
Organizing Your Presentation: Adding Sections and Slides
To create an interactive slide zoom presentation, it’s important to organize your slides into meaningful sections. This structure will allow you to insert section zooms later, enabling smooth navigation between different parts of your presentation.
Right-click in the slide sorter pane and select Add Section. Name this section Opportunity. After creating the section, insert a new blank slide with a dark background. This contrast will make it easier to work with white shapes and text later on.
For the dark background, you can either fill the slide with a solid dark color or use a darkened image. This slide will serve as the introductory visual for the Opportunity section.
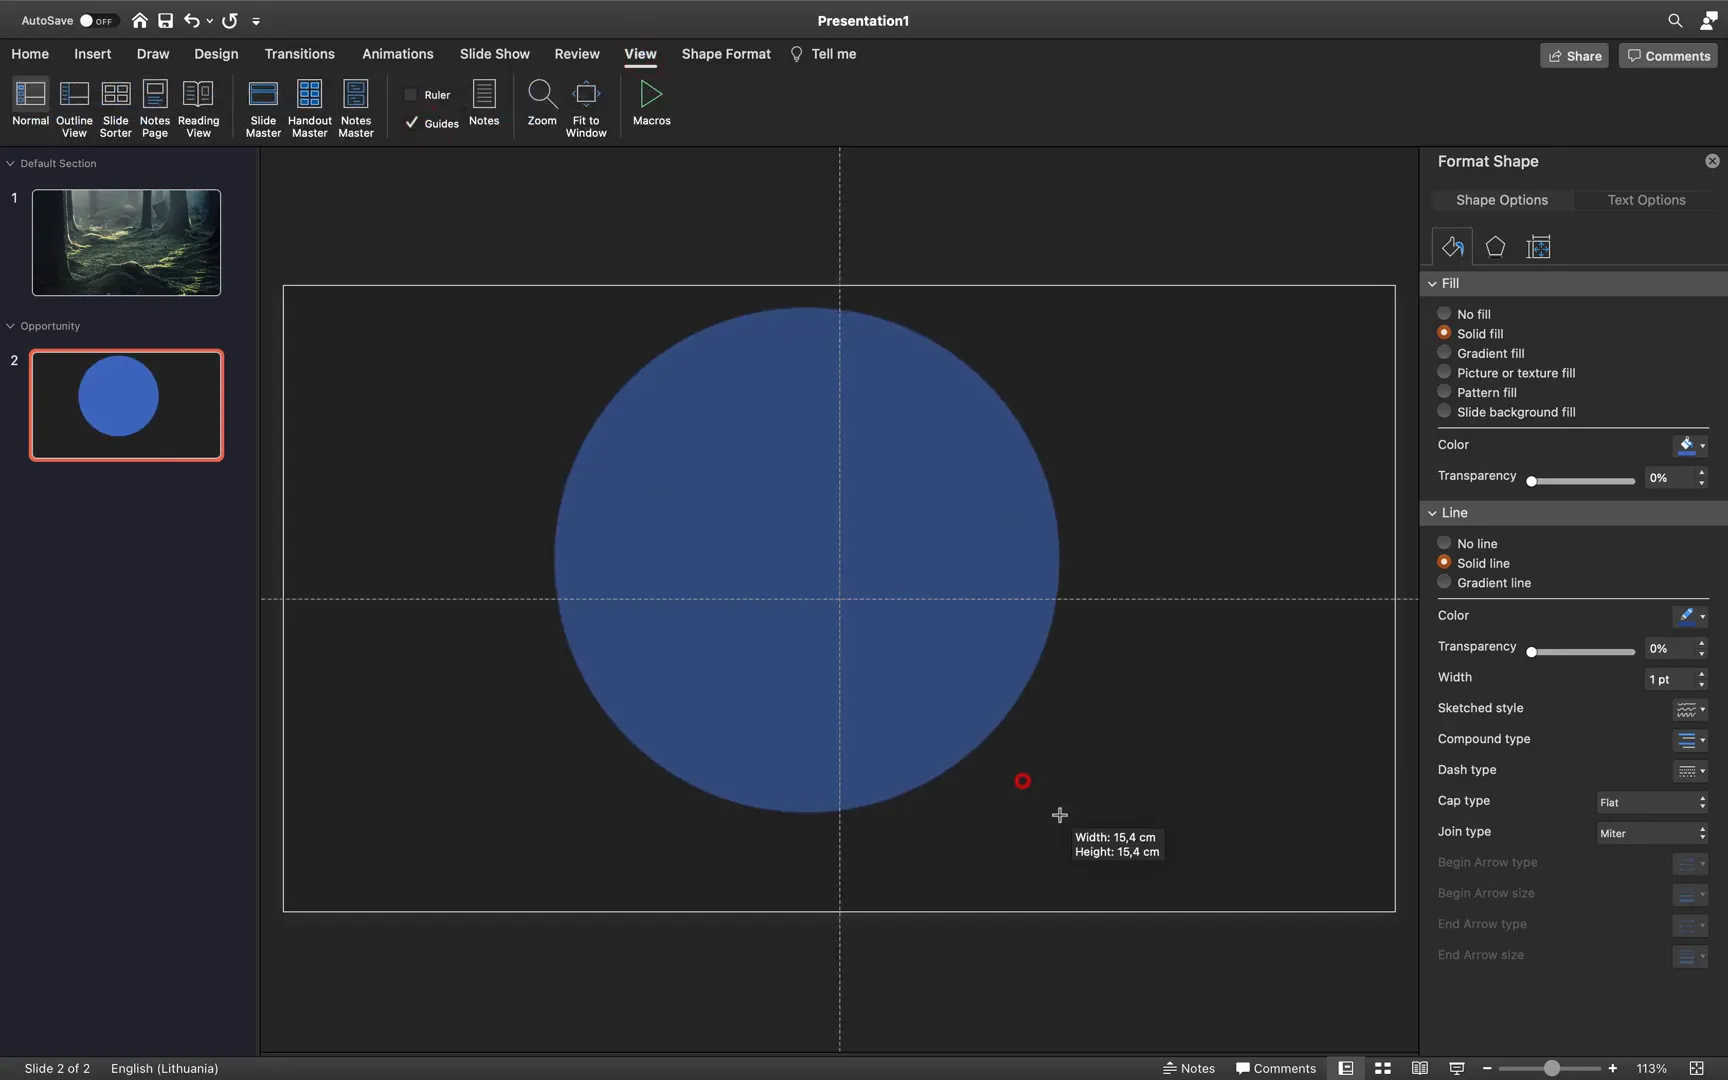
Creating a Central Circle Shape
On this dark slide, insert a perfect circle shape by choosing the circle tool and holding the Shift key while drawing. Align the circle precisely to the center of the slide using the slide guides, which you can activate for better alignment accuracy.
Set the circle’s outline to white with a thickness of about 10 points to make it bold and striking. Then, cut this circle and paste it onto the home slide (slide number one) so that you can use the Eyedropper tool to match the fill color with a prominent color from the background photo — for example, the green of a tree. Adding some transparency to the circle fill helps create a subtle yet elegant effect.
After adjusting the circle’s fill color and transparency, cut and paste it back to the dark slide in the Opportunity section.

Adding Text and Icons
Next, insert a text box on the dark slide and type the section title, such as Opportunity. Change the text color to white for visibility against the dark background. To save time and maintain consistent styling, you can copy the text box style from a previous presentation and apply it here.
Center the text box on the slide, ensuring that it aligns with the circle shape.
To add a visual icon that represents the theme, insert a light bulb icon by going to Insert > Icons. If your version of PowerPoint does not have the icon tab, you can download free icons from websites like Flaticon. Choose a white-colored light bulb icon and enlarge it so it balances well with the text and circle.
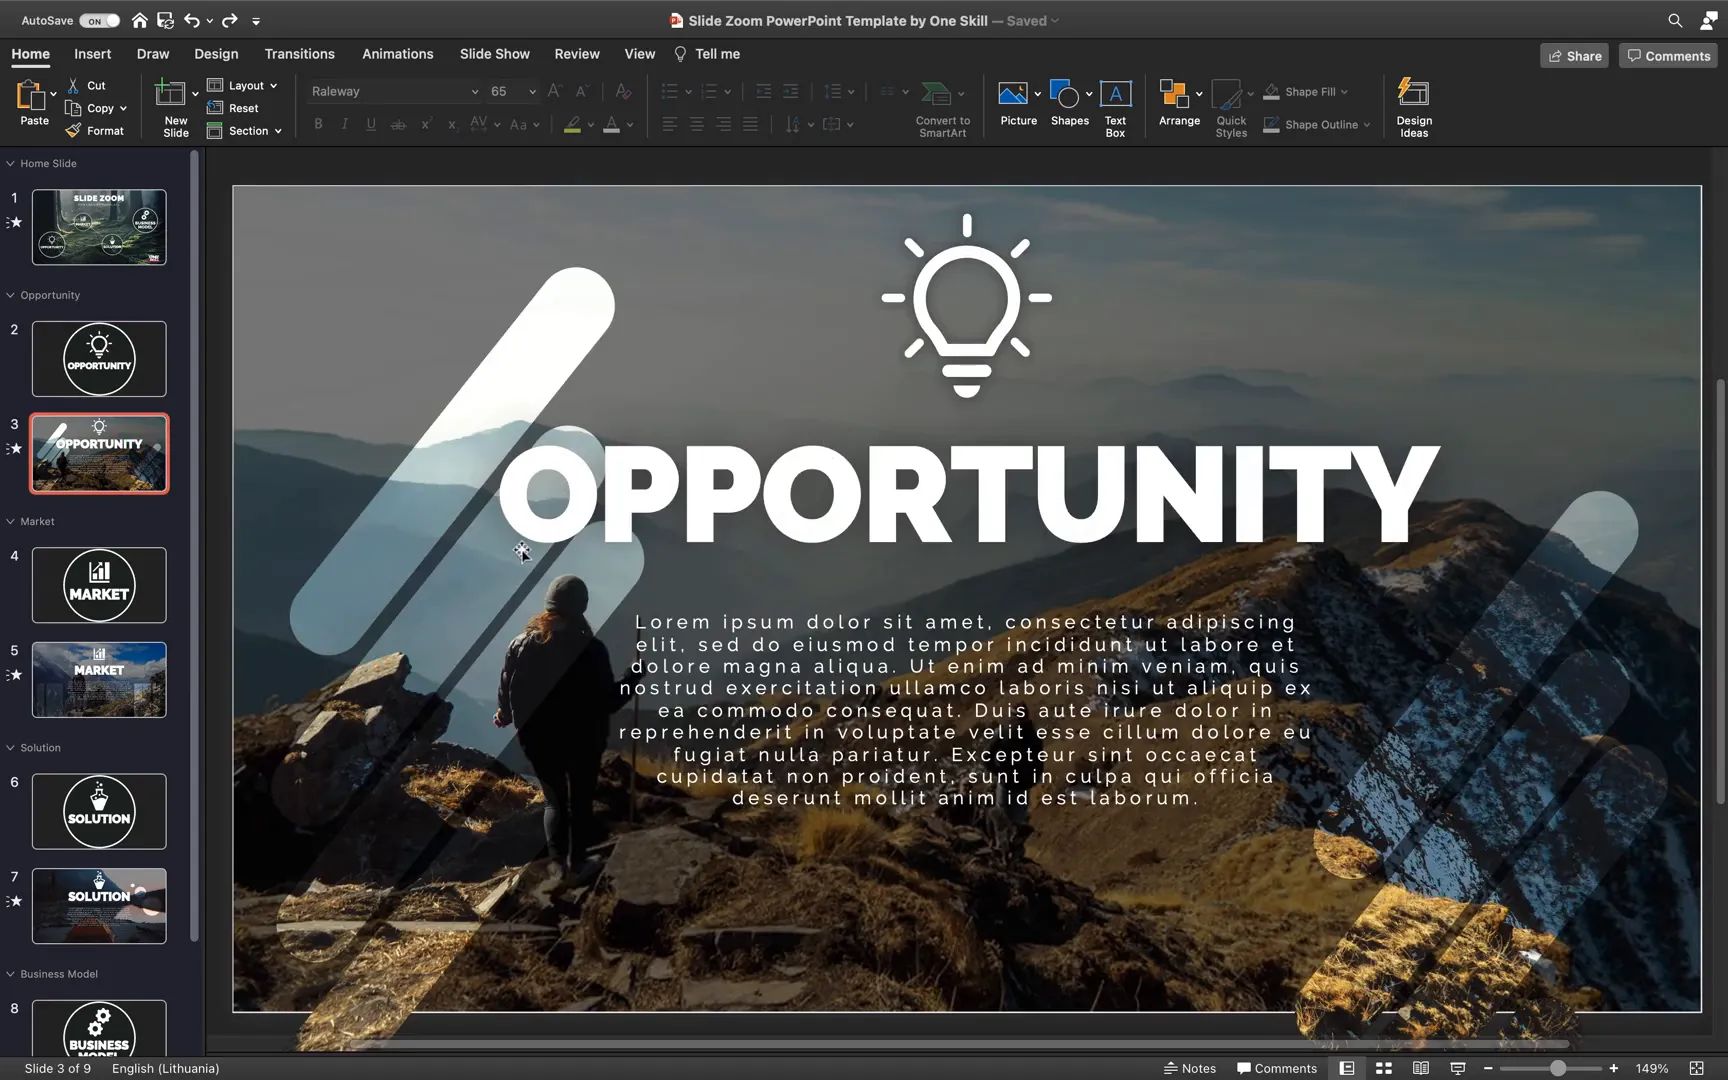
Designing the Opportunity Slide
Now, create the second slide within the Opportunity section. This slide will feature a bright background with the same circle, icon, and text elements for continuity.
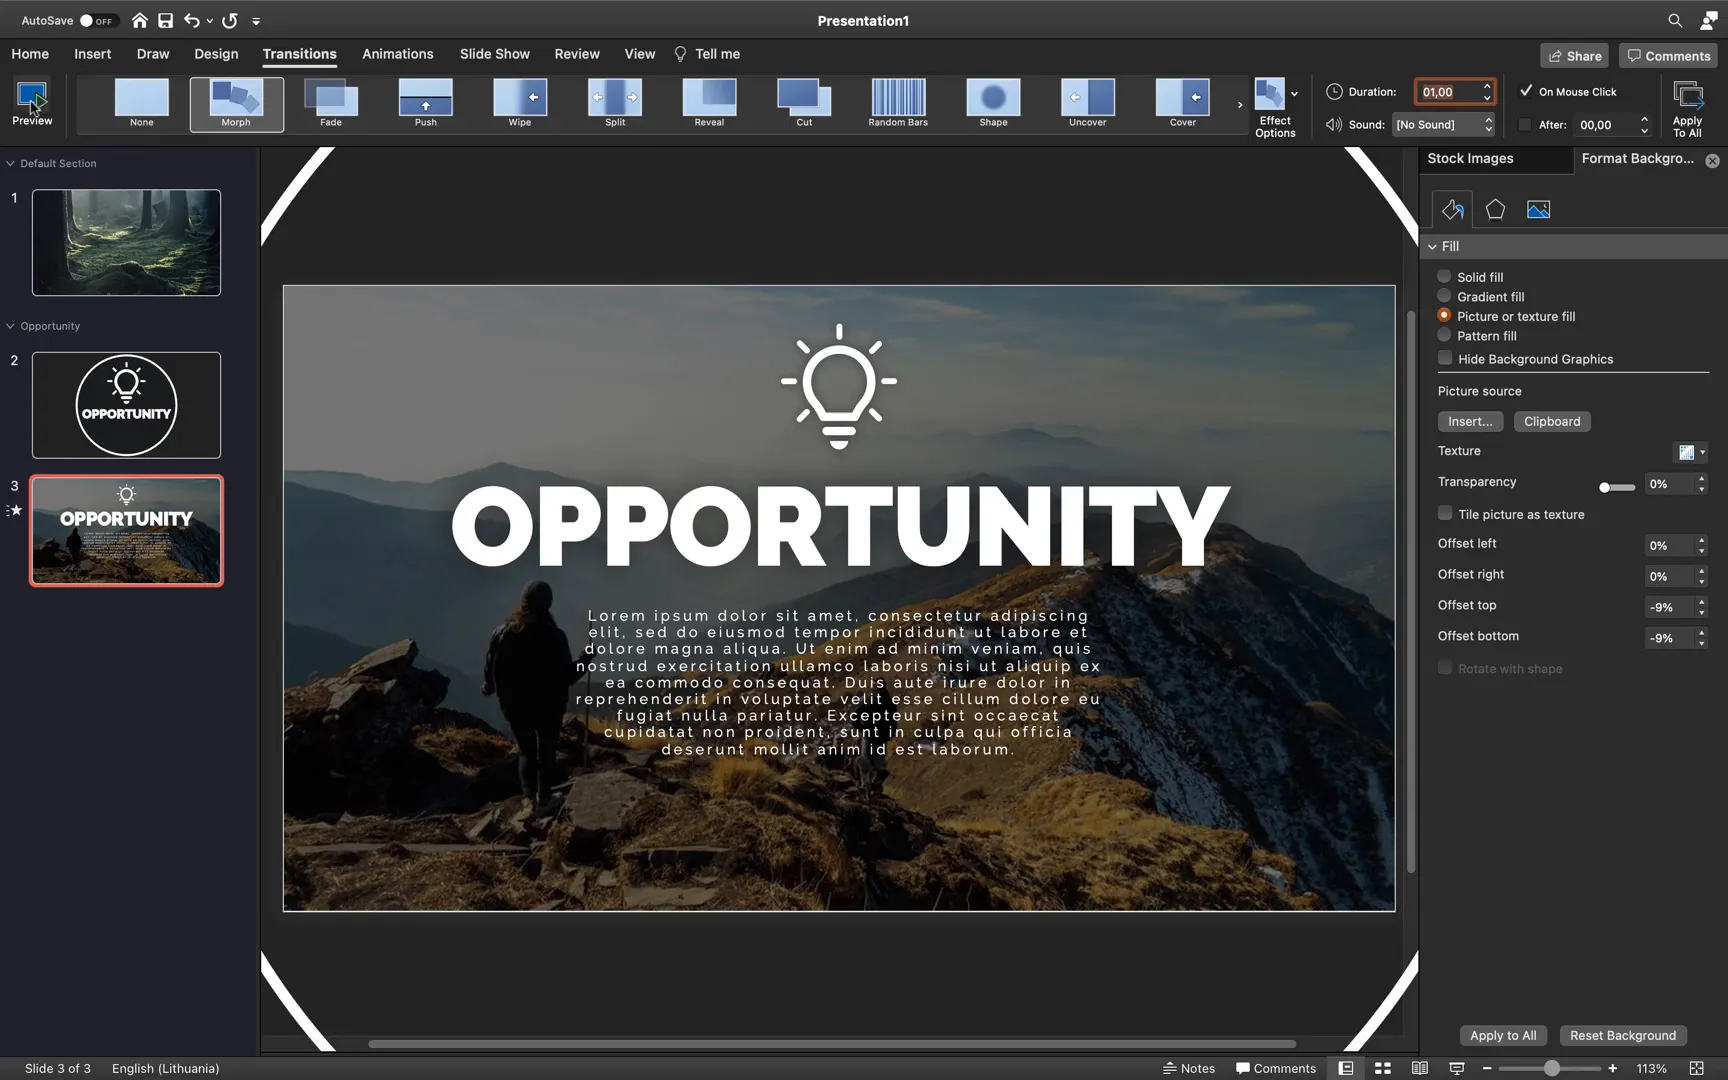
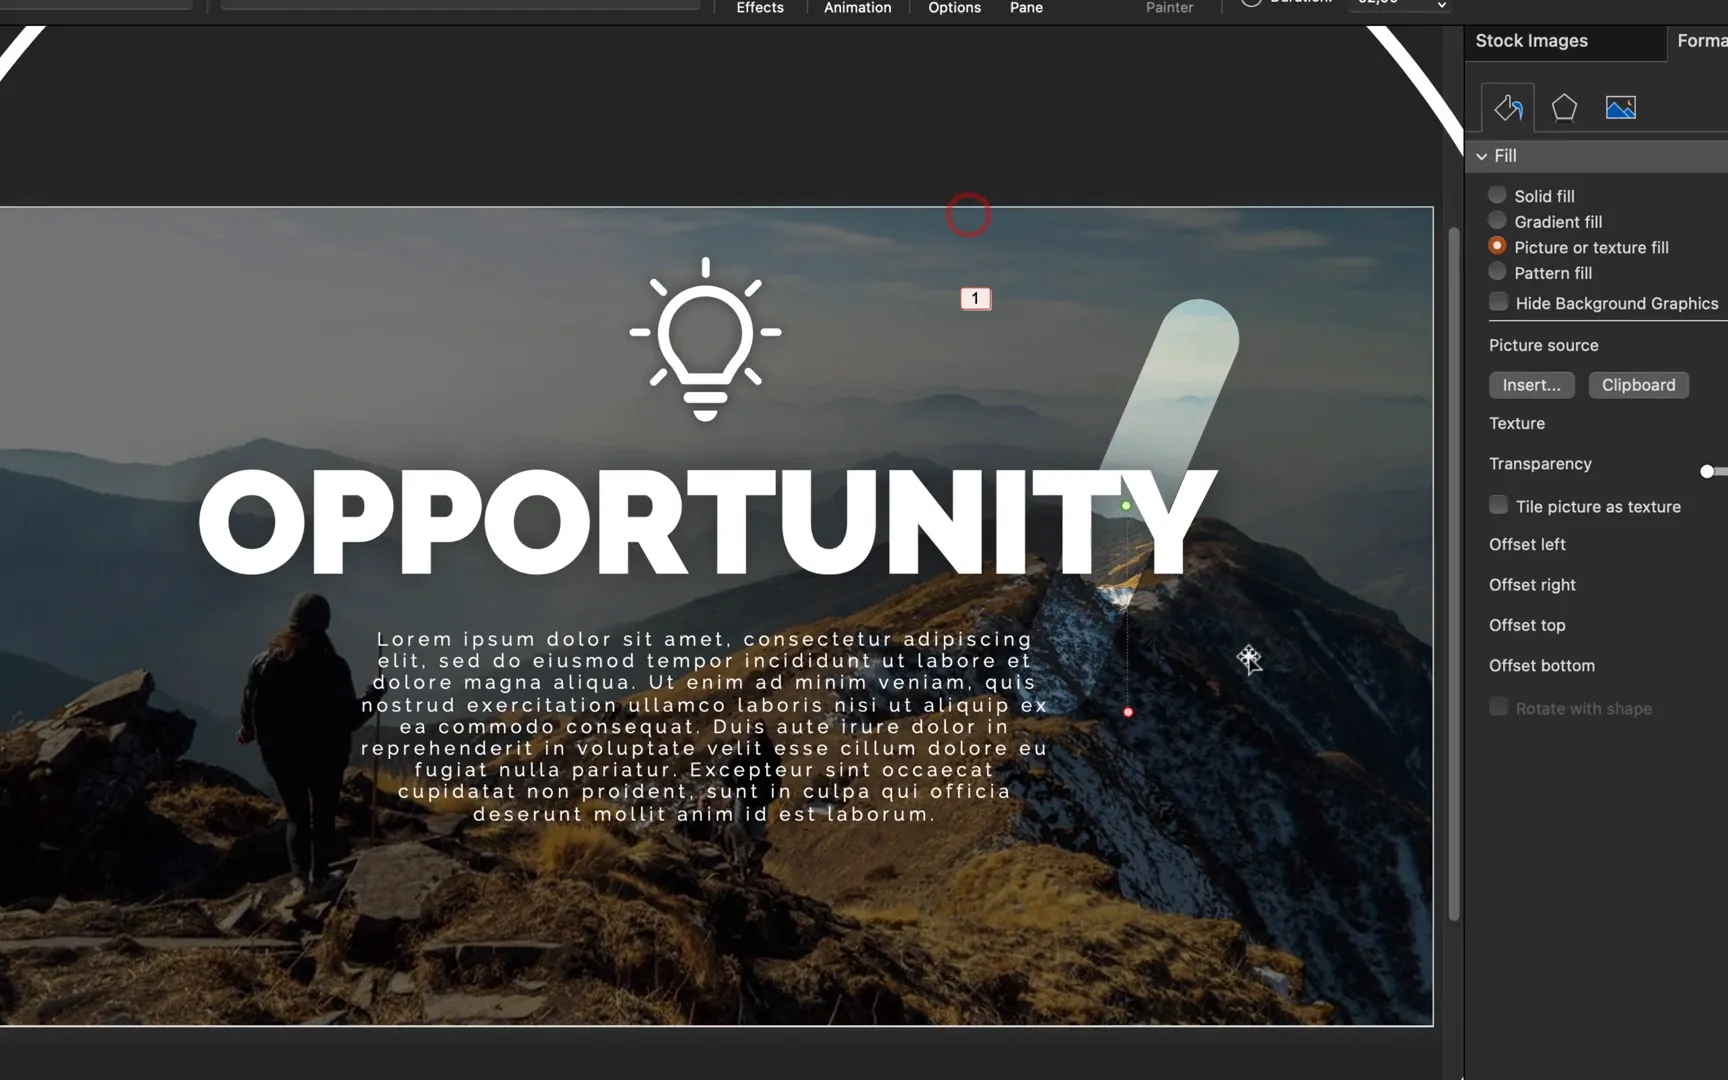
Start by copying the circle, light bulb icon, and text box from the dark slide and pasting them onto the new slide. Change the background to a bright image sourced from Unsplash or any preferred image library. To set the background image, go to Format Background, select Picture or texture fill, and choose your copied image from the clipboard.
Increase the size of the circle so that it extends beyond the slide edges and remove its fill, leaving only the white outline. Then, paste the background image again on top of the slide and adjust its brightness by reducing it to around -50%. This dark overlay creates contrast for the white circle and text, making them pop.
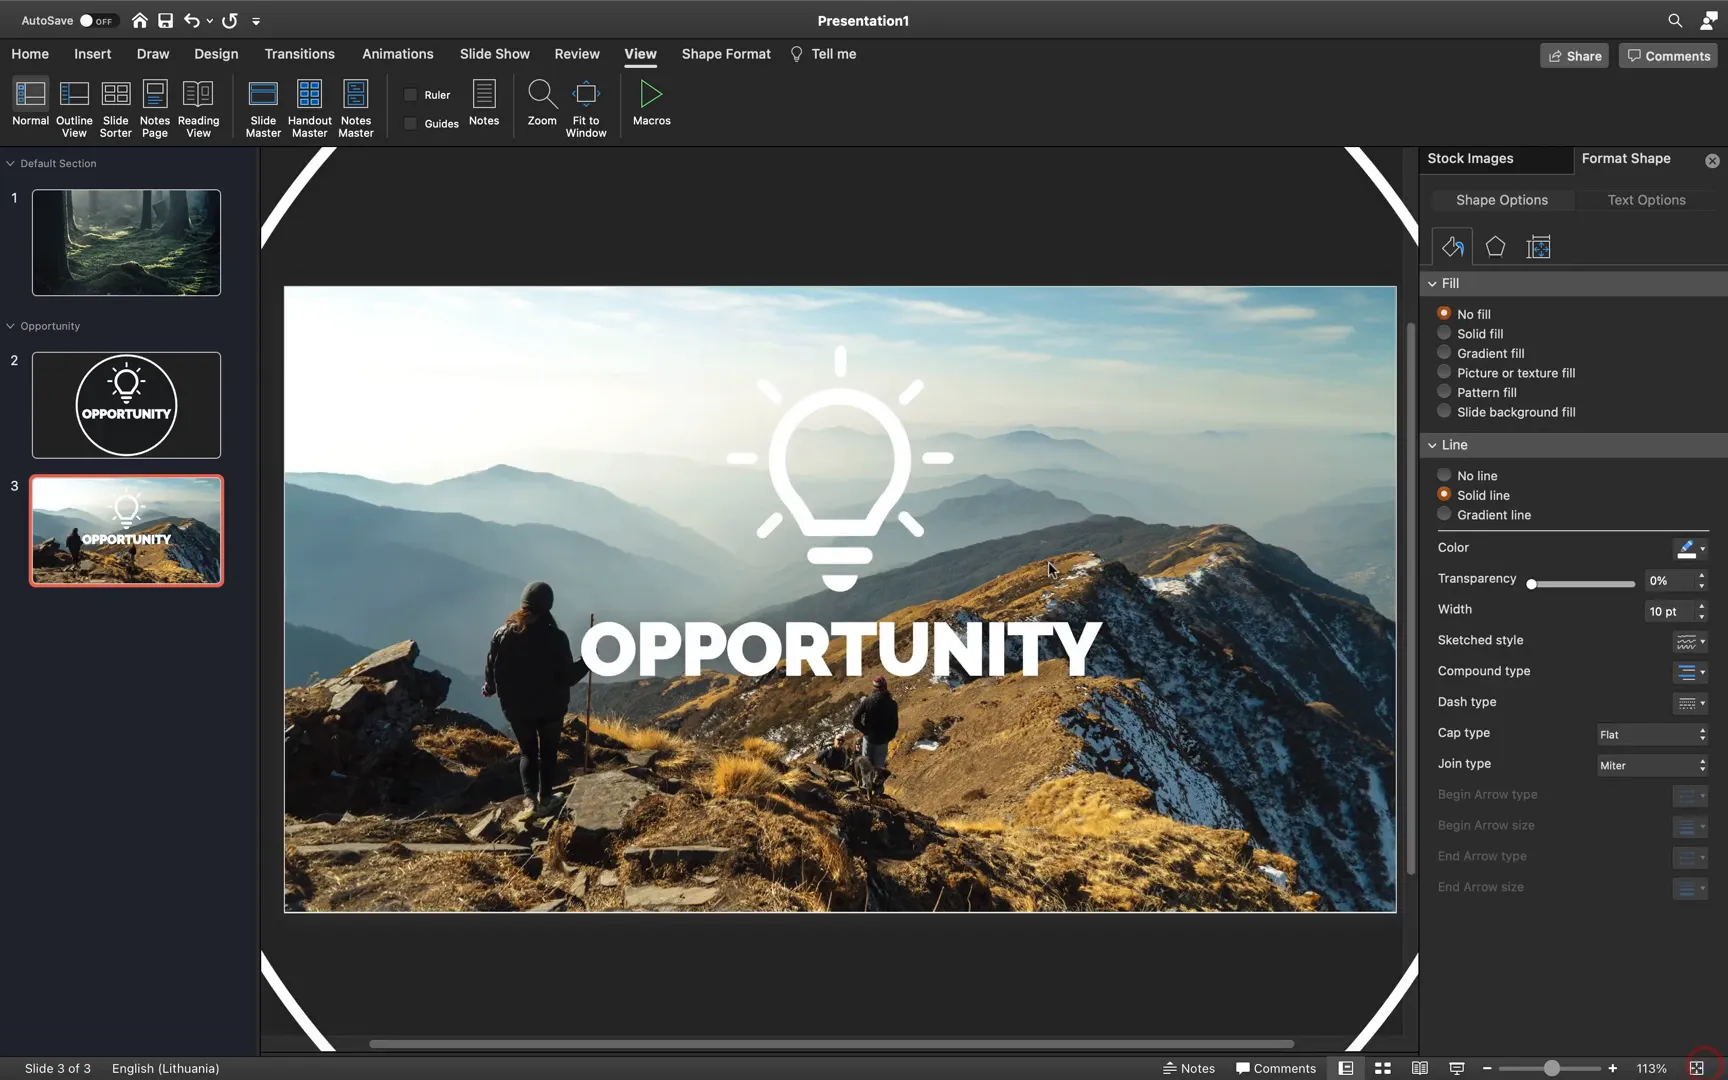
Enhancing Text and Icon Design
Resize the light bulb icon to be smaller and reposition it to maintain balance. Increase the font size of the Opportunity text to around 88 points for emphasis.
Add shadows to both the light bulb icon and the text box to give them depth and a subtle 3D effect. You can adjust shadow transparency, blur, and size to achieve the desired look.
For the slide transition, apply the Morph transition between the dark slide and the bright slide. This transition creates a smooth animation effect, making the circle and text appear as if they are transforming seamlessly.
Set the previous slide’s transition to advance automatically after zero seconds to trigger the morph effect without manual clicks.
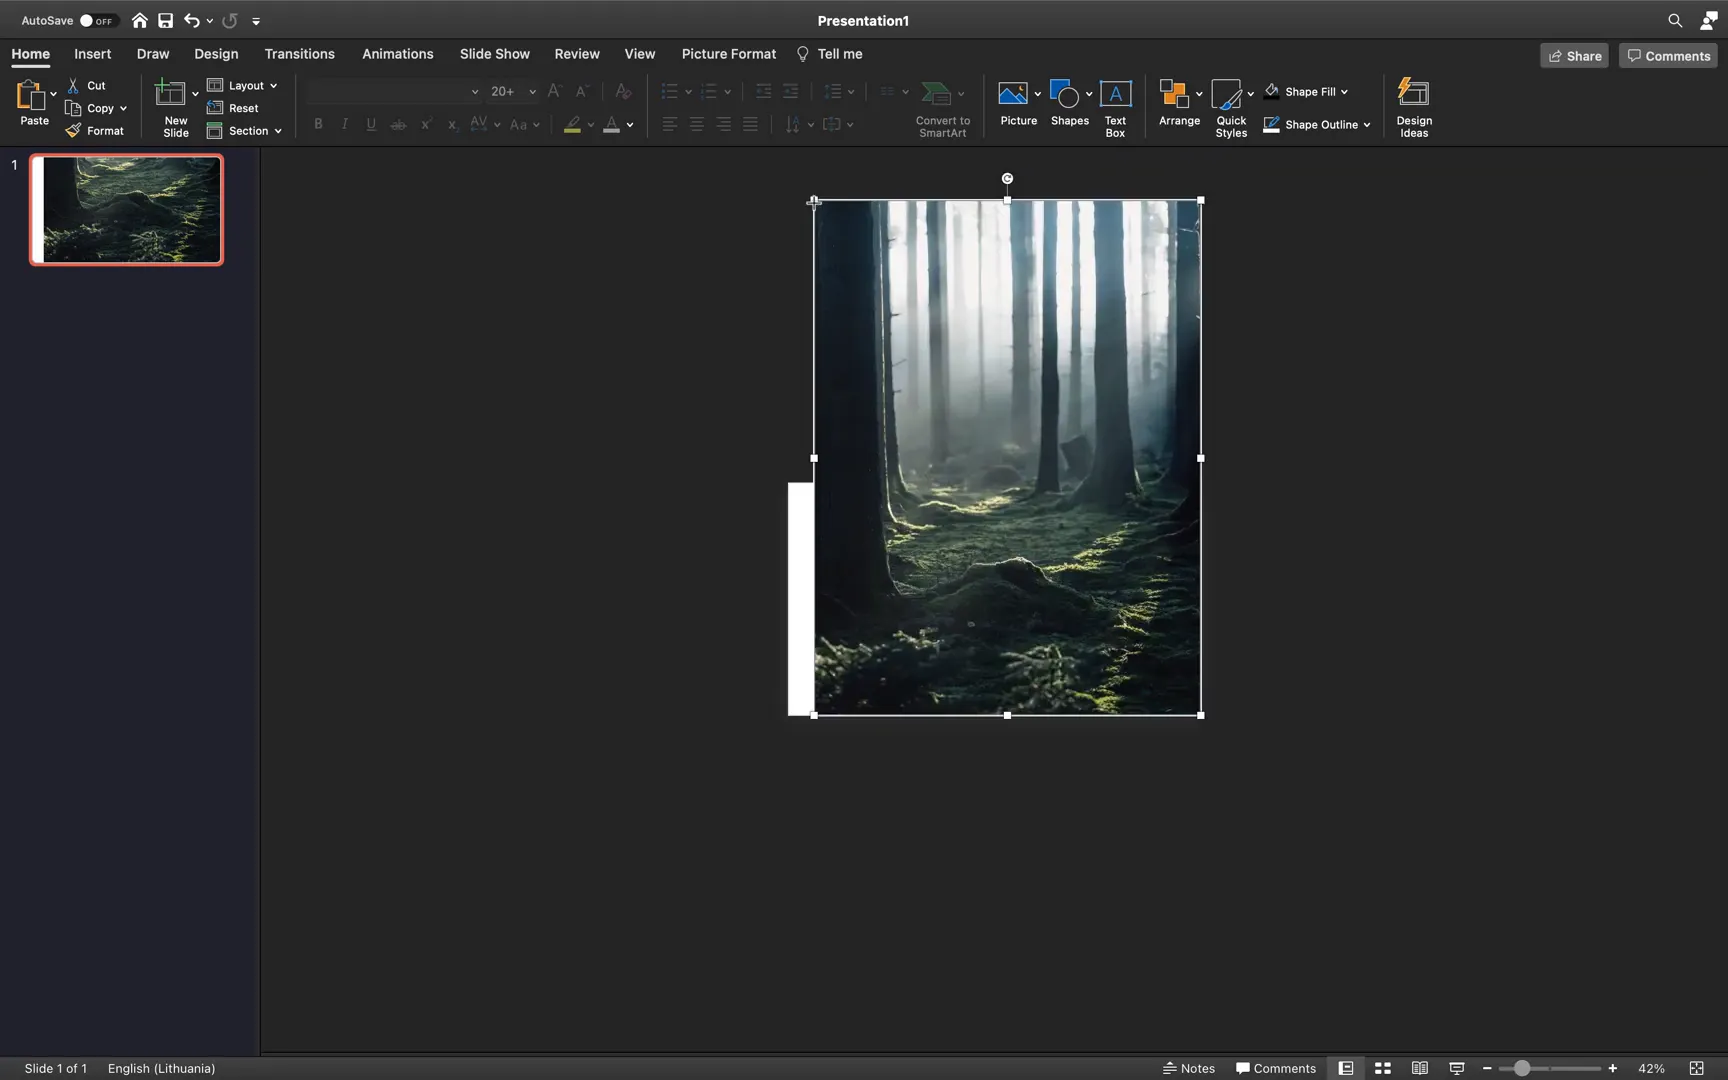
Animating Rounded Rectangles for Visual Interest
To add dynamic motion to your slides, create animated shapes such as rounded rectangles that subtly move or rotate.
Insert a rounded rectangle shape, make it fully rounded by adjusting the corner radius, and remove the outline. Set its fill to Slide Background Fill so that it reflects the underlying slide background image. This technique creates a stylish masked effect where the shape appears to contain the background image itself.
Rotate the rounded rectangle and position it on the right side of the slide for visual flair. Make sure your text elements remain on top of the shapes.
Apply a Line animation path to the rounded rectangle, moving it upwards. Adjust the animation settings to:
- Start with previous
- Auto-reverse
- Repeat until the end of the slide
- Duration of about 2 seconds
Create multiple copies of these rounded rectangles, distribute them across the slide, and offset their animation start times with delays (e.g., 0.4s, 0.8s, 1.2s) to create a pleasing staggered effect.
Inserting Section Zooms for Interactive Navigation
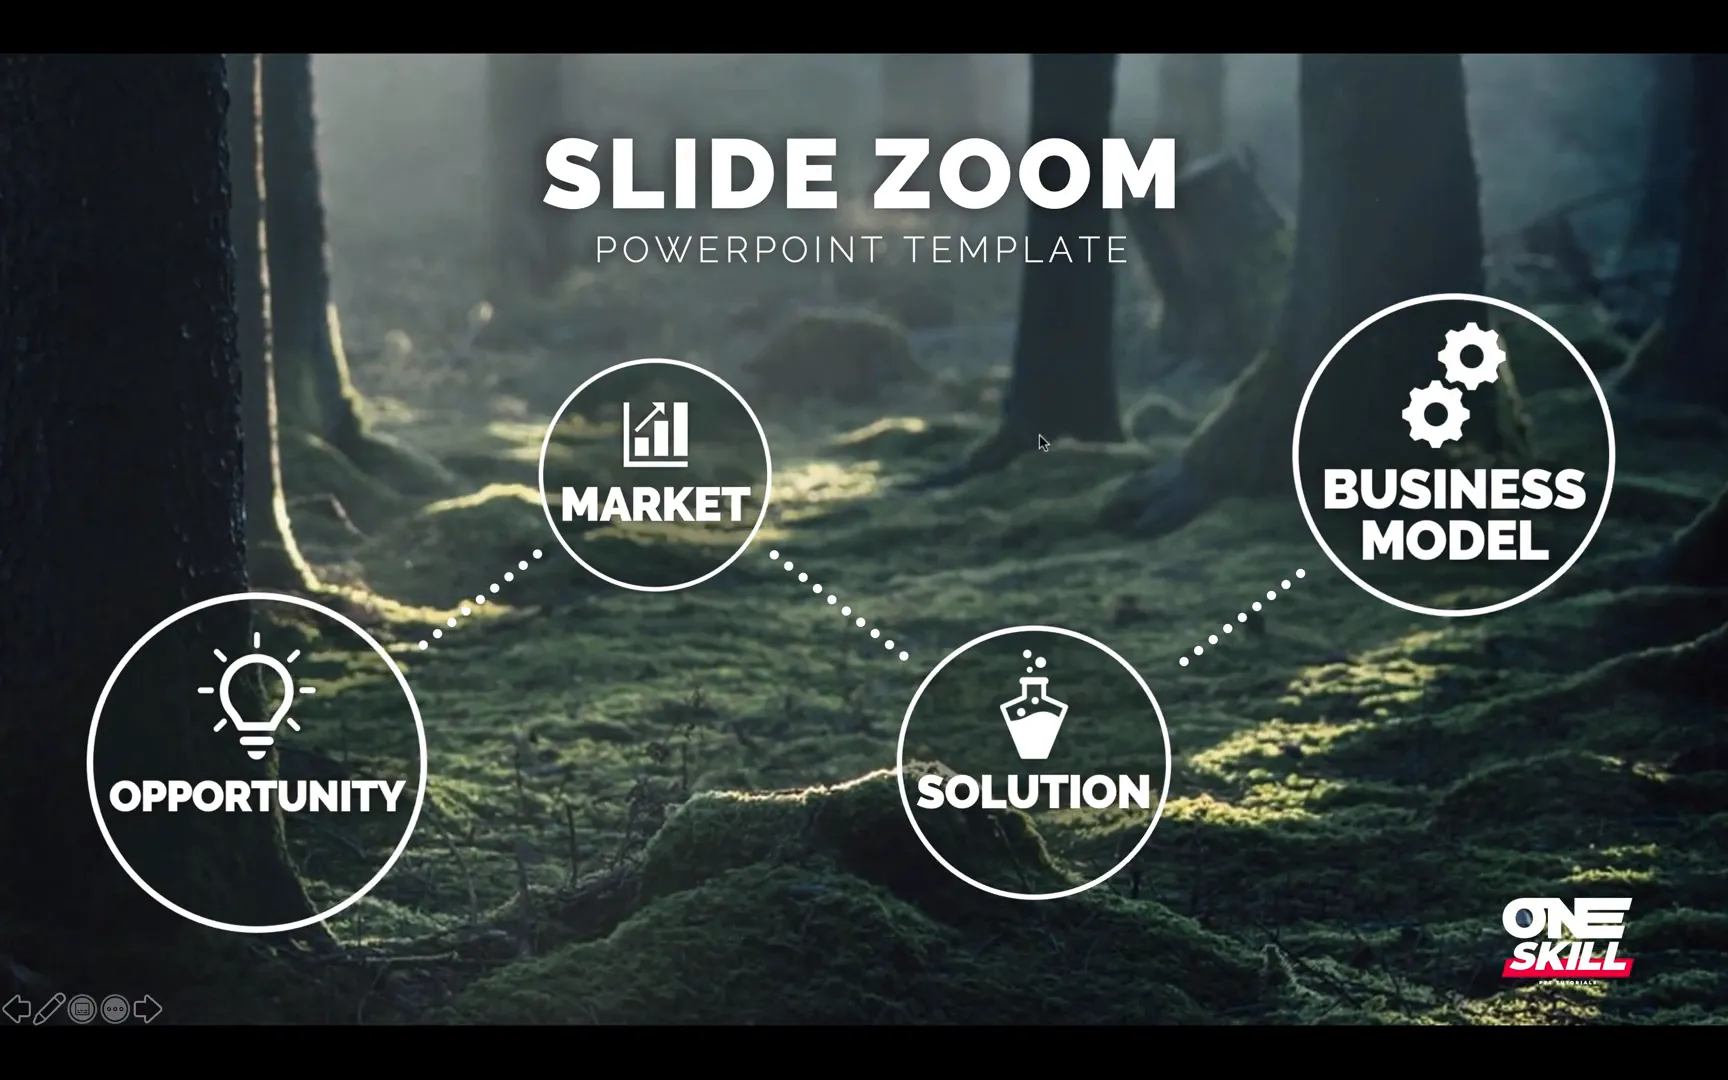
With your sections and slides designed, it’s time to add Section Zooms to your home slide for interactive navigation. Section Zooms allow you to click on a thumbnail representing a section and zoom directly to it, creating a non-linear, engaging presentation flow.
Rename your first section to Home Slide for clarity.
To insert a Section Zoom:
- Go to Insert > Zoom > Section Zoom
- Select the section you want to link to (e.g., Opportunity)
- Insert the zoom onto the home slide
- Right-click the zoom thumbnail and choose Zoom Background to make it transparent
- Position the zoom anywhere you like on the slide
When you run the presentation, clicking the section zoom will smoothly transition to the last slide of that section, and clicking again will zoom back to the home slide. This interactive effect is both intuitive and visually appealing.
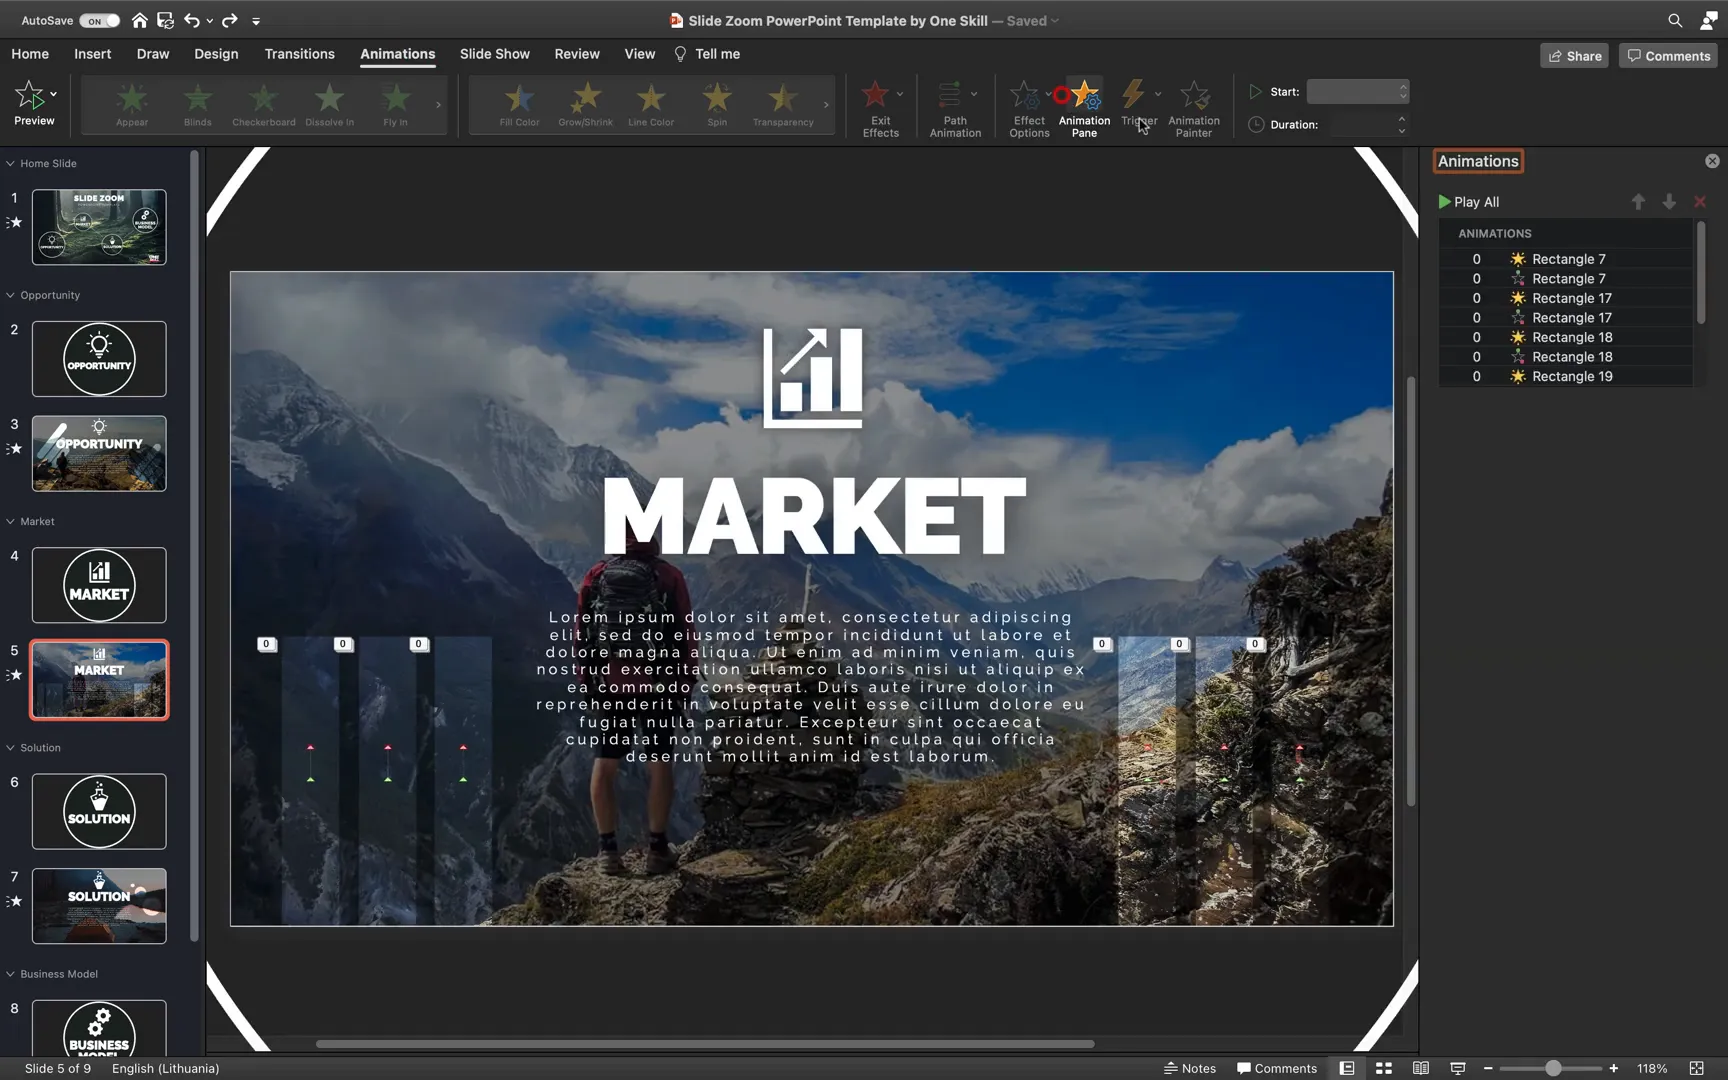
Creating the Market Section with Animated Rectangles
Next, create a Market section by adding a new section and duplicating the slides from the Opportunity section. Keep the source formatting to preserve styles.

Update the duplicated slides by changing the text, icons, and background images to fit the Market theme. Use a new high-quality photo for the background to maintain freshness.
For the Market slide’s animated elements, create simple rectangles filled with the slide background fill, without outlines. These rectangles will animate by growing vertically to simulate rising bars or visual data representation.
Apply the Grow/Shrink animation vertically with these settings:
- Start with previous
- Smooth start and smooth end enabled
- Auto reverse enabled
- Repeat until the end of slide
- Grow to 125% size (experiment with this value)
To make the growth appear only upwards (instead of growing both up and down), add a Line animation moving the rectangle slightly upwards. Adjust the motion path distance and synchronize the animation timing with the Grow/Shrink animation, including delays to stagger the rectangles.
Align the rectangles at the bottom of the slide and distribute them evenly across the horizontal axis. Duplicate and position more rectangles if desired to enhance the effect.
Enhancing the Home Slide with Background Zoom Animation
To add subtle movement to your home slide background and make it more engaging, apply a Grow/Shrink animation to the background image:
- Set growth to 110%
- Enable smooth start and smooth end
- Enable auto reverse
- Set animation to start with previous
Use the animation painter tool to quickly copy and apply this effect to the home slide background image.
Animating Bubbles for the Solution Section
Create a Solution section following the same process: add a new section, duplicate slides from a previous section, update text, icons, and background images.
For a visually interesting effect, add animated bubbles on the right side of the slide:
- Insert perfect circle shapes with no outline and fill set to slide background fill
- Apply a Line animation moving the bubbles upward
- Add a Fade animation to make the bubbles appear and disappear smoothly
- Set both animations to start with previous, no smooth start/end, and repeat until the end of the slide
- Duplicate bubbles with varying sizes and add delays (e.g., 0.4s, 0.8s) to create natural staggered movement
This creates a lively effect that adds energy and motion to the slide.

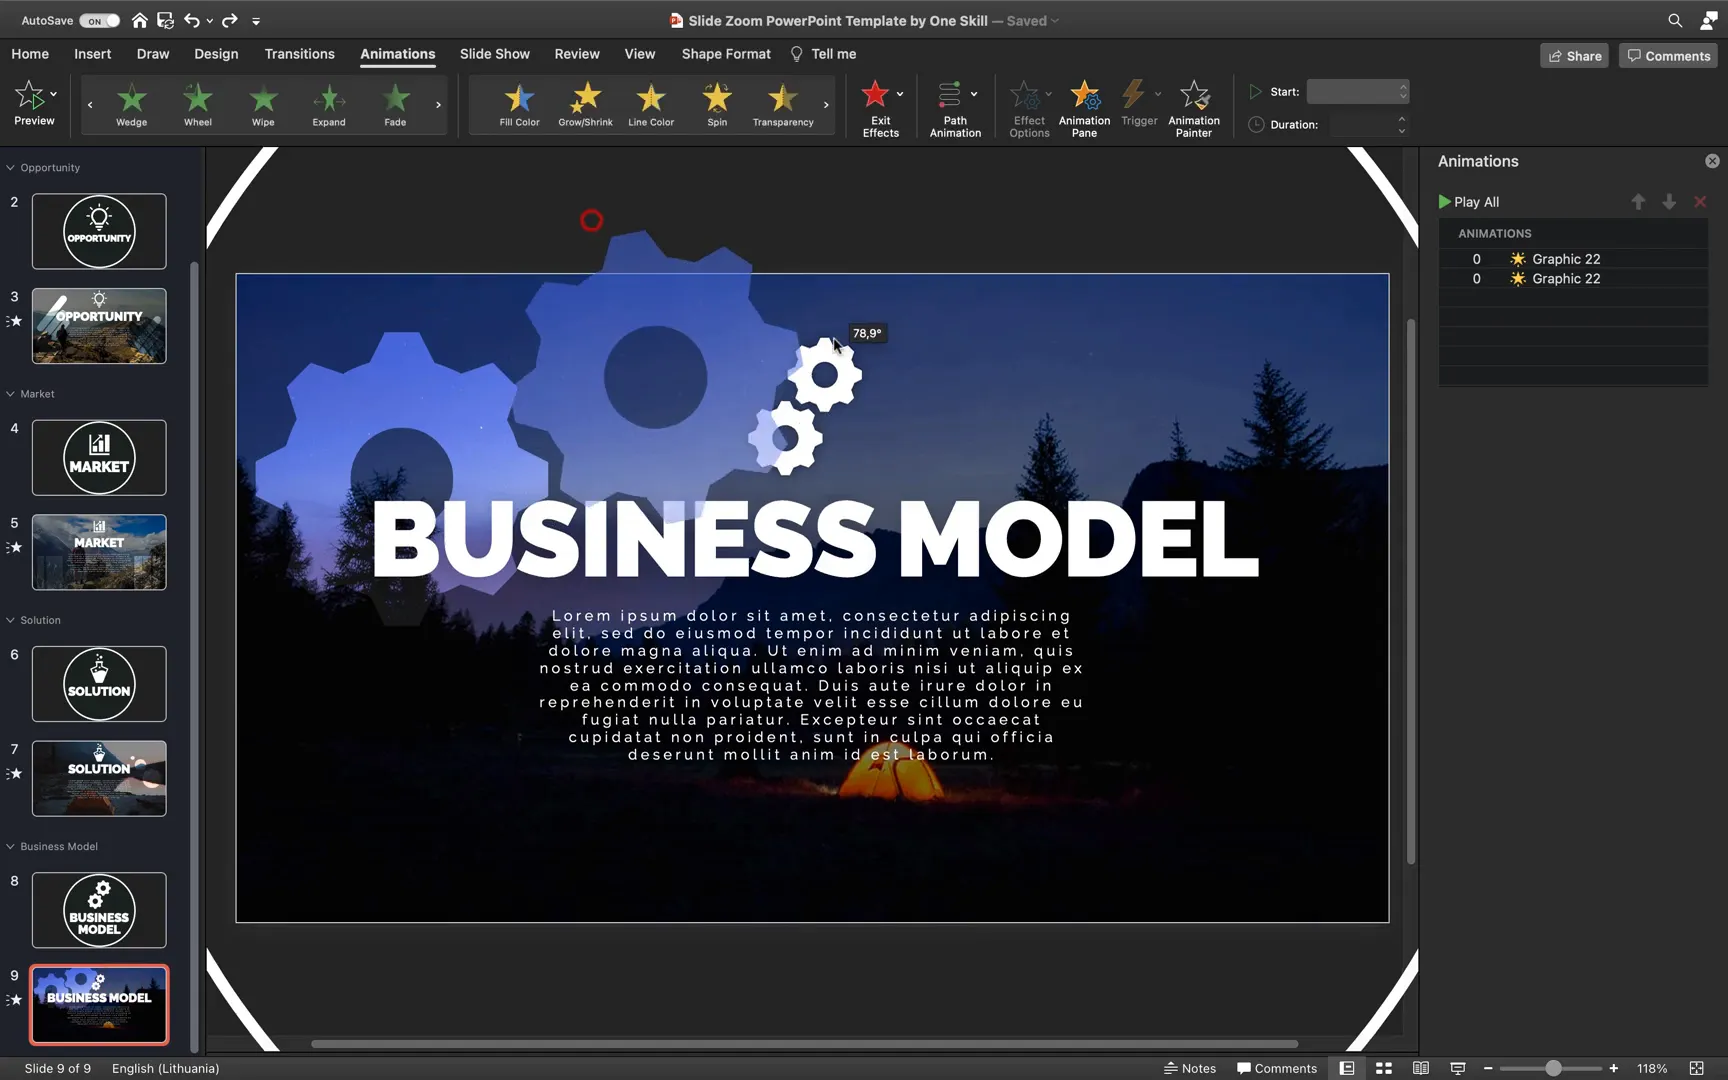
Designing the Business Model Section with Spinning Gears
For the final section, Business Model, copy slides from previous sections and update the content accordingly.
A standout animation here is a pair of spinning gears, which symbolize mechanics, processes, and business operations. To create these:
- Begin with a gear icon and convert it to an editable shape
- Use a vector graphic editor like Inkscape to subtract one gear from another by tracing and editing paths (since PowerPoint’s merge shapes may be limited)
- Export the edited gear as an SVG file and import it back into PowerPoint as an editable shape
- Set the fill of the gears to slide background fill for a cohesive look
- Arrange two gears so they mesh visually
- Apply Spin animations with these settings:
- Start with previous
- Duration: approximately 7 seconds
- One gear spins clockwise and the other counterclockwise
- Repeat indefinitely
This creates a captivating mechanical motion that draws attention and reinforces the business theme.
Connecting Section Zooms with Dashed Lines
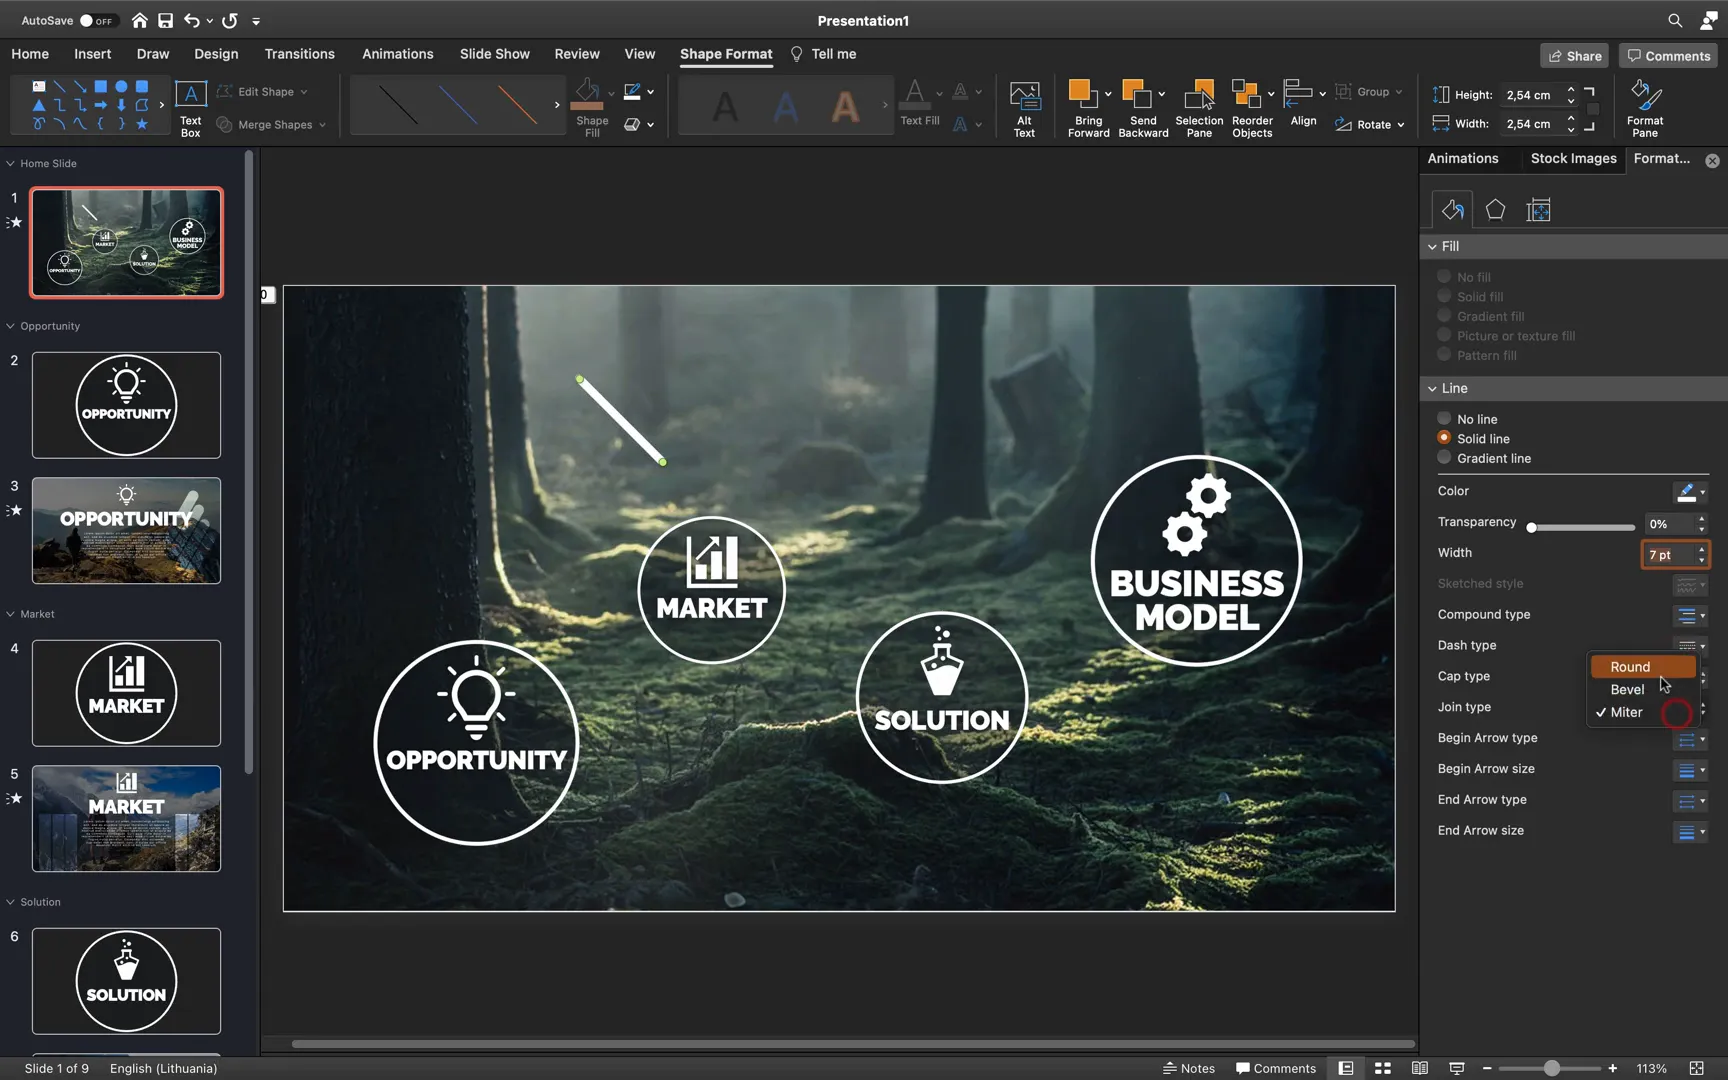
To visually connect your section zooms on the home slide and create a polished navigation interface, add dashed lines between them.
Insert straight lines between each section zoom icon. Customize the lines by:
- Changing the color to white or a color that contrasts well with the background
- Setting the line width to about 7 points
- Rounding the line caps and joins for smooth edges
- Selecting a dashed line style from the line formatting options
You can duplicate the lines easily by holding Option (Mac) or Control (Windows) while dragging. Experiment with different dash styles to find the one that best fits your design.
Make sure to bring the section zooms to the front so they remain clickable and visually prominent over the lines.
Final Touches: Title, Subtitle, and Logo
To complete your home slide, add a title, subtitle, and your logo or branding element. This helps establish identity and professionalism.
Copy these elements from a previous presentation or create new ones with matching fonts and colors. Position them thoughtfully to balance the slide visually without overcrowding.
Now your interactive slide zoom presentation is complete and ready to impress your audience!
Frequently Asked Questions (FAQ)
What is a Section Zoom in PowerPoint?
A Section Zoom is an interactive thumbnail that links to a specific section of your presentation. Clicking it zooms into the section’s slides and clicking again zooms back, allowing non-linear navigation.
How does the Morph transition enhance animations?
The Morph transition smoothly animates the transformation of objects between slides, such as size, position, and color changes, creating seamless visual effects without complex animation setups.
Can I use my own images for backgrounds?
Absolutely! You can use any high-quality images that fit your presentation’s theme. Websites like Unsplash provide free photos, or you can use your own photos or graphics.
How do I maintain consistent styling across slides?
Use the Format Painter tool to copy styles from one object to another, and keep your font choices, colors, and effects consistent by using the Slide Master or custom themes.
Is the animated slide zoom template compatible with all versions of PowerPoint?
Section Zooms and Morph transitions are available in PowerPoint 2016 and later versions, including Microsoft 365. For older versions, some features may not be supported.
Can I download the slide zoom template shown here?
Yes! You can download the free slide zoom template by visiting the creator’s website and signing up with your email. This allows you to explore and customize the template for your own use.
Conclusion
Creating a dynamic PowerPoint presentation using slide zooms, morph transitions, and animated shapes can significantly enhance your storytelling and audience engagement. By following this detailed tutorial, you’ve learned how to build a professional slide zoom template from scratch, incorporating interactive navigation and eye-catching animations.
Remember, the key to a successful presentation lies in thoughtful design, smooth transitions, and engaging visuals that support your message. Experiment with different backgrounds, icons, and animation timings to tailor the template to your unique style and content.
Feel free to download the free template to get started quickly, and keep exploring PowerPoint’s powerful features to elevate your presentation skills. Stay creative, stay inspired, and happy presenting!
Check out the full video: PowerPoint Slide Zoom Tutorial 🔥Free Template🔥


