
Mastering PowerPoint slides design is essential for delivering presentations that captivate and communicate effectively. One of the powerful ways to enhance your slides is by incorporating dynamic, perspective-based options that add depth and professionalism. In this comprehensive guide, we will walk you through creating a visually engaging slide featuring four perspective options in PowerPoint. This tutorial will equip you with techniques to design multi-option slides with shadows, icons, and animations that are adaptable to your presentation needs.
Whether you’re a beginner or looking to elevate your PowerPoint skills, this guide will provide clear instructions and practical tips to help you build slides that stand out and impress your audience. Let’s dive into the art of creating perspective options slides that combine style and functionality.
Table of Contents
- Why Use Perspective Options in PowerPoint Slides Design?
- Preparing Your Slide Background
- Creating the Base Trapezoid Shape
- Adding Perspective and Shadow Effects
- Inserting Text and Icons
- Grouping and Duplicating Options
- Customizing Colors and Alignments
- Adding Animation Effects
- Scaling for More Options
- Frequently Asked Questions (FAQ)
- Conclusion
Why Use Perspective Options in PowerPoint Slides Design?
Perspective options slides add a three-dimensional feel to your presentation, making your content more engaging and visually appealing. They help:
- Highlight multiple choices or steps in a clear, organized manner.
- Create depth and visual interest that draws attention and breaks the monotony of flat slides.
- Improve information hierarchy by using shadows, color variations, and icons to differentiate options.
- Encourage audience interaction if combined with animations that reveal options progressively.
Using perspective designs aligns with best practices in PowerPoint slides design by combining aesthetics with clarity.
Preparing Your Slide Background
Before diving into shapes and text, the foundation of your slide is the background. A well-chosen background enhances the overall look and feel of your presentation.
Step 1: Add a New Slide
Start by inserting a new slide into your PowerPoint presentation. For this tutorial, a blank slide layout works best to give you full control over the design.
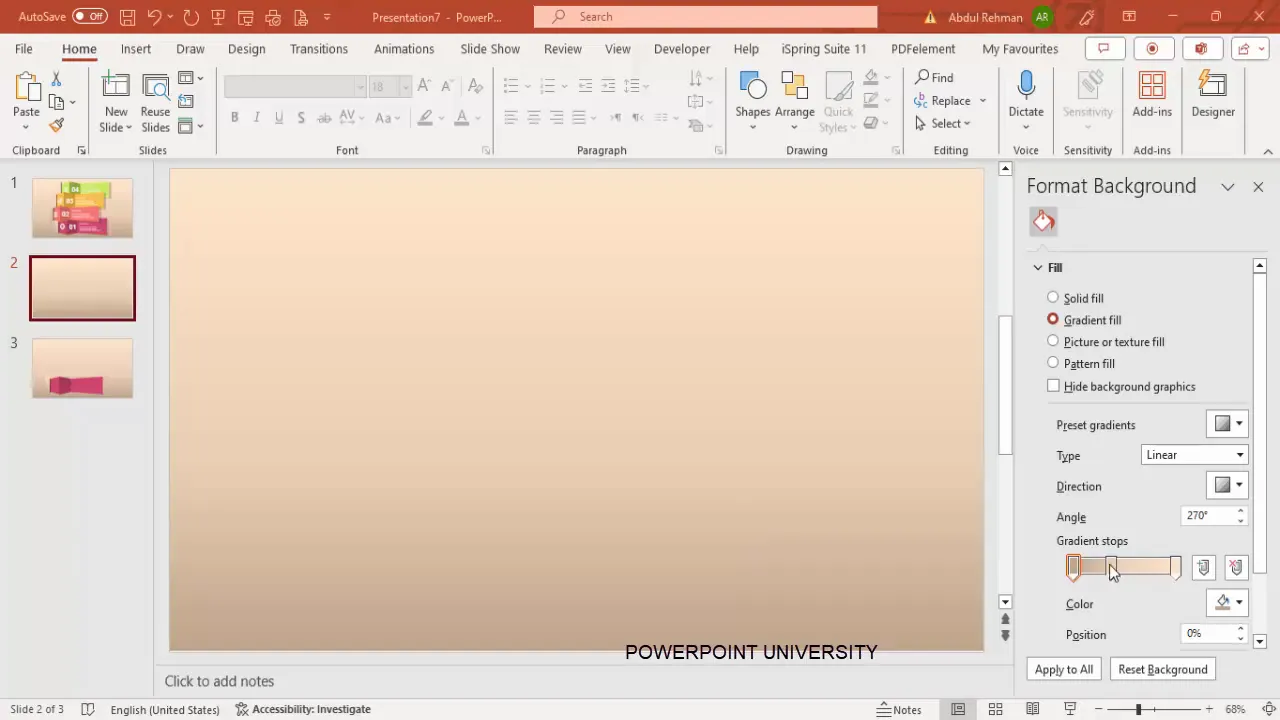
Step 2: Set a Gradient Color Background
Gradient backgrounds add subtle sophistication and depth. Here’s how to set it up:
- Right-click on the slide background and select Format Background.
- Choose Gradient fill from the options.
- Select your gradient stops and colors. For this example, use a light orange transitioning into a tan shade. This can be customized to suit your brand or preference.
Gradient backgrounds need to blend well with your shapes and text, so choose colors that complement your design palette.
Creating the Base Trapezoid Shape
The trapezoid shape forms the core of each perspective option. Its angled form gives the illusion of depth and perspective.
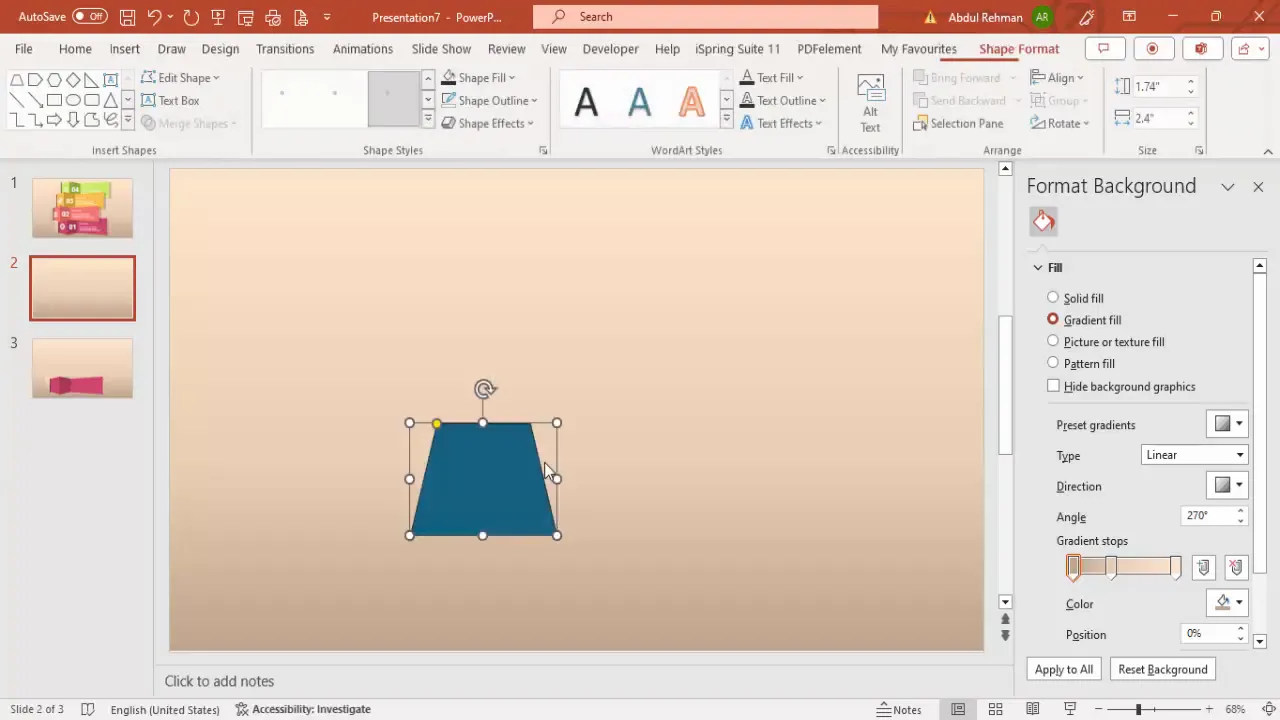
Step 1: Insert a Trapezoid Shape
- Go to the Insert tab and click Shapes.
- Select the Trapezoid shape from the Basic Shapes group.
- Draw a small trapezoid on the slide.
Step 2: Remove the Outline and Apply Fill Color
- With the trapezoid selected, click Shape Outline and choose No Outline.
- Choose Shape Fill and pick a light pink or any color that suits your theme.
Step 3: Rotate the Shape for Perspective
- Go to the Shape Format tab and find the Rotate option.
- Choose Rotate Left 90° to position the trapezoid vertically.
- Adjust the shape’s position by dragging it slightly up or down to enhance the perspective effect.
Adding Perspective and Shadow Effects
To create a convincing 3D perspective, you need to layer shapes and add shadows.
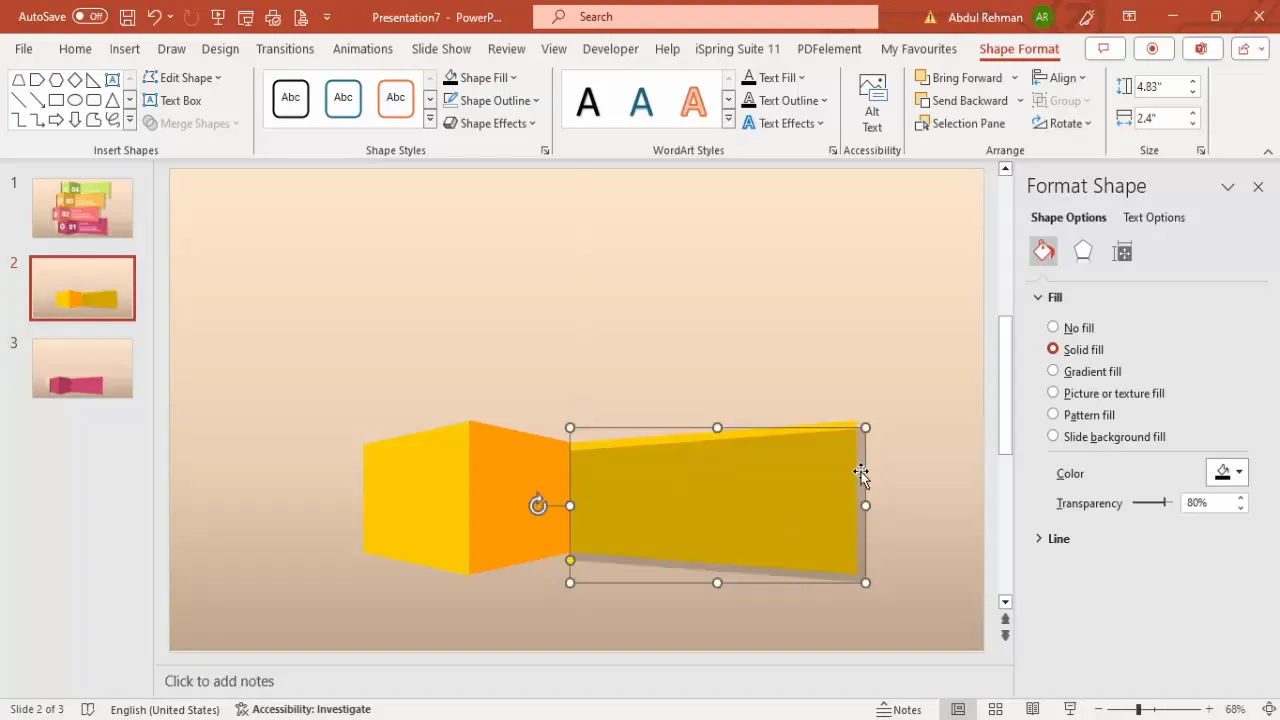
Step 1: Duplicate and Flip for Depth
- Duplicate the trapezoid by selecting it and pressing Ctrl + D.
- Change the fill color to a darker shade to simulate shadow.
- Flip this duplicated trapezoid horizontally using the Rotate options.
- Align it carefully next to the original trapezoid to create a layered perspective.
- Repeat the process to add more layers, adjusting fill colors between light and dark shades to build depth.
Step 2: Adjust Size and Alignment
Increasing the size of the shapes can affect alignment. Use the small orange adjustment handles to fine-tune the positioning so the edges align perfectly.
Step 3: Create a Shadow Effect
- Select the entire shape group and duplicate it.
- Change the fill color of the duplicate to black.
- Set the transparency to about 80% for a subtle shadow.
- Resize it slightly larger than the original shape group.
- Send this shadow layer to the back and position it behind the shapes to enhance the 3D effect.
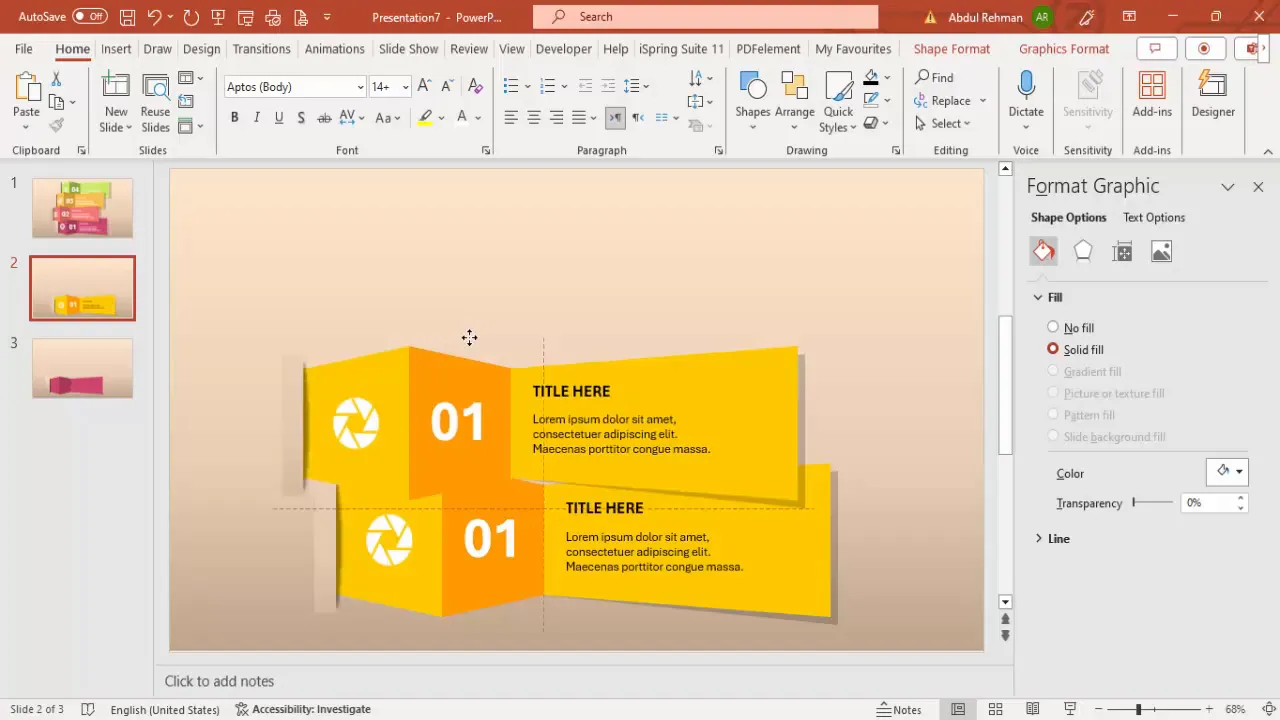
Inserting Text and Icons
Adding clear text and meaningful icons helps communicate the purpose of each option effectively.
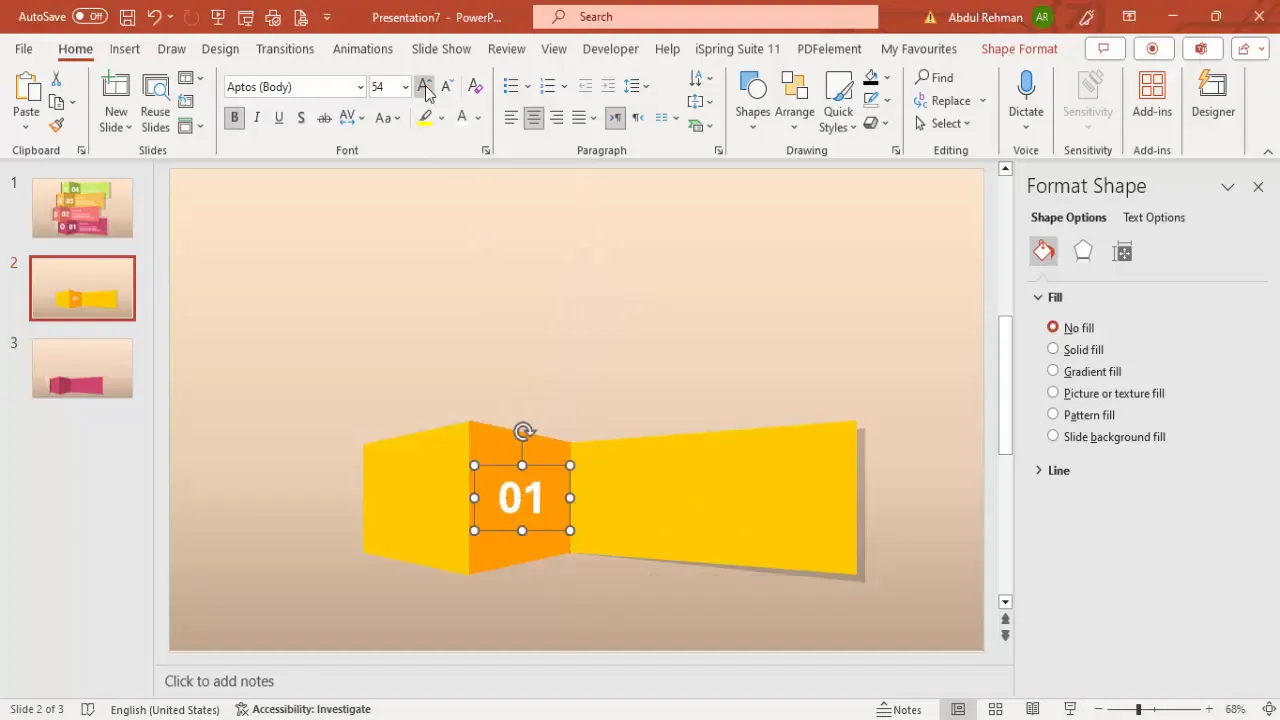
Step 1: Add Option Number Text
- Go to Insert > Text Box.
- Type the option number (e.g., “01”).
- Center-align the text, set the font color to white, make it bold, and increase the font size (around 60-66 pt) for visibility.
- Position the text on the trapezoid.
Step 2: Insert an Icon
- Navigate to Insert > Icons.
- Choose an icon that represents the option’s theme and insert it.
- Change the icon color to white to maintain consistency.
- Apply 3D rotation effects for perspective:
- Go to Effects > 3D Rotation.
- Select a preset like Perspective Left.
- Adjust the X rotation to fine-tune the perspective angle.
Step 3: Add Shadow Ellipse for Depth
- Insert an Oval shape.
- Remove the outline and fill it with black with 60% transparency.
- Apply soft edges effect and increase its size to create a subtle shadow beneath the icon.
- Cover the oval partially with a rectangle filled with the same gradient background to blend the shadow smoothly.
Step 4: Add Title and Detail Text
- Insert a text box for the title, use black bold font, and position it appropriately.
- Insert another text box for detailed description. Use smaller font size and concise text to maintain clarity.
Grouping and Duplicating Options
Grouping elements makes it easier to manage and replicate the design for multiple options.
Step 1: Group All Objects for One Option
- Select all the shapes, text boxes, and icons that form one option.
- Press Ctrl + G or right-click and select Group.
Step 2: Duplicate the Grouped Option
- With the grouped option selected, press Ctrl + D to duplicate it.
- Position the duplicate next to the original option.
Step 3: Customize Each Option
- Change the fill colors of the trapezoids to different color schemes to distinguish each option.
- Adjust the shadows accordingly to maintain the perspective effect.
- Change the title and detail text to reflect the new option’s content.
- Change icons without deleting and re-inserting by selecting the icon, going to Graphic Format, and choosing Change Graphics.
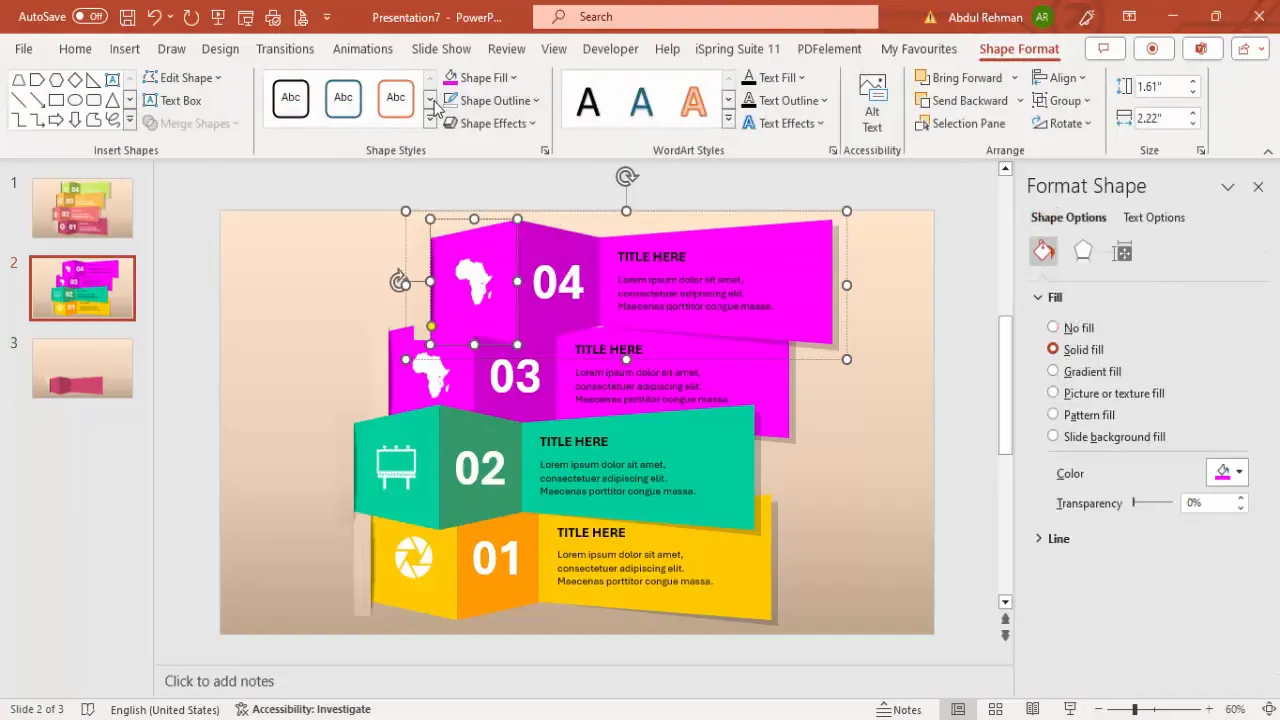
Customizing Colors and Alignments
Colors and precise alignment are vital to maintaining a professional, cohesive look across all options.
Tips for Color Customization
- Use the Eyedropper Tool to pick exact gradient colors from your background to fill shape layers and rectangles for seamless blending.
- Maintain a consistent shadow effect by choosing darker shades of your base colors for the shadow layers.
- Test different color combinations like light pink, teal, purple, and light blue to see which best fits your presentation’s theme.
Alignment Best Practices
- Use the small orange adjustment handles on shapes to fine-tune alignment after resizing.
- Ensure the edges of the trapezoids align perfectly to maintain the perspective illusion.
- Group objects before resizing to keep proportions intact, then ungroup if you need to make further individual adjustments.

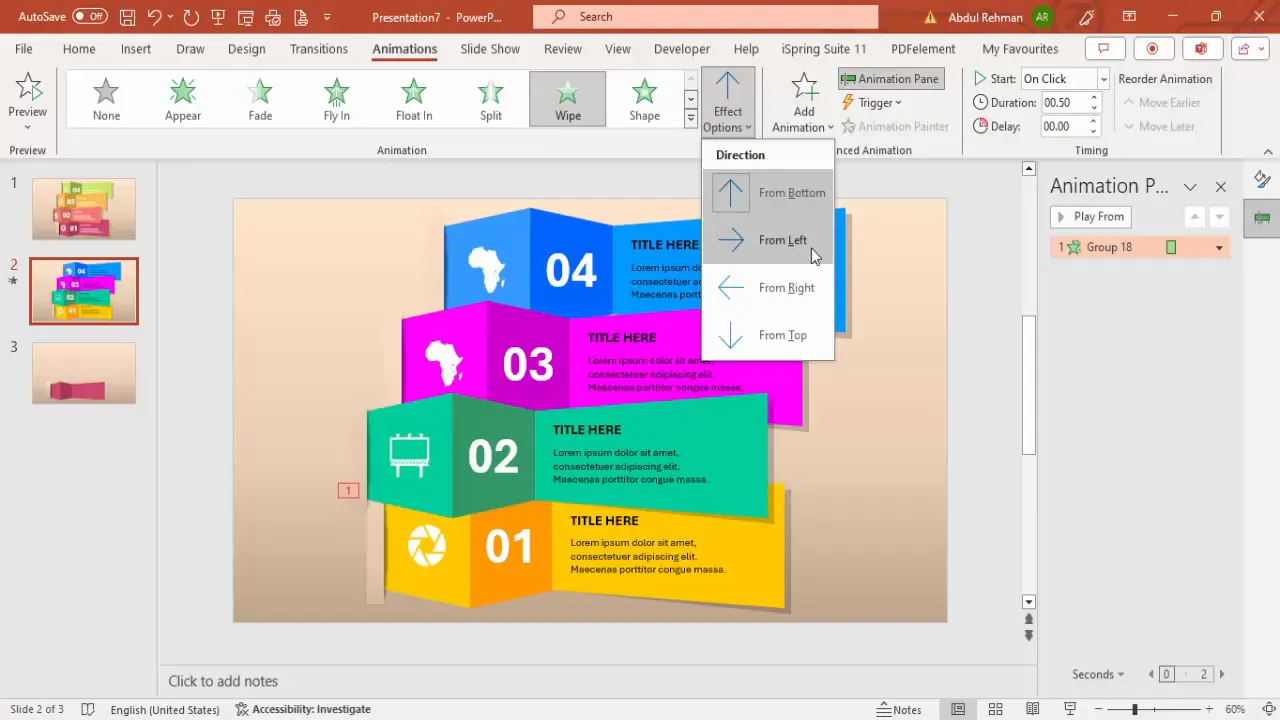
Adding Animation Effects
Animating your perspective options slide adds an interactive layer, improving audience engagement and pacing.

Step 1: Apply Wipe Animation
- Select one grouped option.
- Go to the Animations tab and open the Animation Pane.
- Click Add Animation, then choose Wipe.
- Set the direction of the wipe to start from the left.
Step 2: Copy Animation to Other Options
- Use the Animation Painter tool by double-clicking it to keep it active.
- Click on each of the other grouped options to apply the same animation effect.
- Press Esc to deactivate the Animation Painter.
Step 3: Preview the Animation
Run your slide show to see the options appear sequentially with smooth wipe animations:
- Option 1 wipes in.
- Option 2 wipes in with a different color.
- Option 3 and 4 follow similarly.
You can customize the animation type and direction based on your preference, adding variety to your presentation.
Scaling for More Options
If your presentation requires more than four options, you can scale your design accordingly.
Step 1: Group and Scale Down
- Select all objects for the current options and group them.
- Hold the Shift key while dragging a corner handle to reduce size proportionally.
Step 2: Ungroup and Duplicate
- Ungroup the scaled group using Ctrl + Shift + G.
- Duplicate existing options using Ctrl + D and position them evenly.
Step 3: Adjust Colors and Text
Apply new color schemes and update text and icons for the additional options using the methods described earlier.
Frequently Asked Questions (FAQ)
Q1: Can I use other shapes besides trapezoids for perspective options?
Yes, while trapezoids work well for this design, you can experiment with other shapes like parallelograms or custom polygons to create unique perspectives. However, trapezoids provide a straightforward way to simulate 3D depth.
Q2: How do I maintain consistent color gradients across multiple slides?
Use the Eyedropper tool in PowerPoint to pick exact colors from your slide background or shapes. This ensures consistency in gradient stops and overall color harmony.
Q3: Can I customize the animation effects for each option individually?
Absolutely. While this tutorial uses the wipe animation for simplicity, PowerPoint allows you to choose different animations, durations, and directions for each option to suit your presentation style.
Q4: What if my icons don’t fit well within the trapezoid shape?
You can resize icons or adjust their position within the trapezoid. Using the 3D rotation presets helps integrate icons with the perspective effect, making them look natural within the shape.
Q5: How do I ensure my slide looks good on different display sizes?
Design your slides using standard widescreen dimensions (16:9) and preview them on different devices. Use the Slide Master to maintain consistency and avoid skewing when resizing slides.
Conclusion
Creating a four-options perspective slide in PowerPoint is a fantastic way to showcase multiple choices or steps with style and clarity. By combining trapezoid shapes, thoughtful color gradients, shadow effects, icons, and animations, you can craft slides that are both visually appealing and highly functional.
Remember these key takeaways for your PowerPoint slides design:
- Start with a well-chosen background that complements your shapes and text.
- Use trapezoid shapes and layering to simulate 3D perspective.
- Incorporate shadows and soft edges for depth.
- Add icons and text with perspective adjustments for professionalism.
- Group elements for easy duplication and customization.
- Apply animations to enhance engagement.
- Use scaling techniques to expand your design for more options.
With these skills, you can elevate your presentations and deliver messages that resonate visually and contextually. Keep experimenting with colors, shapes, and animations to tailor your slides perfectly to your audience and content.
PowerPoint slides design is an ongoing learning journey, and mastering these techniques gives you a solid foundation for creating stunning presentations every time.
Check out the full video: Create 4 Perspective Options slide in PowerPoint


