
PowerPoint is a powerhouse for creating presentations, but sometimes you want to take your slides to the next level with interactive features that captivate your audience. One such advanced technique is using Section Zooms to create a dynamic, clickable presentation where viewers can jump to different parts seamlessly, enhancing engagement and storytelling.
In this detailed tutorial, inspired by the expert guidance from One Skill PPT, we will walk you through creating a stunning section zoom presentation in PowerPoint from scratch. You’ll learn how to design a beautiful interactive home slide with clickable bubbles that zoom into different sections, how to apply transitions like Morph for smooth animations, and how to achieve a modern glassmorphic design effect that adds polish and professionalism.
Best of all, the Pitch Zoom Template used in this tutorial is available for 100% free download so you can get started right away without reinventing the wheel.
Table of Contents
- Introduction to Section Zoom Presentations
- Designing the Interactive Home Slide & Creating the Glassmorphic Background
- Creating Clickable Bubbles for Sections
- Adding Presentation Sections & Slides
- Using Morph Transition for Smooth Animations
- Inserting and Configuring Section Zooms
- Enhancing Slide Design with Icons and Additional Elements
- How to Get the Free Pitch Zoom Template
- Frequently Asked Questions
- Conclusion
Introduction to Section Zoom Presentations
Traditional PowerPoint presentations are linear: you move slide by slide in a preset order. But what if you could create a presentation where your audience can click on interactive elements to jump into specific sections? This is the magic of the Section Zoom feature in PowerPoint.
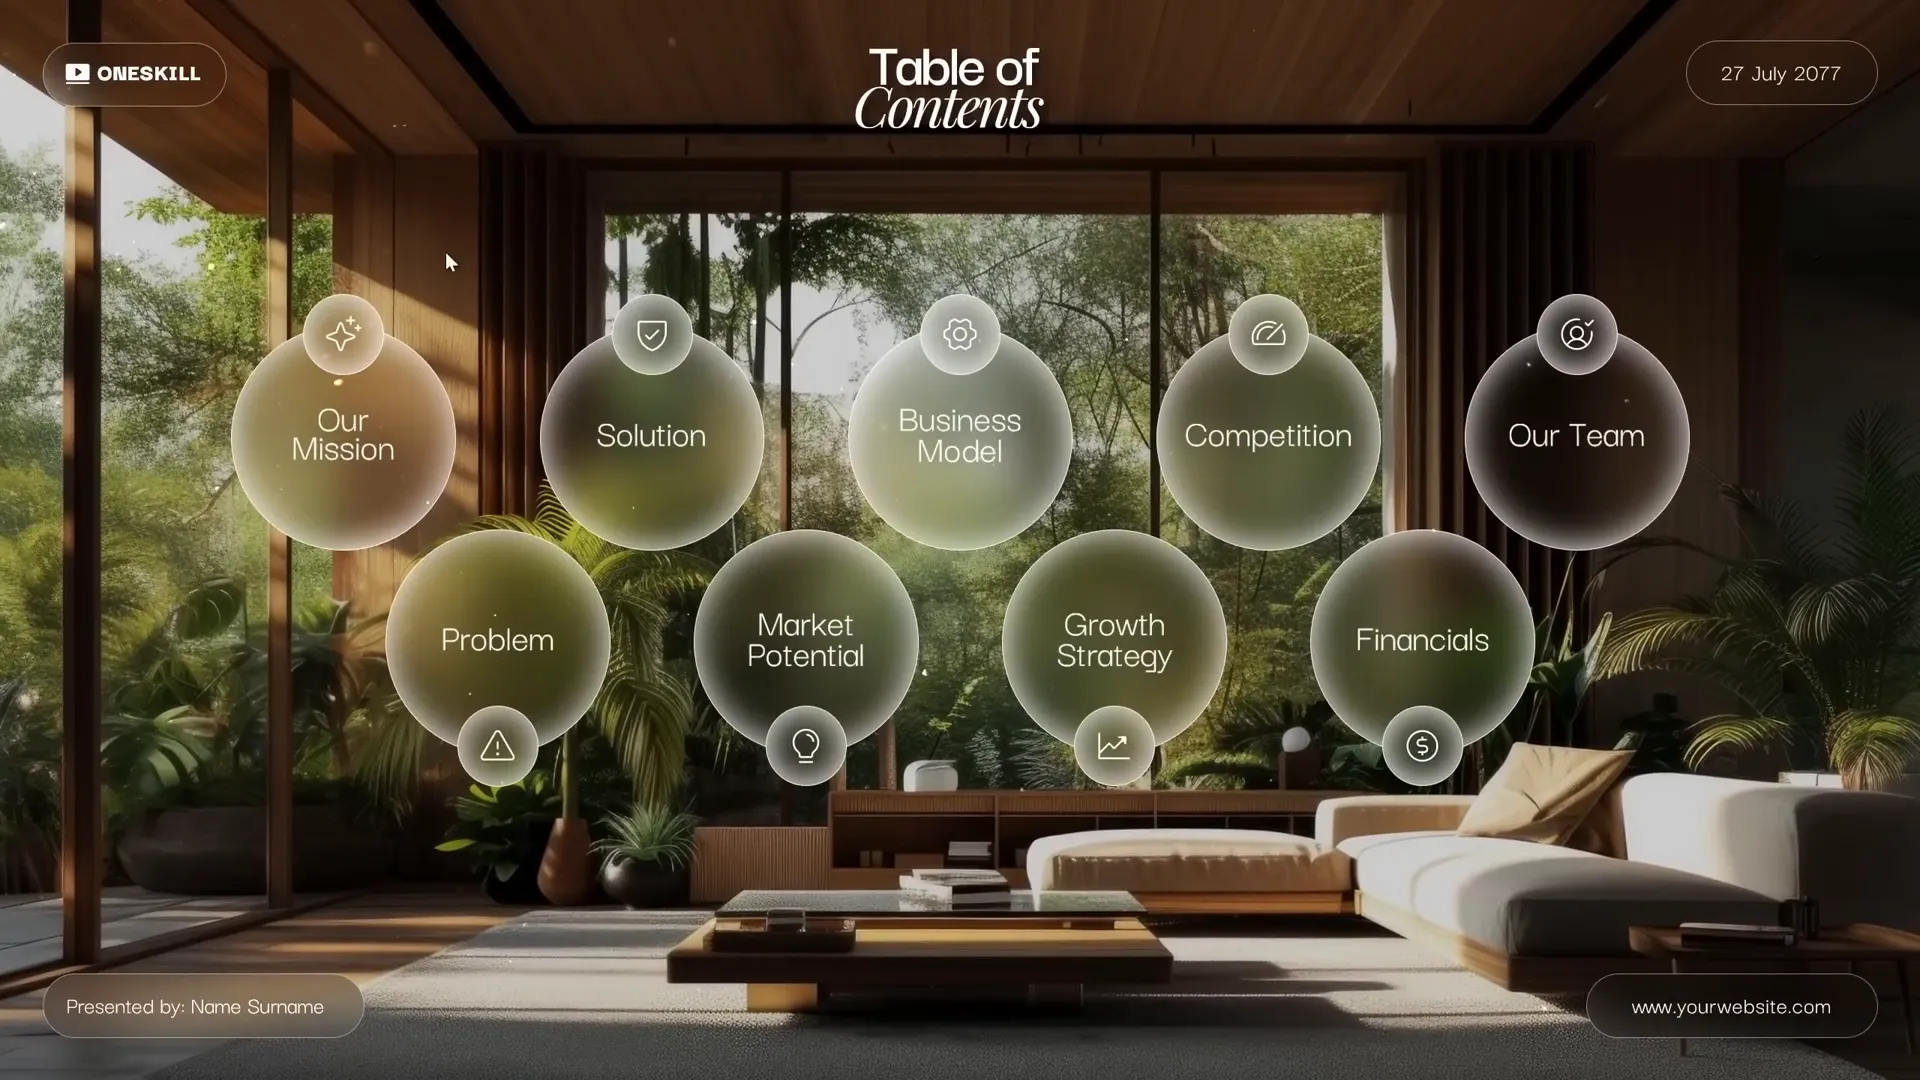
Section Zooms allow you to create clickable thumbnails that zoom into a group of slides, making your presentation non-linear, dynamic, and highly engaging. This technique is perfect for pitch decks, product demos, training modules, or any presentation where you want to control the flow based on audience interest or questions.
In this tutorial, you’ll learn to build a Pitch Zoom Template — a presentation with a home slide featuring clickable bubbles that zoom into different sections, each with its own content and transition effects for a professional look.
Designing the Interactive Home Slide & Creating the Glassmorphic Background
1. Starting a Blank Presentation
Begin by opening PowerPoint and selecting a Blank Slide Layout. This allows you to design from scratch without any preset placeholders cluttering your canvas.
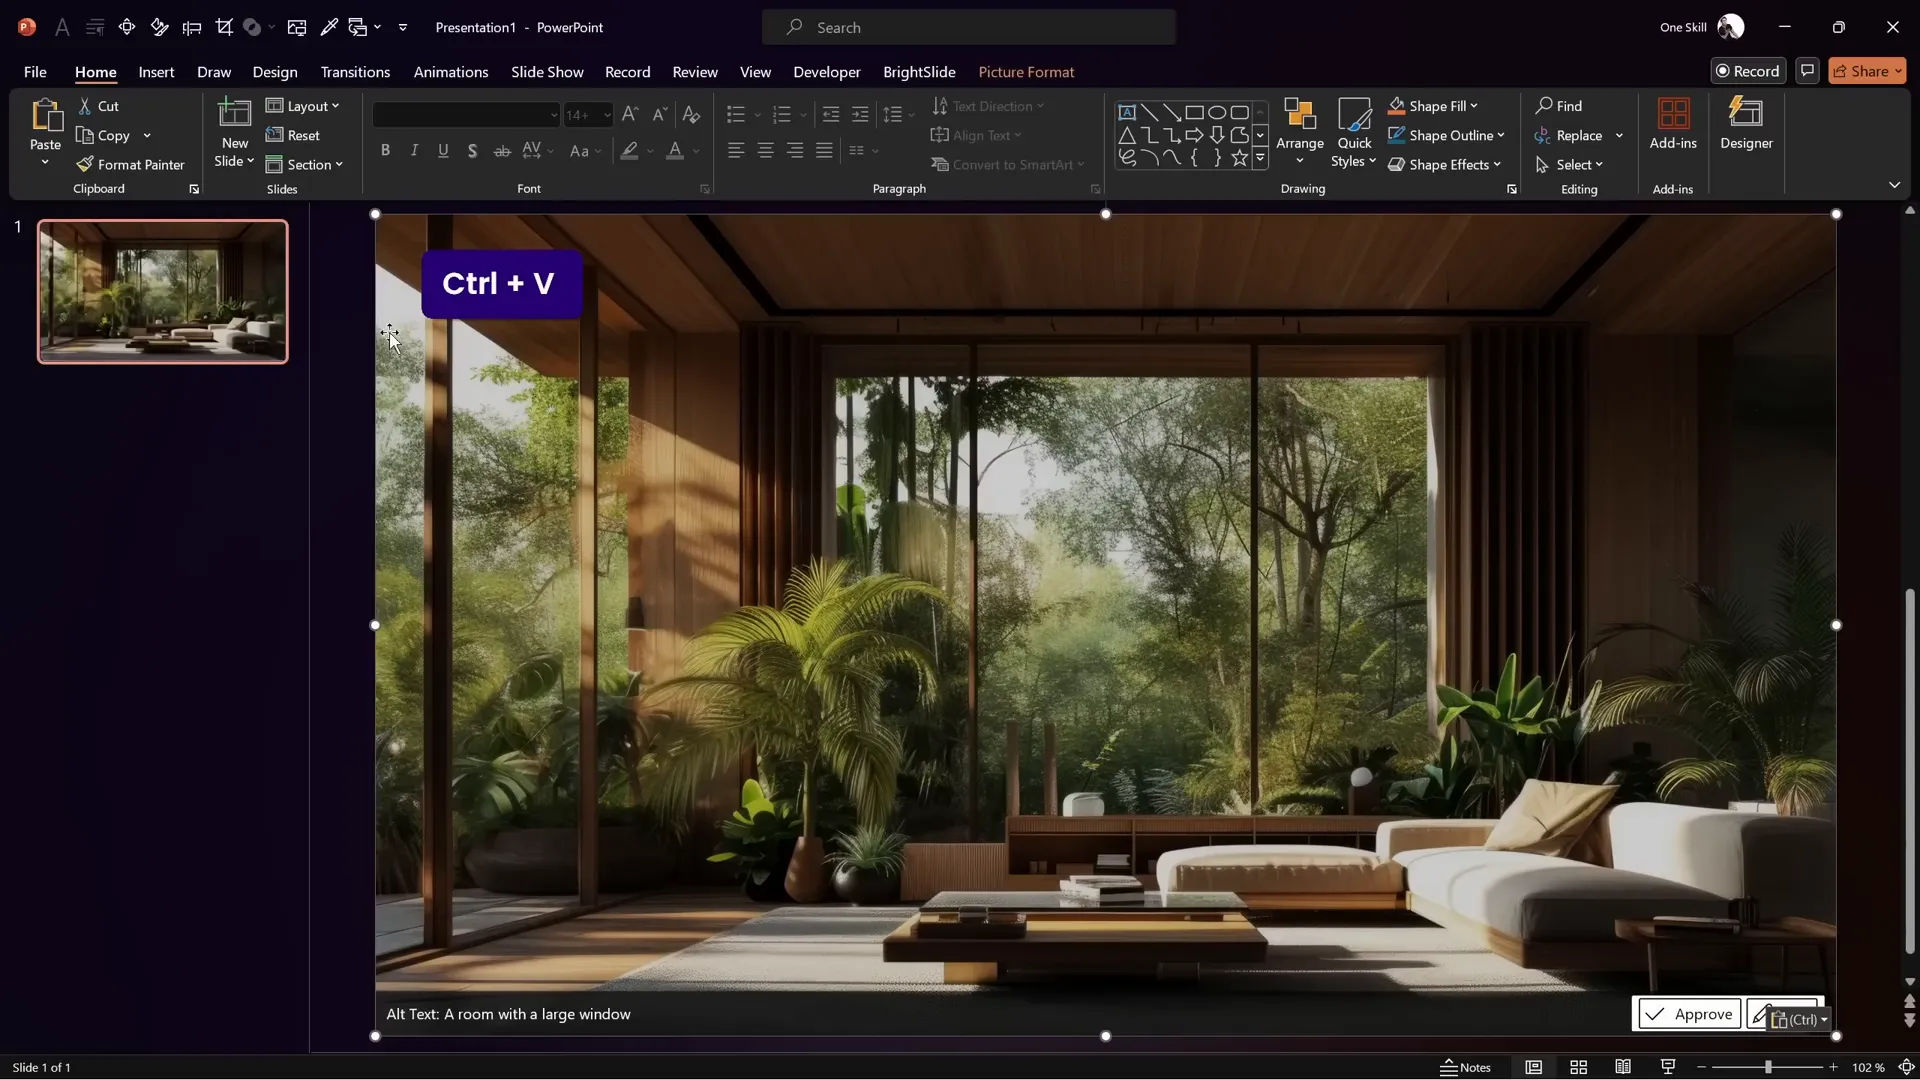
2. Choosing a Beautiful Background Image
The background sets the tone for your home slide. You can use any high-quality image; in this tutorial, a photo sourced from PrePick.com is used. Copy the image from your source presentation or file and paste it onto your slide using Ctrl + V.
3. Creating a Glassmorphic Blur Effect
Glassmorphism is a trendy design style characterized by frosted glass-like transparency and blur effects. To create this effect:
- Duplicate the background image by copying and pasting it.
- Right-click the duplicate image and select Format Picture.
- Navigate to Artistic Effects and choose the Blur effect at 100% intensity.
- Copy the blurred image, delete the duplicate, and then set the slide background fill to this blurred image via Format Background > Picture or texture fill > Clipboard.
- Place the original sharp image on top of this blurred background.
This layering creates a subtle frosted glass effect that adds depth and sophistication to your slide.
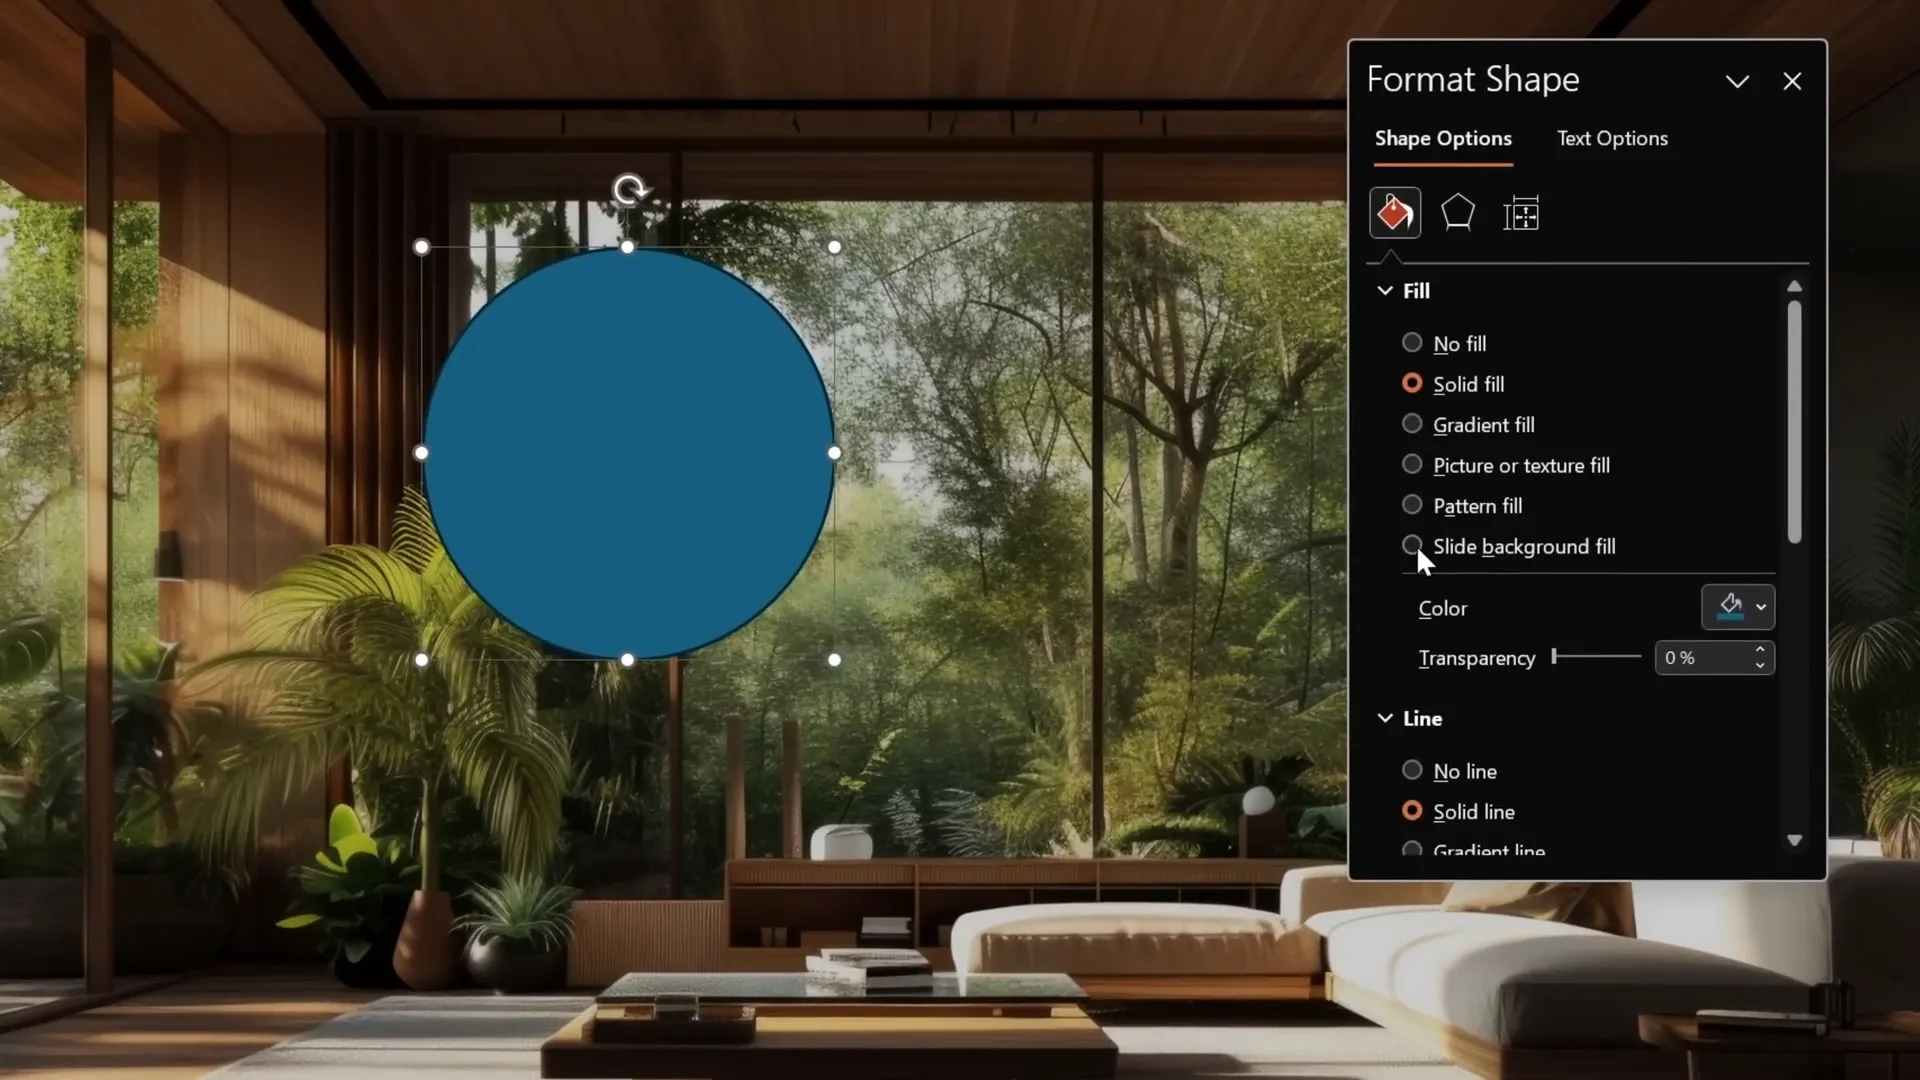
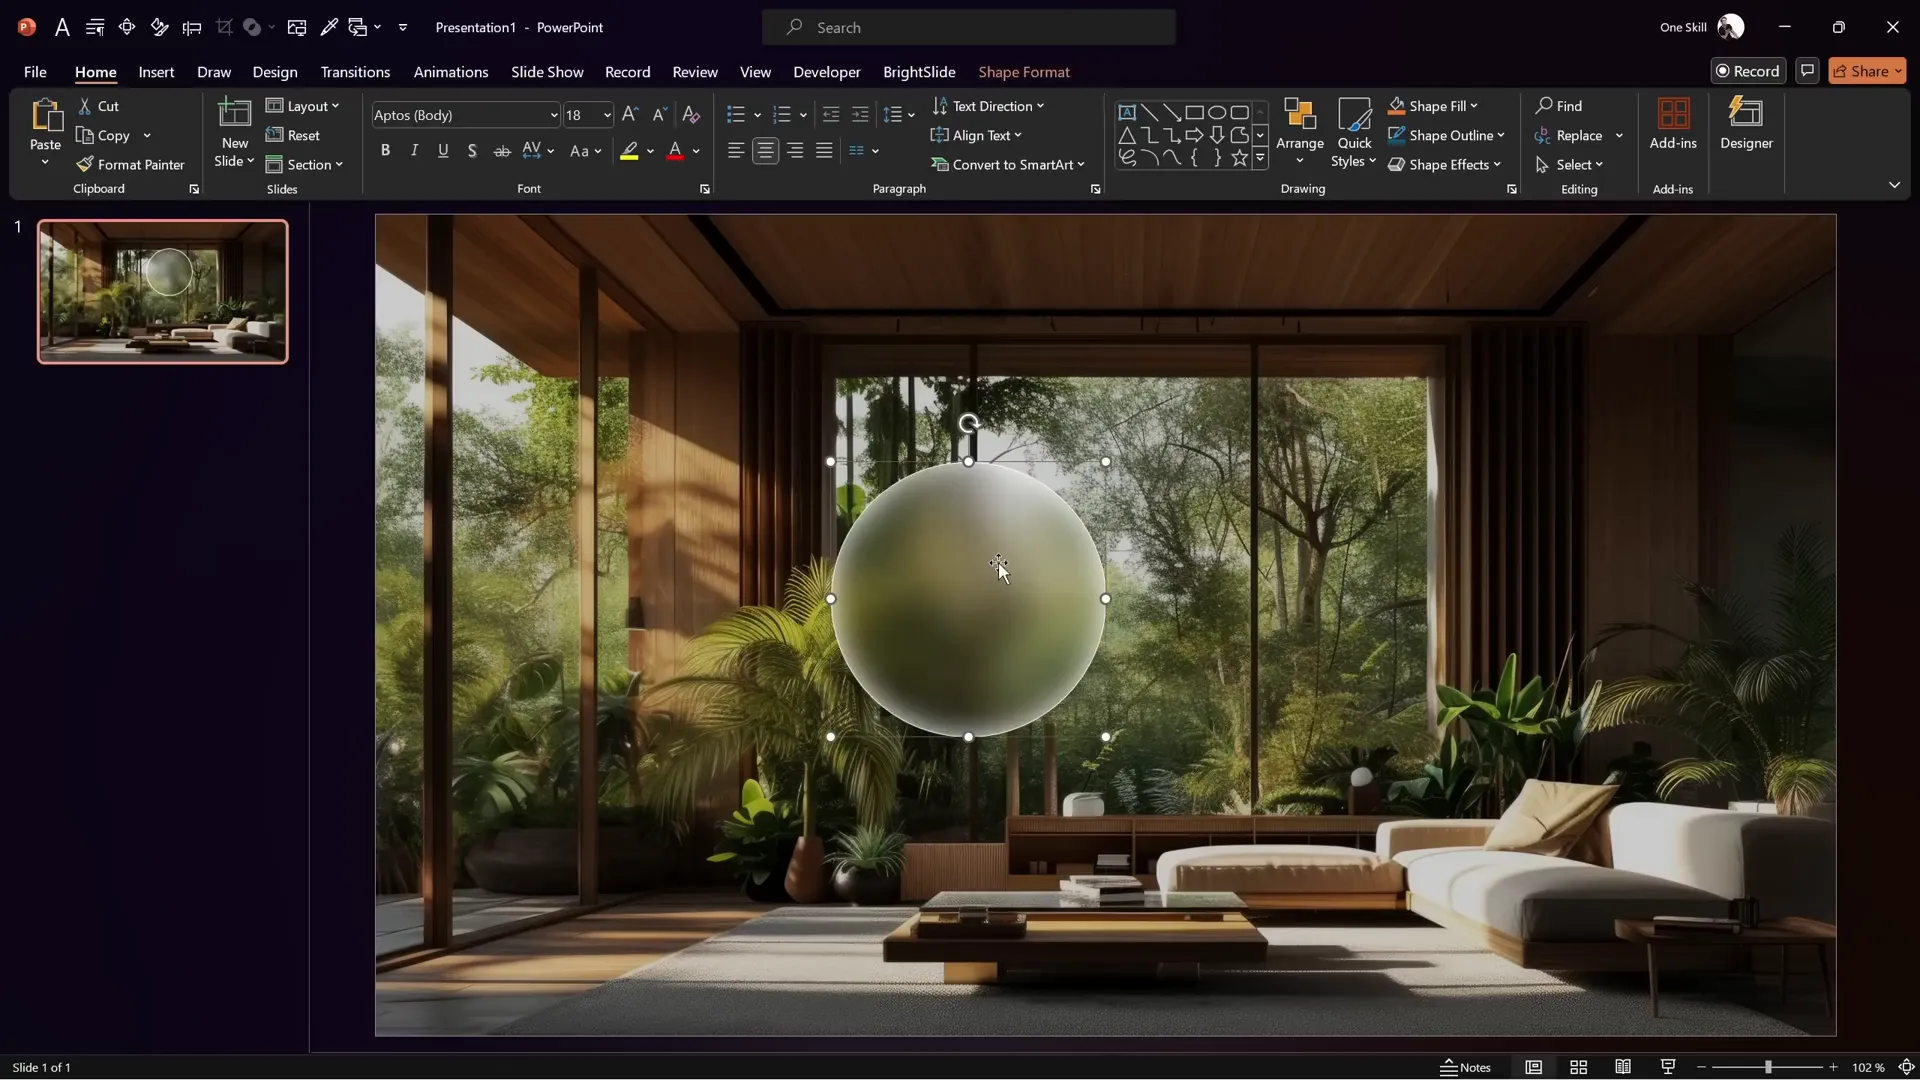
4. Adding Shapes with Glassmorphic Effect
Any shape added on top of this background can mimic the glass effect by:
- Inserting a shape (e.g., a circle).
- Setting its fill to Slide Background Fill so it picks up the blurred background.
- Adjusting the outline to white with zero transparency and a thin line weight (e.g., 0.5 pt).
- Applying an Inside Center Shadow with white color and a blur radius (e.g., 25 pt) to simulate glowing edges.
This creates beautiful, glass-like bubbles perfect for your clickable section buttons.
Creating Clickable Bubbles for Sections
These bubbles are the interactive buttons that will link to your presentation sections. Here’s how to create them efficiently:
- Create one glassmorphic circle shape as described above and size it to your liking (e.g., 4 cm by 4 cm).
- Hold down the Ctrl key and drag the shape to duplicate it.
- Create as many bubbles as you need, corresponding to the number of sections in your presentation.
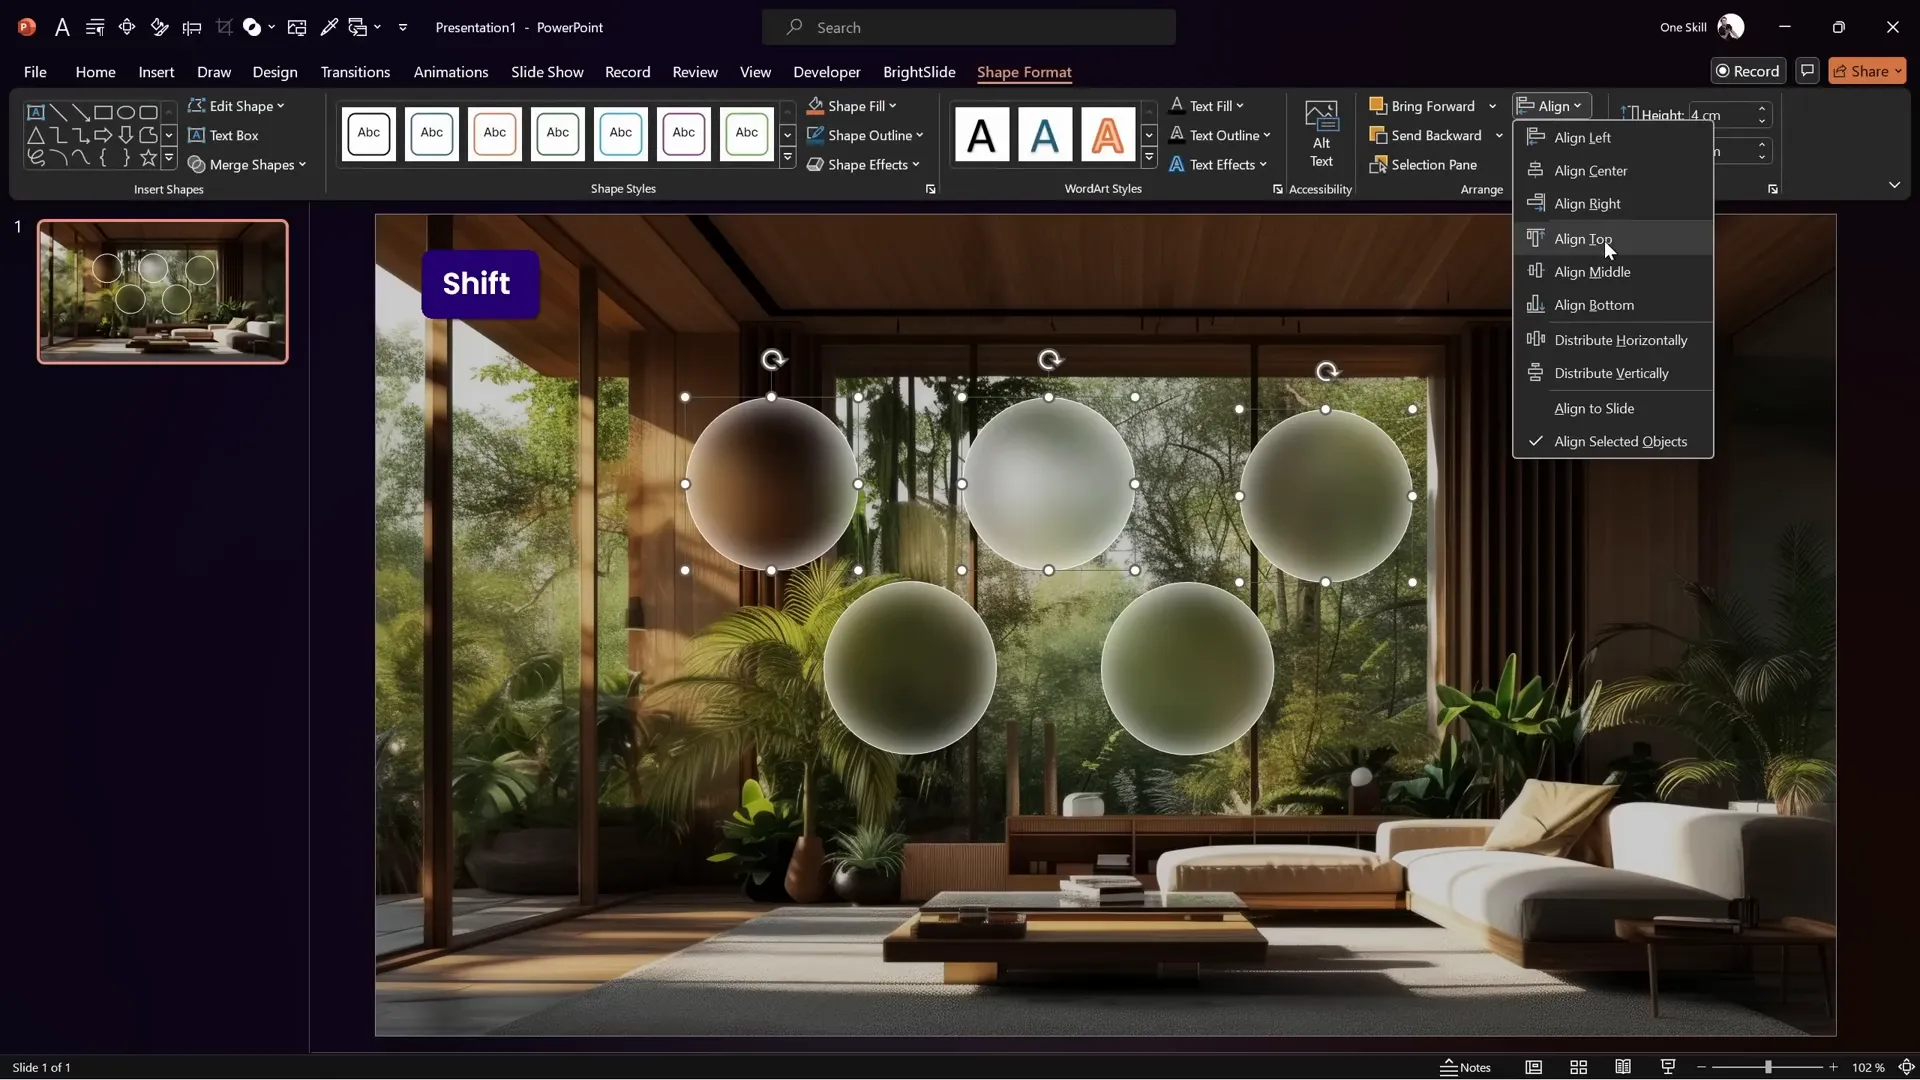
- Select all bubbles, go to Align options, and choose Distribute Horizontally for equal spacing.
- Align the top row of bubbles to the top and the bottom row to the bottom for a neat layout.
- Group the bubbles, center them on the slide, then ungroup to allow individual editing.
Adding Presentation Sections & Slides
1. Adding Sections
Sections help organize your presentation into logical parts that can be zoomed into. To add sections:
- Right-click just above your first slide in the slide thumbnail pane and select Add Section.
- Name this first section Home.
- Add another section after the first slide and name it Our Mission (or any other relevant title).
2. Creating Slides for Sections
For each section, add slides with appropriate content. For example, in the “Our Mission” section:
- Insert a new slide with a blank layout.
- Change its background to black for contrast with white text.
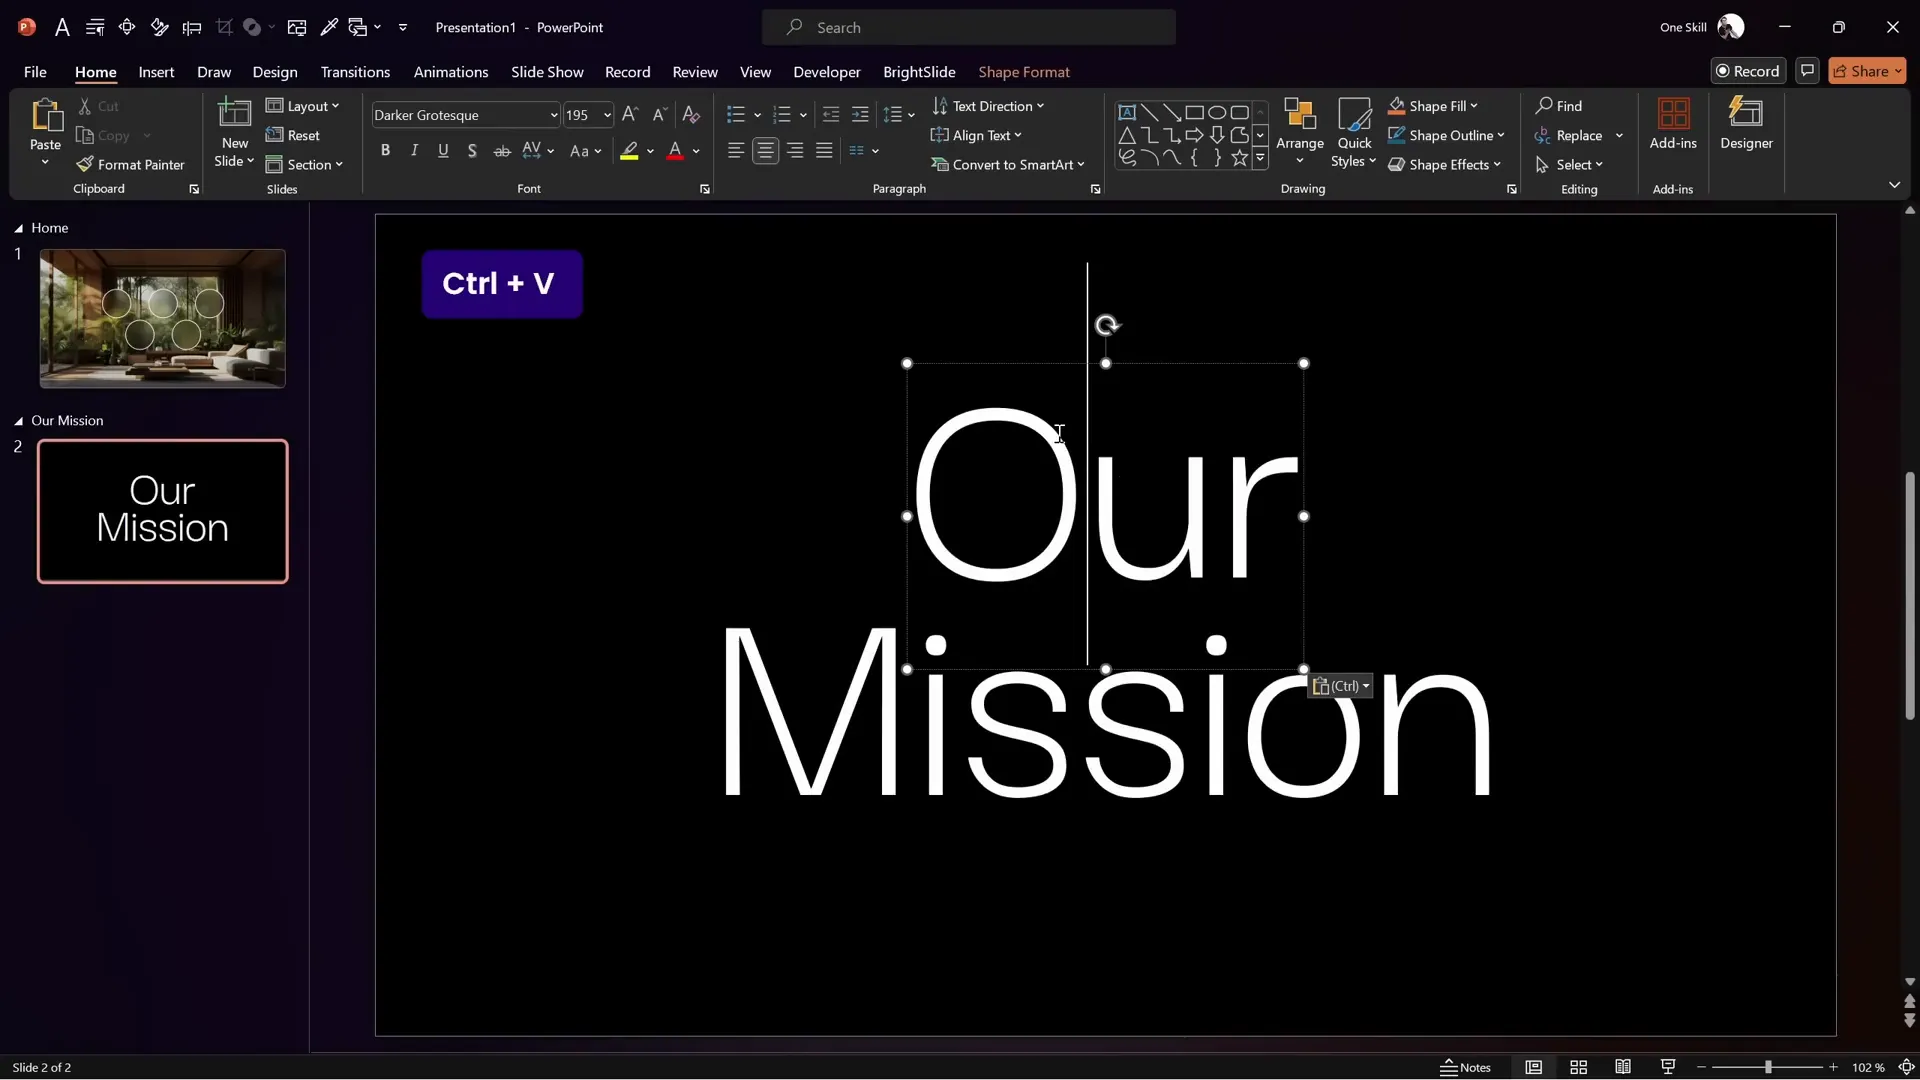
- Insert two large text boxes with your key message words, using a stylish font like Darker Grotesque.
- Use separate text boxes for each word to enable smooth Morph transitions later.
Using Morph Transition for Smooth Animations
1. Setting Up the Morph Transition
The Morph transition allows you to animate the movement and resizing of objects between slides seamlessly:
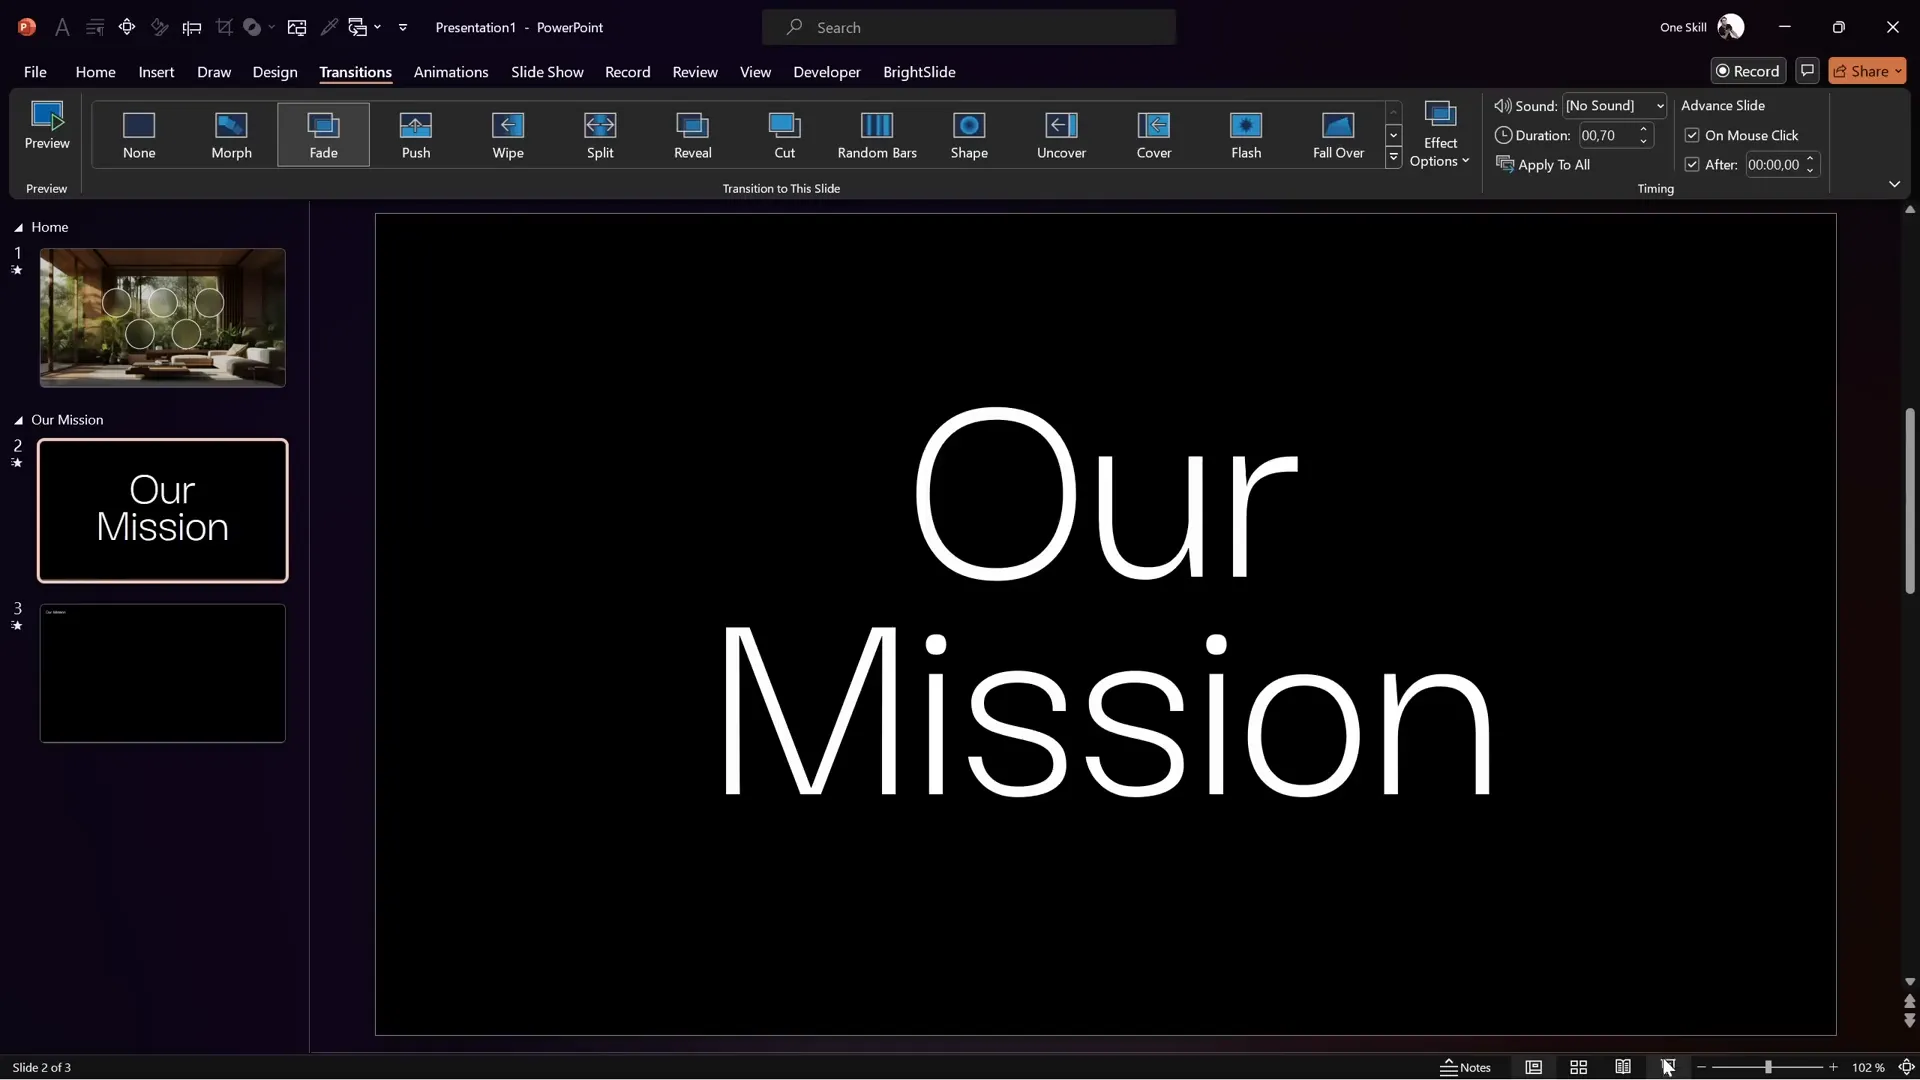
- Apply the Fade transition to the first slide and the newly created mission slide.
- Set the mission slide to auto-transition after 0 seconds for seamless flow.
- Add a third slide with the same black background.
- Paste the two text boxes again but resize the font smaller (e.g., 18 pt) and reposition them side by side at the top-left corner.
- Turn on slide guides (using a PowerPoint add-in like BrightSlide) to align the text boxes precisely within the margins.
- Apply the Morph transition to this third slide with a duration of 1 second.
2. Enhancing the Morph with Additional Elements
To add more polish:
- Insert a thin white line with 50% transparency under the text boxes to act as a visual separator.
- Copy this line to previous slides to maintain consistency.
- Add supplementary content like images or additional text boxes below the main content to create depth and context.
These subtle touches enhance the visual flow and storytelling of your presentation.
Inserting and Configuring Section Zooms
1. Inserting Section Zooms
Once your sections and slides are ready, it’s time to insert Section Zooms that link your home slide bubbles to the respective sections:
- On the home slide, go to Insert > Zoom > Section Zoom.
- Select the section you want to link (e.g., “Our Mission”) and click Insert.
- Resize the section zoom thumbnail to fit perfectly inside the corresponding bubble on your home slide.
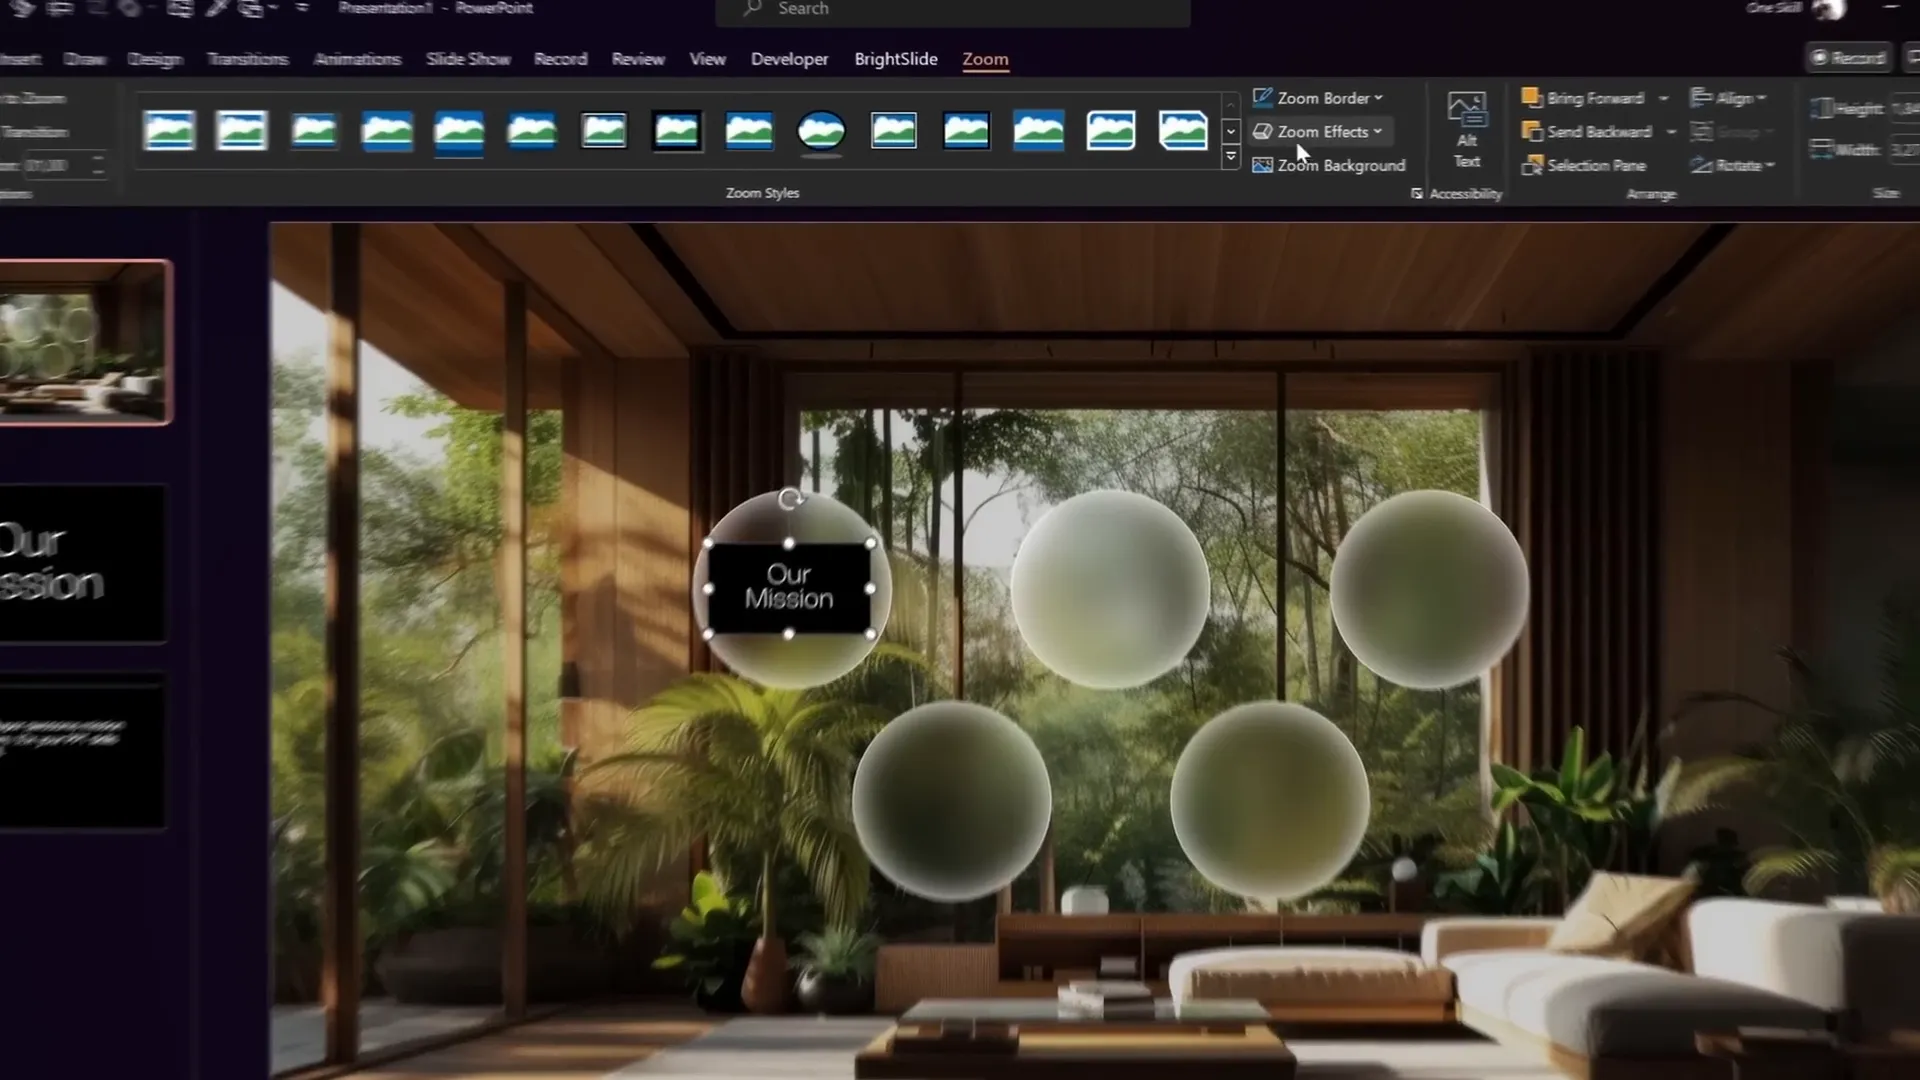
2. Configuring Zoom Background
To maintain the glassmorphic look and avoid showing the dark background of the section slides:
- Select the Section Zoom.
- Go to the Zoom tab in the ribbon.
- Click the Zoom Background button to make the zoom background transparent.
This setting ensures that when you zoom into a section, the blurred background from the home slide shows through, keeping the design consistent and elegant.
3. Testing the Interactive Zoom
Run your presentation in full-screen mode to test:
- Click a bubble on the home slide to zoom into the corresponding section.
- Watch the slides in that section auto-transition smoothly (thanks to the fade and morph transitions).
- At the end of the section, the presentation automatically zooms back to the home slide.
This interactive flow creates a captivating experience for your audience.
Enhancing Slide Design with Icons and Additional Elements
1. Adding Informational Elements
To add professionalism and context to your home slide, include elements such as:
- Company logo
- Presentation date
- Website URL
These are usually placed neatly in the corners or top center of the slide.
2. Adding Sparkling Icon in a Small Bubble
For a stylish accent, add a smaller bubble with an icon:
- Duplicate one of the large bubbles and resize it to a smaller size (e.g., 1.4 cm by 1.4 cm).
- Insert an SVG icon inside the small bubble, such as a sparkling star from Phosphor Icons.
- Set the icon color to white and size it appropriately (e.g., 0.7 cm by 0.7 cm).
- Group the icon and the small bubble and align it over a line or design element on the slide for added visual interest.

3. Matching Fill Colors
Ensure consistency by copying the fill style from existing bubbles to the new small bubble using Ctrl + Shift + C and Ctrl + Shift + V for format painter functionality.
How to Get the Free Pitch Zoom Template
If you want to skip the manual creation process, you can download the exact Pitch Zoom Template used in this tutorial for free from pptskill.com.
- Visit pptskill.com.
- Scroll down to the Slide Zoom Animation section.
- Sign up for free to access the PowerPoint Animation Mastery course.
- Go to Chapter 12 and find the Bonus Pitch Zoom Lesson.
- Download the PPTX file and enjoy your ready-made interactive presentation.
Make sure to install the required fonts Darker Grotesque and Playfair Display on your computer to ensure the template displays correctly.
Frequently Asked Questions
What is a Section Zoom in PowerPoint?
A Section Zoom is an interactive thumbnail that links to a section of your presentation slides. Clicking it zooms into that section, allowing non-linear navigation and enhancing audience engagement.
How do I create a glassmorphic effect in PowerPoint?
Create a blurred background image, set it as your slide background, overlay the original sharp image, and add shapes with slide background fill and white outlines with shadows to mimic frosted glass.
What is the Morph transition and why use it?
The Morph transition animates smooth movement, resizing, and repositioning of objects between slides. It creates professional-looking animations without complex setups.
Can I customize the bubbles on the home slide?
Yes! You can resize, recolor, and add icons or text inside the bubbles to suit your branding and presentation style.
Is the Pitch Zoom Template free?
Yes, it is completely free to download from pptskill.com after signing up for their free course.
Do I need special fonts for this template?
Yes, the template uses Darker Grotesque and Playfair Display. Install them on your computer to avoid font substitution issues.
Will this work on all versions of PowerPoint?
Section Zoom and Morph transitions require PowerPoint 2019 or Microsoft 365. Older versions may not support these features.
Conclusion
Creating an interactive, visually stunning PowerPoint presentation with Section Zooms is easier than you might think. By combining thoughtful slide design, glassmorphic effects, Morph transitions, and clickable zooms, you can craft a pitch deck or presentation that truly stands out and keeps your audience engaged.
Whether you build your presentation from scratch following this tutorial or start with the free Pitch Zoom Template from pptskill.com, you’ll have a powerful tool to pitch your ideas, products, or services with confidence and style.
Remember, the key to effective presentations is not just the content but how you deliver it. Interactive features like Section Zooms can elevate your storytelling and make your message memorable.
So, dive into PowerPoint, experiment with the techniques shared here, and wow your audience with a dynamic, professional presentation.


