If you want to level up your PowerPoint presentations and create engaging, interactive slides that captivate your audience, then mastering slide zooms with animations is a game-changer. In this comprehensive guide, we’ll walk you through how to build a beautiful slide zoom template in PowerPoint, complete with clickable section zooms, gorgeous rounded hexagons, morph transitions, and even a glassmorphic blurry background effect.
This tutorial is based on the expert walkthrough by One Skill PPT and is designed to empower you to create professional and dynamic presentations using Microsoft PowerPoint 365 or later versions. Whether you’re a beginner or a seasoned user, this step-by-step guide will help you unlock powerful features that make your slides interactive and visually appealing.
Table of Contents
- Getting Started: Setting Up Your PowerPoint Presentation
- Adding and Adjusting a Beautiful Background Photo
- Creating Slide Sections for Section Zooms
- Designing Rounded Hexagons Using Figma and PowerPoint
- Inserting Icons and Styling Text Boxes
- Using Morph Transition and Automatic Slide Transitions
- Inserting and Customizing Section Zooms
- Creating a Glassmorphic Blurry Background Effect
- Animating Section Zooms for Impact
- Workaround to Control Animation Replays
- Expanding Your Template with More Sections
- Frequently Asked Questions
- Conclusion
Getting Started: Setting Up Your PowerPoint Presentation
Before diving into the creative elements, it’s important to clarify the tools and versions you’ll need. This tutorial uses Microsoft PowerPoint 365, which supports advanced features like the morph transition. If you have PowerPoint 2019 or 2021, you’re also set. For older versions, don’t worry—you can still create the core of this template, though some animations might be simplified.
Start by opening a fresh, blank presentation in PowerPoint:
- Close the notes section at the bottom to maximize your workspace.
- Change the slide layout to Blank to remove default placeholders.
This clean canvas is where all your creativity will unfold.
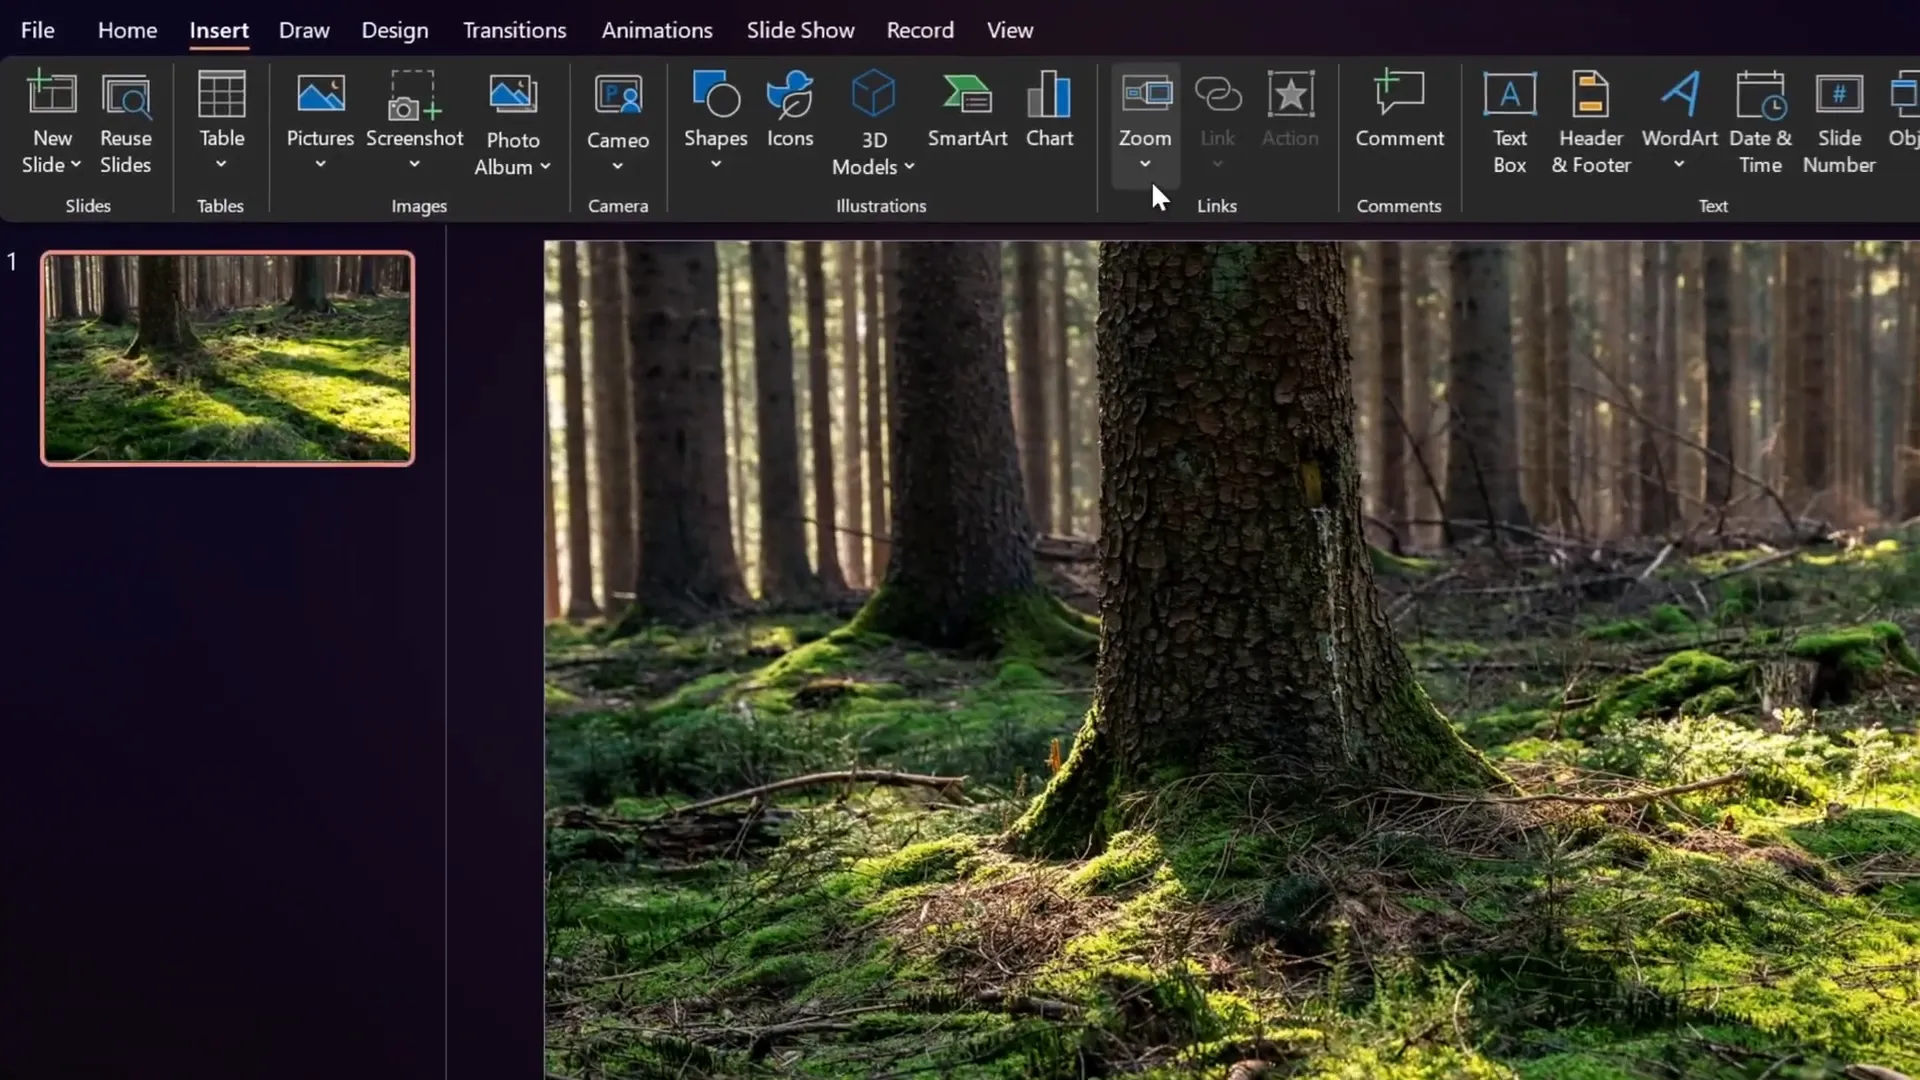
Adding and Adjusting a Beautiful Background Photo
A captivating background sets the mood for your presentation. For this template, we use a stunning forest photo sourced from Unsplash, specifically a new photo by Kat Clausen.
To add and adjust the background photo:
- Find the photo online, zoom in, right-click, and copy the image.
- Paste it into your PowerPoint slide using
Ctrl + V. - Resize the photo by dragging its corners while holding the
Shiftkey to maintain proportions. - Crop the top of the photo to fit the slide nicely via the Picture Format > Crop menu.
- Flip the photo horizontally to create a warmer, golden hour effect.
- Adjust picture settings to enhance brightness (+10%), contrast, and temperature (around 11,200K) for that warm glow.
These subtle tweaks give your background a professional and inviting look that matches the template’s aesthetic.
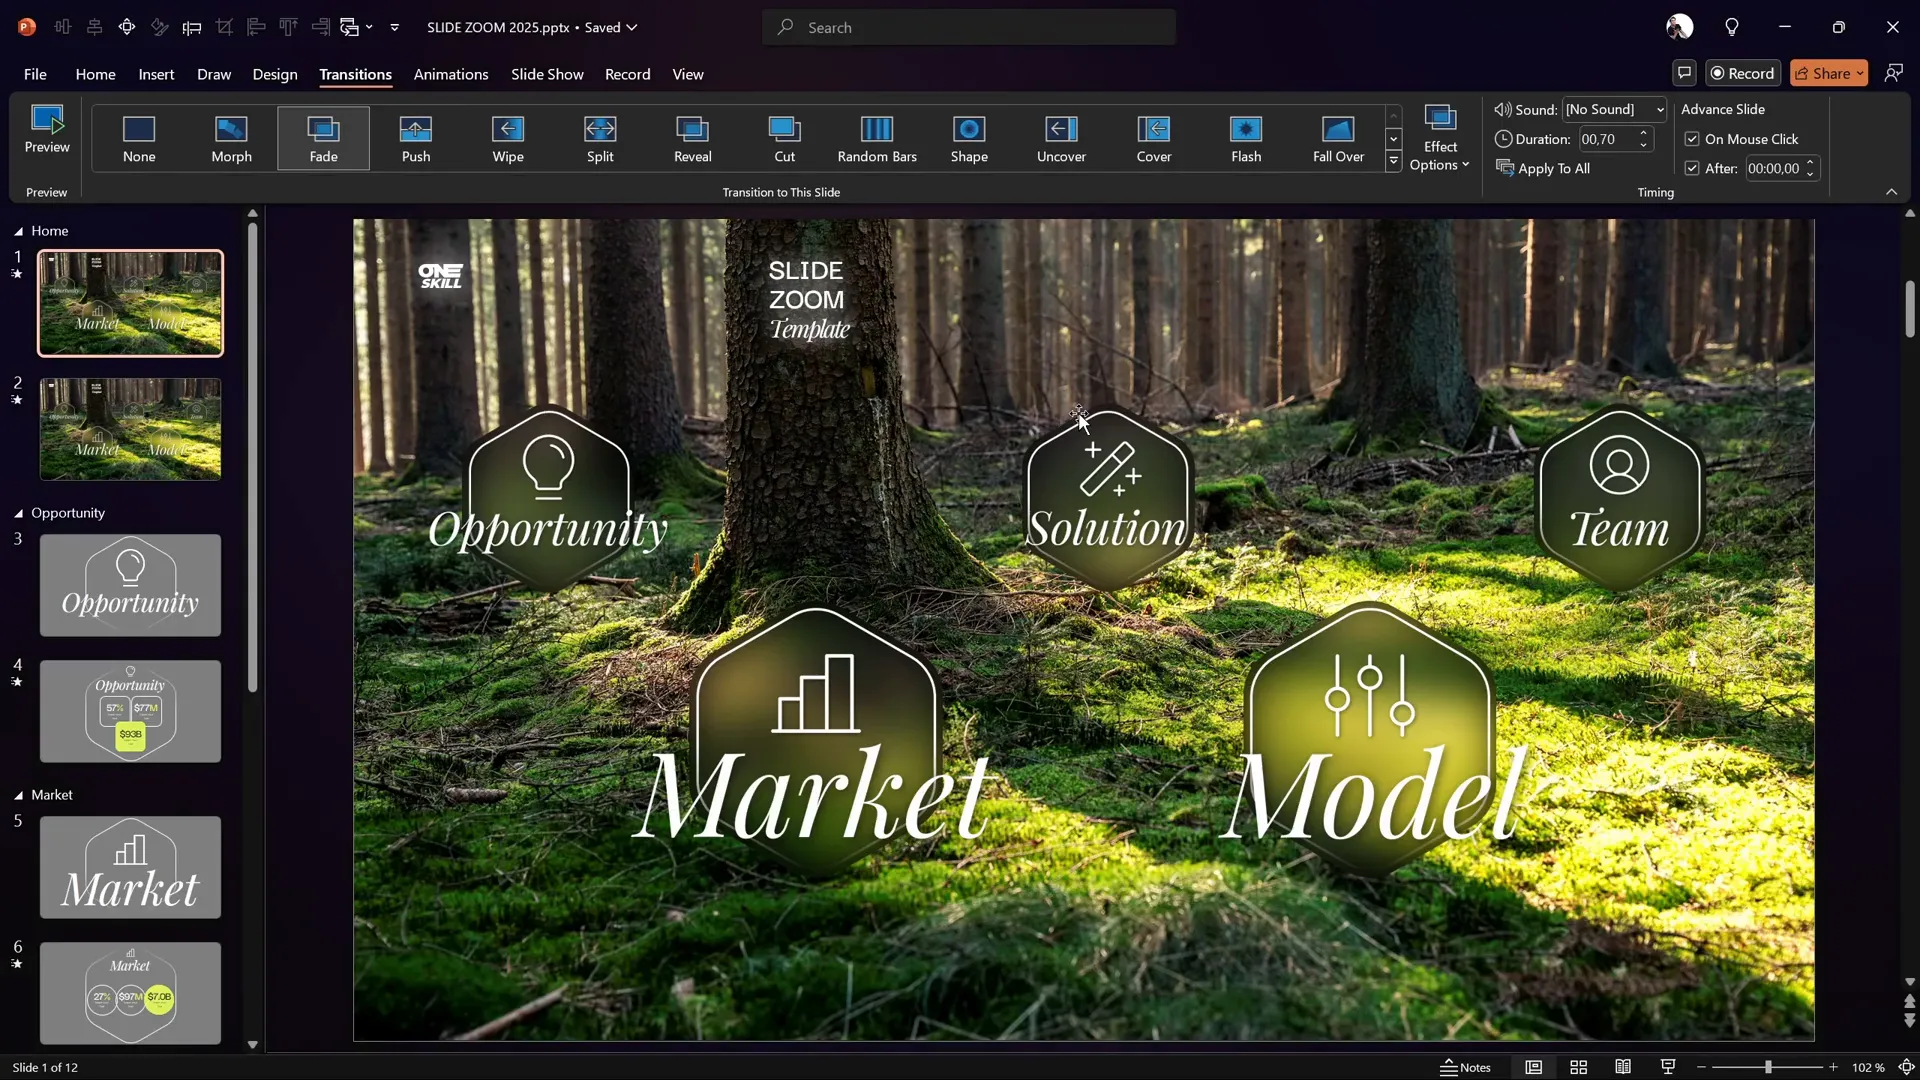
Creating Slide Sections for Section Zooms
Section zooms are the heart of this interactive template. Unlike slide zooms that zoom into individual slides, section zooms allow you to zoom into entire sections of your presentation, making navigation smooth and intuitive.
To enable section zooms, you first need to create slide sections:
- Right-click above your first slide and select Add Section. Name this section Home.
- Add a second section and name it Opportunity.
- Inside the Opportunity section, add two new slides. These will be the slides you zoom into.
Once sections are created, the section zoom option becomes available in the Insert > Zoom menu.
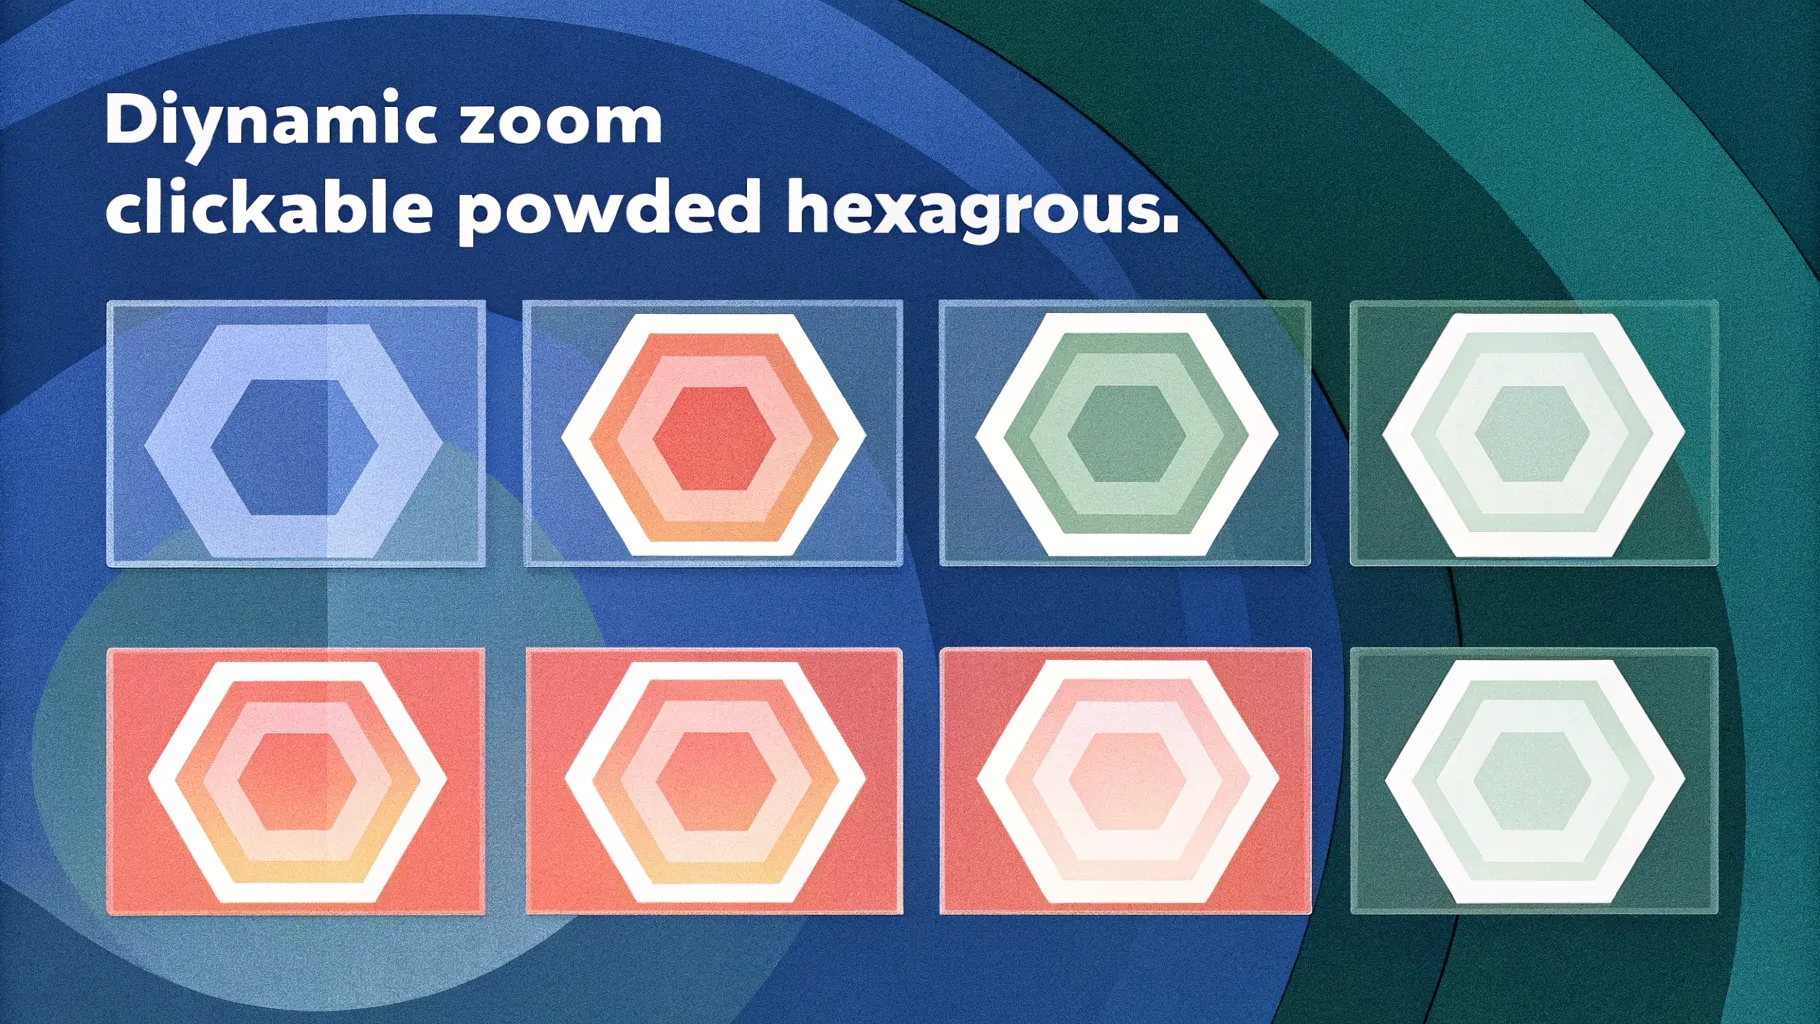
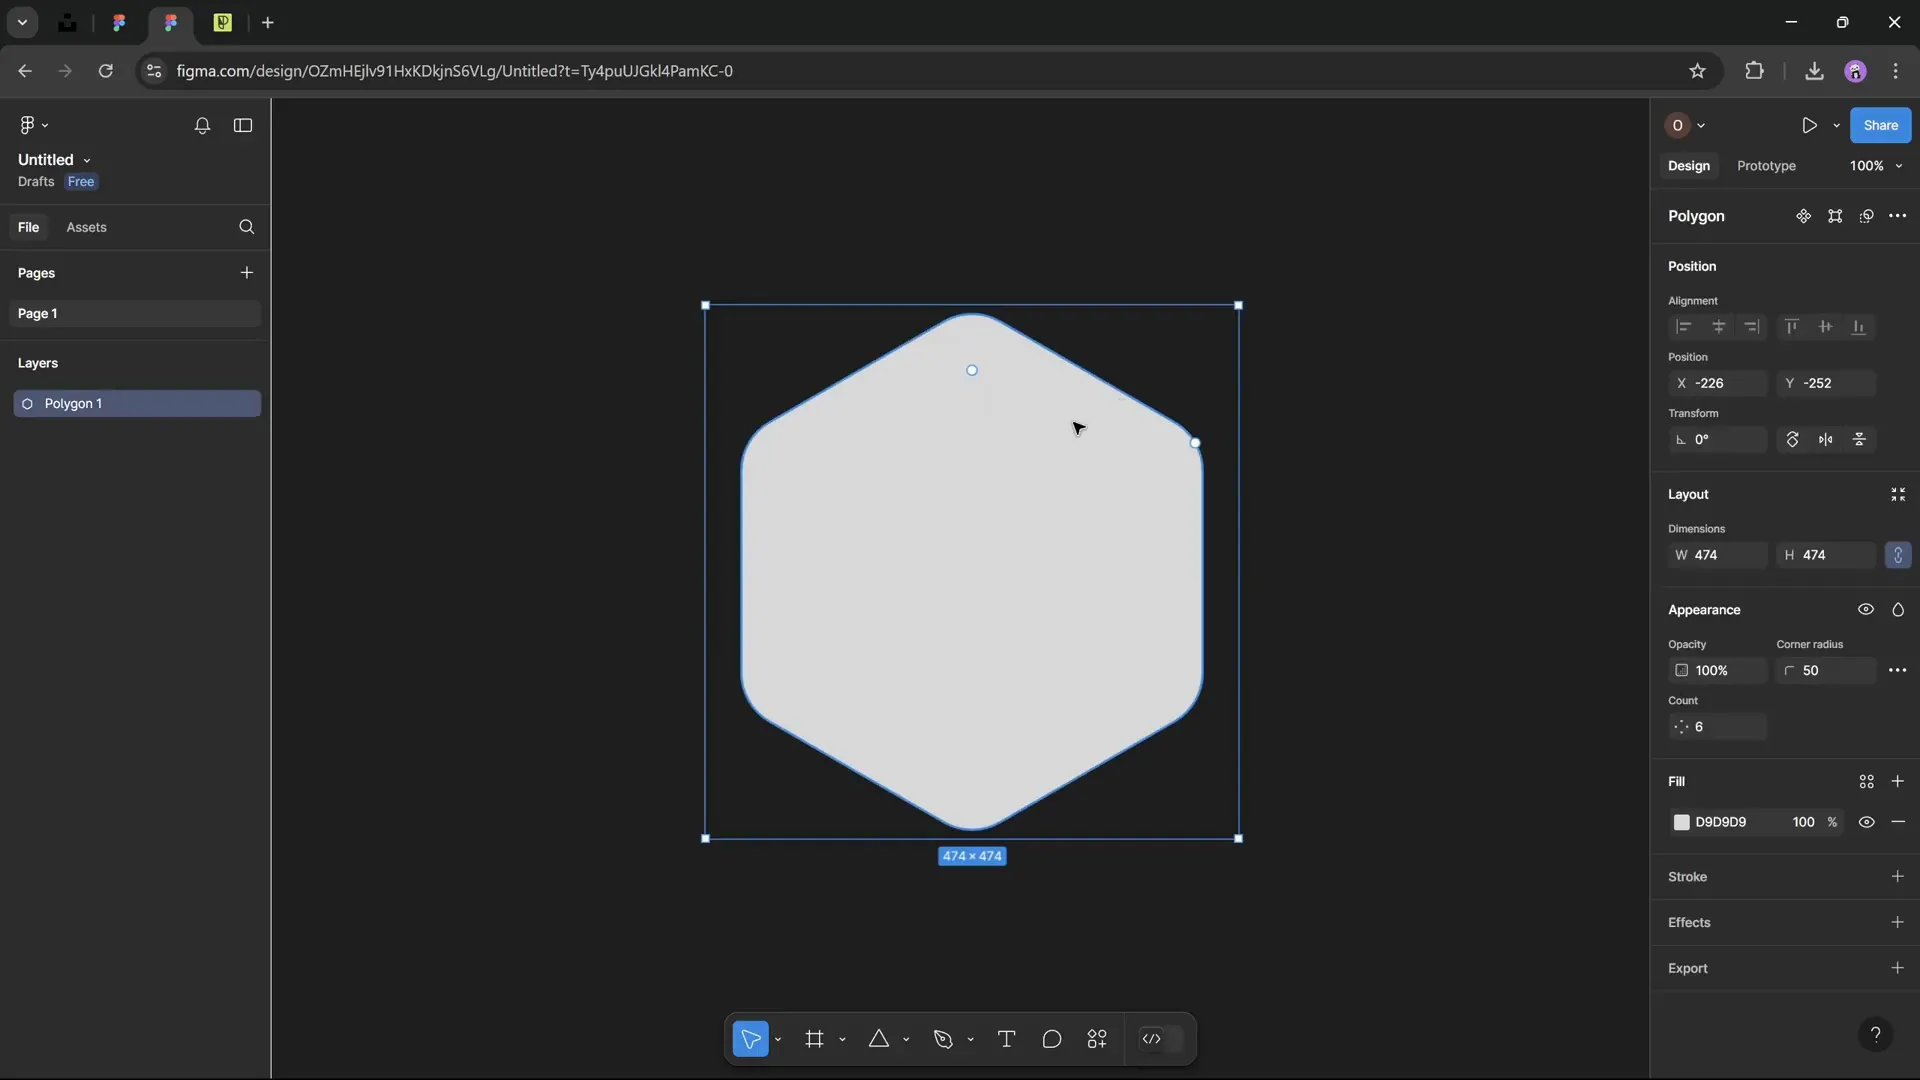
Designing Rounded Hexagons Using Figma and PowerPoint
One of the signature visual elements in this template is the beautiful rounded hexagons. PowerPoint’s default hexagon shape has sharp corners and isn’t oriented the way we want, so we use an external tool called Figma to create custom rounded hexagons.
Here’s how to create and import them:
- Go to figma.com and create a new design file.
- Select the Polygon tool and hold
Shiftwhile drawing to keep the shape constrained. - In the polygon settings, set the number of sides to 6 for a hexagon.
- Adjust the corner radius to around 50 to get rounded edges.
- Choose any fill color to preview your shape.
- Rename the shape to “hexagon” for easy reference.
- Export the shape as an SVG file.
Back in PowerPoint, insert the SVG file via Insert > Pictures > This Device. You can convert the SVG to a shape for easier editing. Align and resize it to fit your slide perfectly.
Using the Format Shape pane (hotkey Alt + 4), remove the fill and add a gradient outline to simulate a fading effect:
- Set the line width to 5 points.
- Use two color stops: the first white at 50% opacity, the second fully transparent.
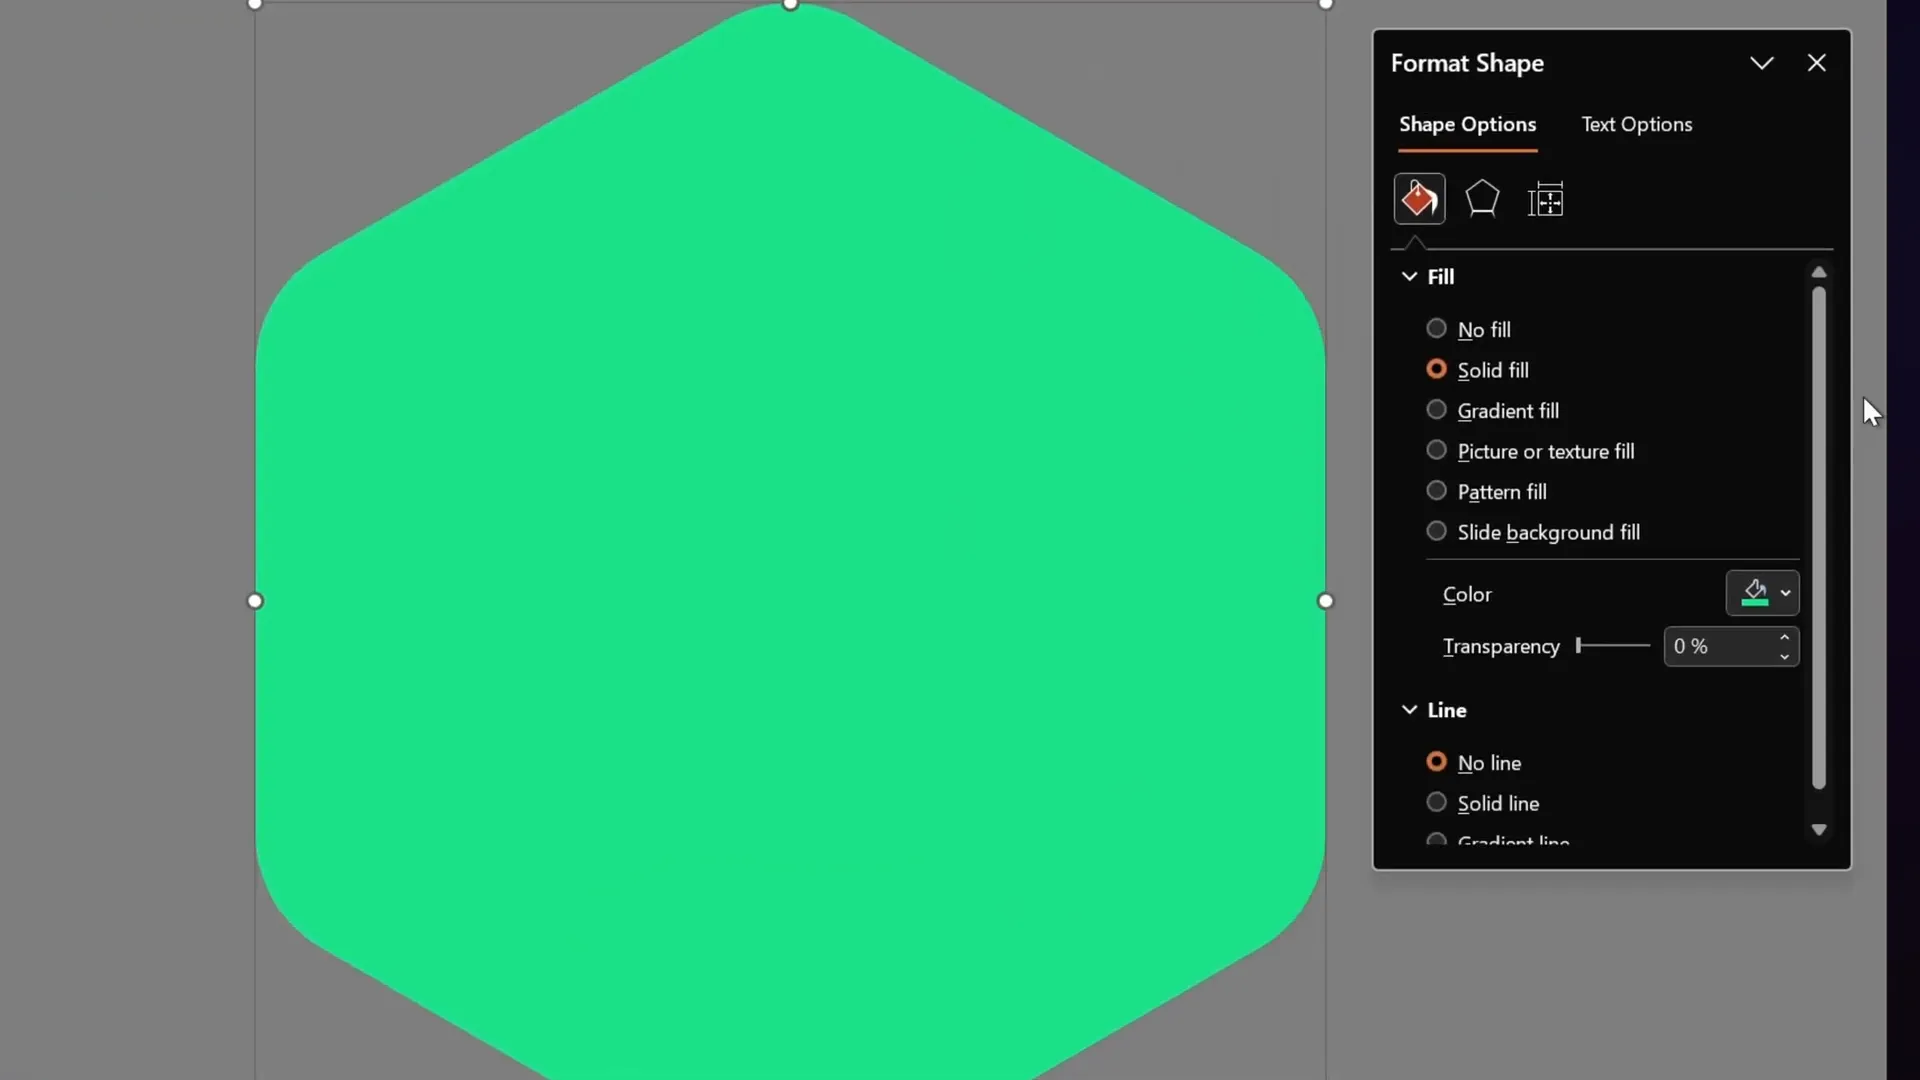
This creates a subtle glowing border around the hexagon, making it visually appealing and modern.
Inserting Icons and Styling Text Boxes
Icons add clarity and visual interest to your slide. Instead of using built-in PowerPoint icons, this tutorial introduces Phosphor Icons, a free icon library.
To add a bulb icon (or any icon you prefer):
- Search for your icon on phosphoricons.com and download it as an SVG.
- Insert the SVG into your slide and convert it to a shape.
- Resize and fill it with white.
- Add a shadow effect via Format Shape > Shadow with settings like 50% transparency, 10 pt blur, and 3 pt distance for depth.
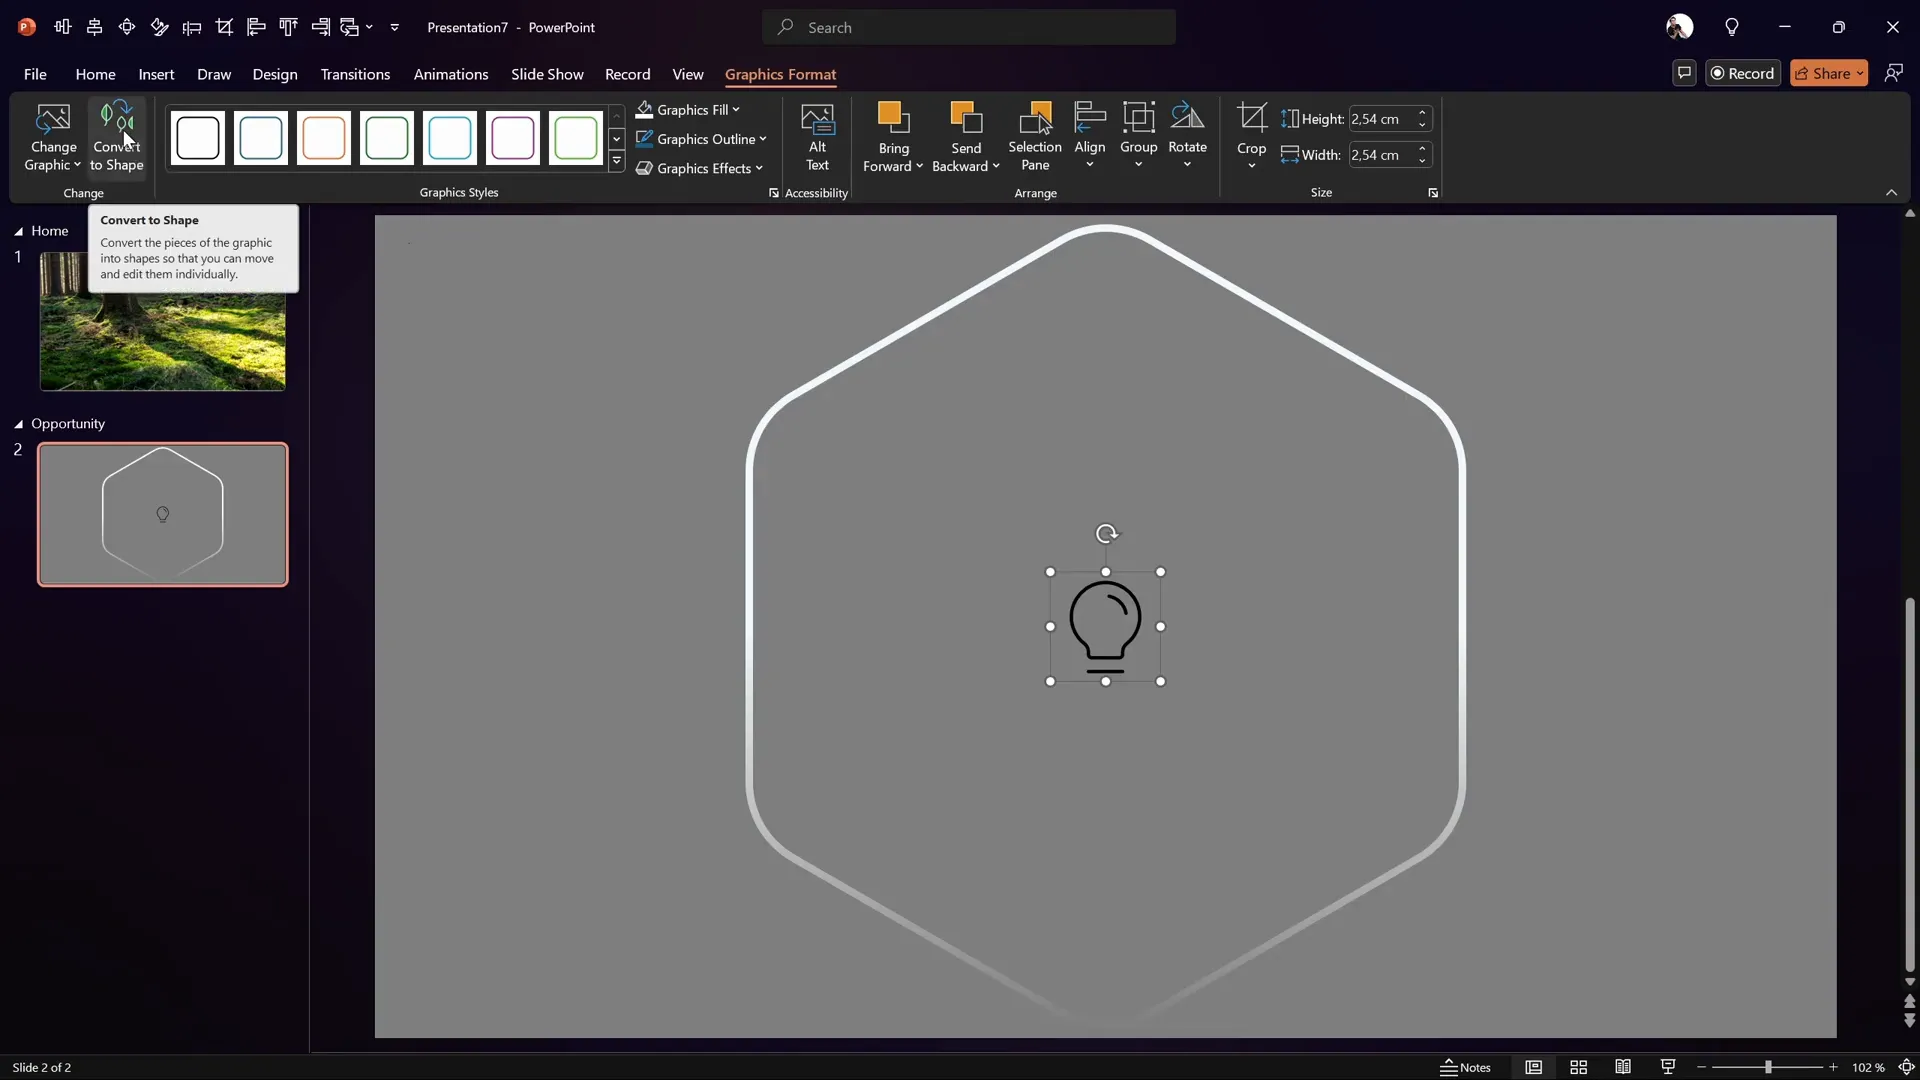
Below the icon, add a text box with the heading for the section, such as “Opportunity”:
- Use the Playfair Display font, italicized, size 140 pt.
- Center-align the text.
- Add a shadow with similar settings to the icon for consistency.
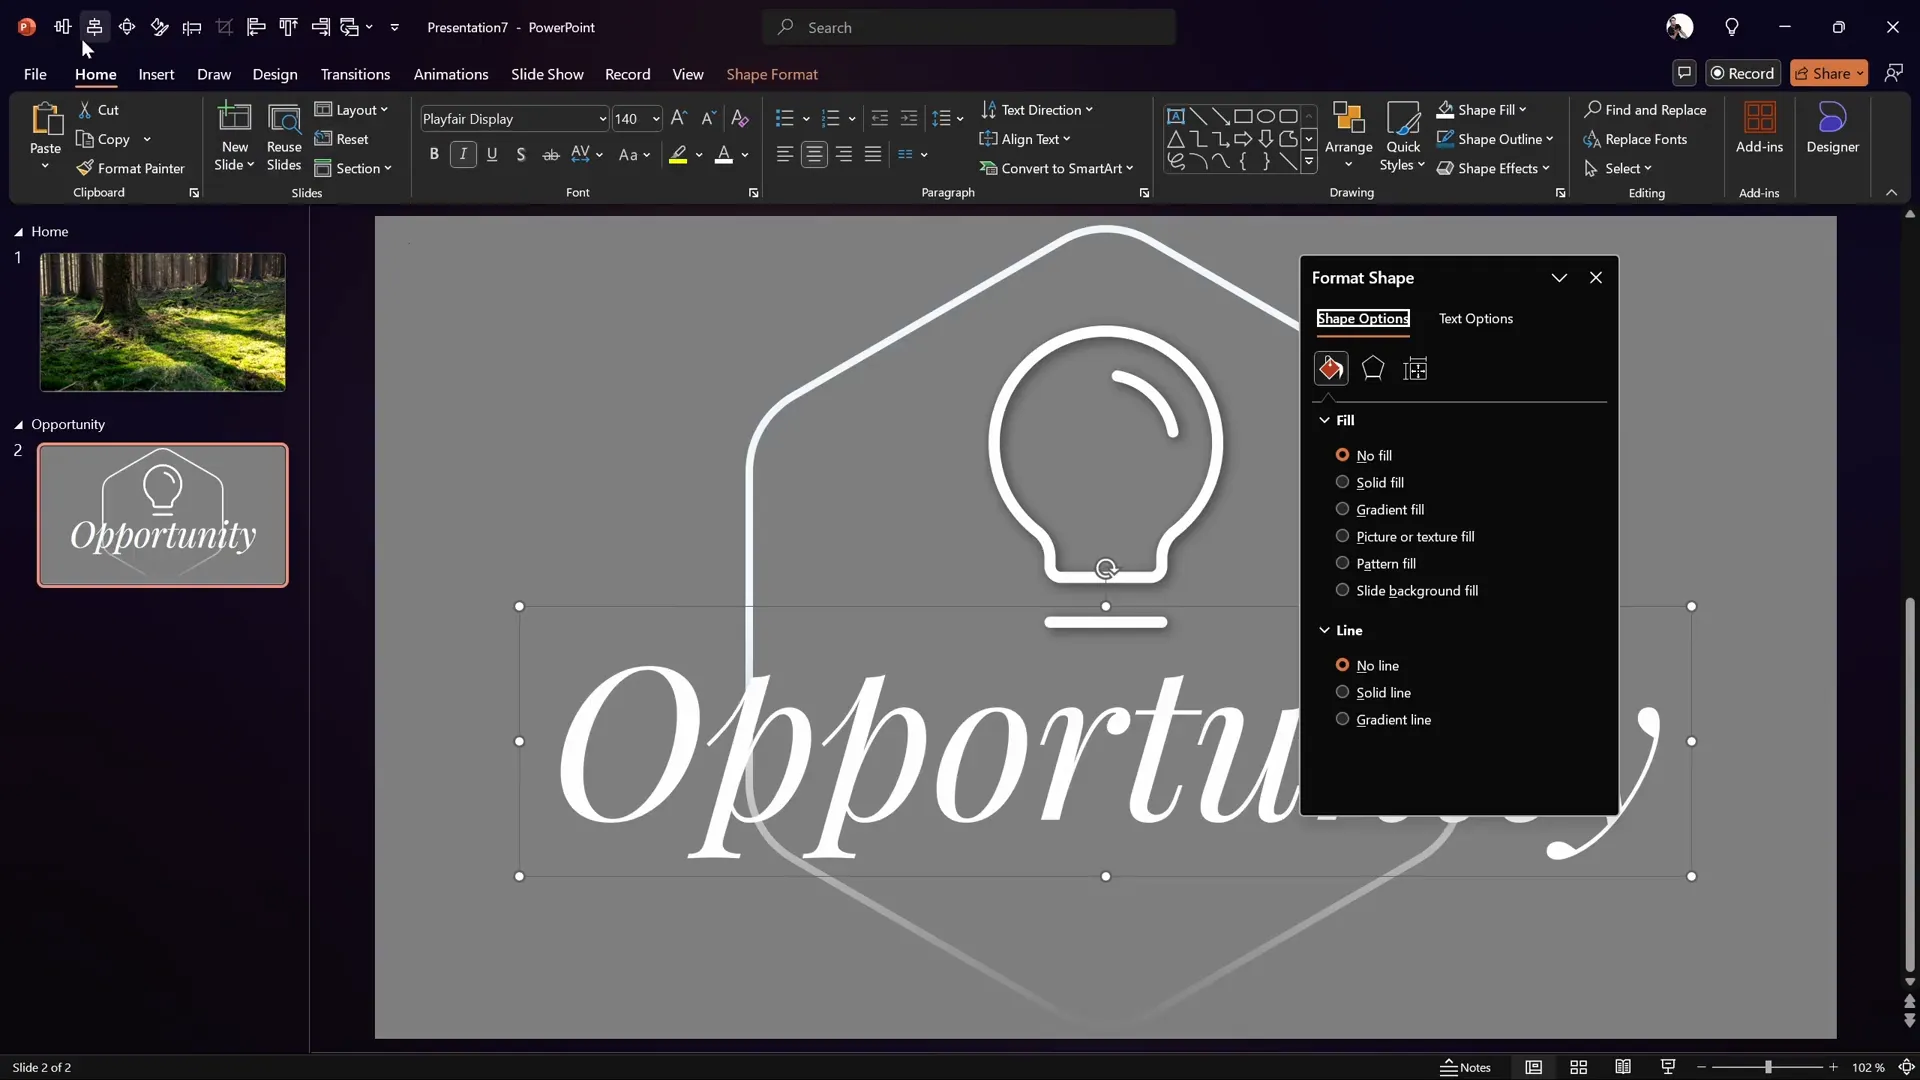
This combination of icon and text creates a strong visual focal point for your section.
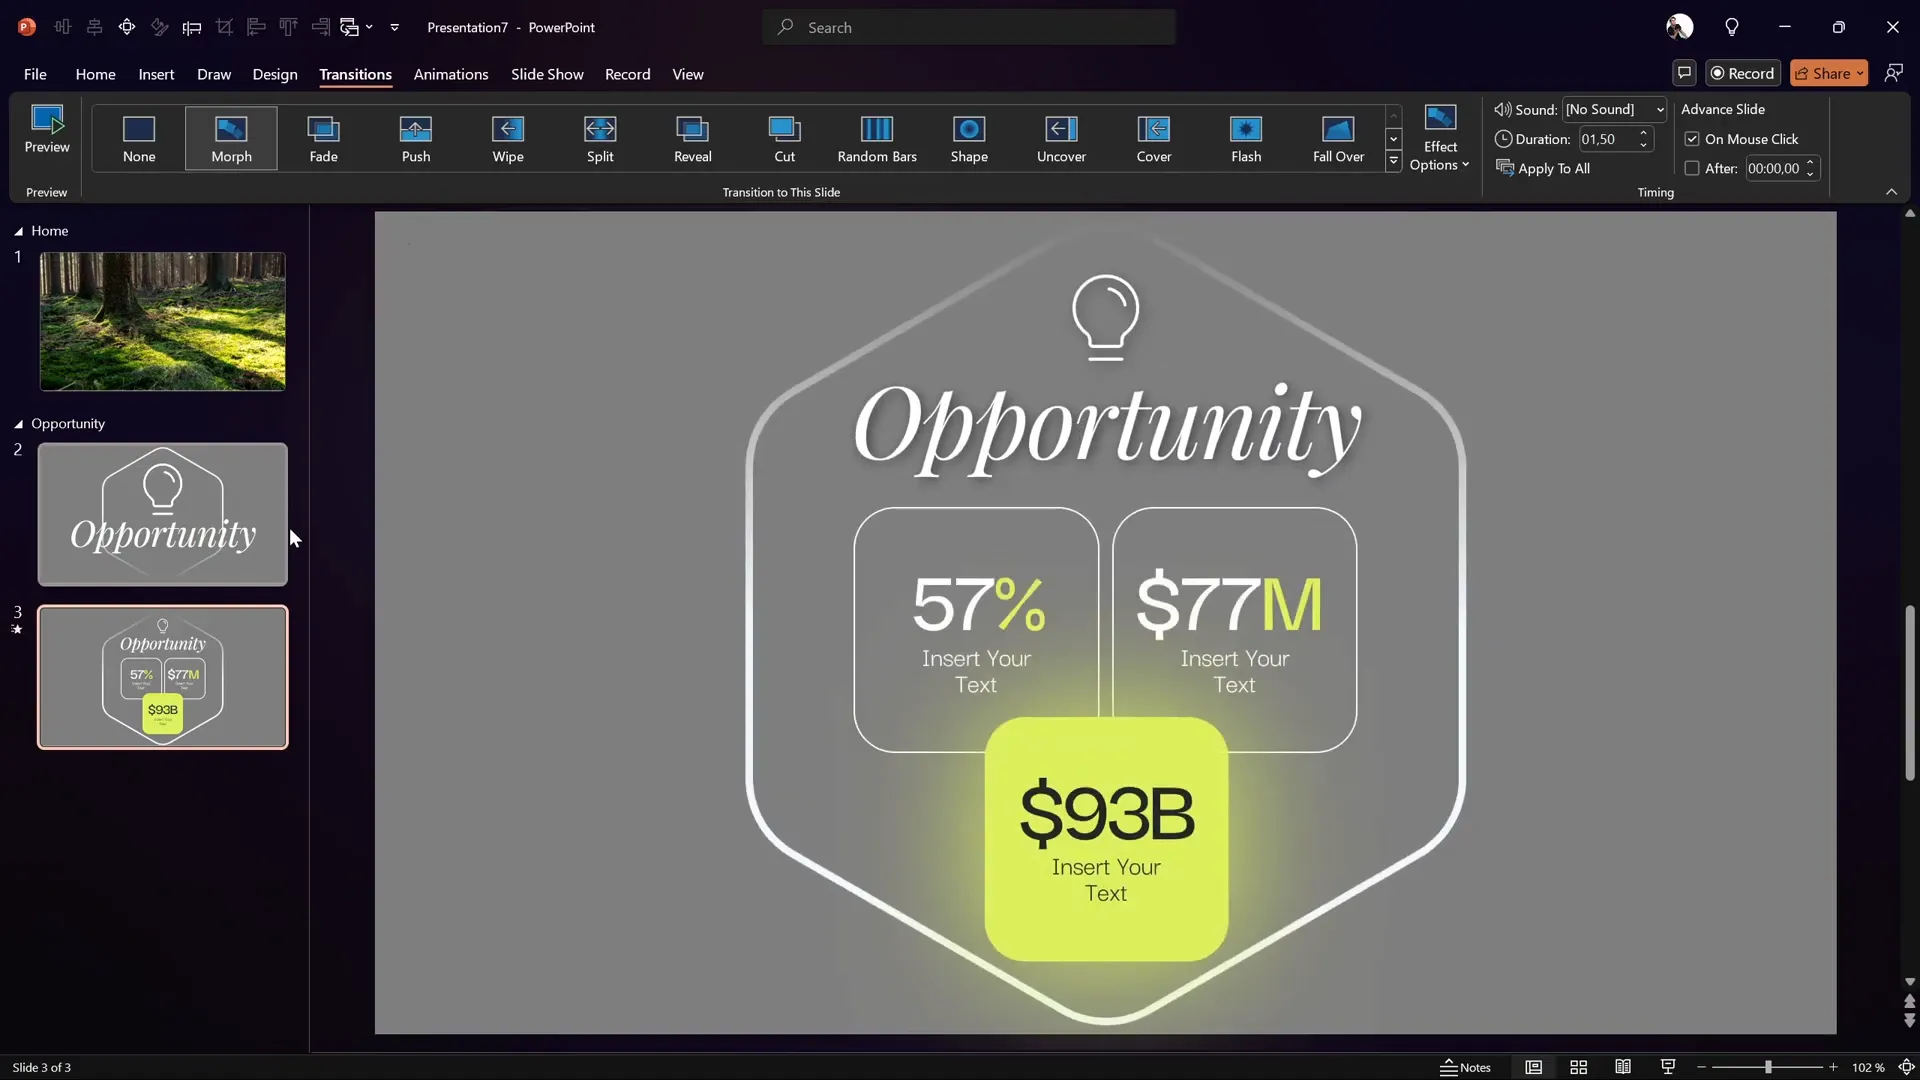
Using Morph Transition and Automatic Slide Transitions
The morph transition in PowerPoint allows smooth, dynamic animations between slides, such as flipping or resizing objects.
For the Opportunity section, create two slides:
- First slide with a large icon and text.
- Second slide with a smaller icon and text, plus additional content like rounded rectangles with numbers.
Set the first slide to transition automatically after 0 seconds to the second slide, which uses the morph transition with a duration of 1.5 seconds.
Flip the hexagon vertically on the second slide to create a flipping animation when morphing between slides.
If you don’t have the morph transition, you can substitute with other transitions, but the animation won’t be as smooth.
Inserting and Customizing Section Zooms
Now that your sections and slides are ready, it’s time to insert the section zooms that enable clickable navigation between sections.
On your Home slide:
- Go to Insert > Zoom > Section Zoom.
- Select the Opportunity section.
- Insert it and remove the gray background by clicking Zoom Background to make it transparent.
- Enable Return to Zoom so after viewing the section slides, you return to the Home slide.
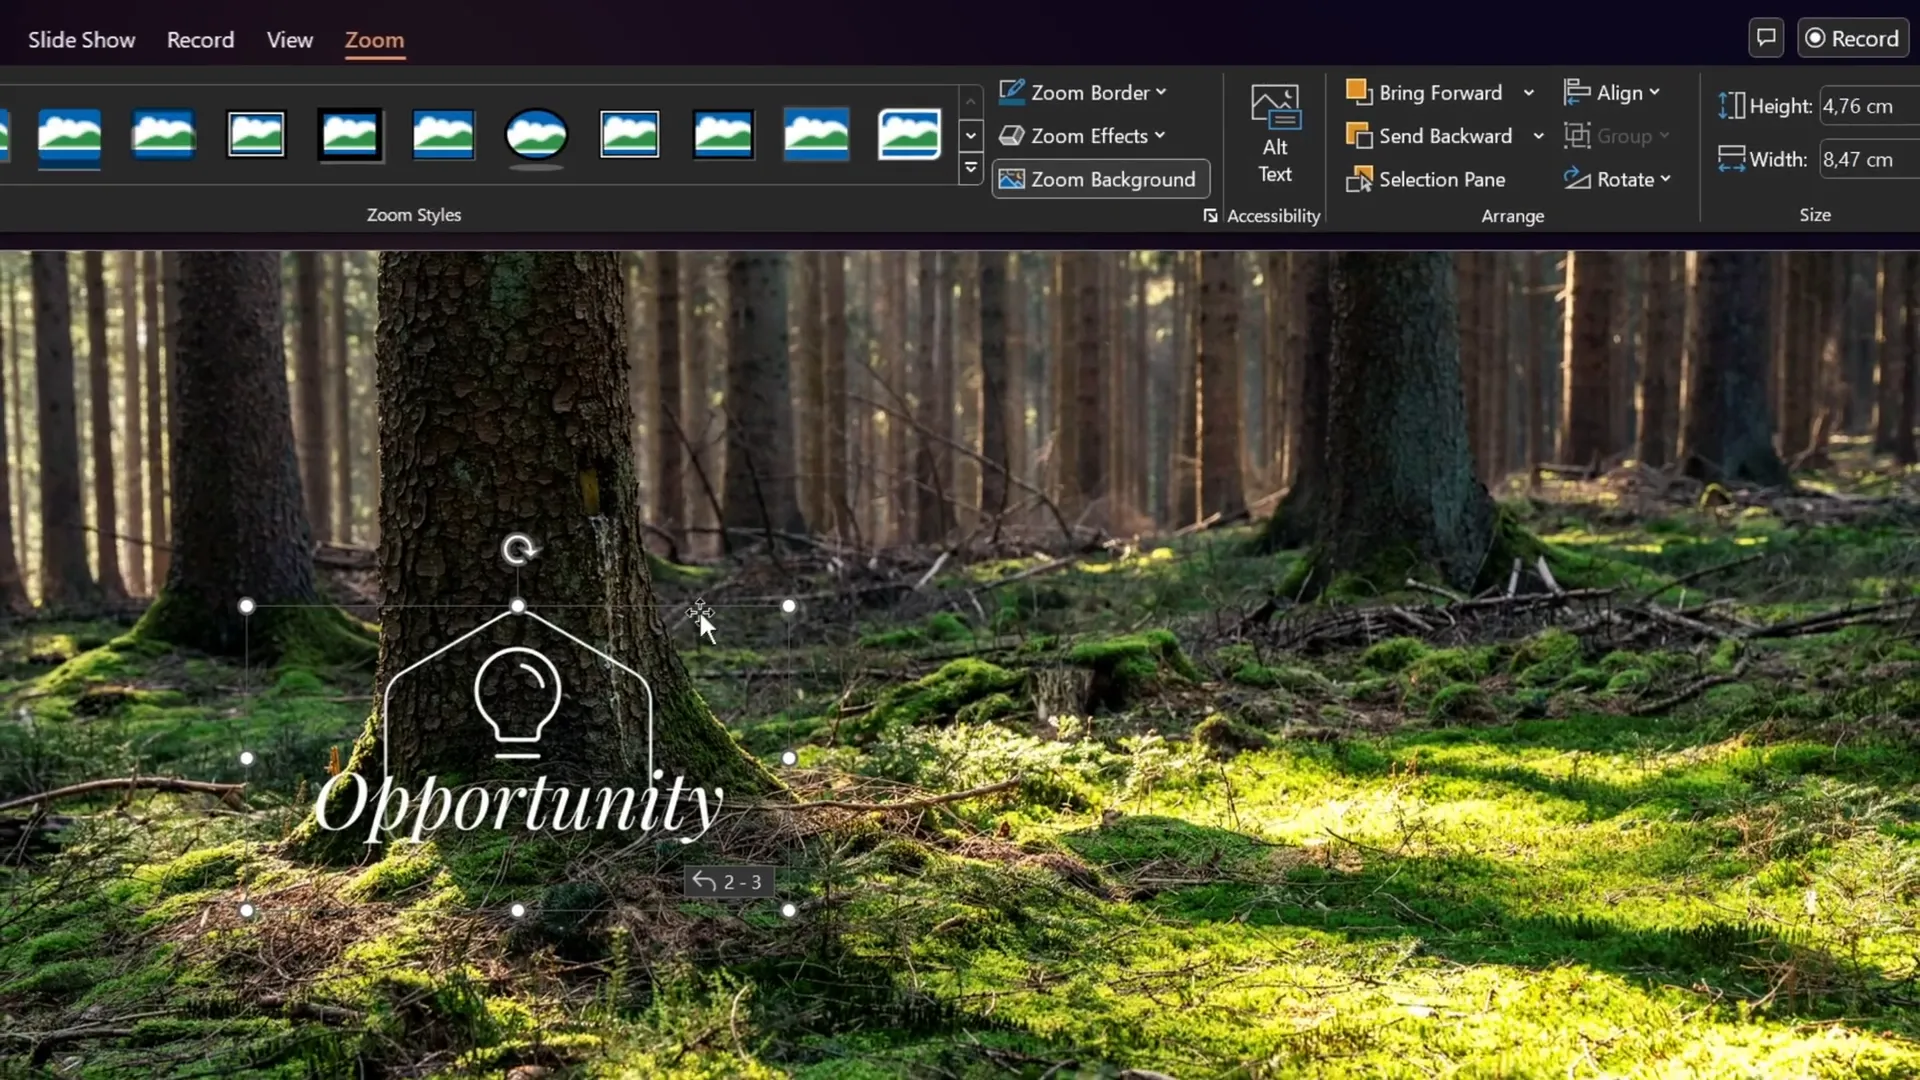
Set the Home slide transition to fade for a subtle effect.
Now, clicking the section zoom in presentation mode zooms into the Opportunity section, plays through the slides, and returns to Home smoothly.
Creating a Glassmorphic Blurry Background Effect
To add a sophisticated glassmorphism effect (a blurry, translucent background behind your zoom button), follow these steps:
- Duplicate the rounded hexagon shape and place it behind the section zoom button.
- Fill it with a solid color, e.g., dark green, to contrast with the background.
- Duplicate the original background photo, apply a maximum blur effect via Artistic Effects.
- Copy the blurred photo and set it as the slide background.
- Set the hexagon’s fill to Slide Background Fill so it reflects the blurry background.
- Add an inside shadow to the hexagon for subtle edge definition.
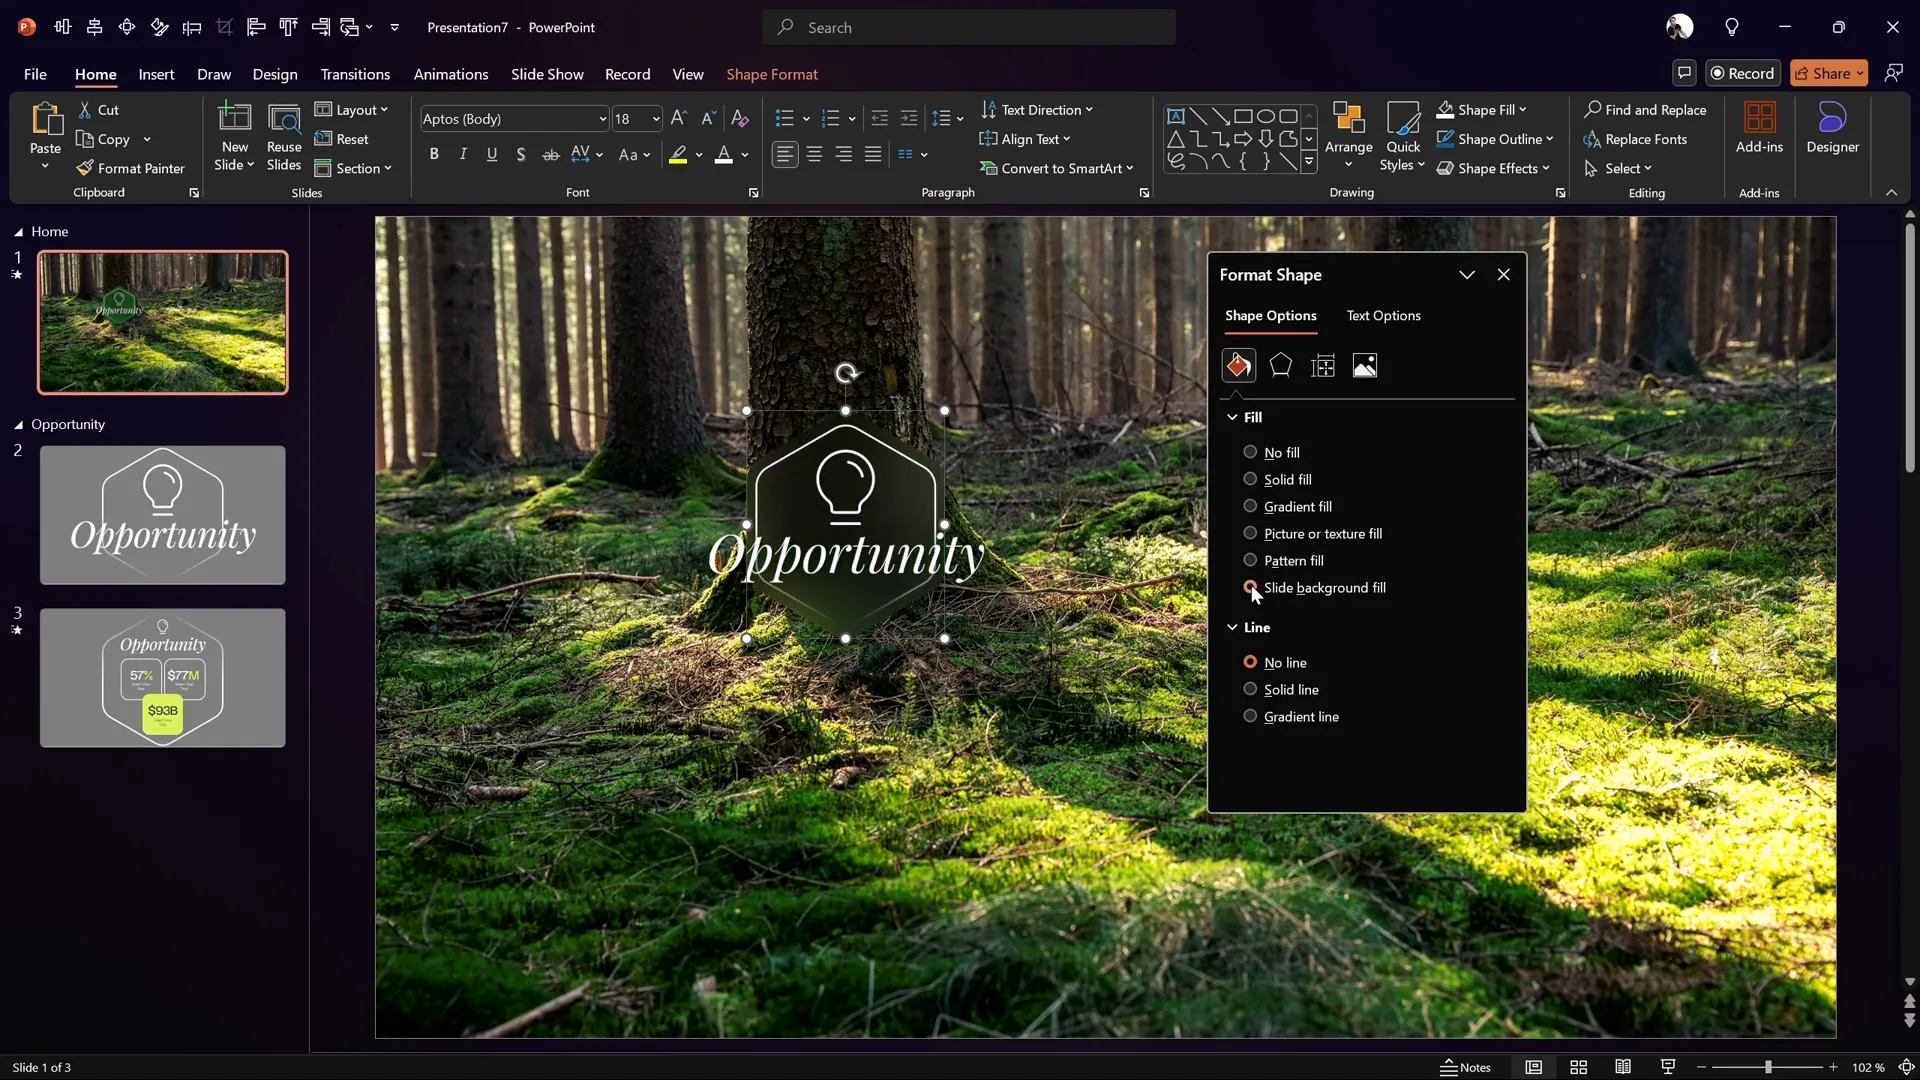
This technique creates a visually striking effect that adds depth and polish to your interactive zoom buttons.
Animating Section Zooms for Impact
Animations bring your presentation to life. For the section zoom and its background hexagon:
- Add a Zoom entrance animation to the section zoom with a duration of 1 second.
- Add a Spinner entrance animation to the blurry hexagon behind it, also with a 1-second duration.
- Set both animations to start With Previous so they play simultaneously.

In presentation mode, this creates a captivating effect where the hexagon spins in while the zoom button animates, reinforcing user interaction.
Workaround to Control Animation Replays
By default, these animations replay every time you return to the Home slide, which might be distracting if you want them to play only once.
Here’s a simple workaround:
- Duplicate the Home slide.
- On the duplicate, remove all animations.
- Set the original Home slide to auto-transition after 0 seconds to the duplicate.
- Use the duplicate slide as your main Home slide for zoom interactions.
With this setup, the animations play only once on the first Home slide, then the duplicate slide (without animations) is used for navigation, providing a cleaner user experience.
Expanding Your Template with More Sections
Using the same process, you can create multiple section zooms such as Market, Solution, Model, Team, and so on. All these sections and slides can follow the same design principles and animation techniques to maintain consistency.
Best of all, all the slides and templates discussed are 100% free and can be downloaded from the video description linked below.
Frequently Asked Questions
1. What version of PowerPoint do I need to create this slide zoom template?
This tutorial is optimized for Microsoft PowerPoint 365 and versions 2019 or 2021 because of the use of morph transitions and section zooms. However, you can still create most of the template features without morph, using simpler transitions.
2. What is the difference between slide zoom and section zoom?
Slide zoom zooms into a specific slide, whereas section zoom zooms into an entire section containing multiple slides, making navigation more flexible and organized.
3. How do I create rounded hexagons if PowerPoint doesn’t support them?
You can create custom rounded hexagons using free tools like Figma, export them as SVG, and then import and convert them to shapes in PowerPoint for easy customization.
4. Can I use other icons besides Phosphor Icons?
Yes! You can use any icon library or PowerPoint’s built-in icons. Phosphor Icons is recommended here because they are free, easy to use, and come as SVG files for flexibility.
5. How do I add a glassmorphic blurry background effect?
Duplicate your background image, apply a blur effect, set it as slide background, and fill a shape with “Slide Background Fill” to simulate a blurry translucent effect behind your zoom button.
6. How can I prevent animations from replaying every time I return to the Home slide?
Duplicate the Home slide, keep animations only on the first slide, set an automatic transition to the duplicate slide without animations, and use the duplicate for navigation.
Conclusion
Creating a professional, interactive PowerPoint presentation with slide zooms and animations is easier than you might think. By following this detailed guide, you can build a dynamic slide zoom template complete with clickable section zooms, smooth morph transitions, custom rounded hexagons, and even a stylish glassmorphism background effect.
Remember to:
- Use slide sections to organize your presentation for section zooms.
- Create custom shapes in Figma for unique design elements.
- Leverage morph transitions to add fluid animations.
- Incorporate free icons and stylish fonts for a polished look.
- Experiment with background effects to elevate your design.
- Control animations to enhance user experience.
With these skills, your presentations won’t just convey information—they’ll tell a story and engage your audience visually and interactively.
Don’t forget to check out the free template and resources linked in the original video description by One Skill PPT. Happy presenting!
Video source and free template: One Skill PPT YouTube Channel


