
Welcome to an extensive guide packed with powerful Microsoft PowerPoint tips and tricks designed to help you create the best presentations possible. Whether you’re preparing slides for work, school, or any other occasion, this article will equip you with practical hacks to supercharge your PowerPoint skills, making your slide decks engaging, professional, and far from boring.
From slide layouts and free image resources to advanced formatting techniques, gradient overlays, morph transitions, and master slide customization, this comprehensive tutorial covers it all. Let’s dive in and transform your PowerPoint presentations from “death by PowerPoint” to captivating visual stories that capture and hold your audience’s attention.

Table of Contents
- Understanding the Two Pillars of PowerPoint: Content and Design
- Starting With Slide Layouts: The Foundation of Your Presentation
- Free Image Resources: Elevate Your Slides with High-Quality Visuals
- Building an Engaging Title Slide
- Mastering the Selection Pane for Layer Management
- Creating Custom Gradient Overlays Using Color Palettes
- Designing a ‘Meet the Team’ Slide
- Animating with the Morph Transition
- Creating Divider Slides with Merged Shapes and Image Effects
- Quickly Inserting Timelines and Organizational Charts Using SmartArt
- Customizing and Using Icons in PowerPoint
- Utilizing Master Slides for Consistency
- Optimizing Your Presentation File Size
- Adding QR Codes to Connect With Your Audience
- Frequently Asked Questions (FAQ)
- Conclusion
Understanding the Two Pillars of PowerPoint: Content and Design
When crafting a PowerPoint presentation, it’s crucial to balance two equally important components: content and design. Your content must be clear, readable, and easy to interpret, providing valuable information without overwhelming your audience. On the other hand, the design should complement the content, making slides visually appealing and engaging.
The goal is to avoid what many dread: “death by PowerPoint.” This scenario happens when slides are poorly designed, overloaded with text, or just plain boring, causing listeners to zone out or fall asleep. By focusing on clear, concise content paired with thoughtful design, you can deliver presentations that inform, persuade, and entertain.
Starting With Slide Layouts: The Foundation of Your Presentation
Every PowerPoint presentation begins with slide layouts. These layouts offer placeholders for titles, subtitles, content, and images, providing a structure to build upon. However, many users find these placeholders restrictive or cluttered, especially when aiming for a modern, clean look.
To start fresh, it’s often best to choose a blank slide layout, removing all default placeholders. This gives you a clean canvas to design exactly what you want. To do this, go to the Home tab, select Layout, and choose Blank. Now, you’re ready to build your presentation slide by slide, with full creative control.

Free Image Resources: Elevate Your Slides with High-Quality Visuals
Images can make or break your presentation. High-quality visuals add professionalism and help convey your message more effectively. However, sourcing royalty-free images that are safe to use can be a challenge.
Here are two fantastic resources for free images and videos suitable for PowerPoint presentations:
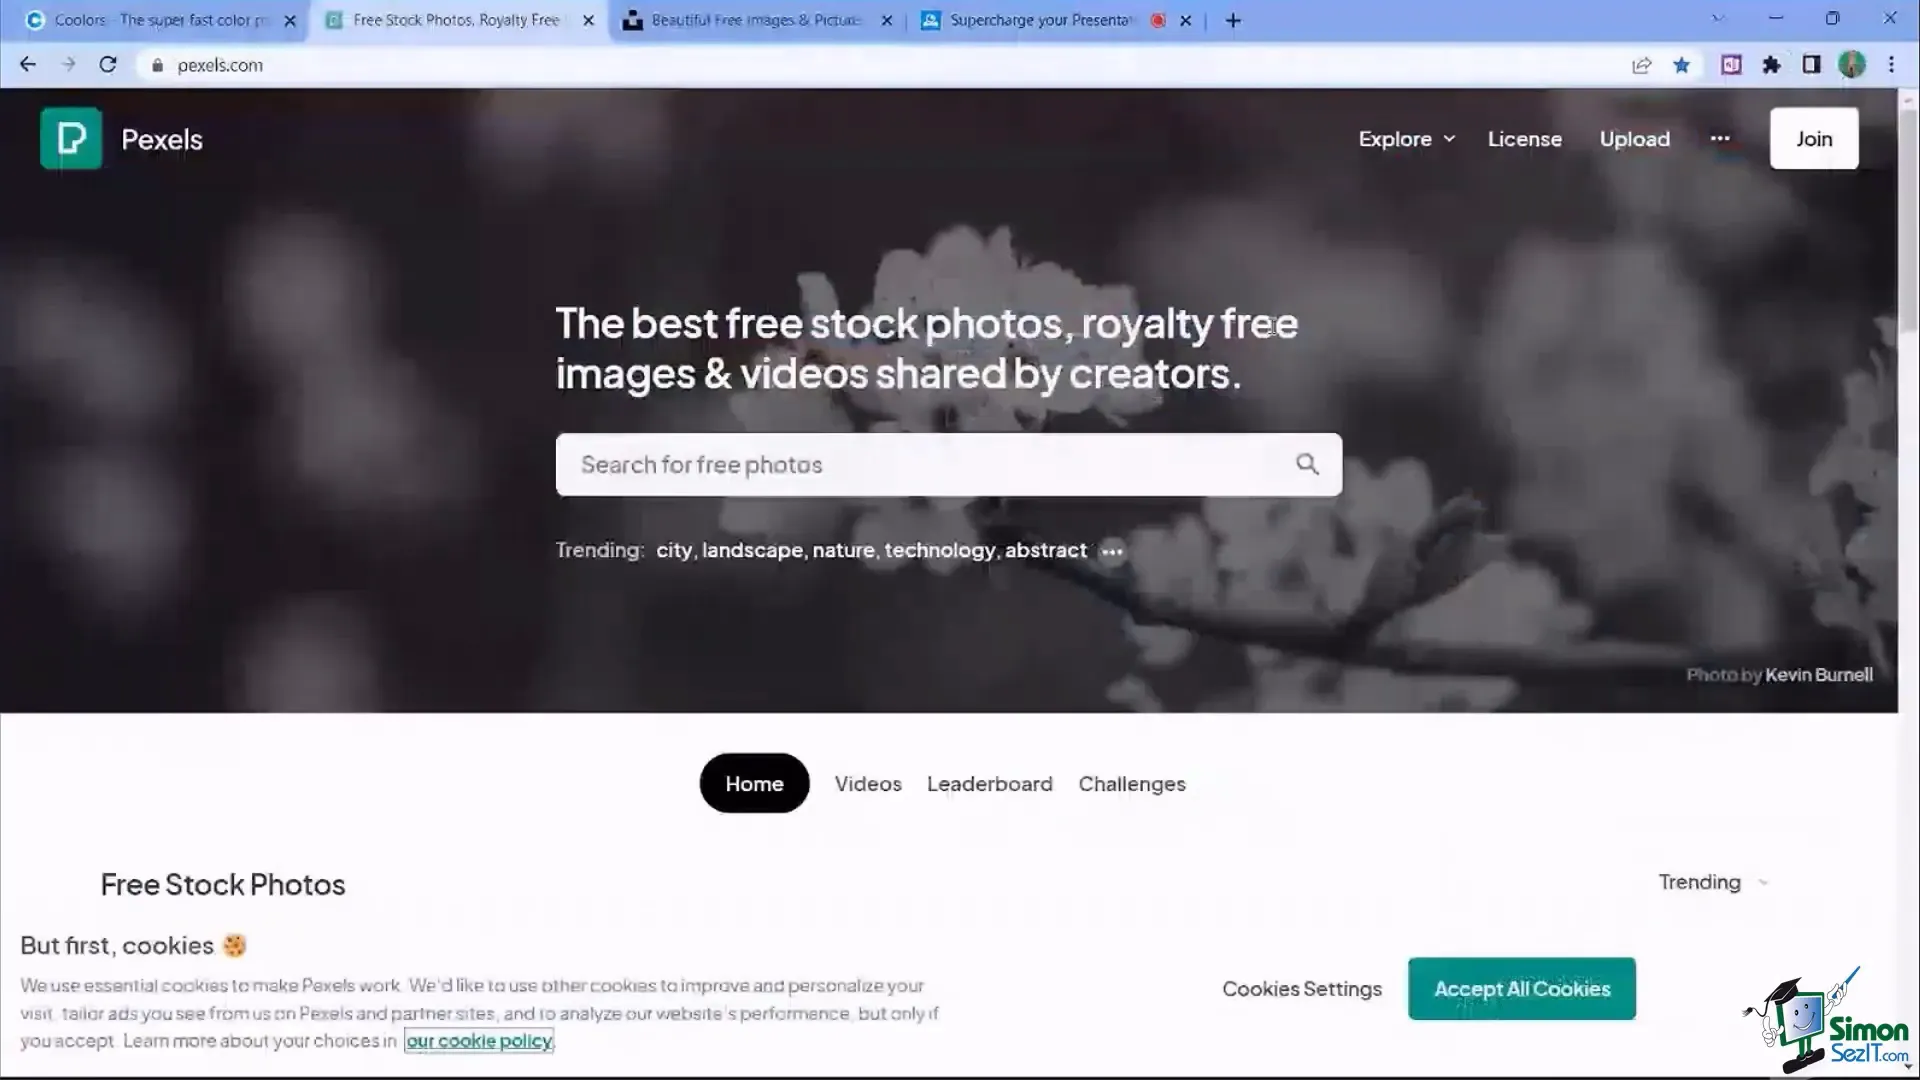
- Pexels (pexels.com): Offers a vast collection of free photos and short looping videos. Simply type in keywords like “mountains” or “team” to find the perfect background or visual element for your slides.
- Unsplash (unsplash.com): Similar to Pexels, Unsplash provides a wide range of free images and videos. Both platforms are excellent for adding professional imagery without worrying about copyright issues.
Downloading images from these sites is straightforward. Search your keyword, select an image, and click the free download button. Save your chosen visuals to your computer, ready to be inserted into your presentation.
Building an Engaging Title Slide
The title slide sets the tone for your entire presentation. It should be visually appealing and clearly communicate the topic. A popular approach is to use a full-slide background image with overlaying text.
Inserting and Resizing Background Images Correctly
When inserting a background image, avoid simply stretching it to fill the slide. Stretching often distorts the image, making it look unprofessional. Instead, use the Crop and Fill feature to maintain the image’s aspect ratio while filling the slide.
Here’s how to do it:
- Insert your image via Insert > Pictures > This Device.
- Select the image, go to the Picture Format tab, click the dropdown arrow under Crop, and select Fill.
- Use the black crop handles to adjust which part of the image fills the slide.
- Click the crop button again to apply.
This method zooms into the image rather than stretching it, keeping proportions intact and avoiding distortion.

Adding and Formatting Title Text
Once your background is set, add a text box for your title. For precise alignment:
- Make the text box span the full width of the slide.
- Center-align the text using the paragraph alignment tools.
- Choose a bold, readable font like Lato Black and increase the font size for impact.
- Use contrasting colors, such as white text on a dark background, for readability.
To add a subtitle, duplicate the title text box (Ctrl + D), modify the text, and reduce the font size. Group the title and subtitle (Ctrl + G) to align them together centrally on the slide.
Making Text Pop with Gradient Overlays
Sometimes, text can get lost against busy or colorful backgrounds. To enhance readability, add a semi-transparent gradient overlay between the image and text.
To do this:
- Insert a large rectangle shape covering the entire slide.
- Right-click the rectangle, select Format Shape, and set the fill to a dark color (e.g., dark gray or black).
- Adjust the transparency slider (around 20-30%) so the background image is visible but muted.
- Use the Selection Pane to reorder layers, bringing text to the front above the overlay.
This simple trick makes your text stand out without obscuring your background image.
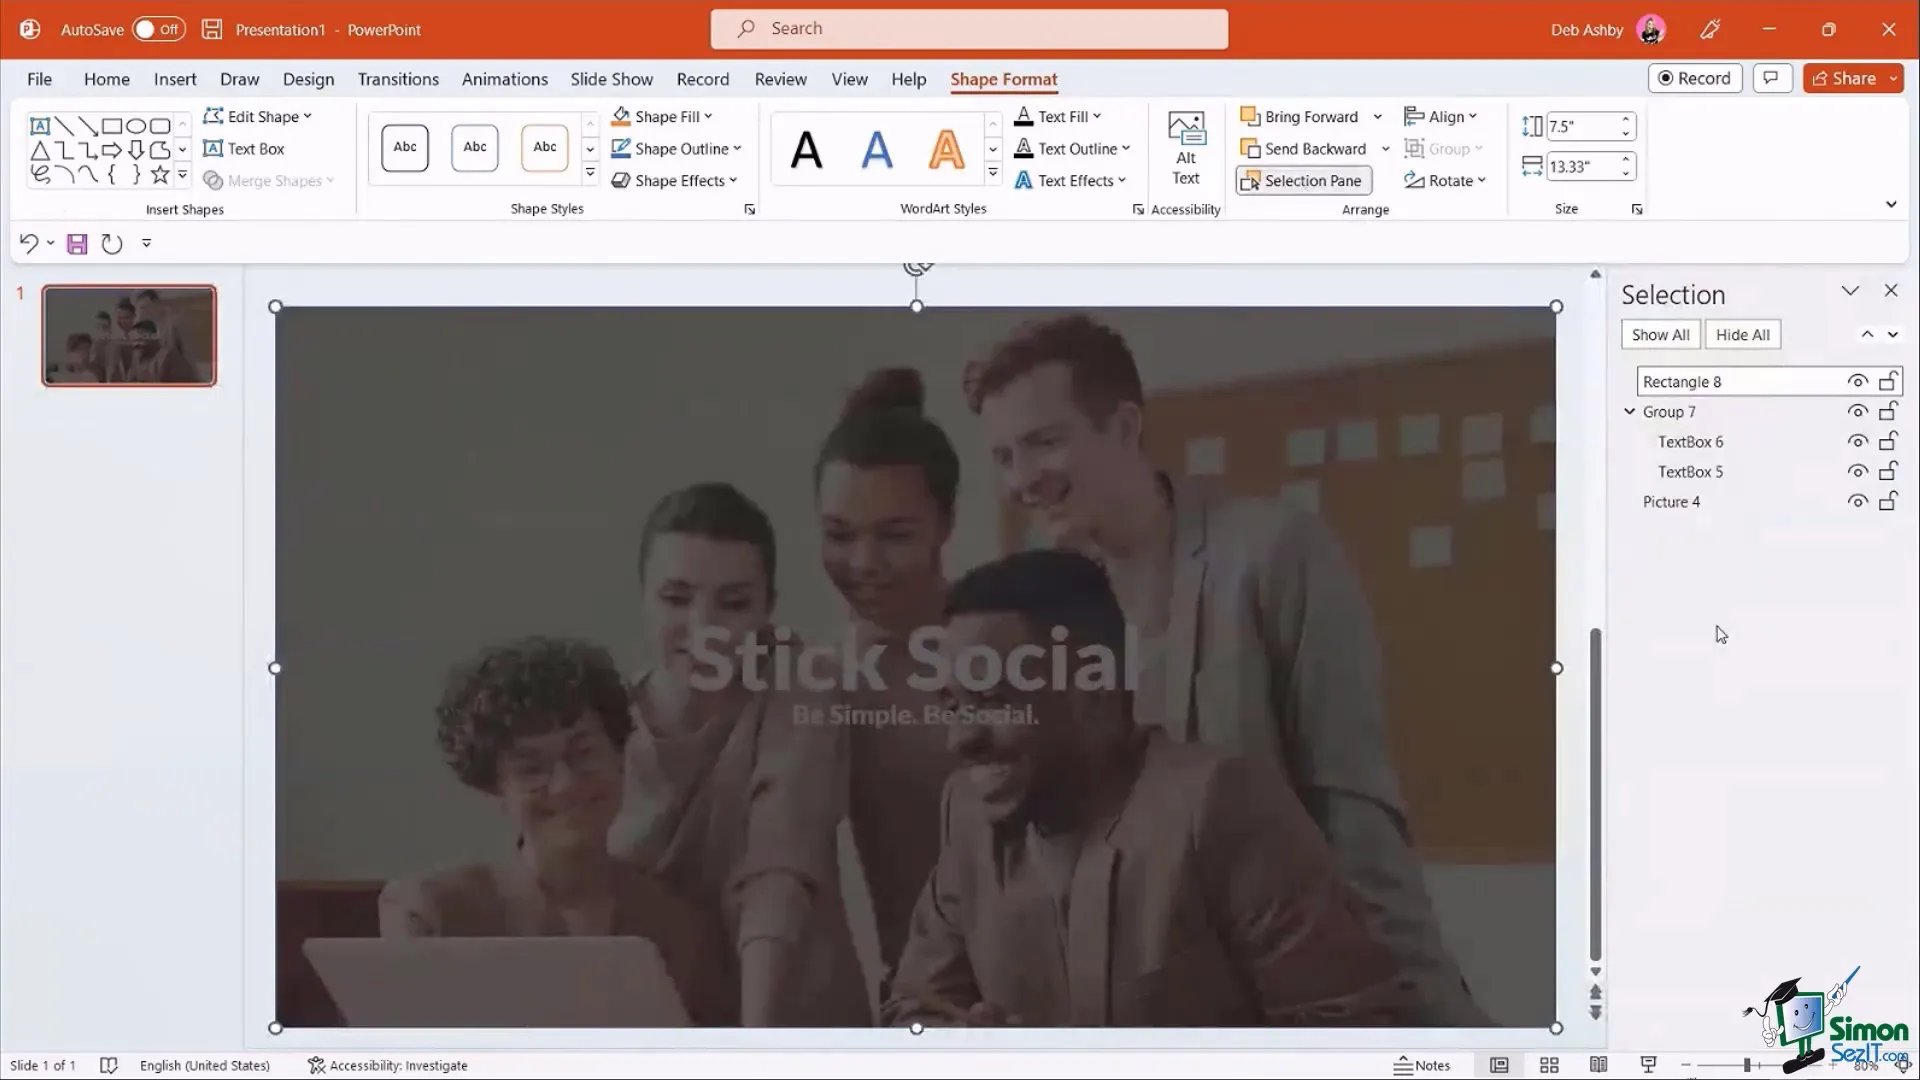
Mastering the Selection Pane for Layer Management
The Selection Pane is a powerful but underutilized tool that helps manage the stacking order (z-order) of objects on your slide—think of it as layers in Photoshop.
Access it via Shape Format > Arrange > Selection Pane. Here you can:
- See all objects on the slide listed with default names (e.g., Rectangle 1, Text Box 2).
- Rename objects for easier identification.
- Toggle visibility of objects to work on items hidden behind others.
- Drag objects up or down to reorder layers, ensuring the correct stacking order.
Using the Selection Pane ensures your overlay, images, and text are layered correctly, making your design workflow much smoother.
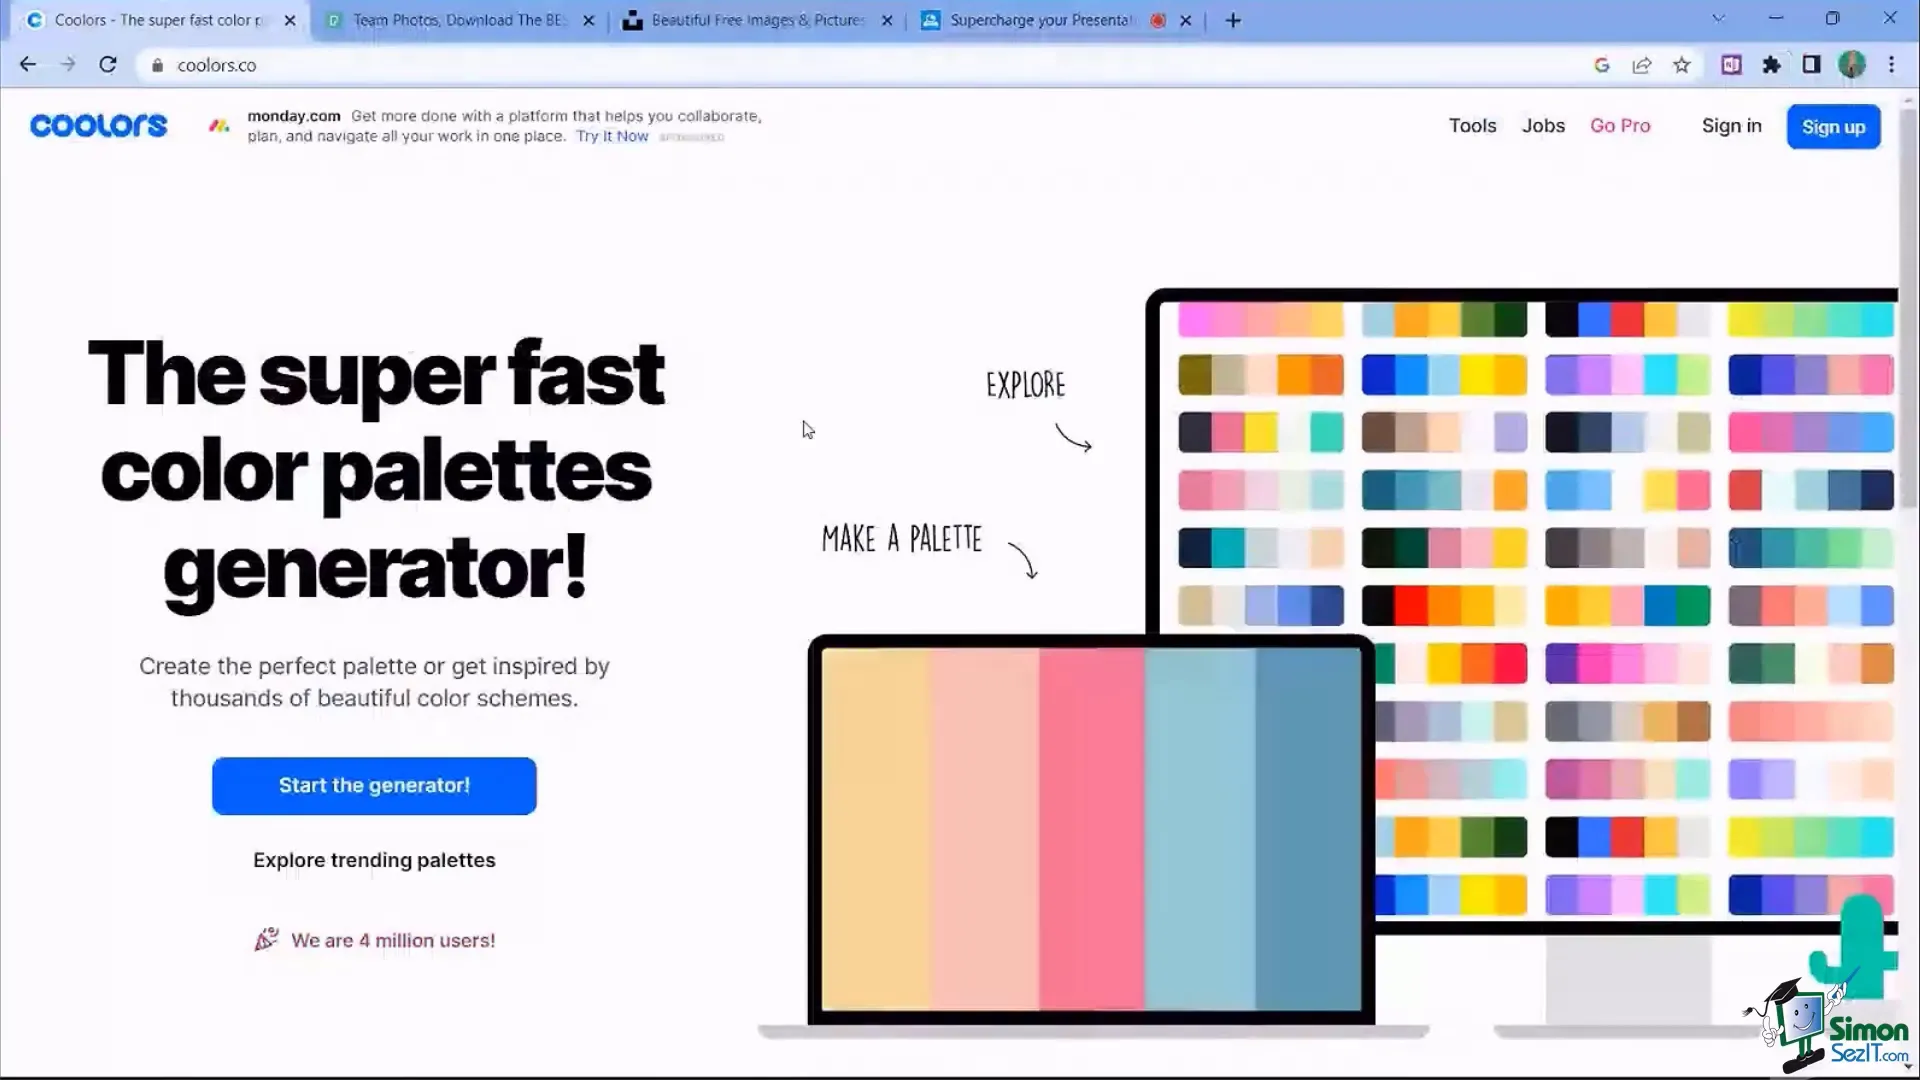
Creating Custom Gradient Overlays Using Color Palettes
To elevate your gradient overlays, customize the colors using professional color palettes. One excellent resource is coolors.co, which offers curated color schemes and gradients.
Steps to create a custom gradient overlay:
- In the Format Shape pane, switch from solid fill to Gradient Fill.
- Adjust gradient stops to two colors for simplicity.
- Copy hexadecimal color codes from Coolors.co and paste them into the color picker in PowerPoint.
- Adjust the gradient stops’ positions and transparency to achieve the desired overlay effect.
This technique allows for visually stunning overlays that complement your presentation’s branding and style.
Designing a ‘Meet the Team’ Slide
Introducing your team can be made visually appealing with simple shapes, images, and alignment techniques.
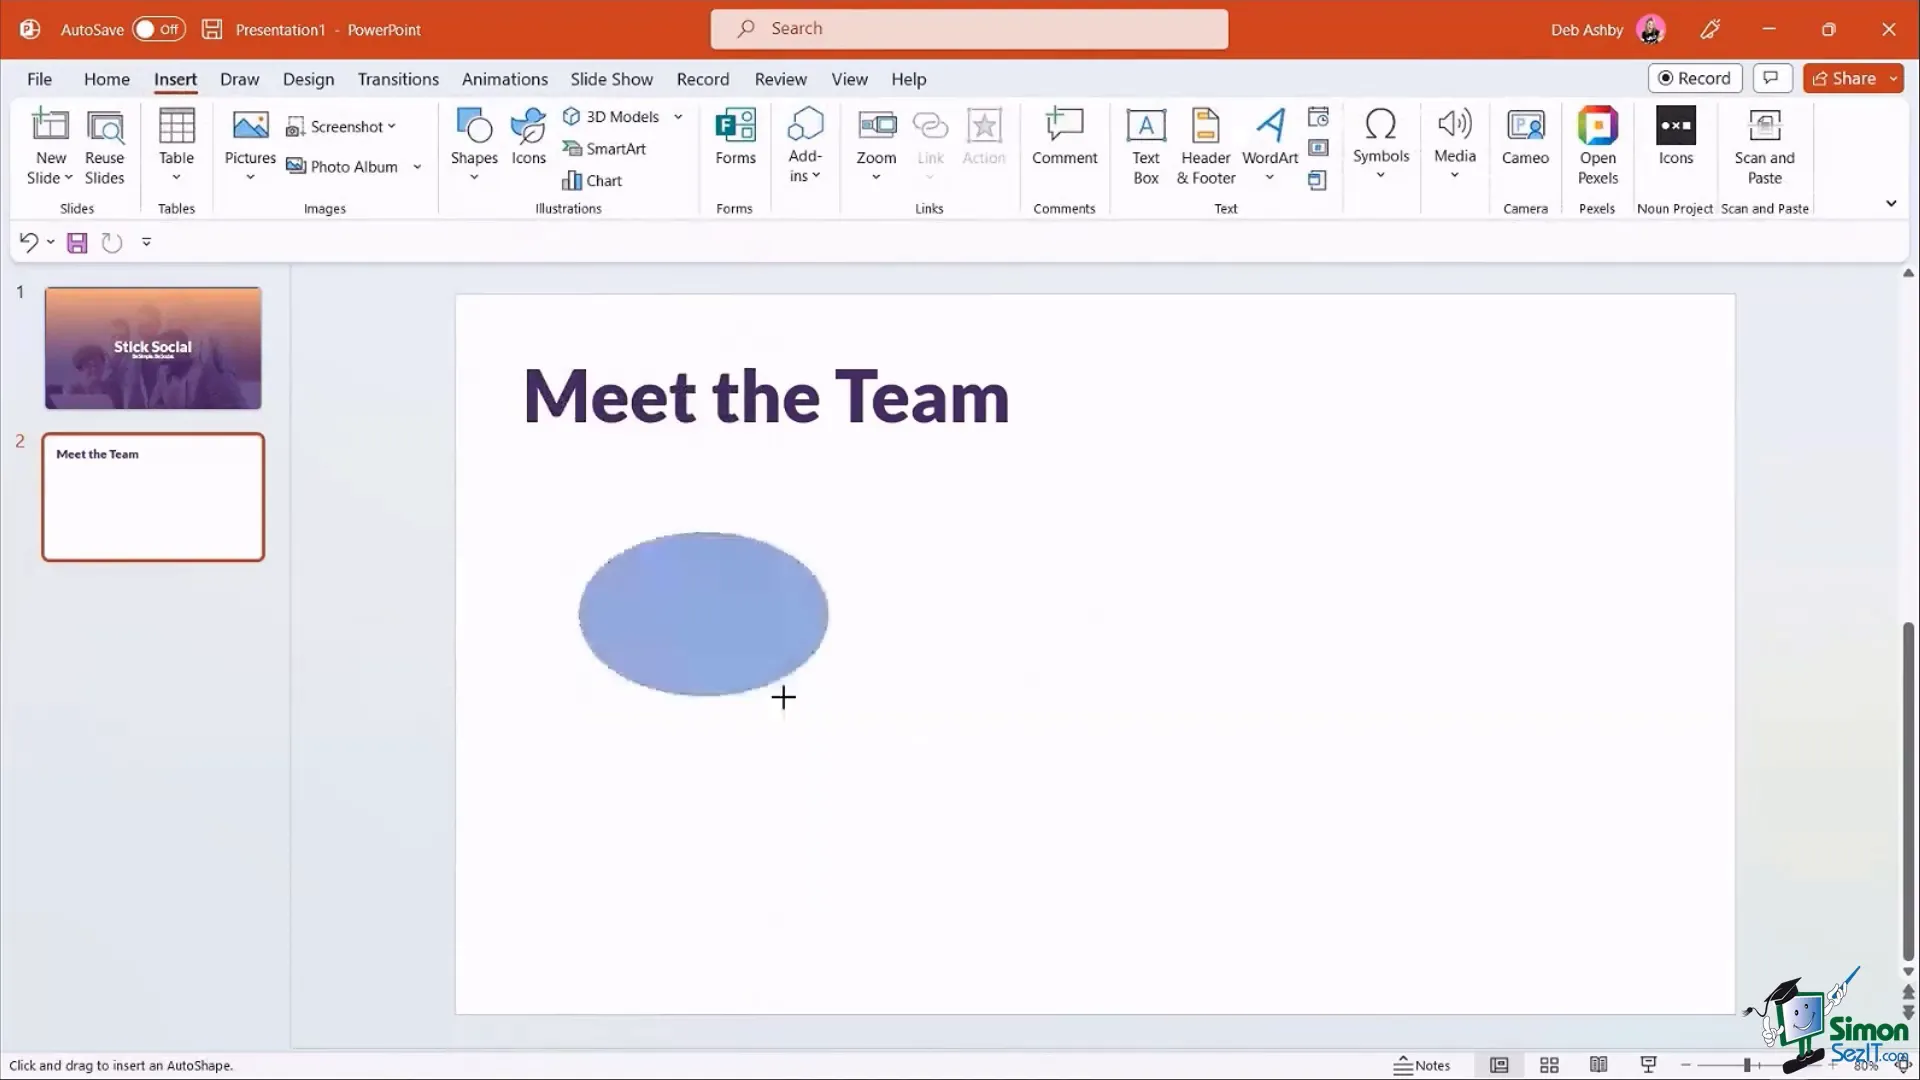
Creating Perfect Circles for Team Photos
Use the Oval Shape tool while holding the Shift key to create perfect circles for each team member’s photo.
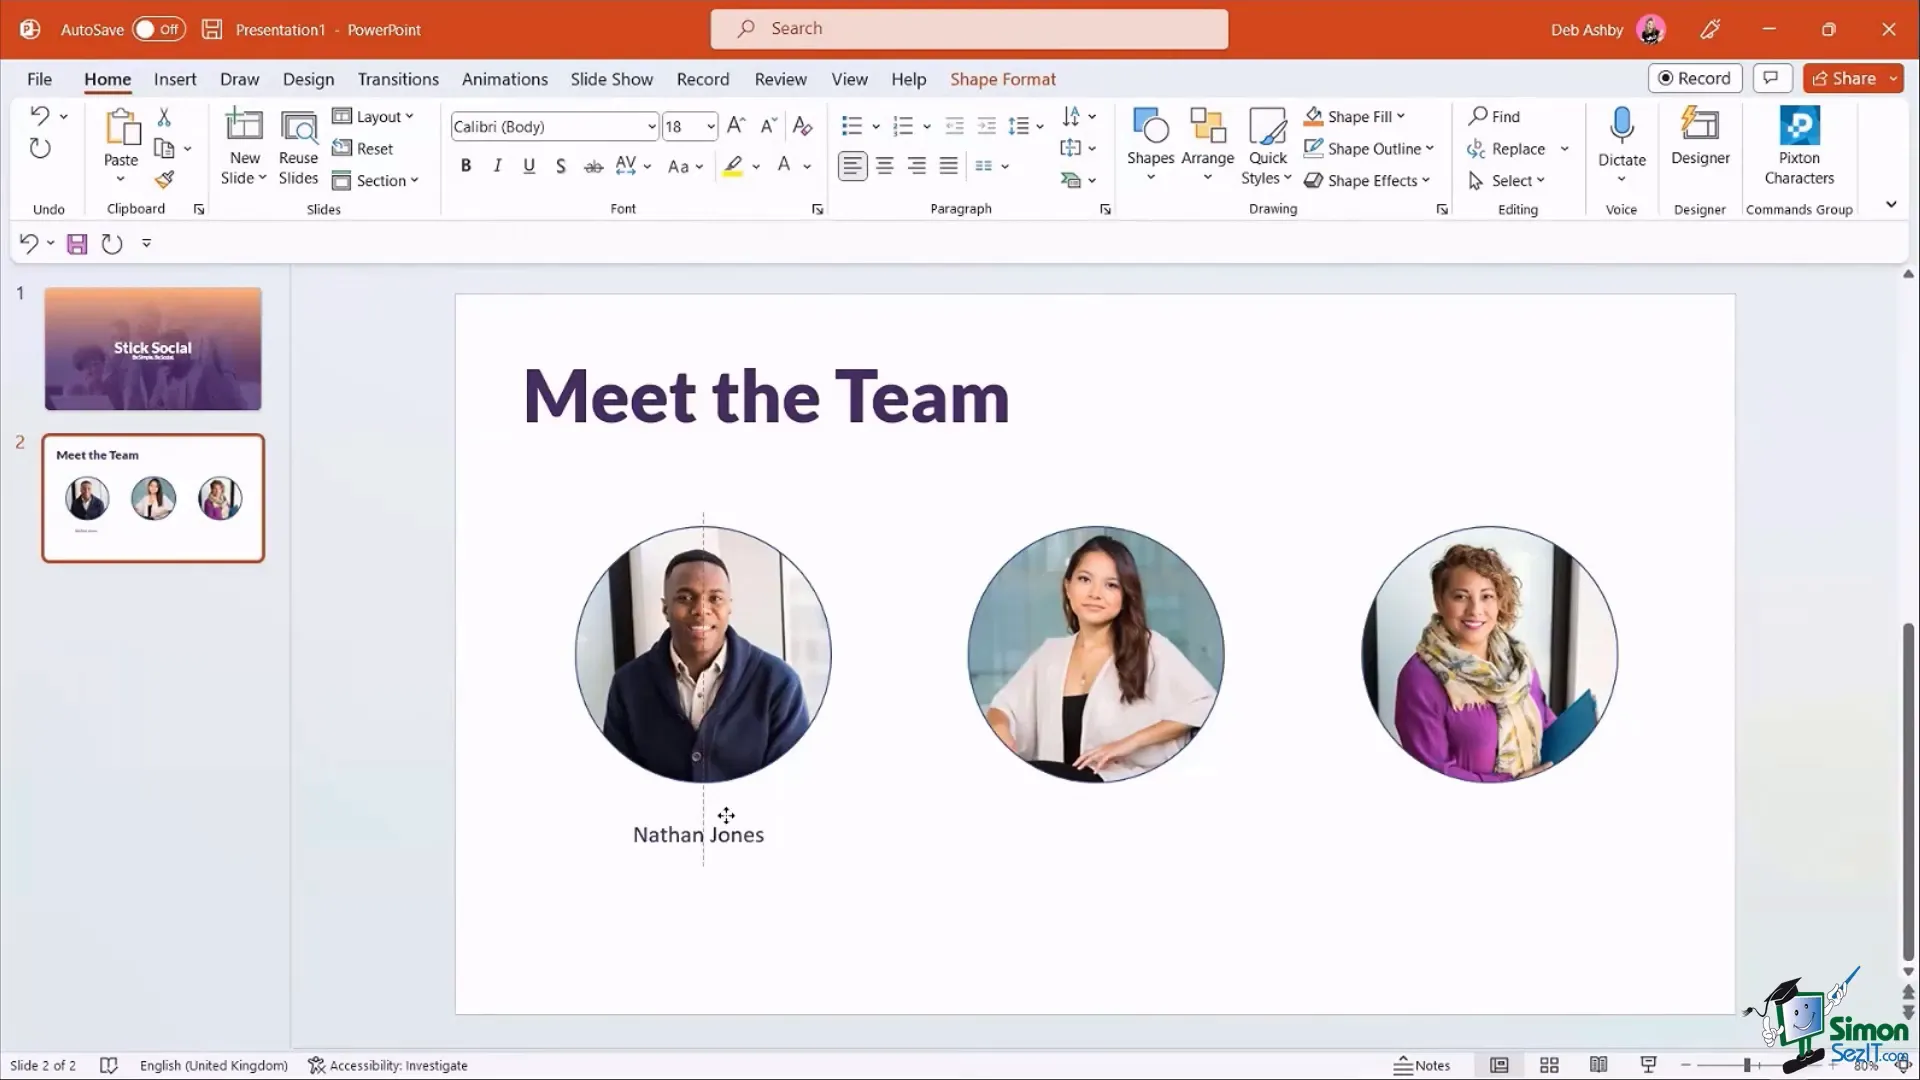
Duplicate the shape (Ctrl + D) to maintain size consistency, then use alignment tools:
- Align to Middle to line up circles vertically.
- Distribute Horizontally to space them evenly across the slide.
Group the shapes to move them as a unit, then ungroup to edit individually.
Filling Shapes with Images Without Distortion
To insert photos within shapes without distortion:
- Right-click the shape and select Format Shape.
- Under Fill, choose Picture or Texture Fill and insert your image.
- Select the image, go to Picture Format > Crop > Fill to fill the shape properly.
- Adjust image positioning within the shape as needed.
This method ensures your team photos look polished and professional.

Adding Names and Using Smart Guides for Alignment
Use text boxes to add team member names beneath their photos. The Eyedropper Tool helps match the text color to your slide’s palette, maintaining a consistent look.
Enable Smart Guides (right-click slide background > Grids and Guides > check Smart Guides) to make aligning text boxes with images easy and precise.
Animating with the Morph Transition
The Morph Transition is a game-changer for adding smooth, animated effects between slides. It’s classified as a transition, not an animation, but it offers powerful visual continuity.
Here’s how to use Morph effectively:

- Create your initial slide with all objects.
- Duplicate the slide (Ctrl + D).
- On the duplicated slide, resize, reposition, or modify objects to create the desired effect.
- Apply the Morph transition to the duplicated slide via Transitions > Morph.
- Run the slideshow to see the smooth animation between slides.
This technique can highlight team members individually, zoom in on key points, or create engaging visual flows.

Creating Divider Slides with Merged Shapes and Image Effects
Divider slides help organize your presentation into clear sections and add a professional touch.
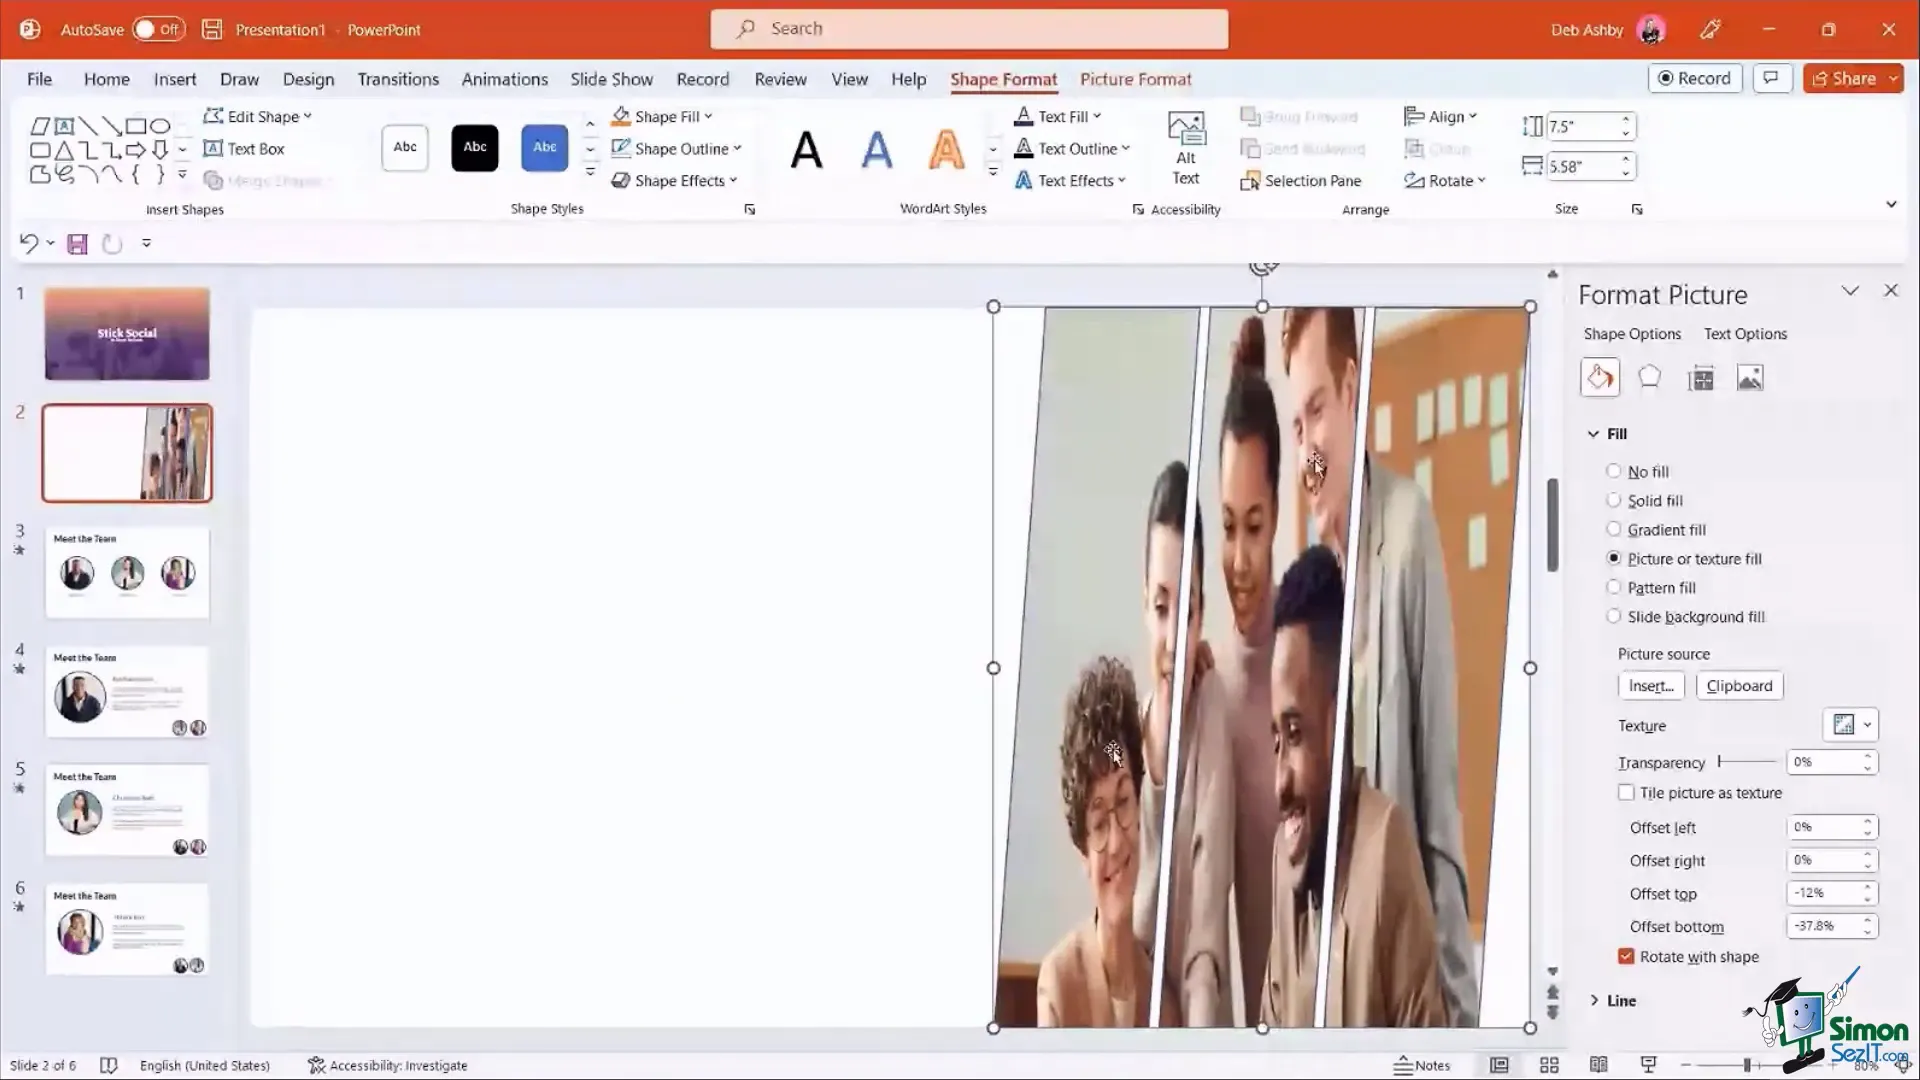
Using Merge Shapes for Unique Visuals
Insert multiple shapes, such as parallelograms, then select them all and use Shape Format > Merge Shapes > Union to combine them into one shape.
Fill the merged shape with an image using the Crop and Fill technique to span the image across the shape seamlessly.
Remove outlines to keep the focus on the image and text.
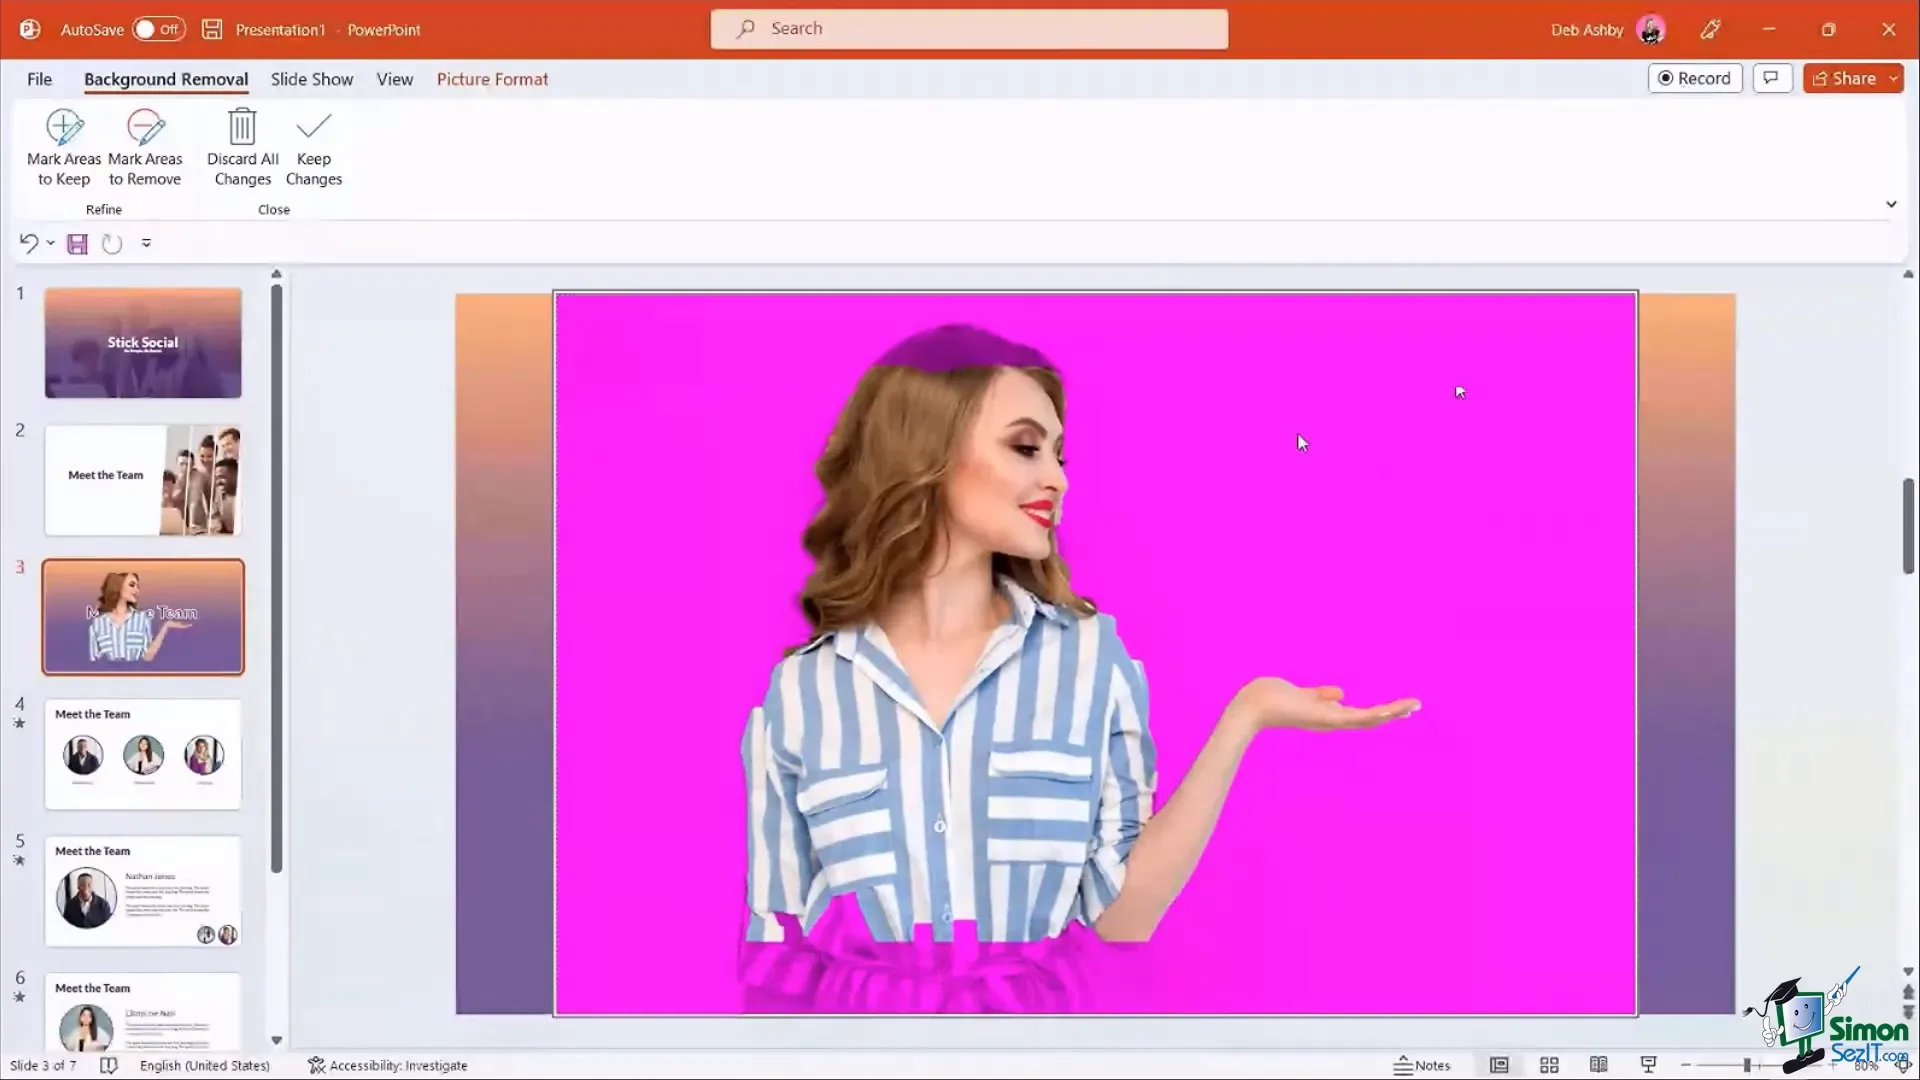
Creating Modern Text Effects with Outlines and Background Removal
Duplicate your heading text, remove the fill from the duplicate to create an outline effect, and layer it behind the original text for a striking visual.
Insert an image and use PowerPoint’s Remove Background tool to isolate the subject. Position this image between the outline and main text layers using the Selection Pane to create a dynamic “behind the text” effect.
Quickly Inserting Timelines and Organizational Charts Using SmartArt
Rather than building timelines and org charts manually, use SmartArt to create them effortlessly.
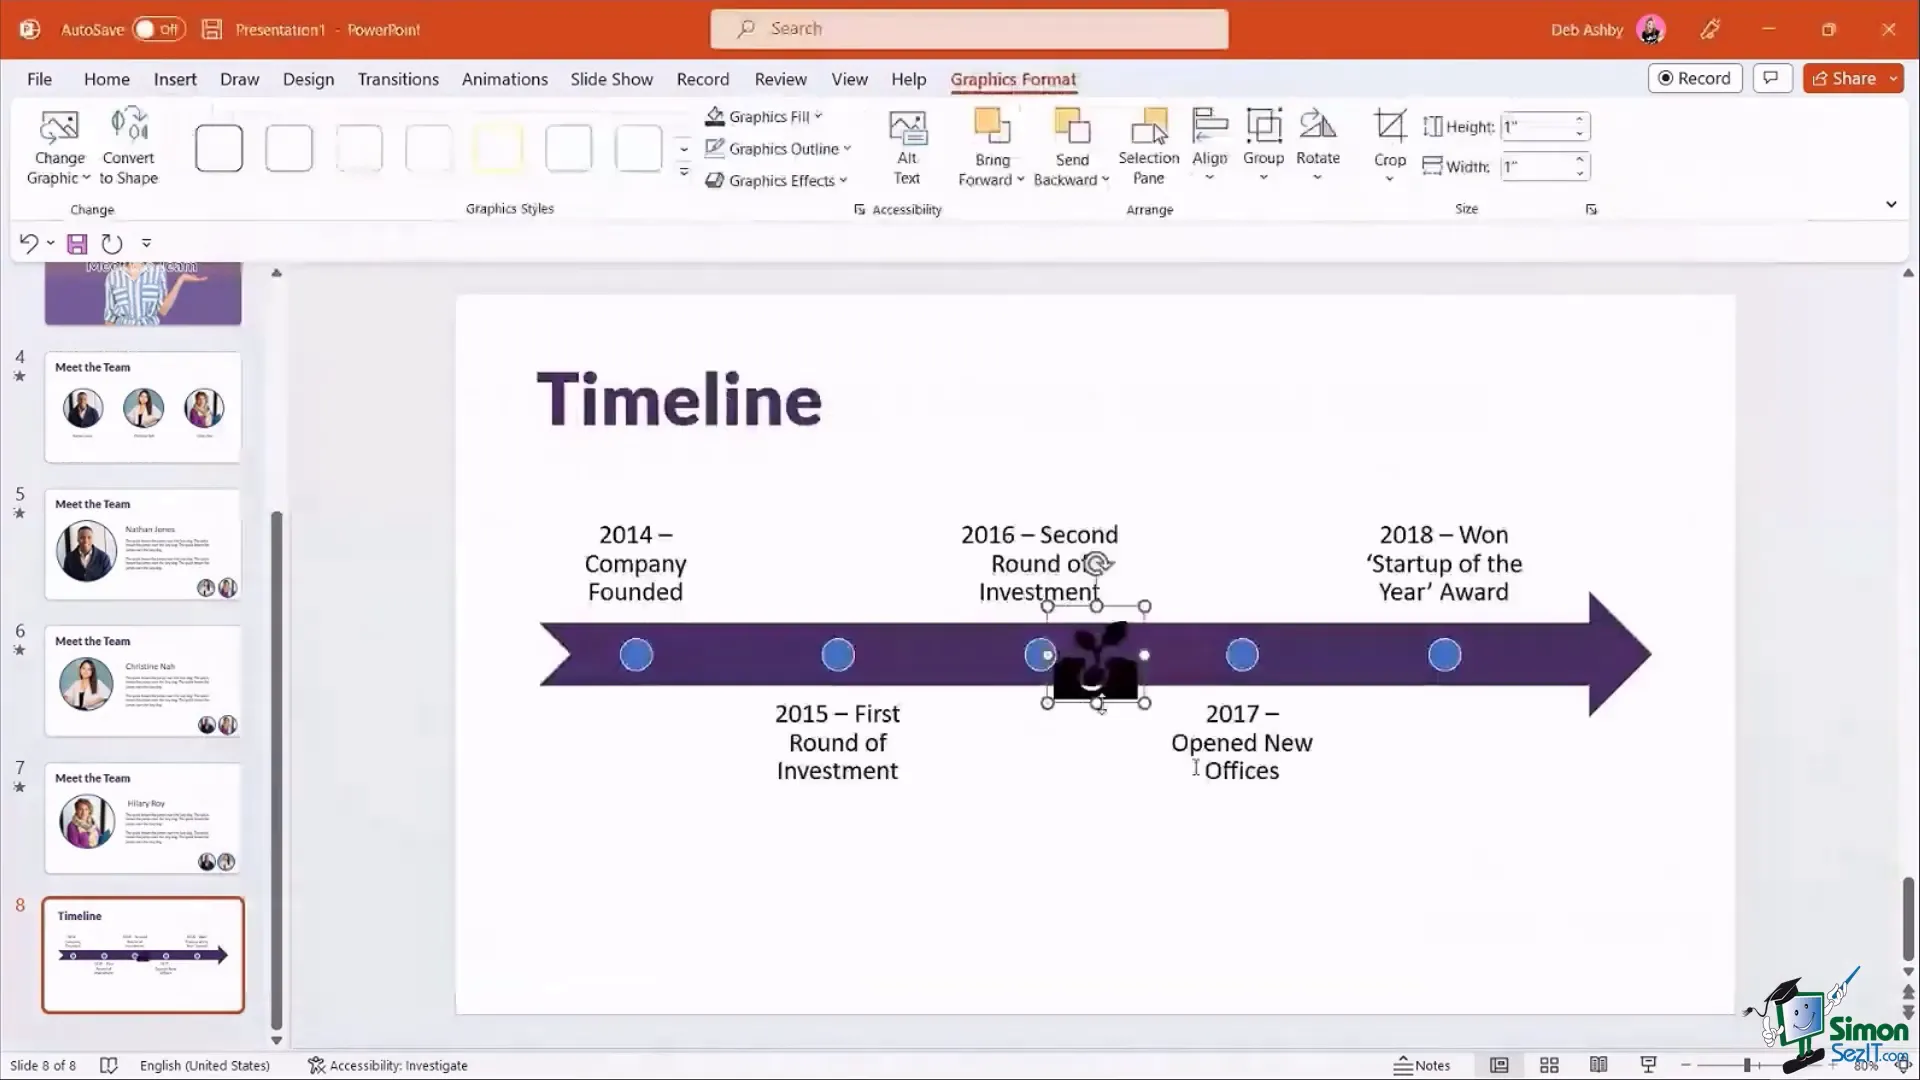
Creating a Timeline
- Type your timeline data in a text box with dates and events listed chronologically.
- Select the text box and click Convert to SmartArt Graphic in the Home tab.
- Choose a timeline layout from the options.
- Resize and format the timeline to fit your presentation style.
This saves significant time and ensures professional visuals.

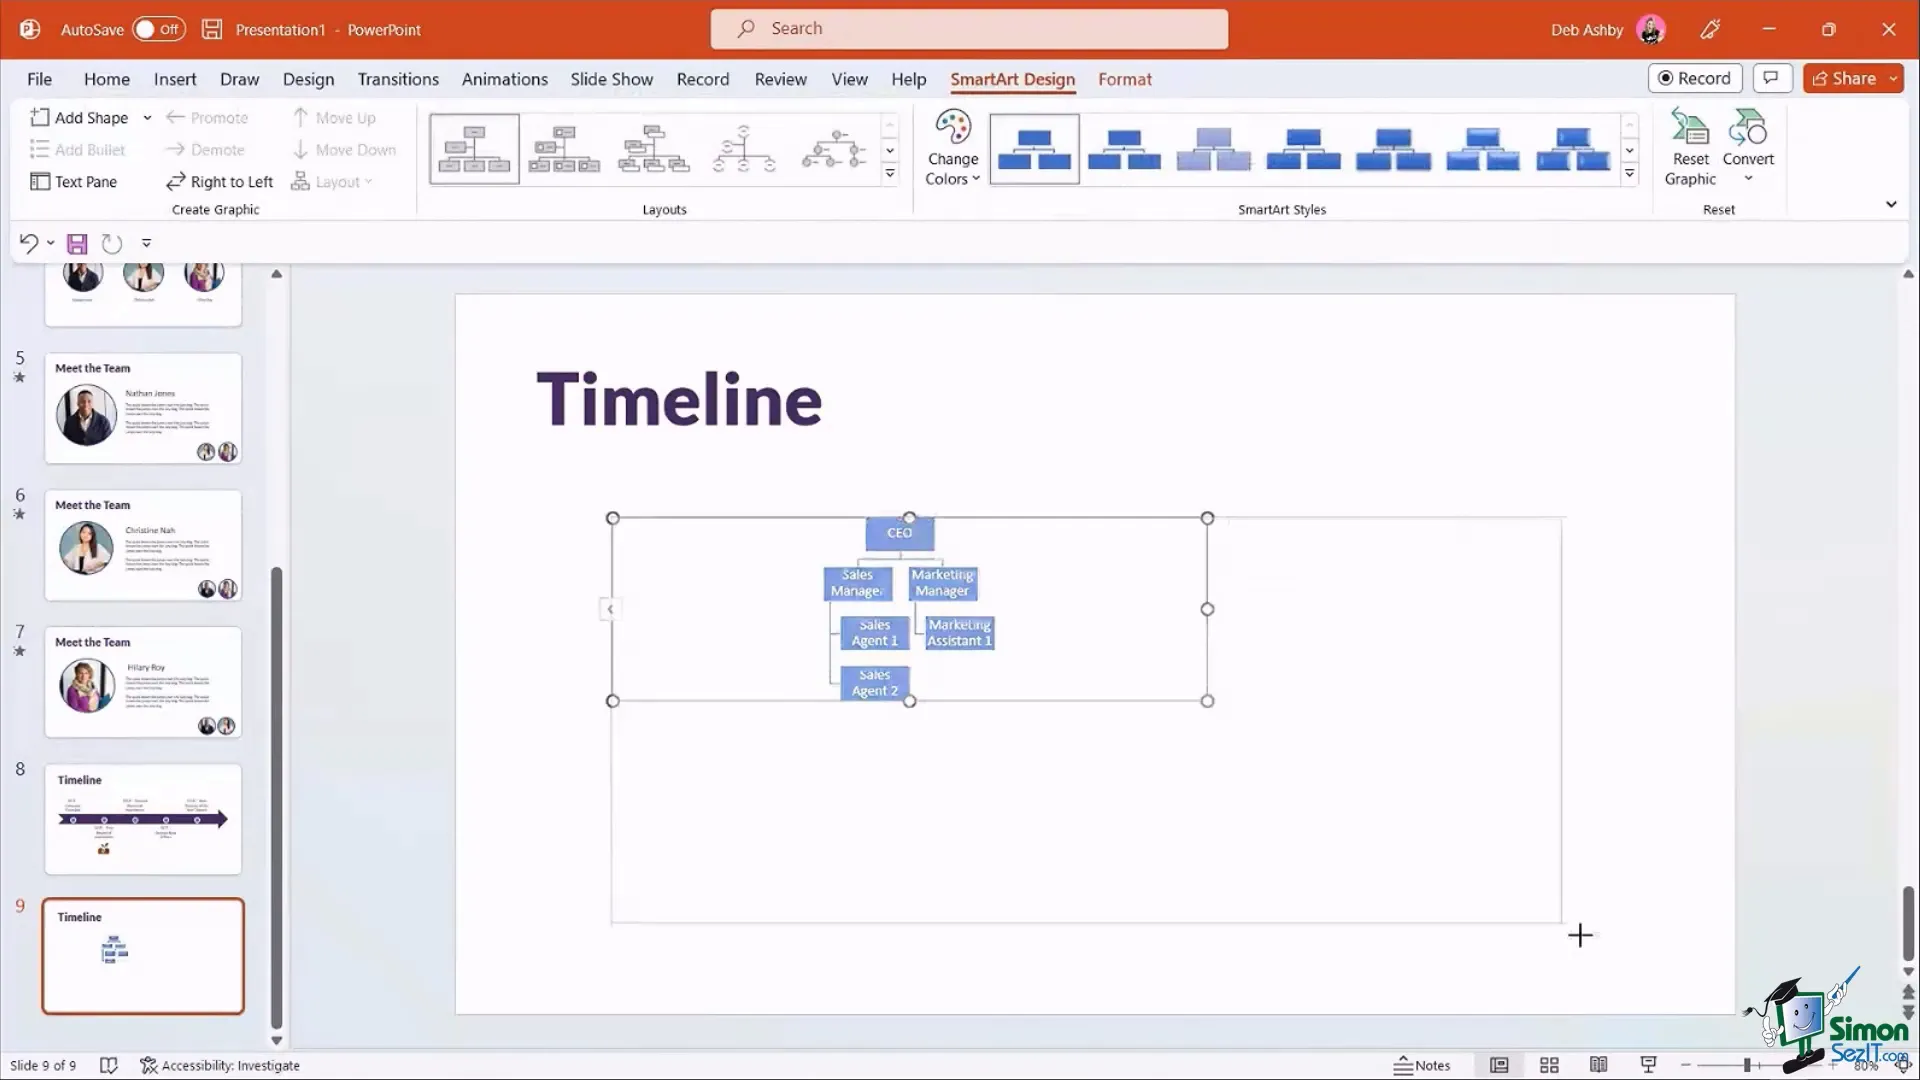
Building an Organizational Chart
Type your hierarchy in a text box, using the Tab key to indent and define levels.
Convert this text to SmartArt and select an organization chart layout. Customize colors and fonts to match your branding.
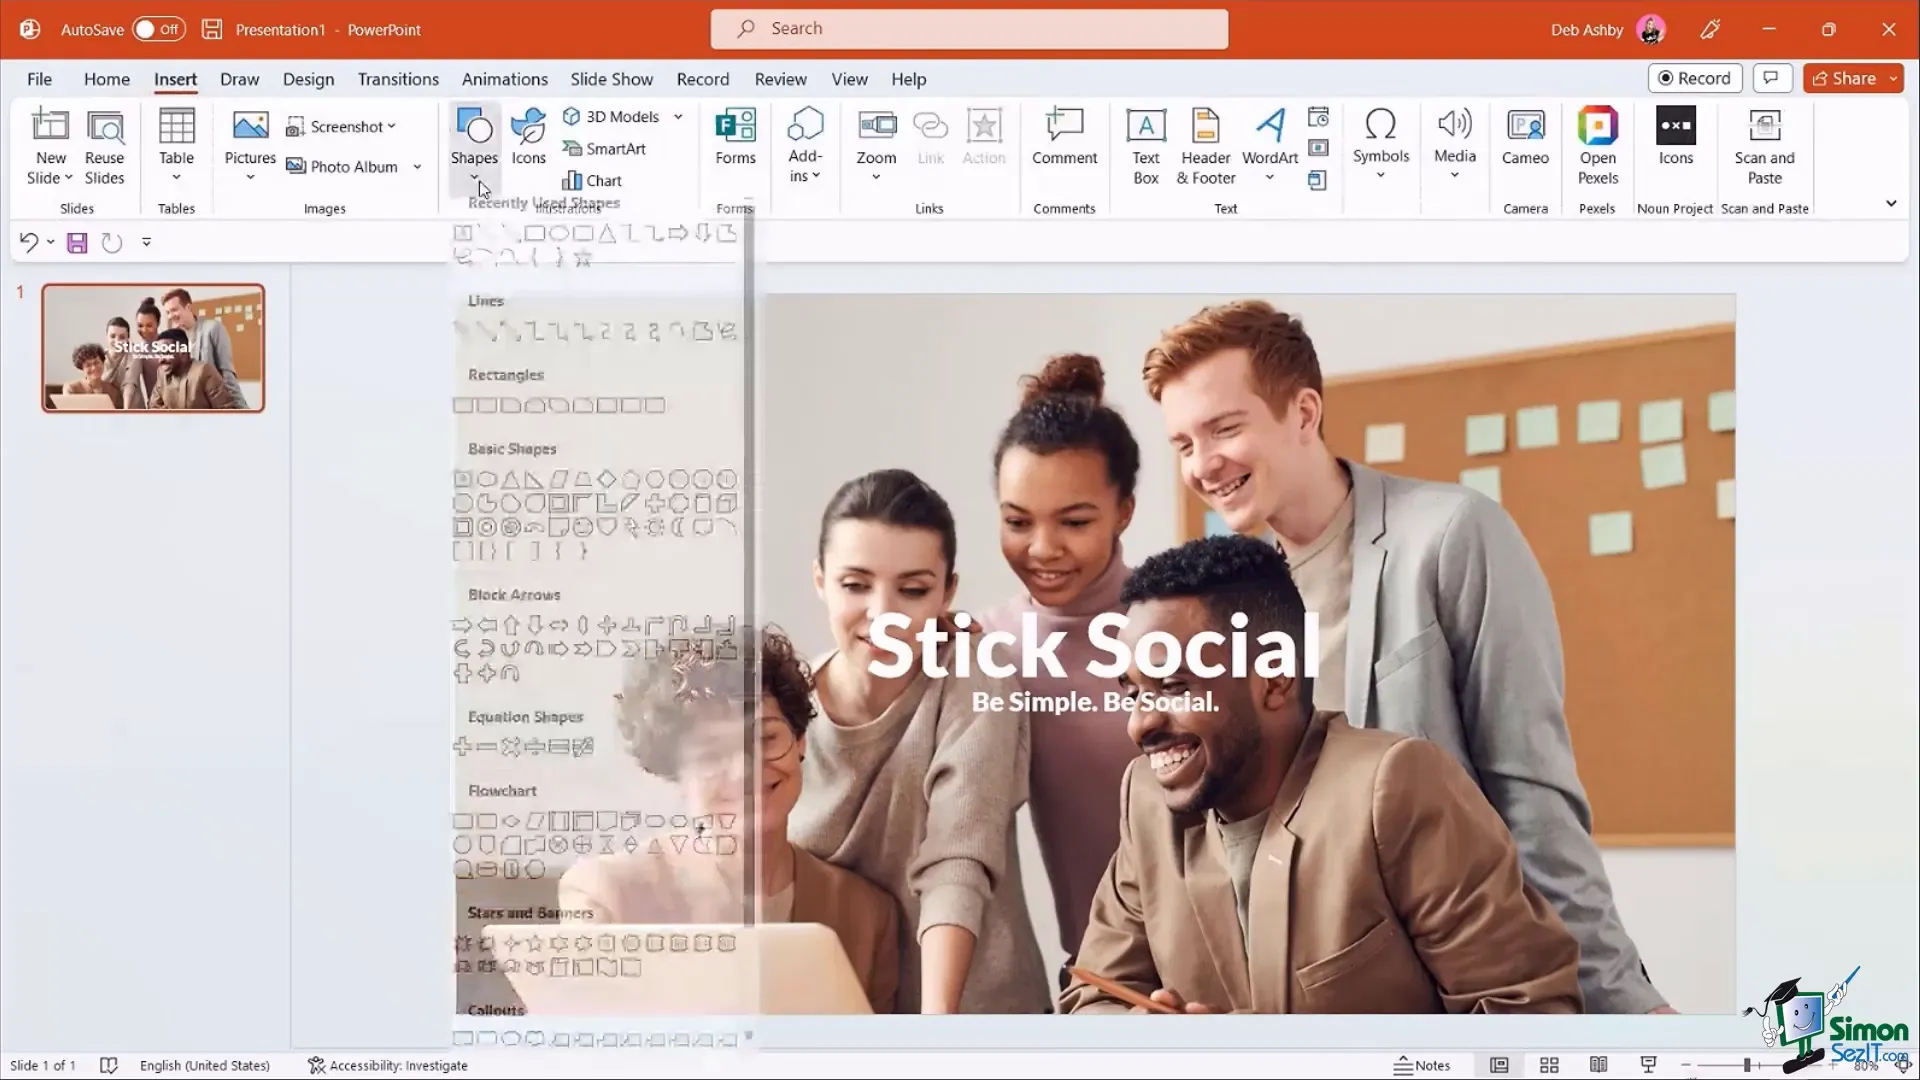
Customizing and Using Icons in PowerPoint
Icons add visual cues and modern flair to presentations. PowerPoint offers a gallery of icons that can be inserted and customized.
To customize:
- Insert an icon via Insert > Icons.
- Select the icon and ungroup it (Ctrl + Shift + G) to convert it into editable shapes.
- Change colors of individual parts via Shape Fill.
- Group the icon back together (Ctrl + G) for easy movement.
This level of customization helps tailor icons perfectly to your slide’s look and feel.
Utilizing Master Slides for Consistency
Master Slides allow you to apply consistent design elements, like logos or footers, across every slide without repetitive copying and pasting.
To add a logo to all slides:
- Go to View > Slide Master.
- Insert your logo image and position it as desired.
- Close the Slide Master view.
The logo now appears on every slide automatically, maintaining brand consistency and saving time.

Optimizing Your Presentation File Size
Large presentations with many images can become slow and cumbersome. To optimize file size:
- Select any image in your presentation.
- Go to Picture Format > Compress Pictures.
- Uncheck “Apply only to this picture” to compress all images.
- Ensure “Delete cropped areas of pictures” is checked to remove unused image data.
- Click OK.
This simple step dramatically reduces file size and improves performance.
Adding QR Codes to Connect With Your Audience
QR codes are a modern way to connect your audience with websites, social media, or any online resource instantly.
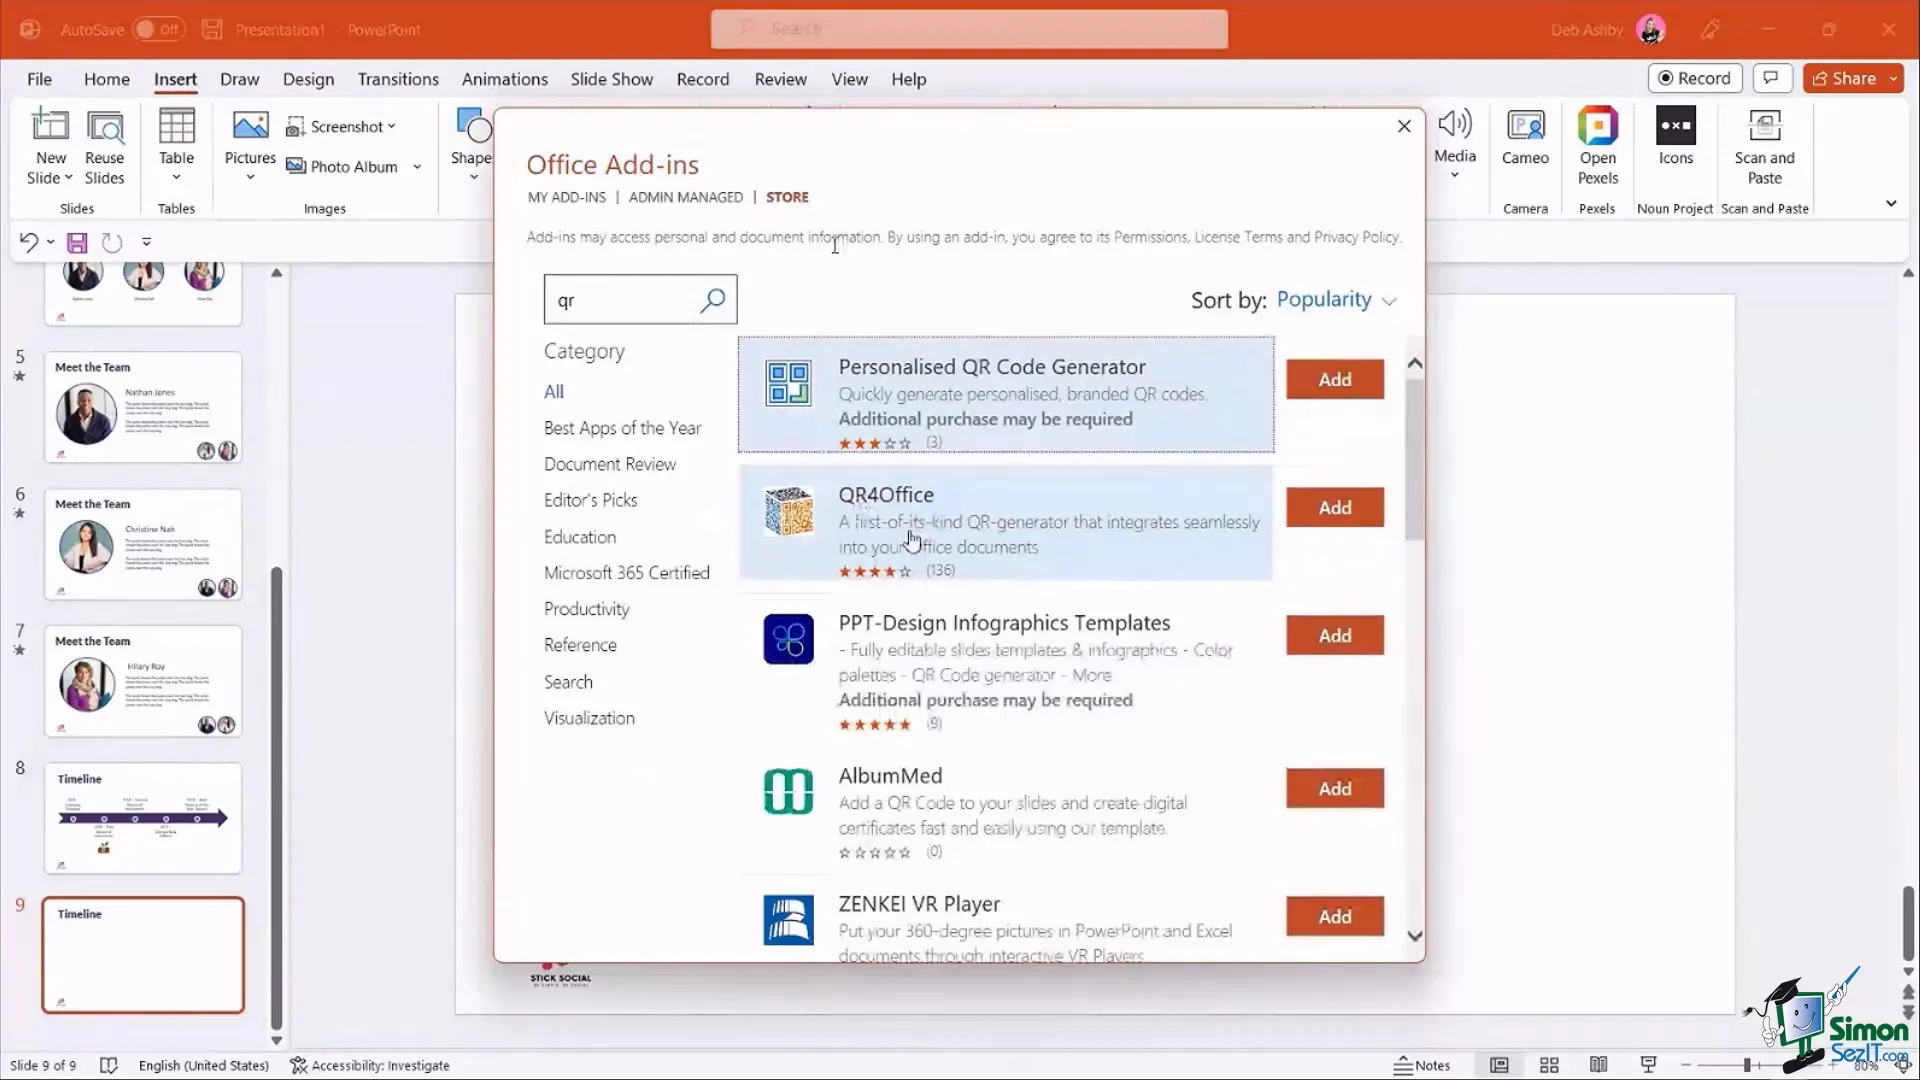
In PowerPoint, add a QR code via an add-in:
- Go to Insert > Add-ins > Get Add-ins.
- Search for “QR” and add “QR for Office.”
- Open the add-in, enter the URL you want to share (e.g., your website).
- Customize the color and size, then insert the QR code onto your slide.
Your audience can now scan the code with their phones, making it easy to engage further.
Frequently Asked Questions (FAQ)
Q: How can I avoid image distortion when resizing pictures in PowerPoint?
A: Use the Crop > Fill feature instead of dragging resize handles. This maintains the aspect ratio and zooms the image appropriately.
Q: What is the Selection Pane and why should I use it?
A: The Selection Pane lets you manage the layering of objects on a slide, rename items for easier selection, and toggle visibility, which is especially useful for complex slides.
Q: How do I use the Morph transition effectively?
A: Duplicate your slide, modify objects on the duplicate, and apply the Morph transition to create smooth animated effects between slides.
Q: Can I customize PowerPoint icons?
A: Yes, by ungrouping an icon, you can edit individual parts to change colors or shapes before regrouping to use it as a single object.
Q: How do I ensure brand consistency across all slides?
A: Use the Slide Master to add logos, footers, and consistent text or design elements that automatically appear on every slide.
Q: How can I reduce the file size of my PowerPoint presentation?
A: Use the Compress Pictures option under Picture Format to reduce image sizes and delete cropped areas.
Q: How do I add a QR code to my presentation?
A: Install the “QR for Office” add-in from the Insert > Add-ins menu, then generate and insert a QR code linking to your desired URL.
Conclusion
Mastering PowerPoint is about combining readable, well-structured content with engaging and polished design. By leveraging the tips and tricks outlined above—such as using free image resources, correctly resizing images, managing layers with the Selection Pane, creating smooth Morph transitions, customizing icons, and using the Slide Master—you can elevate your presentations to a professional level.
Remember, the key to great presentations is not just the information you share but how you visually communicate it. These PowerPoint hacks will help you avoid common pitfalls and deliver slides that captivate and inform your audience effectively.
Start experimenting with these techniques today and watch your presentations transform into powerful communication tools that truly stand out.
Check out the full video: PowerPoint Tips and Tricks Tutorials – Make the Best Powerpoint Presentations!


