If you’ve ever wanted to elevate your PowerPoint presentations with stunning visual effects, you’re in the right place. In this comprehensive tutorial, we’ll walk you through creating an epic PowerPoint video animation where text appears to rise from behind mountains and then gracefully disappear behind them—all within PowerPoint itself. No fancy video editors, no external software, just pure PowerPoint magic.
This effect is perfect for presentations that want to wow audiences, tell compelling stories, or simply add that creative spark to your slides. Whether you’re a beginner or a seasoned PowerPoint user, this step-by-step guide will empower you to create captivating video animations using duplicate videos, clever masking, and smooth text animations.
Table of Contents
- Getting Started: Preparing Your PowerPoint Slide and Video
- The Big Secret: Using Two Video Layers for Masking
- Masking Techniques: How to Crop Your Video to Mountain Shapes
- Advanced Masking with Photopea: Creating Precise Vector Masks
- Animating Text to Rise and Disappear Behind Mountains
- Final Touches: Synchronizing Videos and Adding Fun Elements
- Frequently Asked Questions (FAQ) About PowerPoint Video Animation
- Conclusion: Elevate Your Presentations with PowerPoint Video Animation
Getting Started: Preparing Your PowerPoint Slide and Video
The journey to creating this epic PowerPoint video animation begins with setting up your slide and sourcing the perfect video backdrop. Here’s how to start:
1. Create a Blank Slide
Open PowerPoint (preferably the Office 365 version for the best features) and create a new blank slide. This clean slate allows you to build your effect from scratch without distractions.
2. Choose a Beautiful Landscape Video
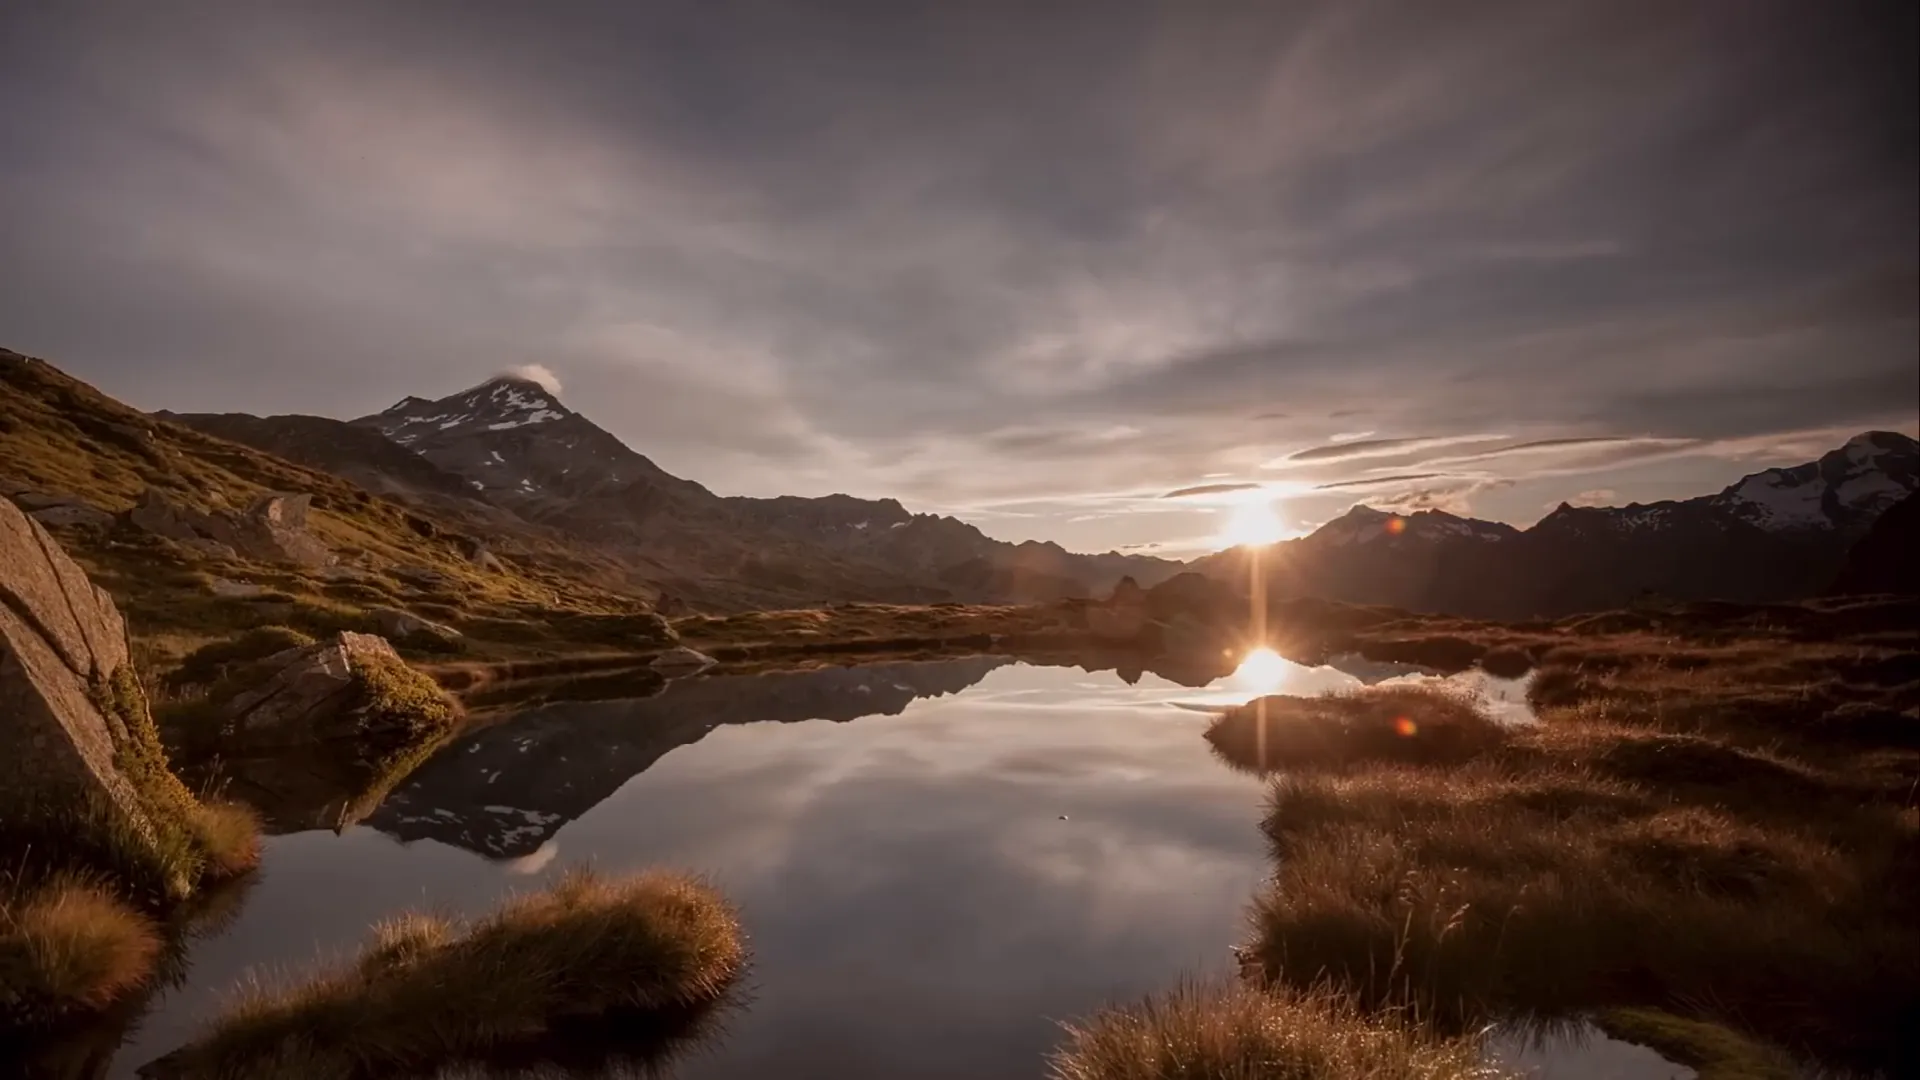
For this effect, you’ll need a video with a static foreground (like mountains) and a dynamic background (like a changing sky). I recommend using this free time-lapse mountain video by Eberhard on Pexels. It’s about 17 seconds long, which is perfect for looping and trimming as needed.
The key is that the mountains remain static while the sky changes, so we can later mask parts of the video to create the rising text illusion.
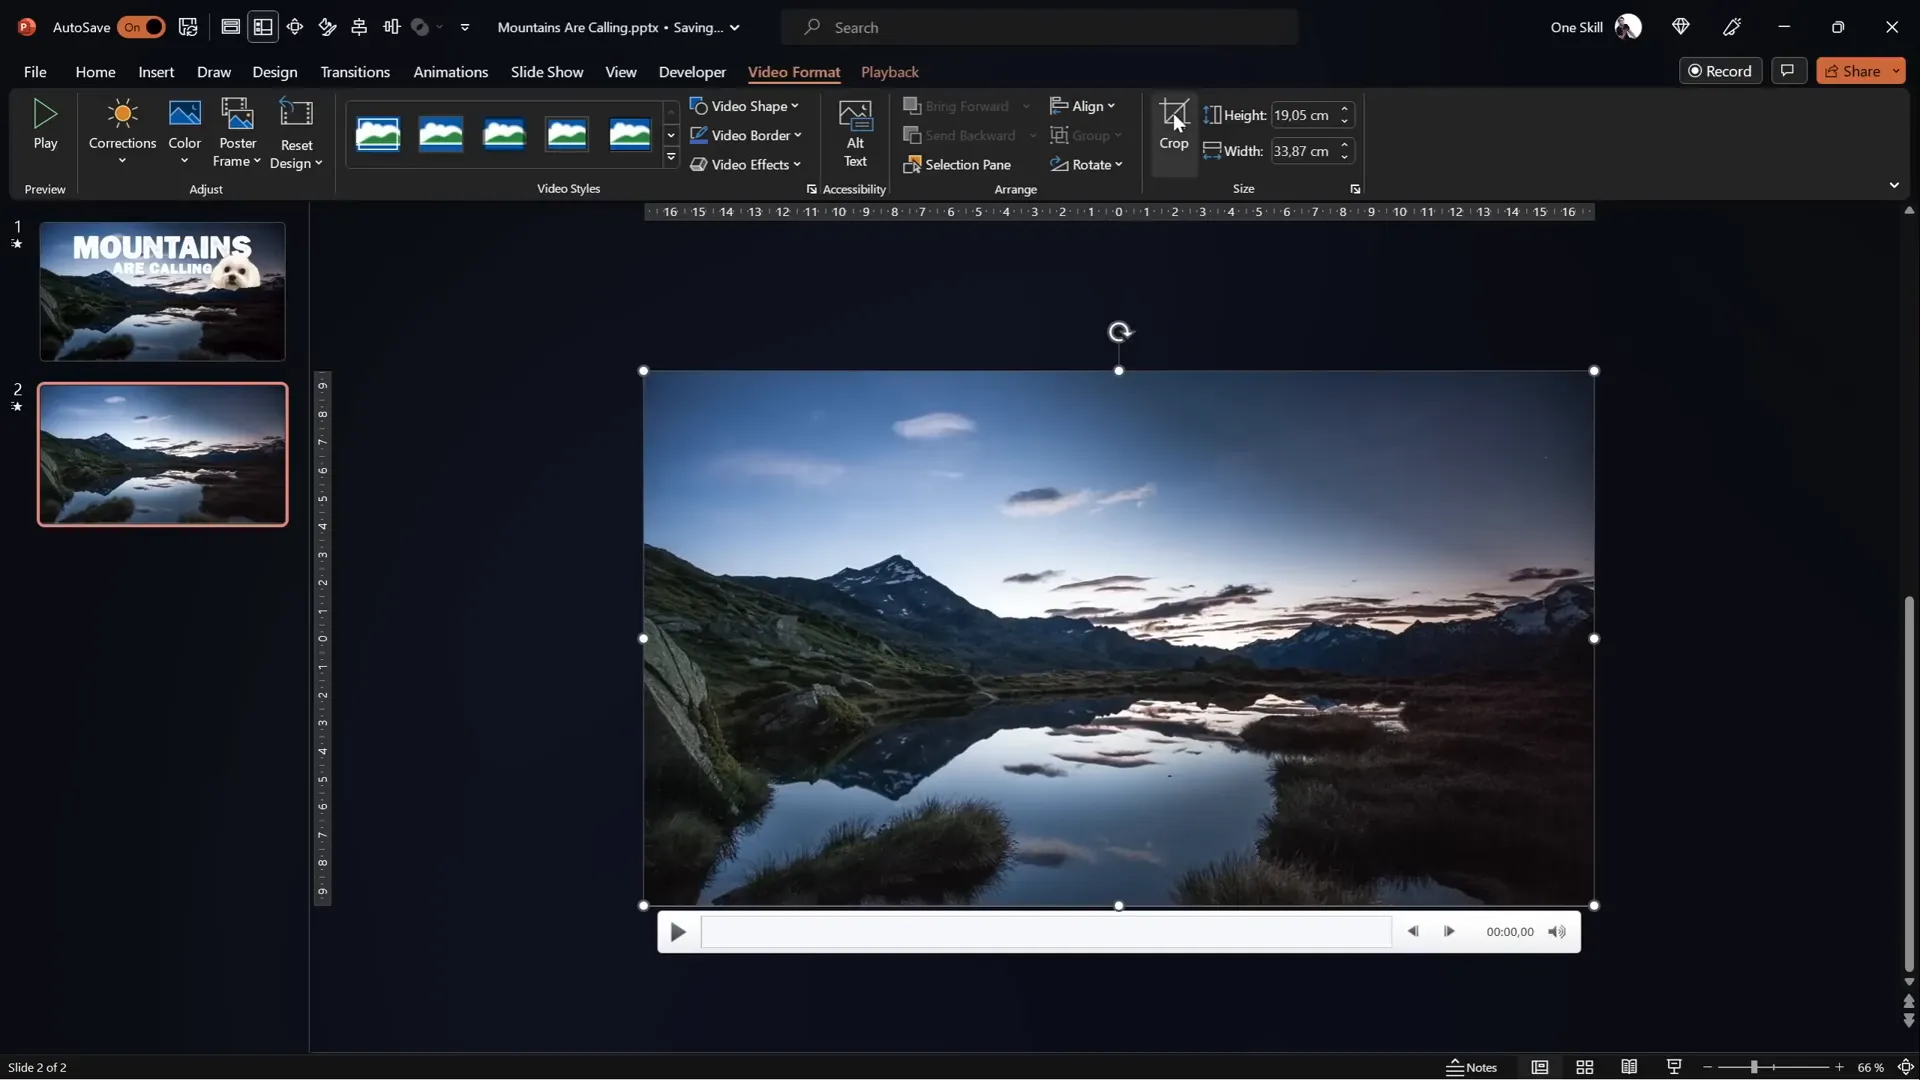
3. Insert and Resize the Video
- Drag and drop your video onto the slide.
- Center it perfectly by holding
Ctrl + Shiftand resizing from the corners to cover the entire slide. - Crop the video’s top and bottom edges to match your slide’s aspect ratio and finalize the crop.
This ensures your video fills the screen without distortion.
4. Adjust Video Brightness for Text Visibility
To make the white text stand out later, reduce the video brightness slightly:
- Open the Format Video panel.
- Set brightness to -5% to darken the video subtly.
5. Set Video Playback Options
- Set the video to start automatically.
- Enable looping so it plays continuously.
Now your video is ready to play seamlessly as a full-screen background.
The Big Secret: Using Two Video Layers for Masking
The key to this amazing effect lies in layering two identical videos and masking one to create depth and interaction with the text.
1. Duplicate Your Video
- Rename the original video to
Video Background. - Duplicate this video clip and rename the copy to
Video Front. - Align both videos exactly centered on the slide.
2. Crop the Front Video’s Sky
Initially, crop the top part of the Video Front to remove the sky, revealing the background video behind it. This simple crop creates a “sandwich” effect where the text or objects can appear between the two video layers.
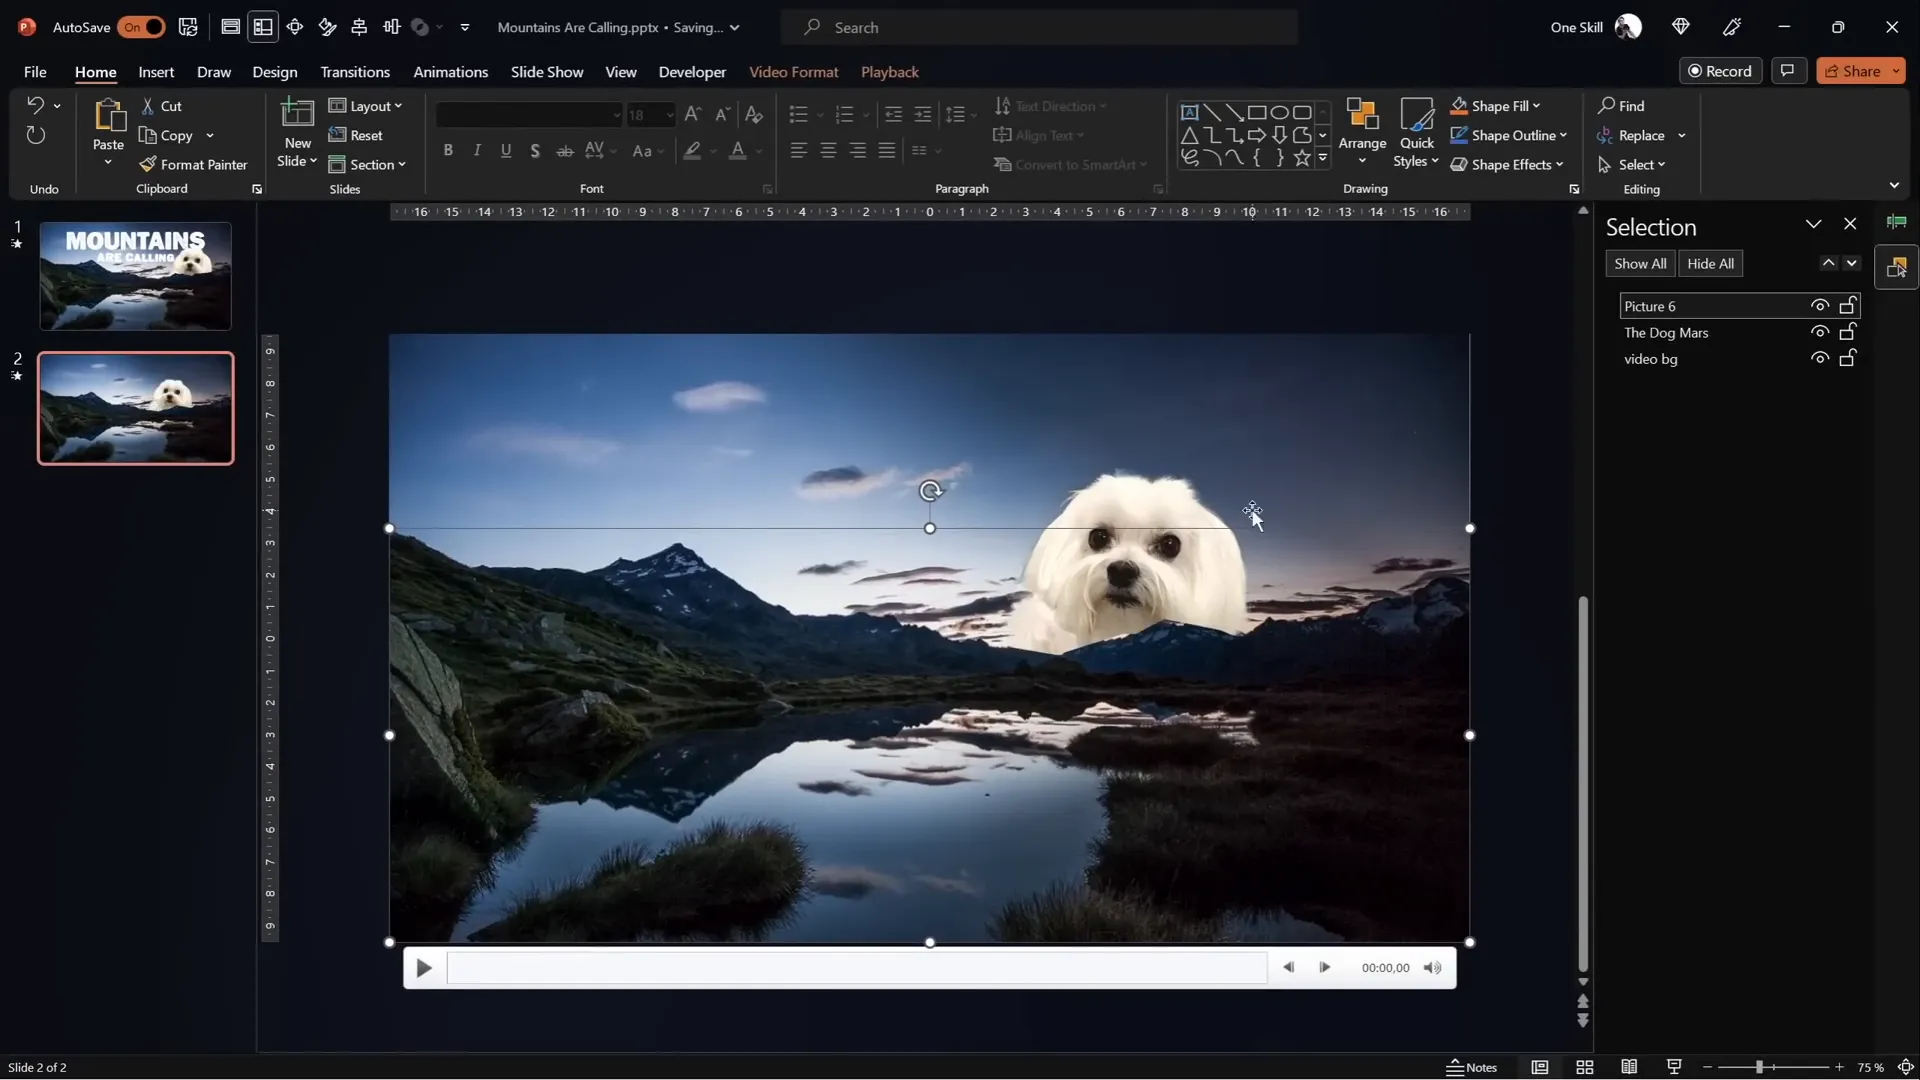
3. Insert Objects to Appear Between Videos
You can now add anything you want between these layers, such as text or images. For example, I inserted my dog Mars, who appears between the mountains and the sky due to the video layering.
This technique is the foundation for creating dynamic interactions between video and slide elements.
Masking Techniques: How to Crop Your Video to Mountain Shapes
Cropping the front video with a straight line is simple but not visually appealing. To create a professional, realistic effect, you need to follow the mountain contours precisely.
Method 1: Using PowerPoint’s Freeform Shape Tool
- Insert a new freeform shape (Insert > Shapes > Freeform).
- Click multiple points along the mountain line to trace its shape as accurately as possible.
- Close the shape by joining the end point with the start.
- Select the
Video Frontclip, holdShift, and select the freeform shape. - Go to Shape Format > Merge Shapes > Subtract.
This subtracts the shape area from the video, effectively masking out the sky and leaving only the mountains visible.
Note: If you don’t see the Merge Shapes option, you can add it to your Quick Access Toolbar. There’s a helpful video tutorial linked in the description to guide you.
Limitations of Method 1
This method works but requires careful clicking and can be imprecise, especially with complex mountain lines.
Advanced Masking with Photopea: Creating Precise Vector Masks
For more precision, use a free online photo editor called Photopea to create an SVG mask shape.
Step-by-Step Guide
- Duplicate the
Video Backgroundagain in PowerPoint for a freshVideo Front. - Copy the video frame by selecting it and pressing
Ctrl + C. - Go to Photopea and paste the screenshot with
Ctrl + V. - Use the Quick Selection Brush tool to select the sky area by clicking multiple times.
- Press
Qto toggle Quick Mask mode to visualize the selection. - If you selected too much of the mountains, use the Lasso Tool in subtract mode to remove unwanted parts.
- Once the sky is perfectly selected, create a new blank layer beneath and fill the selection with a bright color (e.g., yellow) using the Bucket Tool.
- Hide the original photo layer to view only the colored sky shape.
- Go to Image > Vectorize Bitmap and choose the photo mode with polygon checked.
- Export this vector shape as an SVG file.
- Import the SVG into PowerPoint by dragging and dropping it onto your slide.
- Convert the SVG to a shape to reveal vector points.
- Select both the
Video Frontand the imported vector sky shape, then apply Merge Shapes > Subtract to precisely mask out the sky.
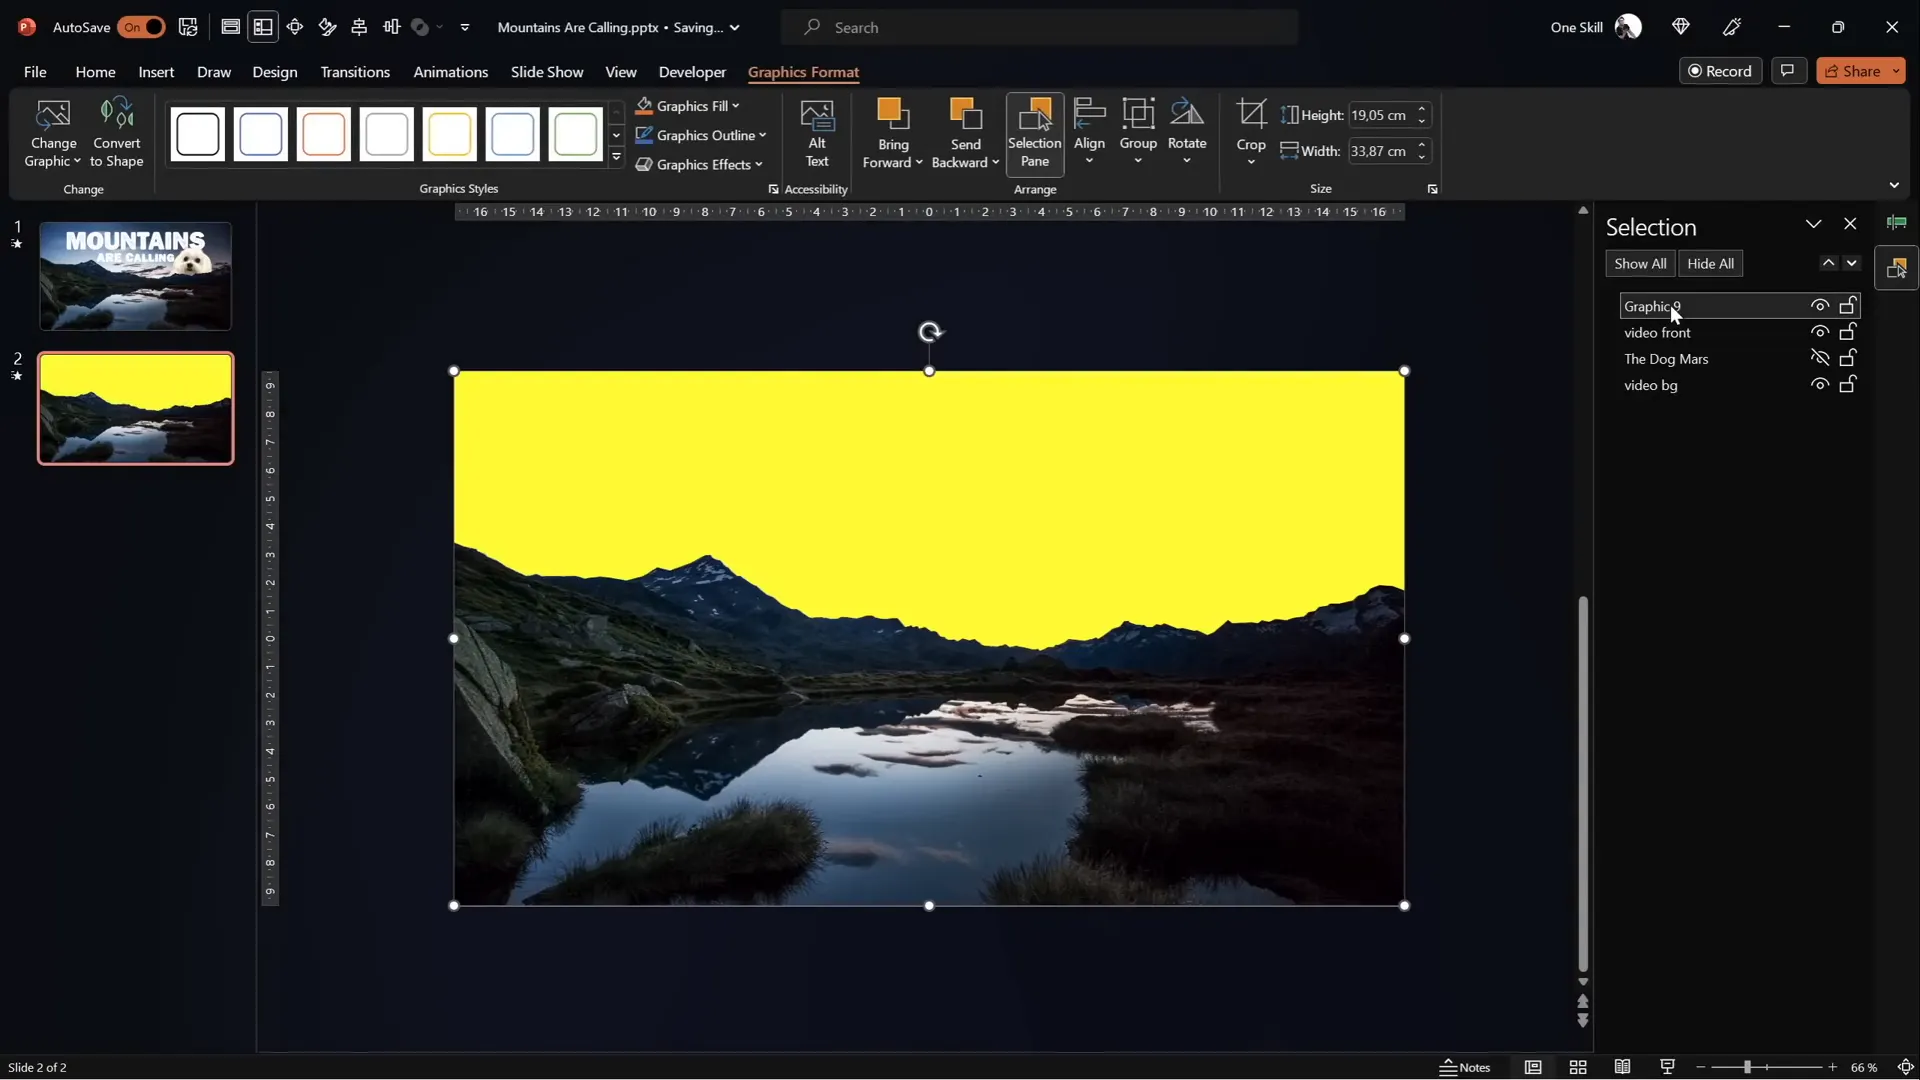
This method provides a highly accurate mask that follows the mountain contours perfectly, making your animation look professional and seamless.
Animating Text to Rise and Disappear Behind Mountains
Now that you have your video layers set up, it’s time to add the magic: animated text that rises from behind the mountains and disappears behind them.
1. Insert Your Text
- Choose a font that fits your theme. I used Joyful Mountain, a beautiful, bold font perfect for this effect.
- Create your text boxes and position them between the two video layers in the selection pane so they appear behind the
Video Front. - Use
Ctrl + Shift + CandCtrl + Shift + Vto copy and paste text formatting if you want consistent styling across slides.
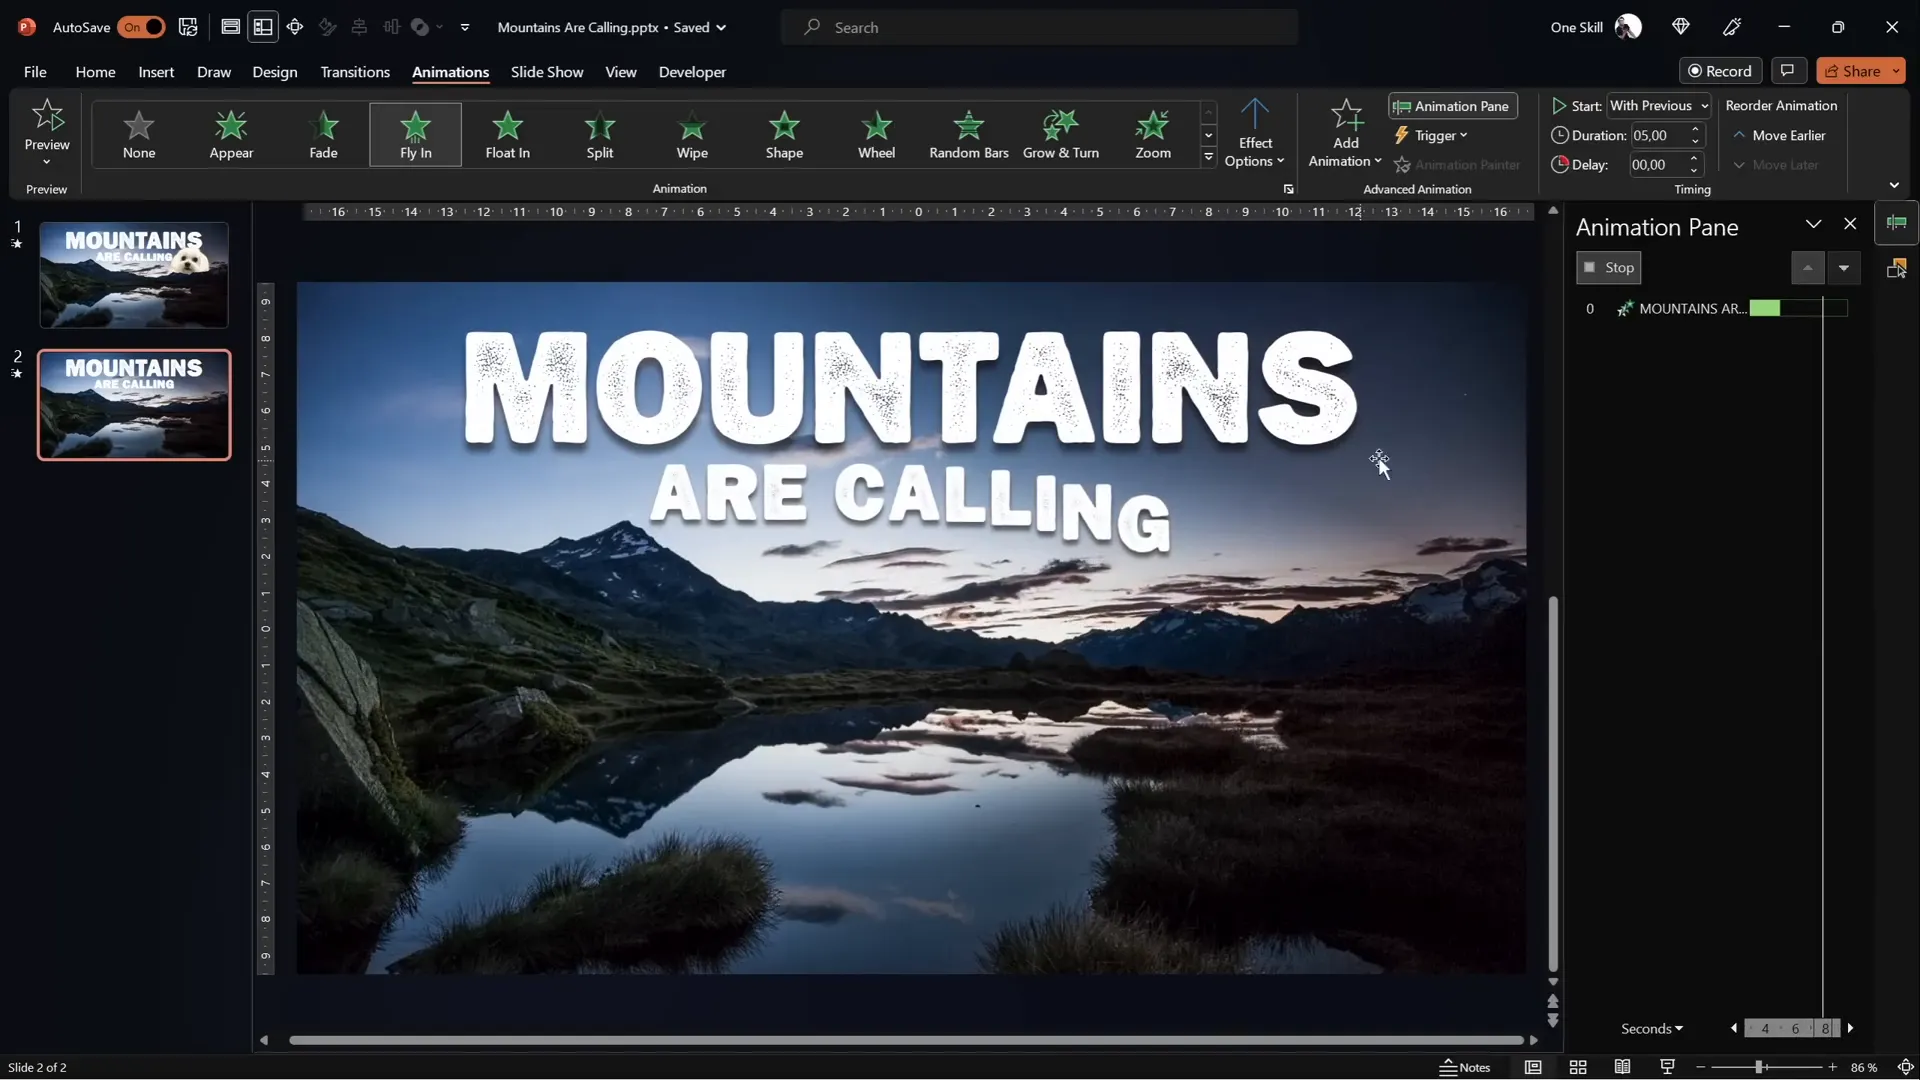
2. Apply Entrance Animations
- Select your text box and apply the Fly In animation.
- Set the animation to start With Previous and the duration to 5 seconds.
- Choose Effect Options and set it to Maximum Smooth End.
- Animate the text by letter with a 5% delay between letters for a cascading effect.
- Add another entrance animation: Basic Zoom, also starting with previous and lasting 5 seconds.
- Set the zoom animation to animate by letter with a 5% delay as well.
3. Add Exit Animations
- Add a Fly Out exit animation, starting with previous, 5 seconds duration, with the effect option Maximum Smooth Start.
- Add a Basic Zoom Out animation for exit, also starting with previous and lasting 5 seconds.
- Set both exit animations to have zero delay initially, then apply a delay of about 11 seconds to control timing so they exit after being fully visible.
These animations combined create the effect of text rising up from behind the mountains and then zooming out and flying away behind them, perfectly synchronized with your video layers.
Final Touches: Synchronizing Videos and Adding Fun Elements
1. Sync Video Playback
Make sure both video layers have play animations set to start With Previous and no delays, so they play simultaneously. This synchronization is critical to maintaining the illusion of a single seamless video.
2. Add Additional Objects Between Layers
Feel free to add other elements between the video layers, like images or shapes. For example, I added my dog Mars to appear behind the mountains but in front of the background video, adding a playful touch.
3. Manage Animation Order
Use the animation pane to reorder animations for text and objects, ensuring smooth transitions and timing. You can drag and drop animations to adjust their sequence.
4. Preview Your Slide
Always run a full-screen preview to see how your animations and videos interact. Adjust timing and animation options as needed to perfect the effect.
Frequently Asked Questions (FAQ) About PowerPoint Video Animation
Q1: What version of PowerPoint do I need for this effect?
This tutorial is optimized for PowerPoint Office 365, which supports advanced video playback options and the Merge Shapes feature. Some features may not be available in older versions.
Q2: Can I use any video for this effect?
Yes, but the video should have a static foreground (like mountains or a silhouette) and a dynamic background (like sky or clouds) so you can mask the sky effectively.
Q3: How do I add the Merge Shapes button if it’s missing?
You can add it to your Quick Access Toolbar by customizing the toolbar from the PowerPoint options. There are detailed tutorials available, including a linked video in the description.
Q4: Can I use this effect for other shapes besides mountains?
Absolutely! You can mask videos with any shape or silhouette, but it works best with clear, distinct edges for the masking to look natural.
Q5: Is Photopea free to use?
Yes, Photopea is a free online photo editor that works similarly to Photoshop. It’s very useful for creating vector masks and editing images without installing software.
Q6: How do I ensure my text is readable on video backgrounds?
Lowering the video brightness slightly (about -5%) helps white or light text stand out. Also, choose bold fonts and consider adding subtle shadows or outlines to your text.
Q7: Can I loop the video during the presentation?
Yes, set the video playback options to loop until stopped, so your video plays continuously during your presentation.
Conclusion: Elevate Your Presentations with PowerPoint Video Animation
With just a few clever techniques, you can transform your PowerPoint slides from static visuals into dynamic, cinematic experiences. By layering two identical videos and carefully masking one to follow the mountain line, you create the illusion of text rising from behind the mountains and disappearing again—an effect that captures attention and adds storytelling power to your presentations.
This tutorial showcased two methods for masking: using PowerPoint’s freeform shape tool for quick results and Photopea for pixel-perfect precision with vector shapes. Both methods have their merits, and you can choose based on your comfort and desired accuracy.
Animating your text with fly-in and zoom effects, synchronized perfectly with the video layers, completes the effect, making your slides memorable and engaging.
Try experimenting with different videos, shapes, and animations to create your own unique PowerPoint video animations. And if you enjoyed this tutorial, be sure to check out additional creative ideas on using video in PowerPoint on the One Skill PPT YouTube channel.
Happy presenting, and may your slides rise like mountains!


