
If you’ve ever wanted to make your PowerPoint presentations more interactive, engaging, and visually stunning, then you are in the right place. In this detailed guide, you’ll learn how to build a dynamic section zoom presentation in PowerPoint that allows you to click on stylish bubbles and instantly zoom into different sections of your presentation. This technique not only elevates your pitch decks or business presentations but also keeps your audience hooked with smooth transitions and a modern look.
Best of all? The full PowerPoint template used in this tutorial is available to download for free, so you can jump right in and customize it to your needs.
Table of Contents
- Introduction to Section Zoom Presentations
- Designing the Home Slide with Glassmorphic Bubbles
- Creating the Glassmorphic Background Effect
- Adding Sections and Linking with Section Zooms
- Using Morph Transitions for Seamless Animations
- Enhancing Design with Icons and Additional Elements
- Final Tips & How to Get the Free Template
- Frequently Asked Questions
Introduction to Section Zoom Presentations
PowerPoint has evolved far beyond static slides. One of its powerful features is the ability to create interactive presentations using Section Zooms. This allows you to create a dashboard-like slide with clickable buttons or shapes that zoom into different sections of your presentation.
Imagine a home slide filled with bubbles or buttons representing different parts of your pitch deck. Clicking on any bubble smoothly zooms into that section, which can contain multiple slides, and then automatically returns to the home slide once the section finishes. This approach is perfect for sales pitches, product demos, or any presentation where you want to maintain flow and engagement.
In this tutorial, you’ll learn how to:
- Create a stylish home slide with glassmorphic bubbles
- Set up sections in your presentation for easy navigation
- Use Section Zooms to link home slide bubbles to sections
- Apply Morph transitions for seamless animations
- Enhance your design with icons and additional info
Let’s get started!
Designing the Home Slide with Glassmorphic Bubbles
All the magic starts on the home slide, the dashboard where your audience will interact with clickable bubbles to navigate the presentation. Here’s how to design this slide step-by-step:
Step 1: Start a Blank Slide
- Open a new PowerPoint presentation and select a Blank slide layout. This gives you a clean canvas without any default placeholders.
Step 2: Choose and Insert a Background Image
- To create a modern and inviting look, select a beautiful background photo. For the tutorial, a photo from Freepik was used.
- Copy the photo and paste it onto your slide by pressing Ctrl + V (or Command + V on Mac).
Step 3: Create the Glassmorphic Bubbles
These bubbles act as clickable buttons for your sections, but they also have a stylish glass effect that lets the background peek through.
- Insert a circle shape (hold Shift while drawing to keep it perfect).
- Format the shape fill with Light Background Fill (we’ll create this effect shortly).
- Add a white outline with 0% transparency and a thin line weight (around 0.5 pt).
- Add a subtle Inside Shadow effect in white with a blur radius around 25 points.
- Resize the circle to about 4 cm x 4 cm.
- Duplicate the circle as many times as you have sections, holding Ctrl and dragging to create copies.
- Distribute the circles evenly horizontally and align them vertically for a clean layout.
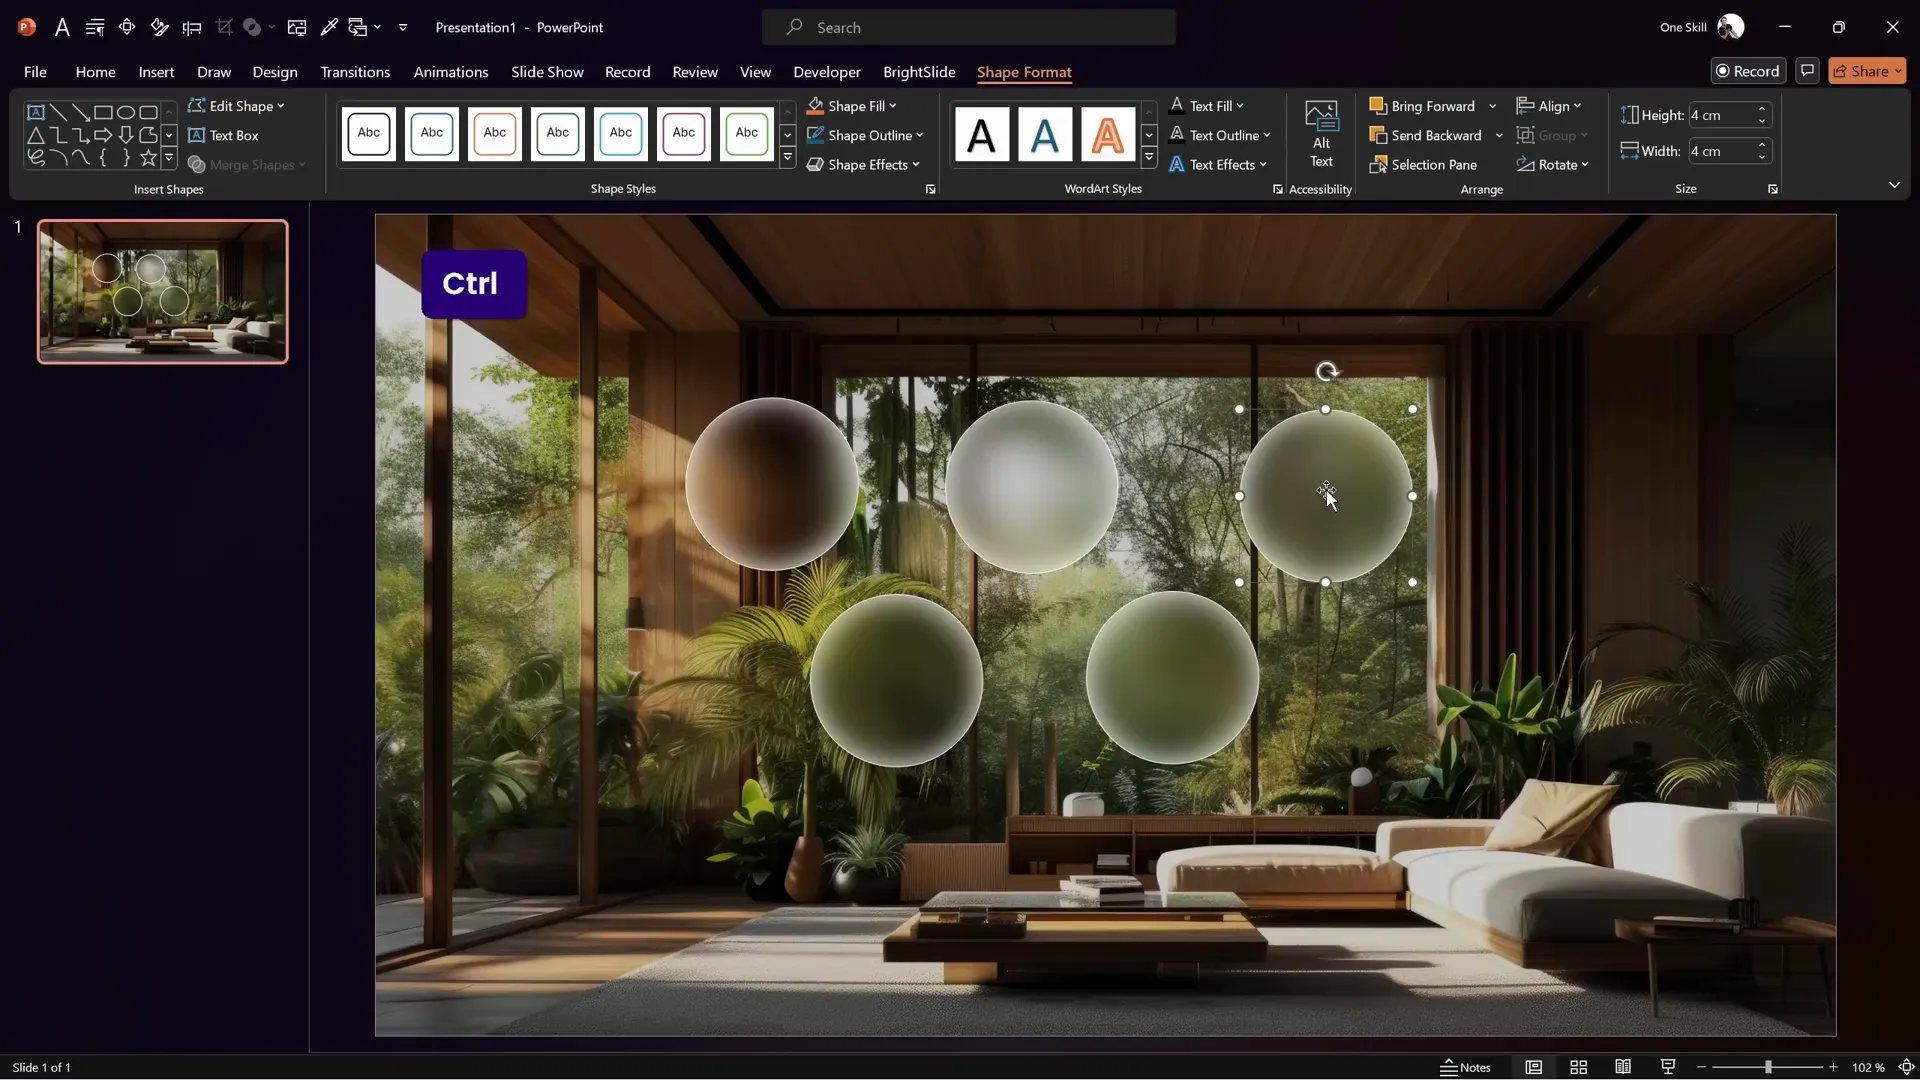
This setup serves as your clickable dashboard for jumping between different parts of your presentation.
Creating the Glassmorphic Background Effect
The glassmorphic effect is a trendy design style that combines transparency and blur, giving your shapes a frosted glass look. Here’s how to achieve it in PowerPoint:
Step 1: Duplicate and Blur the Background Image
- Duplicate the original background photo on your slide.
- Right-click the duplicate and select Format Picture.
- Go to Artistic Effects and choose the Blur effect.
- Increase the blur level to 100% for maximum softness.
- Copy this blurred image (Ctrl + C) and delete the duplicate from the slide.
Step 2: Apply the Blurred Image as Slide Background
- Right-click on the slide background and select Format Background.
- Choose Picture or texture fill, then select Clipboard as the picture source to paste the blurred photo as the background fill.
Step 3: Layer the Sharp Background Image on Top
- Move the original sharp photo to the top layer on the slide, directly above the blurred background.
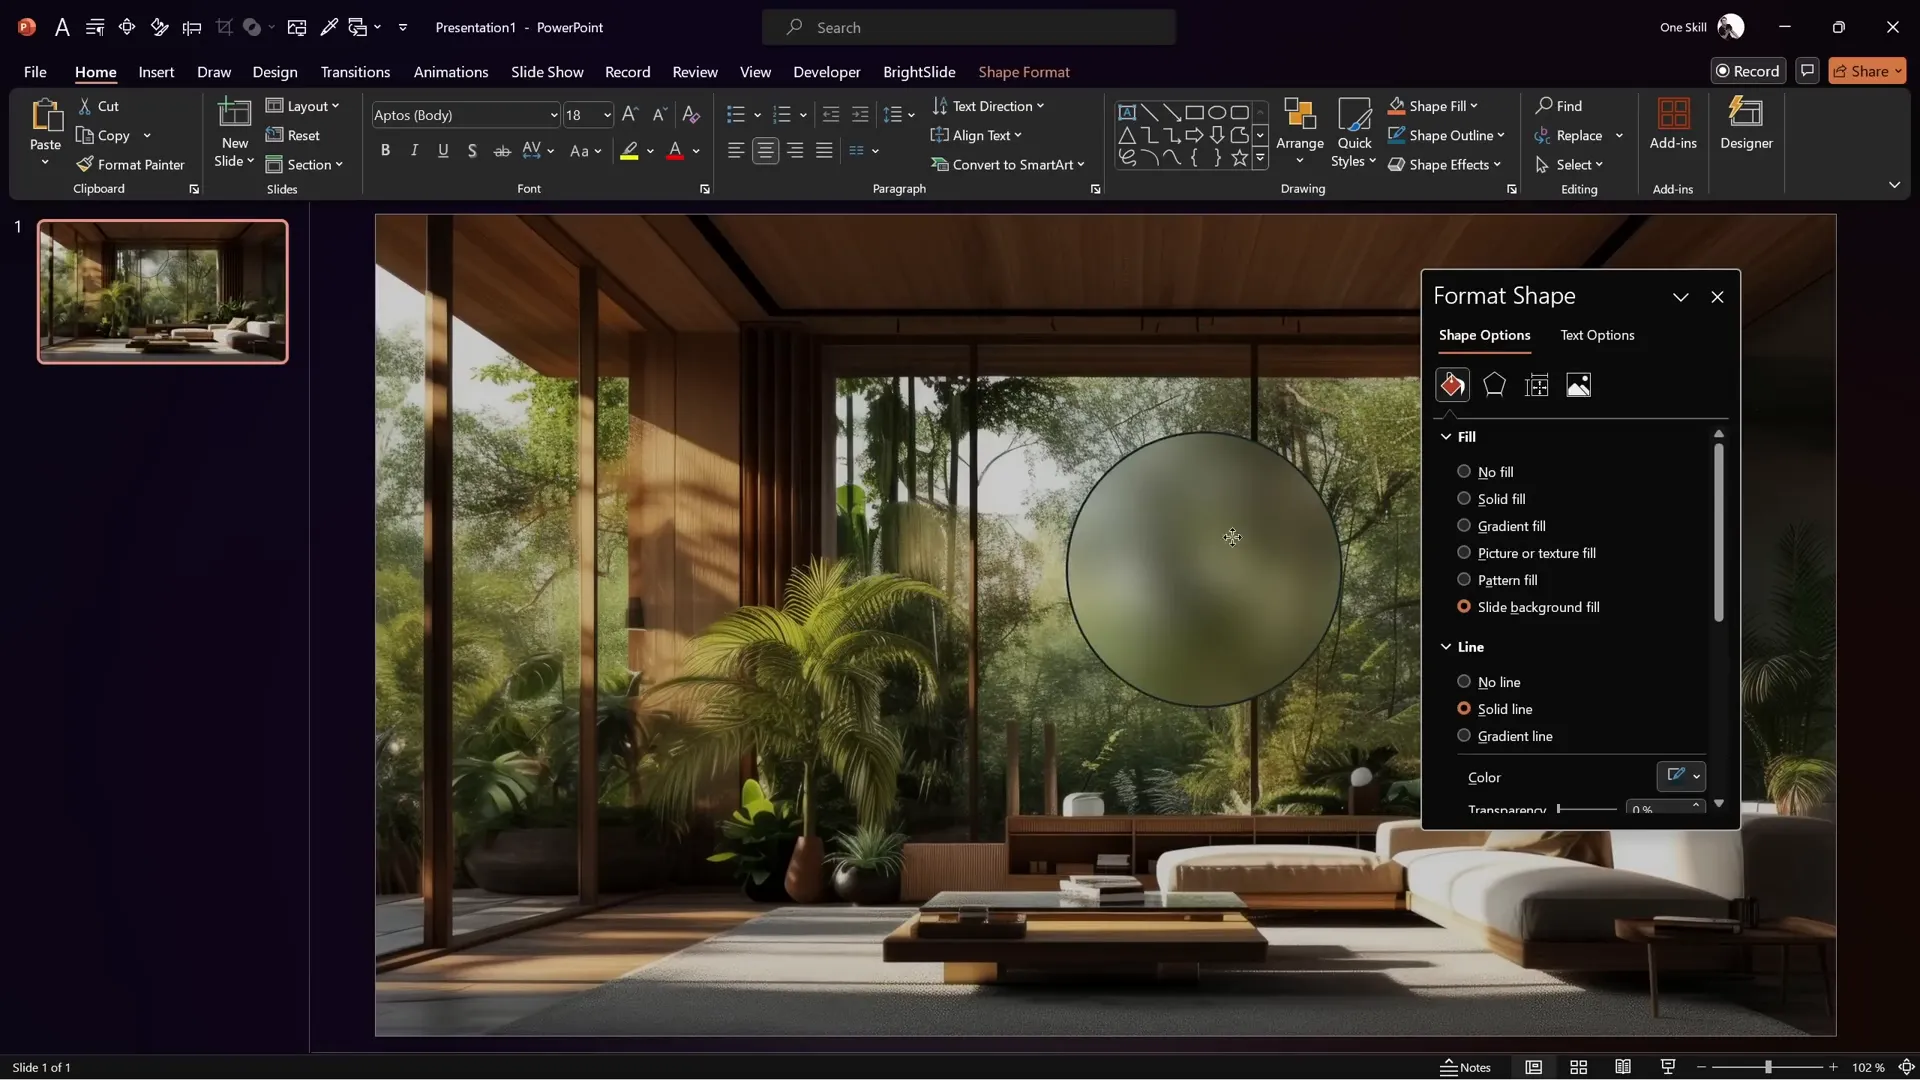
Step 4: Use Light Background Fill for Glassmorphic Shapes
- When you insert shapes like circles, set their fill to Light Background Fill.
- This fill references the blurred background underneath, creating the glass effect inside the shape.
This combination of blurred background and transparent shapes gives your bubbles a frosted glass look that is modern and visually appealing.
Adding Sections and Linking with Section Zooms
Now that you have your home slide with glassmorphic bubbles, it’s time to organize your presentation into sections and link those bubbles to the corresponding sections using Section Zooms.
Step 1: Add Sections to Your Presentation
- Right-click between slides in the slide sorter pane and select Add Section.
- Name the first section Home—this is your dashboard slide.
- Add more sections for each topic or part of your pitch, e.g., Our Mission, Product, Team, etc.
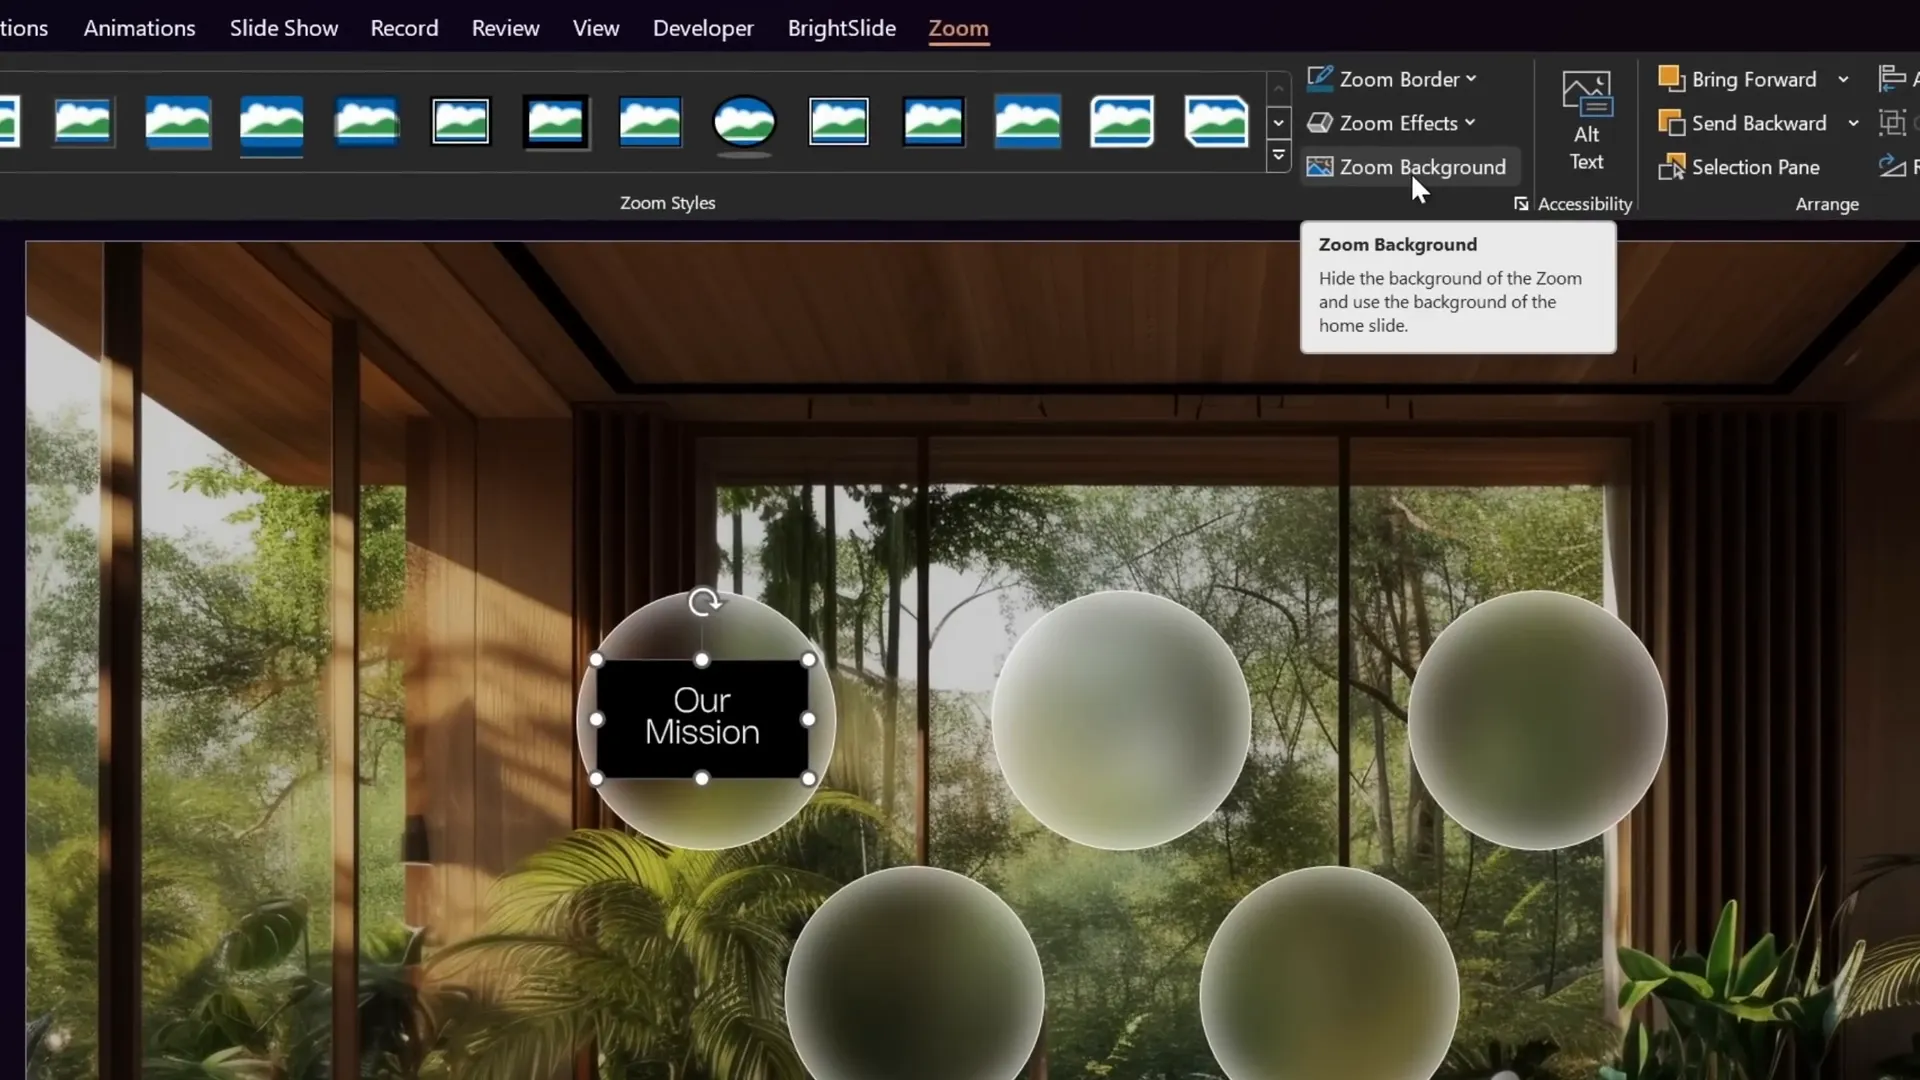
Step 2: Insert Section Zooms for Navigation
- Go to the Insert tab and select Zoom → Section Zoom.
- Pick the section you want to link to, for example, Our Mission, and insert it.
- Resize and position the zoom thumbnail inside one of your glassmorphic bubbles on the home slide.
- With the zoom selected, go to the Zoom tab and check Zoom Background to make the zoom background transparent. This allows the blurred background to show through during zoom.
Repeat this process for each bubble to create an interactive menu that zooms into each section.
Using Morph Transitions for Seamless Animations
One of the standout effects in this presentation is the smooth transition of text and elements as you zoom into sections. PowerPoint’s Morph transition makes this possible with minimal effort.
Step 1: Prepare Text Boxes on Slides
- Create separate text boxes for words or phrases you want to animate independently. For example, split the heading “Our Mission” into two text boxes, one for “Our” and one for “Mission.”
- On the first slide of the section, use large font sizes (e.g., 195 pt) for emphasis.
- On the next slide, reduce the font size (e.g., 18 pt), reposition the text boxes, and align them horizontally near the top left corner.
Step 2: Set Slide Transitions
- Apply a Fade transition to the first slide and set it to auto-advance after 0 seconds for a seamless flow.
- Apply the Morph transition to the second slide with a duration of about 1 second.
- Test the transition to see the text smoothly shrink and move to the new position.
Step 3: Add Additional Content and Lines
- Enhance the slide with additional text boxes, icons, or images.
- Draw thin lines using the Line tool and format them with white color and 50% transparency for subtle accents.
- Copy these lines between slides to maintain consistency during morph transitions.
This technique adds a professional polish to your presentation by animating text and shapes in a visually appealing way.

Enhancing Design with Icons and Additional Elements
To add more personality and brand identity to your presentation, consider adding icons and other design elements around your home slide bubbles.
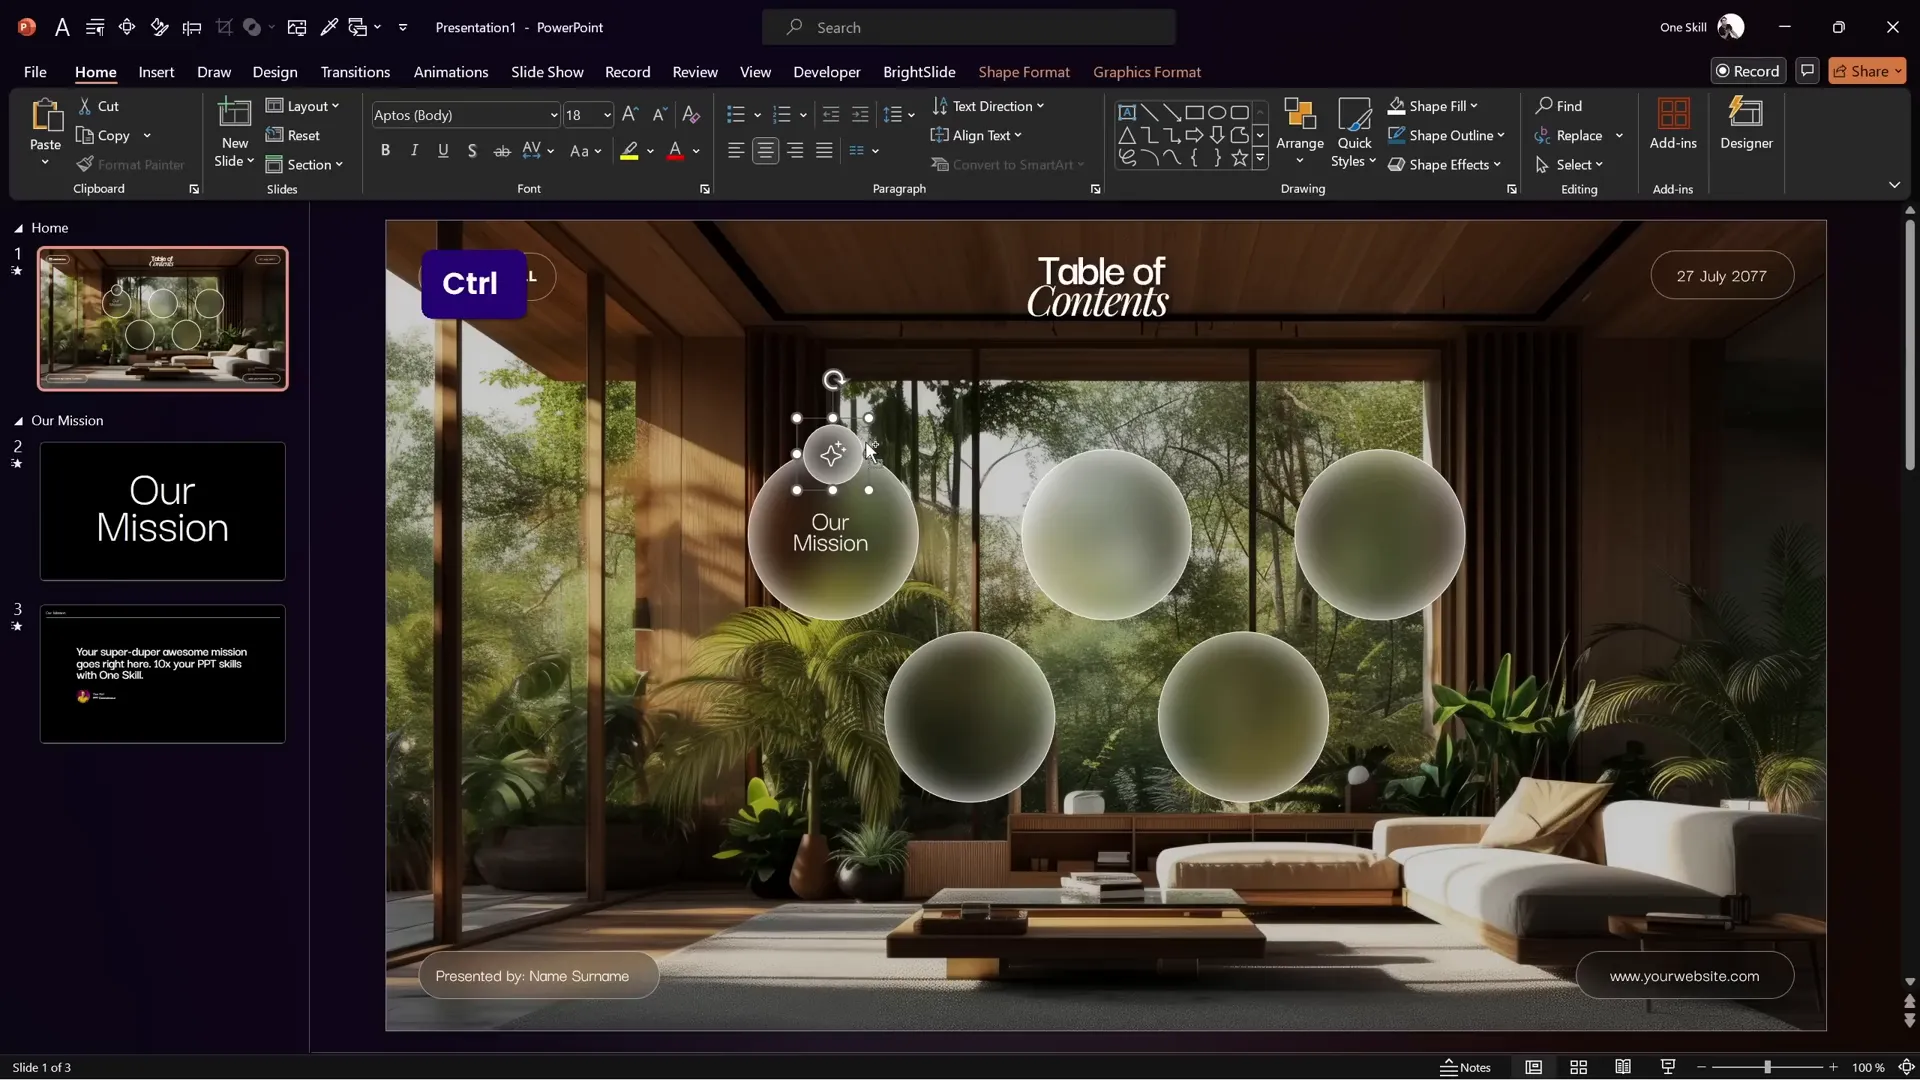
Step 1: Add Company Logo, Date, and Website
- Place your company logo and other details like the presentation date and website URL in the corners of the home slide.
- Use rounded rectangles or other shapes with fills and outlines that complement your color scheme.
Step 2: Insert Decorative Icons Inside Bubbles
- Duplicate a bubble and resize it smaller (e.g., 1.4 cm x 1.4 cm) to create a mini bubble.
- Insert an SVG icon inside the mini bubble. For example, a sparkling star icon from Phosphor Icons works great.
- Resize and color the icon white to contrast with the bubble’s fill.
- Group the mini bubble and icon together, then position this group over a line or design element on your slide.
Step 3: Match Styles Across Slides
- Use the Format Painter to copy and paste style attributes like fills and outlines between shapes for consistency.
- Make sure these decorative elements are also added to the zoomed-in slides so the design feels cohesive.
These finishing touches make your presentation look thoughtfully designed and professional.
Final Tips & How to Get the Free Template
Before you dive into creating your own section zoom presentation, here are a few tips to keep in mind:
- Use the right fonts: The tutorial uses Darker Grotesque for headings and Playfair Display for other text. Make sure you install these fonts for the best look.
- Organize slides into sections: Clear sections make your presentation easier to navigate and help PowerPoint’s Section Zoom feature work properly.
- Test transitions and timings: Preview your presentation in full-screen mode to ensure smooth transitions and correct auto-advance timings.
- Keep your background consistent: Using the zoom background transparency option keeps the blurred glass effect seamless across slides.
Where to Get the Free Pitch Zoom Template
You can download the exact template used in this tutorial for free from pptskill.com. Here’s how:
- Go to pptskill.com.
- Scroll down to the Slide Zoom Animation section.
- Look for the “Bonus Slide Pitch Zoom Template” lesson.
- Click the blue button to join the free lessons of the PowerPoint Animation Mastery course.
- Once logged in, scroll to the Slide Zoom Animation section and download the PPTX file.
Make sure to have the recommended fonts installed to enjoy the full design as intended.
Frequently Asked Questions
What is a Section Zoom in PowerPoint?
A Section Zoom is a feature in PowerPoint that lets you create clickable thumbnails on a slide that jump to a group of slides organized as a section. It’s perfect for interactive presentations with multiple topics.
How do I create a glassmorphic effect in PowerPoint?
You create a glassmorphic effect by layering a blurred background image under your slide, then using shapes with light background fills and white outlines with inner shadows to mimic frosted glass.
Can I use Section Zooms on any version of PowerPoint?
Section Zooms are available in PowerPoint 2019, Microsoft 365, and later versions. If you have an older version, you might not have this feature.
How do Morph transitions work?
Morph transitions animate the smooth movement, resizing, and color changes of objects between two slides that share similar elements, creating seamless animations without complex setups.
What fonts are recommended for this template?
The tutorial uses Darker Grotesque and Playfair Display, both available for free on Google Fonts.
Is the template really free to use?
Yes, the pitch zoom template is completely free to download and use for your presentations, as long as you have PowerPoint with the required features and fonts.
Can I customize the bubbles and icons?
Absolutely! You can resize, recolor, and replace the bubbles and icons to fit your brand and presentation style.
How do I make the zoom background transparent?
After inserting the Section Zoom, select it, go to the Zoom tab, and check the box labeled Zoom Background. This makes the zoom background transparent, revealing the blurred background beneath.
Can I add more sections and bubbles?
Yes, simply add more sections in the slide sorter and create matching bubbles on your home slide. Then insert corresponding Section Zooms and link them accordingly.
Will this work on Mac?
Yes, but make sure your PowerPoint version supports Section Zooms and Morph transitions, as some features vary between platforms.
Conclusion
Creating an interactive section zoom presentation in PowerPoint is a fantastic way to captivate your audience and make your pitch decks or presentations stand out. By combining glassmorphic design elements, organized sections, Section Zooms, and Morph transitions, you can build a sleek, professional, and highly engaging slide deck.
Don’t forget to download the free pitch zoom template from pptskill.com to save time and start customizing right away. With the step-by-step instructions in this guide, you have everything you need to create beautiful and functional presentations that wow your audience.
Happy presenting!


